
If you are reading this article, you may be in need of an urgent DIY. If that’s you, feel free to a skip the write-up and get straight to the supply list and step by step tutorial.
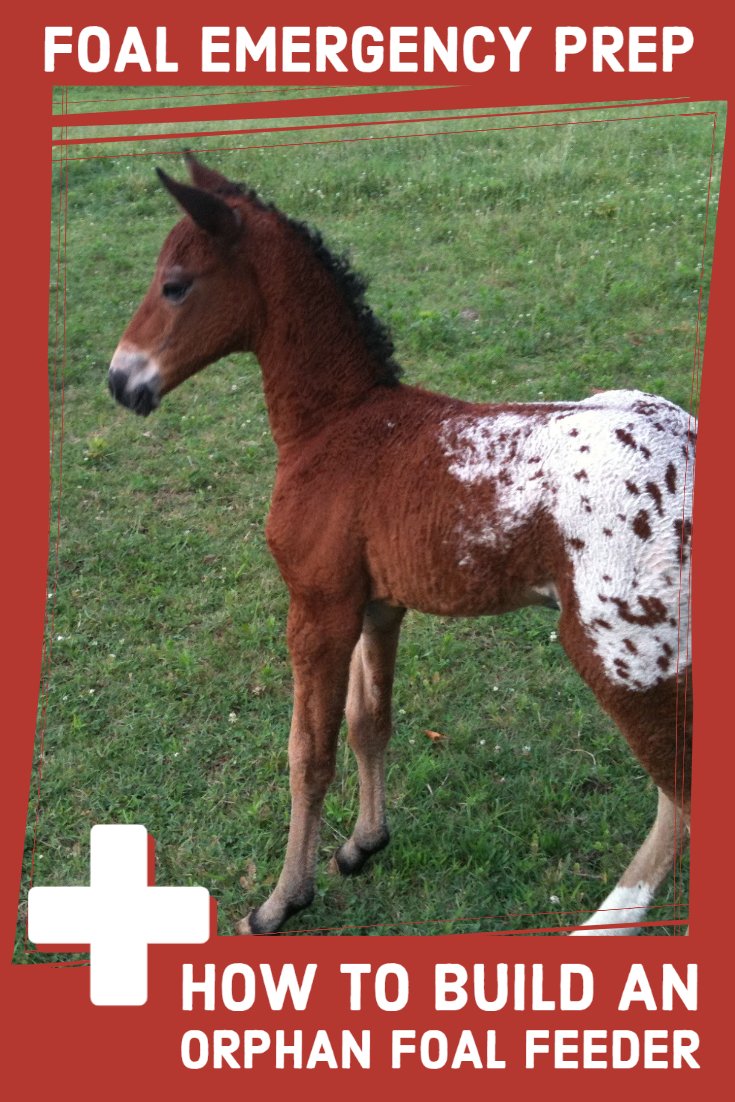
How I learned to make an orphan foal feeder
Before I moved to the farm I am at now, I was living on a small horse farm and enjoying a lifelong dream of breeding and raising horses. 2009 was my 4th year of breeding and that year brought the first orphan foal. Unfortunately, the foal was rejected by a first-time broodmare who was unsure of how to care for her first foal.
While we were able to help the foal get a little colostrum from an easy-going mare who brother her own foal the same day, and initial blood tests on our little orphan were good, we lost the foal to an unknown infection around midnight of his 5th day- his last moment’s spent with his head in the vet’s lap and his body resting on my own lap. It was a heartbreaking end to that breeding season and ultimately what made me decide to sell all but 1 of my horses and move to Hawk Hill the following year, but was an educational experience in many ways.
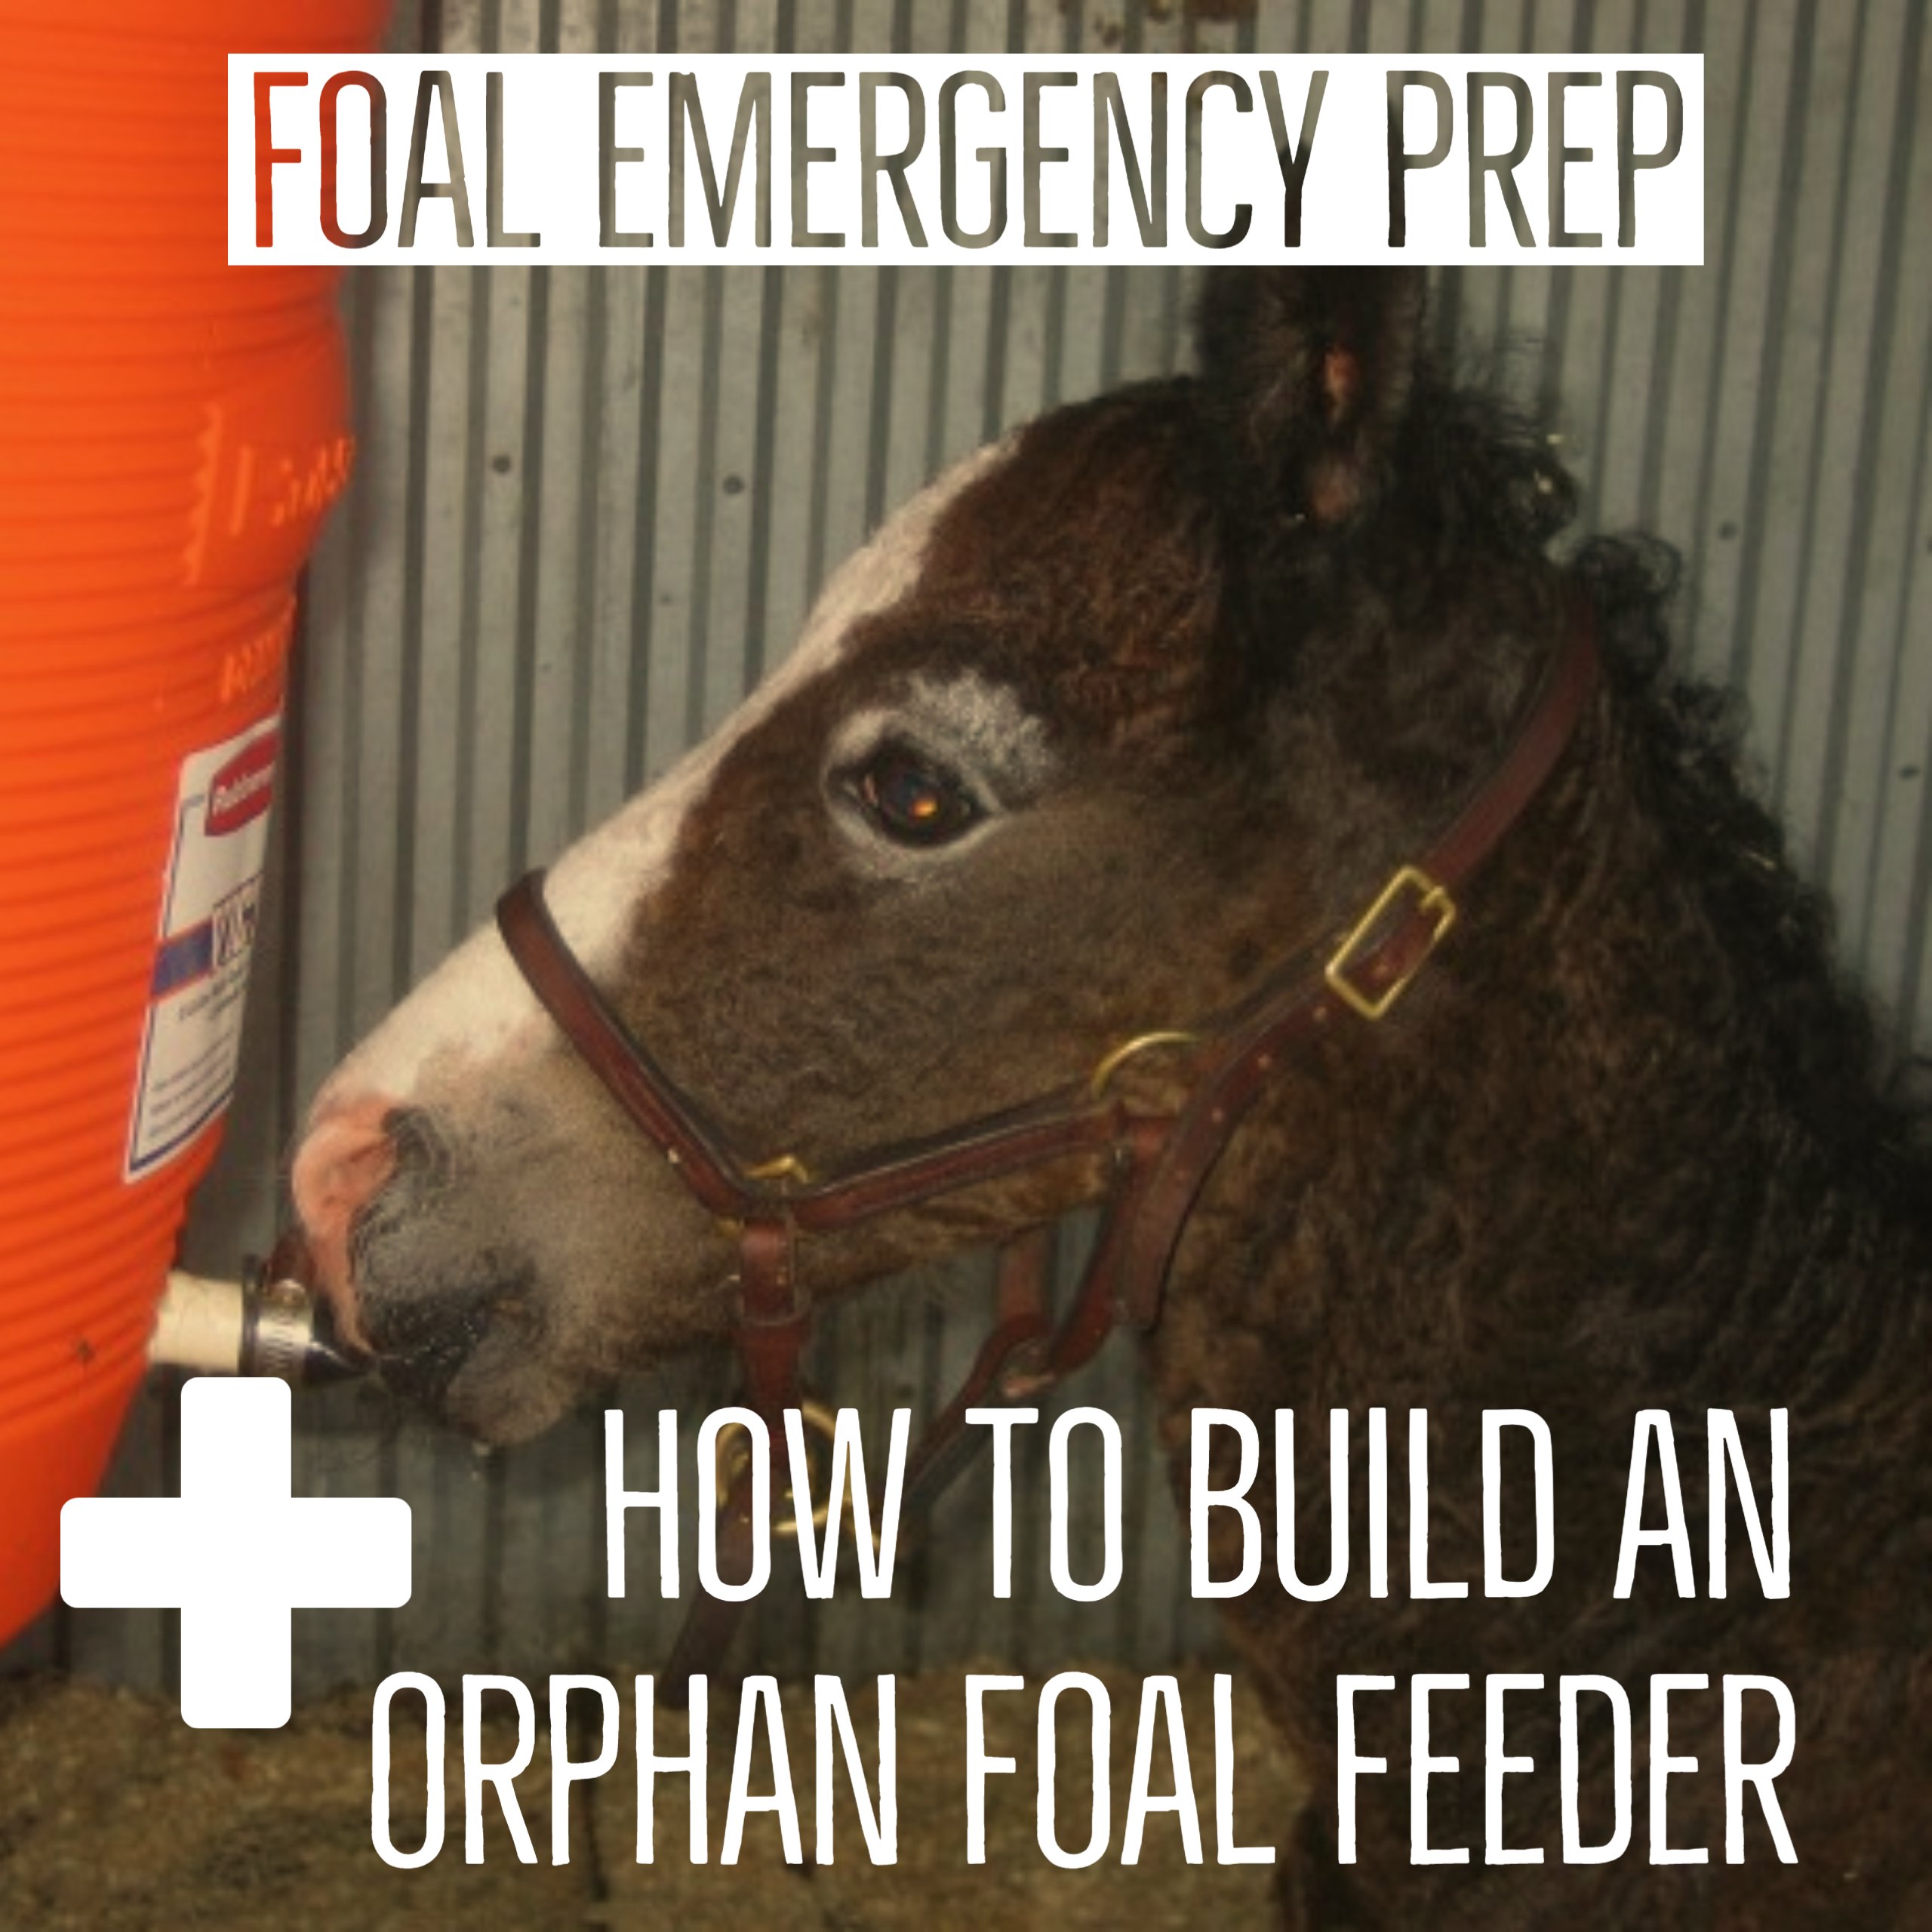
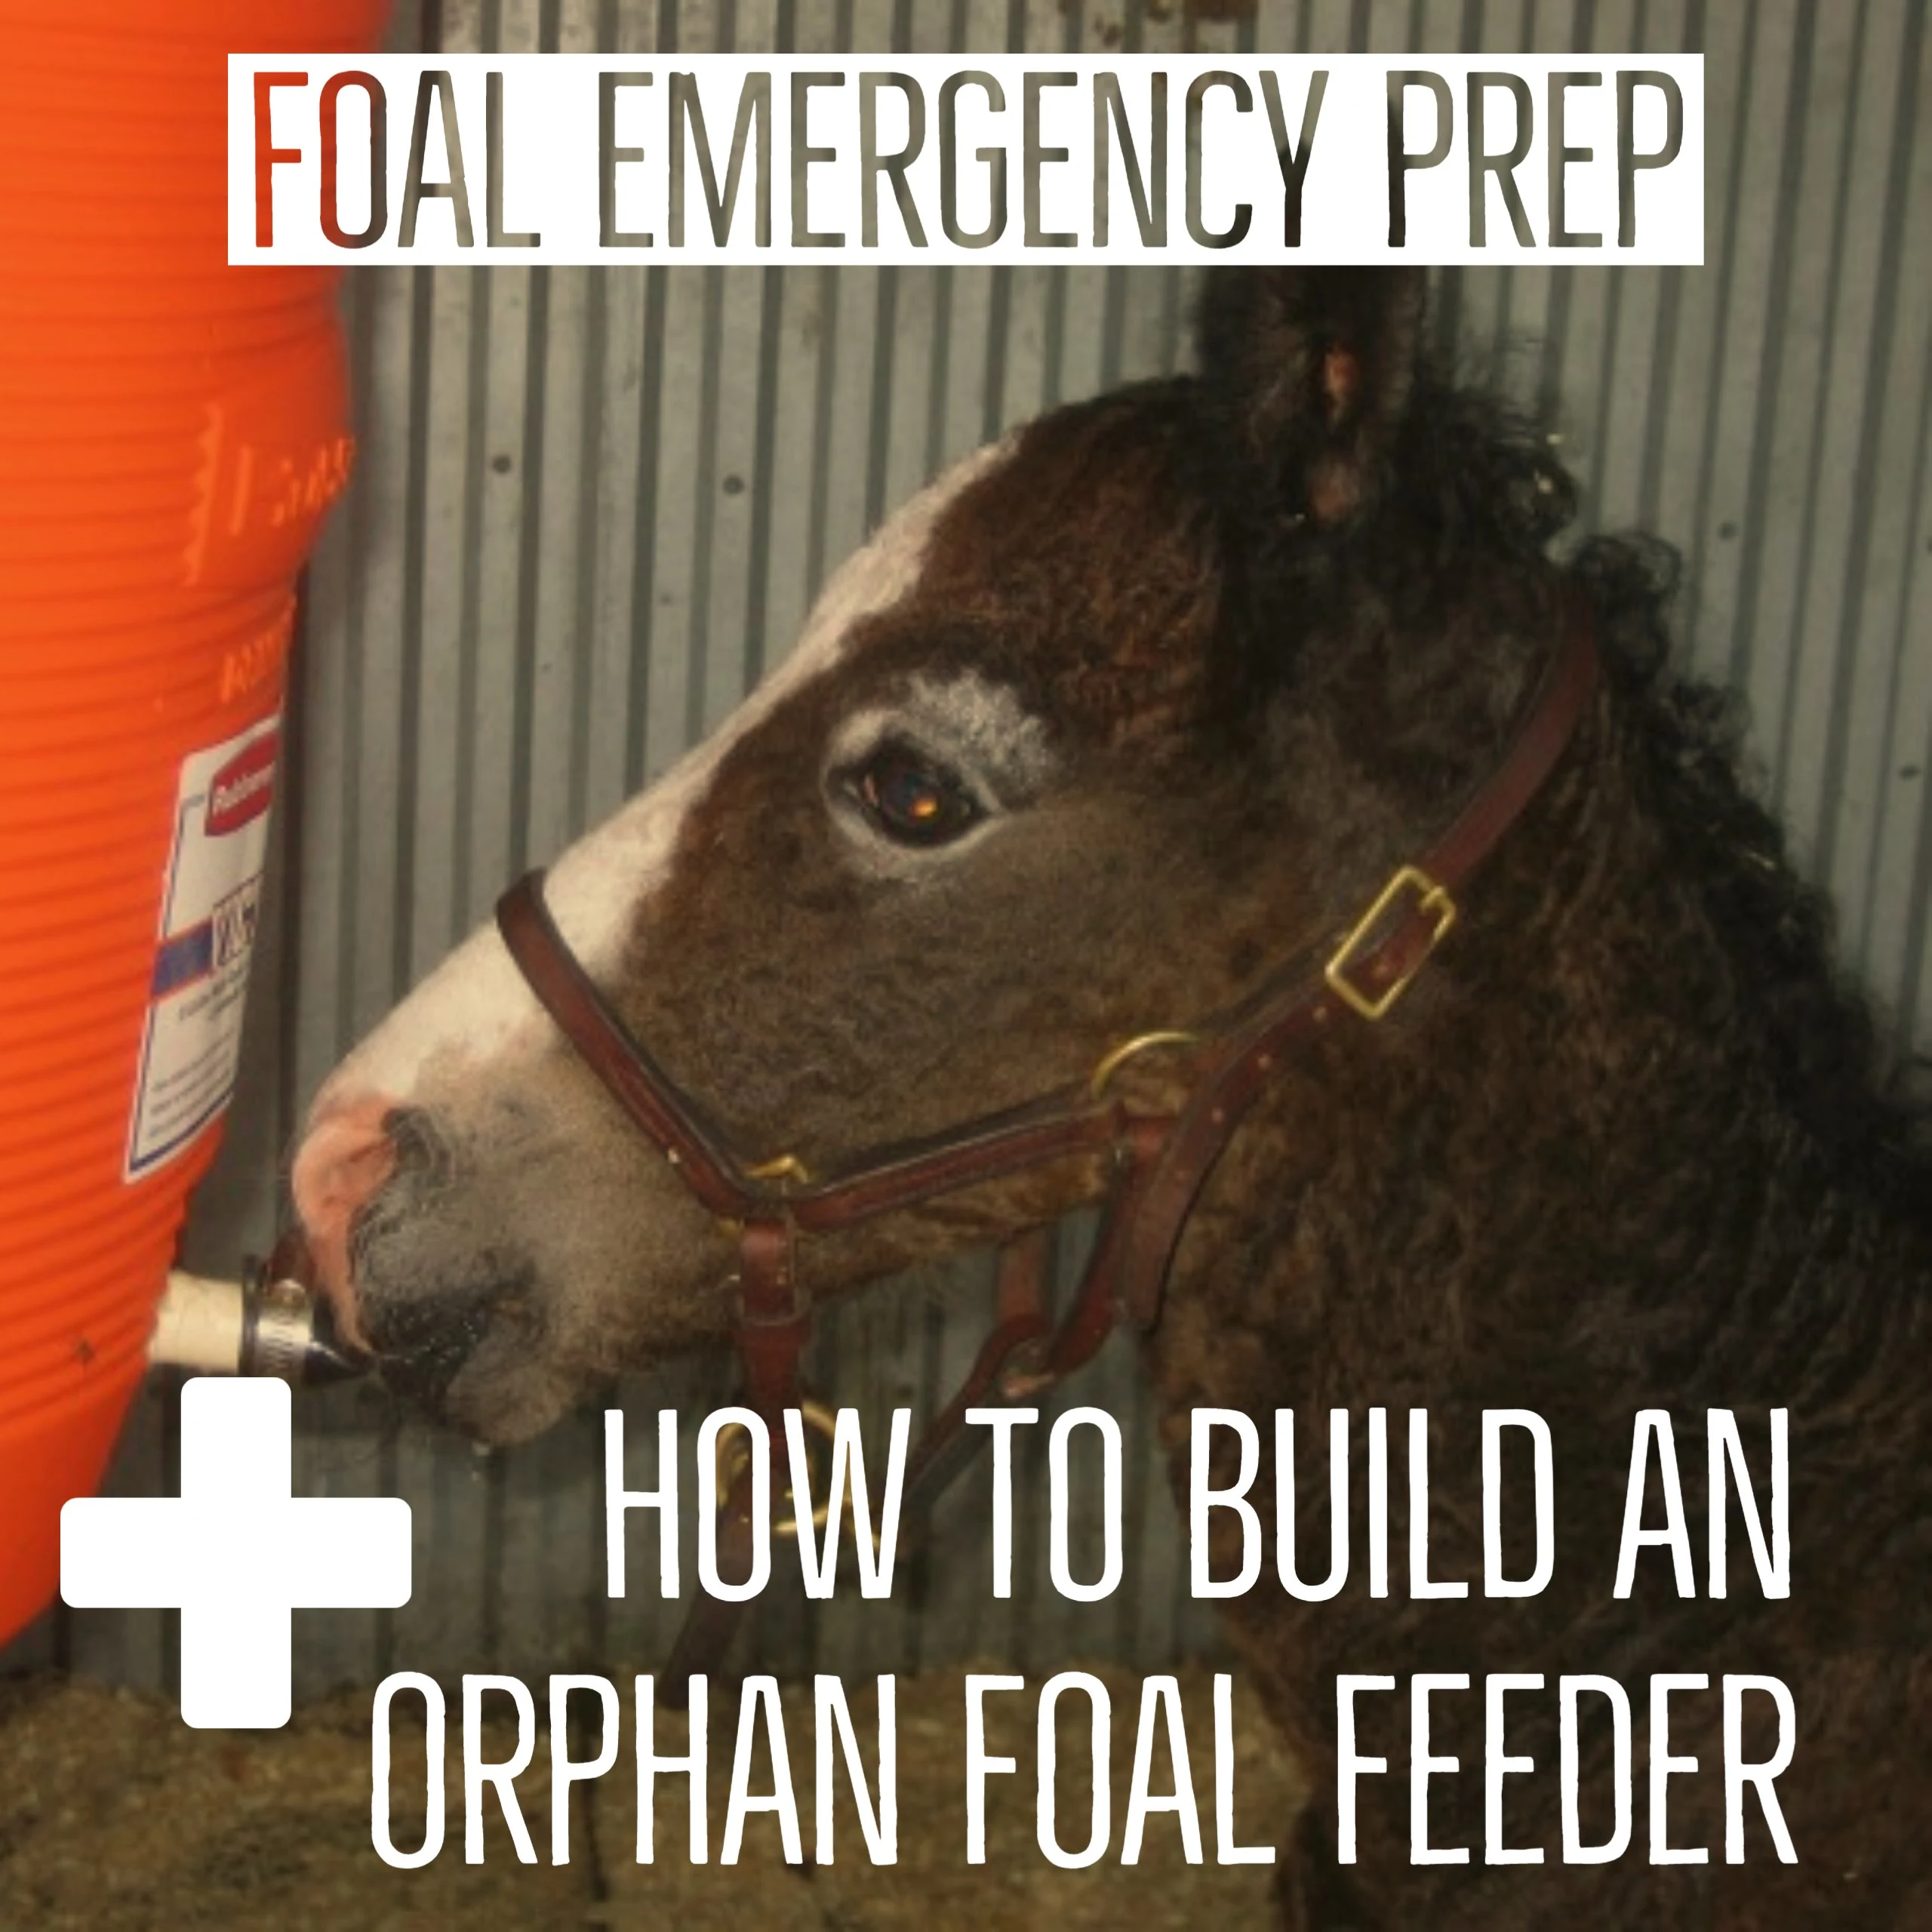
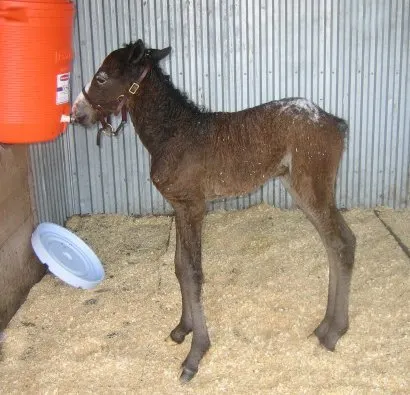
One valuable skill garnered from that brief experience with an orphan foal was how to build an insulated foal feeder. This foal feeder means instead of waking up every hour to mix milk replacer and bottle feed a foal, the foal can nurse on-demand on a more natural feeding schedule. Honestly- I can’t even take credit for building this original contraption- I simply headed to a small, locally-owned hardware store with an igloo cooler and a pitiful look on my face. After I explained what I needed, they located and even glued together all the needed components.
That first foal feeder was a mashup of random parts and cut piping that required gluing and water-sealing- but as I’ve helped a few folks build foal feeders since then (briefly, I was my vet’s go-to referral for orphan foal feeder advice for other breeders who lost a mare in labor or had a foal rejected) I’ve located a simple list of parts available for overnight shipping from amazon that, when assembled without glue or other modifications, create a stable, easy to clean, and safe orphan foal feeder.
Frequently Asked Question: Does it work for calves, sheep, or goats? YES. Well, that’s the feedback I’ve received on folks using this feeder for orphan kids, lambs, and even 4-H bottle calves. The main difference you’ll need to attend to is species-specific nursing nipples and milk replacer.
The following section may contain affiliate links. As an Amazon Associate, we earn from qualifying purchases.
Parts Needed to Build a Milk Feeder for Nursing Livestock:
- 1 5 gallon beverage cooler
- Threaded Drain Plug for Drink Coolers (converts the cooler from spigot to open-drain)
- ALTERNATE FOR ABOVE: If you have a saw to cut through plastic, this replacement spigot might be a better option, because it offers a longer, smoother surface to attach a nipple.)
- Mounting Rack for 5 gallon Cooler (Foals instinctually will headbutt the cooler in an attempt to get milk to flow. You’ll need a very steady mount)
- 2-3 foal nipples (nipples made for lambs, kids, or foals can be used interchangeably. Calf nipples will NOT work for foals.)
- 2-3 Corrosion Resistant Hose Clamps
- 1 brand new toilet brush for easy cleaning between feedings
- 1 bottle brush for cleaning the drain tube
First, you’ll need a big drink cooler. For a newborn foal, you really only need a 2 gallon cooler at max, but the smaller igloo coolers are a little harder to find and the necessary parts (rack, spigot, etc) for that size are even more scarce, and your foal will need larger feedings as they grow. Amazon carries both the 3 gallon or the 5 gallon drink Coolers, but the price on the 5 gallon actually trends lower than the 3 gallon!
Converting a cooler into a foal or lamb feeder is really pretty easy!

1. Unscrew the Spigot
Because we need milk to flow freely when the foal, lamb, or kid applys suction with their mouth, we need to remove the standard drink cooler spigot. Despite what I always thought about these big drink coolers, the spigot is not permanently attached. For ease of cleaning and replacing broken spigots, they actually screw in and most brands share an identical size and thread type (most hardware stores carry a universal replacement)
The first step to turning your cooler into an orphan full feeder is just to unscrew that spigot by grasping the spigot and turning it counterclockwise. With a little bit of pressure you will feel the spigot began to turn. You may need to also grasp the portion of the spigot that extends into a second part – a smooth rim on the interior of the cooler. By turning these in opposite directions you can loosen and then remove the spigot,
2. Replace Spigot with Open-Flow Alternative

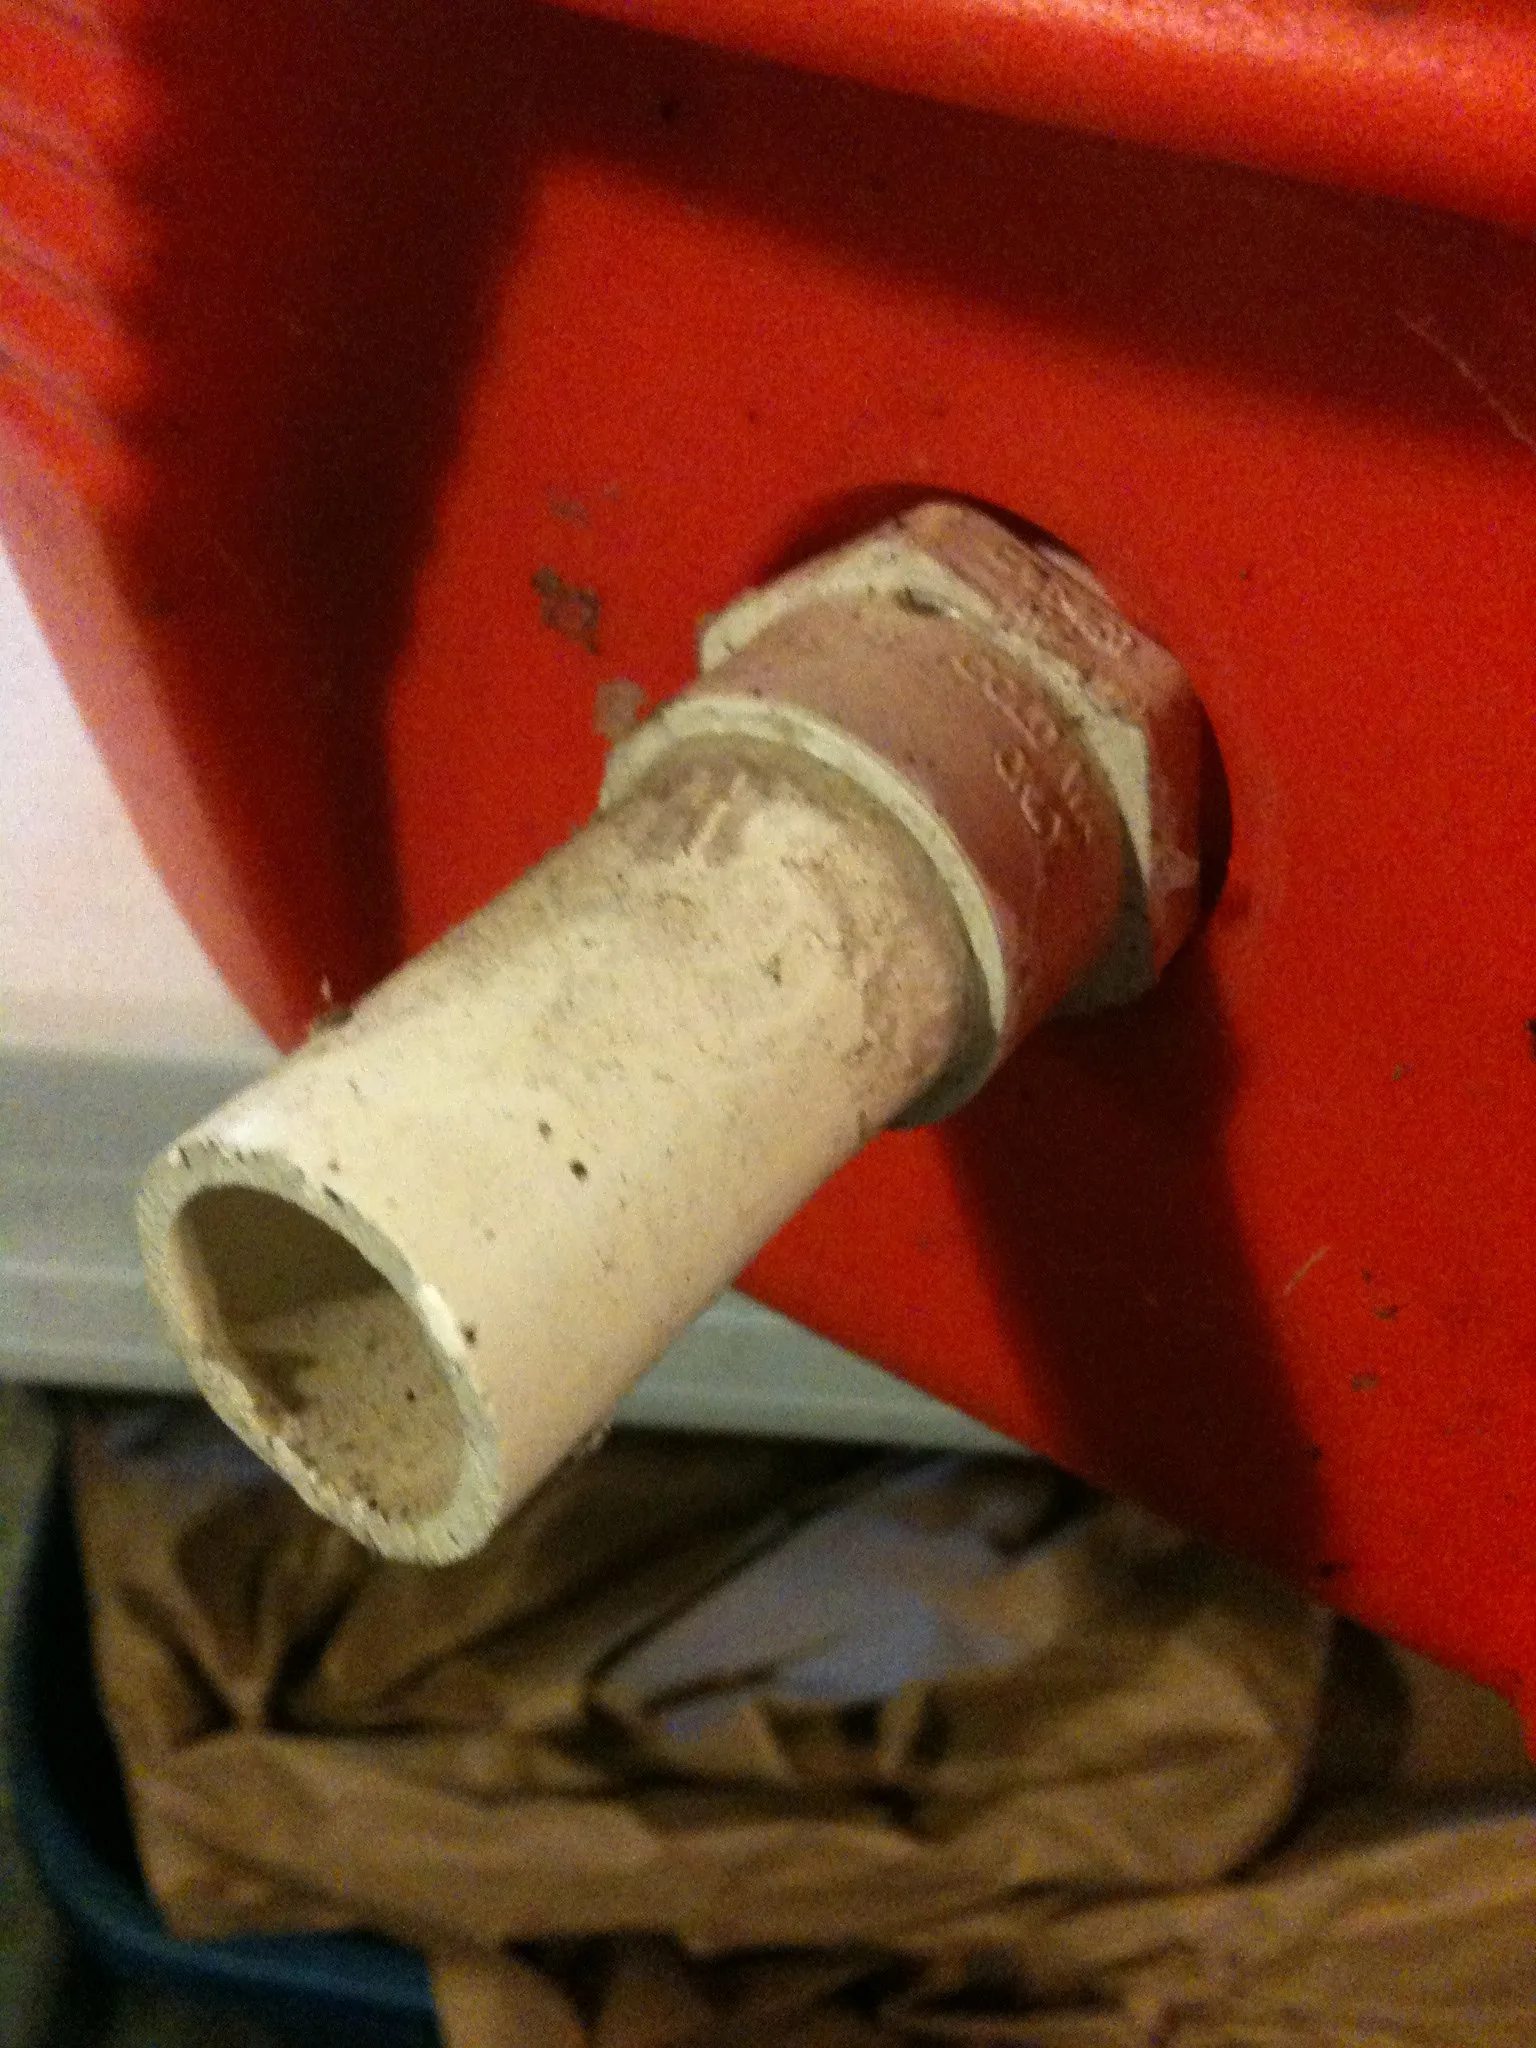
Now that the spigot is removed, and the cooler can drain freely, we need to add a short pipe to which we can attach a nipple. There are several options:
- Threaded Drain Plug for Drink Coolers (Pros: easiest. Screws in exactly as the spigot unscrewed. Cons: offers a relatively short, headed length of pipe to attach nipple too. It may leak slightly)
- Replacement spigot (Pros: easy to attach. Screws in easily. Cons: the valve portion must be cut off using a hacksaw or pipe cutter)
- custom cut PVC pipe – before I knew there were plug-and-play parts for these types of coolers, actually built mine with the help of hardware store employees using raw PVC fittings. If you have pipe glue and a pipe cutter on hand, this option can work well.
Whichever option you choose, the final result of this step should be a water-tight, open-flow style pipe fitting extending out a minimum of 1.25 inches from the barrel.
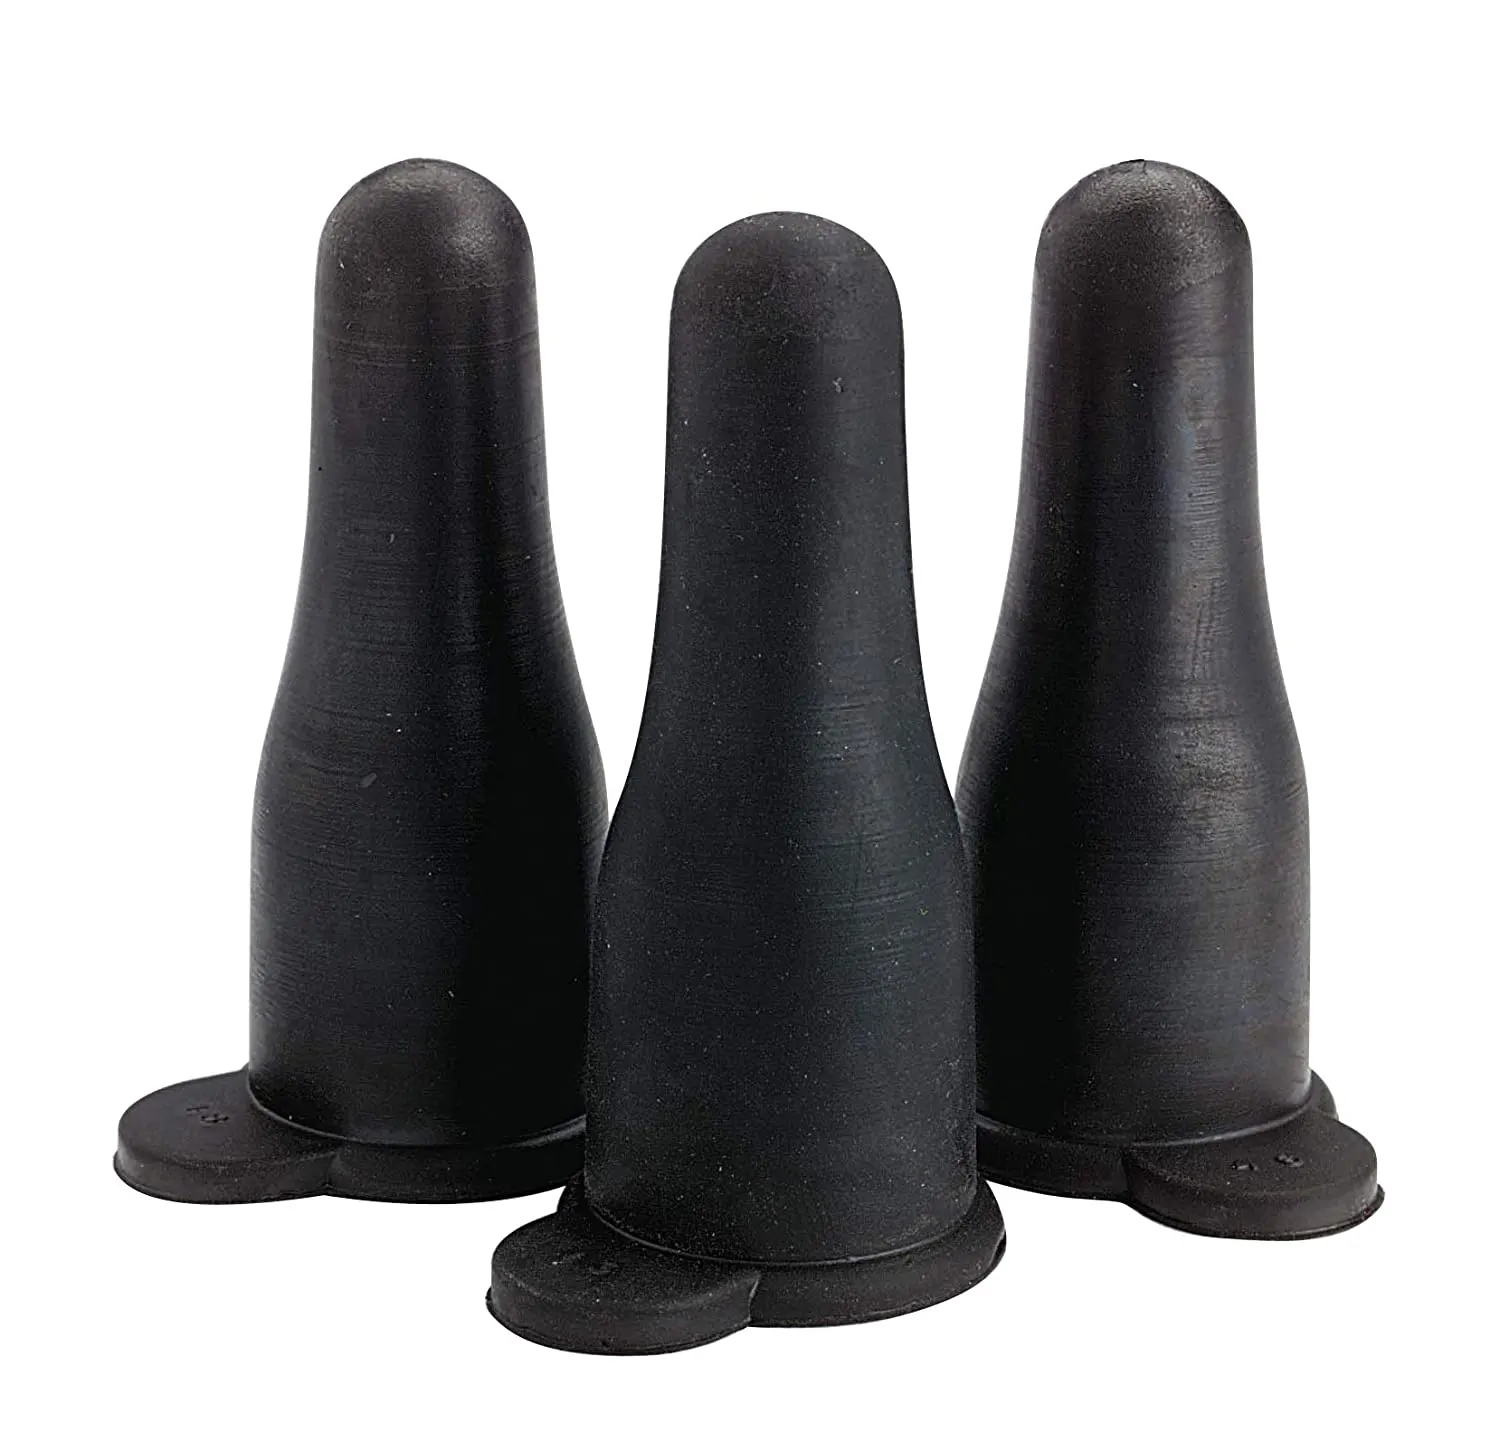
3. Securely attach a nipple
The last step in constructing this orphan foal feeder involves attaching a foal nipple. lamb nipples, which may be easier to find at a local feed store will work, but a calf or pig nipple will NOT work with the anatomy of a horse and won’t work to get a foal suckling from your stationery milk feeder.
You can expect your foal to be really rough on the nipple, so you’ll want to be sure you attach it very securely. For us, a hose clamp was the first thing we tried and it worked great throughout all the feedings. Just stretch the rubber nipple over the outlet pipe, add a hose clamp over the base of the nipple, and tighten the clamp.
The black nipples below, the type that don’t have a base but just a tab, are the nipples that worked well for us and that our orphan foal readily adapted to.

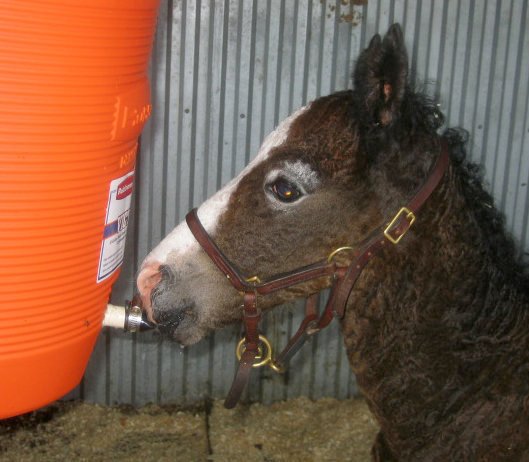
4. Securely mount cooler
There are a few concerns here with mounting:
1. Height. Be sure to mount your feeder at the height that a mare’s udders would be
2. Stability. Foals will be super rough on the cooler as they instinctually nuzzle, bump, and headbutt it like they would their mom’s teat. Use a mounting bracket, the included straps, and potentially even add bungee cords to make sure the cooler stays mounted and secure.
3. Ease of human handling. When we had our foal milk cooler we didn’t have a mounting bracket, and it was kind of awful. In order to keep the cooler mounted and prevented from swinging too much we had all kinds of ropes and bungee’s holding it in place. This made the multiple daily refills and cleanings really a hassle. With a good bracket you should just be able to refill and even clean without having to hassle with straps and clips.
5. Train your foal to feed
If you’ve got a hungry and healthy orphan baby horse, this shouldn’t take too much work. Guide the foal’s mouth to the cooler’s nipple. If the reluctant, coat your hand with milk-replacer, then rub their gums with your milk coated fingers. As the foal taste the milk, they should begin suckling on your fingers. Simply move your fingers towards the cooler’s nipple to encourage the foal’s mouth to follow and latch onto the nipple.
Most foals adapt readily to the milk replacement cooler. Once your foal has adapted to feeding from the cooler, feeding will become one of the easiest parts of raising an orphan foal into a healthy and well-socialized young horse!
Notes on behavior and socializing for an orphan foal
Old horse pros will tell you- as they did me in – that orphan foals often grow up into horses with terrible ground manners around humans and bad social skills with other horses. Without a mother to teach them “horse rules,” and instead having lots and lots of (often very cuddly) human contact, orphan foals often grow up into horses who don’t adopt a well to herd life and who may have to unlearn dangerous ways of interacting with humans (ways that were “cute” when they were a small foal).
Using a cooler as an orphan feeder can actually improve some of these behavioral outcomes. Although it doesn’t replace interaction with a mother, the foal feeder does minimize some of the negative behaviors with humans that a foal can learn when being hand nursed. For example, the young horse won’t learn that it’s okay to shove or headbutt a human, because that feeding-related behavior will be displaced onto the milk replacement feeder.
Get a companion as quickly as possible: Although the young horse’s mother may not be available to care for them and nurse them, they should be socialized to an older horse “buddy” as soon as possible. A veteran pony or retired stable matriarch can bond with your horse and provide some of the social skills that your foal will miss by not being raised by their mother. Introductions should take place with much care, however, as one sharp kick from a mature horse can critically injure a young foal. Instead, introduce the foal and the older horse slowly by keeping them in separate but adjoining stalls or pens for several days to get a sense of how they might relate when co-stabled. When you do introduce them without barriers, do so in a wide-open area such as a very safe paddock or an arena without corners. This gives the space for the young foal to escape if the older horse becomes too rough or aggressive

Cleaning your orphan foal feeder
The trade-off for not having to get up every two hours to bottlefeed the orphan foal is that the spigot and bucket interior must be cleaned well between every feeding or the milk, or milk residue left in the barrel and spigot interior, can spoil.
With each feeding, you will need to unscrew and remove the nipple, flush out any leftover milk, do a quick scrub of the interior (a brand-new toilet brush is actually shaped perfect for this), shove a bottle brush up and through the spigot to clear out and residue, and replace the nipple with a clean nipple, before refilling the cooler with milk replacer.
Hot or cold milk replacer? And how long is it safe to let sit in the cooler?
After checking with the manufacturer, we found that the milk replacer we used could be mixed warm or cold and left in the cooler for 6-8 hours before needing to be replaced, but you should contact the manufacturer of the milk replacer you use to see how long it can sit unrefrigerated before needing to be dumped and remixed. Reusable ice packs may be used to prolong time between refilling without diluting the nutrients in your milk replacer in the way that ice blocks would.