


Many older homes feature rooms with no wiring for an overhead light. In this post, I demonstrate a simple method to add a ceiling light without wiring. Watch how I avoid the hassle of expensive electrical rewiring by using add a ceiling light without overhead electrical box connections.
I’ll show you everything you need and then a step by step guide to hanging a ceiling light like a pendant or chandelier from a plain ceiling.
It’s a perfect solution for renters in old homes- and it’s a great way to add a fun light fixture in a room with harsh lighting (i.e. like many professional offices where fluorescent lighting is the only overhead light source). Keep reading to learn how you can hang a functional ceiling light in this beginner-friendly tutorial.
Ceiling Lights in Rooms with No Overhead Electrical Box
In older homes, builders usually didn’t install wiring for an overhead light in common spaces like living rooms. It was fashionable at the time to have lamps warmly lighting a living room. In today’s multi-purpose living room, most people prefer a mix of lighting options. We use lamps for setting a mood and overhead lights to fully illuminate the room on demand.
Hawk Hill’s living room is of the former persuasion. My living room did not have existing wiring for ceiling lights. Instead, I had to walk around and turn on and off multiple lamps. What I really wanted was one switch near the door. While smart plugins offered an alternative, I find it frustrating to have to fumble for my phone just to turn on the lights when I enter a room!
The obvious solution was to call an electrician, but I wasn’t ready to deal with the cost of having an electrician run new wires through Hawk Hill’s 100-year-old plaster and lathe walls.
It took a bit of research and creativity, but I figured out how to have my cake and eat it too. I hung a ceiling light in this room without existing wiring by using the quick DIY method described below.
Combined with a smart switch, I now have the best of both worlds: a mechanical switch on the wall and an app-controlled overhead light! – All without needing to call in an expert.
Now, when the wall switch is flipped in Hawk Hill’s living room, a chandelier and lamp both switch on and brightly illuminate the room. Thrilled with the results for a few months now, I thought I’d take a few minutes to share the instructions for installing a wireless switch for illuminating your own lair of darkness.
The following section may contain affiliate links. As an Amazon Associate, we earn from qualifying purchases.
How to Hang a Chandelier in a Room without Ceiling Light Wiring:
Supply List:
- A hanging overhead light (I LOVE Etsy for vintage chandeliers and new-handmade pendant lights in all price ranges, or these light fixture designed to hang from Amazon)
- Wireless wall switch
- (optional) Smart Power Strip (this will permit you to have a mechanical wall switch and the ability to turn the light on and off from smart devices)
- stud finder
- driller ceiling hook (requires only a screwdriver for mounting) OR ceiling hook with toggle wings (requires drill for mounting)
- cord cover (or check out these covers from Haddock Industrial)
- (optional) heat shrink tubes
Step 1: Choose a Ceiling Light Fixture:
I picked a chandelier (of course!) but any ceiling light fixture designed to hang should work. I’ve completed this project for friends using pendant lights and drum shade style fixtures). This method will not work with ceiling lights labeled “flush mount.”

Step 2. Convert wiring connection


I already have a popular blog post on how to convert a light fixture to a plug-in style lamp, but for safety, you’ll want to convert this light fixture a bit differently from that method.
Since you’ll need a long cord to reach from the ceiling to an outlet (usually near the floor) you’ll actually need to splice the wires of the light fixture to the male end of a heavy-duty extension cord. An electrician can help you with this project, or you can consult an expert guide (which I am not!) on how to splice electrical wires and cords. (Alternately, you can also learn from a YouTube tutorial, like this one)
As you can see in the photo above and in the video linked, heat shrink tubes make it easy to splice ceiling light wiring for a smooth and safe cord.
Step 3. Install a Sturdy hook for your Ceiling Light
You’ll need to install a hook on your ceiling for your new light. Because light fixtures can be heavy and especially dangerous if they fall, it’s very very important that you use a good quality hook and anchor it to a ceiling joist or beam.
Ceiling joists are just like wall studs, but in the ceiling. You can find and mount things to a joist just like you would for a wall stud. Any stud finder can help you locate a joist to install a hook for your light.
If you can’t find a stud or there isn’t a stud where you want your light, ceiling hooks with “toggle wings” should be able to hold any light fixture under 15 lbs if installed properly on plaster and lathe or drywall.
TIP: You can skip locating a joist to mount the screw for your ceiling light if your fixture is lightweight. If your light is 4 pounds or less, any quality drywall anchor should be able to hold your hook and light without issues. For lights that weigh 4-15 pounds, use a toggle lock anchor which expands behind the ceiling drywall. For fixtures heavier than 15 lbs, it’s best to mount the screw directly into a joist.
Step 4. Hide or Disguise the Cord
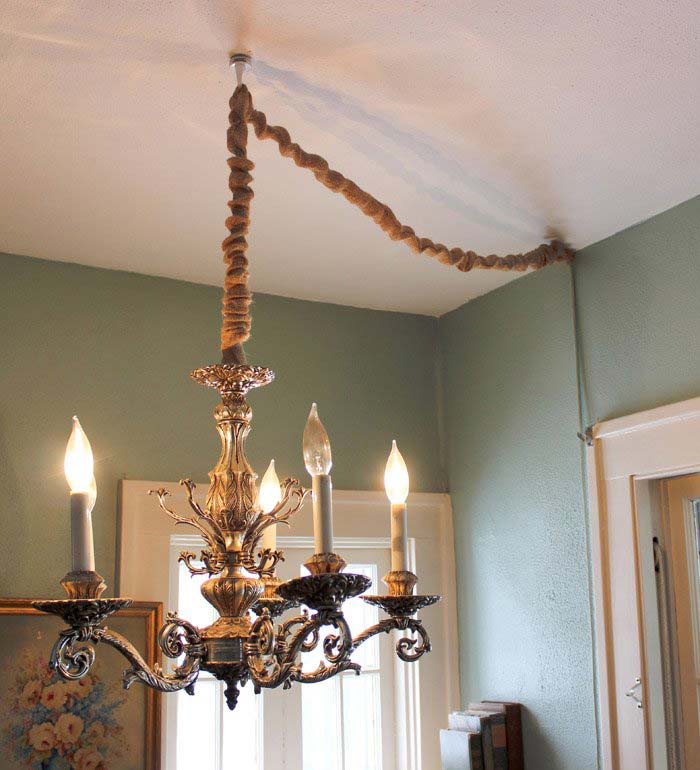

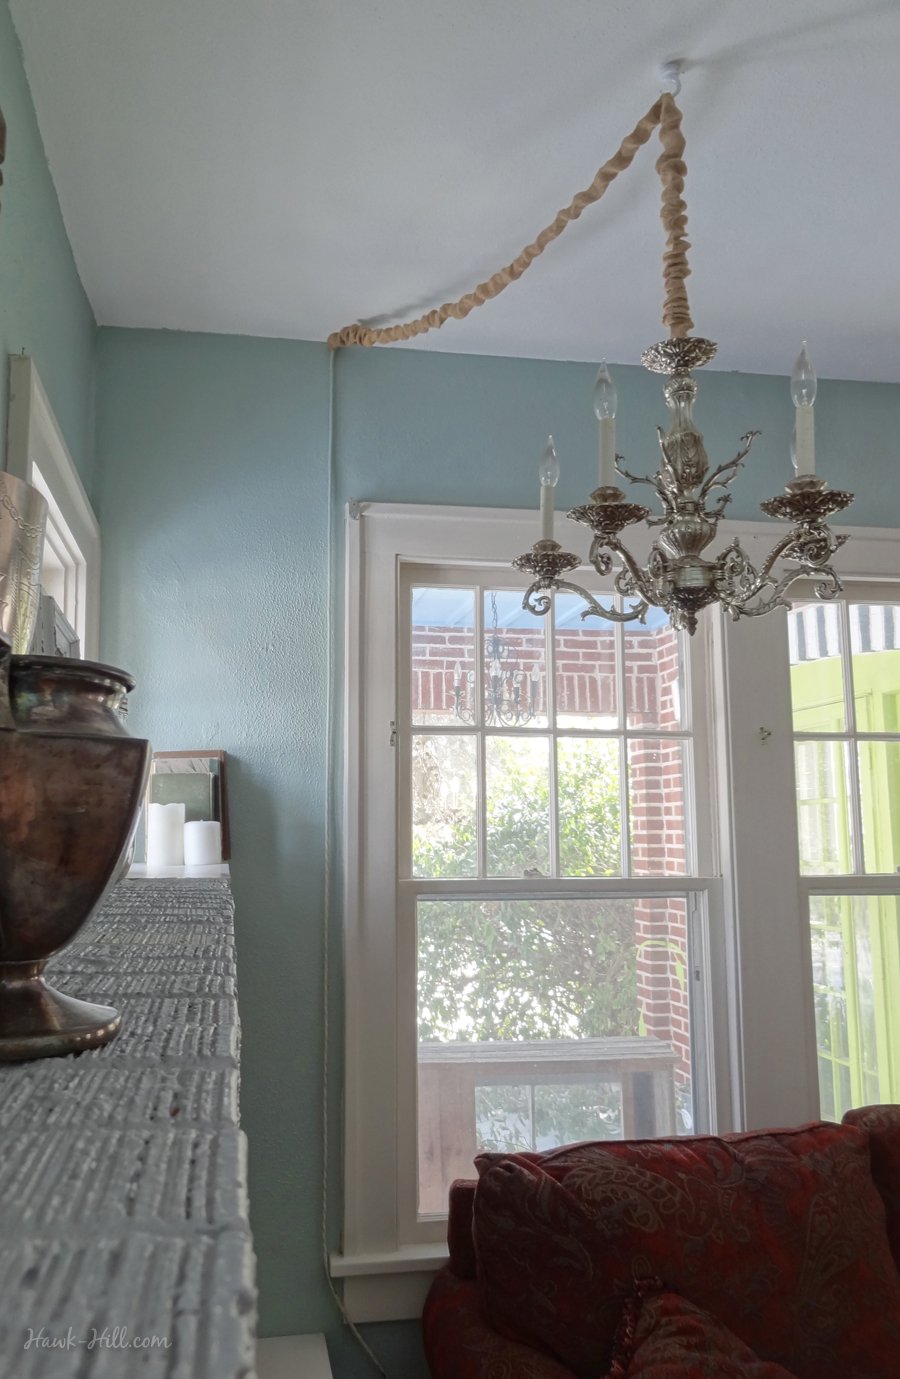
Once you have your ceiling light rewired and a ceiling hook installed, installation is simple! You can hang the fixture on the hook or take an extra step: I prefer to put some thought into how to mask or cover the cord. With your light hanging from the ceiling, the cord will be very visible. For this project, I chose a Velcro-On Chandelier Cord Cover to make my extension cord a bit less of an eyesore.
Option #2 for hiding the cord: use one of the trendy modern extension cords disguised as manila rope.
Conceal Remaining Cord
After hanging your ceiling light without ceiling wiring, you’ll want to put some thought into how your cord will be disguised. It doesn’t have to be an eyesore as the cord runs down your wall and to an outlet. Can you conceal it behind window moulding? Tuck it around a picture frame?
The exposed section of my cord is painted Wythe Blue to match the walls.
🎨💡🔌 Consider painting your ceiling light’s extension cord to help it blend in. To easily paint a cord: just place a plastic sandwich bag over your hand, place an old sock over the plastic bag, and then place a few tablespoons of paint in your gloved palm. You can paint an extension cord in moments by pulling the cord through your paint-filled mitt.
Step 5. Adding & Setting up a Wireless Switch

By step five, you’ll have a ceiling-mounted light in your formerly lamp-lit room, but if you stop here, it won’t turn on and off like a normal light wired to a wall switch. But guess what? I fixed that problem to!
Installing an Analogue Switch for your Light
Smart switches and power strips make it easy to turn this light on and off with a smartphone tap or voice command. However, you can call me old fashioned but I still want a wall switch. I hate having to pause my phone call or podcast to turn a light on! So, I rigged up a solution that incorporates the best of both options.
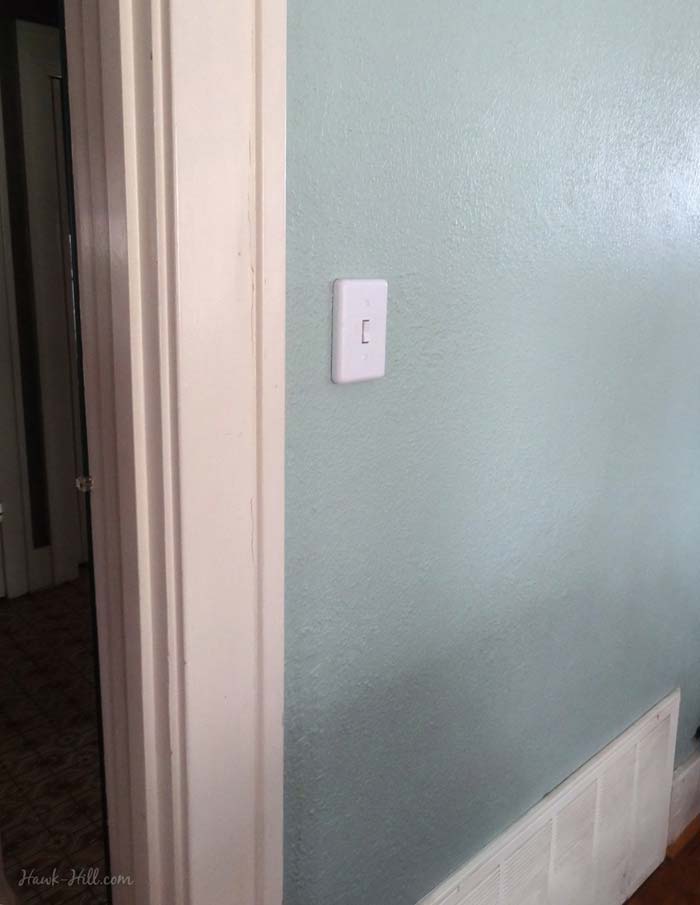
To add an easy wall switch, I scoured Amazon and found this gem (which I now have 3 of in my house!): Westek Wall Mounted Switch and Plug-in Receiver.
This product comes in two parts: a wireless switch (basically, a remote control) that you attach to your wall, and a remotely-controlled outlet that turns the light on or off according to the signal sent by the wireless switch.
To combine with Google Home or Amazon Alexa use a smart power strip in addition to the switch.
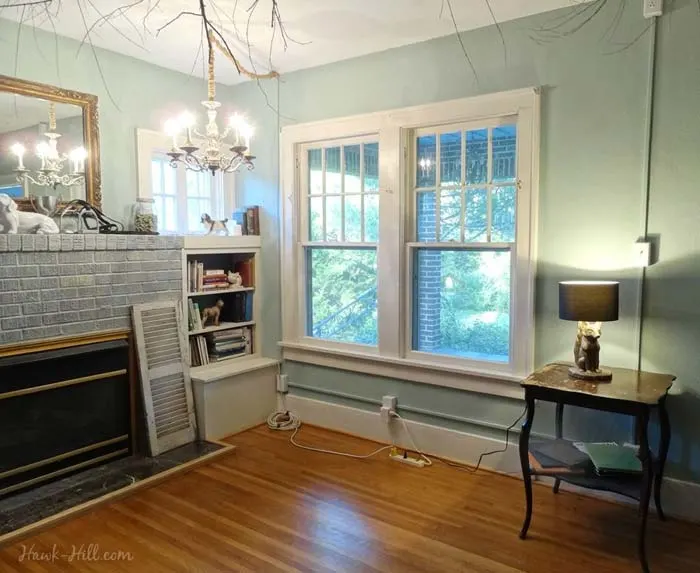
Here are a few views of how the setup works in my living room to control two lights. First, the zoomed out view:

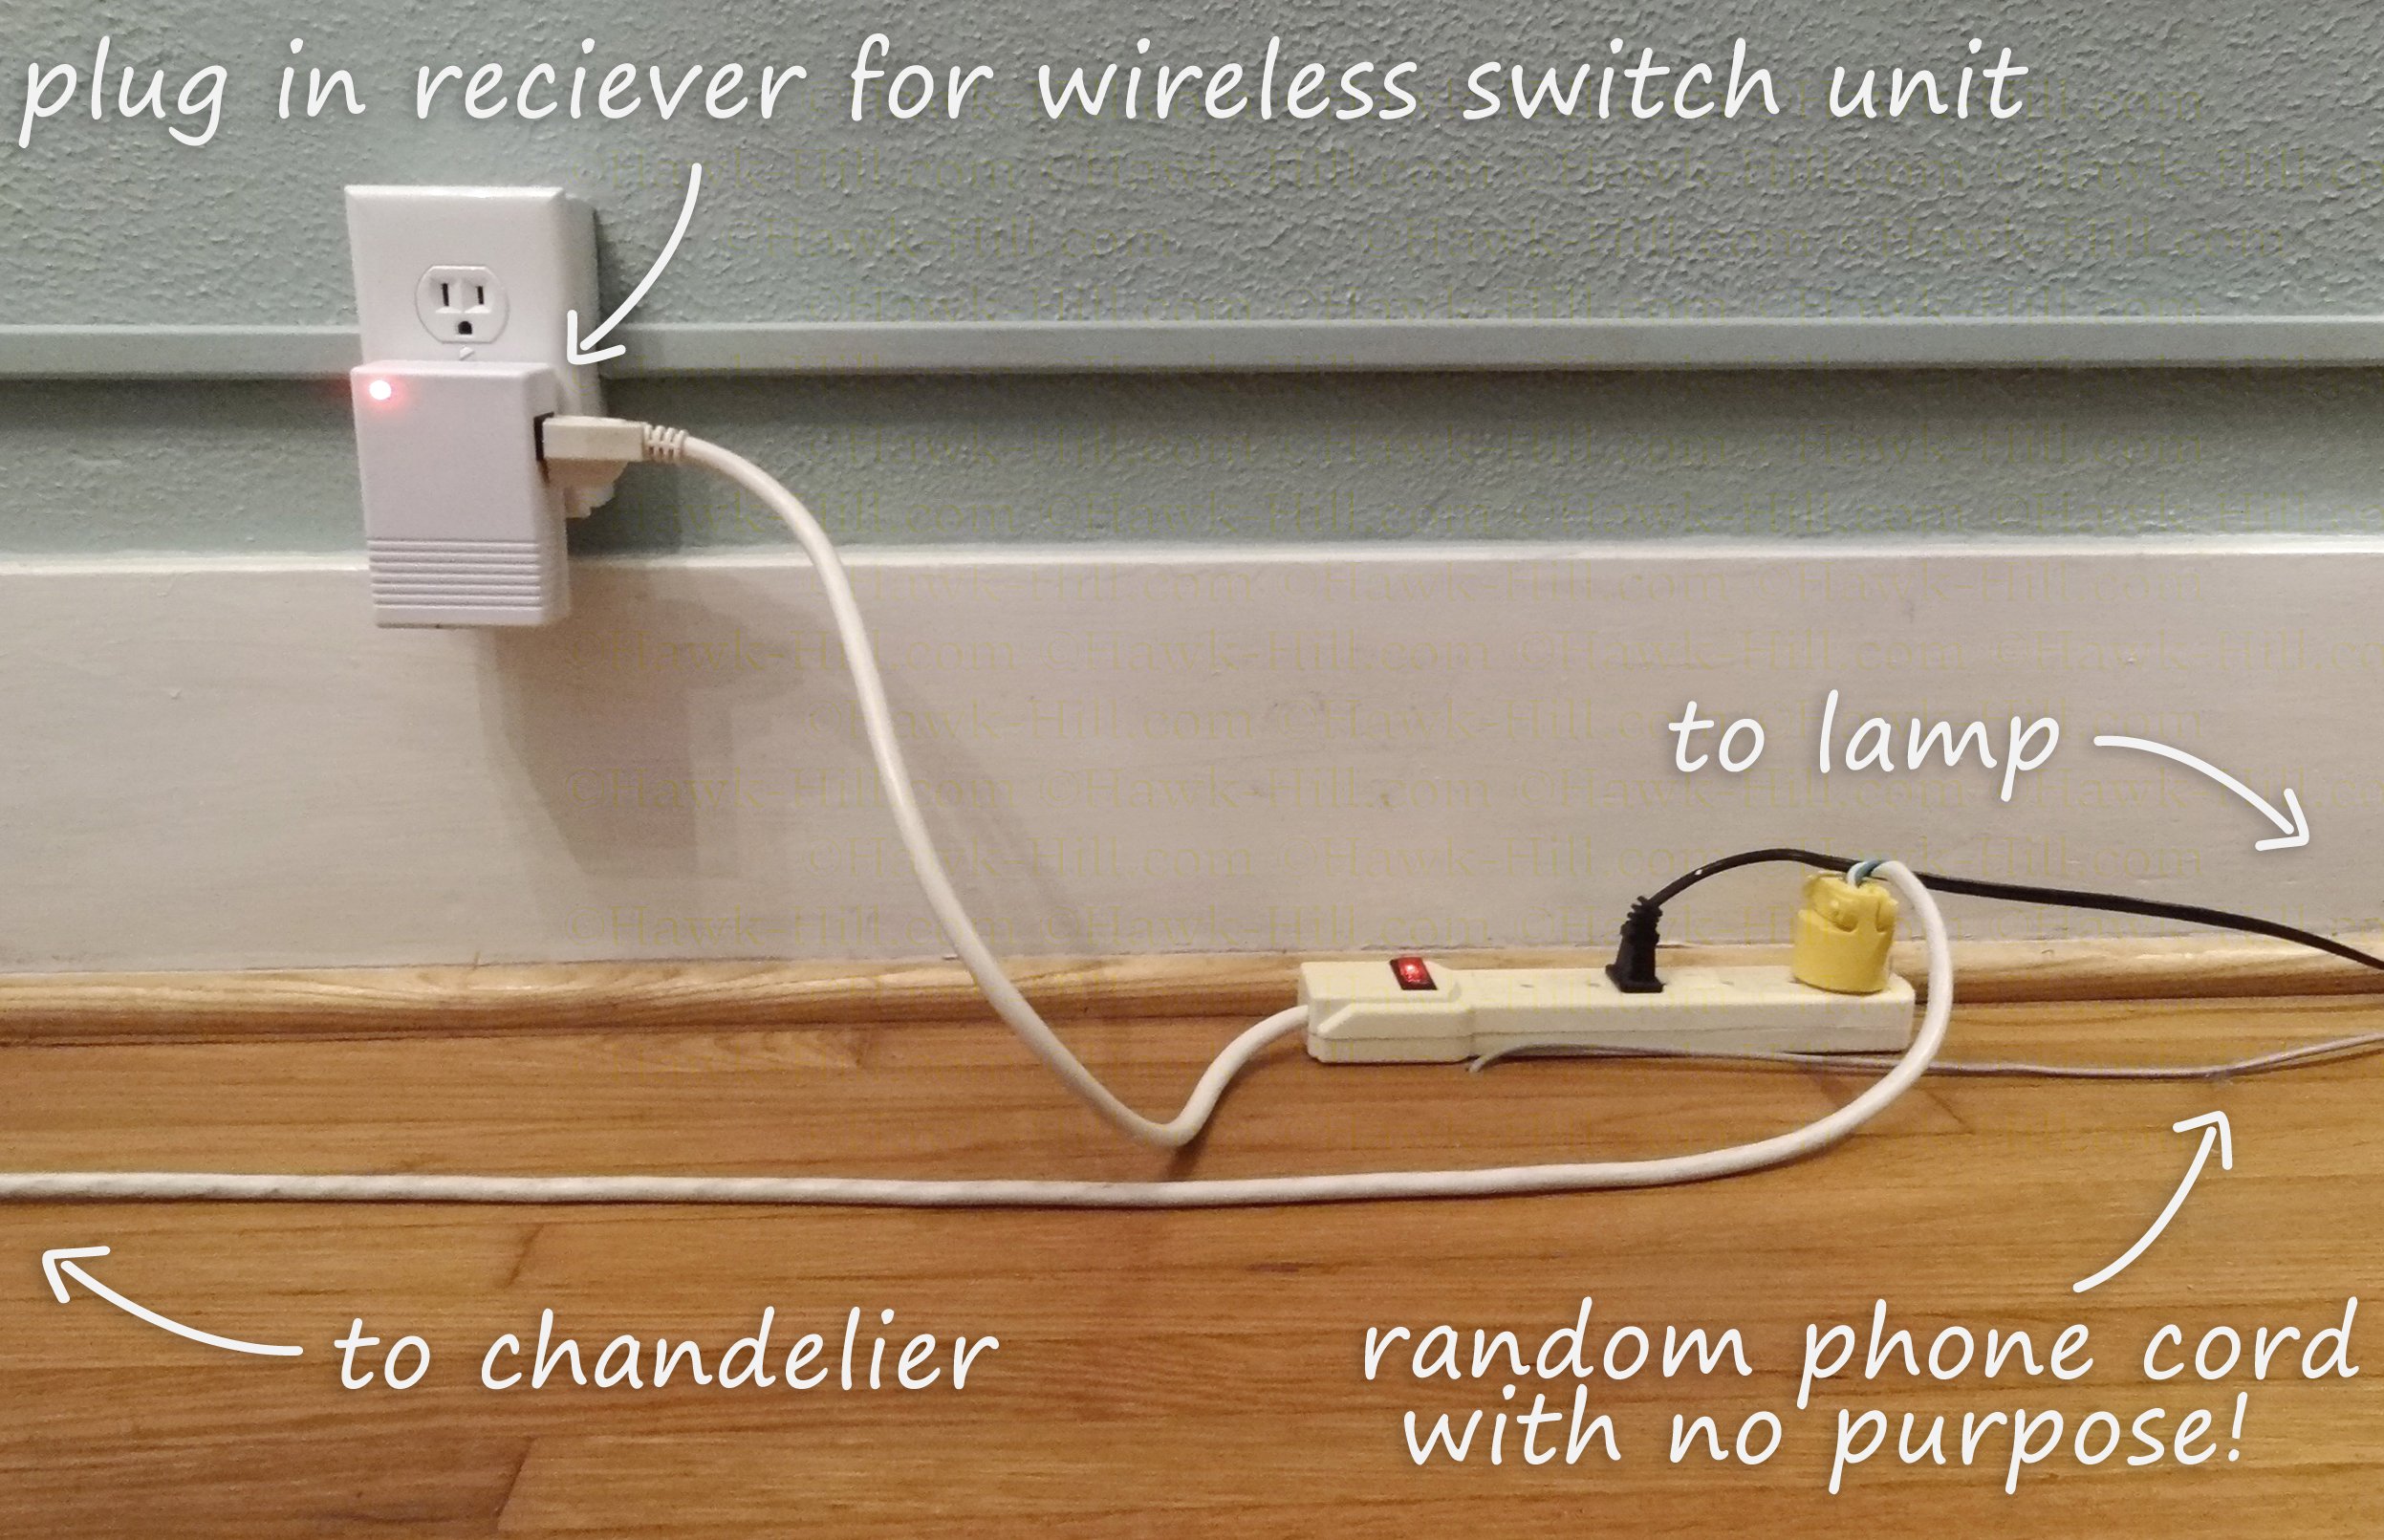
Here’s a more detailed view of the setup:

And here’s a panorama of the room without furniture, scrunched up so you can see the entire setup:
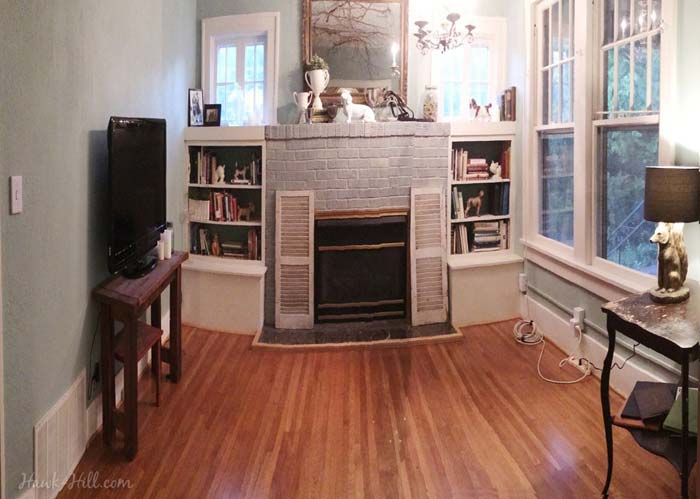

I still consider my living room a work in progress (those couches were out the next week! yikes!), but love how it’s coming together. Here are a few work-in-progress shots.


Spring 2023 Update: Using this method for auxiliary lighting
In 2015 I made the big plunge into tiny living, and two chandeliers made it past the “love-inventory” and were packed into my downsized life. Although my 280 square foot apartment in downtown Seattle had overhead lighting, it never seemed bright enough to push back the gloom of Seattle winter enough to work on the art, craft, and DIY projects that I love.
So I hung a chandelier in my apartment and repeated this method once again, this time as a rental friendly DIY. This has been such a small luxury- and such a delight to settle into bed with a book by the warm light of a chandelier.
Thanks for Reading!!!
I hope you can tell that I love DIY, researching the best affordable solutions for every-day problems opportunities and documenting / sharing solutions!🙌 Hawk-Hill.com is reader-supported.
☕ Hawk-Hill.com is reader-supported. If this article saved you time or money, please consider donating $1 to help me cover the cost of hosting this website OR If you appreciate this information and want to throw a “Thanks!” my way by buying me a coffee – I would Of Course appreciate it! :]
Reader Questions and Recommendations
Readers, do you have any favorite topics / posts? What would you like to read more about in the future? As I hope you can tell from this and other articles on my site, I really enjoy DIY / a good challenge, and I’m not afraid to roll up my sleeves to figure out a great, and hopefully simple 😁 solution. So please feel free to let me know in the comments below (or reach out via social media)!
Ok Really – I’ll try to wrap this up now😂
Finally, if you’d like to continue to learn about interesting DIY options as well as how YOU can tackle creative new projects consider checking out the latest and most popular articles listed on the Hawk-Hill Home Page. I’m always trying to enjoy and write about the creative side of life so please don’t be a stranger – check back often!😍
If you enjoyed this post you may also enjoy reading / perusing / devouring😊 one or all of these articles as well!
Amanda
Tuesday 29th of August 2023
Themis page was so cluttered. Could you make all the links in one area?
Lindsayanne Brenner
Monday 11th of September 2023
Good suggestion -Thanks for the feedback. I'm always looking to make this site better :]
Sara
Monday 3rd of January 2022
THANK YOU this saved me a ton of time and unnecessary expense!
Laura Laudadio
Saturday 10th of October 2020
Thank you so much for this valuable information that we will certainly use to hang an auxiliary/decorative light fixture. Now my dilemma is where to hang it! We have plenty of canned lighting in our newly remodeled family room but sometimes that is too much. I bought this cascading light fixture in Colorado where I feel in love with it before I figured out where to hang it. If I send you some photos would you be able to offer me some advice?
Lindsayanne
Saturday 10th of October 2020
Thanks so much for reaching out. Unfortunately, my blogging does not extend to availability for consults, for now!
Maria
Friday 4th of September 2020
I have a iron chandalier that i gutted out i want to use battery operated light on it Can i hang this 24 lbs chandalier on a jumbo swag hook and would it hold it securely without it crashing down
tracy
Thursday 19th of January 2023
@Maria, where do you find battery operated Chandelier light bulbs? Thank you.
Lindsayanne
Saturday 5th of September 2020
Hi Maria- it definitely depends on the hook you choose and the method you use to mount that hook to your ceiling. 24 lbs is very heavy, so my recommendation would be to buy a specialty ceiling hook specifically rated for that weight, and make sure it's mounted properly (for typical ceilings, that means locating the stud, triple verifying that location, and then using a ceiling hook designed to be screwed into wood)
Alicia
Thursday 7th of February 2019
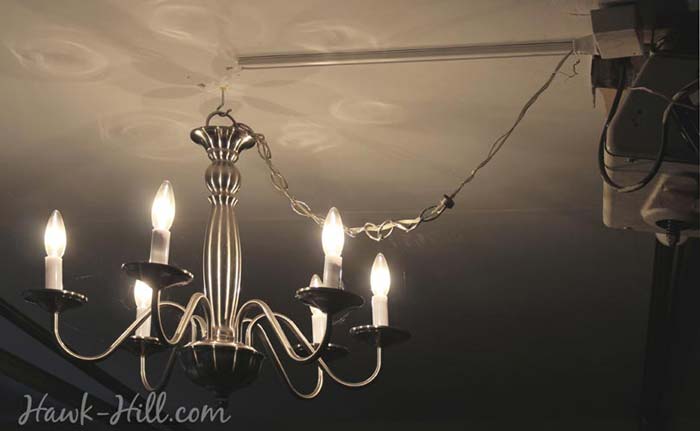
How is the cord attached to the hook to maintain the length and the slack?
Lindsayanne
Saturday 9th of February 2019
Great question! I think I have an image that might answer your question better than an explanation, so I'm including it below. Unlike many lightweight modern fixtures, generally, older/larger chandeliers have a chain for mounting- and the electrical cord is threaded through it so that the actual wires bear no weight.