
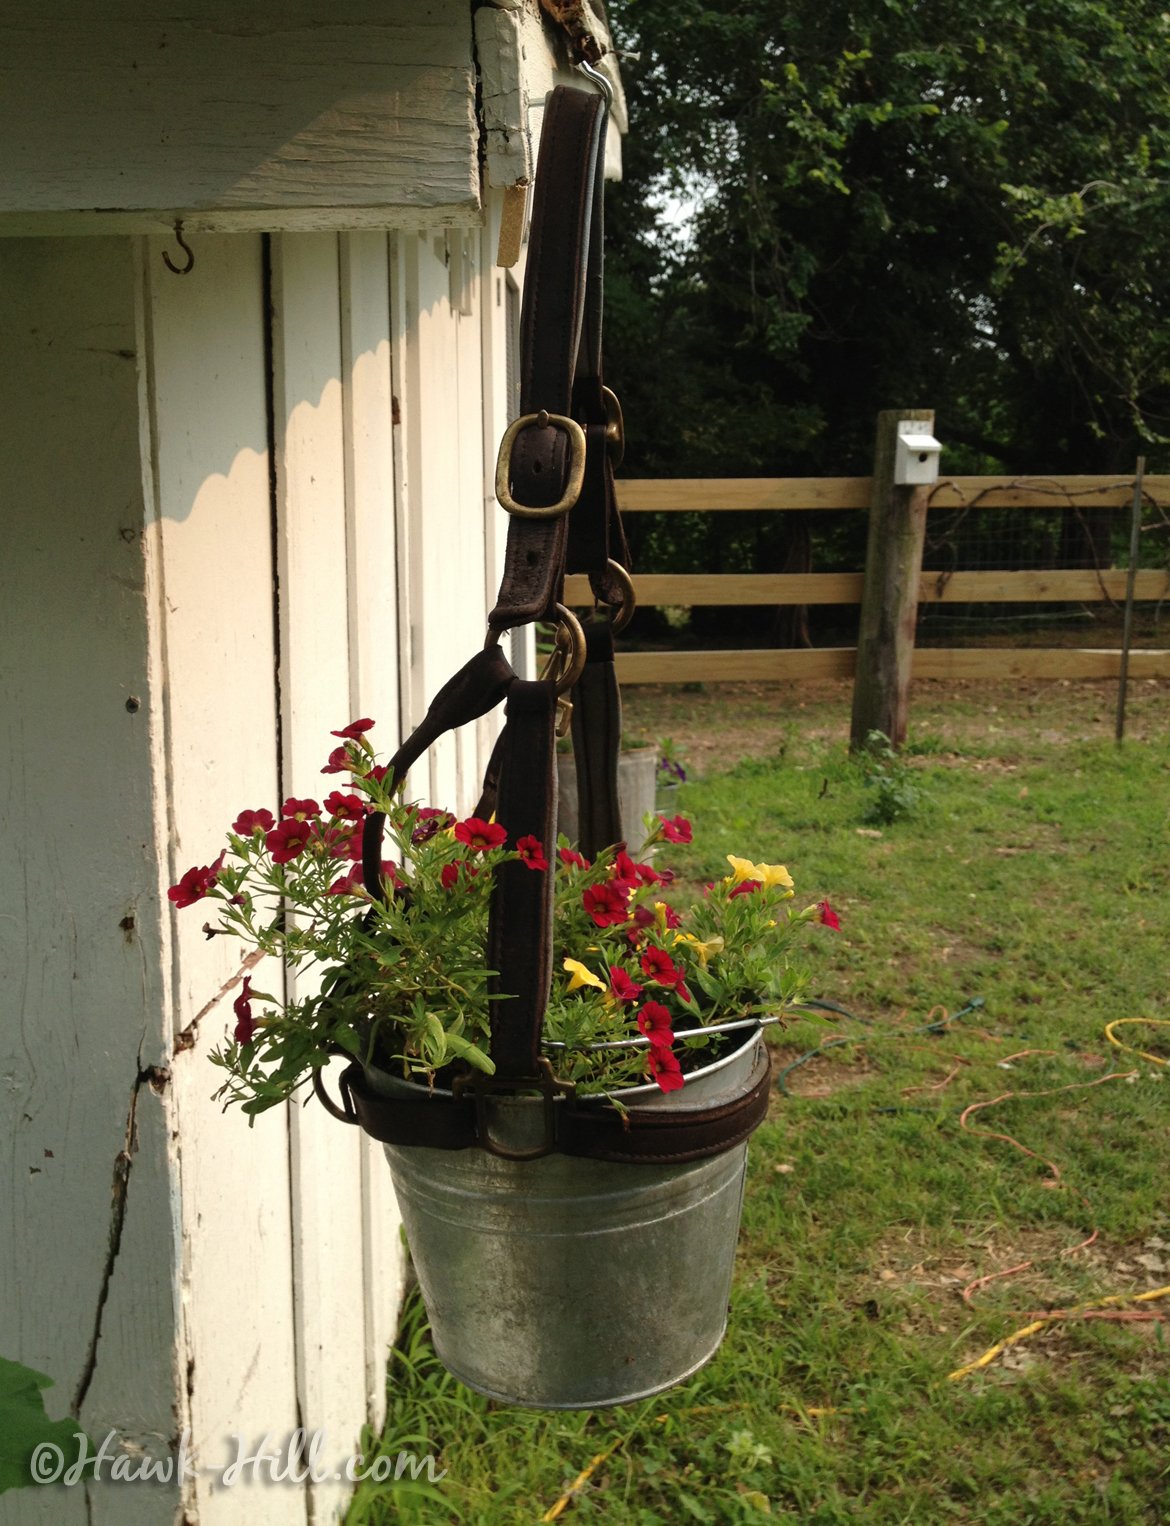
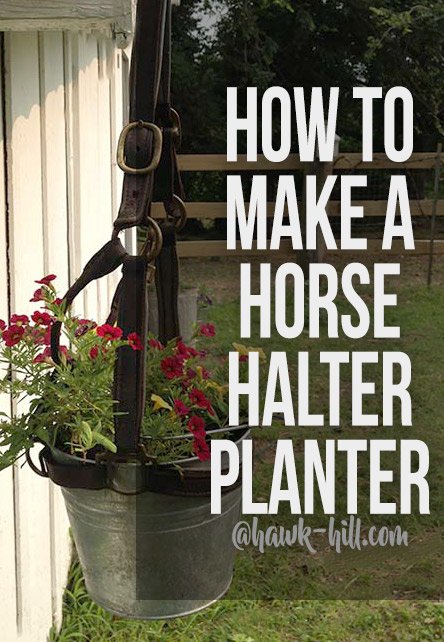
One of the most frequently Pinterest pinned images from this site is this photo, above, from my chicken coop / barnyard, taken in the summer of 2013 (give or take a year), showing an old leather horse halter that I converted into a hanger for a galvanized bucket of Calibrachoa flowers.
The noseband of many halters can be used as a support for varying sizes of planters and buckets- the tricky part is finding the right bucket.
If the noseband and bucket rim aren’t very similar in size, the bucket won’t drop fully into the halter, and doesn’t look quite as charming.
Today I’m going to walk you through some tips on how to make sure you get the right size bucket on the first try and then through simple steps for making sure your planter will stay secure even if the leather stretches or the bucket becomes heavier than anticipated.
Finding a Halter for your Horse Halter Hanging Planter:
A good halter for this project is one that is worn but not worn out. You can use a nylon horse halter but I love the rustic look and warmth of a well broken-in-leather halter. In fact, I used to buy average quality leather halters for my horses and use them during turnout for the purpose of supplying my used-horse-halter-crafting ideas. Cheap halters would break too easily, or the leather would crack before it took on an aged patina, and luxury leather halters were just too expensive for my budget, but a mid-range basic turnout halter made the horses look smart, easy to catch, and worked better than nylon if an emergency required the halter snap under pressure.
The following section may contain affiliate links. As an Amazon Associate, we earn from qualifying purchases.
Finding a Halter to Use:
You can create this project with halters from yours or a friend’s horses, old flea market halters, vintage halters from Etsy, or even new halters. If you use old halters- especially from a flea market- just make sure the leather is still soft and supple without cracking on the surface of the leather.
Stiff leather is better than oily old cracked leather, but if it has a strong smell of chemicals, keep walking. (Many leather horse tack items are produced in India and Pakistan presently, and the leather quality and tanning methods create products that don’t last and aren’t worth the investment- even for this decorative project)
What size Halter to Use:
Any size halter should work- you’ll just have to hunt longer for a bucket to fit warmblood or pony size halters. I found COB sized halters made the cutest planters. (Cob, aka “small horse”, is the size between Average Horse and Pony Size)
Condition before Use
If your leather is dry, you can condition with a leather conditioner or just spray with some cooking oil. If you’ll be displaying your horse halter planter outdoors, you’ll want to take a moment a few times a year to oil the halter. A simple coating of cooking oil (applied only on days the halter is completely dry and has not recently been rained on) can extend the life of your halter planter by months or years. Oil replenishes and protects the leather fibers and helps it repel water.

Finding a Bucket for your Horse Halter Hanging Planter:
Finding a bucket that fits just right was harder than I expected. To get a good fit on the first attempt, take your halter with you to the farm store – don’t eyeball it. Lowes sometimes carries multiple sizes of galvanized buckets. It took a few tries before I found the perfect small metal bucket at Tractor Supply.
Amazon has a selection of cool primitive style buckets that would add a lot to this project. Ordering online is always a gamble when sizing is tricky, but might be worth it to get a rustic looking bucket- especially if your halter has an adjustable noseband that can be cinched down around a bucket. The largest bucket from this set (shown below) might work great for this project. Whatever bucket you choose, just make sure it’s tapered from top to bottom and has a lip that protrudes on the outside of the rim.


Converting the Bucket to Planter:
Really there’s just one important step between finding a bucket that fits and getting started, and that’s punching holes in the bottom of the bucket. When you plant flowers it’s important that the soil be able to drain off excess water, and 2-3 holes in the bottom of the bucket should do the trick nicely.
To add holes to the bottom of a bucket, even a metal bucket, just turn the bucket upside down on a stable surface and hammer a large nail down through the bottom until a hole is created. Remove nail and repeat until you have two or three good drainage holes in the bottom of the pail. (CAREFUL: use caution to avoid any sharp pieces of metal that may have turned inward during the hole making process.)
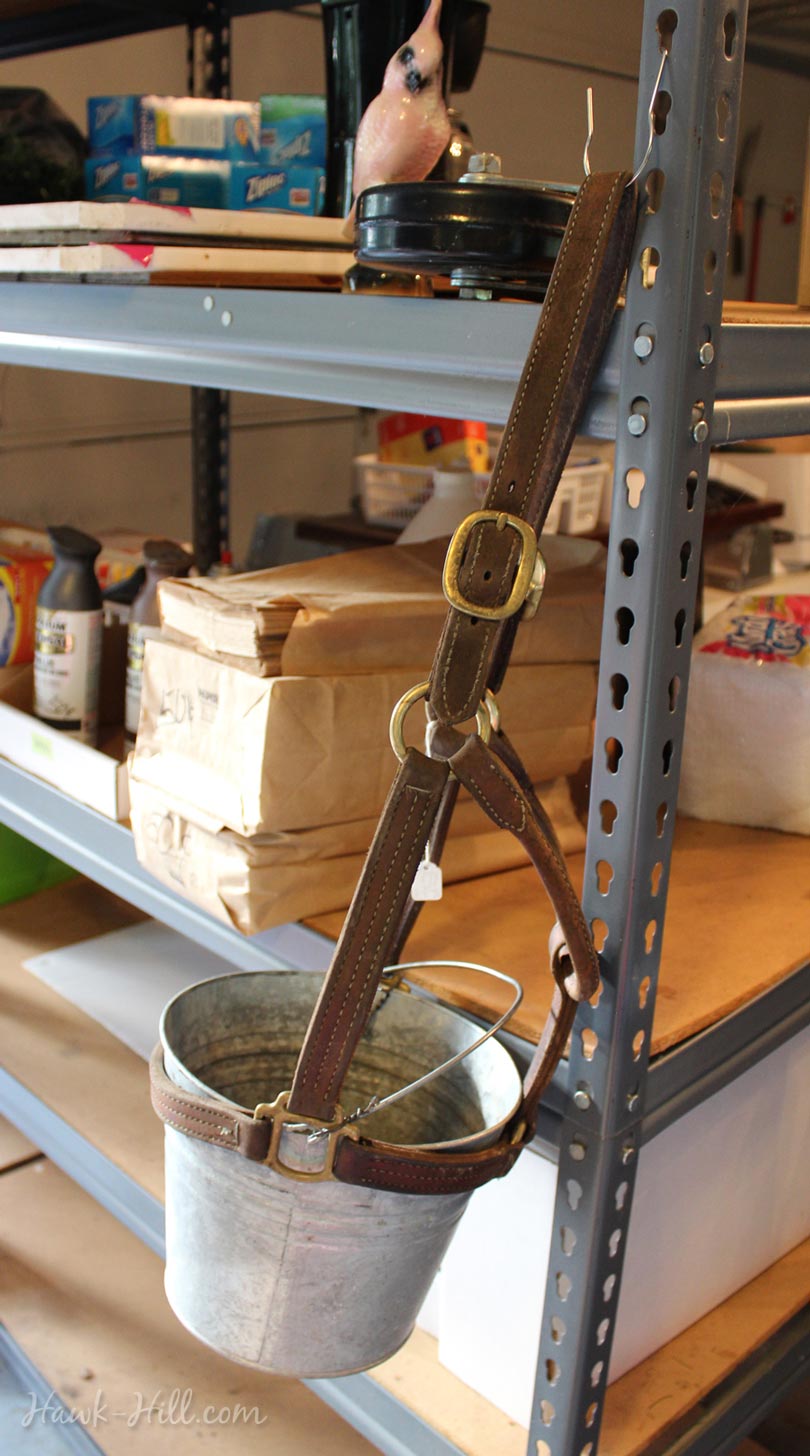
Securing Bucket to Halter & Constructing the Planter:
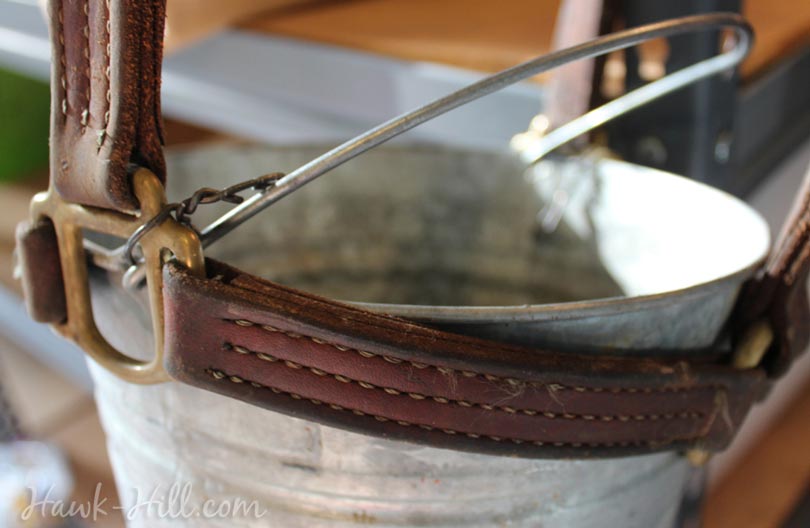
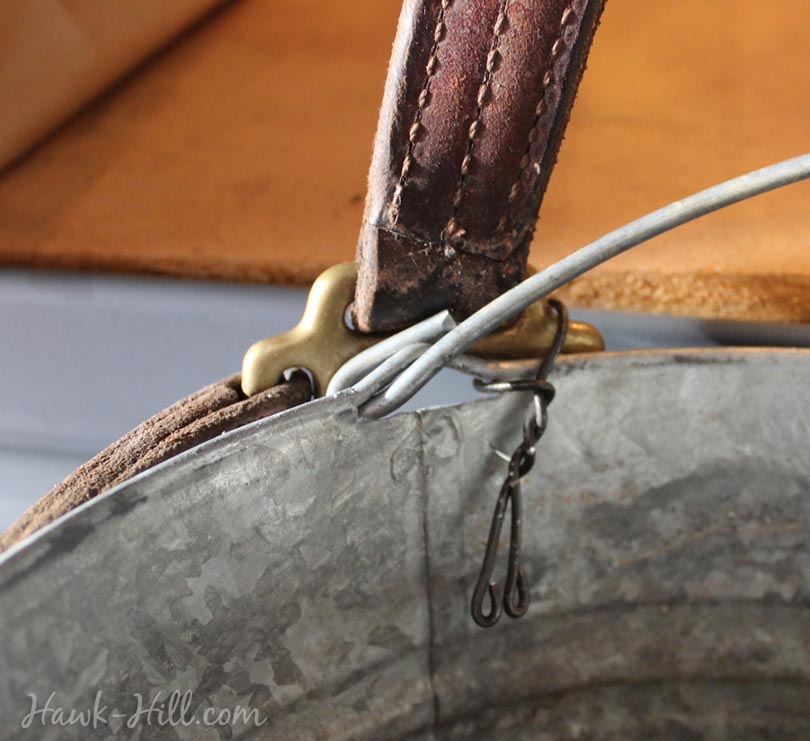
Finally! We’re ready to add halter to bucket and secure the pair in partnership. The following three photos show how I secure a bucket to a halter. Theoretically, the leather strap, plus the bucket’s taper and rim prevent the bucket from sliding through, but when creating a hanging planter it’s better to be safe than sorry and reinforce that connection.
To be on the safe side, I use medium/heavy gauge wire to connect the bail of the bucket handle to the metal of the halter squares, as shown. A loop and a few twists is enough to hold a full bucket of moist soil & flowers even if the noseband were to fail in it’s job of holding the bucket in place. When finished, I bend the twisted ends of the wire downward into the bucket, where they won’t show.
Construction finished! Ready to plant & hang (or, sell at a flea market booth, in my case!):

Last tip on Planting Halter Planters:
These planters do NOT look good when planted with upright plants or plants more than 6-8″ tall. Keep this in mind when selecting and planting your flowers. I recommend a flower with a mounding/overflowing growth style and multiple small blooms. Calibrachoa is the flower variety shown in the image below and through that growing season it grew even larger and mounding around the sides of my bucket. Moneywort (aka Creeping Jenny) is a good choice for co-planting. Creeping Jenny doesn’t really bloom, but the growth pattern is very low and it drapes in long flowing branches, creating a cool look for hanging planters.


That’s it! It’s so easy. Don’t let the length of this post fool you- once you’ve got the right size bucket and halter, this is a 5 minute project that you can enjoy for at least a few growing seasons.

Thanks for Reading!!!
I hope you can tell that I love DIY, researching the best affordable solutions for every-day problems opportunities and documenting / sharing solutions!🙌 Hawk-Hill.com is reader-supported.
☕ Hawk-Hill.com is reader-supported. If this article saved you time or money, please consider donating $1 to help me cover the cost of hosting this website OR If you appreciate this information and want to throw a “Thanks!” my way by buying me a coffee – I would Of Course appreciate it! :]
Reader Questions and Recommendations
Readers, do you have any favorite topics / posts? What would you like to read more about in the future? As I hope you can tell from this and other articles on my site, I really enjoy DIY / a good challenge, and I’m not afraid to roll up my sleeves to figure out a great, and hopefully simple 😁 solution. So please feel free to let me know in the comments below (or reach out via social media)!
Ok Really – I’ll try to wrap this up now😂
Finally, if you’d like to continue to learn about interesting DIY options as well as how YOU can tackle creative new projects consider checking out the latest and most popular articles listed on the Hawk-Hill Home Page. I’m always trying to enjoy and write about the creative side of life so please don’t be a stranger – check back often!😍
If you enjoyed this post you may also enjoy reading / perusing / devouring😊 one or all of these articles as well!