
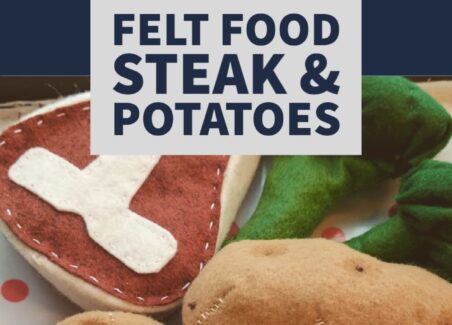

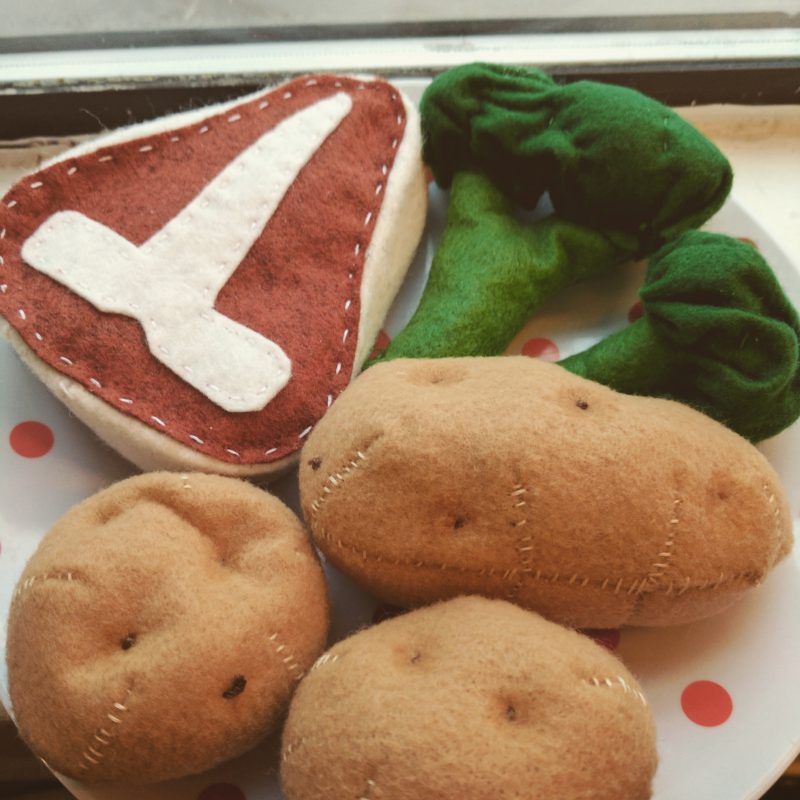
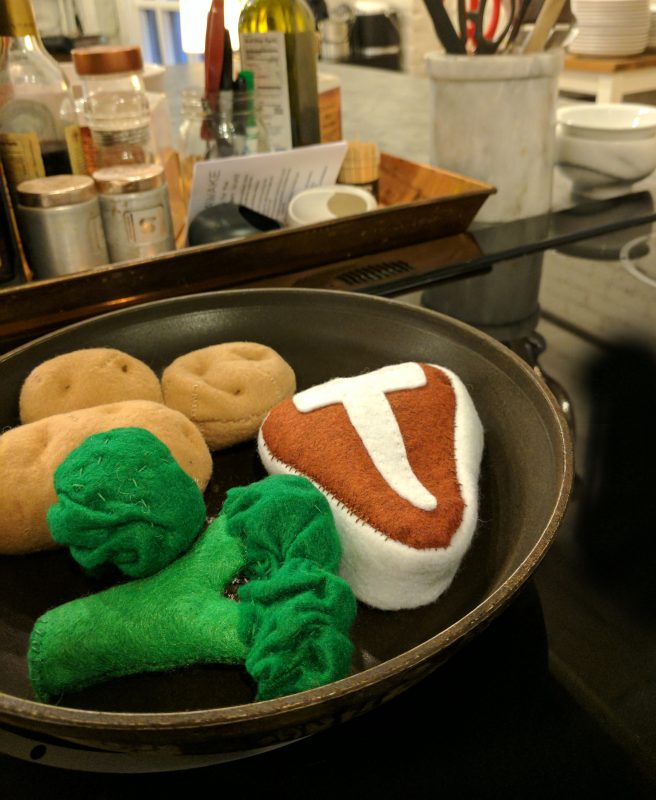
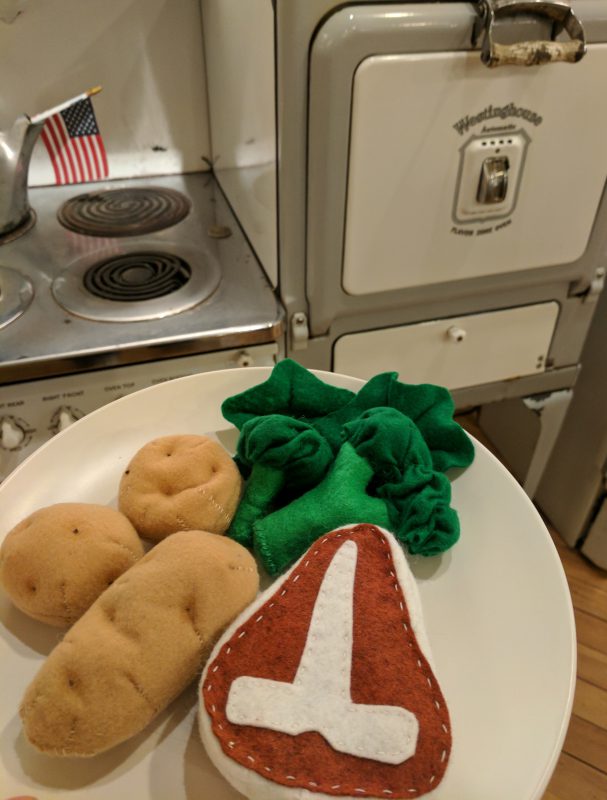
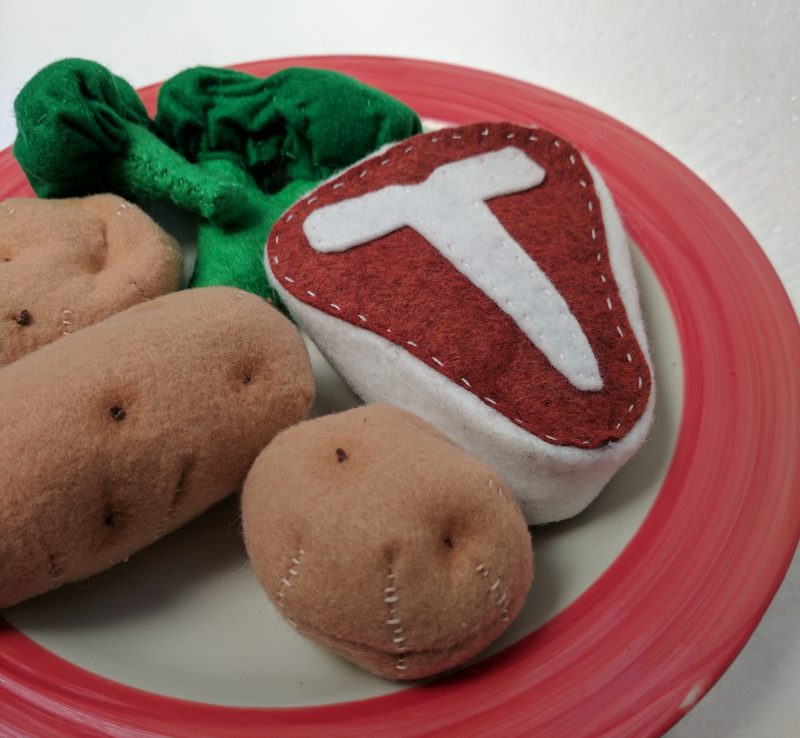
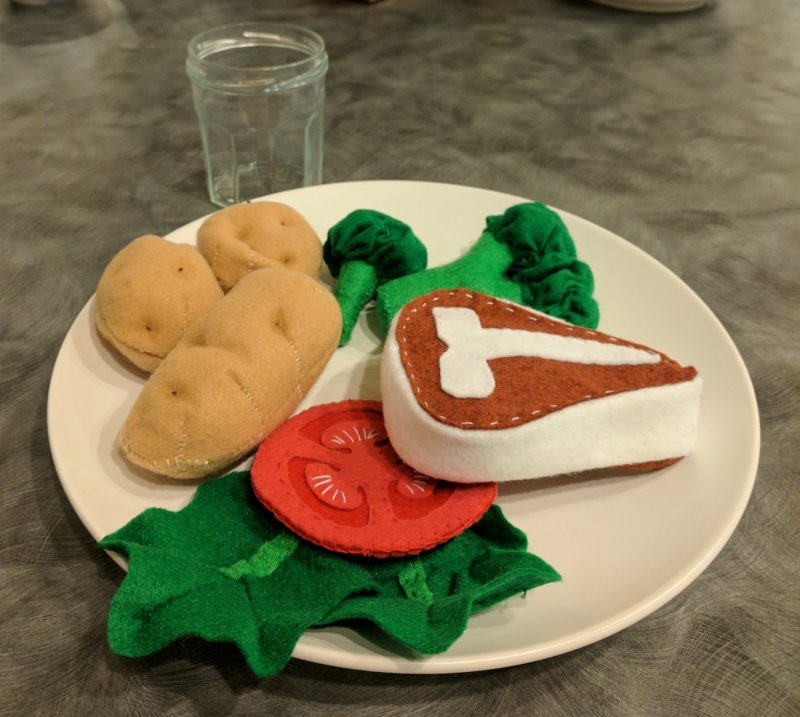
Nothing makes up a hearty play food meal more than steak and potatoes. In this tutorial, I will be showing you how to make a steak dinner. This iconic T-bone felt steak is made with reddish-brown wool felt and cream edges. Paired with our mini potatoes and a few florets of bright green broccoli, this felt fake food meal is sure to satisfy the most discerning tastes in felt food.

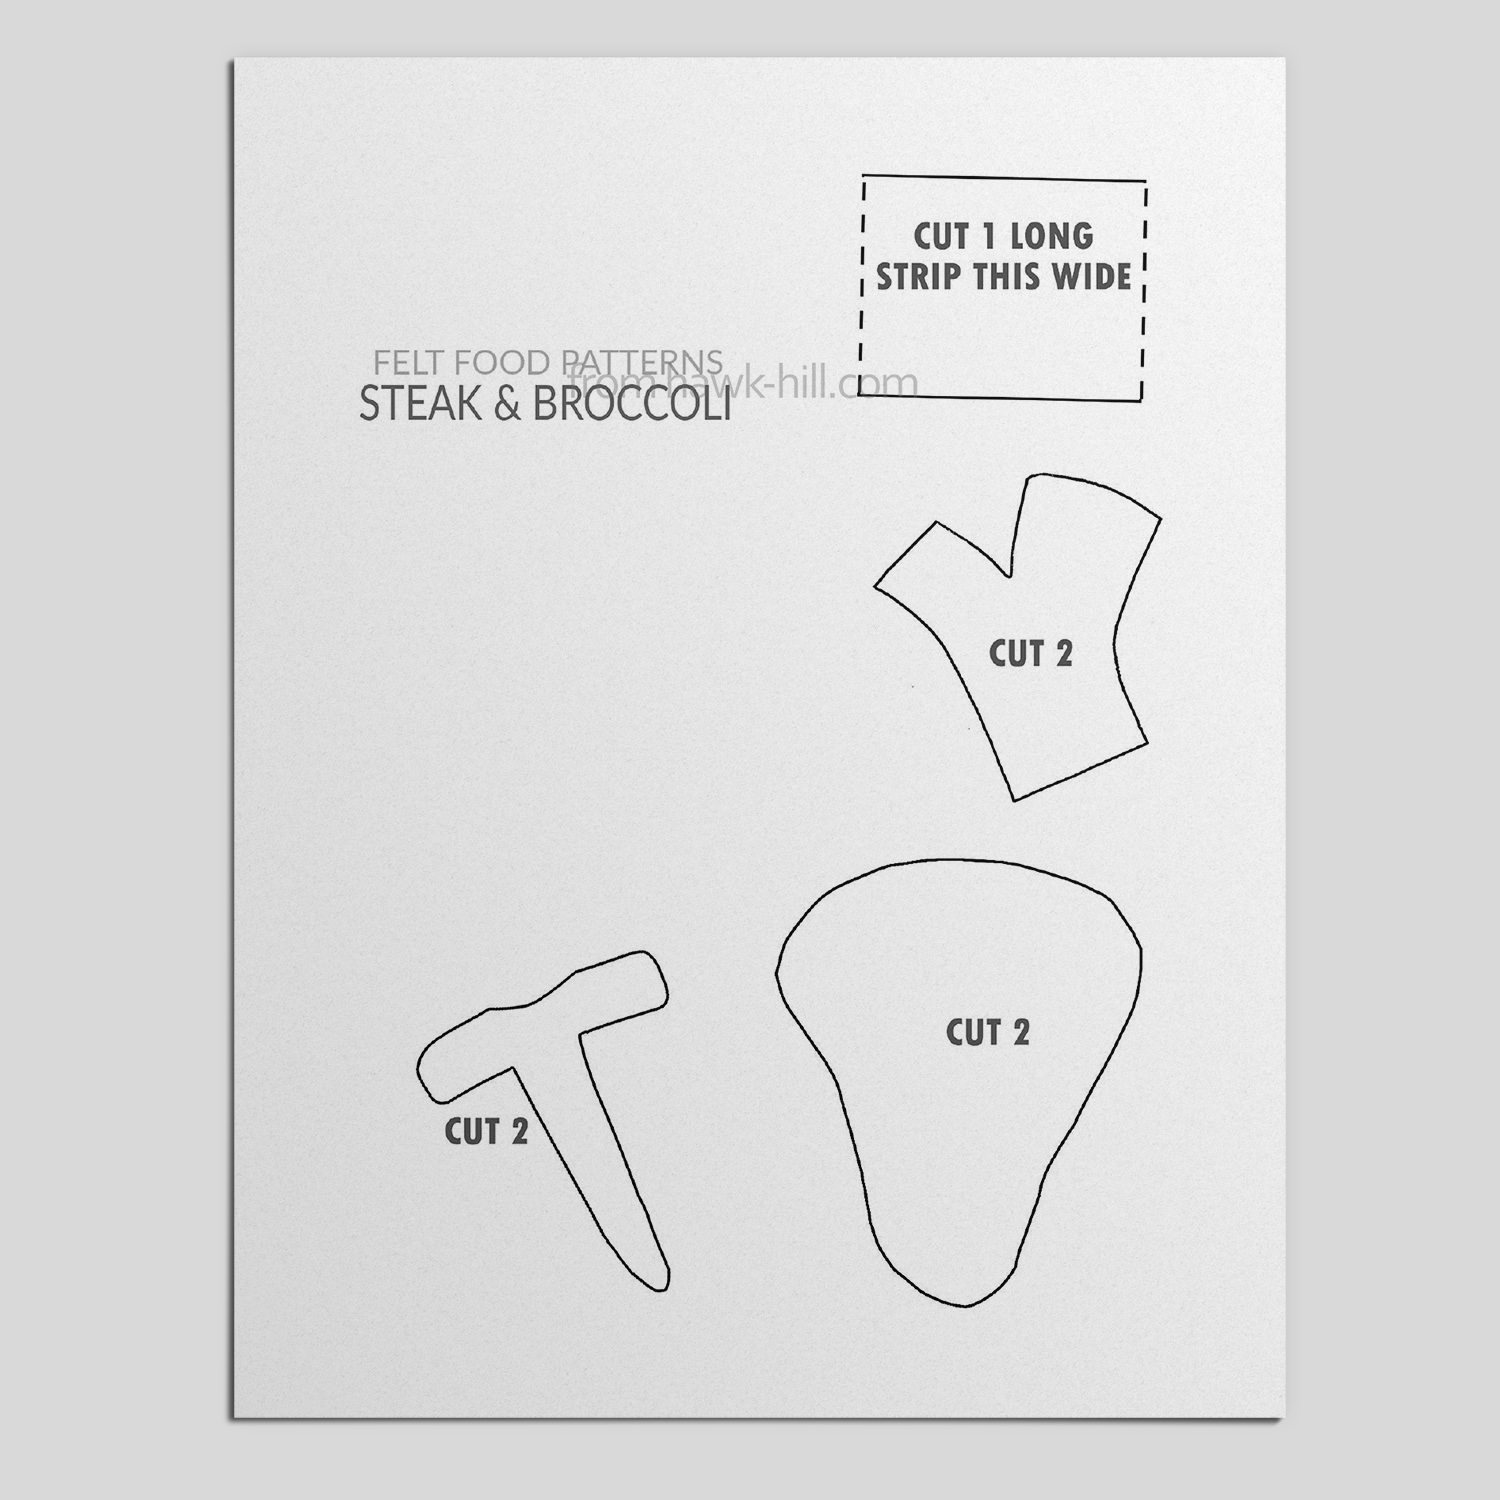
Step 1. Cut Pieces from the pattern
Click Here to download the steak and broccoli pattern

Step 2: Sew Edge
I like the white edge on my T-bone, though it does make it look a bit like a cartoon steak, so feel free to make an edge that’s matched to your meat color.
I complete this step by folding the white strip in half, and sewing a blanket stitch down the length. When finished, this stitch will be completely hidden, so feel free to be sloppy, as long as it holds:

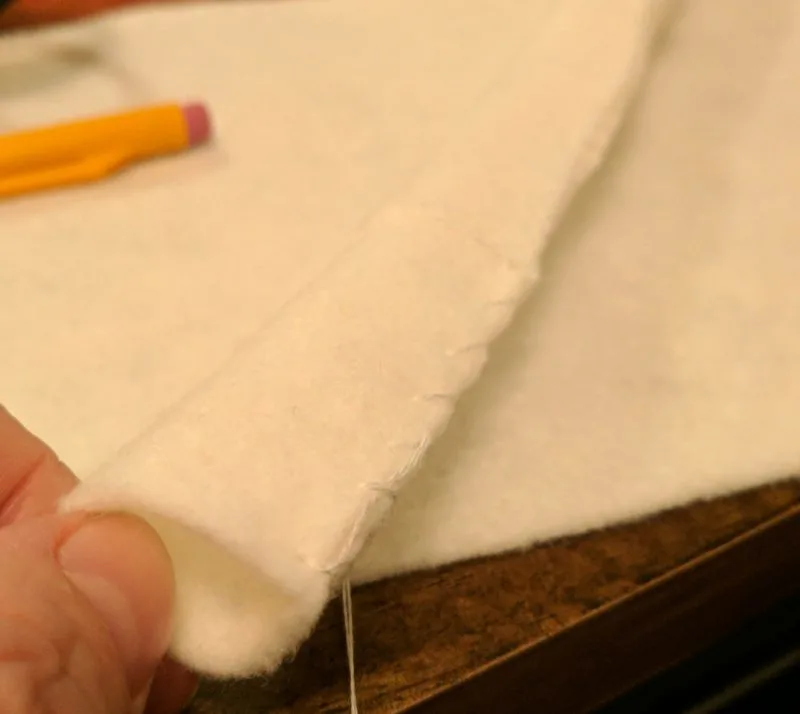
Once stitched into a tube, gently refold the tube so that it flattens with the stitches in the center of the width, rather than on the edge.
Step 2. Stitch T-Bone to Steak

I always feel like the addition of bones to felt-food meat adds to their charm. (Ground beef doesn’t sound like much fun to play with, right?) For this step, just stitch the white “T bone’s” to each of the steak shapes.
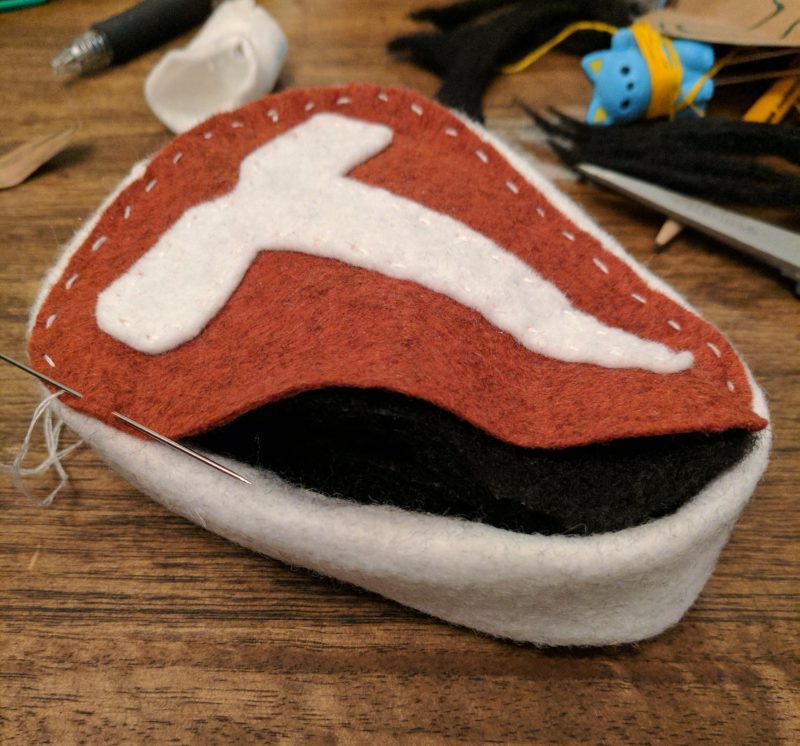
Step 3. Sew Edge and Top Together.
This is a somewhat tricky stitch, and it might be helpful to press your felt edge before starting. Starting with the bottom, then the top of the steak, stitch the face of the steak onto the edge, bending the edge around to meet the contours of the steak shape. When sewing the second face, stop 3/4ths of the way around and continue to step 4.
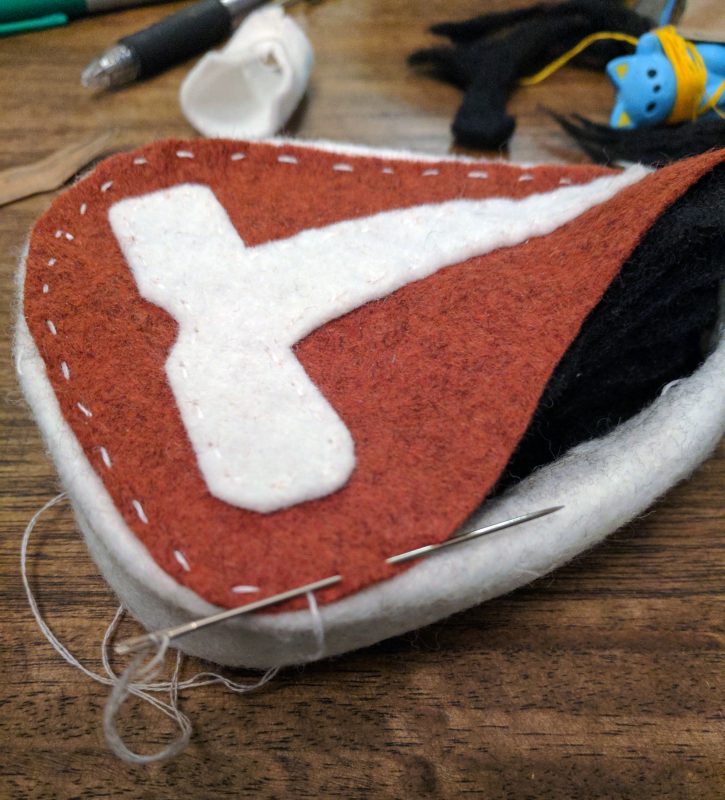
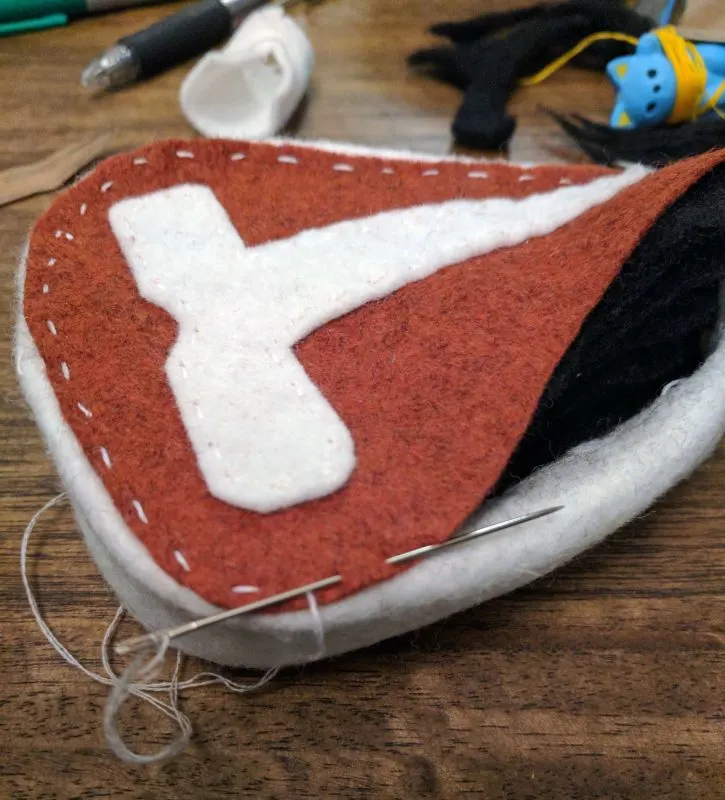
Step 4. Stuffing
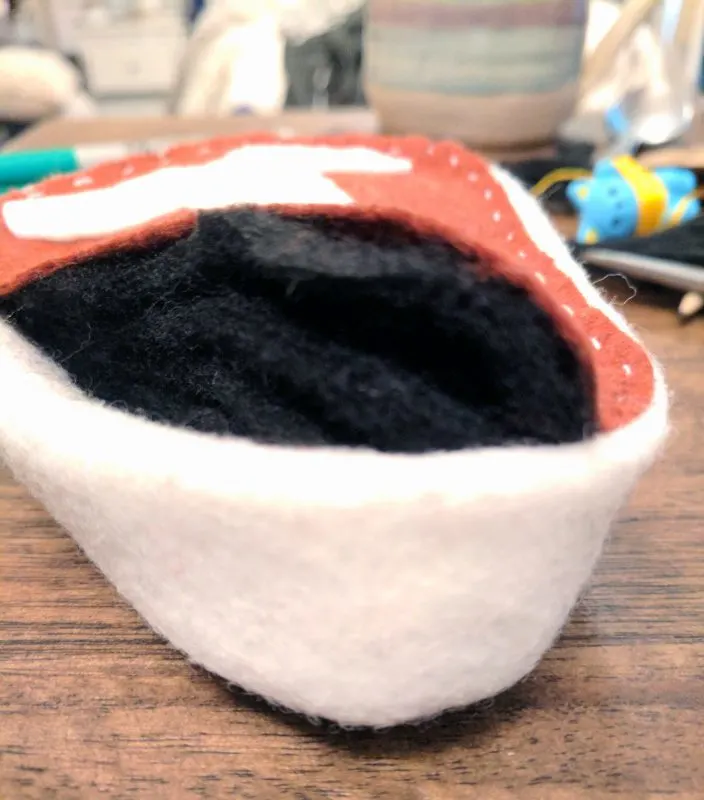
It’s time to stuff, but since steaks are a well defined flat-shape, rather than a bulging plush, you’ll want to stuff with a contoured FLAT stuffing such as: foam sheets, compressed batting, scrap felt sheets, etc. Anything that will stay flat without bunching or bulging will work. I’m using black poly-fill sheets in these images to stuff my meat so it will stay flat and cute.
Just cut your flat stuffing about 1/2″ inch smaller than the steak face shape and slip inside the steak, then continuing your stitching of the edge to close the opening.

Once your steak is stuffed, stitched, and tied off, you’re ready to continue on to broccoli.

Felt Broccoli Tutorial
Step 1. Cut stalks from a light green felt using pattern provided above. Stack, and stitch, then turn inside out, and add a circle of green to the base of the stalk. Stuff lightly with polyfill stuffing.
Step 2. Freehand cut darker green circles.
Step 3. Using a bunching stitch described in my kale tutorial, create texture on the darker green circles.


Step 4. Using the gathering method described in the technique for making felt meatballs, gather up and stuff the dark green shapes, inserting the upper end of the stalks into the dark green ball before stitching firmly onto the stalk and gathering edge snugly against the edge of the light green stalk.
Part 2: Felt Food Potatoes
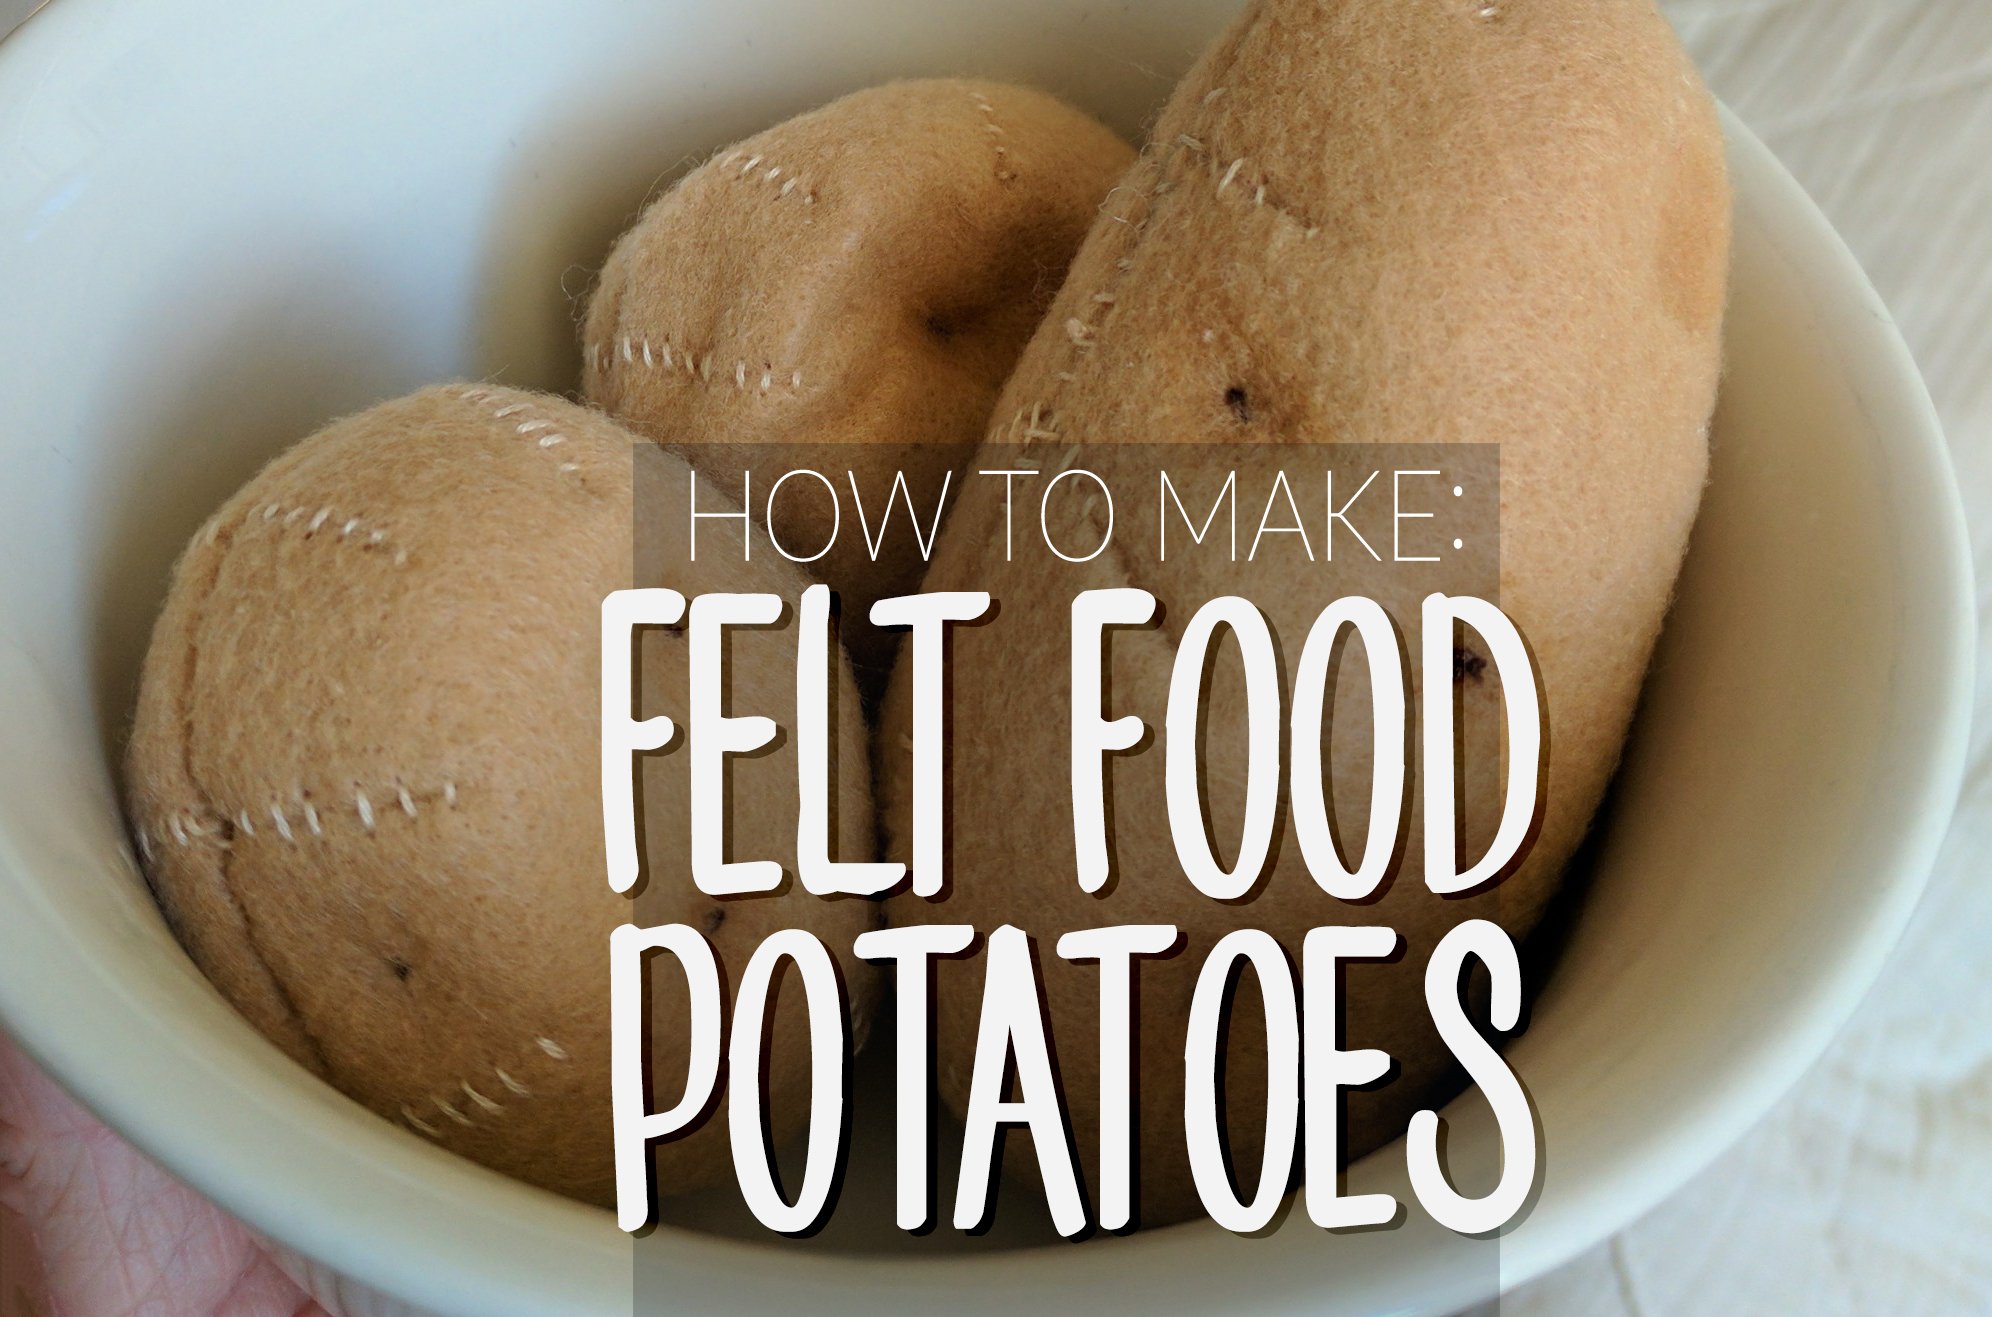
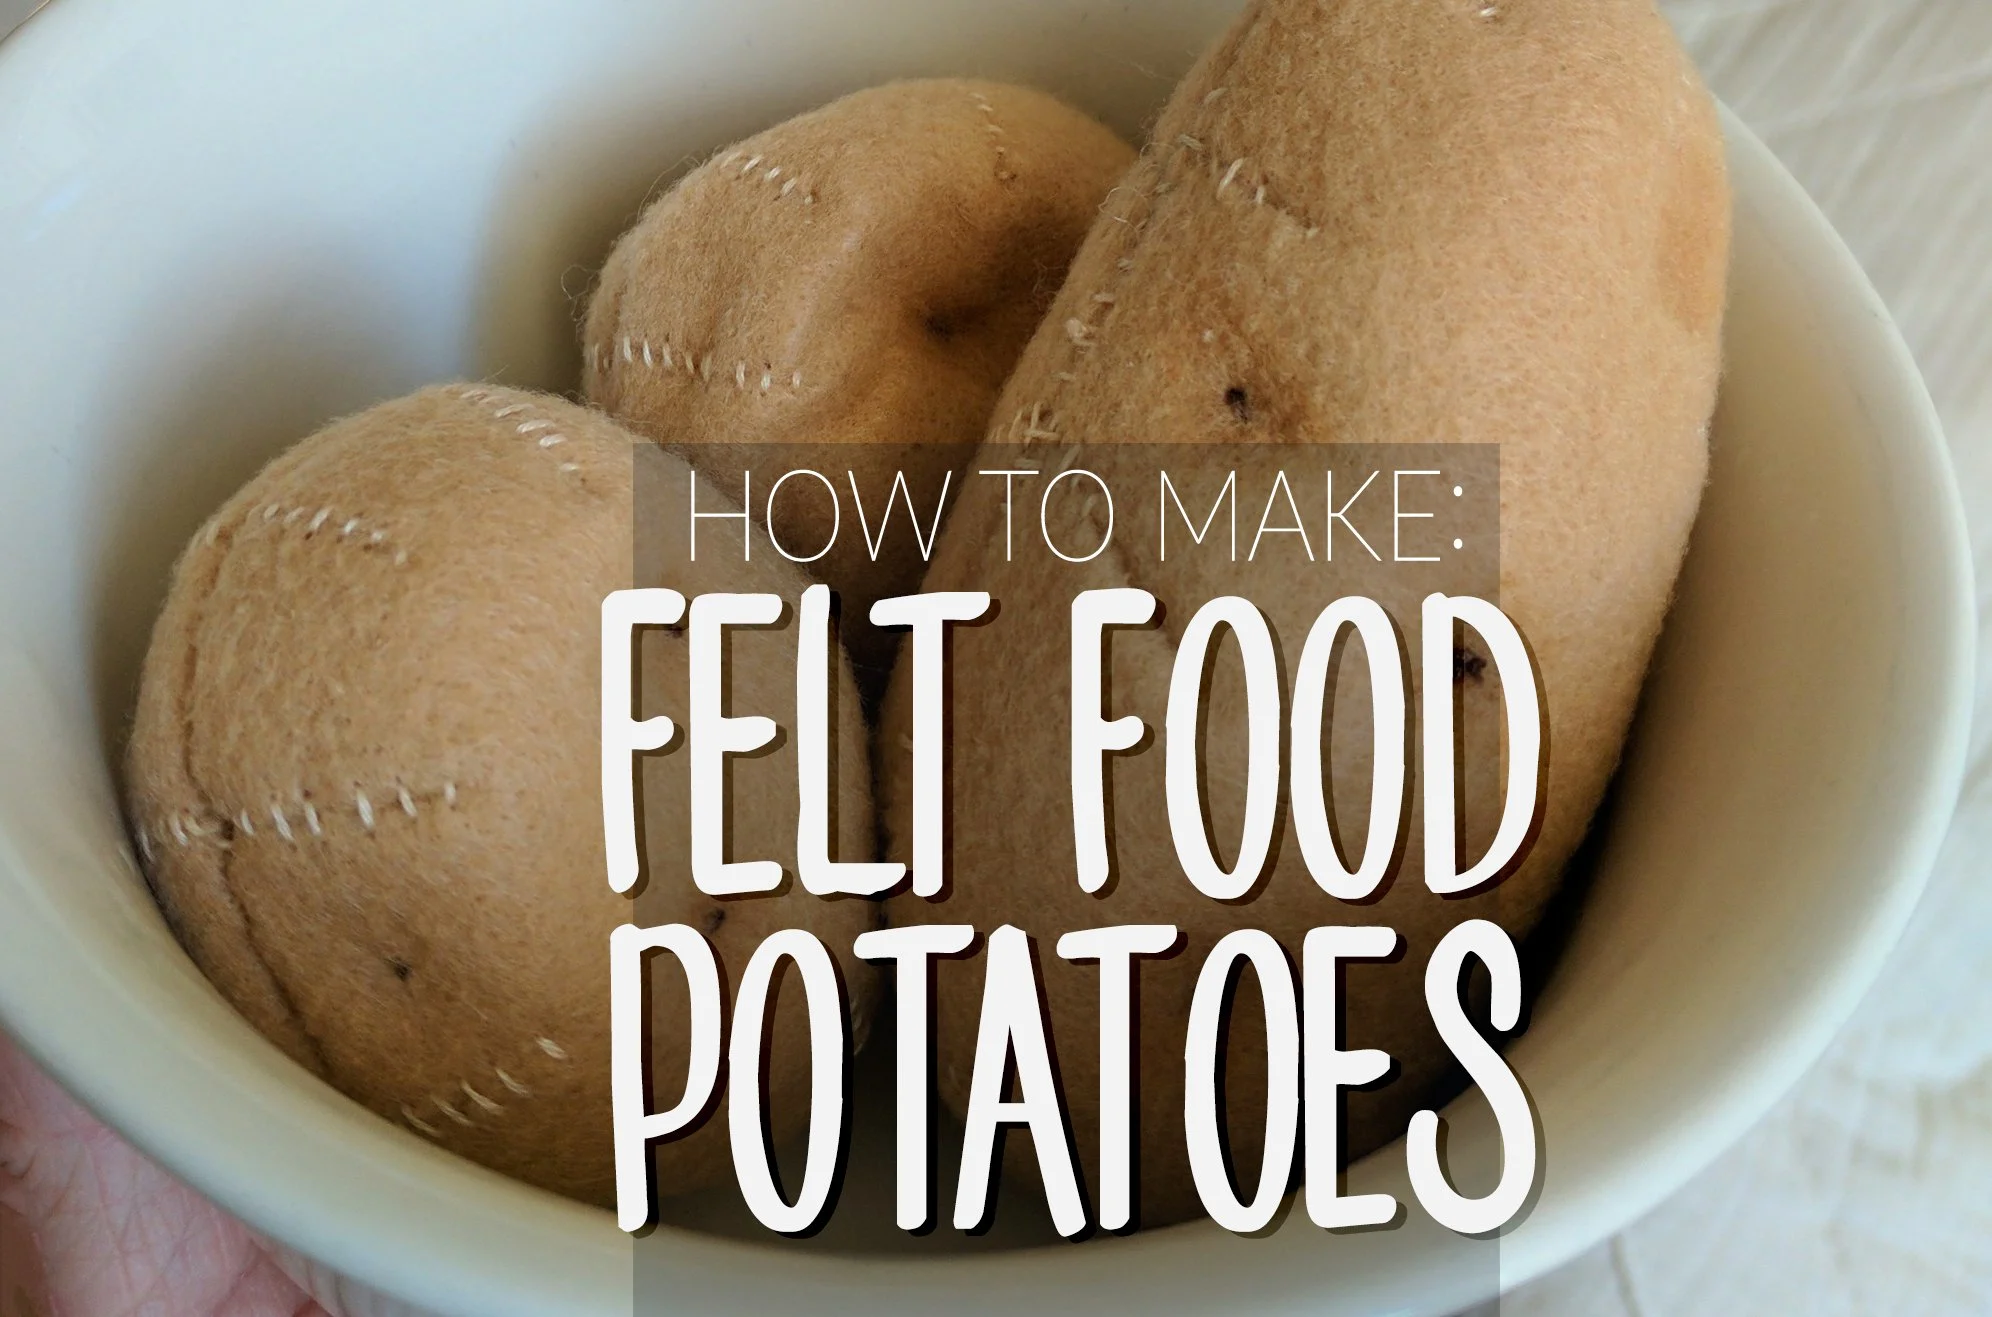
These felt potatoes make the perfect addition to our Felt Steak Dinner. The trio of steak, broccoli, and new potatoes make a fun meal that’s perfect for play kitchens, play dining sets, and even play grill sets.
These can be made with tan craft-felt, but for more authentic colors and durability in play, try our wool blend felt.

Recommended colors:
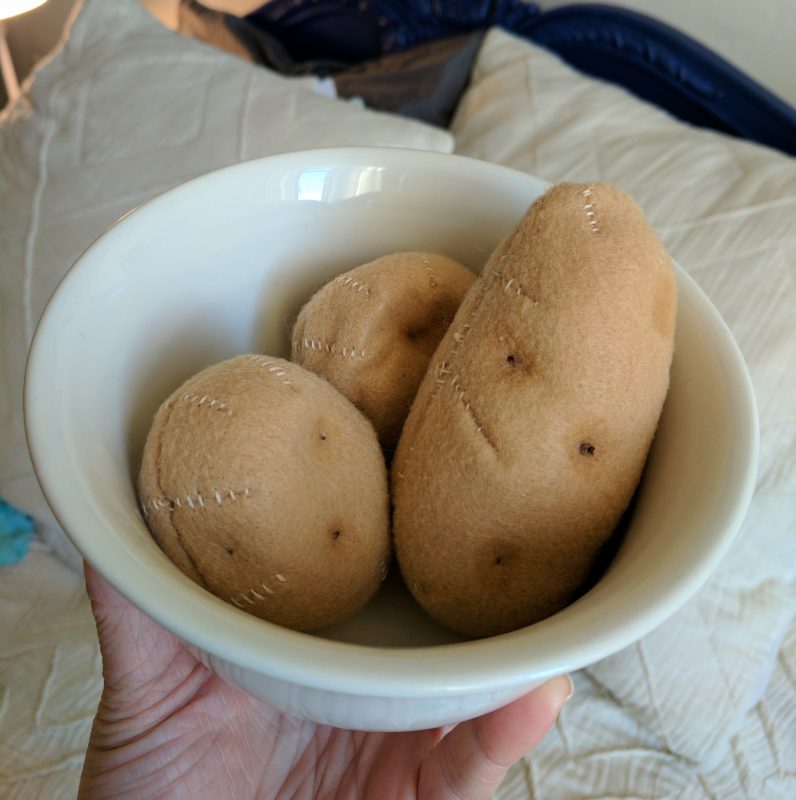
For red new potatoes, chose a brownish-red felt like Grandmas Garnet.
For brown spring potatoes, try combining colors for depth. Camel, Hay Bale, Champagne*, and Cinnamon all are potato-appropriate color shades from National Nonwovens durable and workable wool blend felt line. (*Champagne is my top pick for this pattern)
NOTE: If you prefer 100% wool, oatmeal brown 100% wool felt is a good choice for this pattern and the eyes on the potato can be added simply by needle felting the eyes into the texture of the felt.
Step 1: Print Free Potato Pattern
Click Here to Download Printable pattern
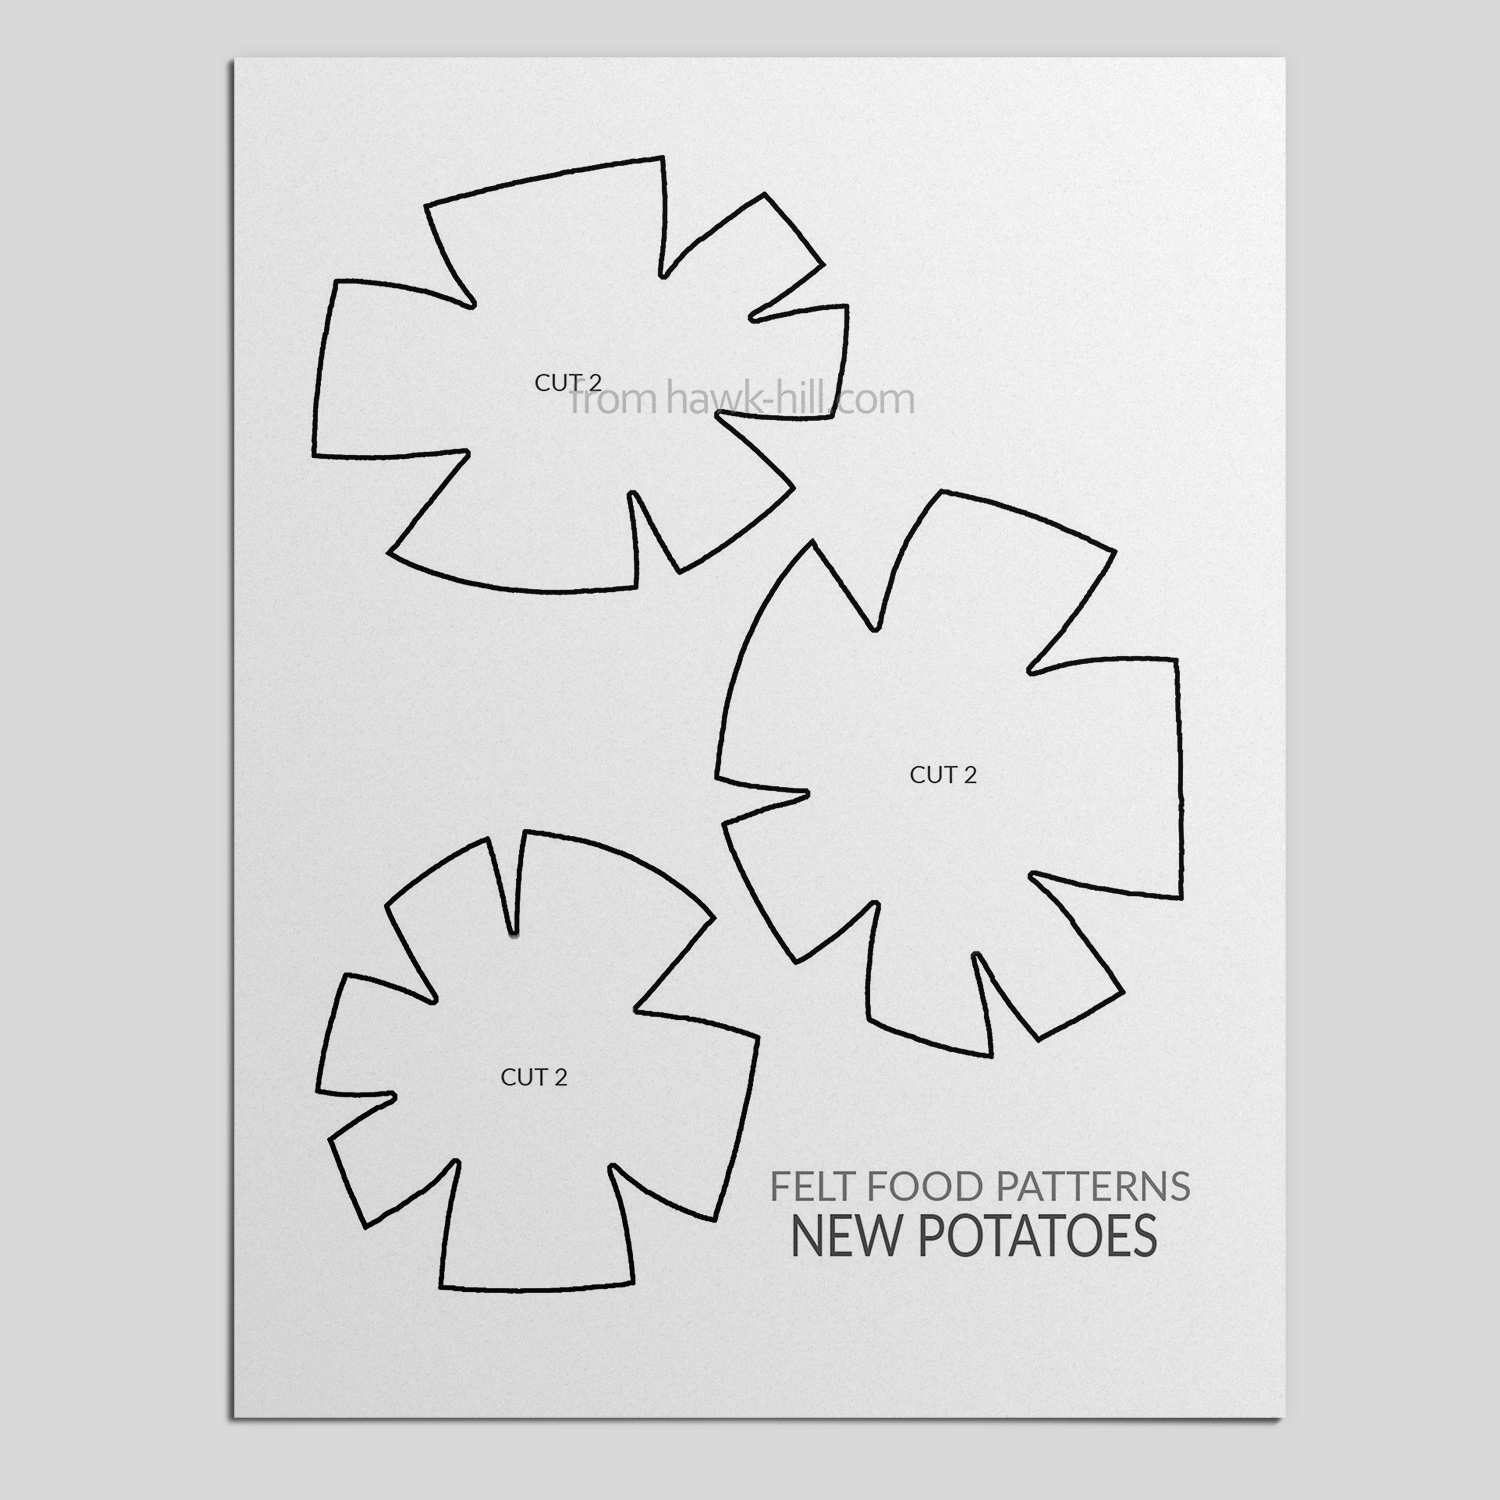

Step 2: Cut Felt for Felt Potatoes
From your chosen color of felt, cut 2 of each pattern. The pattern is altered slightly for each of the 3 patterns, creating a final result of 3 slightly different potatoes with “natural” variation in size and shape.
VERY IMPORTANT: Keep the pattern pairs together throughout the construction process, as each will only match correctly with its pair.

Step 2: Stitch Darts
For each of the 6 pieces you’ve cut out, stitch the darts together with a simple overcast stitch. After sewing the darts, you’ll have 6 half-potatoes.
Step 3: Join Halves & Stuff
Using an overcast stitch, sew 4/5ths of the way around the potato, then turn right-side out and stuff with poly-fill stuffing or cotton or wool batting. Close the gap with stitches.
Step 4: Create Potato Eyes
For a natural look, you’ll want to add eyes. This is most simply done by stitching through the middle of the potato with multiple cords of brown embroidery thread and tying off.
For added authenticity, before adding the eye use an alcohol-based marker to add pigment on the felt near where you will place the eyes. This shading adds a depth that creates realism in the final product and is one of my favorite felt food making techniques.
Step 4: Play!
Play! Felt potatoes are fun and versatile, they can be bakes in play ovens, cooked in play pots, or mashed with toy potato mashers. Potatoes are every bit the staple of imaginative play kitchens as they are in real kitchens!

Thanks for Reading!!!
I hope you can tell that I love DIY, researching the best affordable solutions for every-day problems opportunities and documenting / sharing solutions!🙌 Hawk-Hill.com is reader-supported.
☕ Hawk-Hill.com is reader-supported. If this article saved you time or money, please consider donating $1 to help me cover the cost of hosting this website OR If you appreciate this information and want to throw a “Thanks!” my way by buying me a coffee – I would Of Course appreciate it! :]
Reader Questions and Recommendations
Readers, do you have any favorite topics / posts? What would you like to read more about in the future? As I hope you can tell from this and other articles on my site, I really enjoy DIY / a good challenge, and I’m not afraid to roll up my sleeves to figure out a great, and hopefully simple 😁 solution. So please feel free to let me know in the comments below (or reach out via social media)!
Ok Really – I’ll try to wrap this up now😂
Finally, if you’d like to continue to learn about interesting DIY options as well as how YOU can tackle creative new projects consider checking out the latest and most popular articles listed on the Hawk-Hill Home Page. I’m always trying to enjoy and write about the creative side of life so please don’t be a stranger – check back often!😍
If you enjoyed this post you may also enjoy reading / perusing / devouring😊 one or all of these articles as well!