

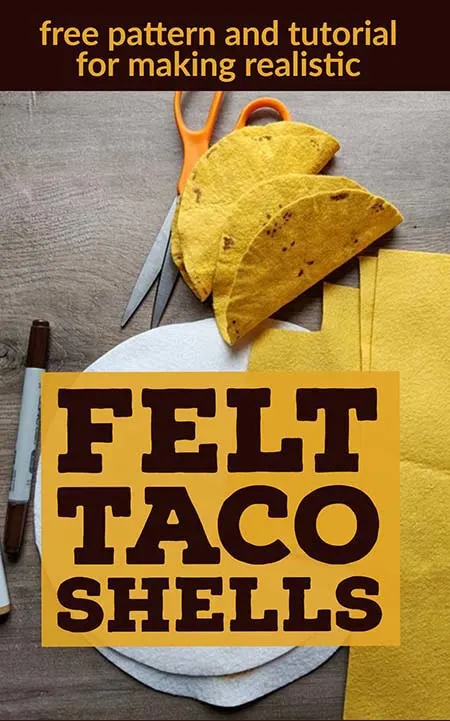
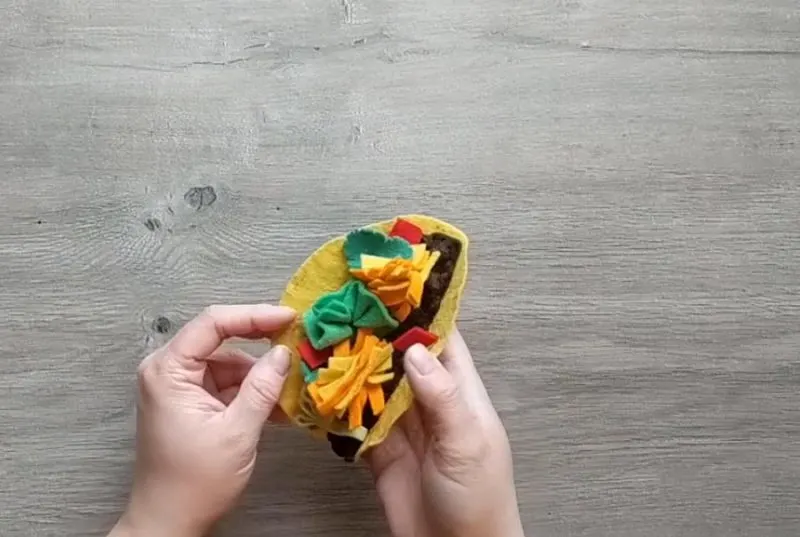
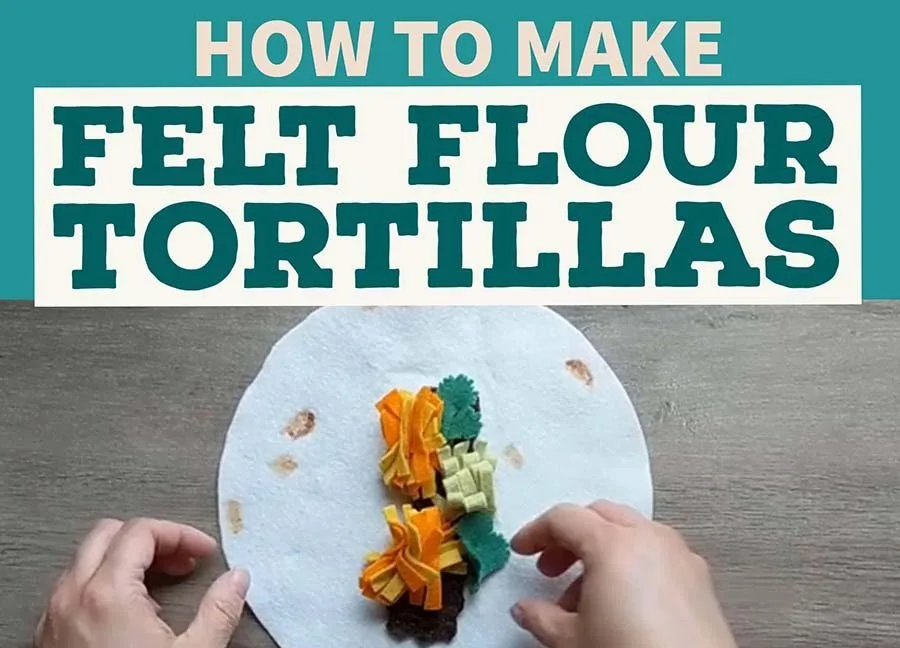
Below you’ll find my full, step by step guide to creating a realistic and durable felt taco toy set for play kitchens, pretend stores, and tiny make-believe restauranteurs.
Every fall, my felt food-making adventures begin anew. Excited about making Christmas gifts for the little ones in my life, I always find myself energized to experiment with new felt foods and create new patterns. In this tutorial, I’ll be showing you how to make these realistic felt food tacos. They are “crunchy” enough to hold their shape, but soft enough to flex to hold all the play food taco toppings your little one can dream up.
Because this is a large article with printable patterns and instructions for various taco ingredients in their own section, feel free to jump around using the links in the table of contents below:

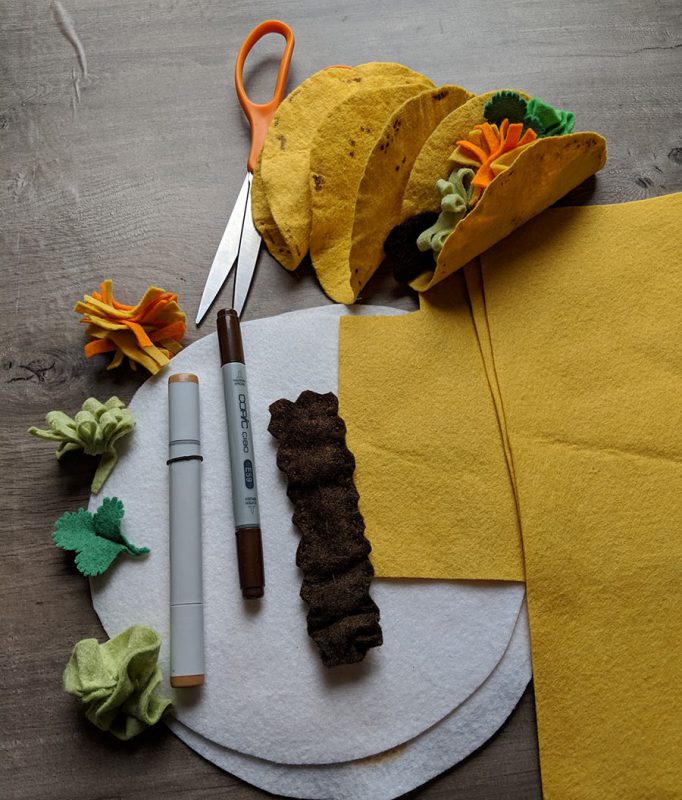
Suggested Supplies:
- Very small, sharp embroidery scissors
- Fabric marking pen
- Copic markers in colors E55 and E57
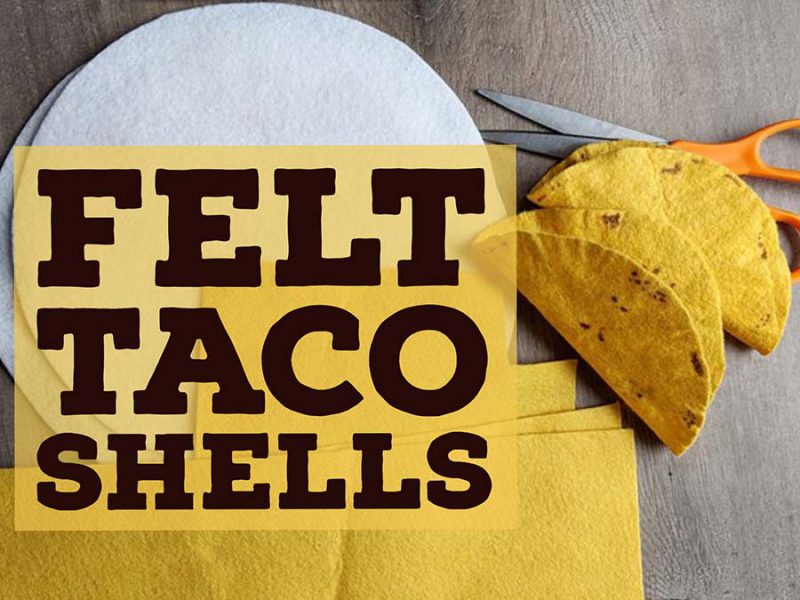
Part 1. How to Make Felt Corn Tortillas and Realistic Felt Taco Shells

In a Hurry?
Click Here to Skip to the Video Tutorial
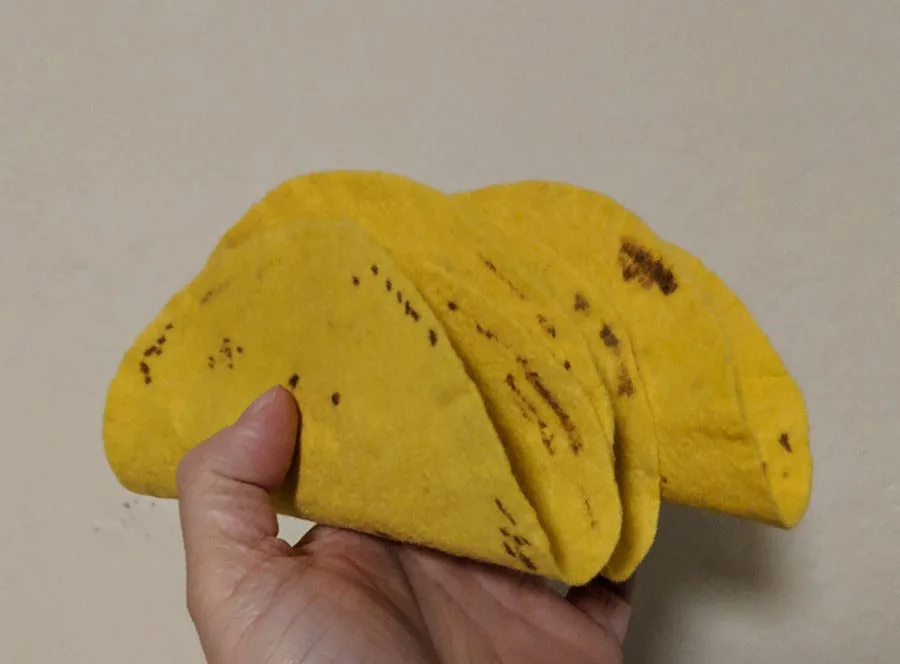
Now, I know tortillas have got to be just about the easiest felt food you could possibly make, and you hardly need a pattern or instructions to cut a simple circle of deep yellow felt that’s perfect for Mexican food-themed pretend play. But as you may know from my previous tutorials on felt food making, I love adding dimension and color variation to create more realistic felt food for my niece’s kitchen. In the case of these tortillas, I’ll show you how I take simple yellow felt circles and create the “crunchy” taco shells pictured here.
Best of all: This is a no-sew project! By adding dimension and shading, this project is completed without a single stitch!
The following section may contain affiliate links. As an Amazon Associate, we earn from qualifying purchases.
Supplies Needed:
- yellow felt (we used a wool blend color called “mellow yellow” to get a perfect color and improved durability)
- water
- cornstarch
- A brown alcohol-based marker. I used a Copic E57 marker*, but a brown sharpie should be sufficient as long as the marker is definitely alcohol-based, not water-based.
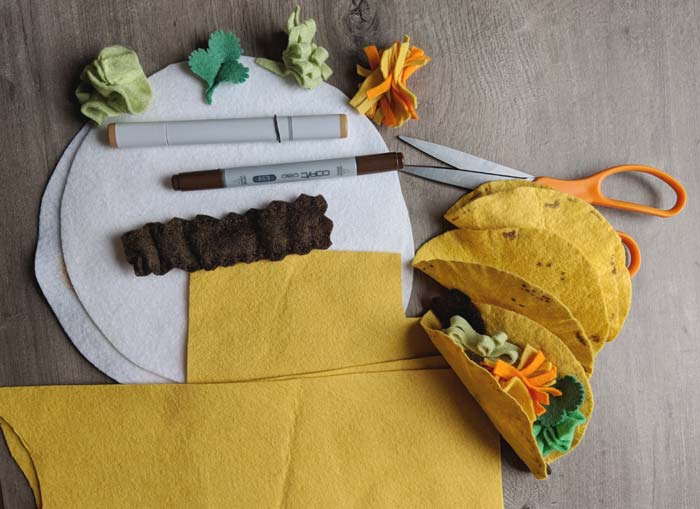
How To Make the Felt Taco Shells:
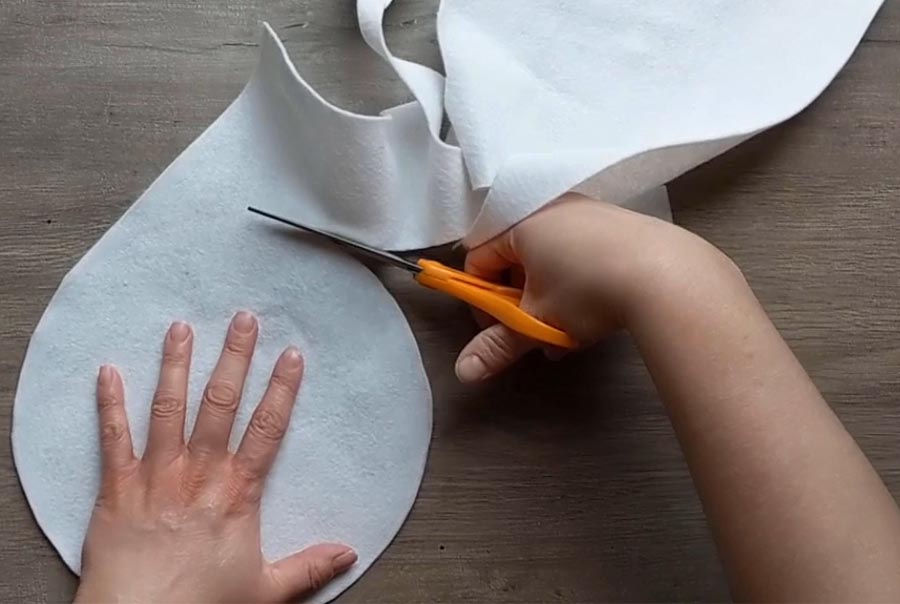
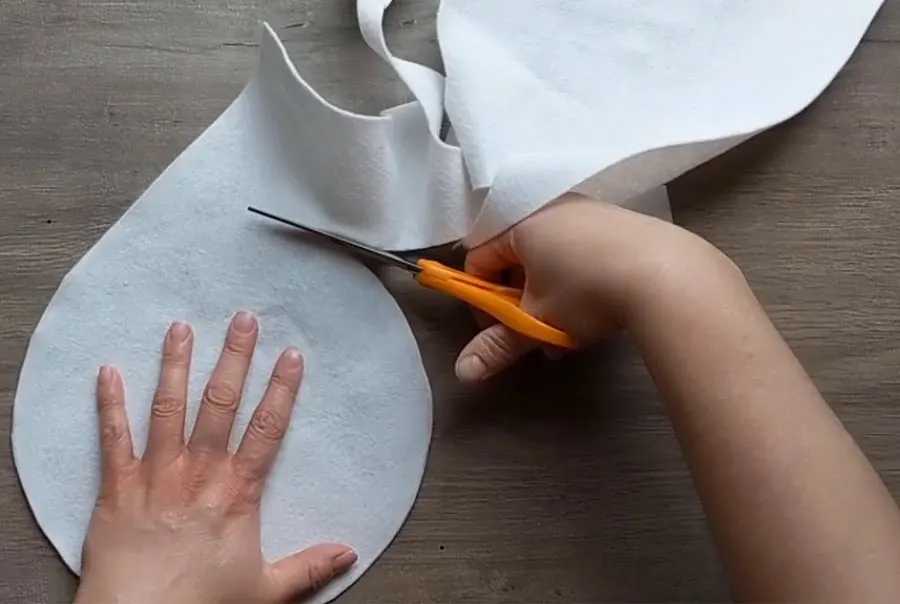
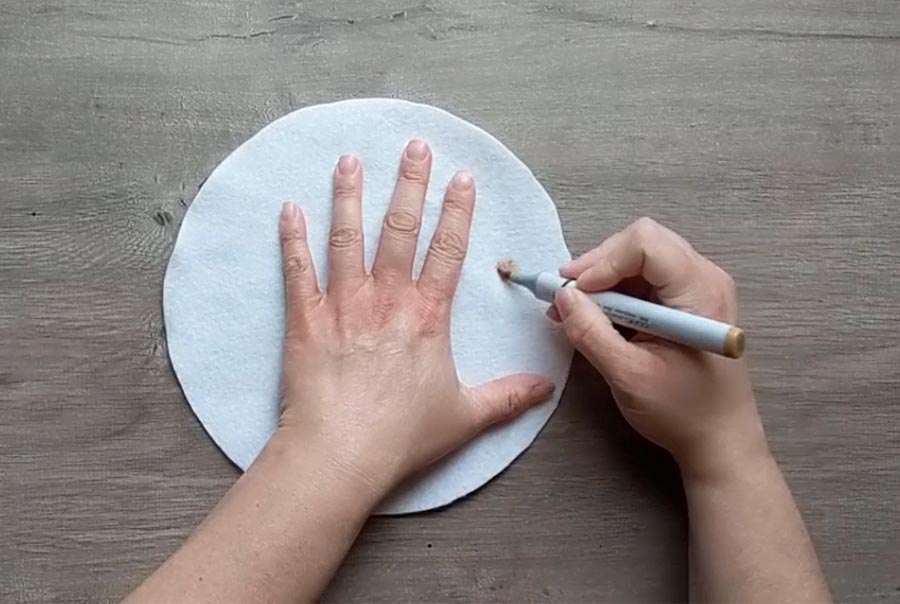
To begin, simply cut 7-inch circles out of the yellow felt. You can trace around a bowl with a washable fabric marker*, like below, or…
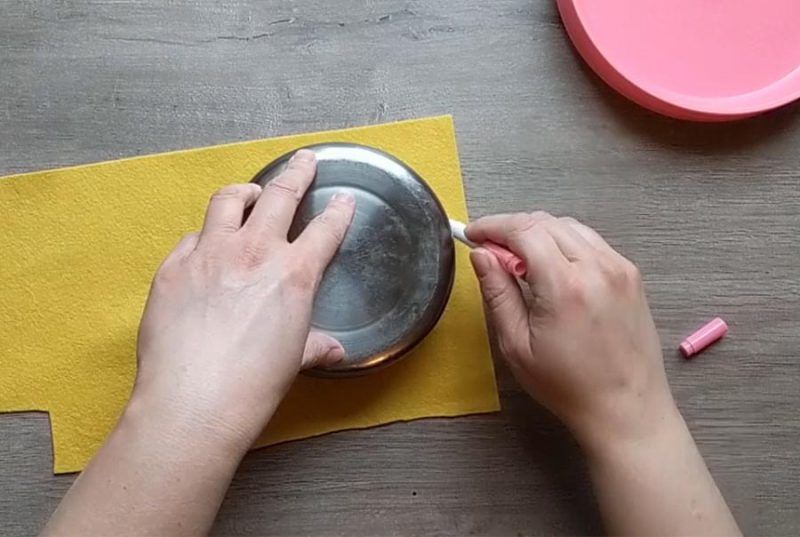

or cut out a simple 7″ circle from paper and use that as a template to cut your felt, like below.

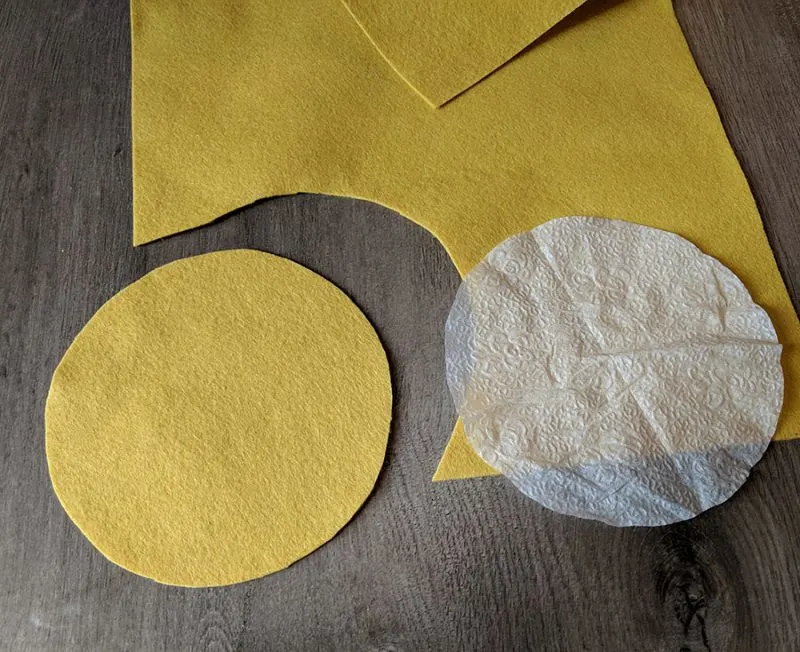
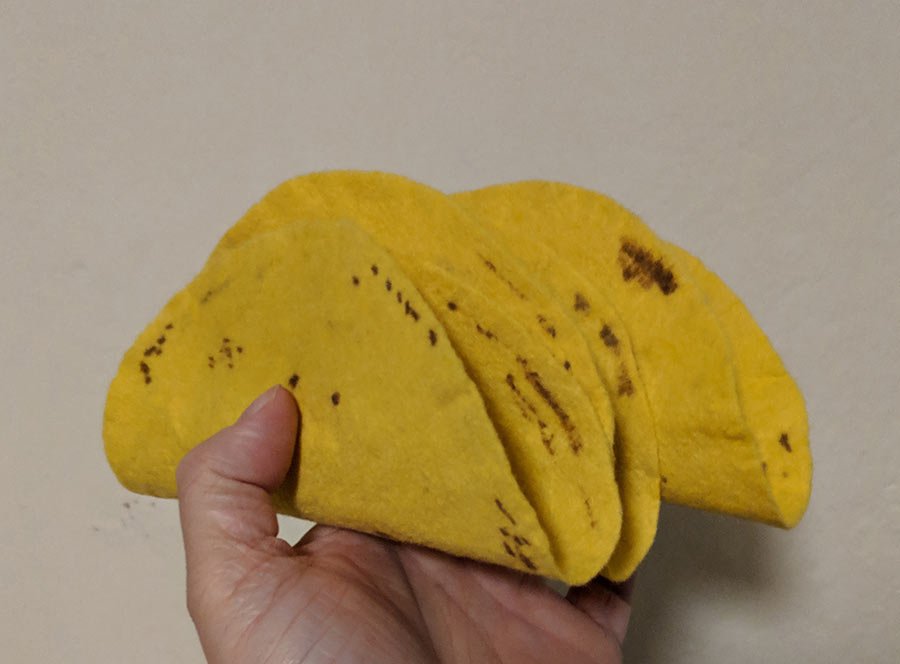
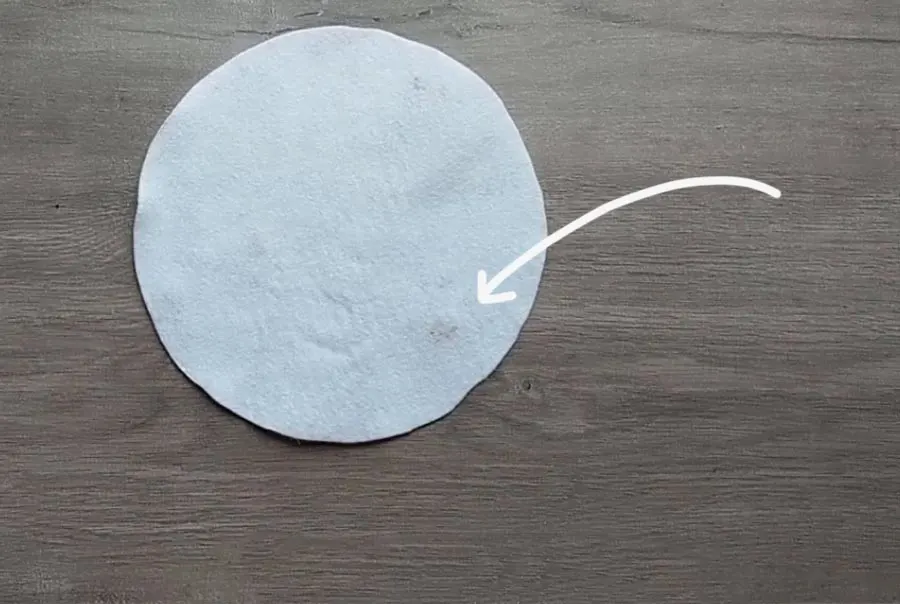
Once your circles are cut, they’ll already look a lot like raw tortillas cut from uncooked dough. To emulate the look of a cooked tortilla, we’ll next add shading using a brown alcohol-based marker.
Shading your Felt Tortillas
It’s important to use an alcohol-based marker, because the final step of making these tortillas into shells involves using water. If you use a water-based marker, your ink will smudge and run during the next step. (Alcohol-based markers are permanent unless exposed to alcohol)
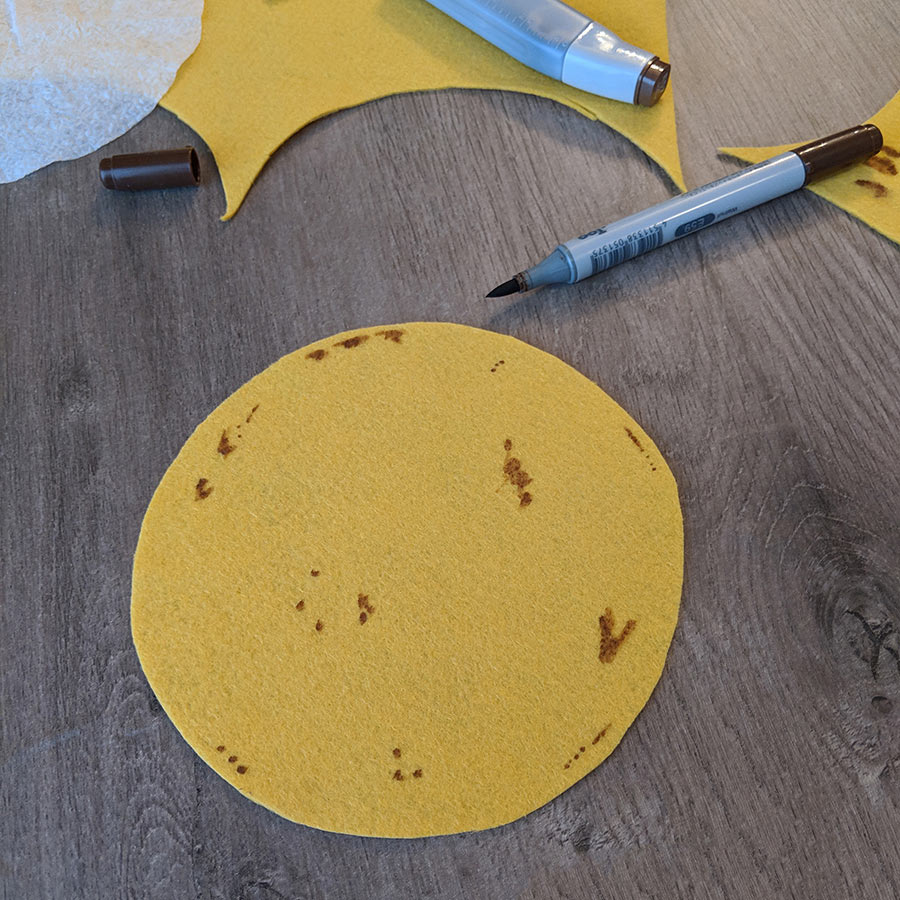
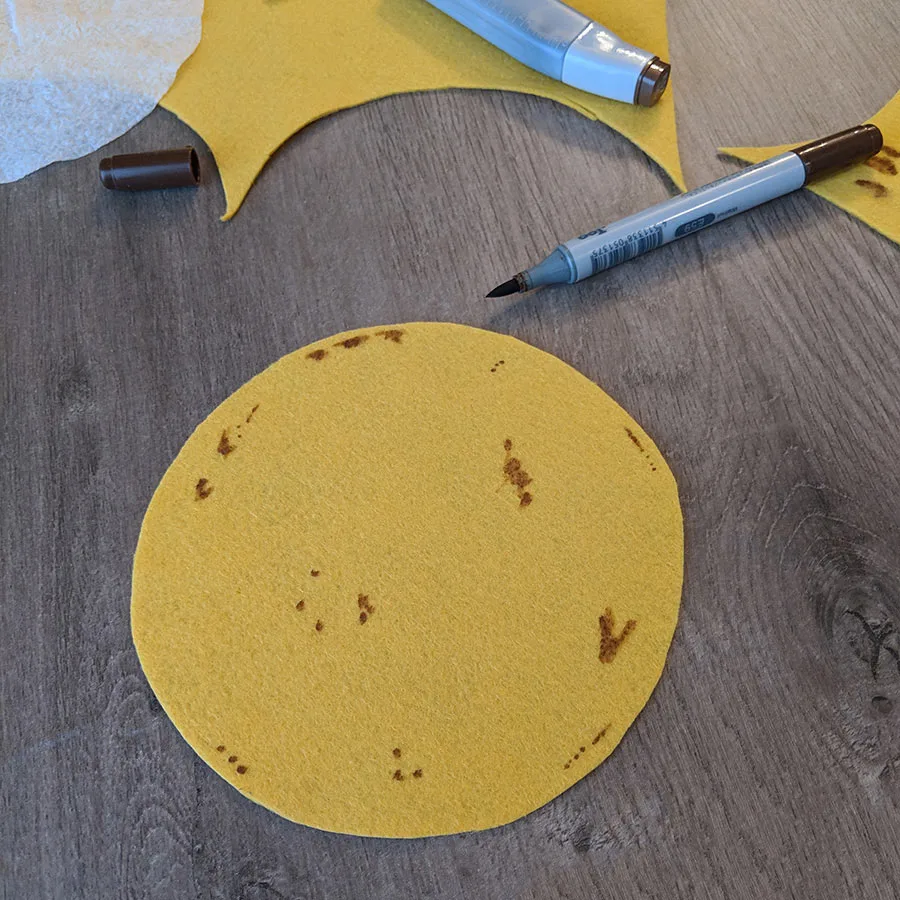
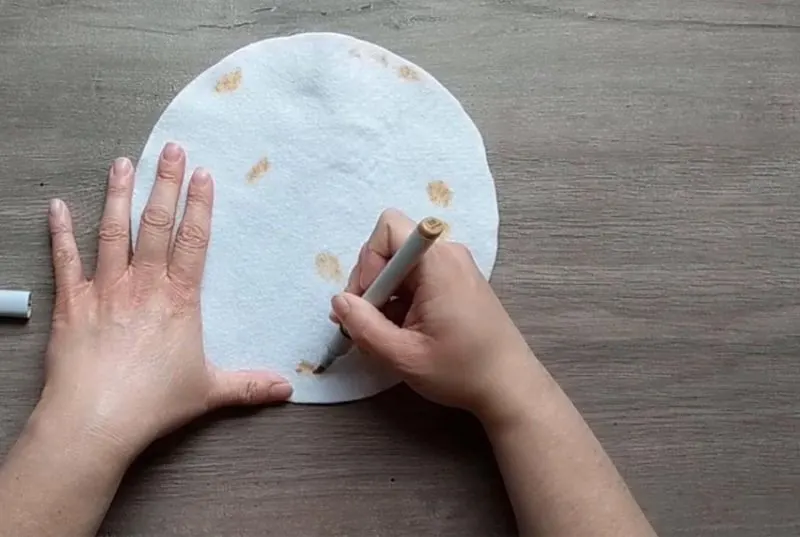
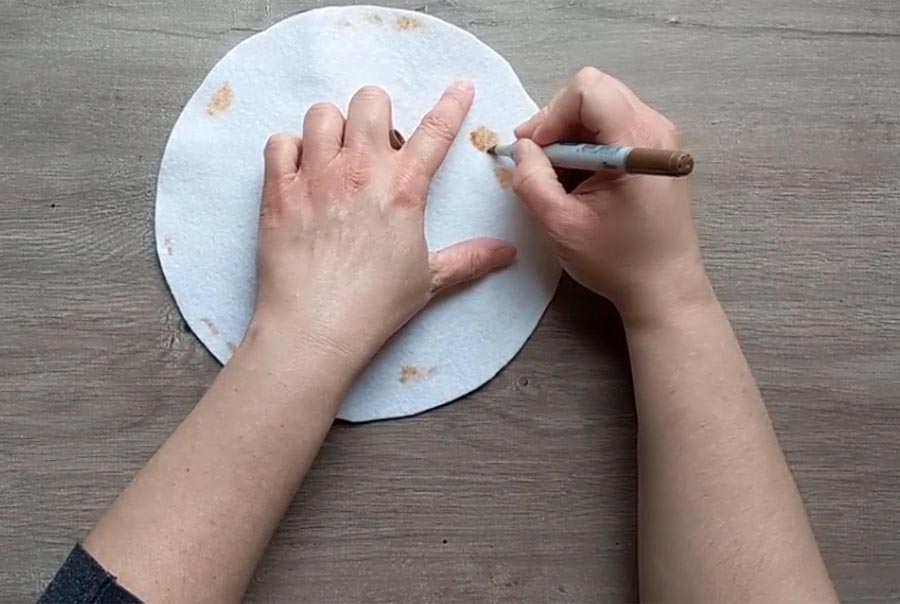
It might be helpful to look at a real tortilla, or to google images of one, while coloring your tortilla. I like to add a little bit of coloring along the edges and a few caramelized spots in the middle using a Copic E57 brown marker*.
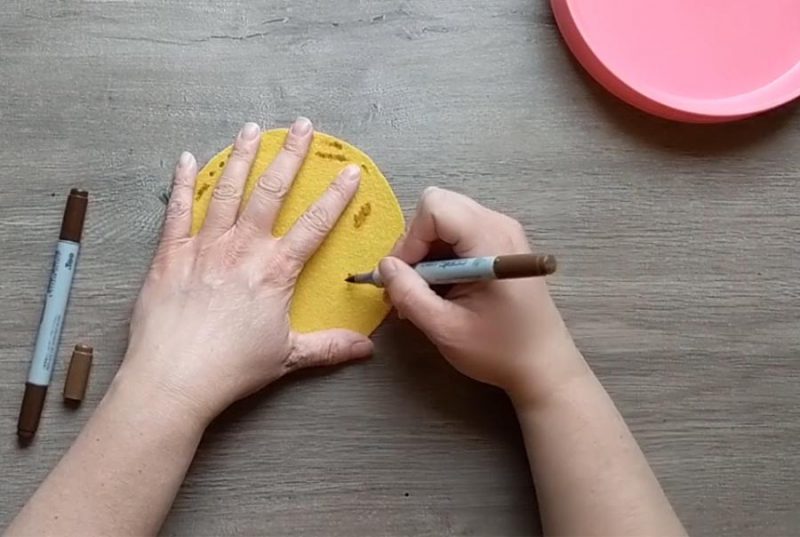

After you have completed one side, flip the felt tortilla over and draw char marks on the opposite side. This technique works best if you work on a light surface so you can see the ink on the other side and re-create the same pattern on both sides.
Aim for duplicating the exact marks on opposing sides- alcohol ink can bleed, so duplicating the design on both sides turns potential “oop’s” into intentional coloring.

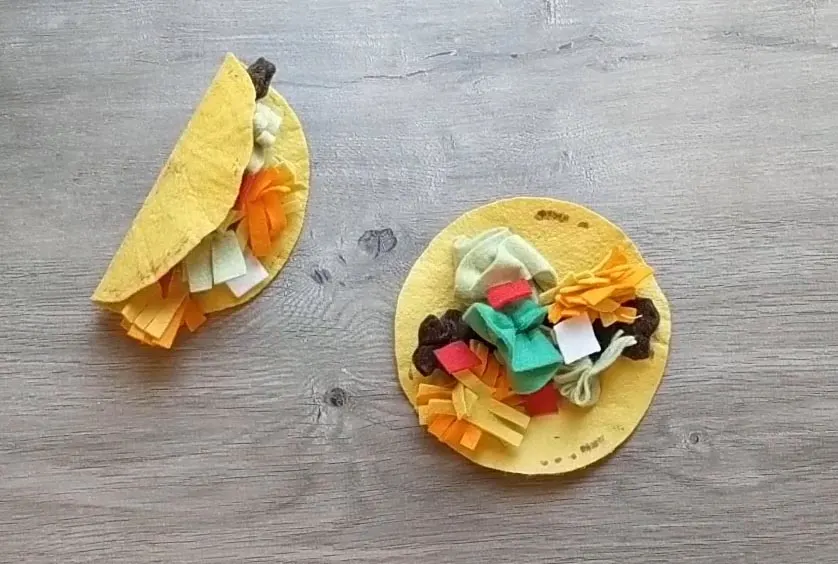
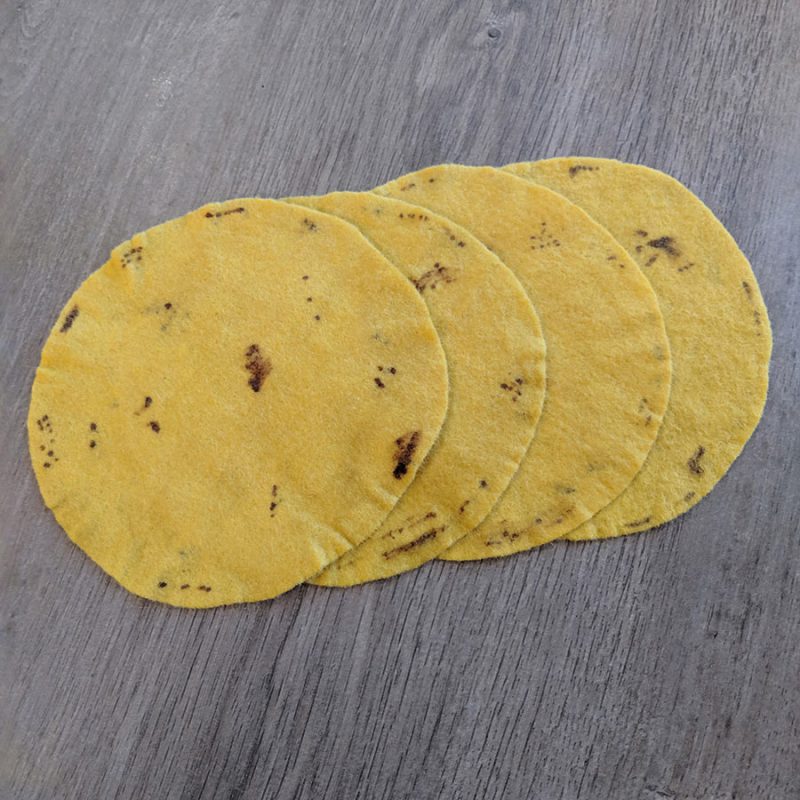
If your end goal is soft tortillas for soft tacos and open-ended toy-kitchen play, you can call this project done after adding shading. For felt tortilla shells that hold the shape of a crunchy taco, proceed to the next step.
How to Make felt tortilla shells “crunchy”
In this final step of making felt crunchy taco shells, we’ll be using the same instructions from my tutorial on stiffening felt. This extra step takes only a few minutes but adds so much durability and authenticity to the final results!
Using the recipe from our felt stiffening article, whip up a batch of cooked-cornstarch thickened water. Pour the cornstarch thickened water into a rimmed plate and let cool until cool enough to touch.
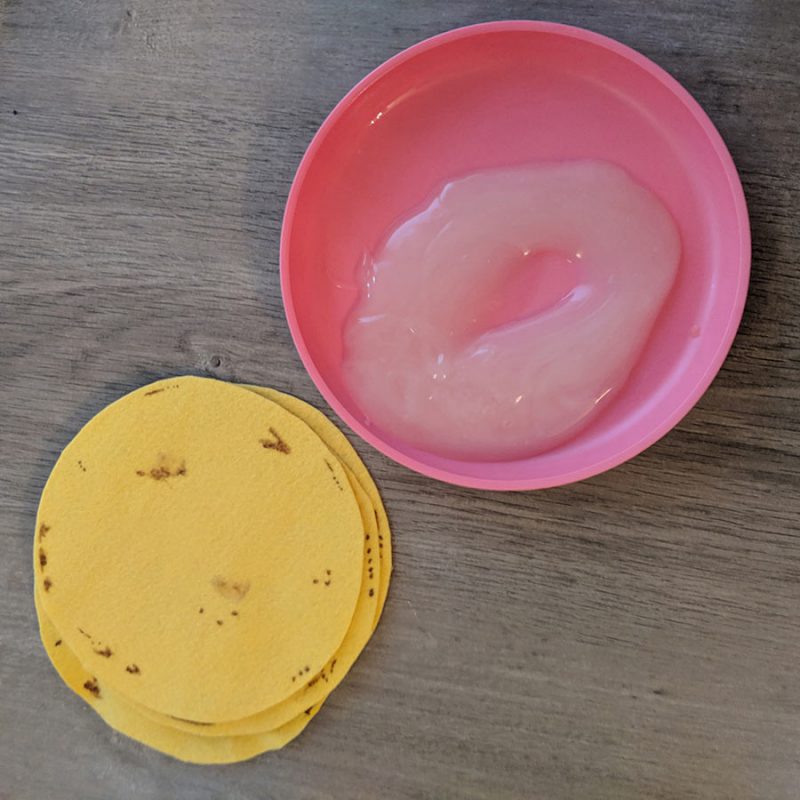
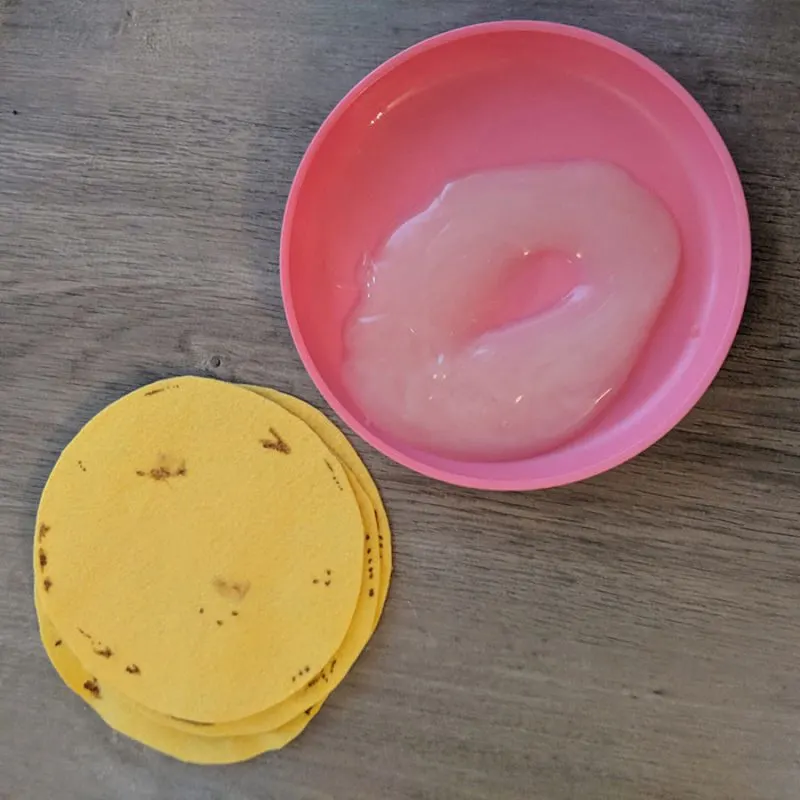
One by one, press the tortillas into the cornstarch mixture. Your cornstarch mixture might look thinner than mine, but that’s okay! The recipe is forgiving and it’s all about experimenting to get the right result.


Saturate the felt tortillas one by one in the cornstarch mixture, making sure that each one is soaked completely and the cornstarch mixture soaks in thoroughly.
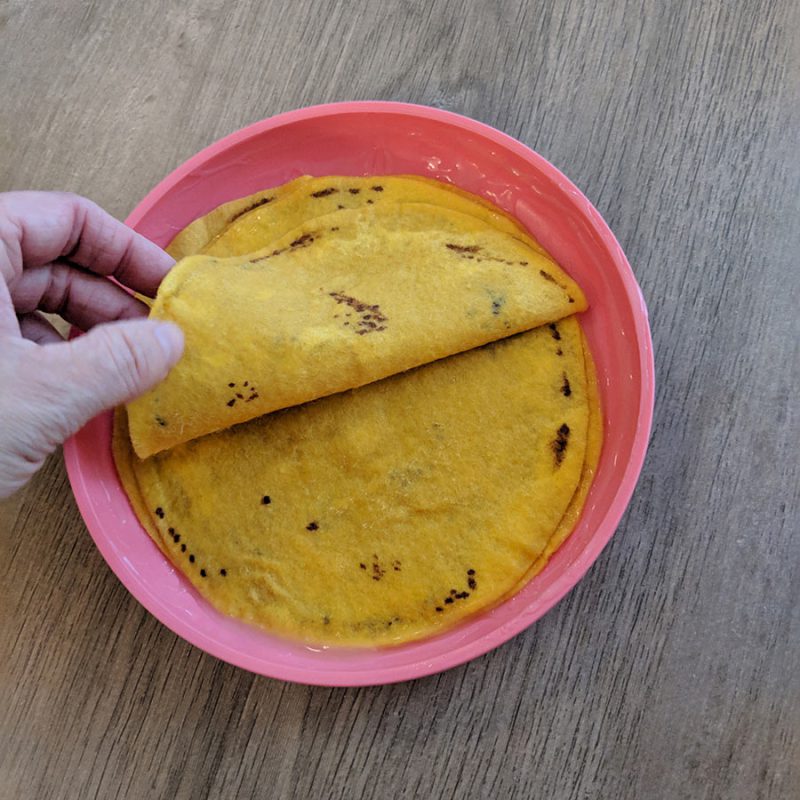

Once completely soaked, gently squeeze (don’t twist!) out excess cornstarch water, then place each round between paper towels to absorb even more moisture. Two important notes here:
How to Mold Soaked Felt into Shaped Taco Shells:
- Do not wring the material. Wringing wet felt can stretch the fibers and distort the final project. Instead, carefully scrape off excess moisture, gently pat and softly squeeze.
- Remove all excess liquid. If left wet with cornstarch-water, the felt will develop a cloudy film when dry. Since we only want to leave a bit of stiffener in the fibers, we need to blot away all excess water until the felt is damp but not soaked.
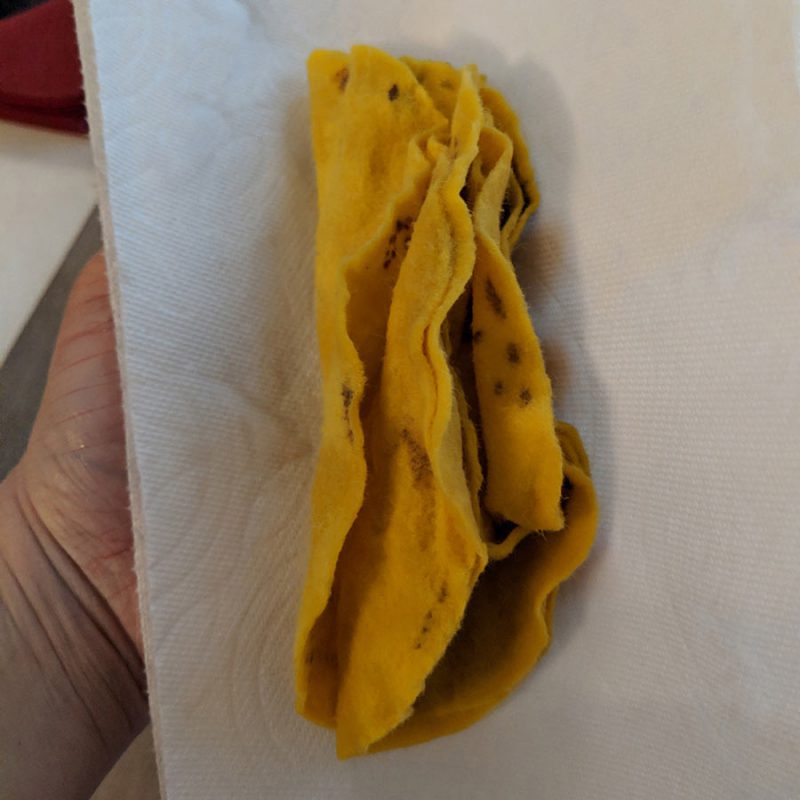
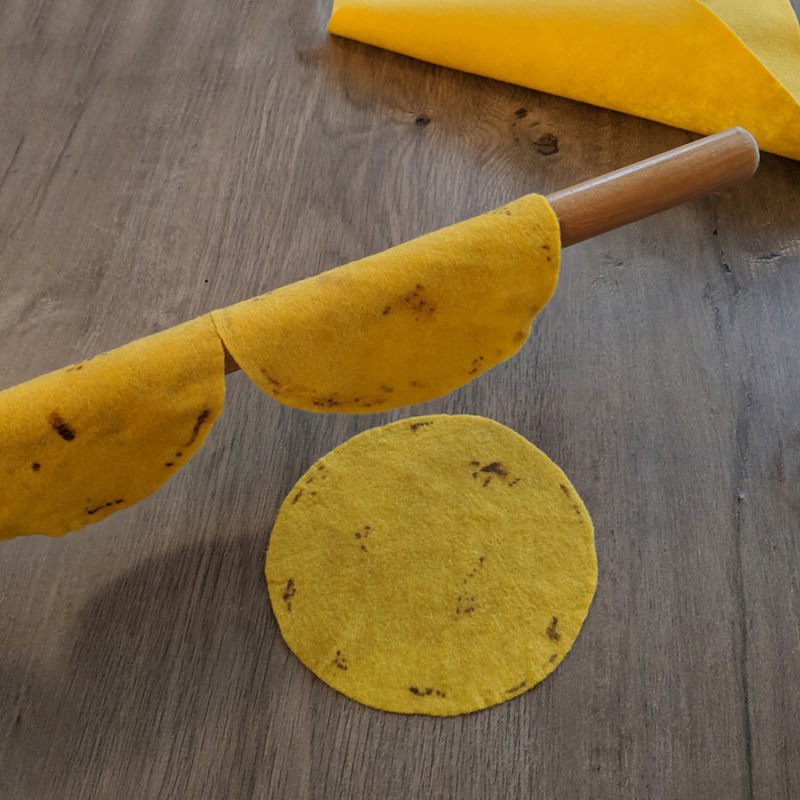
Once colored and soaked in stiffener, you can lay your felt tortilla shells to dry. For felt tostadas, lay the felt tortillas to dry flat. For crunchy felt taco shells, lay the tortilla over a round rod –such as a broom handle- to dry.
Allow to dry completely, and the final result will be a semi-soft, flexible tortilla shell with strong, crisp fibers that maintain the shape in which it was dried- perfect for making crispy felt taco shells.

Need a Do-Over?
Done correctly, these taco shells should easily hold their shape but bend open for “filling” with felt taco toppings. If you find that your taco shells turn out a little too limp or too “crunchy” for pretend play fun, this can easily be remedied.
Too Limp: Run the felt taco shells under warm water until they are soaked and soft, then repeat the cornstarch stiffening process a second time.
Too Stiff: Fill a bowl with very hot water and allow taco shells to soak for 3 to 4 minutes, remove with tongs, allow to cool until they are safe to touch, and repeat the dimensional drying process described above. This extra bath should remove excess cornstarch and result in a softer felt taco shell.
Be sure and check out all of our tutorials for creating this felt food taco playset!

Easy Video Tutorial:
Loved it? Pin the image below!
Want more free tutorials and felt food patterns? Comment, share, buy us coffee, and help us create more quality tutorials and free patterns.

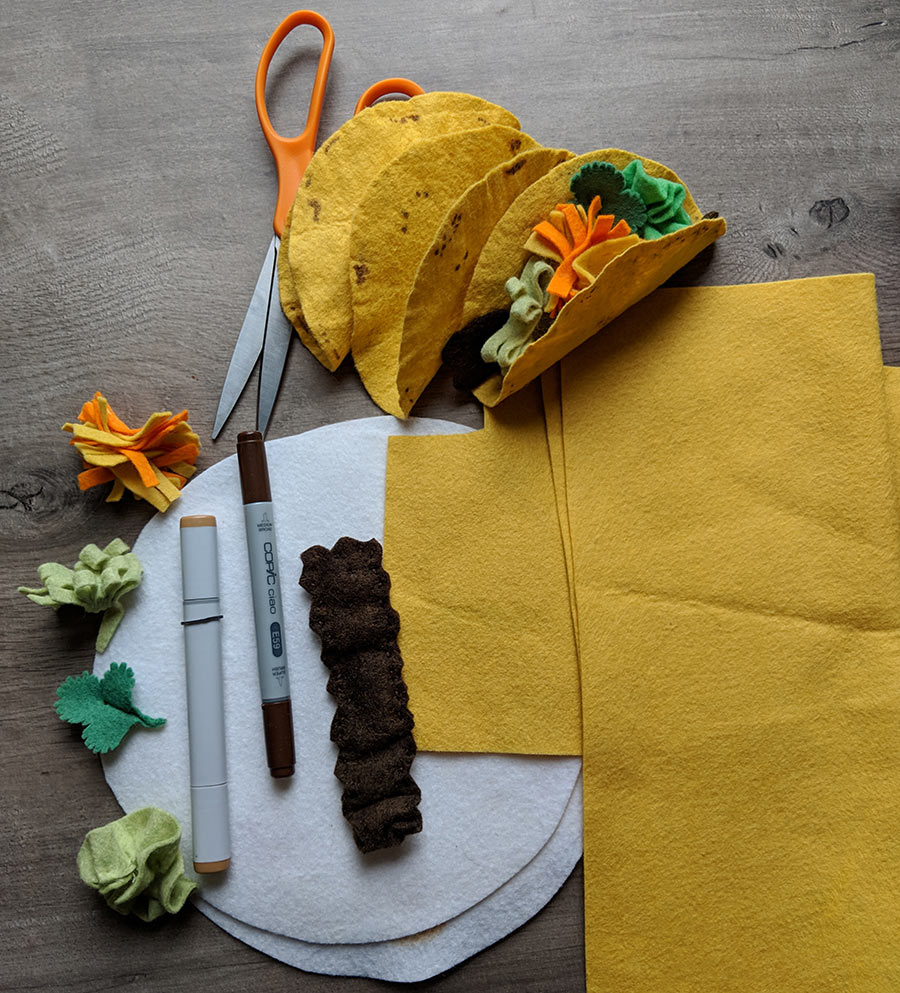
Felt Taco Toppings: Shredded Cheese, Lettuce, and Cilantro
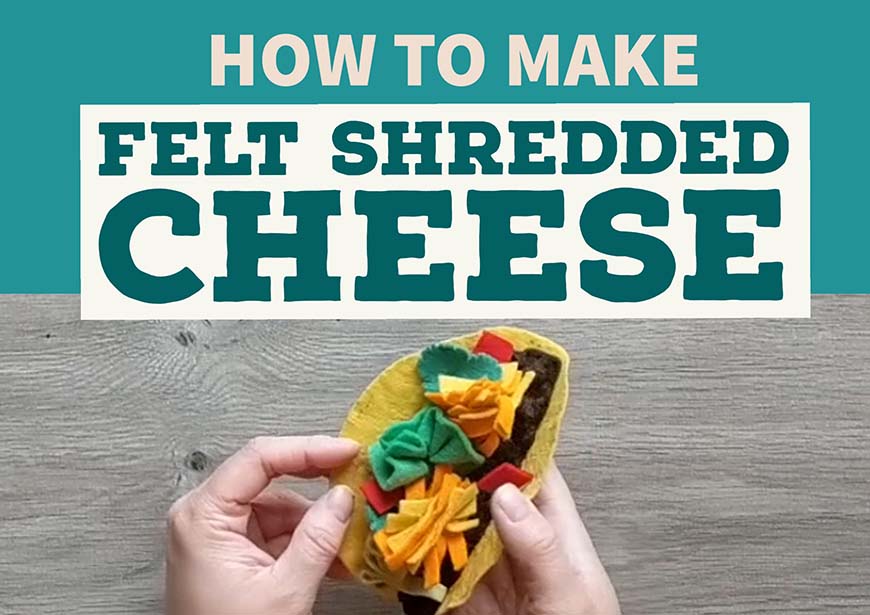
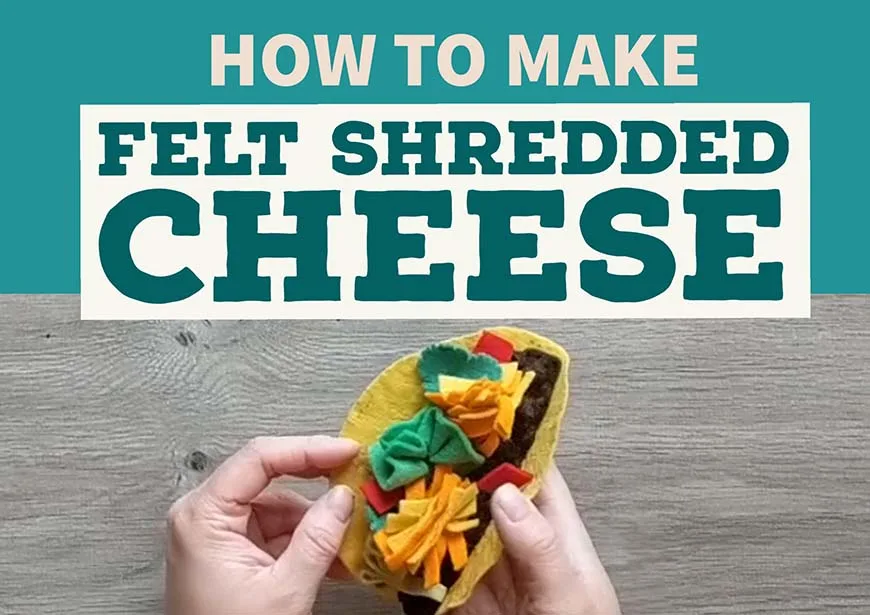
Felt Shredded Cheese
Today we’ll be walking you through step by step instructions for creating little bundles of “shredded cheese” as part of our felt taco play set series. In this post, we’ve slowed it down and provide instructions, materials, and links for resources step by step. If you are looking for a quick summary, you can skip straight to the video at the end of this post.
Shredded cheese can be a difficult texture to represent in felt food, so when it came to our felt food taco playset, it took some creativity and research to come up with these little orange and yellow “pom-poms” of felt “cheese”.
These little poofs of multicolored felt simulate the blend of Cheddar, Jack, and Monterey shredded cheeses popular for American-style crunchy tacos.

In this tutorial, I’ll be showing you how I made these little shredded cheese bundles. They fit perfectly inside the tortillas and taco shells made from other tutorials on our blog.
Begin with Strips
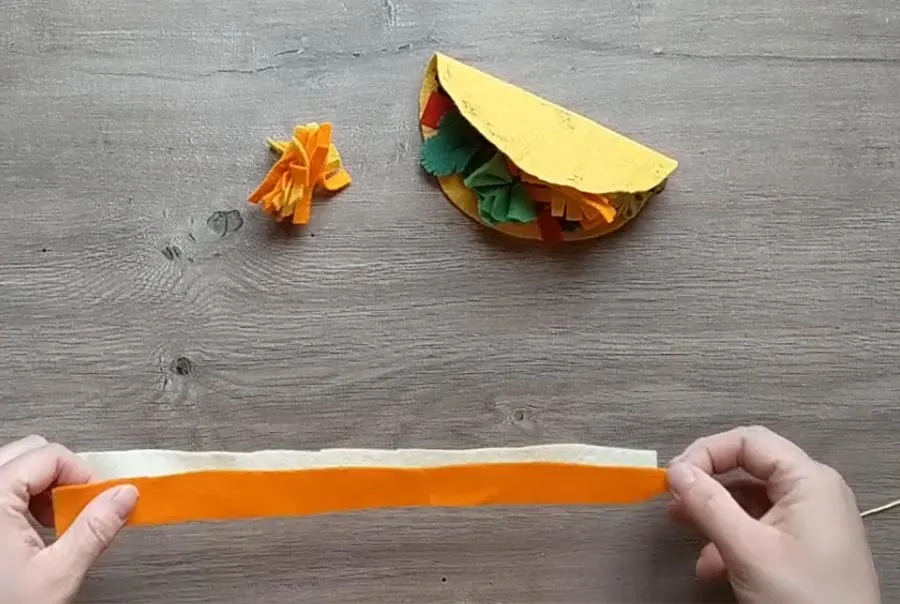
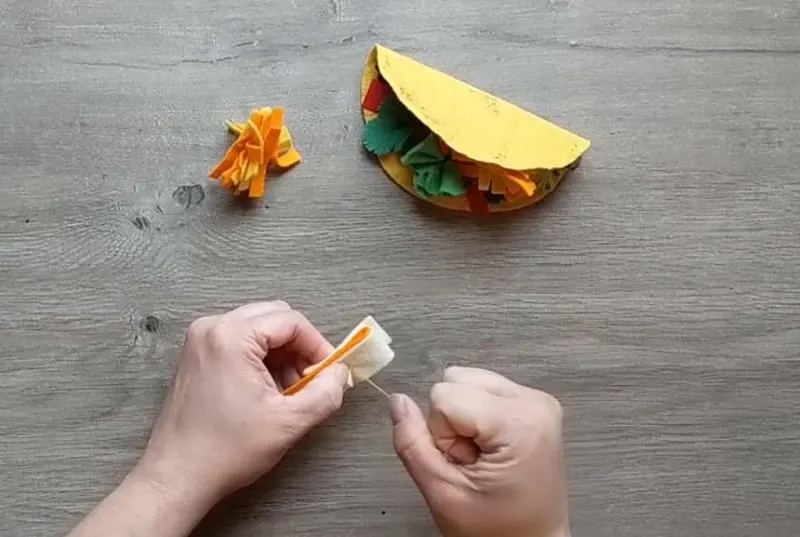
Start by cutting two strips of felt from a complementary yellow–orange pallet.
To begin, cut a strip of each color approximately 3/4 inch wide by 7 inches long. Stack these two strips on top of one another.

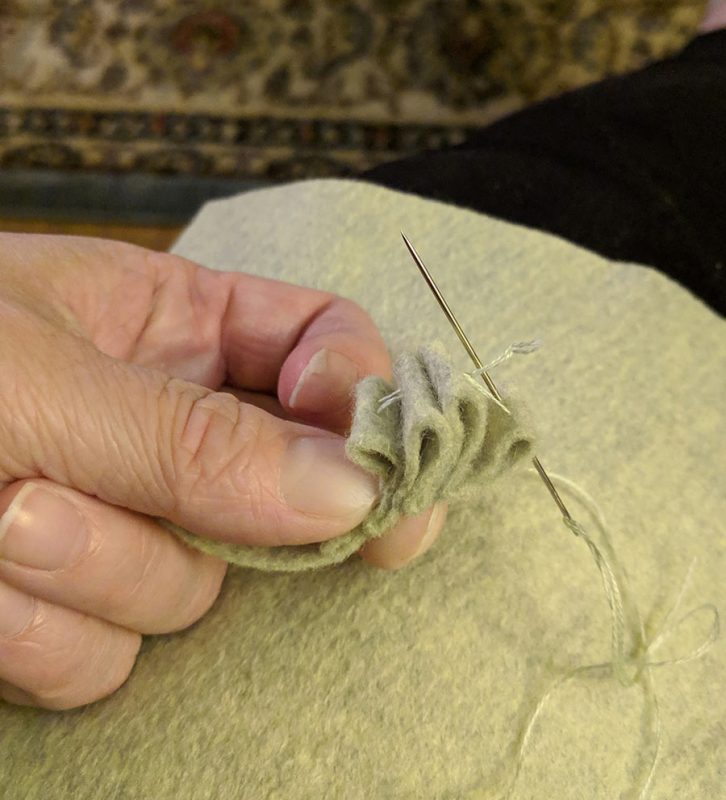
Grasping the strips together, fold them back and forth on themselves – accordion style – and stitch together.

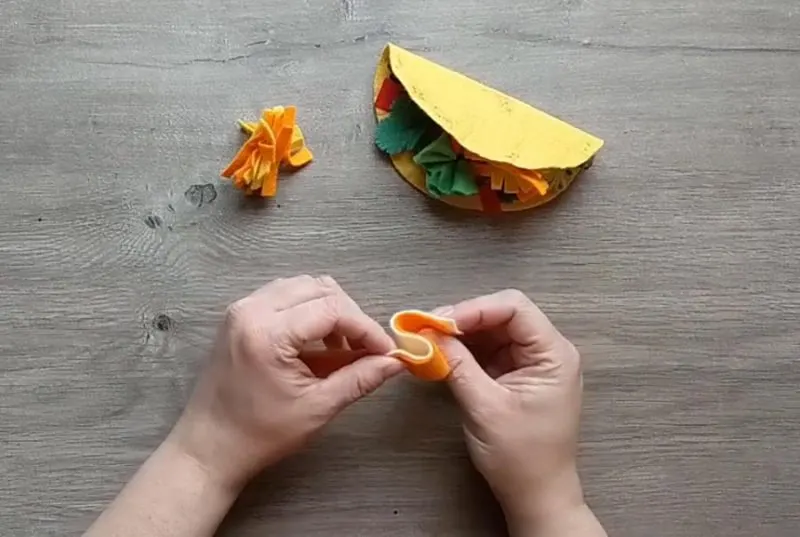
Stitch through the center and back with at least three or four strands of strong embroidery floss. You’ll want to make your stitch very short, since we need the fabric to twist around on this single stitch and a long stitch will prevent twisting.

You can hide your stitch by beginning your stitch between the folds and ending in the same place. By tucking excess thread into a fold, no extra thread or knots will be visible on the finished felt cheese bundle.
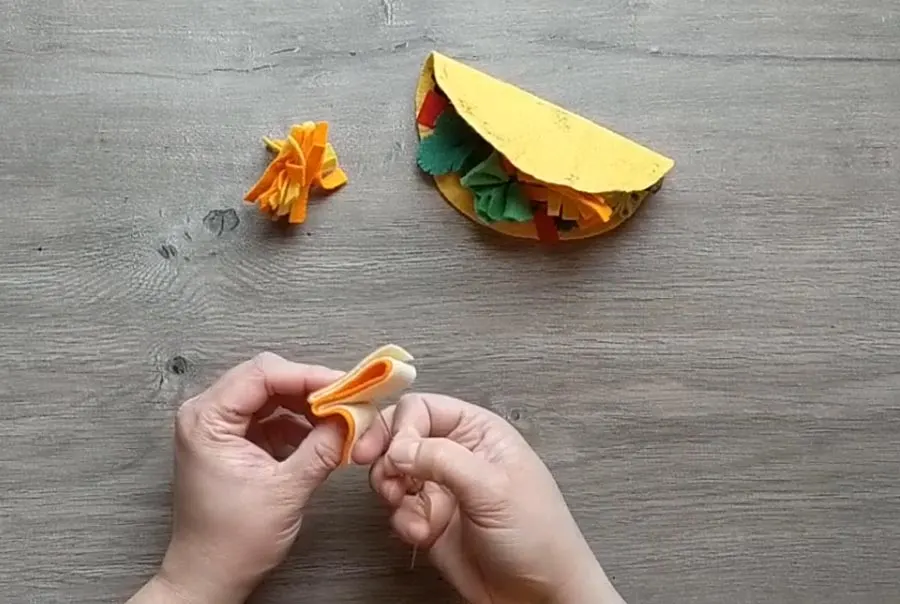
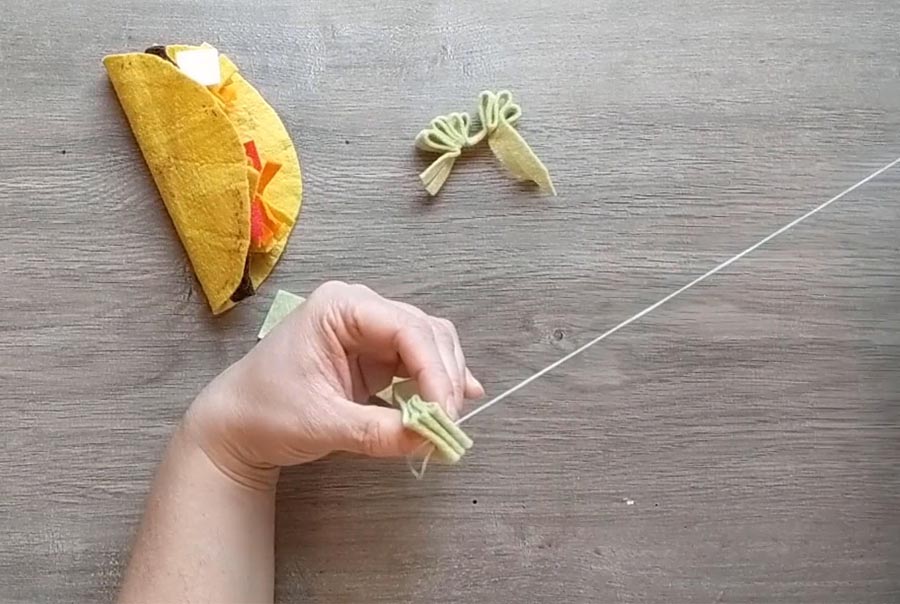
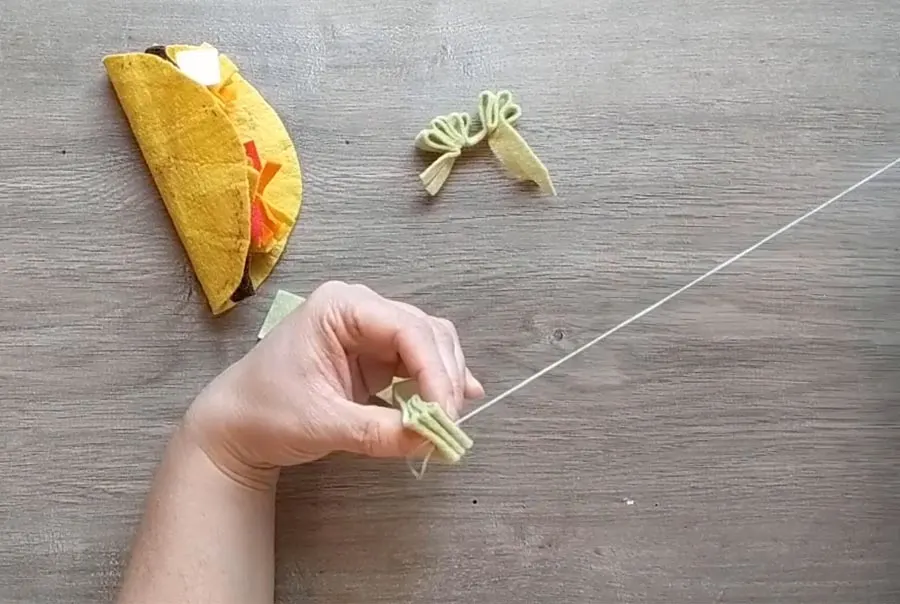
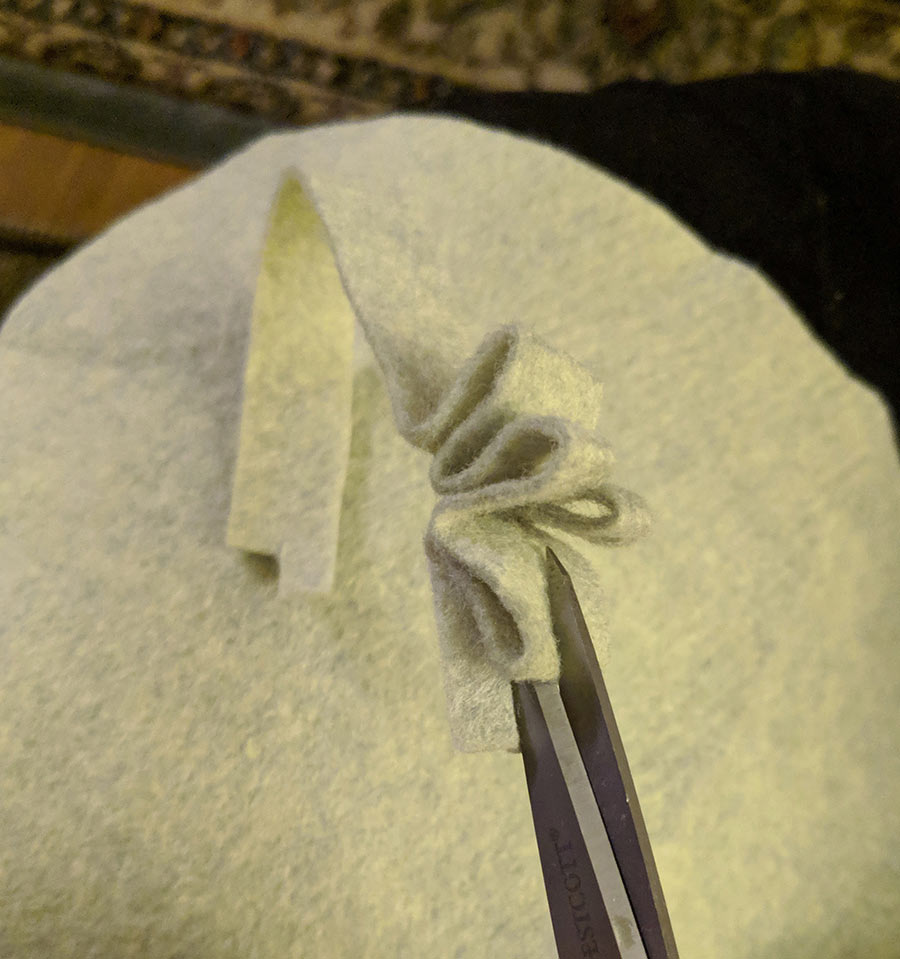
Once securely stitched, cut the loops on each side, so each loop becomes two flaps.

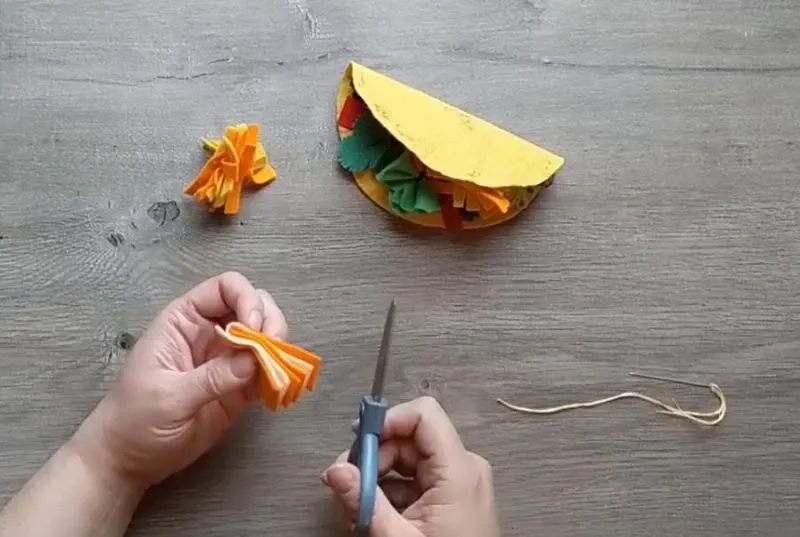
Cut each flap into three or four strips- varying the width of the strips can help create a more natural look. I like to vary it- cutting one color into four strips and another color into three strips.

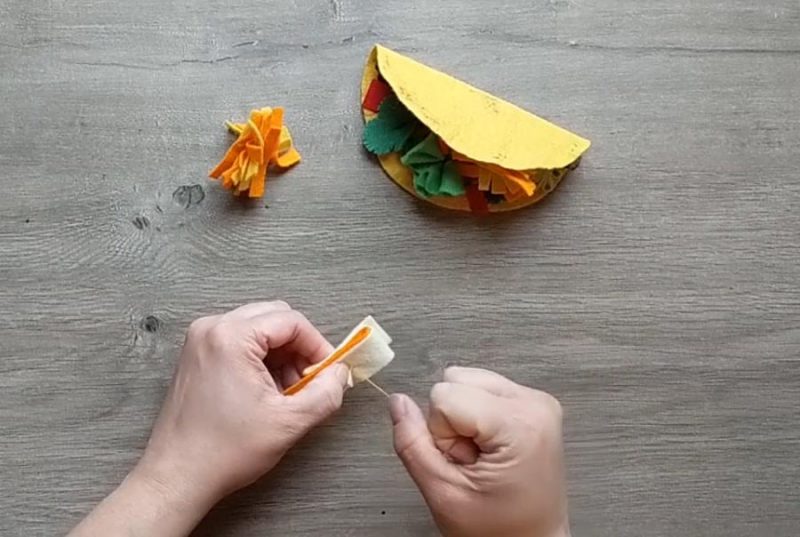
Once the loops are cut into to flaps, and the flaps are cut into strips, it’s time to twist this layered fabric a bit so it looks more like a pom-pom than a pile. To do this, simply grasp the top and the bottom layers and twist around the central stitch. Continue twisting, layer by layer, as needed to create a variegated and textured look.
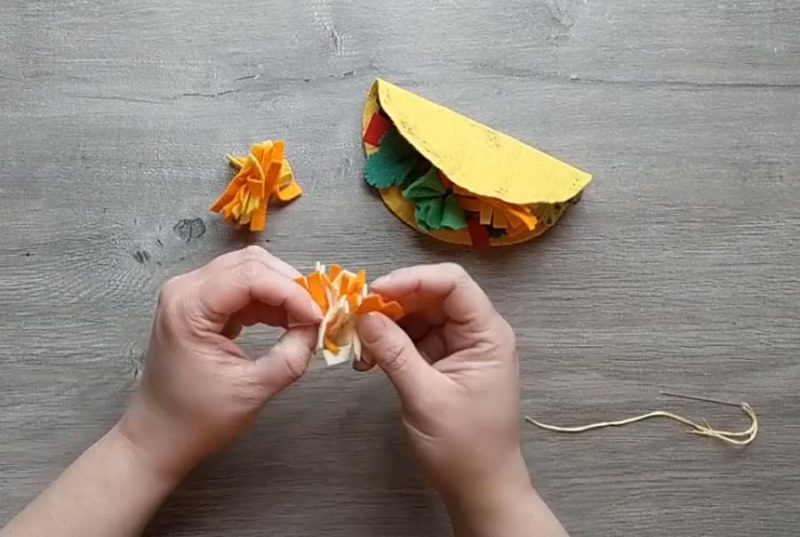
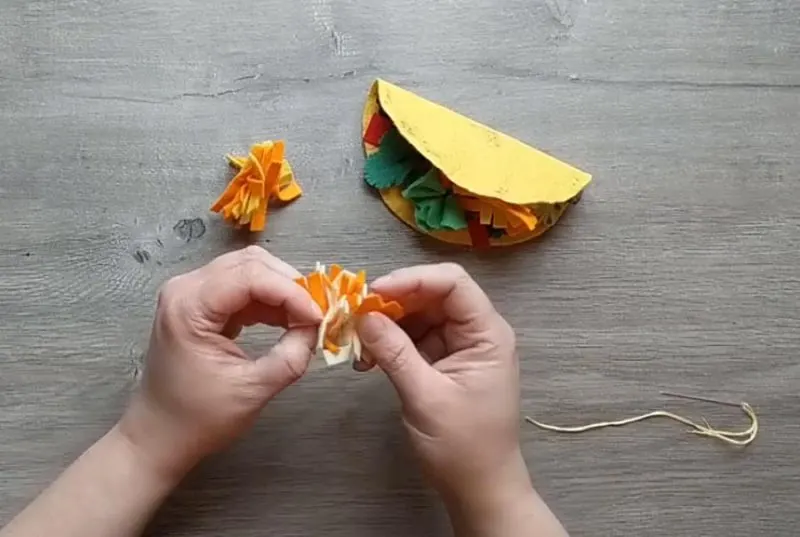
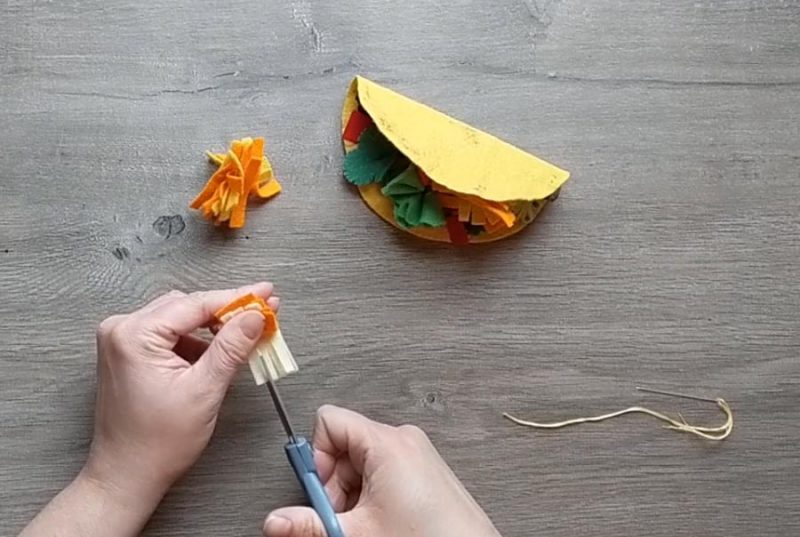
Once you are happy with how your bundle of shredded cheese looks, you’ll want to add some extra stitches through the core to help it stay in place.
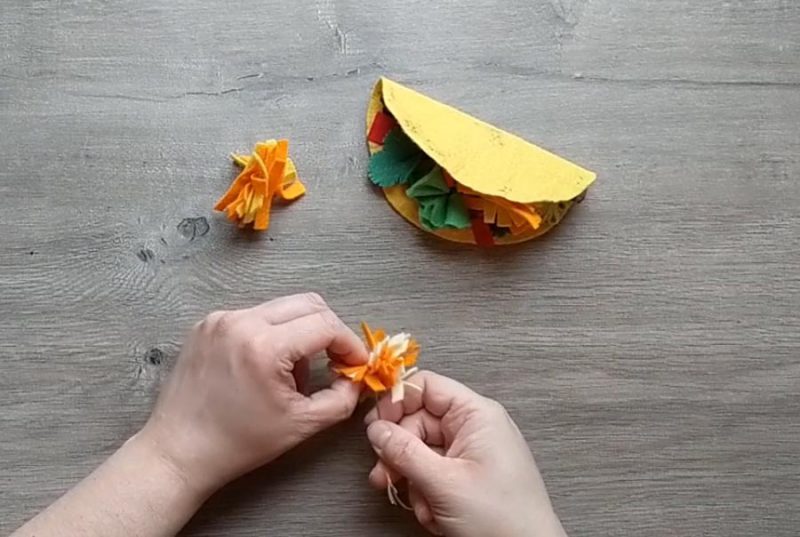

These stitches help the cheese hold its shape and helps ensure that it holds up well to play. Quality felt – whether wool felt or our premium acrylic felt – will be the best bet to keep your creation looking great through lots of hours of open ended play in a child’s play kitchen.

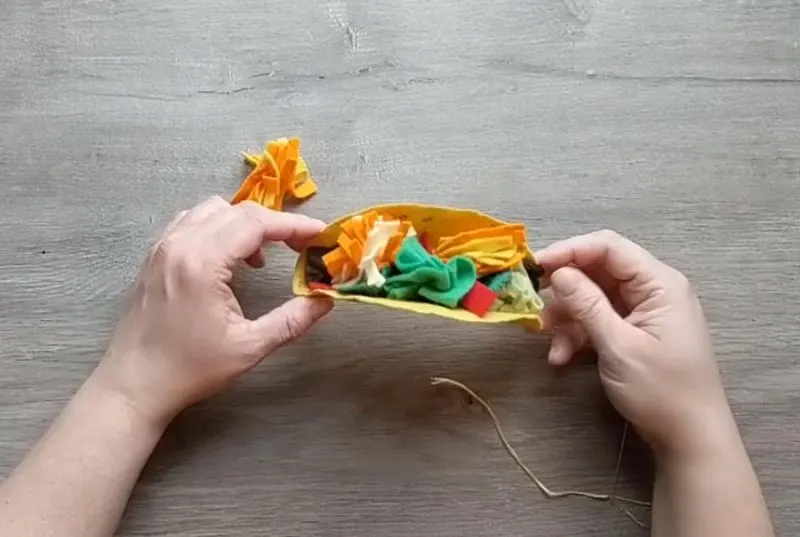
Once securely stitched into place, trim any exposed loose threads, match your pom-pom with a few more shredded cheese felt pom-poms, and combine with other ingredients for our felt taco (or burrito!) playset.
Loved it? Pin the image below!
Want more free tutorials and felt food patterns? Shop our felt and sewing supplies and help us create more quality tutorials and free patterns.
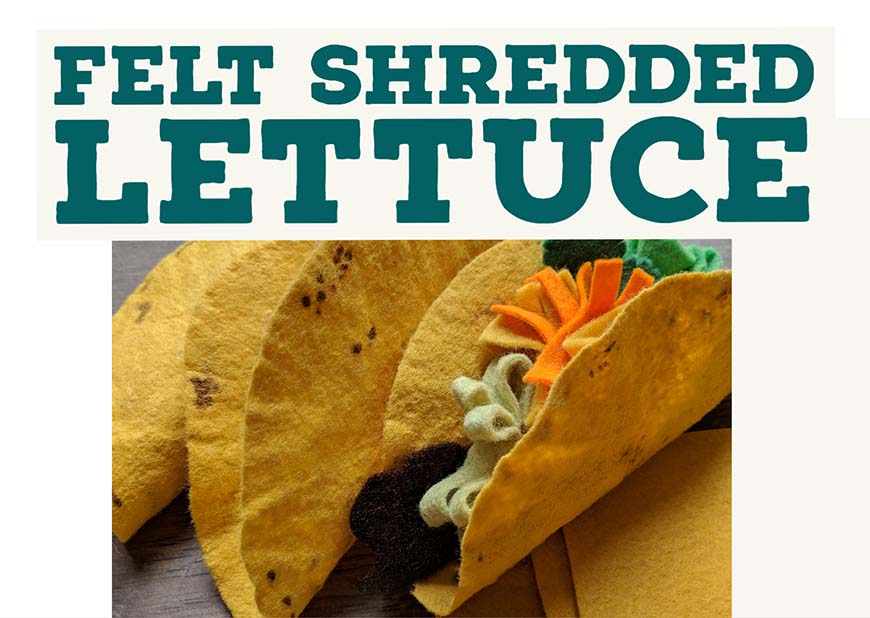

Felt Shredded Lettuce for Tacos
This quick tutorial covers how I make “shredded” iceberg felt lettucefor my felt food taco play sets. No American-style taco is complete without the finely shredded pale green crunch of iceberg lettuce. In this tutorial will be re-creating that important ingredient using the perfectly suited pistachio green color wool felt sold in our shop.
To begin, will start the same way we did for our felt shredded cheese: cut a strip of felt, this time in pistachio green. Your strip can vary, but 1/2-3/4 inch by 6-7 inches should be perfect.
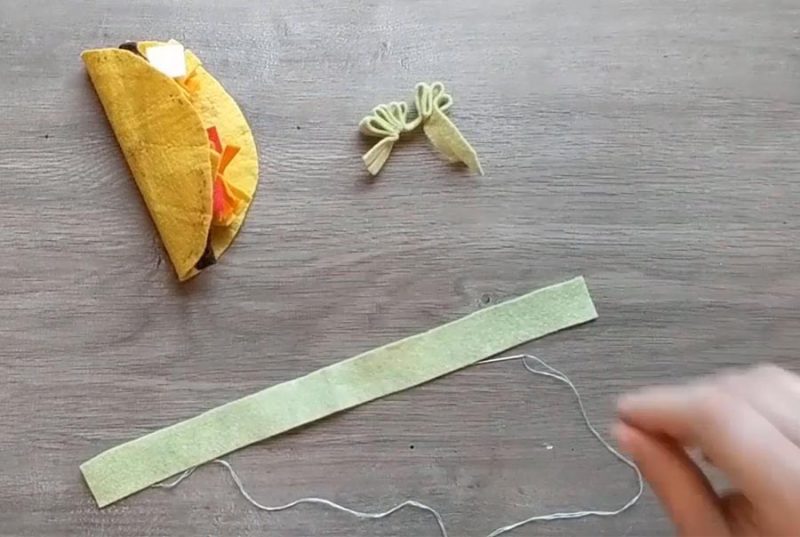

Now, simply fold the green felt back and forth in on itself for three or four layers. Once in an accordion shape, pinch the felt together with one hand and begin stitching starting with the second from the top layer.
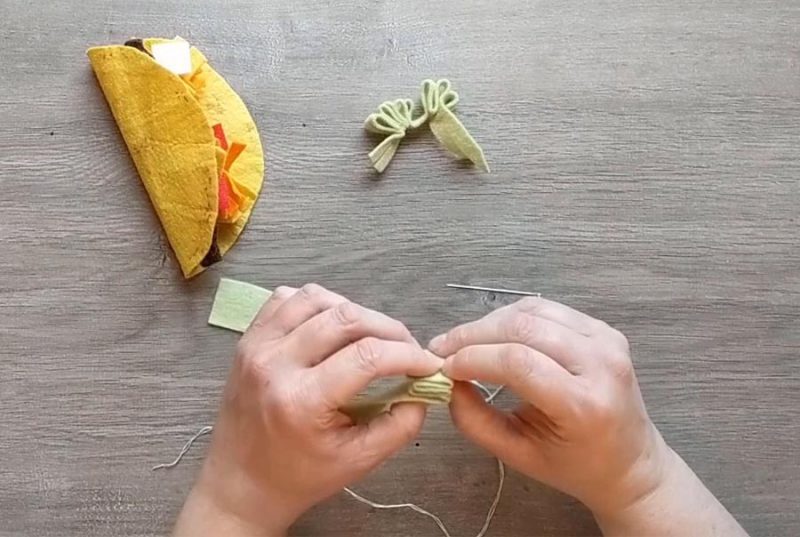

Starting your stitch inside of a fold, instead of on the outside, will help hide any excess thread shown on the outside of your stitch.
Once your thread is anchored, sew down and back through all the layers, loop the top layer into this stitch, and when you return to your starting point, tie off once. This will help keep your stitches tight and the layers from pulling apart as you continue to stitch.

Next, continue stitching along the edge – sort of like a bookbinding stitch that goes through the full-thickness back and forth. When you’ve covered the whole edge with a few stitches, tie-off your thread using the same method we used for starting – hiding your knot within the folds of the felt lettuce.
At this point, you can either be finished or continue with another set of for a longer piece of lettuce. For younger children you’ll probably want to continue on in the second loop of lettuce.
A good rule of thumb is to make your felt food size-appropriate for the hands of the child when they receive them. For younger kids, ingredients will be a little more fun to play with if they are larger and easier to grip. For older children, you can err a bit more of the side of realism, and size down your ingredients if you want.
Because we are making American tacos with very thinly shredded iceberg lettuce, I need to take this big section of looped felt and make it look more thinly shredded. To do this, I grab some sharp scissors and cut each of the loops into one or two smaller loops. I like to cut very narrow loops – with the wool felt, you can cut just under 1/4″ wide loops and still have a very sturdy bundle of felt lettuce.

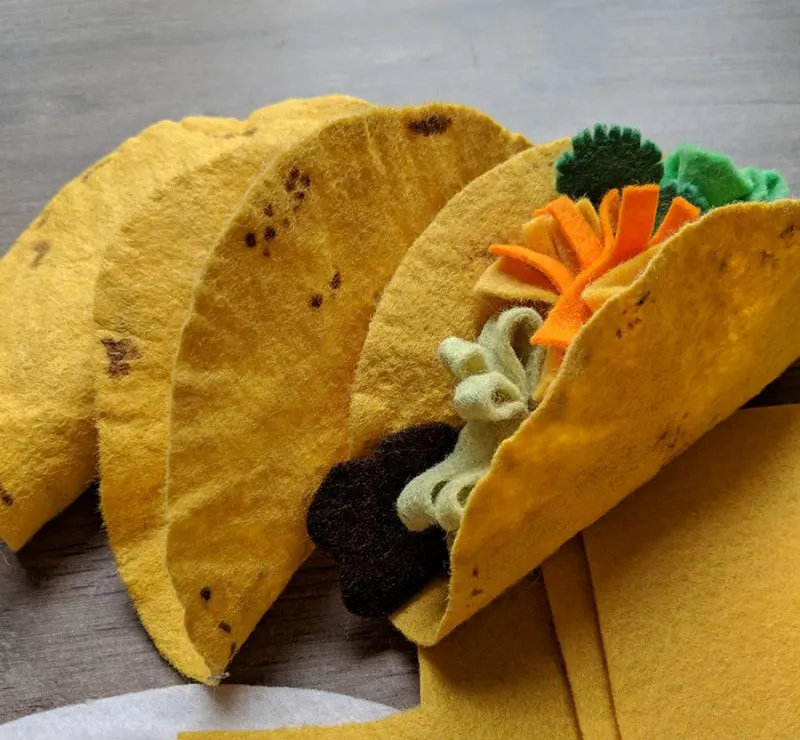
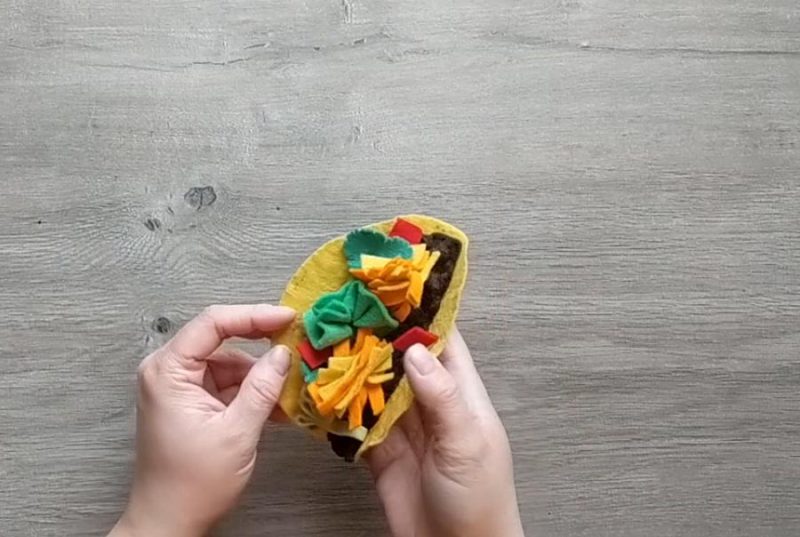
Once cut and paired with all the other toppings, your felt food Mexican taco dinner will be ready to be presented to your felt food chef.

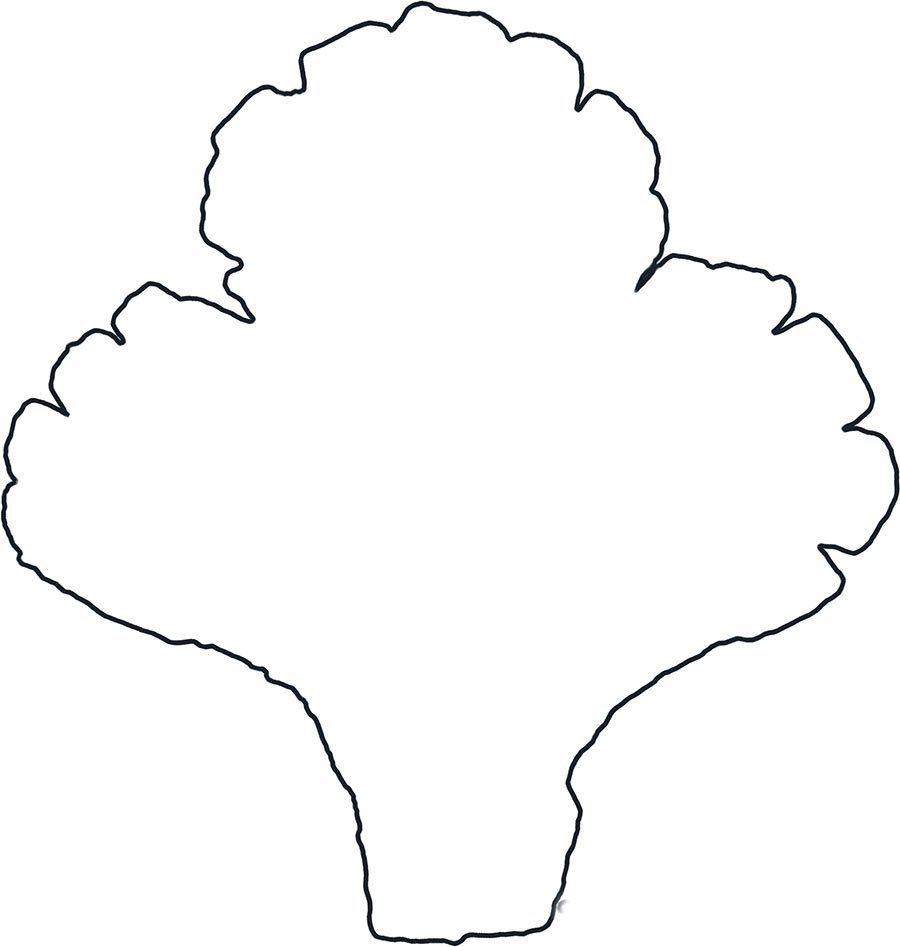
Free Template for Cutting Felt Cilantro Leaves for Felt Food Tacos:
Felt cilantro is the perfect finishing touch to a fake food Mexican food playset. It’s a bit tedious to cut, but with very small, sharp embroidery scissors* they don’t take too much time at all. And you only need to do to get the effect of having the cilantro topping as an option in your taco topping buffet. Enlarge the image below to use as a template for cilantro leaves


Loved it? Pin the images in this article!
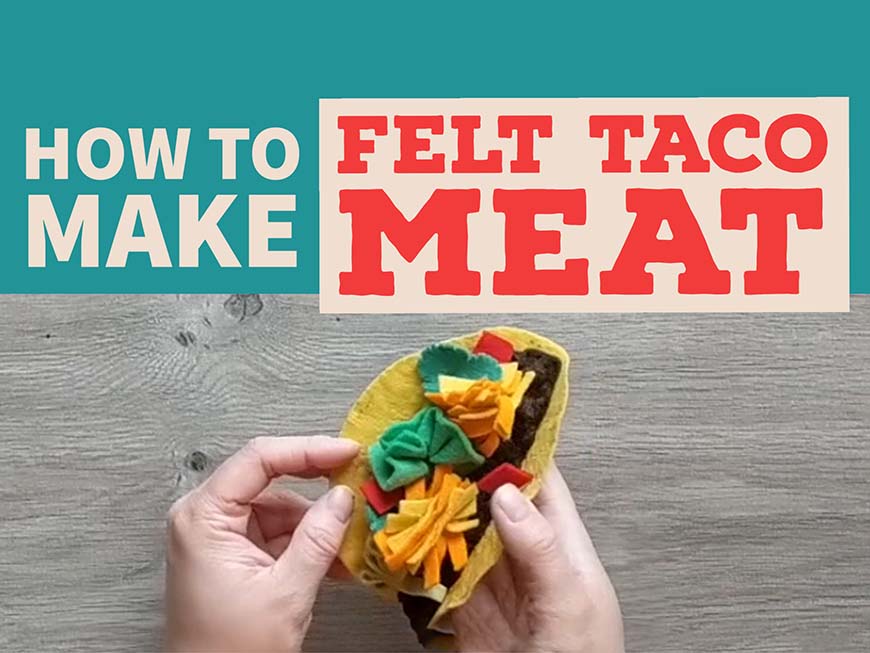
How To Make Felt Taco Meat

In a Hurry?
Click Here to Skip to the Video Tutorial
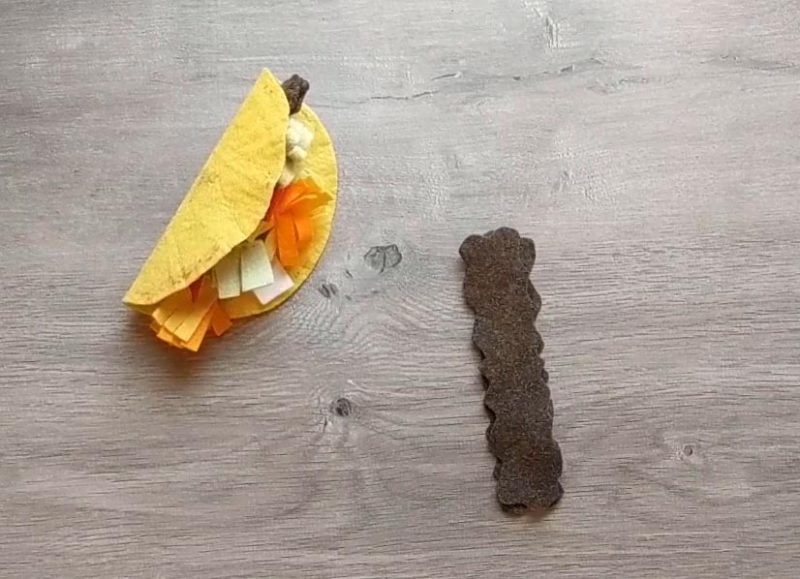
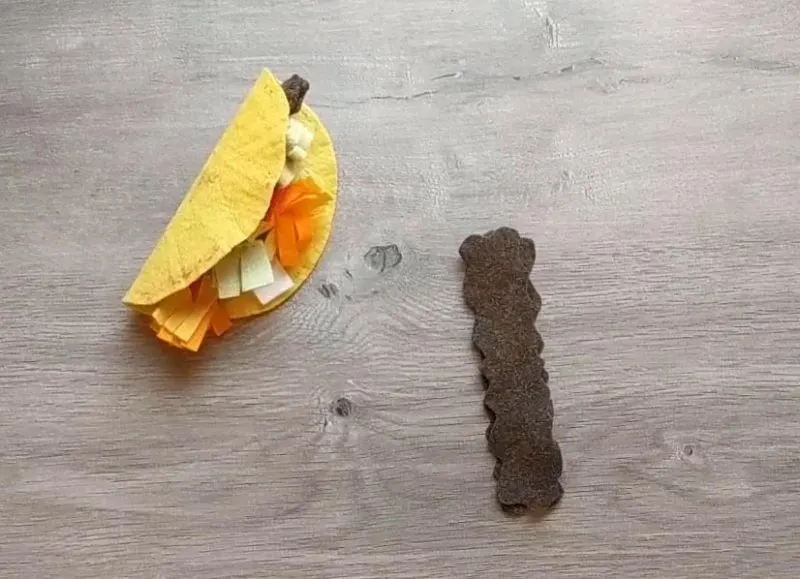
In today’s post, we’re talking about the quintessential taco dinner ingredient: taco meat! Spicy, salty, and even a little greasy, this classic ground beef preparation is essential for any American-style taco dinner. We’ll be reproducing it from soft brown acrylic felt.
Getting Started

Go ahead and get your giggles out now- there was definitely plenty of snickers and poop emoji references when constructing this little brown log of taco meat. Though giggle-worthy, it’s a simple pattern that’s easy for beginner sewers, fits great in our felt taco shells, and is a size and shape that’s easy for young hands to pick up and play with their play kitchen.
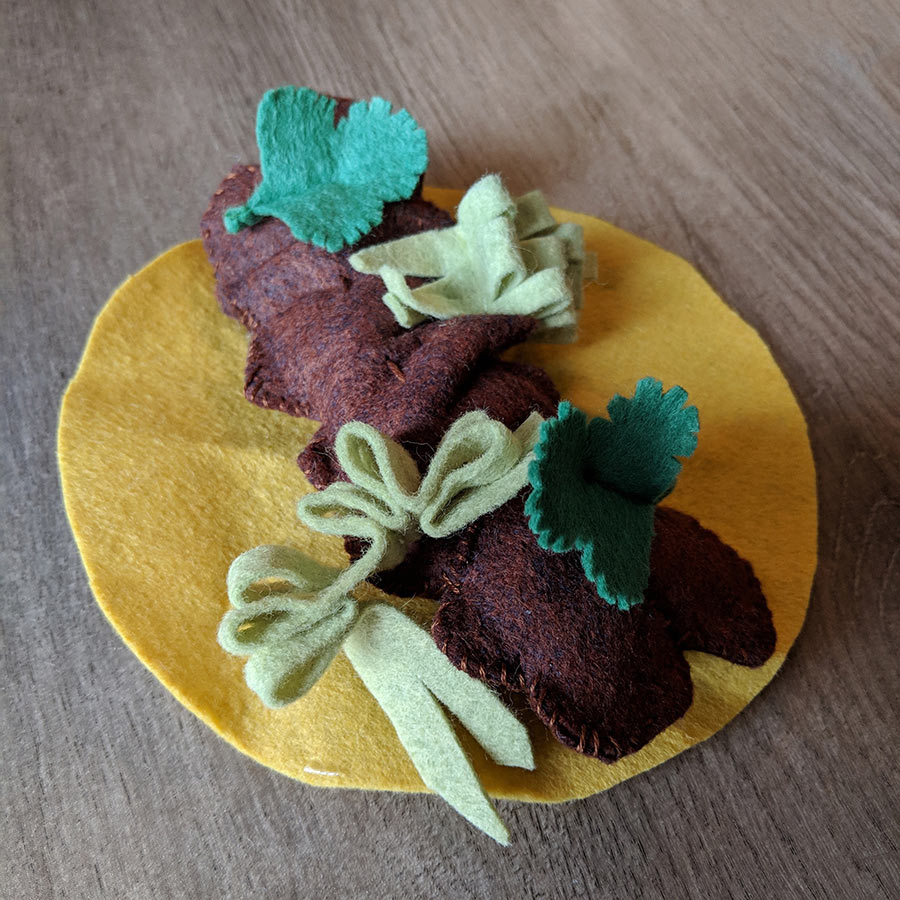
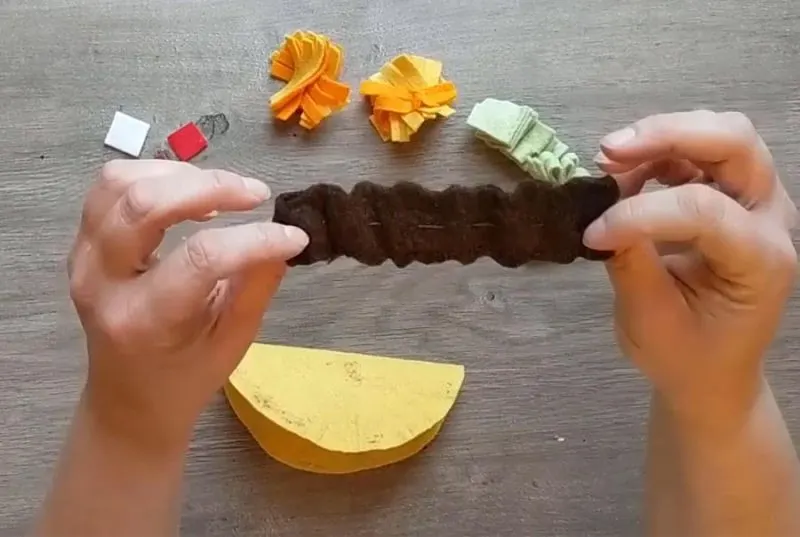
In the photo above you can see all the ingredients in our taco dinner set
The most important part of making taco fillings is getting the color just right. For this project, we used brown acrylic felt.
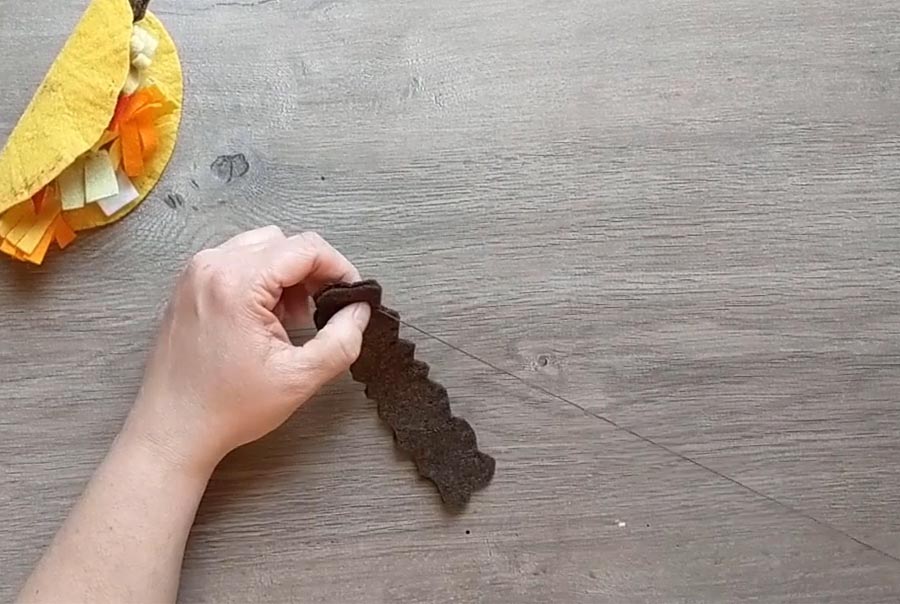
Sewing the Taco Meat
To make the meat I begin with two identical strips of felt- 2 rectangles cut about 7″ by 2.3″, with jagged and scalloped edges.
To start stitching, just quickly start stitching a running stitch along the edge and basically just making a tube. We’ll gather and fill this tube, for texture, but for now, just stitch the short edge and one of the long sides.

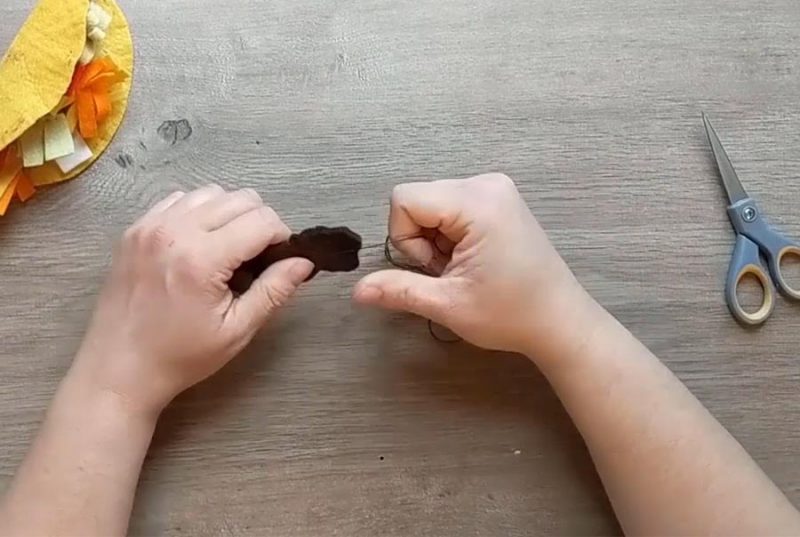
When 3/4ths of the tube is stitched, pause and add just a little bit of stuffing. You don’t want it to be overfilled, but you can just insert some felt scraps to give it a little dimension, and then keep stitching, completing the circle joining the two sides together.
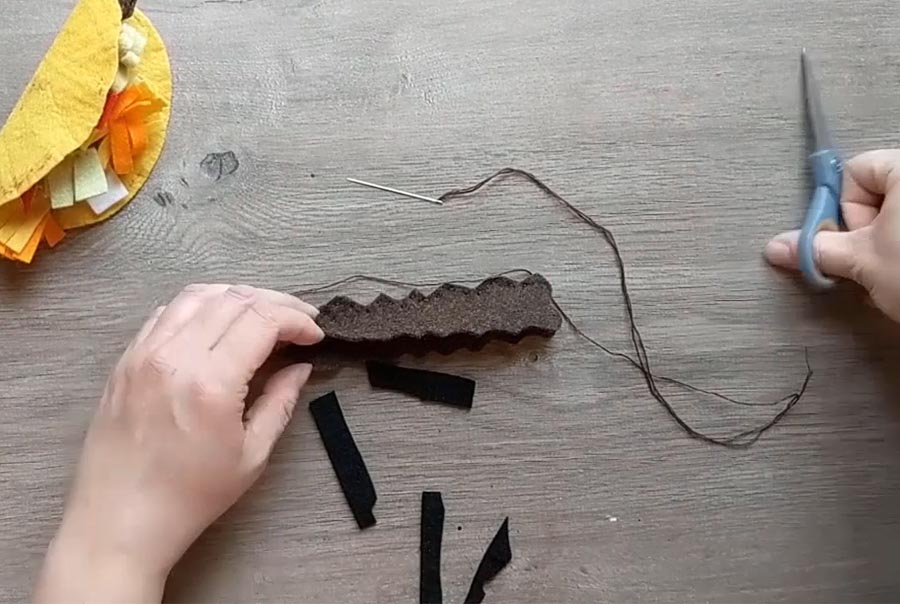

Next, we want to gather the fabric a bit to add texture. If you are using a heathered/variegated shade of felt you’ll already have a lot of dimensions just from the depth of the color shading, but adding a 3-D effect with gathering makes a huge difference as well.
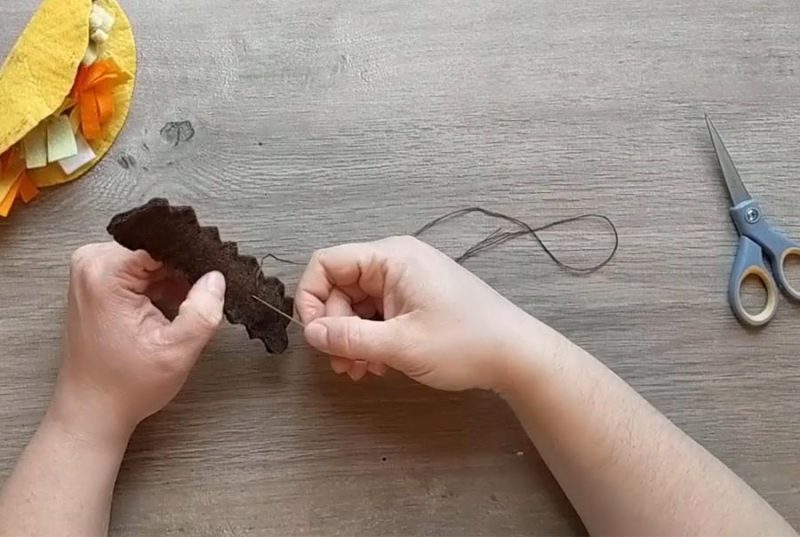


Once “taco meat” tube (yes, I know it looks like poop. 😂) is stitched, use strong thread (or multiple strands of embroidery thread as shown here) to add a long running stitch down the length.
Gather the stitch for the fabric is slightly bunched, and then tie the thread off. The bunched up fabric won’t be able to lay flat, so the texture adds some fun, some dimensionality, and some realism.
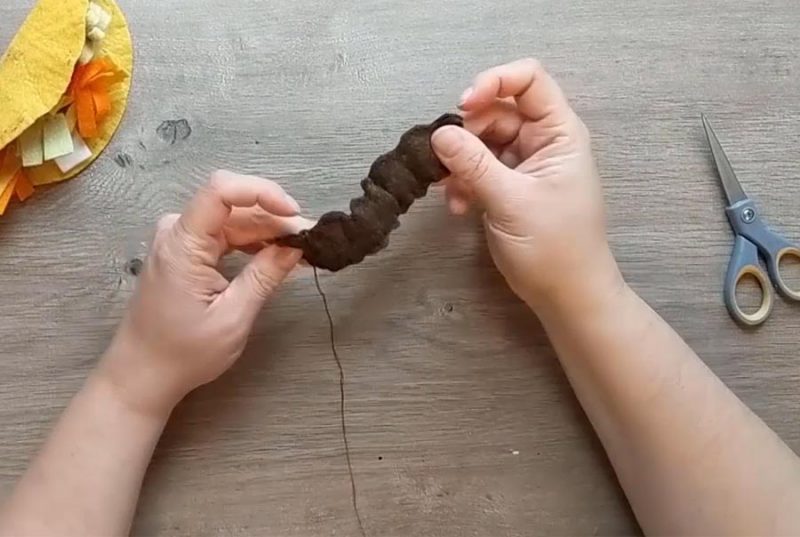
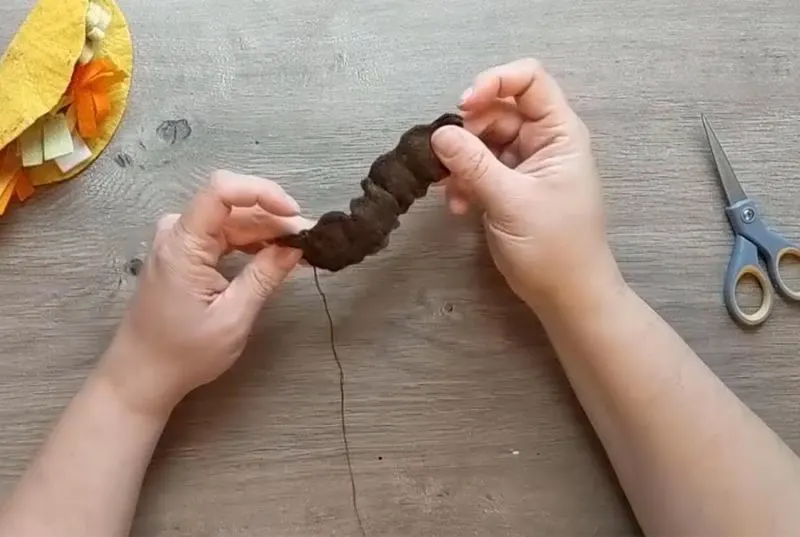
Repeat that stitch-and-gather on both sides. If you just do it on one side, the felt curls over, but if you repeat on both sides the tube should lie flat, but textured.
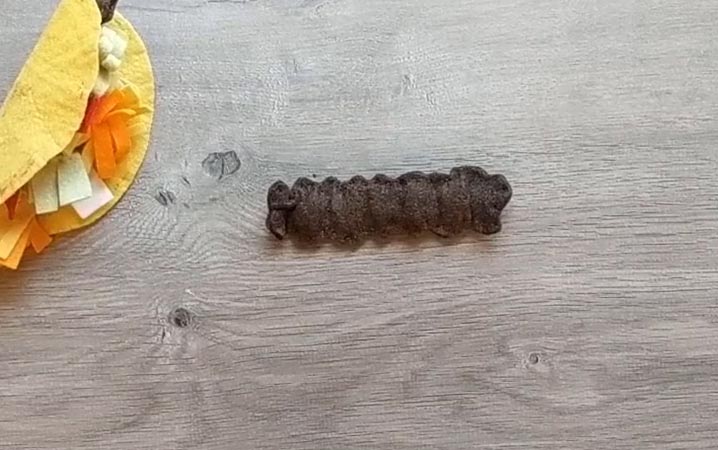
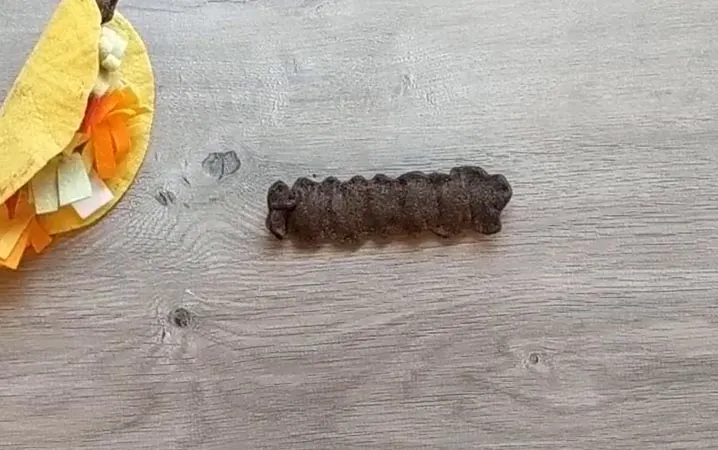
Once the gathers are finished, tie off your thread, trim, and you have a perfect little taco filling to pair with a felt taco shell for your felt taco playset
Loved it? Pin the image below!
Want more free tutorials and felt food patterns? Like, comment, and pin an image to help us create more quality tutorials and free patterns.

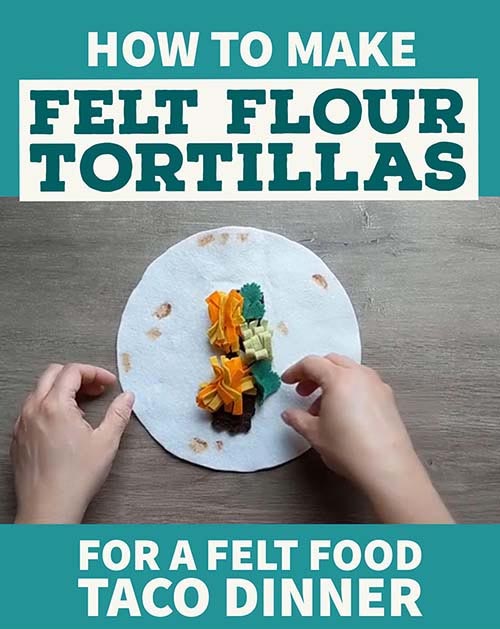
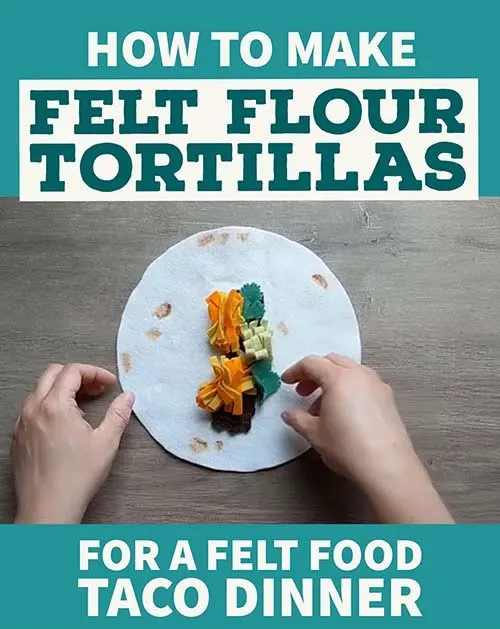
Creating Realistic Felt Flour Tortillas for Soft Felt Tacos

In a Hurry?
Click Here to Skip to the Video Tutorial
Our felt crunchy taco shell tutorial – which uses a variation of this tutorial plus a dimensional sculpting method – is one of our most popular tutorials. Today, I want to show you how to use a very similar method to create realistic looking felt flour tortillas. These felt food items are perfect for kid’s play kitchens and for facilitating open-ended play.
What is Open Ended Play?
While much of children’s play is “scripted” (for example, board/video games, branded/character merchandise, or any play where the goal is imitation) Open-ended play allows children to create and imagine freely.
Open-ended play is incredibly important for psychological development and for growing the skills young kids need in order to be able to develop into young people able to work out and manage their experience in the world.
For many children, food can be a place of conflict between parent and child. Often, children feel powerless at mealtime, and conflict can arise from how power and control are navigated at the dinner table.
One reason we love making these felt food tutorials is the specific kind of play felt food facilitates. In a play kitchen, a child gets to be in charge and work out some of the conflict around food.
When a child prepares a meal in their play kitchen and passes a plate to an adult to “eat” while they watch, the child is both playing and doing important work on to process their own experiences around food, eating, and meals.
Building our Felt Taco Flour Tortilla
For this felt flour tortilla, the most important thing is starting with a good sheet of felt. If your felt is too thin, you’ll need to double up layers and add stitching to get a tortilla-like material. Too thick, and your tortilla won’t bend well (so avoid 100% wool felt for this particular project).
We like White or Angel Wings from our 35% wool blend felt for this project, or our acrylic felt for the softness it brings. In acrylic felt, Ivory and Cream are both ideal color choices.
If your colors are complementary, creating multiples of a felt food project with slightly different colors can create a very realistic effect – just like you’d see in a grocery store market.
Begin by laying out your white felt and using a pattern to draw a tortilla-sized circle. I used a salad plate in the images included here. Use a fabric marking pen* to trace the circle onto your felt (once cut, the ink removes completely by blotting the marks with a damp towel).

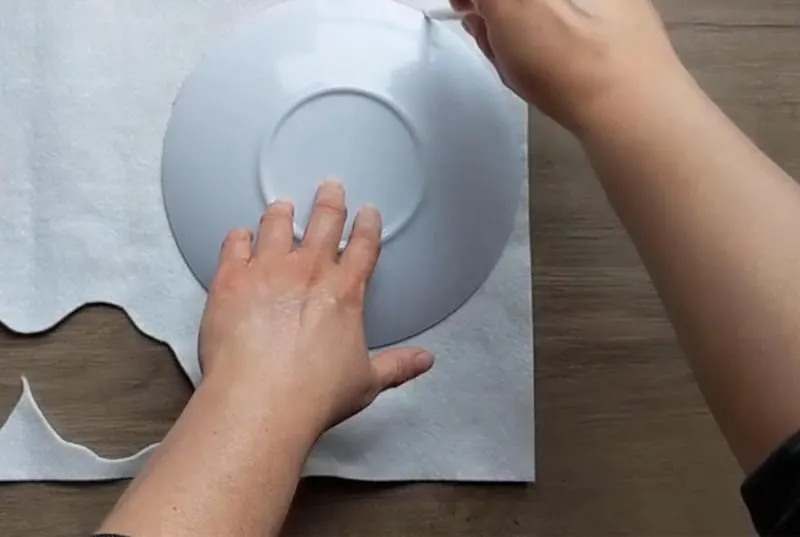
Once you’ve transferred your circles and shaped to your felt, simply cut the circle out of the felt. I like to work one at a time to get good circles, but if you have a rotary cutter you can cut several layers at once.
Here’s where my tutorial differs a bit from other folks: we’re going to use an alcohol-based ink to create the color variation that results from the cooking process on actual tortillas.
In this tutorial, I am using Copic markers in colors E55 and E57*. Copic Markers are an artist’s brand of alcohol-based markers that allow me to have a lot of options for colors and shading.
Any alcohol-based marker should work for this tutorial – even a brown sharpie. To create variation in the coloring, you’ll need multiple shades of brown. Stick with alcohol-based ink markers, since they won’t bleed if they get wet.

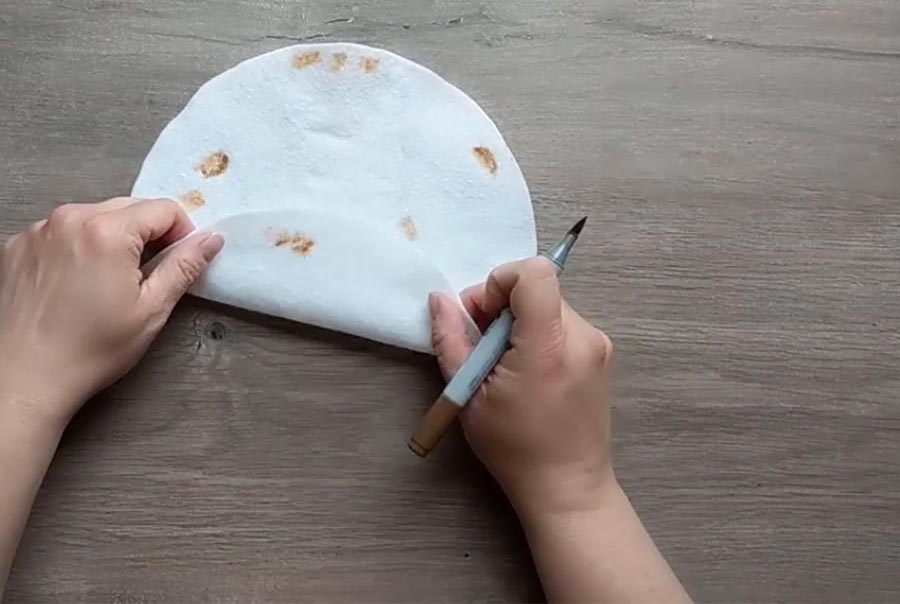
I begin by just randomly coloring a few spots in varying sizes of marks with a light brown marker. You might wish to use Google to look at images of actual flour tortillas to help re-create a natural look.

Once I create a pattern I like with the caramel brown color, I follow with a walnut brown shade, and just add the darker brown to one side of each light brown spot. This helps create the natural variation you would see on tortillas cooked on a griddle.

Once I’m done with the first side, I flip the tortilla over and
do the whole process over again.
IMPORTANT: Felt is not totally opaque, and alcohol inks sometimes bleed- for this reason, it is important to match the marks on both sides. Do this by holding the material up to a light source or just flipping it back and forth.


Your alcohol ink will take just a minute or two to dry, and once dry your felt flour tortilla is ready for play! Use it for a felt taco playset, breakfast burritos, quesadillas, and more!

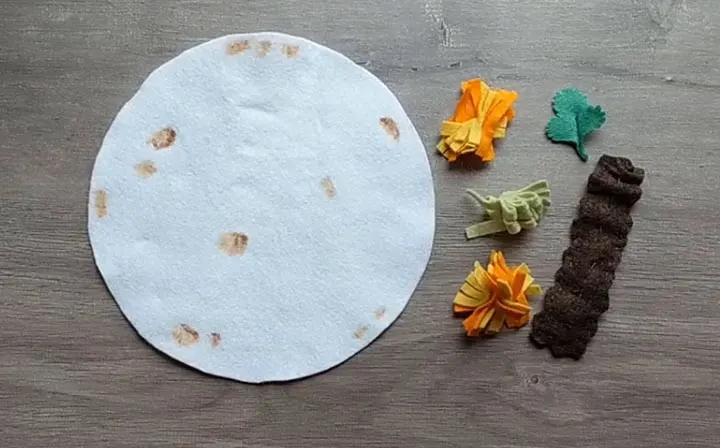
HINT: using a similar disc of light yellow felt with light brown cooking marks, makes for a fun base for a custom-built felt omelet.
Loved it? Pin the image below!
Want more free tutorials and felt food patterns? Comment and share to help us create more quality tutorials and free patterns!
Thanks for Reading!!!
I hope you can tell that I love DIY, researching the best affordable solutions for every-day problems opportunities and documenting / sharing solutions!🙌 Hawk-Hill.com is reader-supported.
☕ Hawk-Hill.com is reader-supported. If this article saved you time or money, please consider donating $1 to help me cover the cost of hosting this website OR If you appreciate this information and want to throw a “Thanks!” my way by buying me a coffee – I would Of Course appreciate it! :]
Reader Questions and Recommendations
Readers, do you have any favorite topics / posts? What would you like to read more about in the future? As I hope you can tell from this and other articles on my site, I really enjoy DIY / a good challenge, and I’m not afraid to roll up my sleeves to figure out a great, and hopefully simple 😁 solution. So please feel free to let me know in the comments below (or reach out via social media)!
Ok Really – I’ll try to wrap this up now😂
Finally, if you’d like to continue to learn about interesting DIY options as well as how YOU can tackle creative new projects consider checking out the latest and most popular articles listed on the Hawk-Hill Home Page. I’m always trying to enjoy and write about the creative side of life so please don’t be a stranger – check back often!😍
If you enjoyed this post you may also enjoy reading / perusing / devouring😊 one or all of these articles as well!