
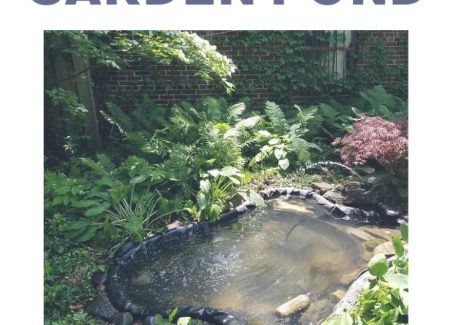
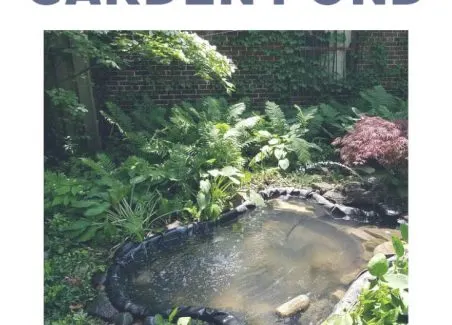

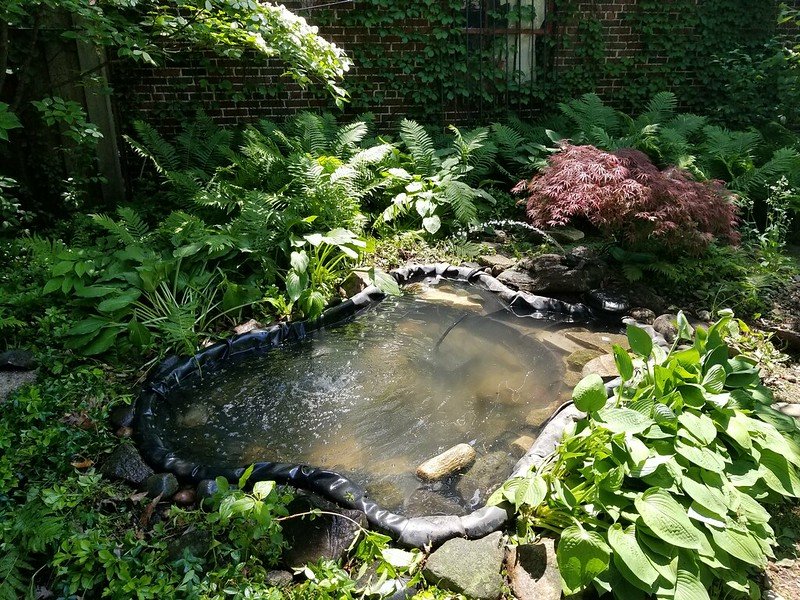
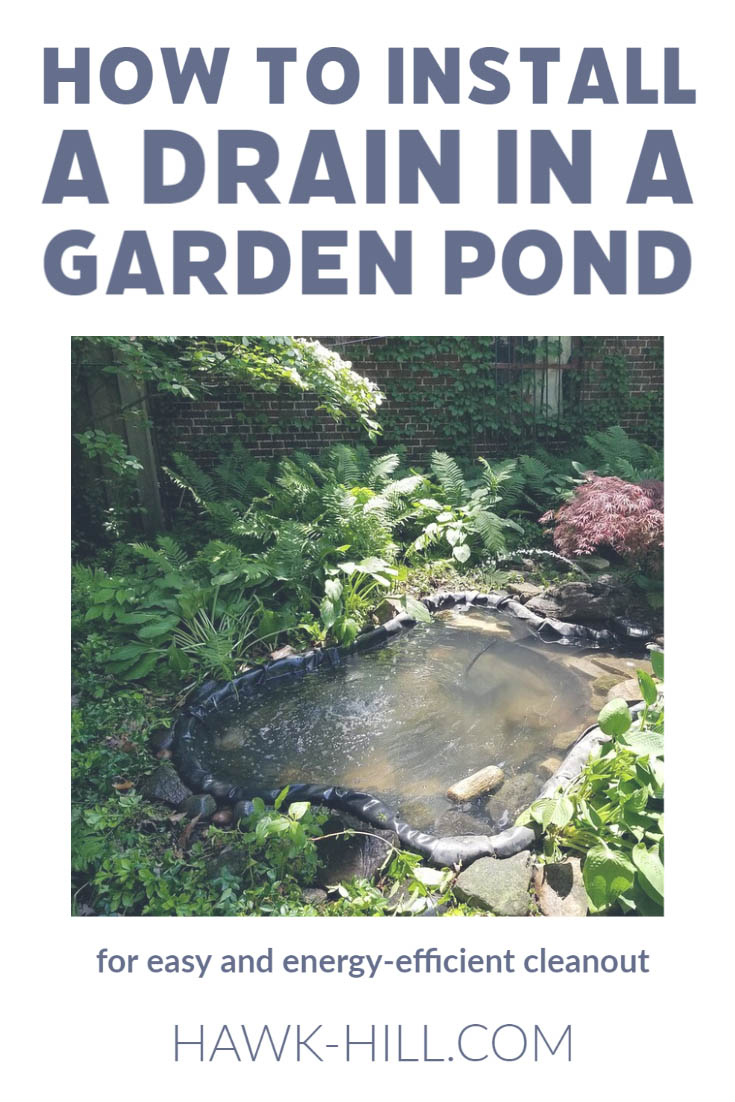
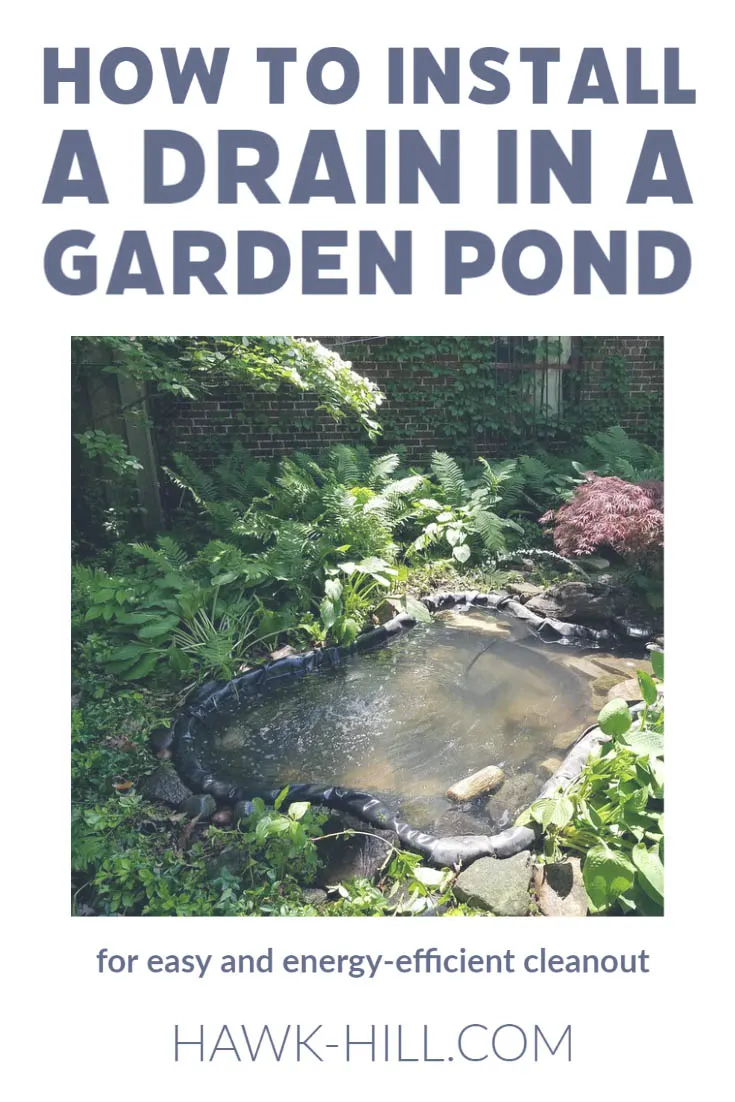
One of the most frequently asked questions I am asked about my above ground pond is how it is cleaned out. This is often framed as negative feedback- which always surprises me since-having had both styles of garden pond, I know my above-ground pond is much easier to clean than the in-ground ponds I have had in the past.
With in-ground garden ponds, the only choice for cleaning out is a pump-out: an electric pump is placed in the lowest point of the pond, and water is pumped out. The problem with this method is that if you have a lot of sludge in the bottom of your pond (typical for ponds left open over the winter or ponds that have been in place for a while) that sludge can’t go through the pump. Instead, once the clean water is pumped out you must manually stoop and scoop with buckets or shovels to remove the remaining sludge from the bottom of the pond.

On the other hand, ponds with full port drains (i.e. drains that have a wide-open passage when in the “open” position) make ponds are really easy to clean. With a good drain and gravity on your side, you can do a complete pond cleaning with no manual labor!
To add a gravity drain to your above ground pond or in-ground garden pond requires just one small modification: cutting, inserting, and waterproofing a drain on your pond liner. I’ll admit that it’s intimidating to cut a hole in an expensive pond liner, but I promise if you use the right supplies and cut conservatively, you’ll have a leak-free pond that’s so much easier to keep clean.
The following section may contain affiliate links. As an Amazon Associate, we earn from qualifying purchases.
How to install a full port drain in your garden pond liner:
[this tutorial works for soft-sided or rigid pre-molded plastic ponds and works for ponds built above ground and those that sit in the ground]Parts Required:
- A full port drain/spigot designed for converting plastic drums to rain barrels.
- A small sheet of Rubber (For DIY rubber gaskets)
- 2 Fender washers
- Teflon Tape
- Silicone Caulk
recommended pond clean out essentials:
1. Locate the Lowest Point of your Pond Liner
With your pond dry and drained, add about a gallon of water to the pond and watch it. Where does it go? Where ever the water drains to is the lowest point of your pond.
If there’s no obvious lowest point you can lift and dig out the dirt a bit in one corner and allow the pond liner to settle back in that spot. For hard molded ponds you’ll need to prop up the opposing corner slightly, but soft pond liners will settle over natural topography – making them so much easier to install and install a drain on. Once you’ve located the lowest point of your pond make a note (I made my mark with a silver sharpie on the black liner) and move on to step two.

Unless your yard has been commercially graded to be totally level, your above-ground pond will probably have high and low areas. If you wait until a test fill to place a drain, the water will tell you what the lowest part of the pond is. Pick a corner or edge near the lowest spot, dig a very small hole so you can access the underside (you shouldn’t need to dig a hole any larger than 6x6x6), poke a hole in the liner to drain that lingering water out, and enlarge that hole to install your drain.
2. Acquire parts
Before you ever cut through your pond liner, gather, test, and make sure all your parts fit together. You’ll need a full port drain/spigot. The one I’ve linked is designed for converting plastic drums to rain barrels and adapts with only minor modifications to being a perfect pond drain that works with soft and hard pond liners.
3. Cut a hole in your liner to fit the parts you purchased
This part is a little scary- at least, it was for me- but it is necessary to get a good drain:
Find the spot you marked previously and cut a hole to fit the stem of the drain you purchased. If you’re working with a soft-sided pond liner, make sure that the hole you cut is a fractionally smaller than the actual recommended opening for the drain you selected. Most soft pond liners have some degree of stretch and that’s a good thing – stretching the pond liner opening around the drain will help keep the drain waterproof when closed (Just be sure that you don’t cut the hole too small – any material that folds over or crinkles is an opportunity for a leak)
SOFT LINER INSTRUCTIONS:
If you’re cutting a soft rubber pond liner, use a small X-Acto knife or a tiny pair of scissors. Don’t get carried away with box cutters or full size scissors or you may get caught with a problem you can’t fix.
HARD LINER INSTRUCTIONS:
For rigid molded ponds, you’ll need a bit heavier cutting equipment. A hole small is one effective option. Careful work with a regular drill bit followed by a small hacksaw is also a safe way to put a hole in the right size in your pond liner


4. Insert hardware
For all drains of this type, there’s a portion that inserts through the hole from the outside and a portion that screws down from the inside, tightening them together creates the waterproof seal. But tightening them together with extra waterproofing between them creates an even better seal.
Because many gallons of water will be pressing down on the drain, we want to give it extra resistance to leaks.
I do this by placing a rubber washer (I had to make my own with sheet rubber since my hardware store did not carry wide rubber washers) on either side of the hole that I cut, placing a Fender washer on top of each of the rubber washers, and then placing and tightening the rain barrel drain, being sure to line the threads with Teflon Tape, adding a bit of silicone caulk in between the washers and around the cut edge of the liner for good measure, and tightening the threads with a bit extra muscle by holding each side with channel locks (or strong pliers) and giving it an extra quarter turn or so.

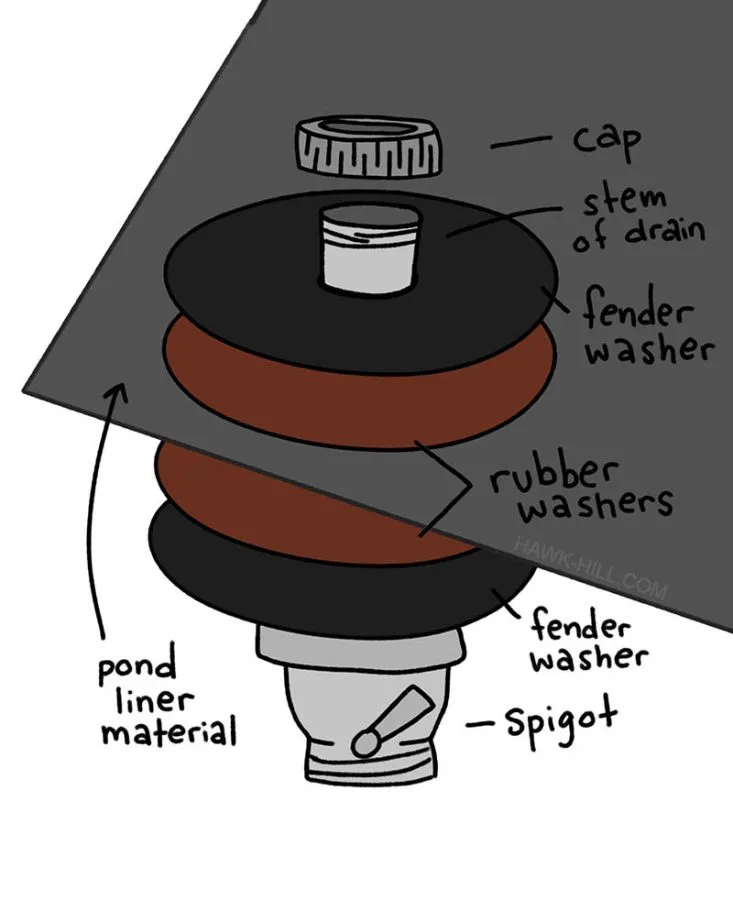
ALL of these parts and precautions are probably more than is absolutely necessary to waterproof the pond, but pond leaks are a real bear to deal with so it’s better to be safe than sorry by pulling out all the stops and waterproofing at every chance you get.
5. Cap drain, Let glue/silicone cure, and test
If you used silicone you want to give it at least a few hours to cure (interestingly, though, you don’t have to wait 24 hours – in fact when I started making silicone molds I learned that water makes silicone cure faster).
Attach any extra fittings or hoses to your new drain. I like the drain recommended because it has a built-in on-off valve, but if you chose a drain without this feature that will be the first thing you want to add. The drain recommended above includes garden hose sized thread on the outside, making it easy to direct your outlet flow.
6. Letting gravity do the work: draining your pond
Now, with a gravity drain at the lowest point, your pond will be incredibly easy to clean.
By attaching a hose to your pond drain you can direct the old pond water anywhere you want – as long as it’s downhill. My vegetable garden absolutely loves being watered with pond water overflow. If you don’t want the water in your yard, just connect enough hoses to reach the closest gutter or storm drain.
Now, all you need to do is open the drain and let the water’s own movement clear the dirty water and sludge. Using a broom to sweep the bottom of your pond while the water drains is a great way to make sure all of the sludge is carried away. If any sludge remains after all the water clears, just spray it out and flush the pond again.
How often should I clean my garden pond?
This depends on lots of factors. When I – briefly– kept ducks in mine, I needed to flush my 10′ x 10′ pond at least weekly. Later in the life of the same pond, when I had a UV-light filter installed, healthy aquatic plants growing, lots of moving water, and a few happy little goldfish, I had a near-stable little ecosystem that could last the better part of a year without major cleaning. All it needed was a bit of skimming here and there to remove leaves or debris that had fallen in the pond.
When you clean your pond, you don’t necessarily need to fully drain it and sanitize it all the way to the liner. For most ponds, a half drain and refill every 2 to 3 months will keep it fresh.
NOTE: If you’re using your garden pond to keep koi fish, grow lotus flowers, or garden watercress, you may want to use a clean water filtration system to make sure the water you are using is safe and balanced for success.
Recommendations to Keep Ponds Clean & Fresh:

I could recommend all sorts of ways to clean your pond, but the best way to save time cleaning is to invest in pond management methods that are low maintenance and self-sustaining. Here are my best low-maintenance maintenance tips:
- Install UV filter (This is my absolute top recommendation: it completely kills all algae and sanitizes naturally)
- Keep water moving (moving water gets oxygenated, which helps keep ponds fresh. It also prevents insects like mosquitoes from being able to breed in the water.)
- Grow plants (plants capture and feed off nutrients floating around in the water. Grow a root-dense aquatic plant, such as watercress, in your waterfalls or fountains for maximum filtering benefits).
- Goldfish (some pond owners say goldfish are a toss-up between the benefits of eating bugs and organic debris and the drawbacks of the nitrogen in fish waste. In my experience, a small number of goldfish in a large amount of water didn’t have a positive or negative effect on water quality, but definitely made my pond more fun!)
- Balance sunshine and shade (ponds in full sun will deal with more algae growth, while ponds under the shade of trees will have water quality impacted by whatever drops from the branches of the tree above. If you can’t move your pond- consider the addition of plants, an awning, or a rock ledge overhang that could shade a portion of the pond)
As you can tell from these tips, there are lots of ways to keep your pond clean, and to effectively clean both aboveground and in-ground garden ponds. With good maintenance, your above ground pond will not need to be drained or cleaned more than once a year, and with a watertight drain installed, you’ll be able to clean your pond with the use of gravity alone.
Thanks for Reading!!!
I hope you can tell that I love DIY, researching the best affordable solutions for every-day problems opportunities and documenting / sharing solutions!🙌 Hawk-Hill.com is reader-supported.
☕ Hawk-Hill.com is reader-supported. If this article saved you time or money, please consider donating $1 to help me cover the cost of hosting this website OR If you appreciate this information and want to throw a “Thanks!” my way by buying me a coffee – I would Of Course appreciate it! :]
Reader Questions and Recommendations
Readers, do you have any favorite topics / posts? What would you like to read more about in the future? As I hope you can tell from this and other articles on my site, I really enjoy DIY / a good challenge, and I’m not afraid to roll up my sleeves to figure out a great, and hopefully simple 😁 solution. So please feel free to let me know in the comments below (or reach out via social media)!
Ok Really – I’ll try to wrap this up now😂
Finally, if you’d like to continue to learn about interesting DIY options as well as how YOU can tackle creative new projects consider checking out the latest and most popular articles listed on the Hawk-Hill Home Page. I’m always trying to enjoy and write about the creative side of life so please don’t be a stranger – check back often!😍
If you enjoyed this post you may also enjoy reading / perusing / devouring😊 one or all of these articles as well!
Meaghan
Saturday 11th of March 2023
Hello! Could you add a photo of the drain and where it is placed while the pond is filled? I just cannot envision it! I have all the materials and want to get started right away. And thank you!
Russ
Tuesday 15th of June 2021
OK, I didn't read this thoroughly...just wanted some ideas. But how do you reach a valve that's under the lowest point of a pond to open it?
Julie
Friday 5th of May 2023
@Lindsayanne Brenner, I read through it thoroughly and still didn't find a clear answer to their question. I am also wondering this. Would you be willing to elaborate?
Lindsayanne Brenner
Tuesday 15th of June 2021
I hope you felt inspired by your quick read! If you go back through and read carefully, you'll find the answer to your question in the section on drains. :-)