

What do you do after you make sea glass? Craft with it! In this article, I’ve collected two full-length free tutorials for making dramatic sea glass lights using found or manufactured Sea Glass. In Part 1, we’ll make a pendant light perfect for dramatic lighting in kitchen and dining areas, in Part 2, written by my friend Jen Whittaker, we’ll construct a Sea Glass lamp that’s perfect for kid’s night lights or a bedside nightstand lamp.
[ Jump to Tutorial for Making a Pendant Style Sea Glass Light
OR
Jump to Tutorial for Making an Ambient Sea Glass Lamp ]
One of my most popular posts on Hawk Hill is my tutorial on making your own tumbled sea glass using a rock tumbler. I love seeing the projects people are creating using the glass produced with the described in the tutorial. From vase filler to aquarium decoration and all kinds of beach-inspired crafts, it’s fun to follow the comments and the images I’m tagged in on Pinterest as people create using this method.
Today, I want to show you one of the projects I’ve made using faux-sea glass from my own tumbler. For a while, I was actually integrating tumbled glass into my resin and acrylic art pieces, but this is a more traditional DIY – I’m breaking out the good old hot glue gun and having a blast!
The following section may contain affiliate links. As an Amazon Associate, we earn from qualifying purchases.
How to Make a Pendant Light with Sea Glass
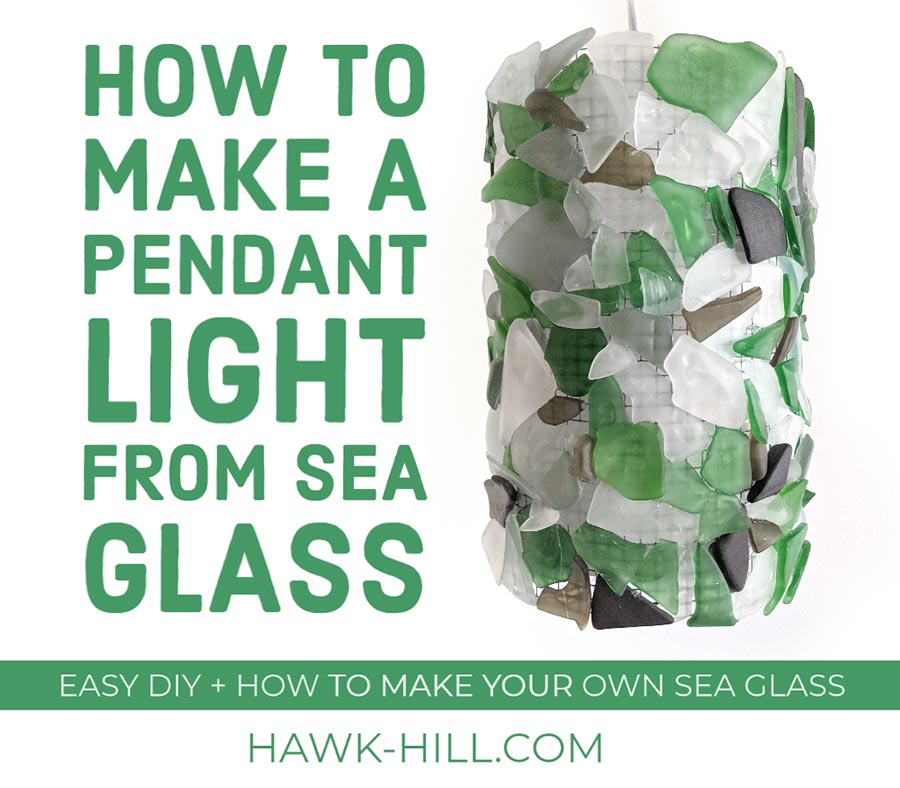

I can’t totally take the credit for this idea for a sea glass pendant light- I first spotted something similar at a sushi restaurant in downtown Seattle, and the rest is history. I experimented a little and worked out my own method for making a lamp or light that filters through a cylinder covered with tumbled sea glass gems.
These instructions are for a pendant light, but you can also convert my method shown in my Tripod to Floor Lamp conversion to create a floor lamp version of this light. The thing I love about this light is that it is lovely to look at whether it’s switched on and illuminated or turned off. A single light is great for illuminating a dark corner, but a few of these could be perfect lighting for a sunny beach house kitchen or a beach-inspired washroom.
Supplies you’ll need
- tumbled recycled glass or beach-combed sea glass – thin pieces work best for this project
- hot glue for a “pretty good” hold, or quickset epoxy (you’ll need a multi-pack) for an even more secure hold (I recommend the epoxy the light will be placed over people’s heads, or if it may be bumped frequently after it is mounted, OR if you don’t have thin glass and will be using thicker, heavier pieces. The hot glue works but takes a lot of glue to get it to about 97.5% secure)
- hardware cloth or sturdy wire mesh – 1/4″ – 1/2″ inch grid width works best. You may wish to spray paint white with an enamel based paint to reduce the show-through of dark metal wires.
- A light socket with cord (just like we used in the vintage tripod to floor lamp DIY)
- medium gauge wire
TOOLS:
- hot glue gun
- protective gloves (I like my Simply Mud gloves)
- needle nose pliers
- (OPTIONAL) a basic soldering kit (below, I use a dirt-cheap $10 soldering gun kit. It’s inelegant, but gets the job done and is hands down the best way to secure metal to metal)
For the full tutorial keep reading, but here’s a quick video overview:
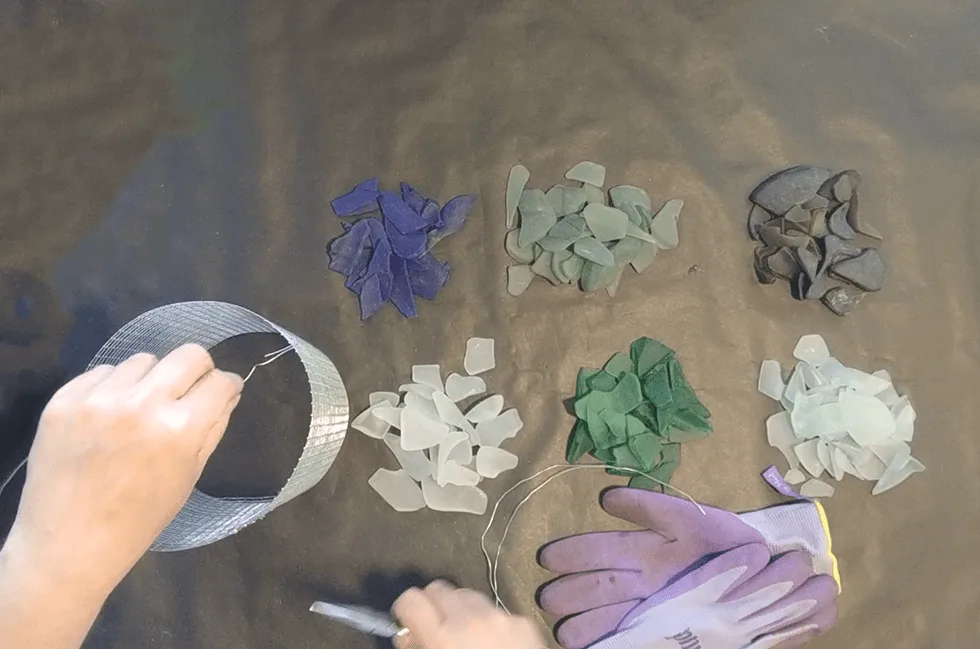
To begin, cut hardware cloth, roll, and secure in a cylinder shape
Visualizing the typical size of a pendant light fixture, choose your light size, and cut your hardware cloth to size. Remember that hardware cloth covered with Sea glass will make it about 5% bigger in circumference, and also keep in mind that the glass adds quite a bit of weight. Keeping it a bit on the small side will help make it easier to handle and to hang.

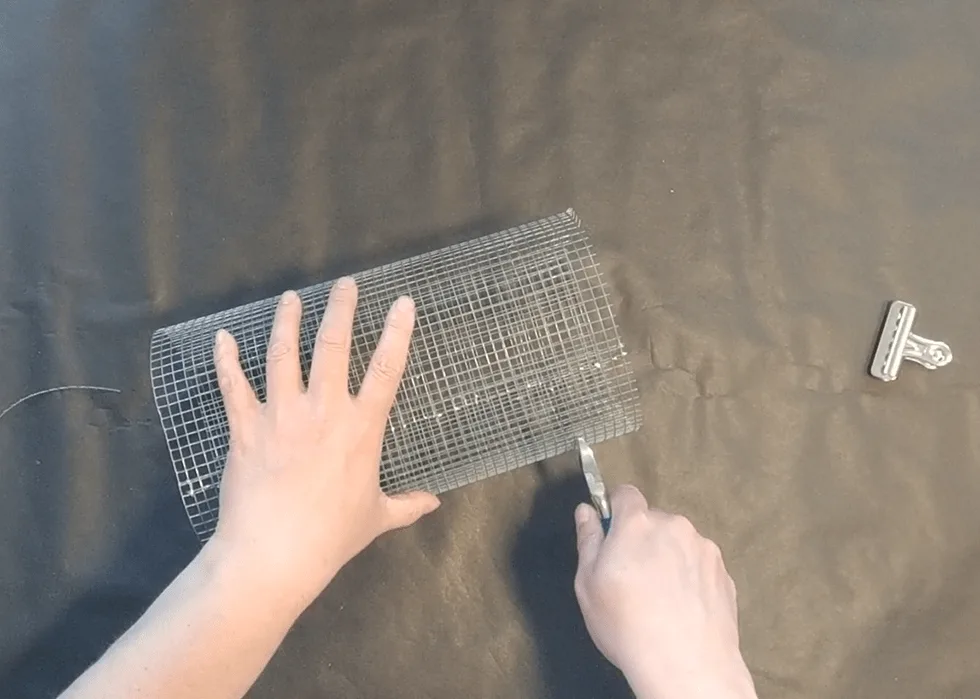
Once cut, roll your hardware cloth into a cylinder. You will need to secure the wire so that it doesn’t unroll during the next steps. There are two ways to do this:
By folding wire:

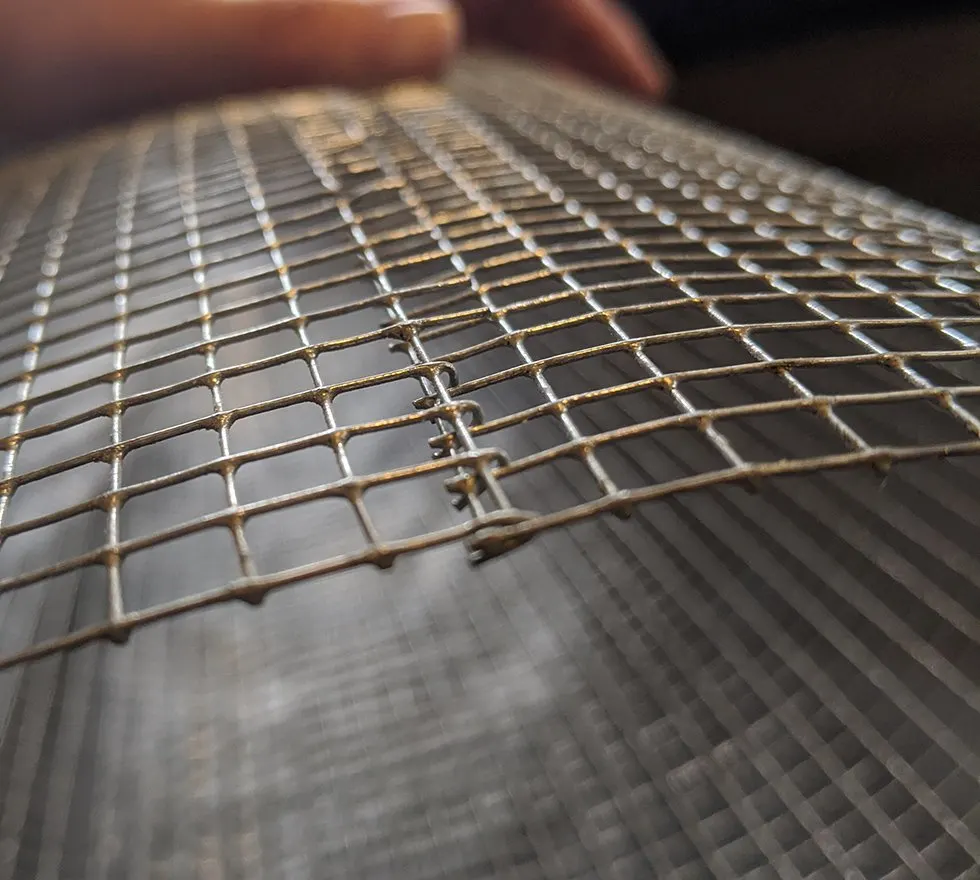
To secure the cylinder by folding, cut the squares so that straight, exposed wires are left at their longest length. Bend those wires down and insert them into the squares of the opposite edge of hardware cloth. Using needle-nose pliers, fold each of those wires in and back upon itself, forming a secure link between the two edges.
or by soldering:

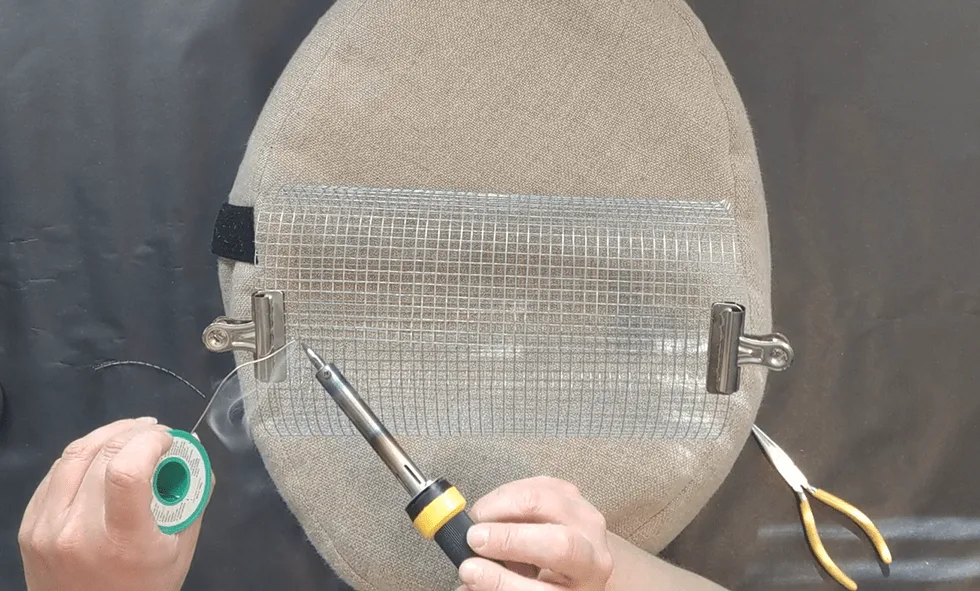
The bending method above can create a cylinder that is just slightly not-quite cylindrical. Basic soldering can secure the wire cylinder faster and with a more even curve.
Note: soldiering can be dangerous, potentially causing burns, fires, or noxious fumes. Before attempting to soldier, take a class or consult an expert guide and be sure to follow all safety precautions and use appropriate safety gear.
If you’re like me, soldering probably sounds a little bit intimidating even if you’ve already got some basic tool know-how and DIY prowess. I promise, learning basic soldering was so much easier than I thought it would be! And starter kits are cheaper than a can of good spray paint. With a cheap little kit that I bought (linked above), I’ve been able to repair headphone cables, splice electrical cords, and, like in this project, join two pieces of metal for crafting. Soldering kind of works like a glue that joins metal, but instead of glue it uses metal with a very low molten point.
Whichever method you choose, once your cylinder is sturdy, you can start adding sea glass.
Step two: place wires for the fixture

Before jumping into adding the sea glass baubles all over the soon-to-be pendant light, take a minute to cut three links of wire, bend them in on themselves at each end, and affix them at three-points evenly placed around the cylinder. The wires should extend inside and will be the anchors for attaching the light socket later in this tutorial. For now, just tuck them inside the cylinder and keep moving.
Step 3: affixing Sea glass to your pendant light frame
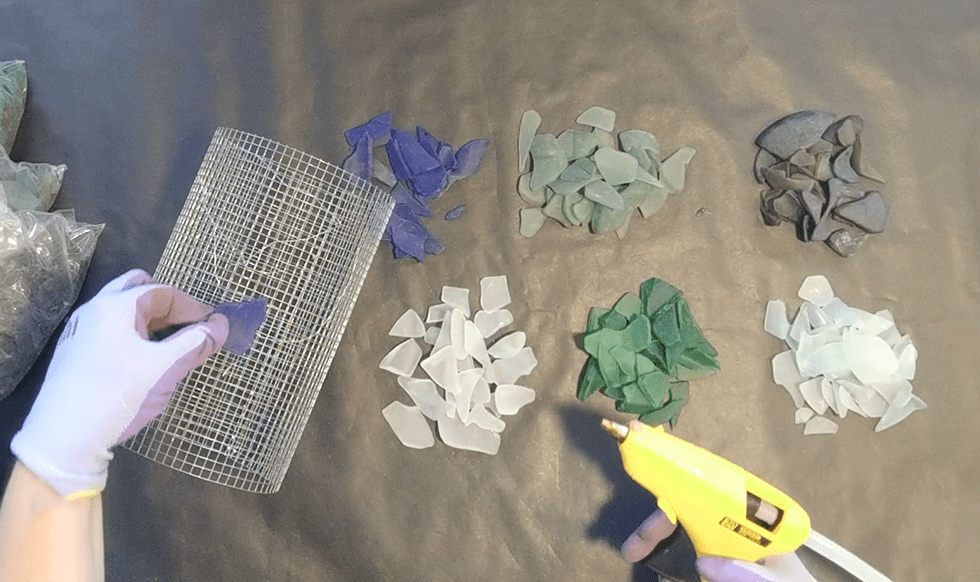

Honestly, it’s not the easiest thing to attach relatively heavy glass to an extremely porous surface like wire mesh. Be prepared for drips (which eventually, as they drip onto already mounted Sea glass on the opposite side, help create stability in the arrangement) and work on a protected surface. You’ll also need to protect your hands, as burning hot glue, glass, and wire are a sure recipe for burned fingers. I really like my Simply Mud gloves (linked above) because they are thick enough to protect from glue but thin enough that I can feel what I’m working on.
Whether you use hot glue or epoxy, protect your hands! The open wire mesh almost guarantees your hands will be exposed to burning hot glue or ultra-powerful epoxy adhesive.
If I did this project again, I’d probably switch from hot glue to quickset epoxy. Like hot glue, quickset epoxy has a relatively thick viscosity which makes it suitable for joining and filling the space between uneven pieces of Sea glass and thin metal wires. Quickset epoxy creates a more permanent adhesion than sea glass, especially on a surface, like Sea glass, that’s covered with tiny scrapes and gaps where the hot glue can’t reach.
Keep Gluing Glass On
Work your way around the cylinder, gluing each piece of Sea glass individually. With hot glue, it may help to place of a big glob of glue on a piece of glass and then wait 10 to 20 seconds before pressing it onto the metal frame. Adding the glass isn’t a fast process, I recommend putting on a podcast or favorite TV show as you work your way around the cylinder.

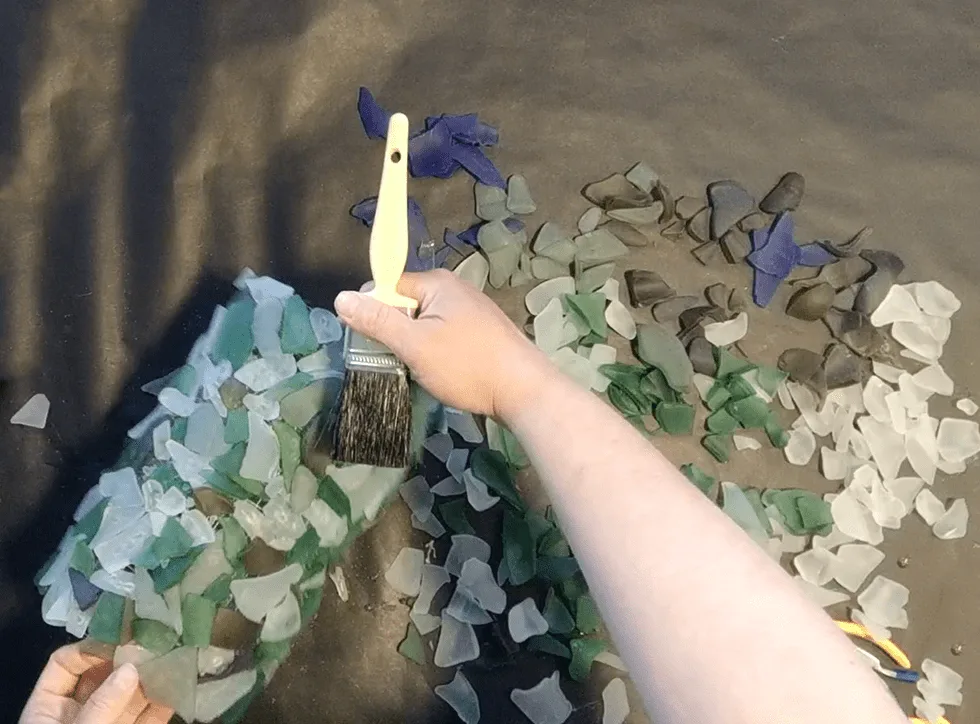
TIP: Cleanup of Hot Glue “Strings”
Hot tip on hot glue cleanup: One of the big complaints about using hot glue on a project like this is the unsightly filaments of glue that remain after the glue has cooled. My trick for removing these thin threads of glue is to take a medium-sized stiff paintbrush and briskly brush down the surface of the project I just completed. The stiff bristles collect and remove the filaments. To remove the filaments from your brush, just swirl it on a towel.

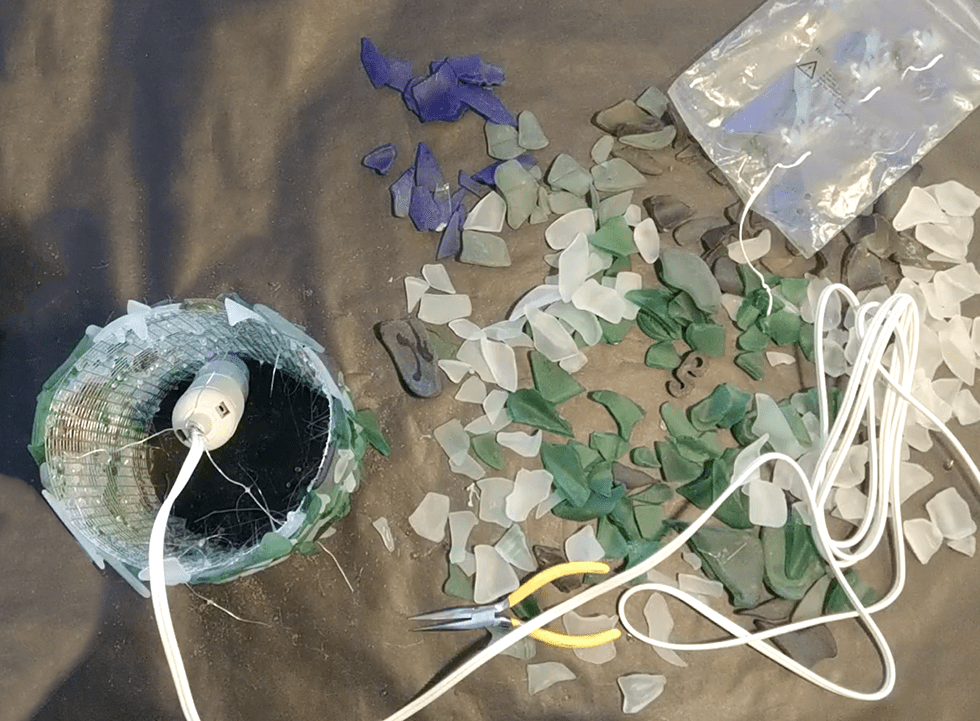
3. Affix Sea glass “shade” to the light socket
Unpackage your light socket and test with a lightbulb before you move on to the next step- just to make sure everything is working. Once you’ve confirmed that your light socket is functional, hold it in place in the center of your cylinder of sea glass and grasp the loose wires put in place and step two. One at a time, wrap each of those wires just above the base of the socket, making sure the wires are snug enough to hold the weight of the Sea glass cylinder.

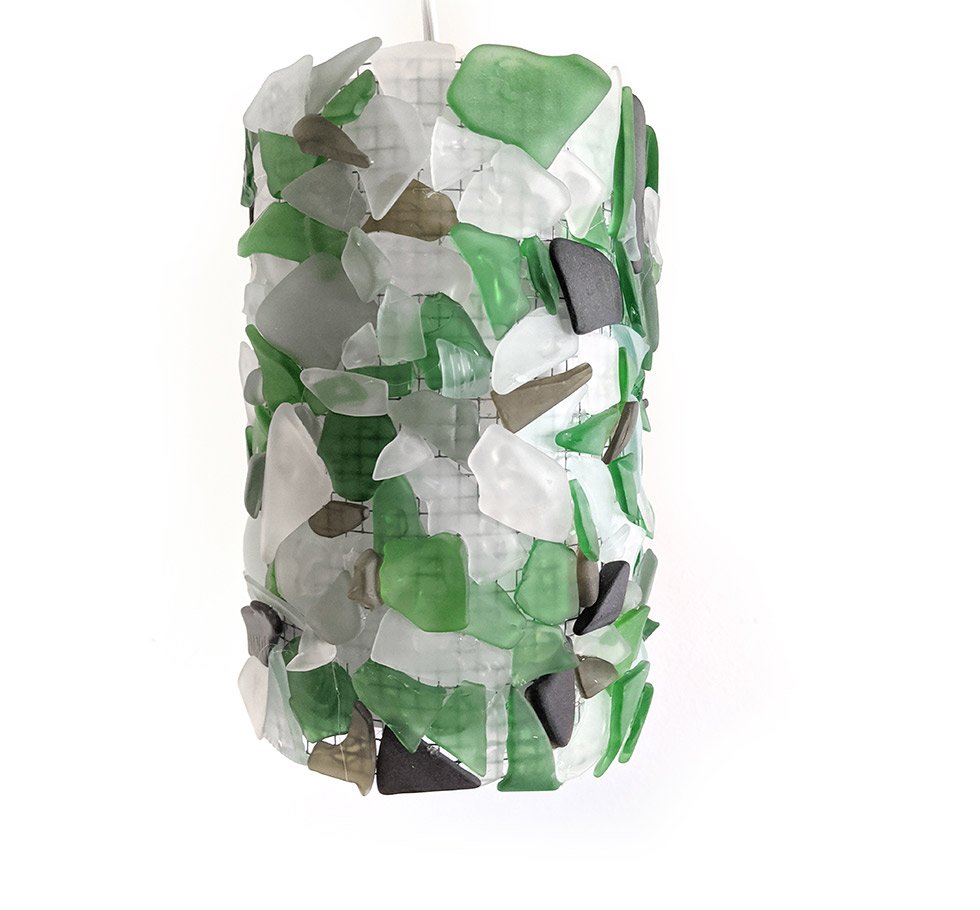
Once all three wires are secured to the base of the light socket, your light is complete! Hopefully, your light socket came with mounting hardware you can use to mount your light on the ceiling or from a bracket. If you’d like to put your new lamp on a switch, check out my article on wiring a lamp to a switch on the wall wirelessly. If you’d like to turn your news sea glass pendant light into a hardwired fixture that wires and directly to an electrical box in your ceiling, you’ll probably need to consult a licensed electrician who can install a base plate, cut the cord of your lamp, and splice it directly onto existing wiring in your home.
Finished Sea Glass Light
That’s it! Except for gluing the sea glass – which took a little over an hour – this project is incredibly fast – maybe just 5 to 10 minutes! I love my new sea glass lamp and it has me thinking of all sorts of other things I can make using the tumbled glass gems that I’ve created from recycled glass using a rock tumbler.
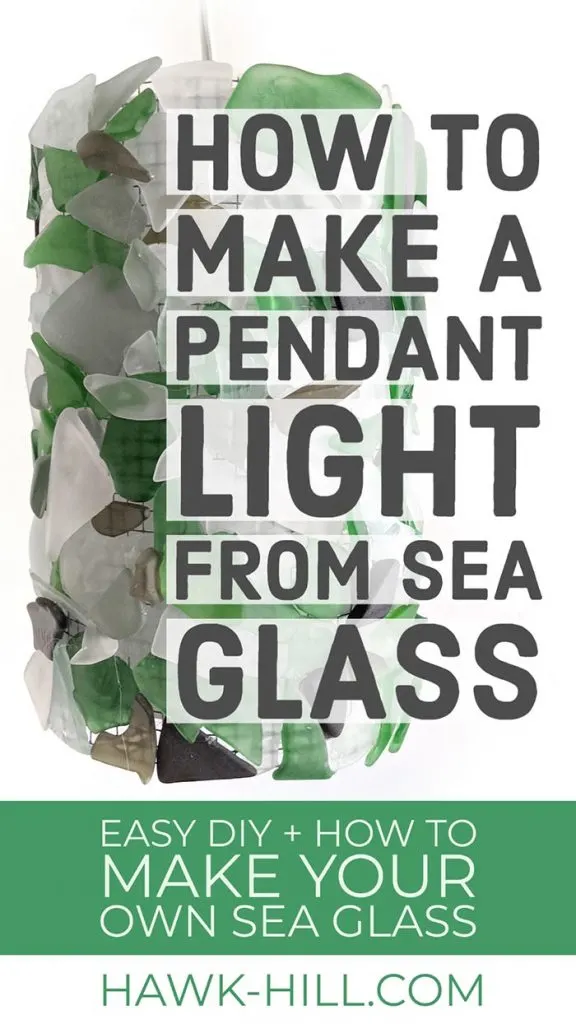
Loved it? Pin it!

Part 2: Making a Sea Glass Nightlight or Bedside Lamp

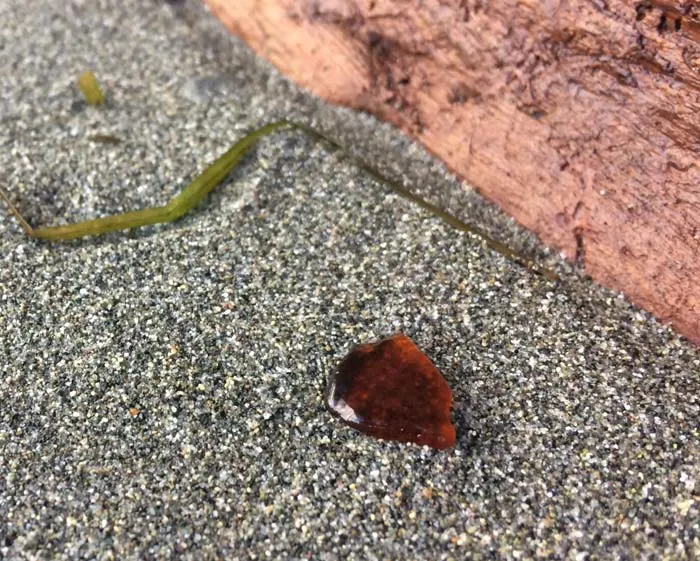
As a resident of Seattle, I’ve gotten to know the beach parks especially well, and can tell you which spots are best for gathering sea glass. A simple beach glass lamp is one use I’ve found for the countless jars full of sea glass that I’ve accumulated over the years. What follows is a tutorial for an artistic, ambient sea glass light fixture on a budget.

MATERIALS NEEDED:
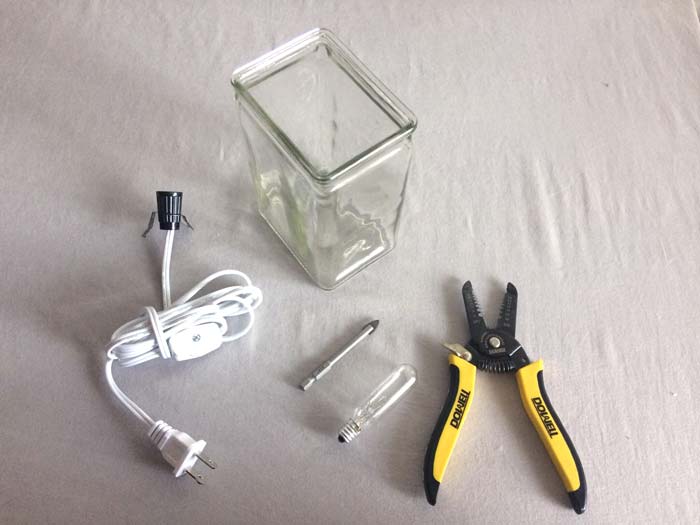
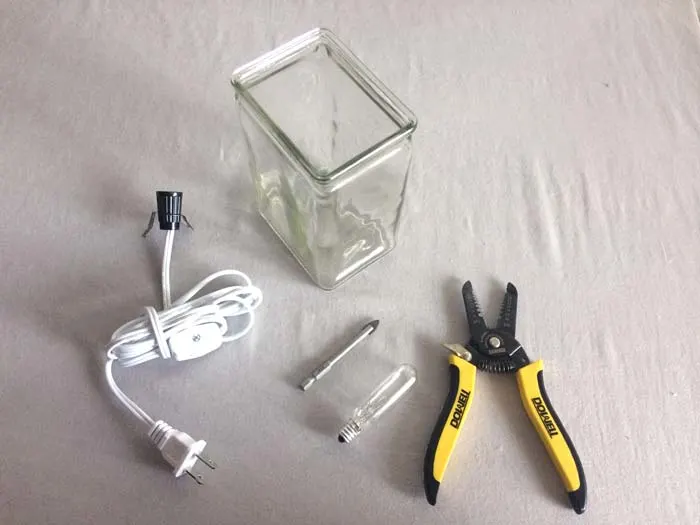
What you’ll need to make a sea glass lamp:
- Lamp cord with candelabra base and switch (you can skip this item, as well as the bulb, if you want to create a sea glass light catcher rather than a lamp)
- Bulb with candelabra base (I use a T6 bulb for this project; this may vary depending on the size of your lamp and your desired brightness)
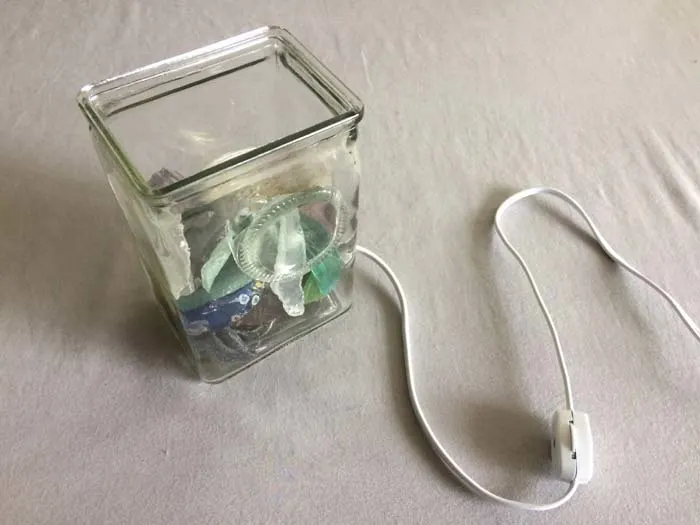
- Clear glass vase or jar large enough to hold some sea glass and the lamp’s bulb and socket (I recommend a local thrift store for both the price and the potential for uniqueness and variety in the vessel you choose)
- Sea glass or beach glass (for a more vibrant look, I recommend including colored sea glass in your selection)
- Basic wire cutters (needlenose pliers will also work)
- Glass drill bit
- Small screwdriver
STEP 1: Drill the Vase
First, while wearing safety goggles, drill a small hole on the glass where you want the exit point of the lamp cord. You can find inexpensive glass drill bits at Amazon, or at your local hardware store. You’ll want to drill a hole that’s about 1/4” diameter.
It’s optional to use a lubricant while drilling, though this may extend the life of your drill bit and help drill the hole faster. Be patient and apply only light pressure as you drill the glass; let the drill bit do the work for you and don’t try to force it, or you could end up wearing out the bit or breaking the glass. Use a small piece of fine-grained sandpaper to file down the edges of the hole once it’s drilled.
STEP 2: Wire the Lamp
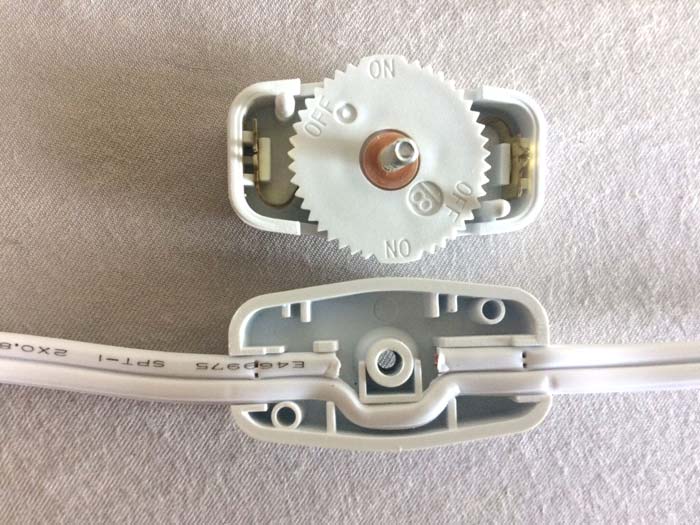

To wire your sea glass lamp, use a screw driver to open the switch. It will come apart in two halves; the top half has the actual switch, a small plastic disc with serrated edges; the bottom half holds the wires. (Read more about how to splice lamp cords here).
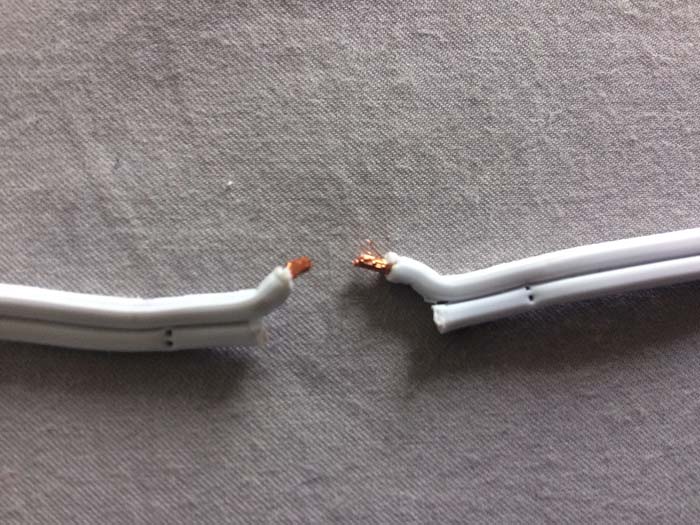
You’ll notice that one wire is connected all the way through, while the other wire has a break in it, with two tiny holes in the ends of the disconnected pieces. The continuous wire is the ground, or neutral wire. The disconnected wires are the hot, conductive wires. Metal pins in the top half of the switch connect to either end of the hot wire, and as you rotate the knob of the switch, it alternates between a conductive connection and being disconnected, thus turning the lamp on or off.
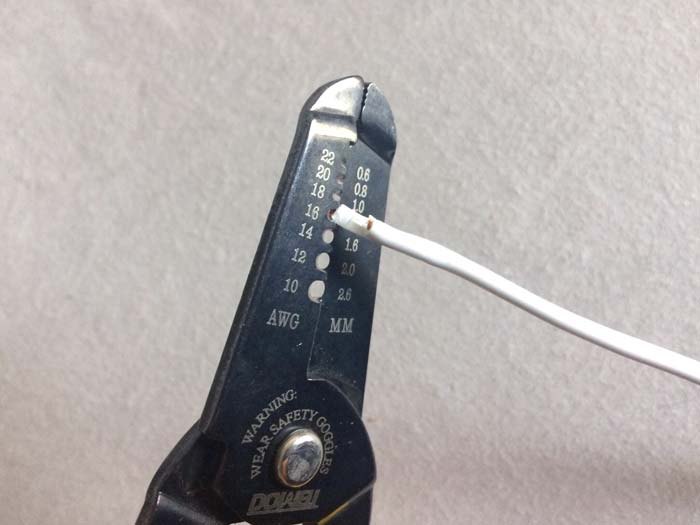

Place the lamp socket in your vase or jar and thread the now-cut cord through the hole. Using the wire cutters, strip a small section off of both ends of the now-severed neutral wire, twist them back together and either solder or seal with a small piece of electric tape. I recommend soldering, since the action of the switch might slowly move the ground wires apart over time and cause the sea glass lamp to stop turning on.

Replace the neutral and hot wires in their settings inside the switch and put the halves of the switch back together. Use the original pin holes in the hot wire as a guide for the pins from the top half of the switch. Plug the cord into a surge protector, screw in the bulb, and test the lamp to check your work.
STEP 3: Assemble the Lamp

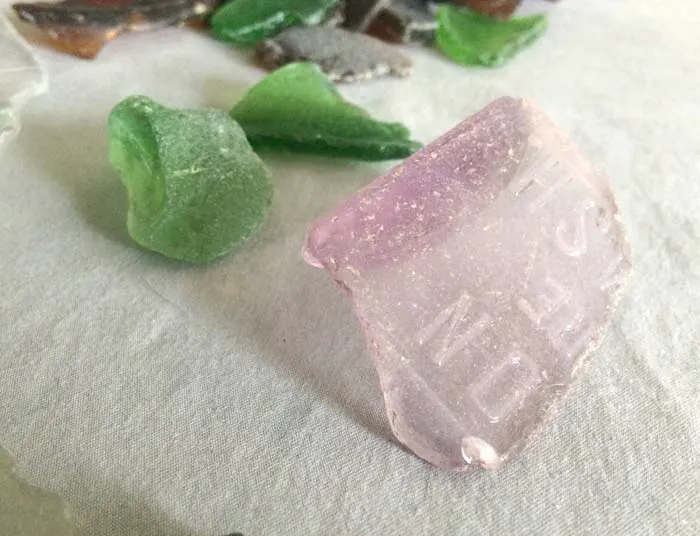
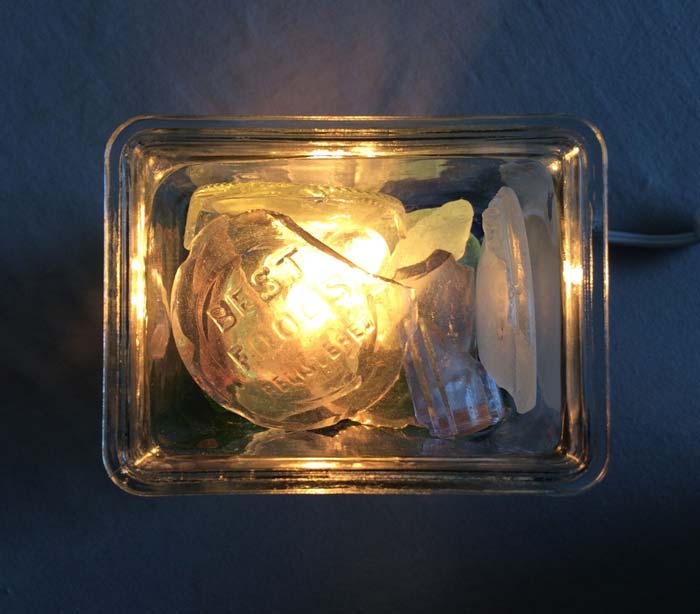
To assemble the sea glass lamp, choose your arrangement of sea glass. Sea glass varies in size, texture, and opacity; the most worn pieces are classified as jewelry grade. For this project I chose a few larger, less-worn pieces because of their colors and the text that was still visible on the glass, and the way the pieces catch the light in bold strokes. Choose pieces that are more uniform in size and worn in texture for a softer, more diffused sea glass light fixture.
Remove the bulb and arrange a layer of sea glass in the bottom of the vase to hold the lamp socket in place, then screw in the bulb. Continue layering sea glass in the lamp, while being careful not to drop pieces in a manner that could damage the bulb.
Be aware that to change the bulb you will eventually have to remove the sea glass and replace it once the bulb is changed. However, T-6 bulbs are often used for appliances, and so tend to last a good many years before they burn out.
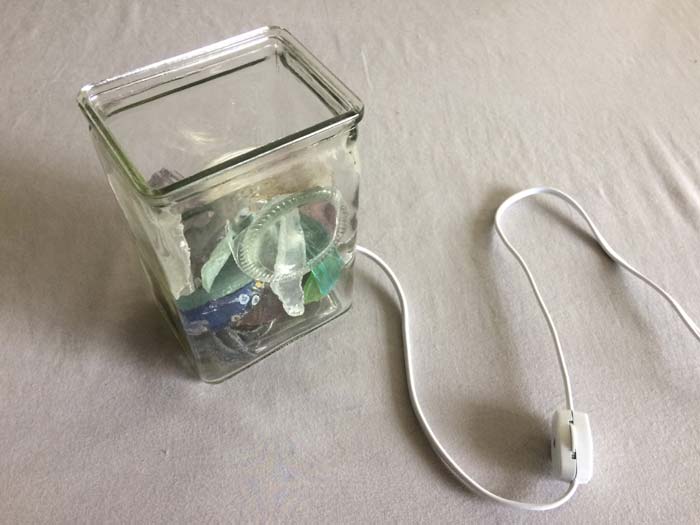
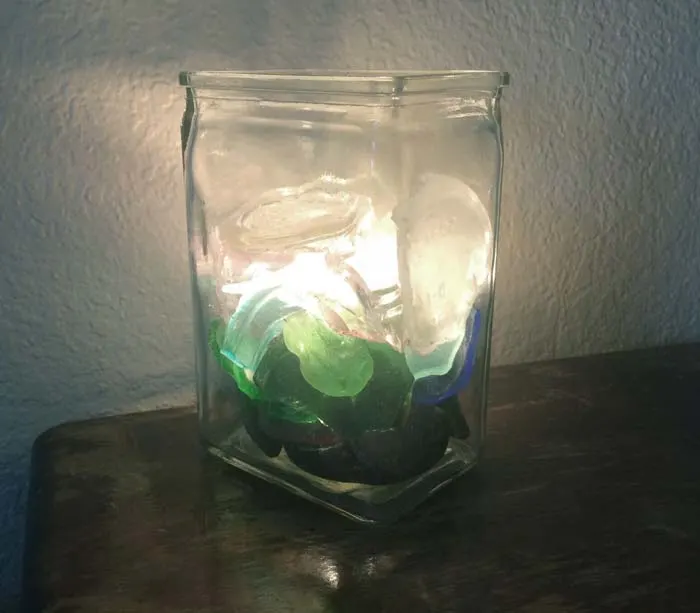
STEP 4: Display Your Work

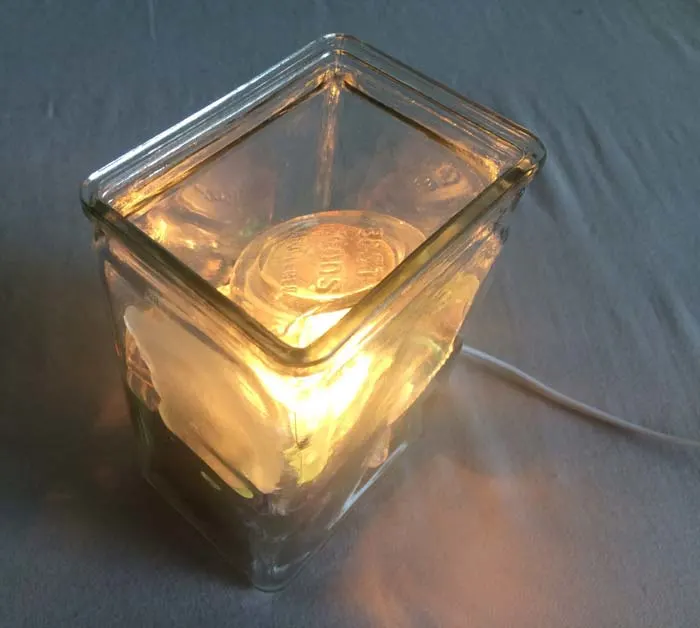
Once the sea glass light is finished, place it on display and enjoy a custom piece of sea glass art! This sea glass lamp is perfect for a bedside night light or end table, as it provides just enough light and perfect ambiance to read while unwinding at the end of a long day.

Pin it now to find it later!

Thanks for Reading!!!
I hope you can tell that I love DIY, researching the best affordable solutions for every-day problems opportunities and documenting / sharing solutions!🙌 Hawk-Hill.com is reader-supported.
☕ Hawk-Hill.com is reader-supported. If this article saved you time or money, please consider donating $1 to help me cover the cost of hosting this website OR If you appreciate this information and want to throw a “Thanks!” my way by buying me a coffee – I would Of Course appreciate it! :]
Reader Questions and Recommendations
Readers, do you have any favorite topics / posts? What would you like to read more about in the future? As I hope you can tell from this and other articles on my site, I really enjoy DIY / a good challenge, and I’m not afraid to roll up my sleeves to figure out a great, and hopefully simple 😁 solution. So please feel free to let me know in the comments below (or reach out via social media)!
Ok Really – I’ll try to wrap this up now😂
Finally, if you’d like to continue to learn about interesting DIY options as well as how YOU can tackle creative new projects consider checking out the latest and most popular articles listed on the Hawk-Hill Home Page. I’m always trying to enjoy and write about the creative side of life so please don’t be a stranger – check back often!😍
If you enjoyed this post you may also enjoy reading / perusing / devouring😊 one or all of these articles as well!