This custom tablet cover DIY was born out of necessity and experimentation with a similar method I’ve used on paper journals.
Shifting from Paper to Tablet Journaling
I’ve been a consistent journal-keeper for more than a decade now, and my journals record details of my life ranging from the mundane to the extraordinary. About five years ago I made the big shift to bullet journaling, but as my illustration work has transitioned more and more to digital illustration, I have found that my journaling practices are beginning to follow.
Rather than scrawling my thoughts on the page with a traditional pen, I’ve been more apt to use a stylus and tablet for journaling. Digital journaling has been especially helpful as I spent more and more time traveling on the road.
Keeping my Tablet Safe
As I’ve been making more and more digital art on my iPad, my tablet has become an essential companion. I rarely leave home without my iPad, and while this has created great opportunities for on-the-fly art, it also exposes my valuable tablet to more opportunities for theft. Based on some advice I got after my horse trailer was stolen from a horse show back in 2008, one of the personal safety measures I frequently use is personalizing my valuables.
Yep! According to a state park patrol officer in Kentucky (who reported seeing 3-4 vehicle or trailers go missing every month from the park) helping our valuables stand out can be an effective theft deterrent. That officer noted that trucks and trailers stolen were always, without exception, non-descript and easy to remove from the property without drawing attention. The following spring, I added custom decals to my horse trailer, and I still use this technique today to reduce the risk of theft of my luggage and valuables while traveling.
This quick tutorial for adding a fun, custom tablet cover to your iPad or tablet case not only looks fun, but a head-turning cover can also help reduce the risk of theft.
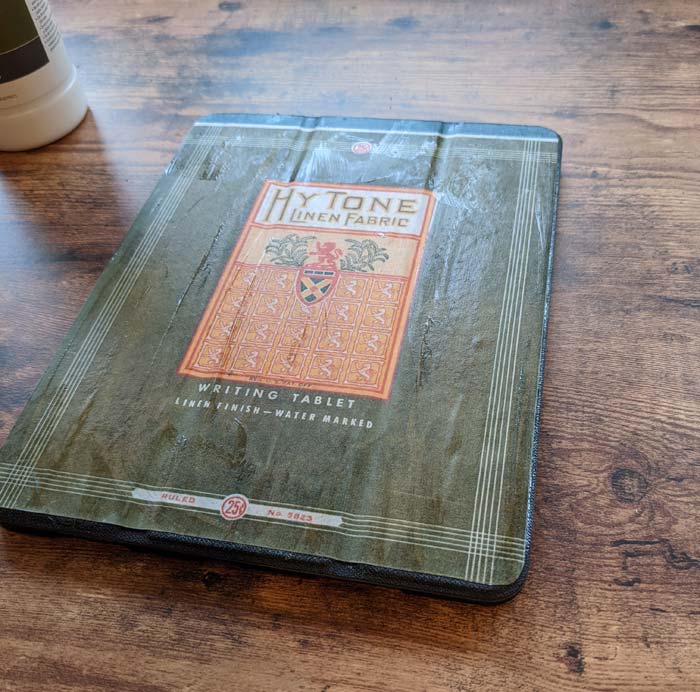
Recently, I decided to try one of my favorite tutorials for recovering bullet journals on an iPad case, and today I wanted to show you the process and the results. In this tutorial, I will walk you through, step-by-step, how to recover a cheap, boring iPad cover with a custom table case.
I’m using one of the free vintage stationery printables that I offer in hawk hill’s download section. With just a few basic supplies and these simple steps you can add a custom cover to your iPad or tablet that is sure to turn heads and draw comments (while providing just a little bit of camouflage to reduce the risk of theft for high-tech devices in public places)
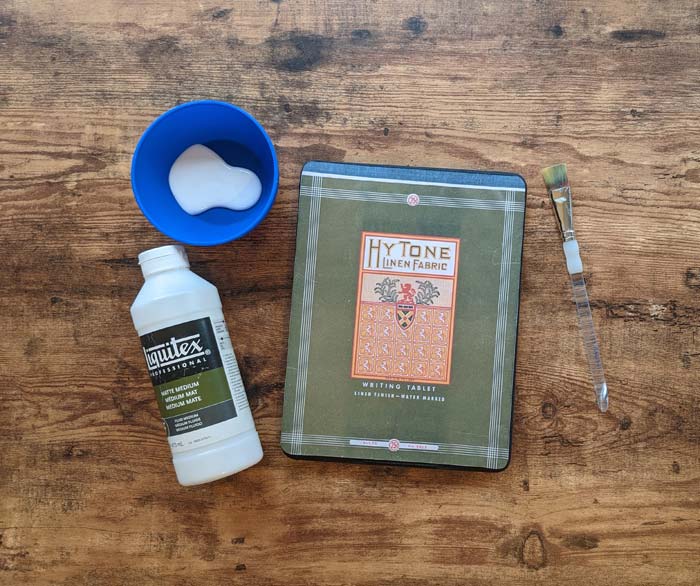
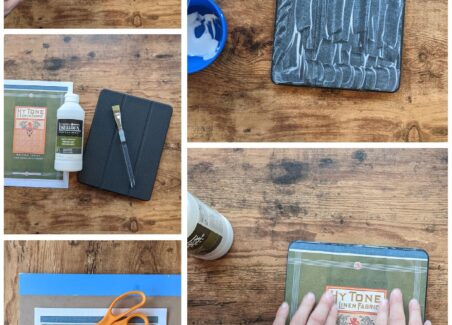
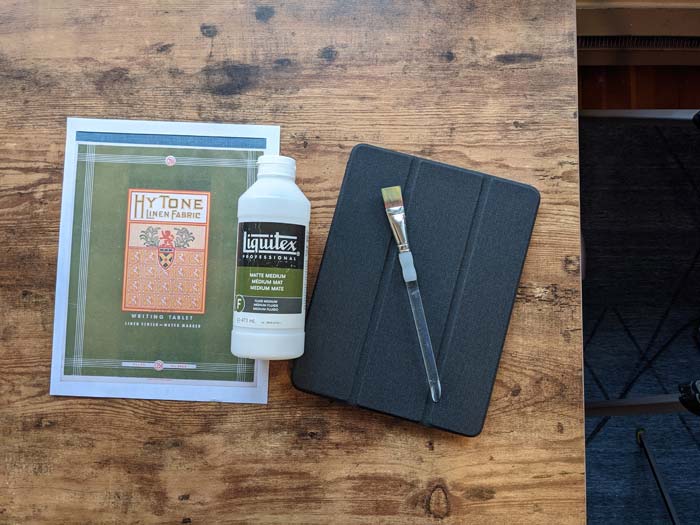
Supplies you’ll need to create this faux vintage tablet cover:
Hawk-Hill.com is a participant in the Amazon Services LLC Associates Program, an affiliate advertising program designed to provide a means for website owners to earn advertising fees by advertising and linking to Amazon.com and any other website that may be affiliated with Amazon Service LLC Associates Program
- A full color printout of one of the scanned vintage notebook covers I have available in my downloads section. If possible, print with a laser printer to reduce ink bleed.
- Liquitex Fluid Medium – matte version (Artist’s Fluid Medium fluid is like a professional artist version of Mod Podge. This premium glue/finish has a smoother finish, goes on with a silky consistency, and in my experiences is much less likely to result in a final project with buckling and bubbles)
- rough grit sandpaper or a pottery shaving tool
- Basic Tablet Cover – I used this one, for only $12***
- 1″ Art Paintbrush – A straight semi-stiff paintbrush meant for acrylic paint, about 1 inch wide
- A safe work area with a water-resistant and easy to clean surface.
IMPORTANT Before starting, remove your iPad from the case, and perform this craft on an empty tablet case. You may want to insert a thin paperback book or foam padding inside the case to keep it rigid during this recovering process.
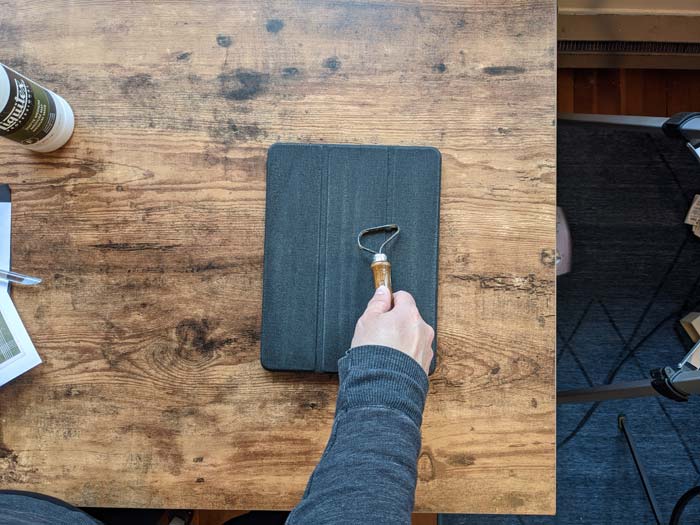
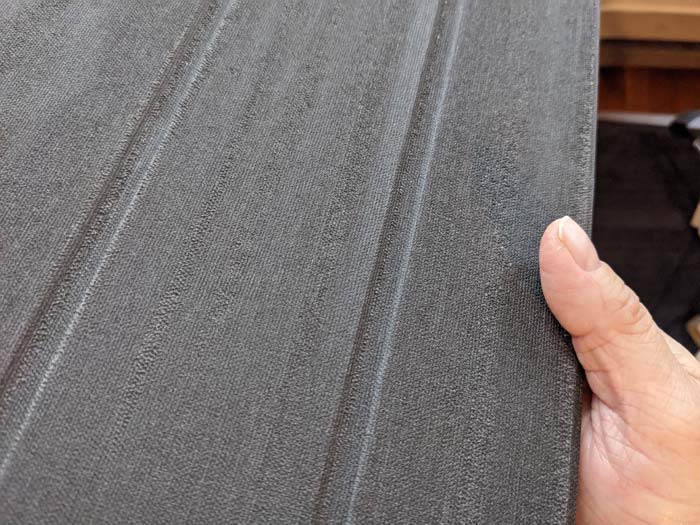
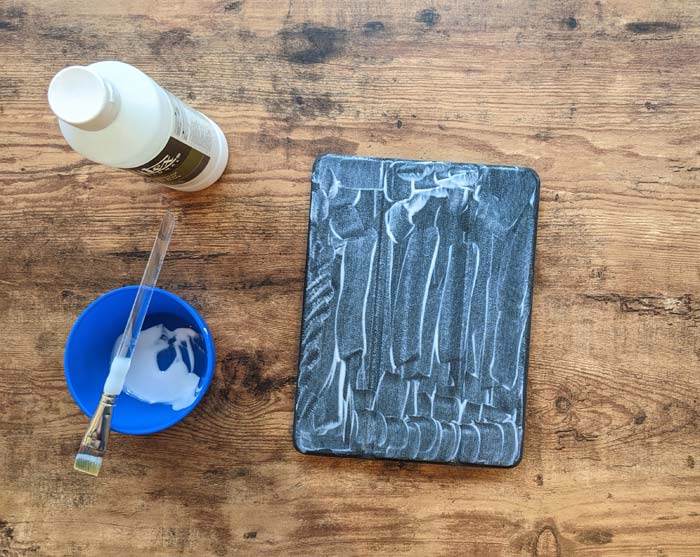
Step one: Create some texture on the iPad cover
The finish of most iPad covers is designed to resist water, dirt, and stains. This same texture will cause the cover to resist the glue unless it is sanded or worn off. In these images, you can see that I’m actually using a tool designed to shave unfired pottery, but it works fine too scrape the surface of this iPad case. If you’re using sandpaper, use a rough grit. The final goal of this step should be removal of the slick, slippery finish of the cover.
Once the finish is removed fully or partially, your iPad cover is ready to be covered with the new custom tablet cover.
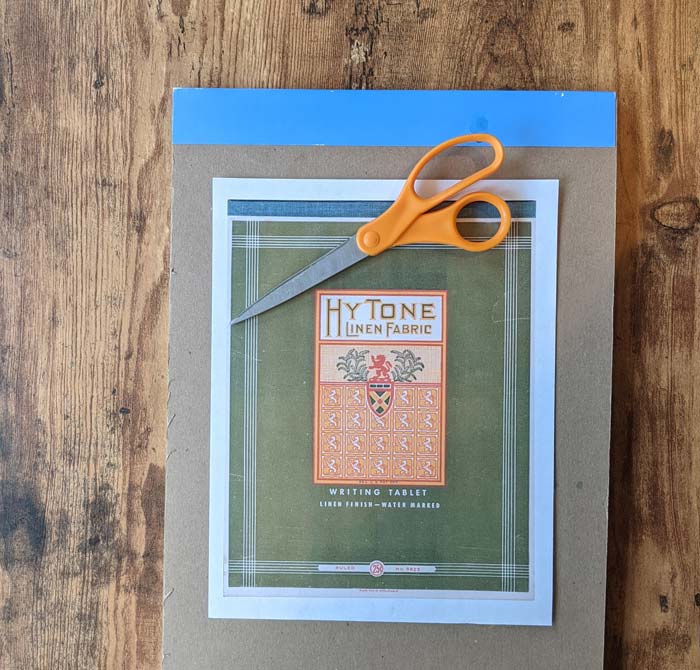
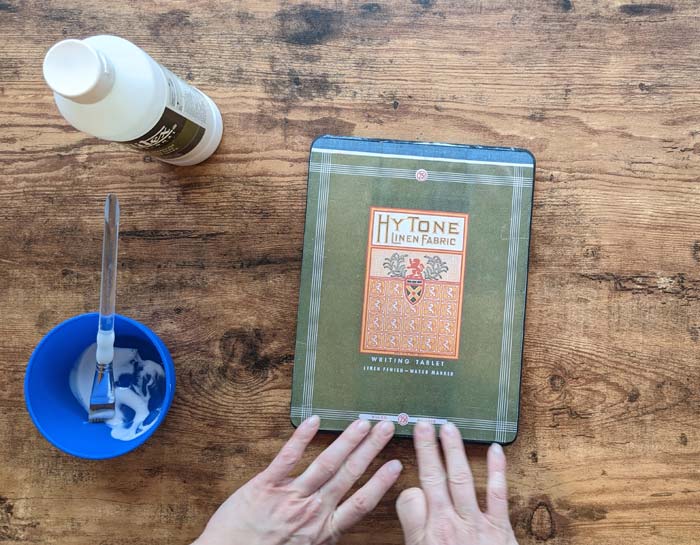
Step two. Cut out your cover
If you’re using one of my principles – created from a cache of 1940’s stationery and tablets I once found in an antique shop in Missouri- print the design of your choice with a “high quality” setting on your printer and the cut to size to fit the front of your tablet.
You can also use just about any other design you can print onto paper just print and high-quality and cut to size. You can even attach photos, art, or magazine clippings.
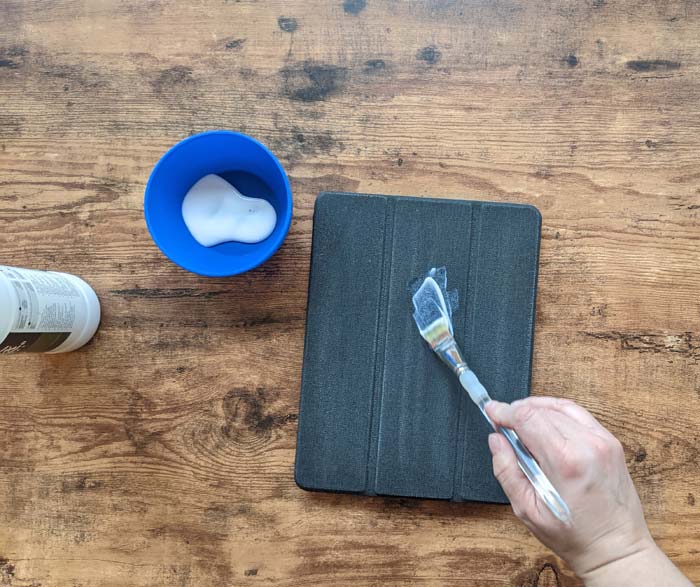
Step three. Add glue to iPad cover
Next, cover the entire front surface of the iPad case with glue. You may find that the open, poorest texture of the iPad cover seems to soak in and absorb the glue. That’s okay, just keep adding glue until there is a thin layer of glue visible on the surface of the case’s cover.
Step four. Position printout
Carefully align the paper you have chosen as your new cover over the iPad cover (you’ll have a minimal ability to reposition once the paper has touched glue, so be careful to align well.) Press the paper down and smooth out any bubbles with your fingers or a soft edge (such as a silicone spatula)
If you have big bubbles and are able to smooth them out, use a razor blade to carefully slice the bubble, then smooth down the paper- the glue should mask and seal the hole.
HINT: to spot bubbles that might not show up easily, grab your smart phone and turn on the flashlight feature. Oblique lighting (that is, bright light from one source directed on a surface from an angle) makes it easy to spot bubbles and smooth them out.
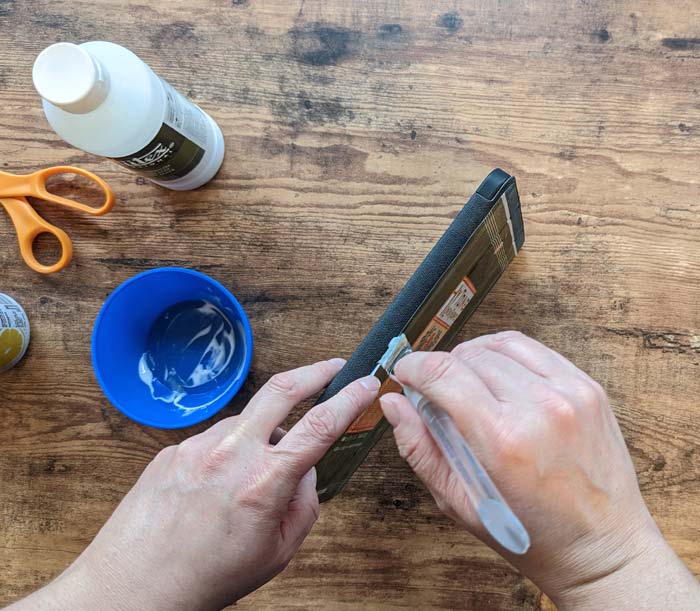
Step five. Touch up edges
Every time I do this, whether it’s with a digital tablet or recovering a traditional notebook, I find that the corners are edges often need a little more glue after the new cover has been applied. Check your edges apply glue as needed.
Step six. Wrap the cover to help edges adhere
To get a really great adhesion even at the corners and edges, I find it to be helpful to wrap the surface of my new journal or tablet cover in plastic, and pull that plastic closed with tension – holding the new cover in place with contoured corners. Allow the glue to dry completely (about 24 hours) before removing.

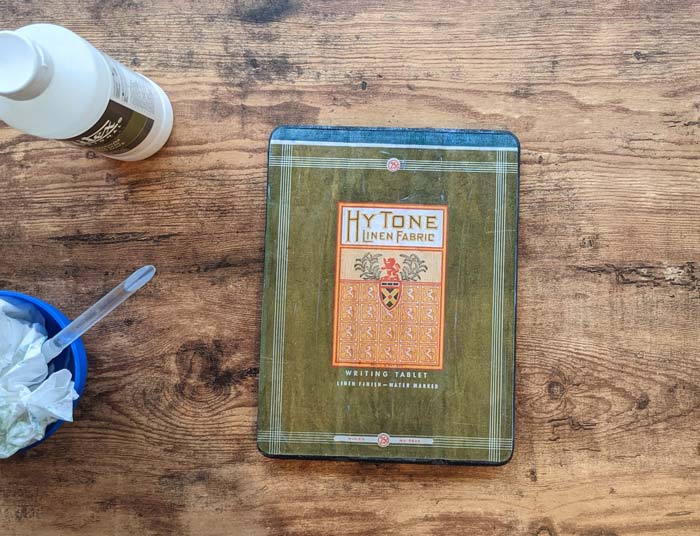
(Optional) Step Seven: Topcoat
If you used a laser printer to print your new notebook cover, you can paint another layer over the cover after the base layer of glue has tried. If you’ve used an inkjet printer, however, you should avoid applying topcoat with a brush- as inkjet ink is typically water-soluble and will bleed when wet. Instead, to seal an inkjet printed cover, you’ll want to apply a spray-on sealant such as matte finish or lacquer.
TL;DR: Making a Custom Tablet Cover
The steps to creating a completely unique tablet cover using your own custom designs or my vintage printables are easy and only take about 10 minutes start to finish.
Once completely dry, your custom cover iPad case will flip, fold, open, and close just like it’s original un-customized condition!