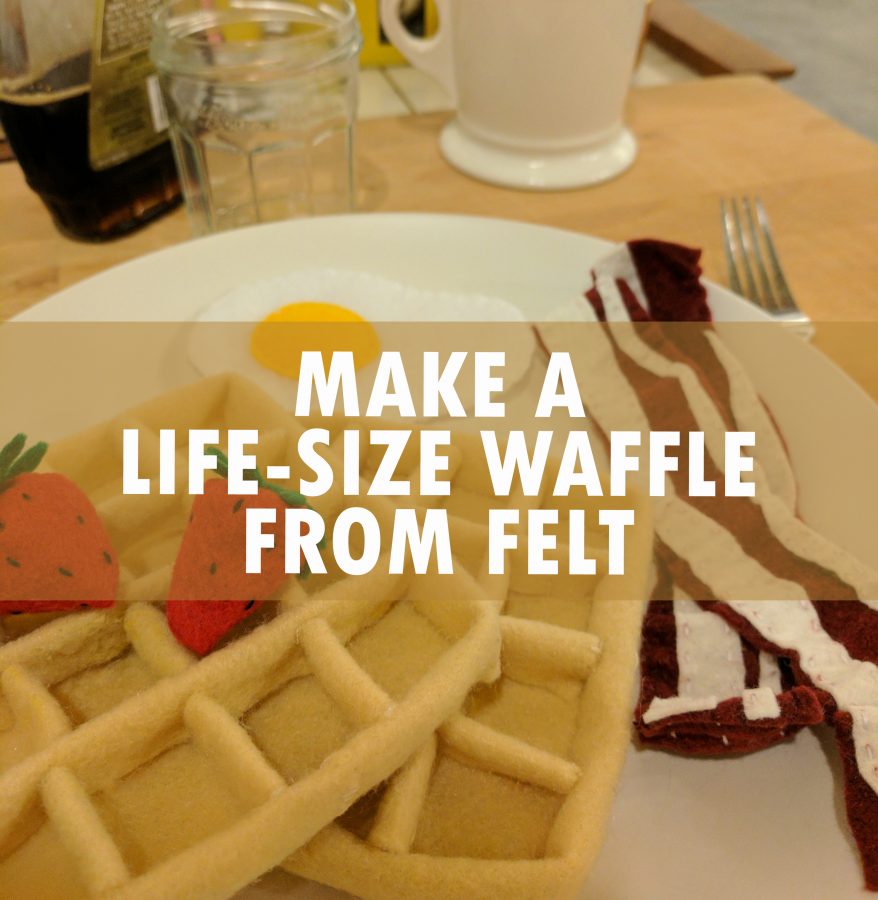
This post features a video showing the full waffle making process, a list of supplies to gather, a printable pattern, and finally a shorter step-by-step set of written instructions.
Tutorial Video:
I’ve been making felt food for my niece since December. Since she lives in Dallas with her parents and I’m a grad student in Seattle, I don’t get to see her very often. Stitching together little meals piece by piece have been a fun creative outlet where I feel like I get to, stitch by stitch, help encourage her development even though I can’t be with her often.
Since starting the process of scouting patterns for this project last summer, I’d been hunting for a good waffle pattern and coming up empty. As Leslie Knope says, and as I want to impart to my young niece, “waffles, friends, work.” And it’s this life-mantra that kept me searching for a felt waffle pattern and, when I came up empty, just making my own.
Open Ended Play & Why it Matters
(skip down for the tutorial- but this is stuff every grown up person who knows a small person should learn about!)
In my professional training we talk a lot about children and a lot about healthy development. One thing I learned early in my training was how important Open Ended Play is. Open Ended Play, aka unscripted play, is play that allows kids to create their own scenes and stories. Board games, STEM toys, puzzles, and video games are all scripted play that has a set goal or purpose. In our highly-purpose driven culture, scripted play is often what we unconsciously direct kids toward.
Unscripted play, however, is incredibly important for little ones. When we as adults get frustrated or confused by a situation, we might talk to another person about our feelings and frustrations or perhaps journal or go for a run. Kids don’t have those options or abilities, so they PLAY to make sense of the world and their place in it, trying out new perspectives or outcomes along the way. Children who have the resources to engage in this kind of play can use their imagination to work through the countless struggles and frustrations that accompany being a tiny human adapting and growing to be a big human.
For example, the child whose picky eating has caused a sense of anxiety at family meals can work with their feelings in play by creating her own meals our of felt food or playing out the drama at the dinner table with toy diners and plates she controls. They can imagine themselves as chefs bossing around a kitchen full of stuffed animal sous chefs, a gardener, a mom or dad, or countless other scenarios- and it’s this free-play setup that definopen-endedded play and makes it a gift far more powerful than mere handmade plush toys!
okay, on to the tutorial!
Waffle Making Instructions
The tutorial video has everything you’ll need to know about putting the waffle together (except, one tiny piece of advice I forgot, that I’ll outline below) but for those of you who (like me) would rather just scroll through some pics and get a general idea of the construction before investing time in a video, here’s a few shots along the way.
Hawk-Hill.com is a participant in the Amazon Services LLC Associates Program, an affiliate advertising program designed to provide a means for website owners to earn advertising fees by advertising and linking to Amazon.com and any other website that may be affiliated with Amazon Service LLC Associates Program
Supplies Needed:
- Tan/Toast Colored *Felt (minimum of two standard sheets.)
- Basic sewing kit (scissors, needle, thread, etc. I always use 2-3 strands of embroidery floss for my felt food, because it’s a little stronger than standard thread)
- Glue (washable fabric glue, preferably)
- And one specialty item that might be in your sewing kit already: a fabric marker. Don’t skip this, it’s really important to getting the placement of the waffle ridges.
- Pattern (download below)
*wool felt works better, because of the thicker body and more robust material
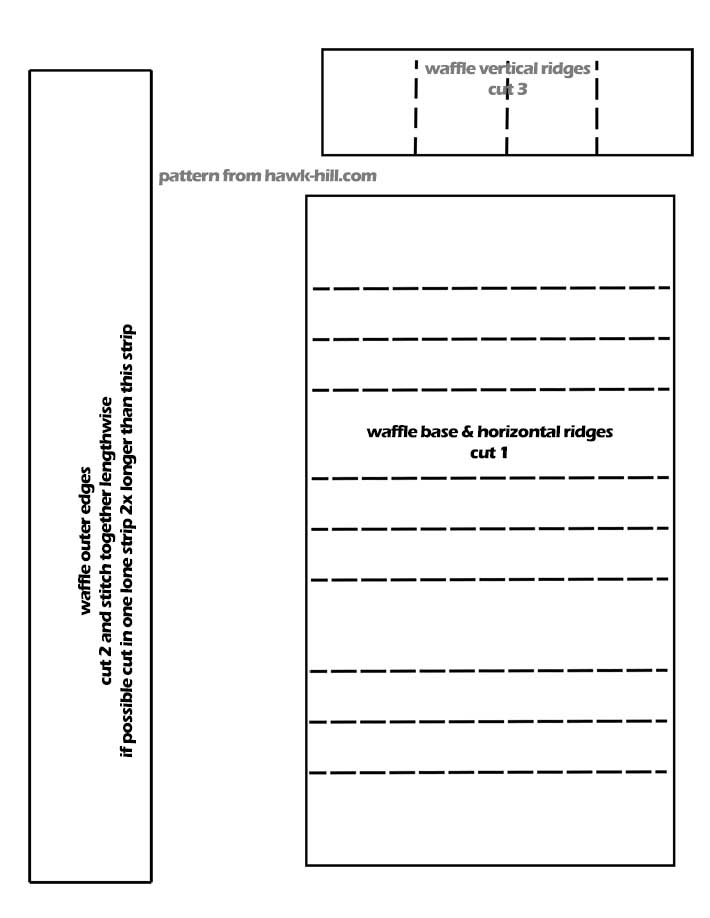
First, the pattern. Download the PDF Waffle Pattern Below:
Click Here to Download the Waffle Pattern
Now, the meat and potatoes of the long format tutorial (remember the video above shows all the steps start to finish!)
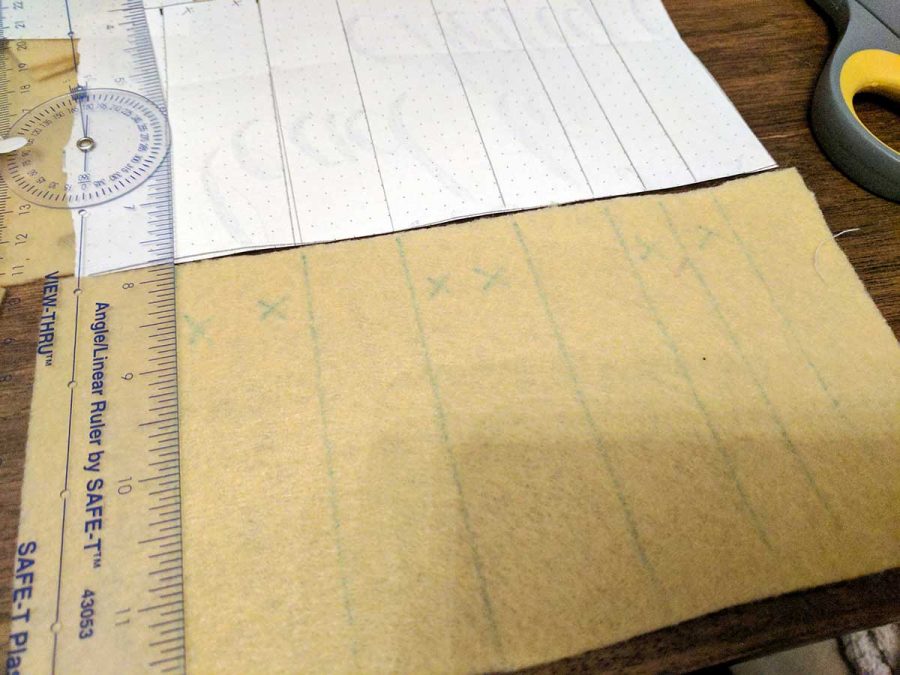
- Once you’ve cut the pieces in the pattern as instructed, you’ll need to go back and transfer the lines drawn across the large block of the pattern onto your felt with the fabric marking pen. The easiest way is to lay the pattern over the cut felt and progressively fold back the pattern, using the printed line as a mark to fold along and then running the tip of your marker down the folded over edge, transferring the mark onto the fabric.
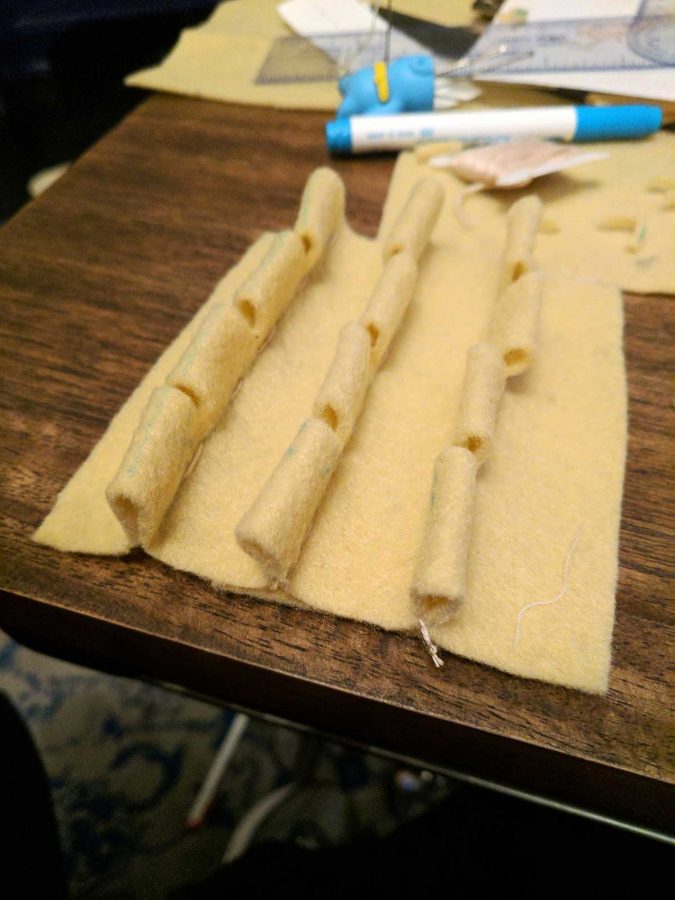
2. I’m skipping a couple steps shown in the video, but this image shows how the large rectangle is stitch into ridges that stand upright. The next step is cutting notches in each ridge. The notches are made by laying the short strip of the paper pattern along the ridge and placing a mark with the fabric marker onto the felt in spots that correspond to the marks on the pattern.
Once aligned and marked (and after you’ve confirmed the visually line up in rows) begin cutting a notch where each mark is. I cut about 50% of the way down the ridge, and am cure to cut free the excess fabric there
After this step, your large felt piece will look like this:
3.
Next, take the 3 short strips of fabric. Fold and glue them in half lengthwise. Once the glue is set, use the short strip pattern template and a fabric marker to transfer the marks on the template to the bottom edge of the folded strip. (leaving the tidy folded-over edge intact) Again, cut a notch about 50% of the way up, and wide enough to accommodate the width of a doubled-over piece of felt.
In this photo, you can see the ridges of the strips and the ridges of the large piece beginning to come together to form an actual waffle! (At this point, in what I think was my 4th attempt to create a felt waffle that actually looked like a waffle, I got pretty excited!)
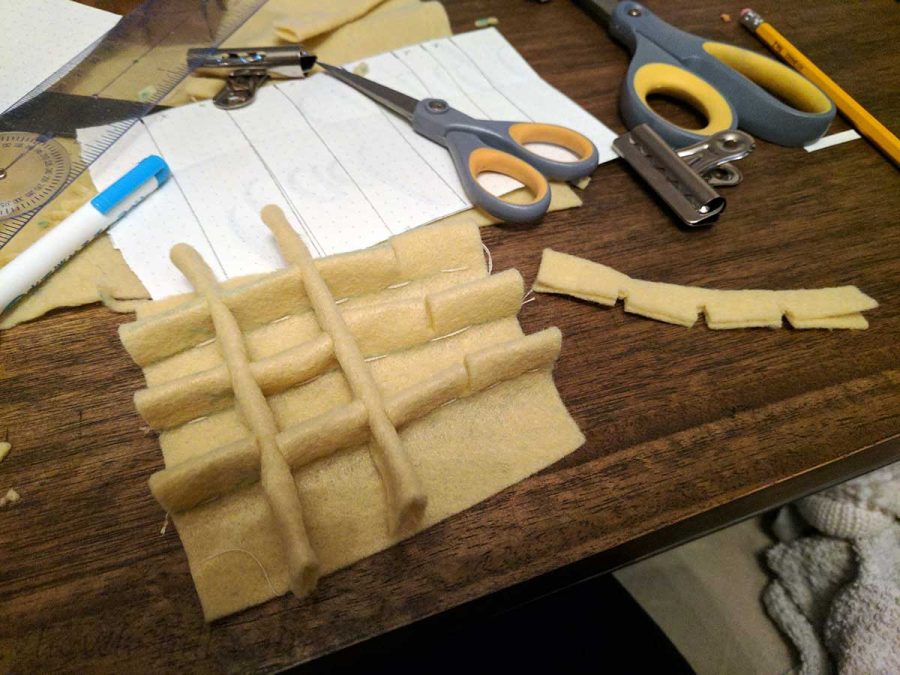
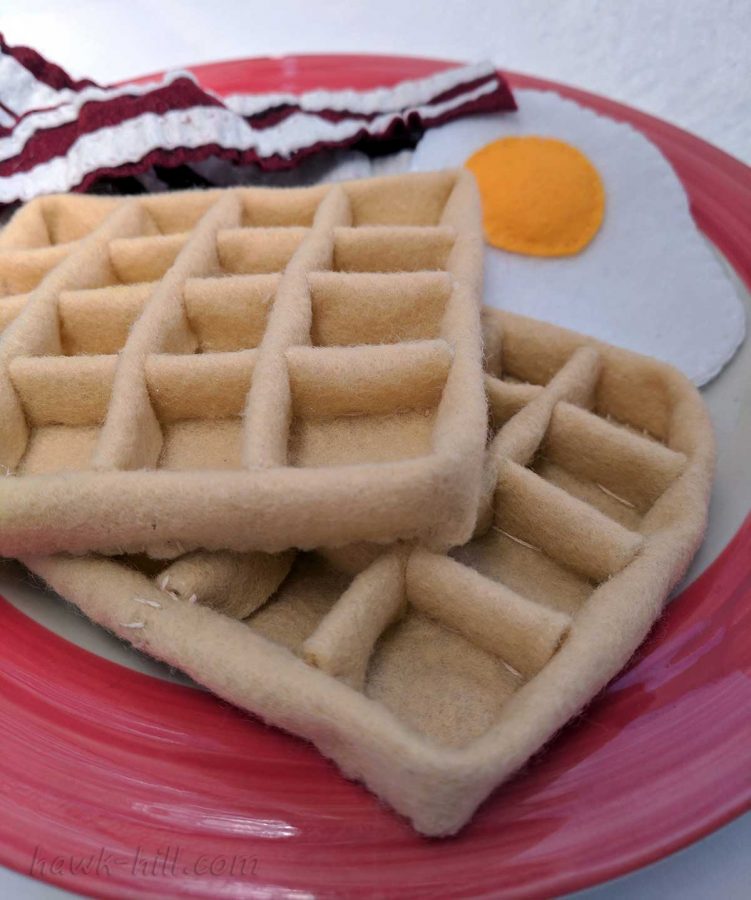
4. When you fit all the ridges together, your felt waffle should look something like this. You’ll want to spend a few minutes retrimming your notches so that the ridges sit evenly and flat.

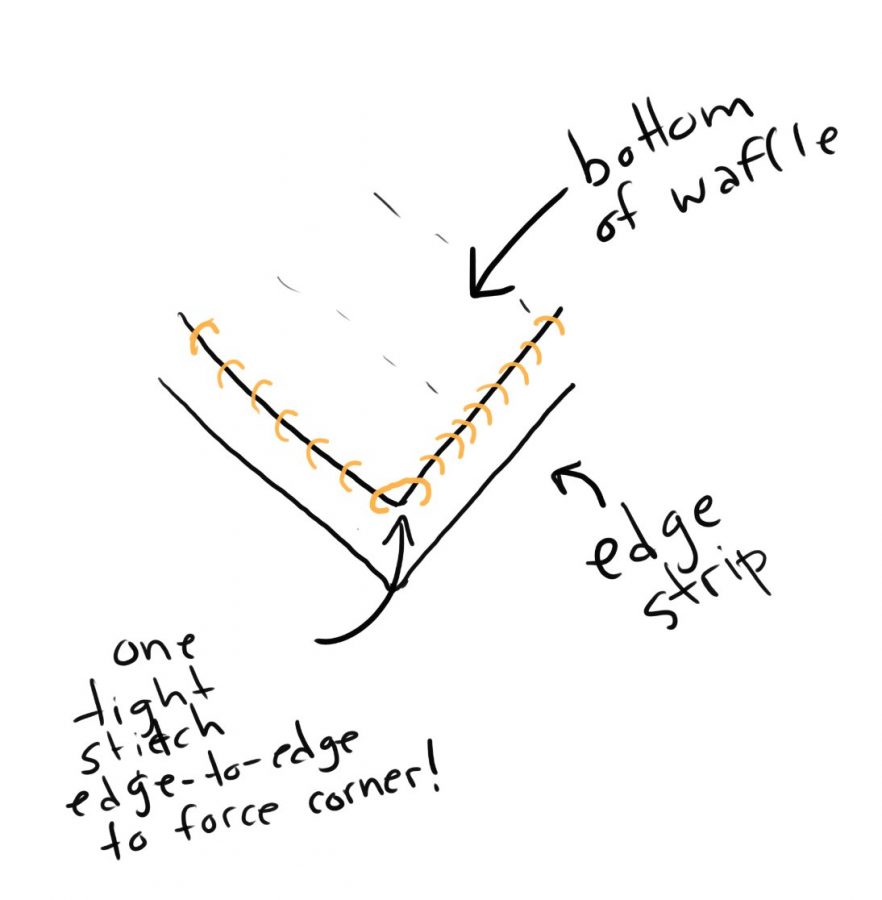
5. To finished your waffle, just take the long strip, fold in half lengthwise, and wrap around the outside edge of your waffle. With a quick running stitch, connect the edge to the waffle body.
TIP: The only tricky part is getting a nice corner on the edges of your waffle instead of a rounded curve. To get sharper corners, when my running stitch gets to the end of a straight edge, I fold the strip together and make one stitch that binds the two pieces together in a tight corner, then release and go back to the running stitch on the edge. Here’s a bit of a graphic demonstrating that visually:
6. Once all your waffle parts are present and fitting together well, you’ll want to add a bit of glue to keep the ridges in place and everything snug and aligned just right. I’m usually anti-glue on felt food toys, but the complexity of this waffle pattern kind of demands it! I add the glue and then let my waffle sit for a couple hours under the edge support of a few books, just to ensure all the glued edges are in contact with one another as the glue sets.
And that’s all there is to it!
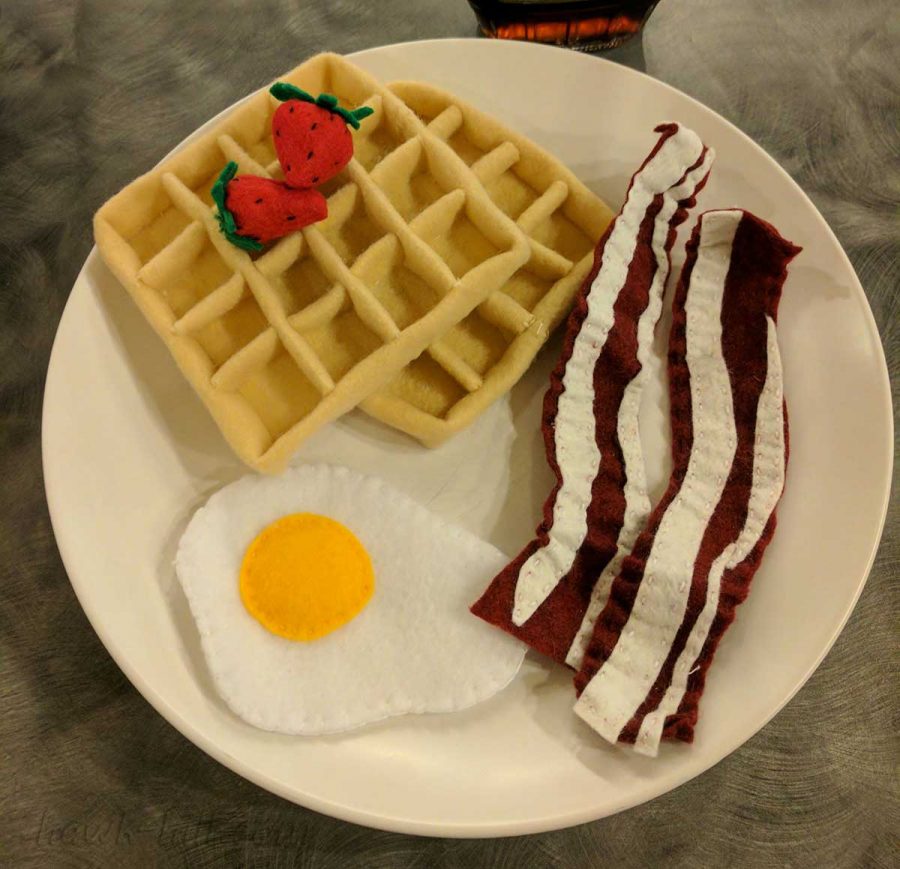
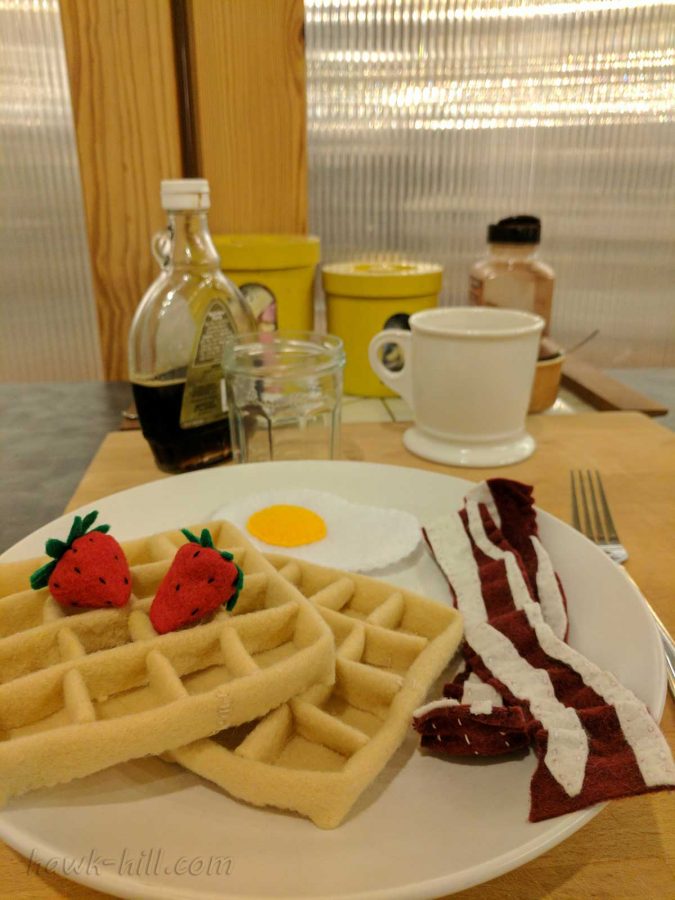
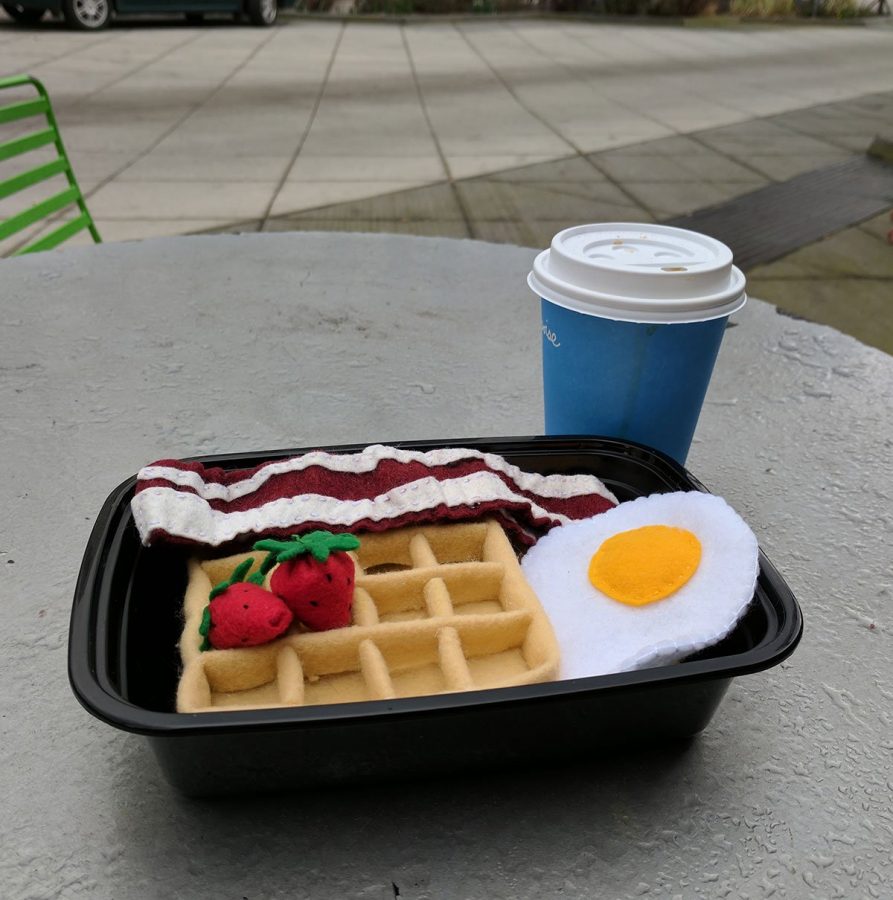
Once you’ve let the glue set completely, your fake play waffle is ready for the perfect fake play brunch!
Adding a Syrup Topping:
A blob of tan is an easy way to let your child create their own play-meal-master piece, but I’ve also heard that Liquid Translucent Polymer Clay works great for a hard-set non-sticky realitic looking maple syrup topping.
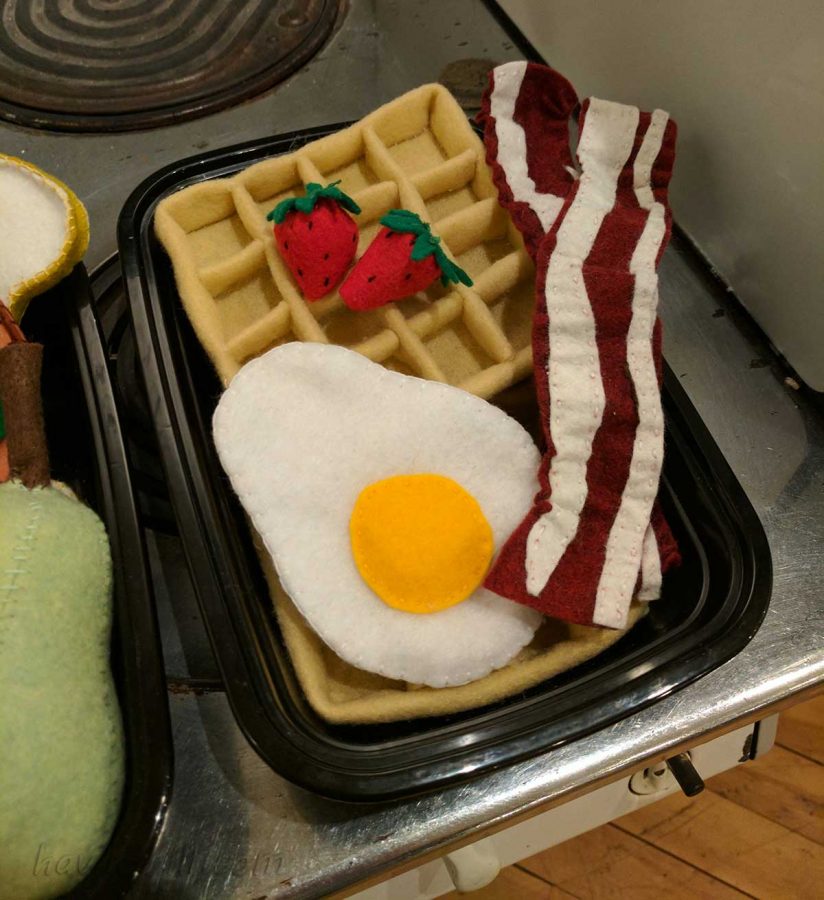
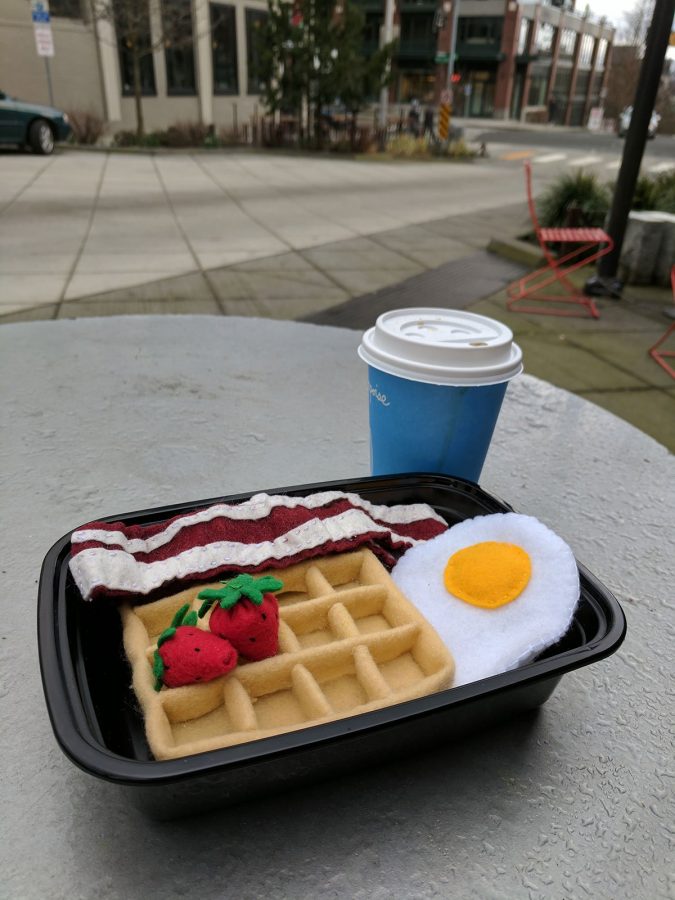
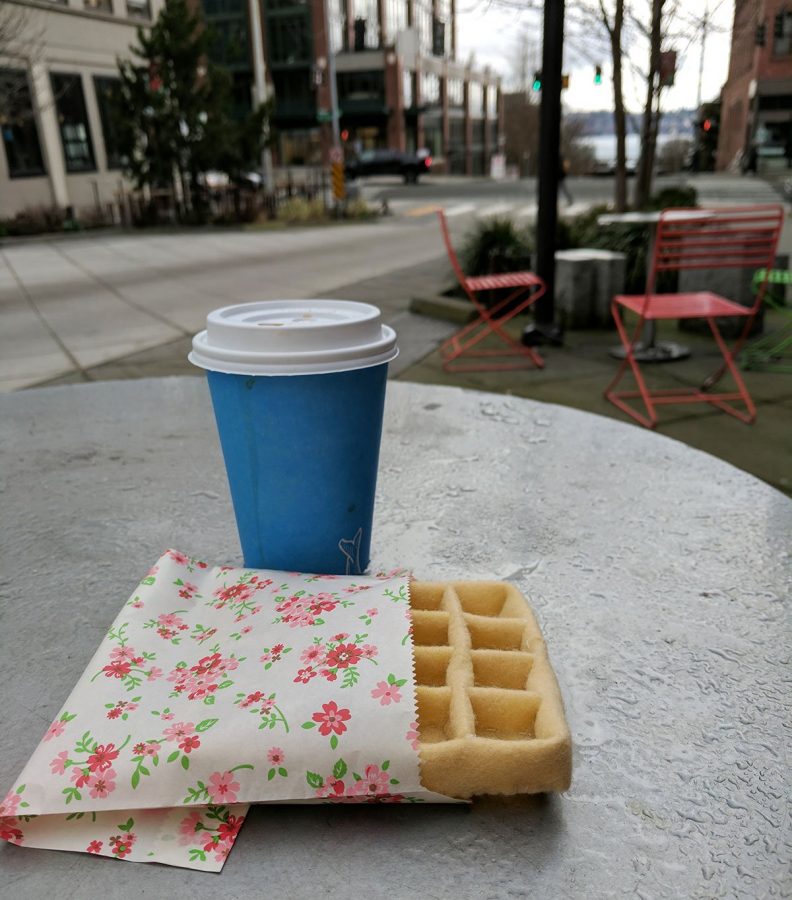
Seeing these handmade toys leave was pretty sad after spending so much time crafting them, so I took lots of photos before boxing them up. They were a particular hit when I took them into my coworking office to take photos in the giant kitchen: