
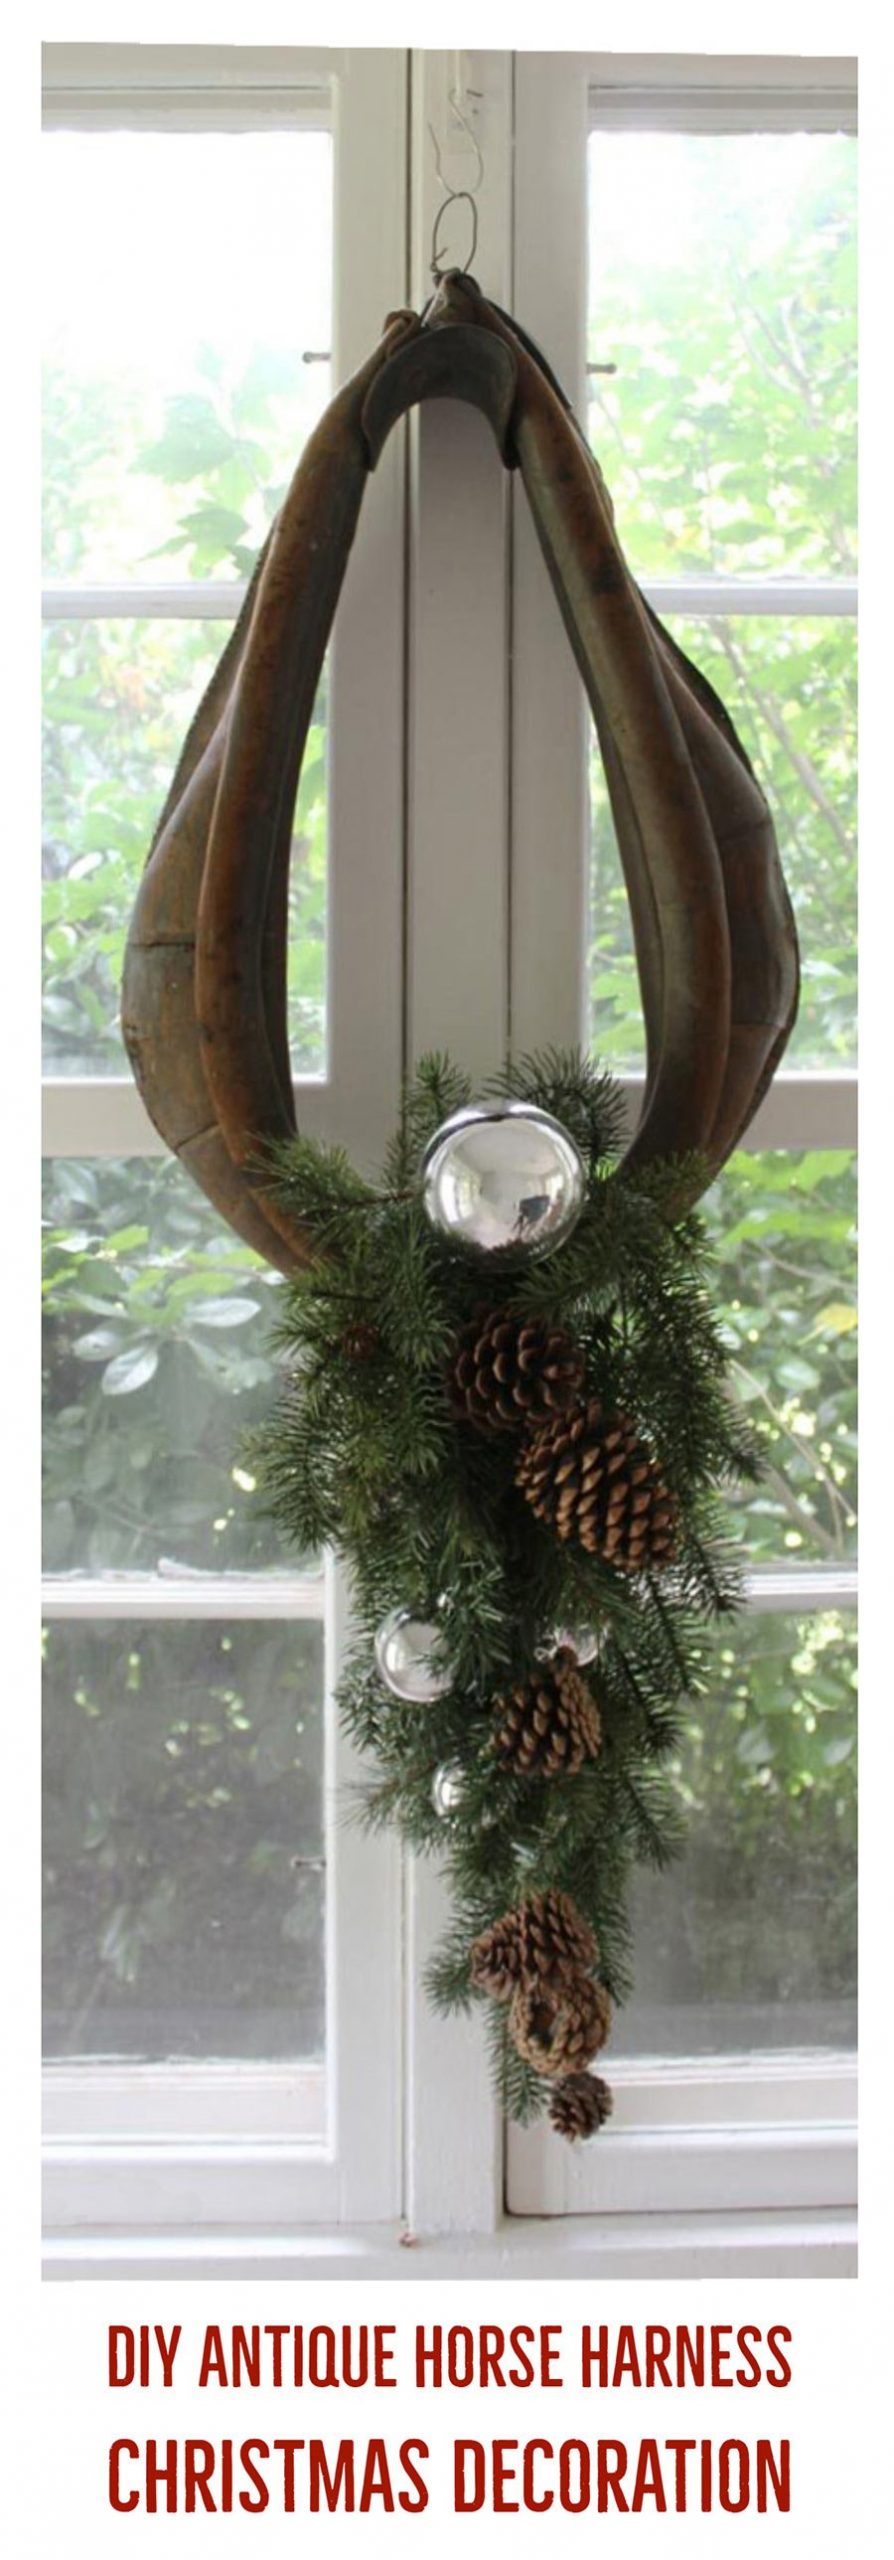
Last fall a friend purchased a fantastic property with a 19th century stone barn still standing on the back of the property. When I remarked on the old horse collars resting under a thick layer of dust in the old tack room, she immediately gifted me all three collars.
It’s no secret I’m a huge fan of horse decorations, so I knew right away I’d make wreaths with them, and thanked her for her generosity by gifting one of the finished wreaths right back to her, keeping one, and selling the third in my flea market booth.
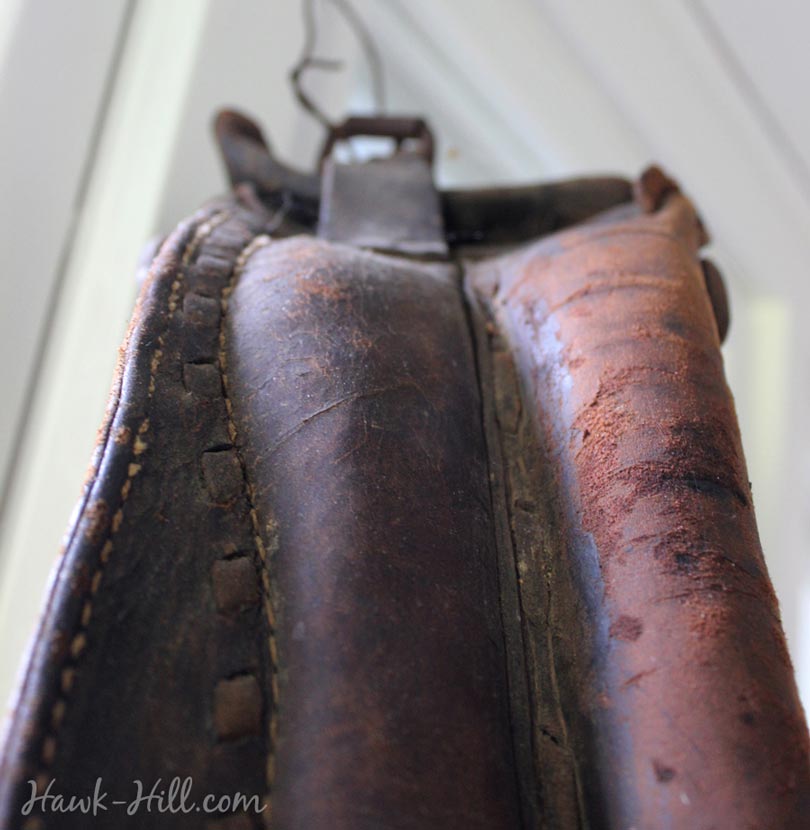
“Horse collar”, FYI, is the technical name for the large padded portion of an old fashioned farm horse harness (sometimes incorrectly called the “hames”) that would have rested around a plow horse’s neck and shoulders. While the strap portions of old horse harnesses likely succumbed to age years ago, the collars were made of thicker leather and many survive in great condition.
As I created these wreaths, I took step-by-step photos of wreath #2 so I could share with my readers a few quick instructions for turning horse collars into neat wreaths. The whole process takes maybe 15 minutes (30 minutes if you are as bad at tying bows as I am, or if you find yourself sharing my compulsive need to overfluff greenery.)

Step 1: Clean the Harness
Start by taking a few moments to care for the leather. This step will help keep your wreath looking great much longer- especially if you plan to use it outdoors. You can skip A and B if your collar is clean, but do not skip C!
A. Go ahead and WASH the harness thoroughly with water and, yes, even soap. Use saddle soap (available at any farm store) if you have it, but any mild soap will work. I like unscented castile soap (shop at Amazon here or from a small business on etsy here). If you found your collar in a similar condition to mine, you may need to scrub to remove layers of dirt and reveal the patina of the aged leather underneath. Be very gentle if the leather of your harness collar is brittle. Do not soak or submerge– these harness collars were often stuffed and padded with straw or newspaper and saturating the stuffing is an easy way to cause the collar to rot from the inside out.
B. Allow to dry. (all the way dry! No cheating! If you’re in a cold climate, do this indoors to prevent water from freezing in the cracks of the leather and causing damage)
C. When fully, 100% dry, you’ll need to oil the leather. Leather has natural oils that dry with age or are removed by soap and water and need to be replaced. You can buy special leather conditioners, but for a decorative piece like this its much faster and easier to use cooking spray. I use olive oil but any shelf stable oil would work.

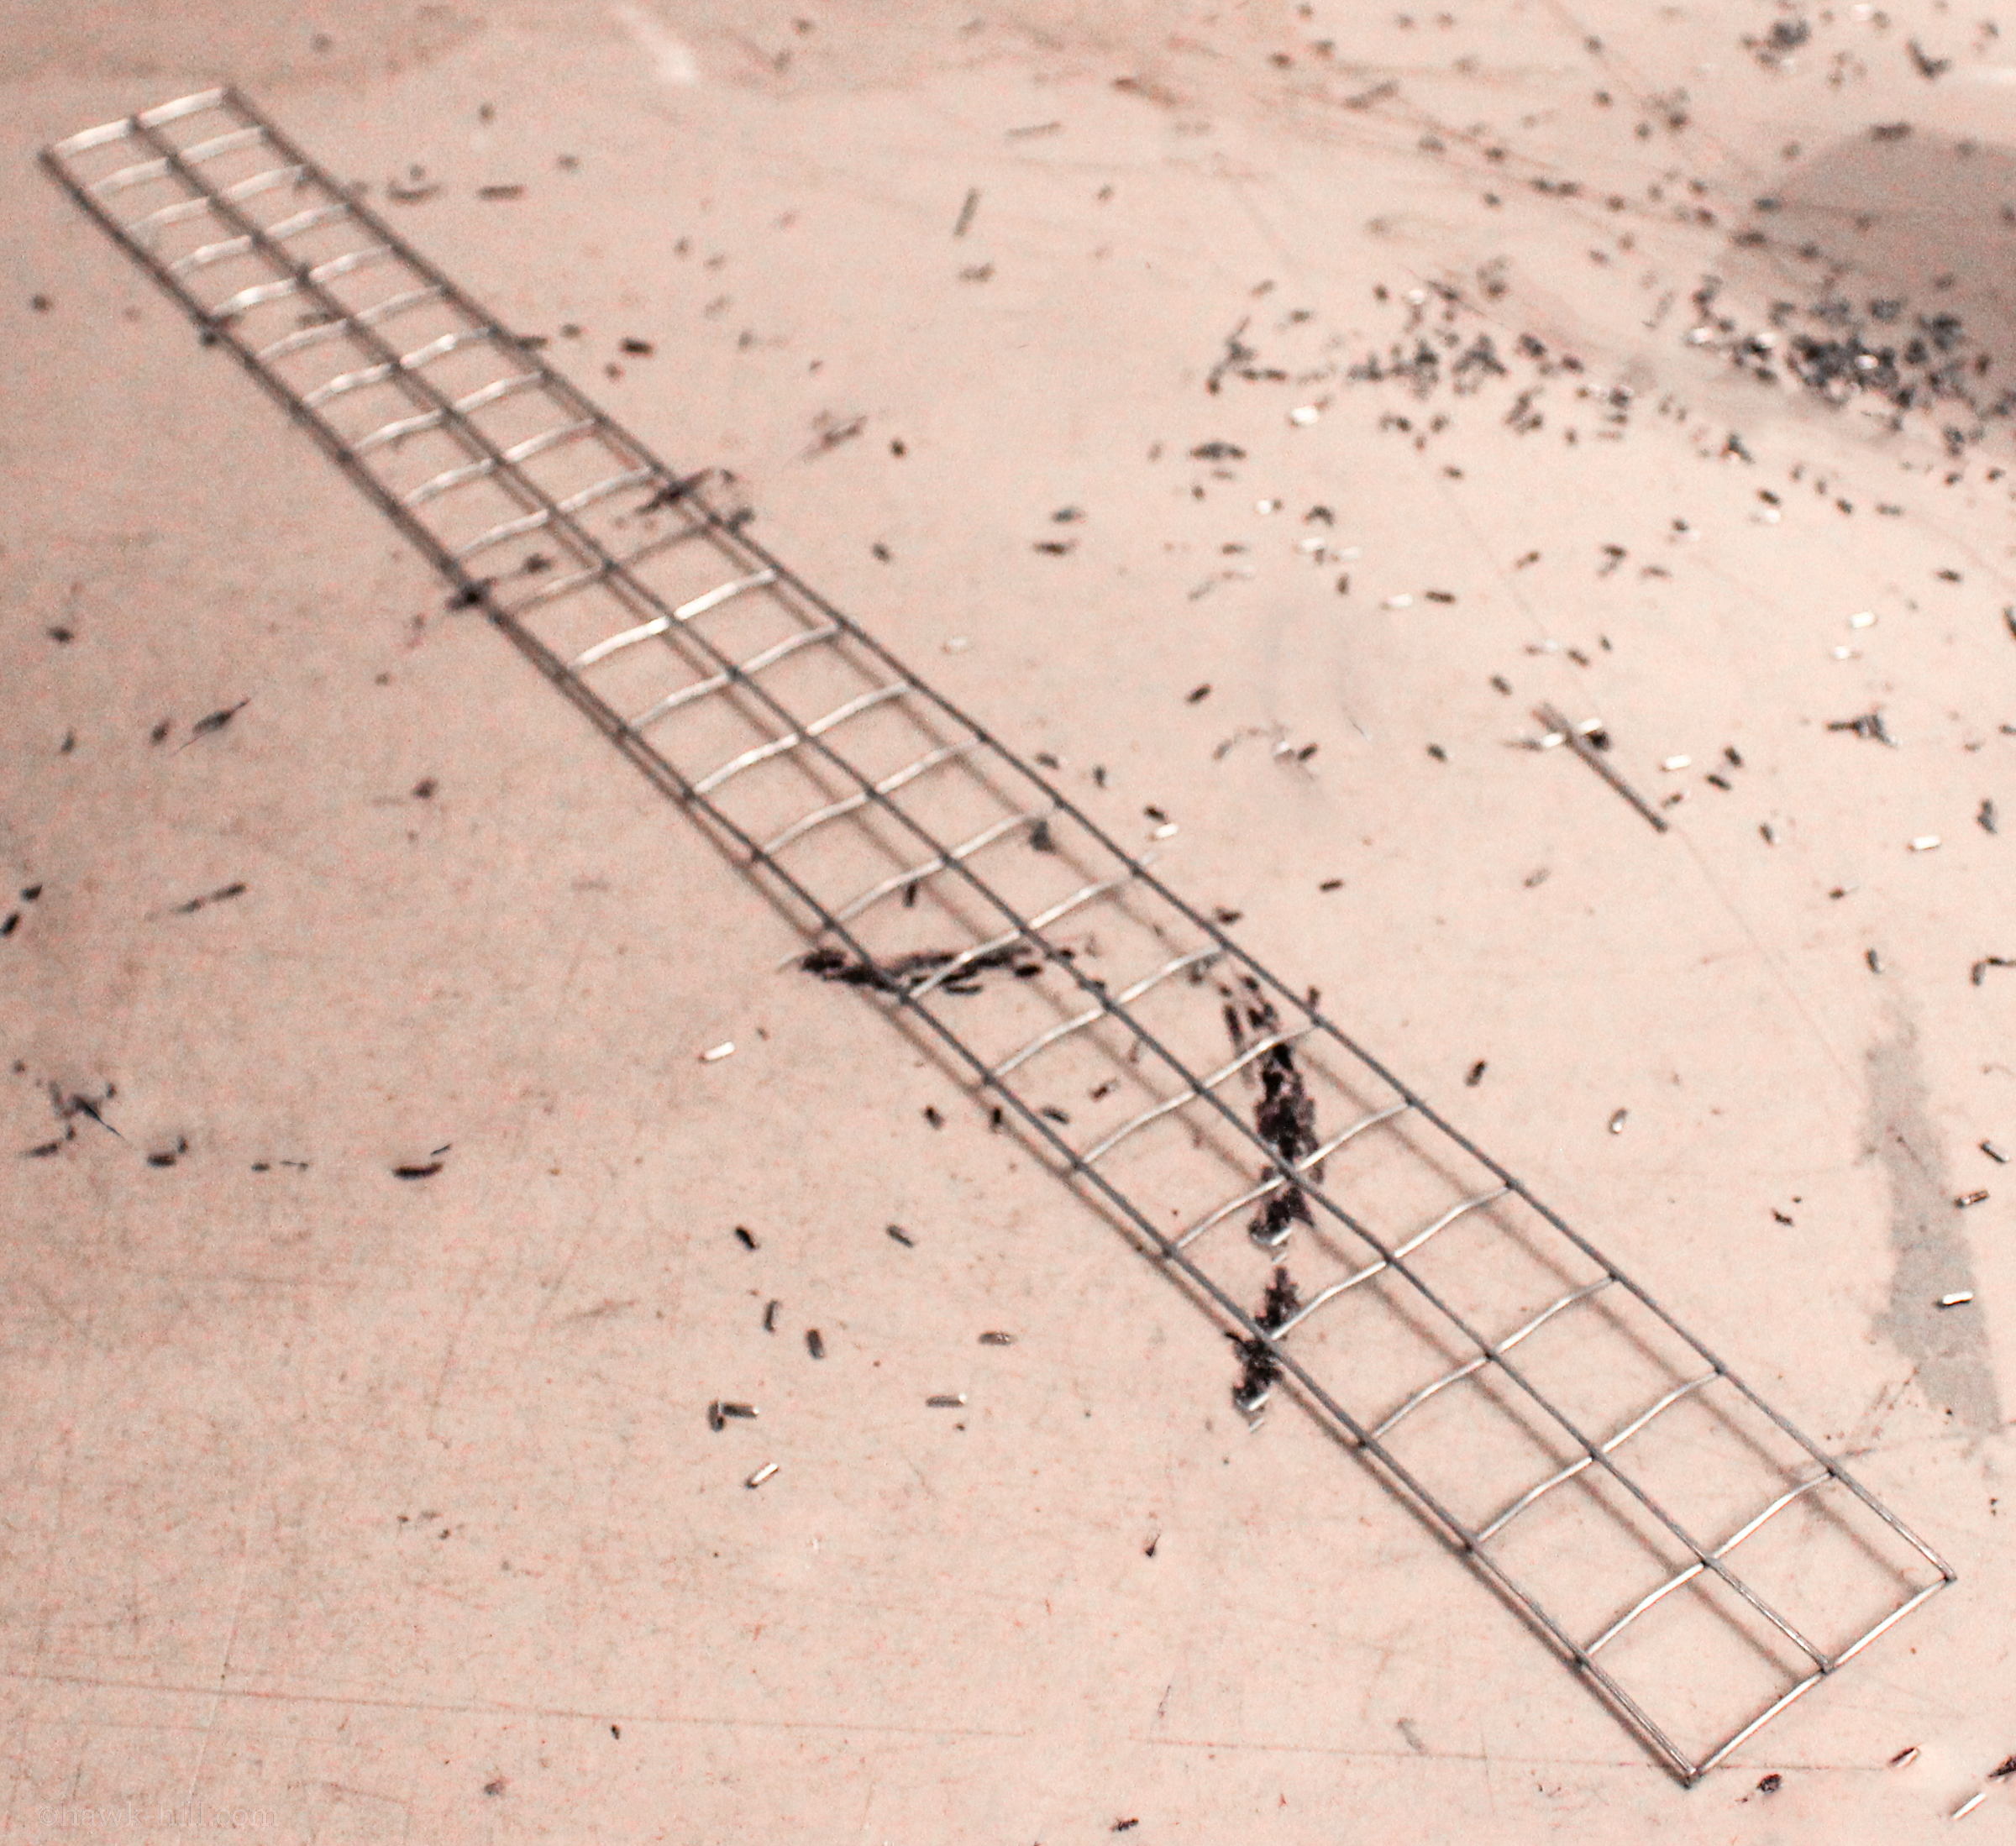
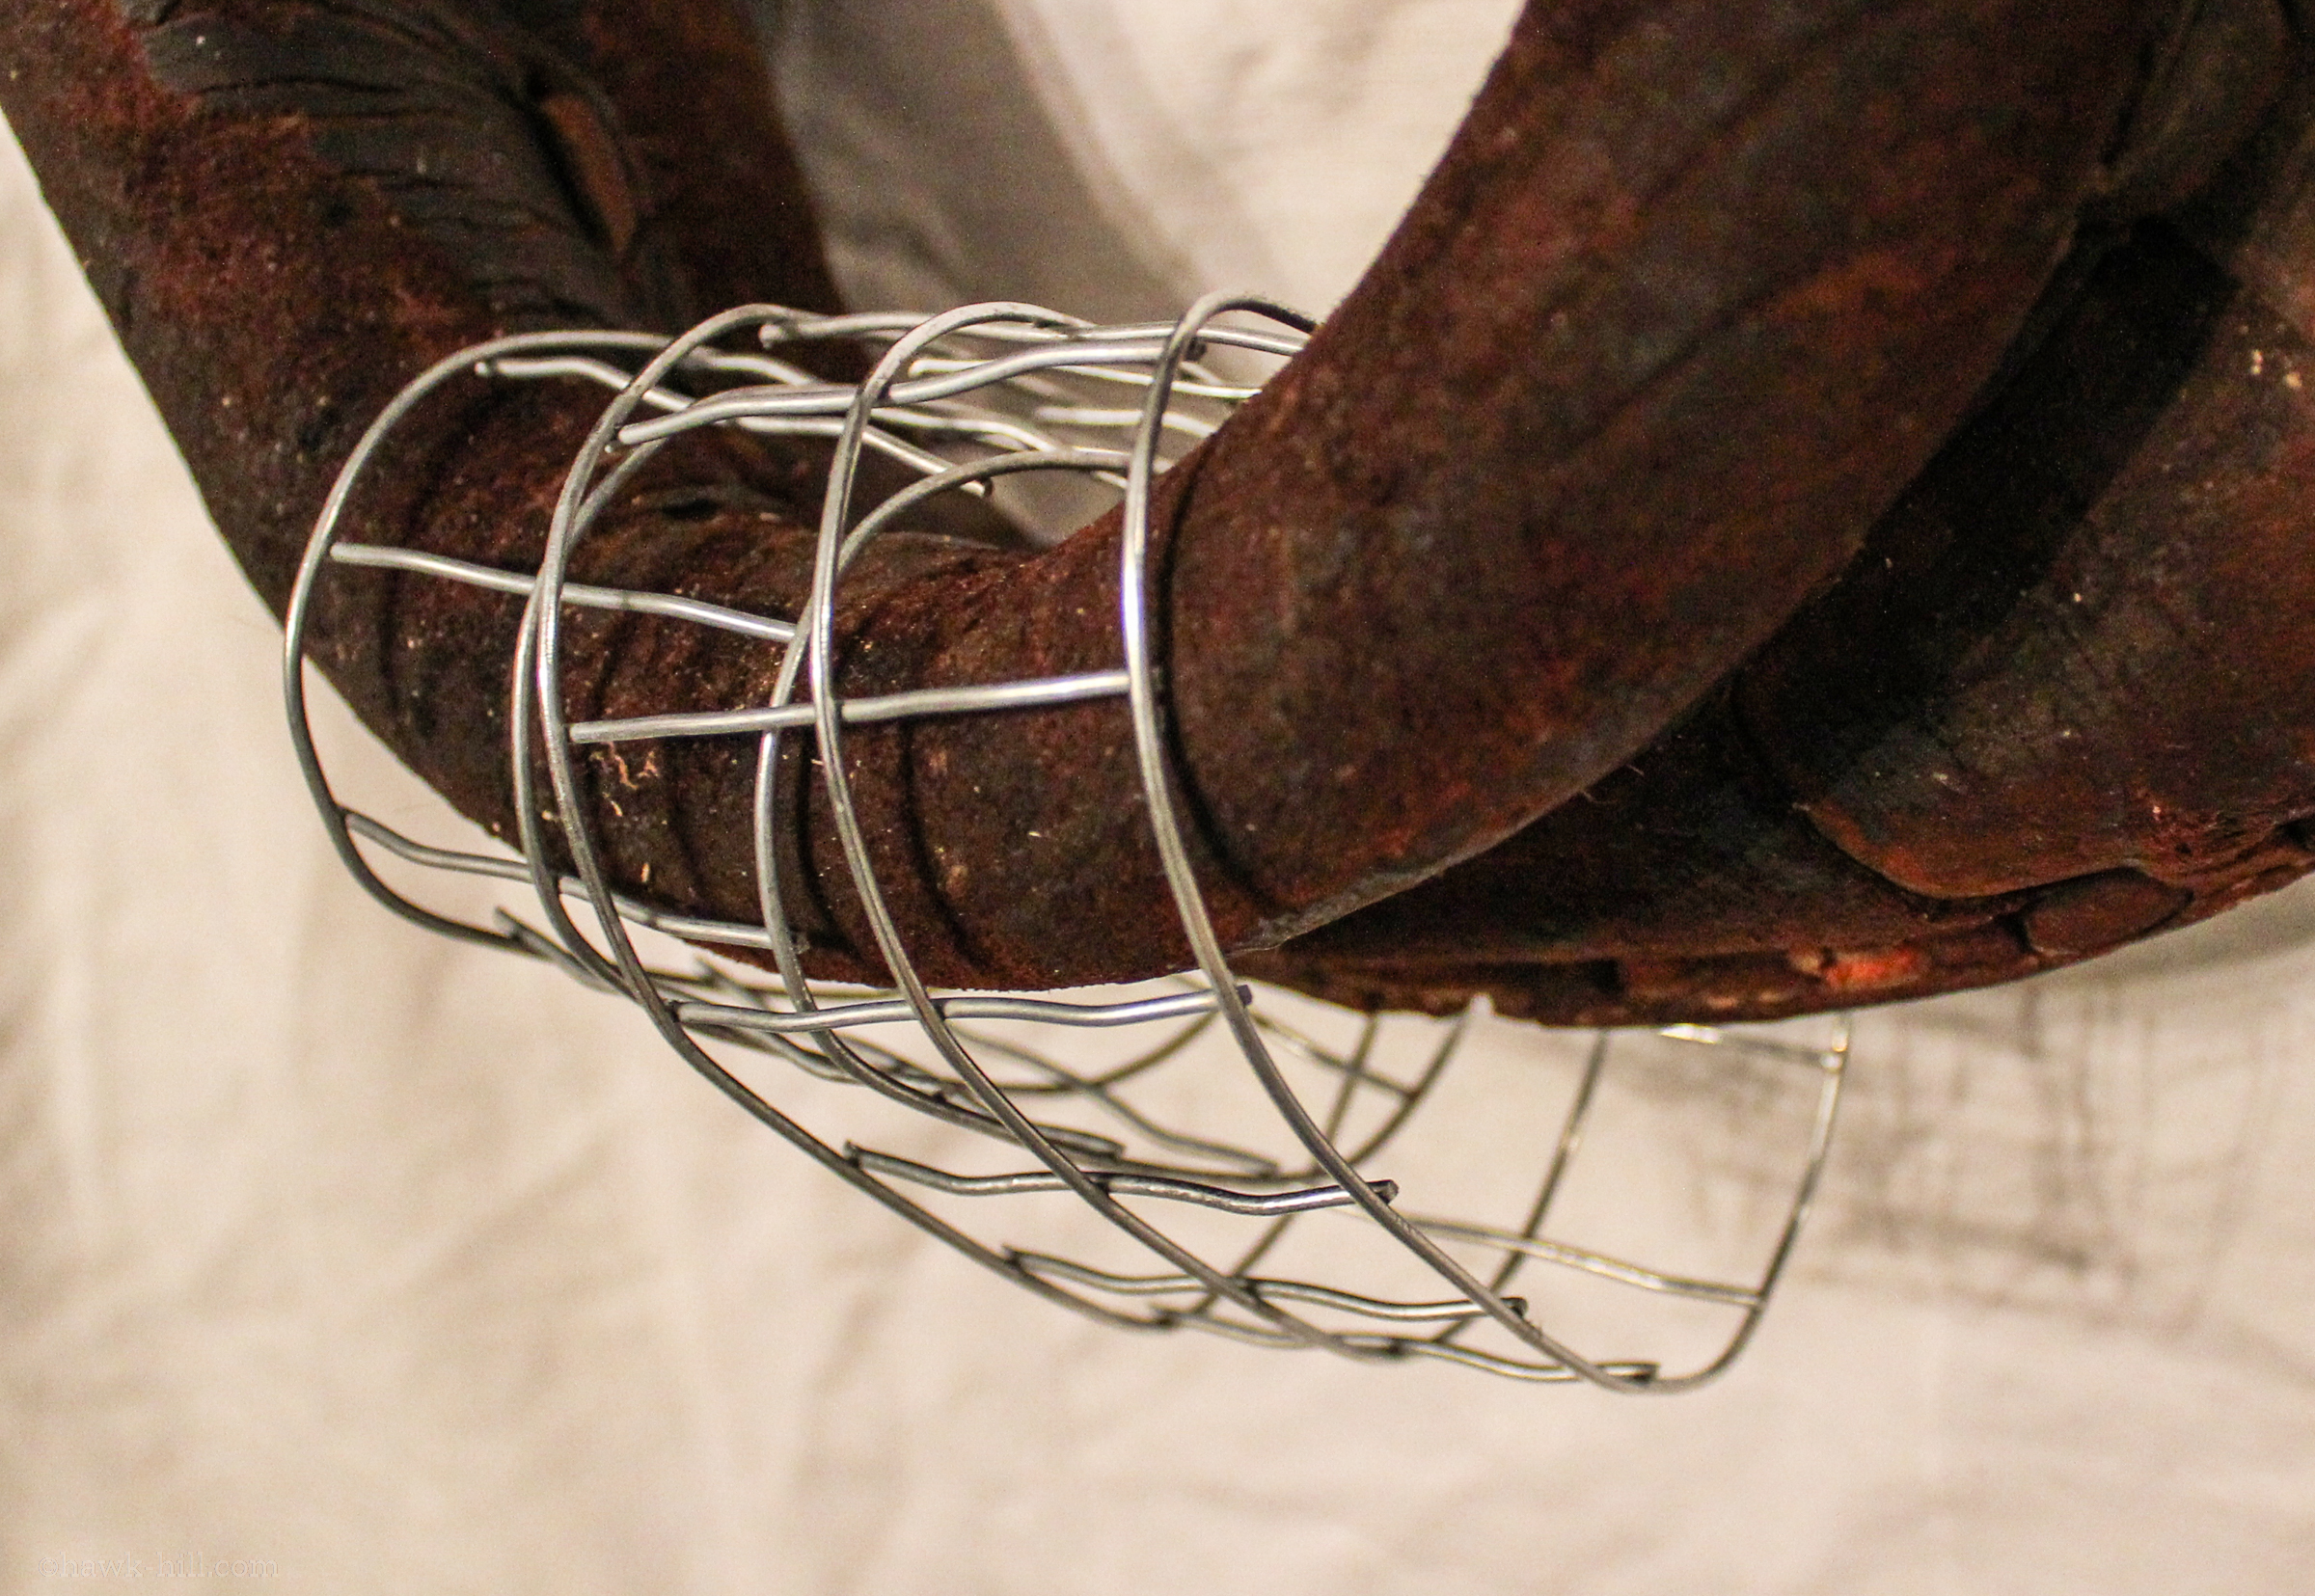
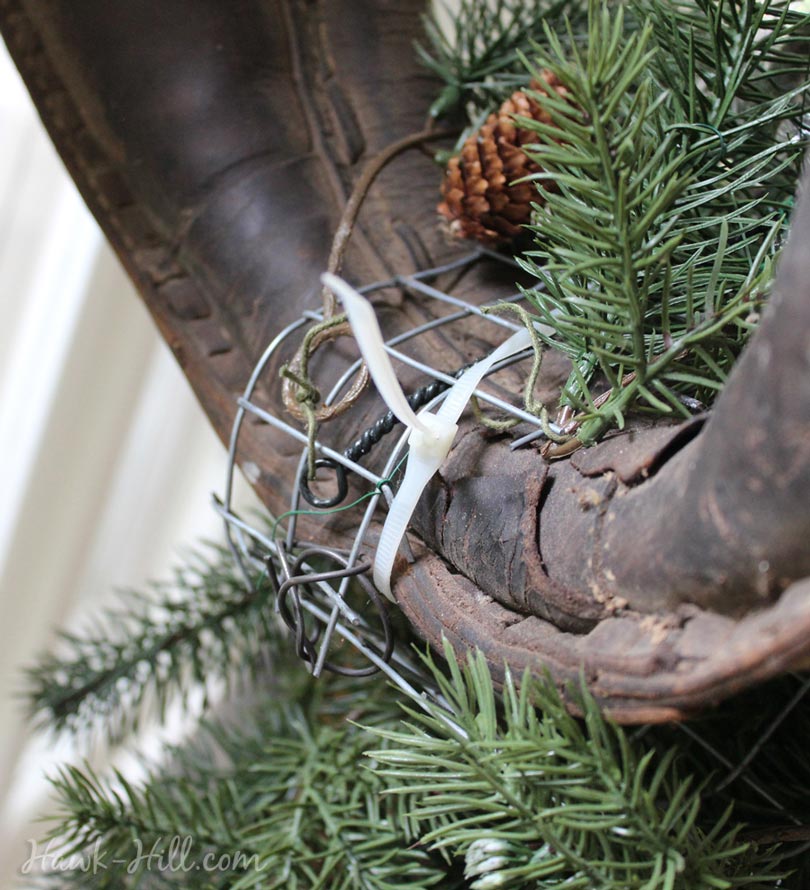
2. Make a Wire Base for your Christmas Greenery
We’ll begin by creating a base that we can easily attach wire the to anchor decorative elements. I cut a narrow strip from a roll of hardware cloth and wrapped that around the bottom of the collar, but you can use whatever material you might have handy that will accomplish the same purpose.
3. Attach Greenery
The next step is to begin attaching greenery.
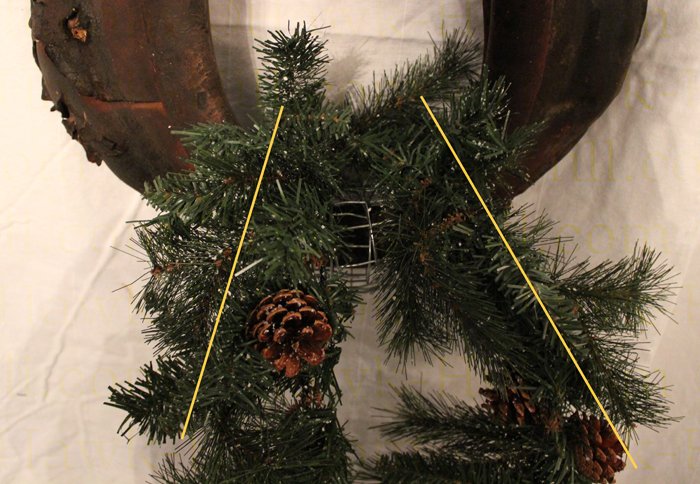
Take 2, roughly 24 inch long pieces of garland and attach them side by side to the wire base you just added to the collar. Leave a space between where you anchor these pieces, as a top piece and decorations will fill this space in later, and it’s important that the top section appear wide, to balance the wreath. You can use the built-in wiring or a zip tie for extra security.
These two pieces will hang separate at this point, like this:
4. Bundle and Fluffy Christmas Garland
Bring the ends of each garland together. Make this bow-shape permanent by intertwining individual pieces of greenery together at the bottom. Fluff your greenery. It is okay at this point for it to appear thin in the center, but the basic outline should balance out the top of the collar.

5. Fill in the Garland
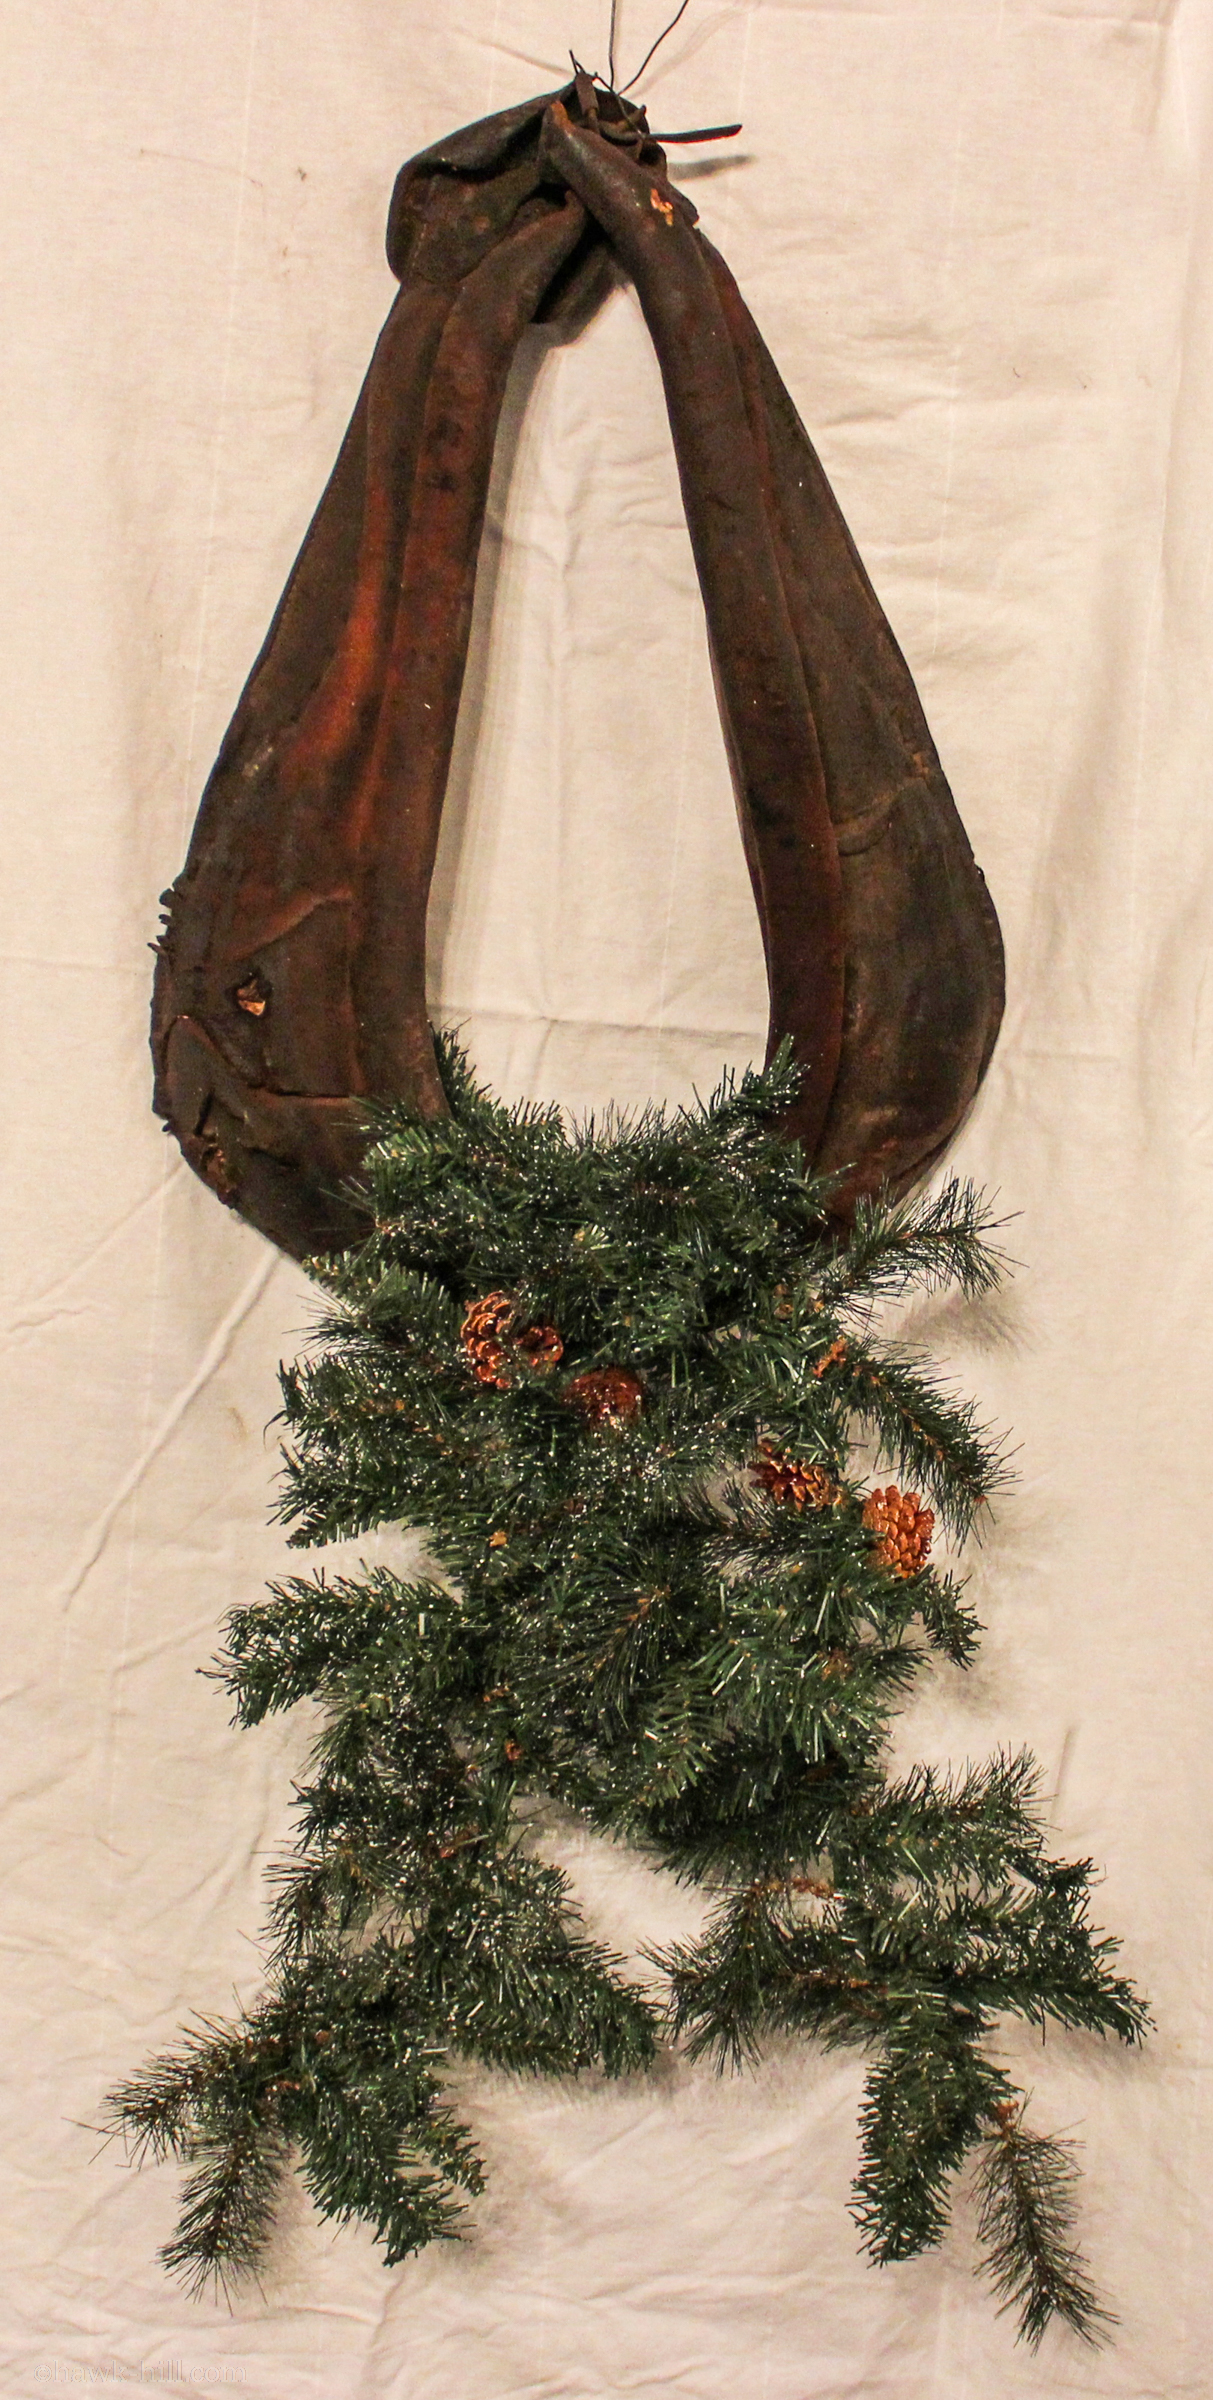
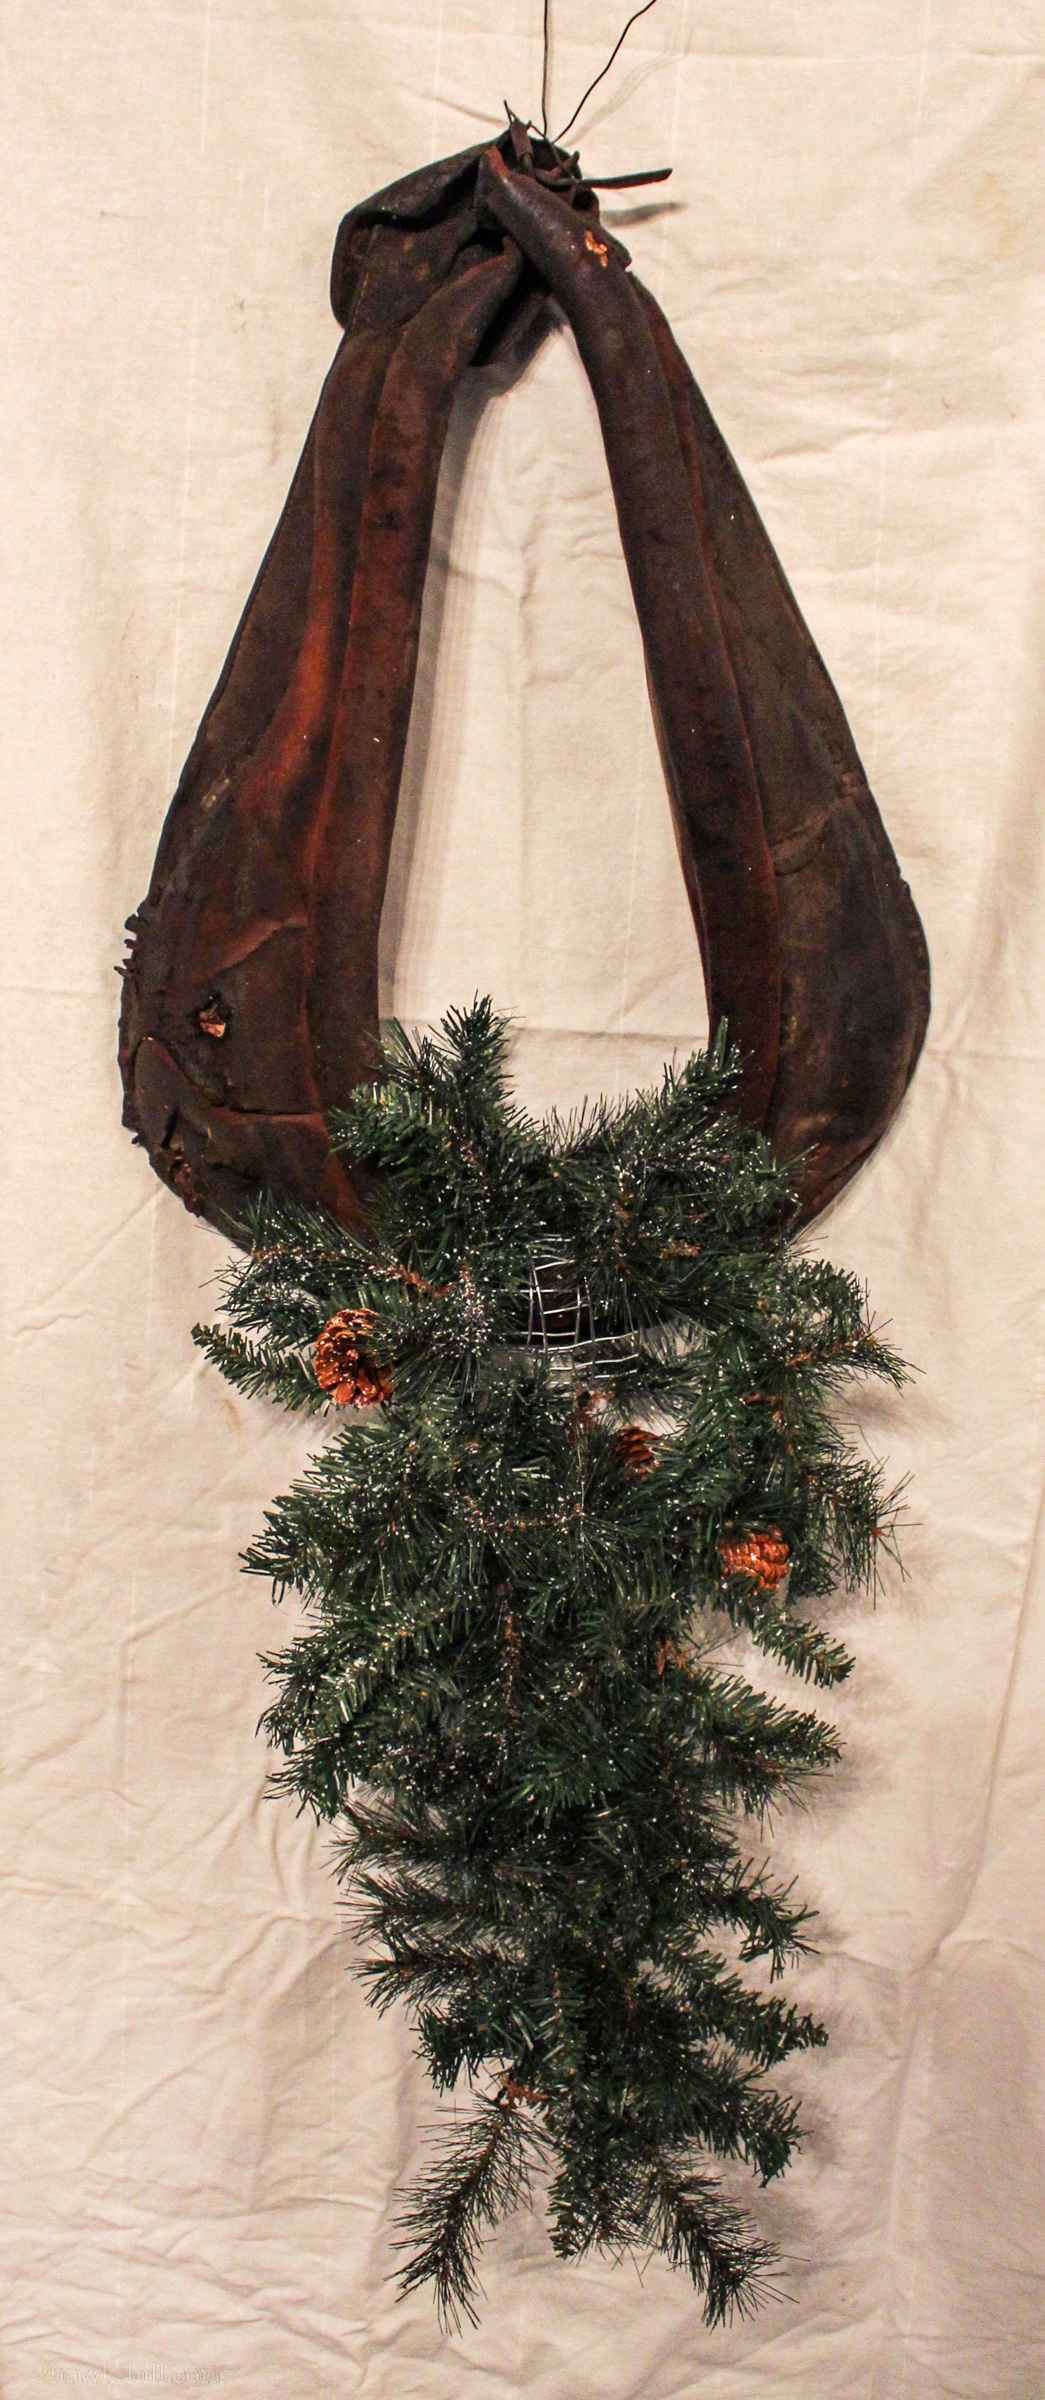
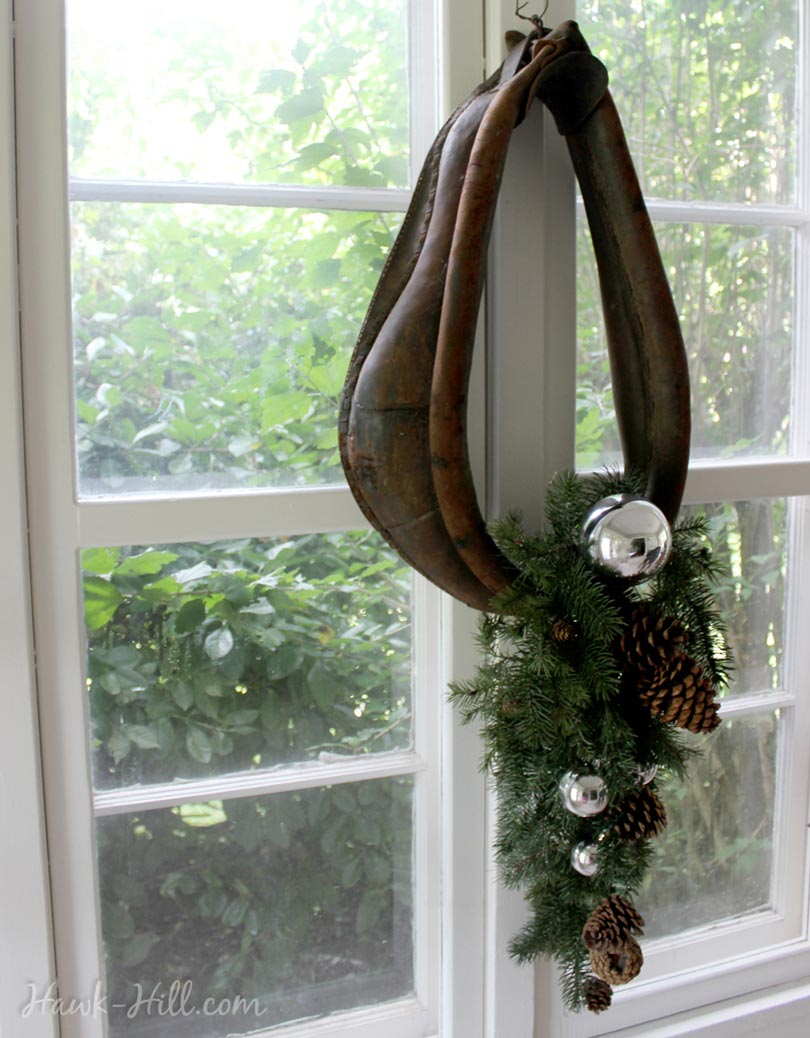
take a new piece of greenery, about 12″ shorter than the first pieces, and attach it to the center of the bottom of the collar, overlaying the sparse portion of the lower layer. Personally, I use a more expensive, higher grade of greenery for this section- because it’s so much more visible. Somehow I managed to miss getting a photo of this step, but you can see the 2nd layer on the photo below, under the pinecones.
Step 6. Add ornaments and decoration
You’ll want to add some decorations to bring your wreath to life. I used silver ornaments on my first wreath and pinecones on my second. You can wire in each object separately or wire the decorations together into a sort of garland and then anchor the garland to the wreath.
Just choose a few items. Whatever you choose, your horse collar wreath will balance out better if you use larger items towards the top and smaller items where the greenery thins and narrows. So I picked a few large, a few medium, and a few small pinecones:
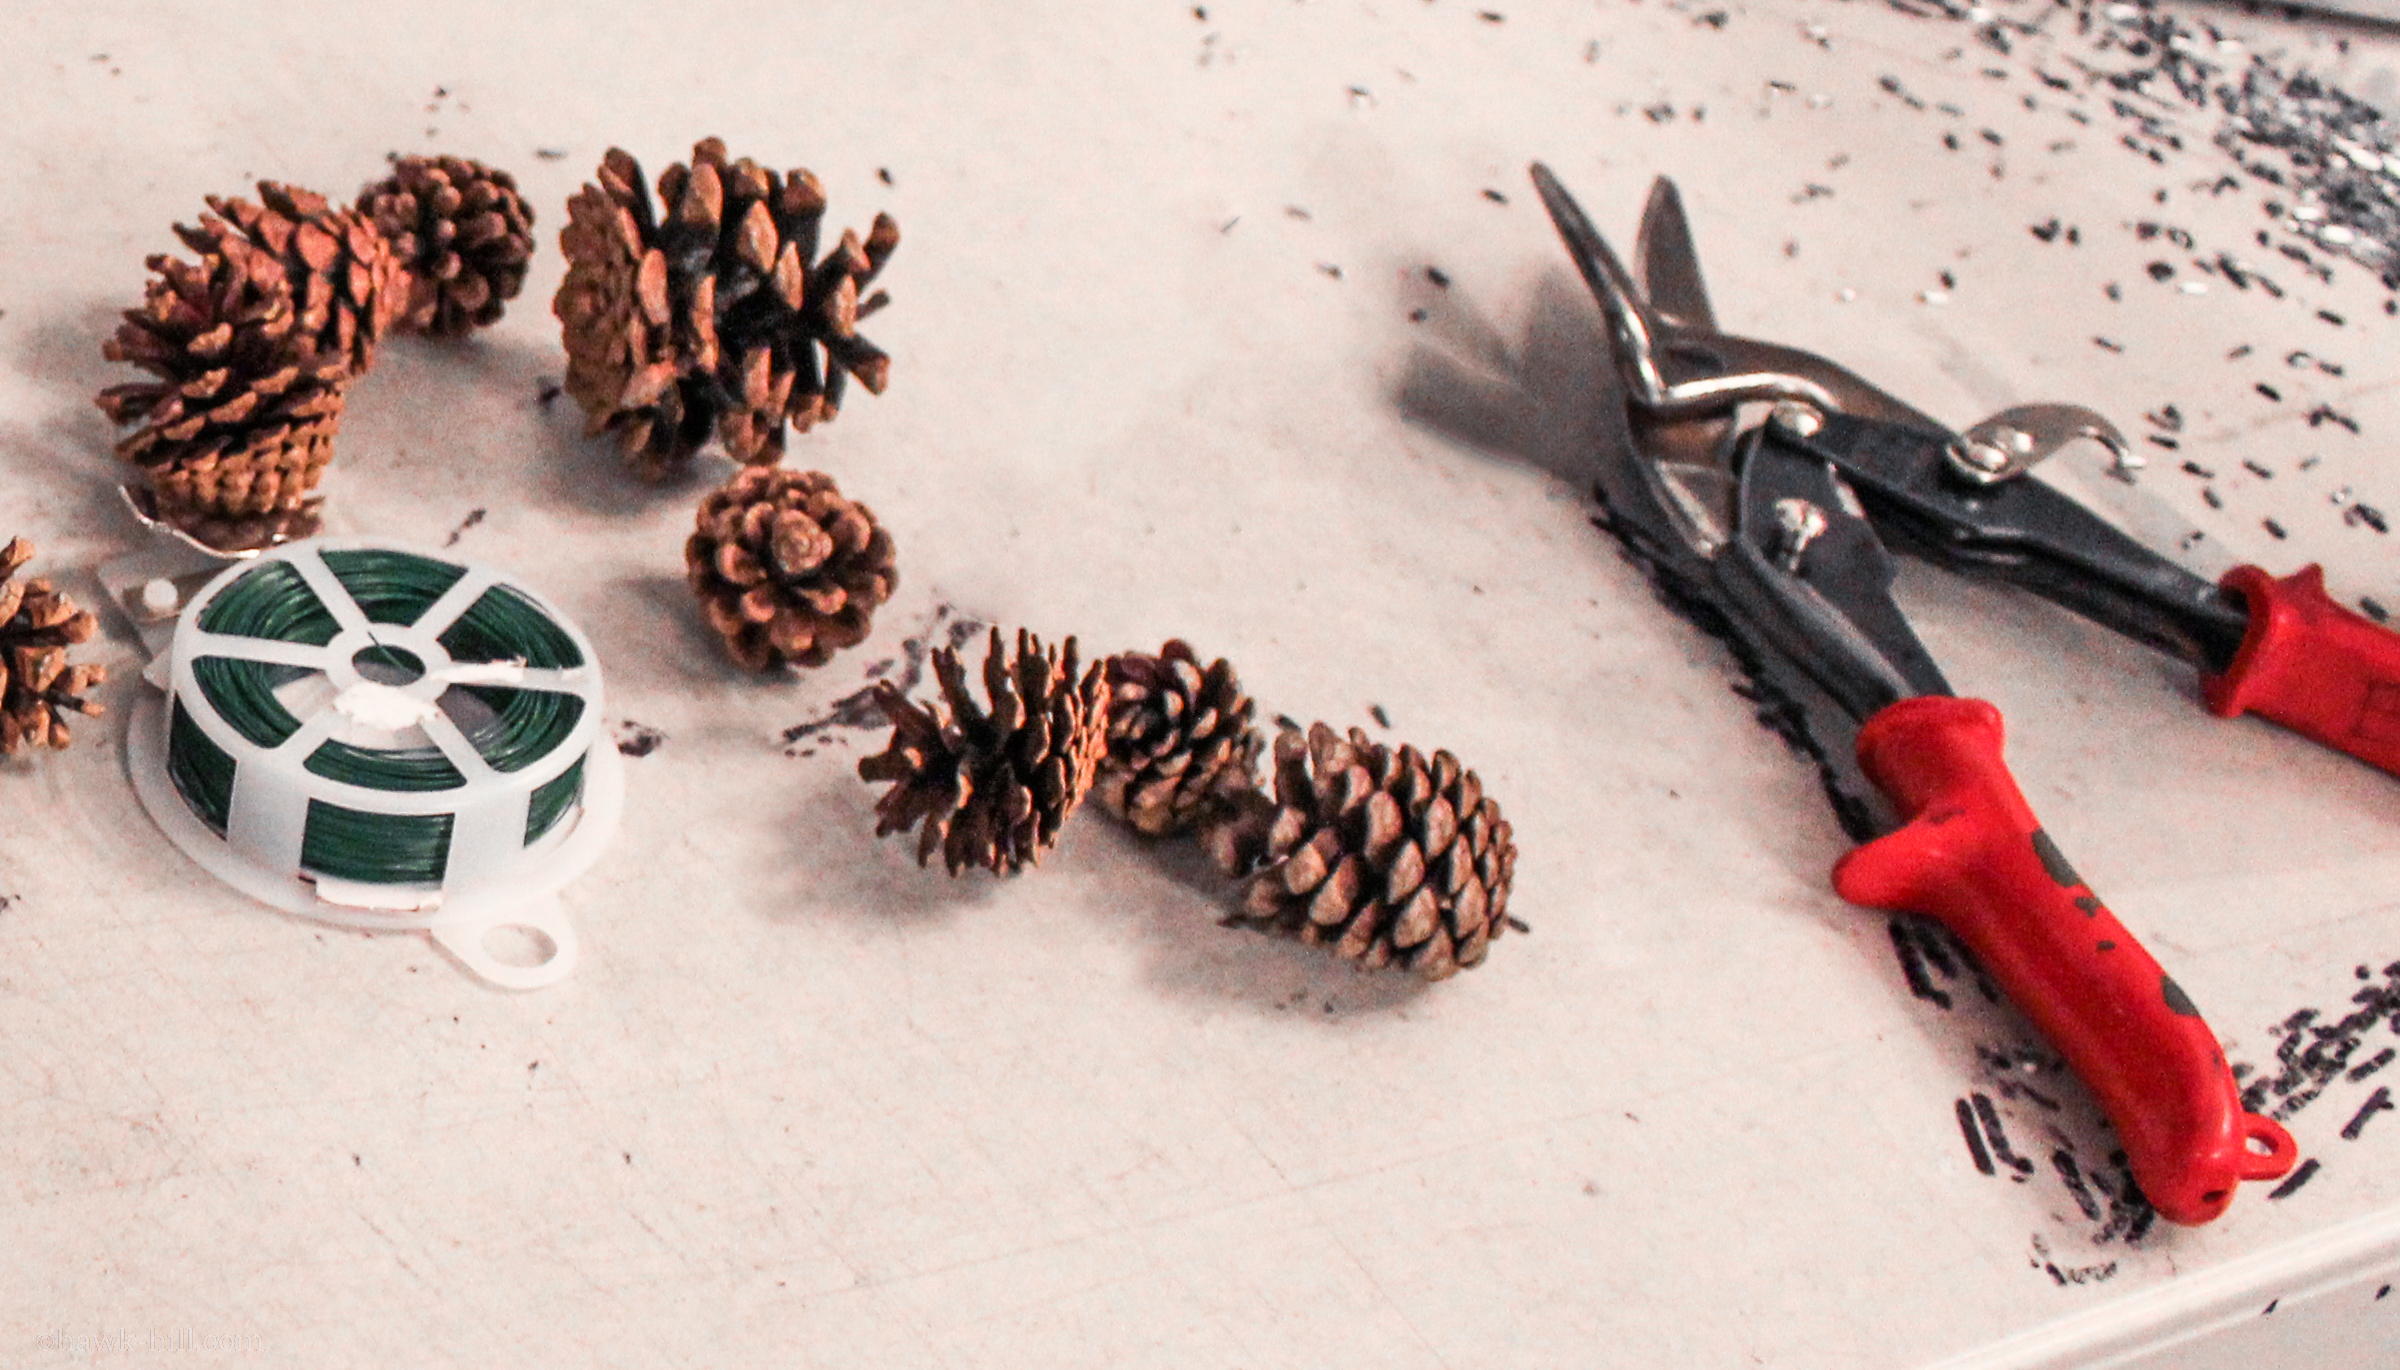
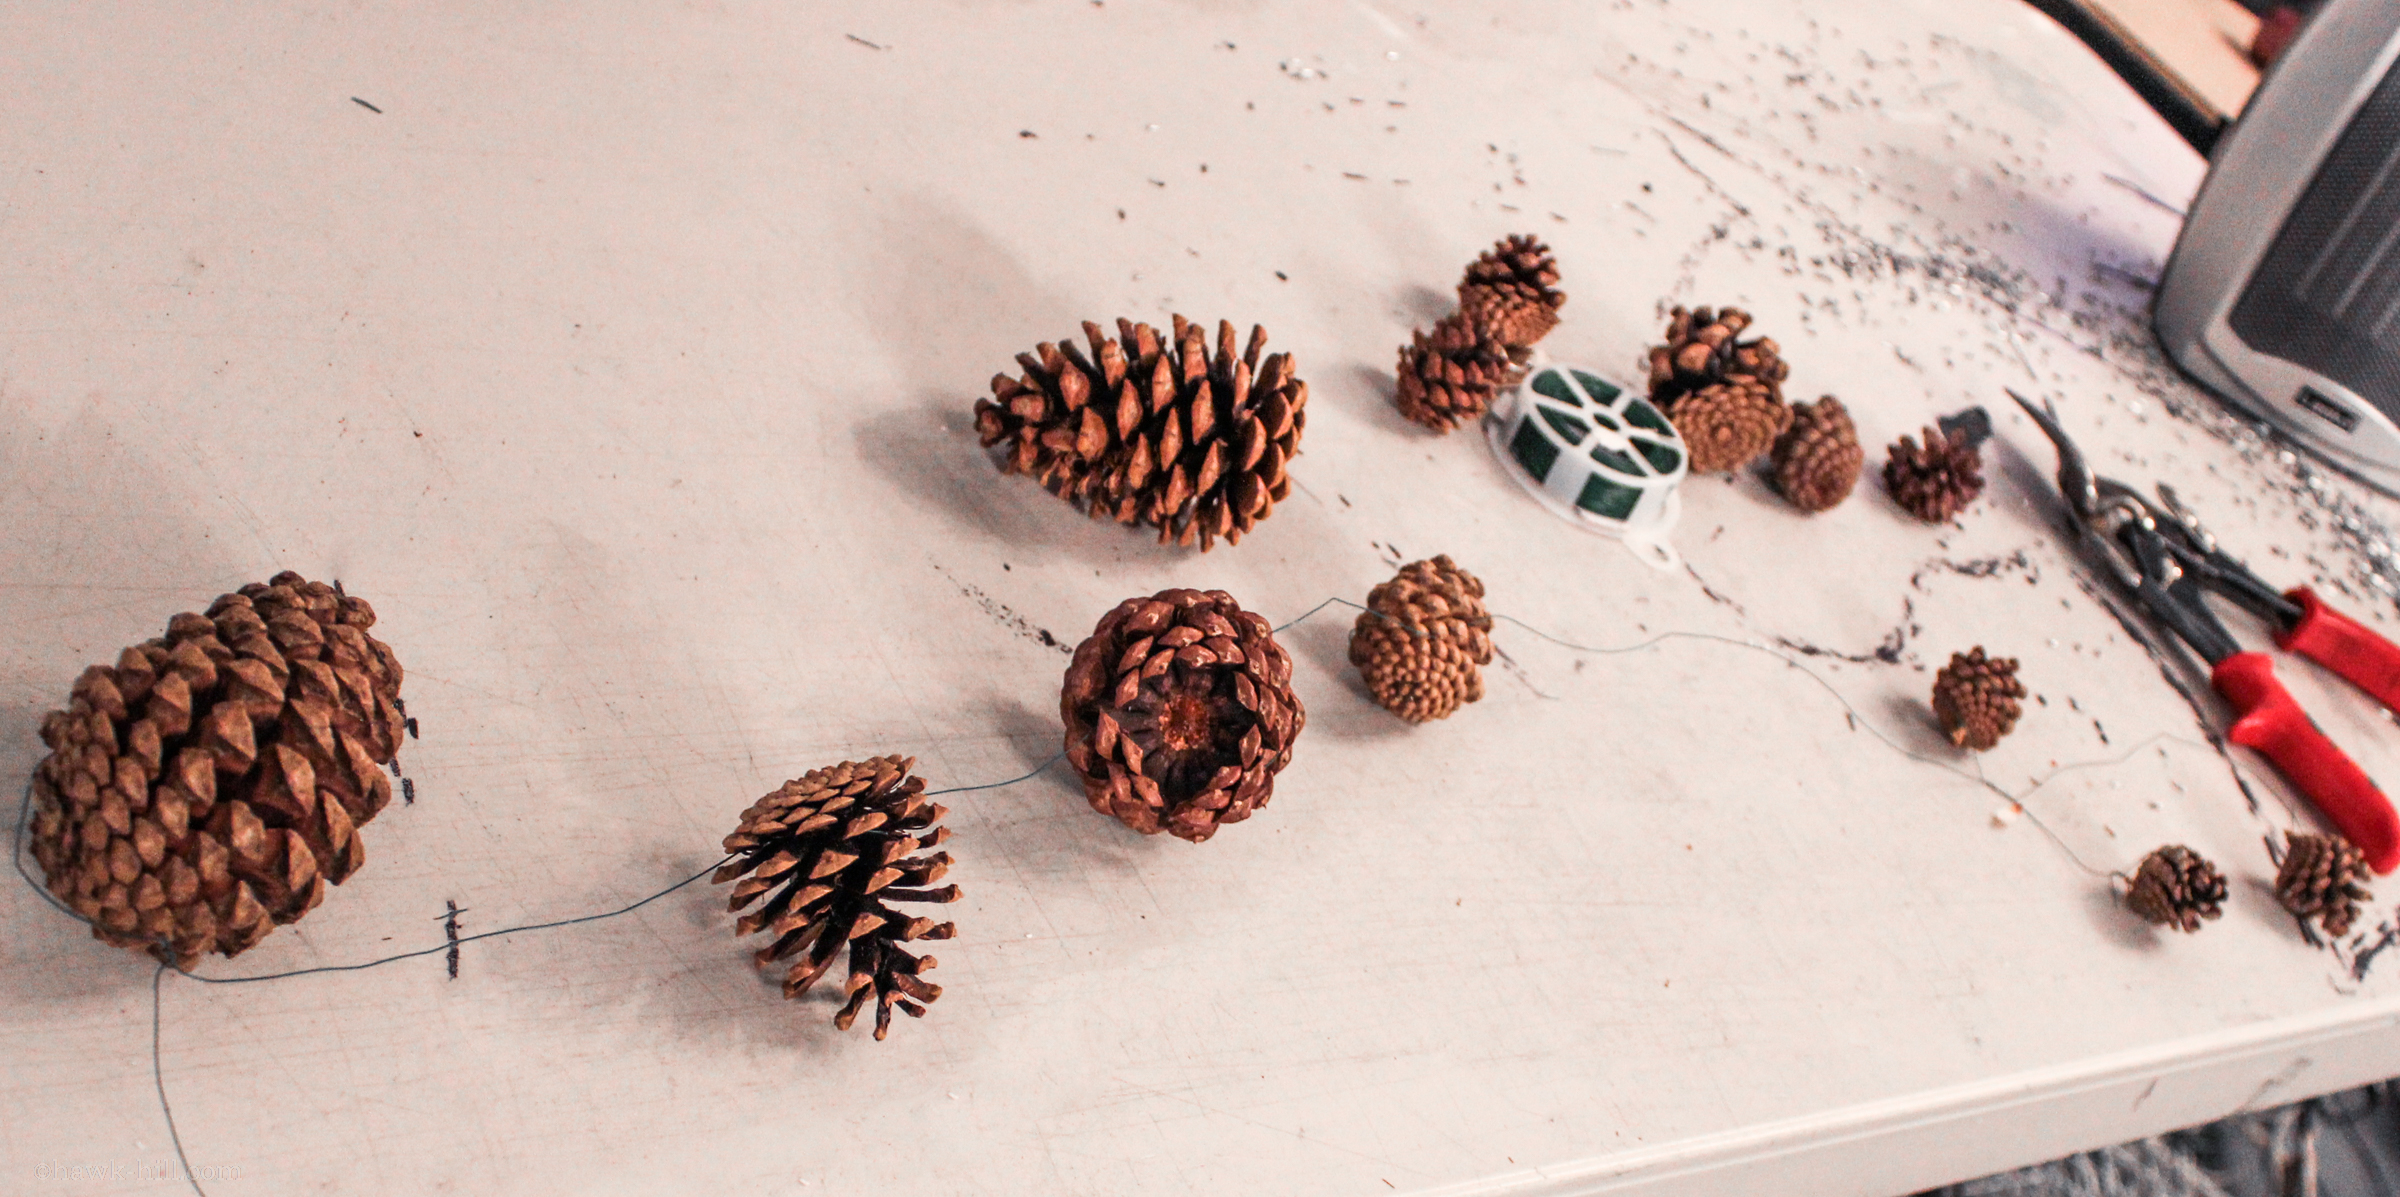
And using green floral wire I wired them together, largest to smallest, about 4″ apart:
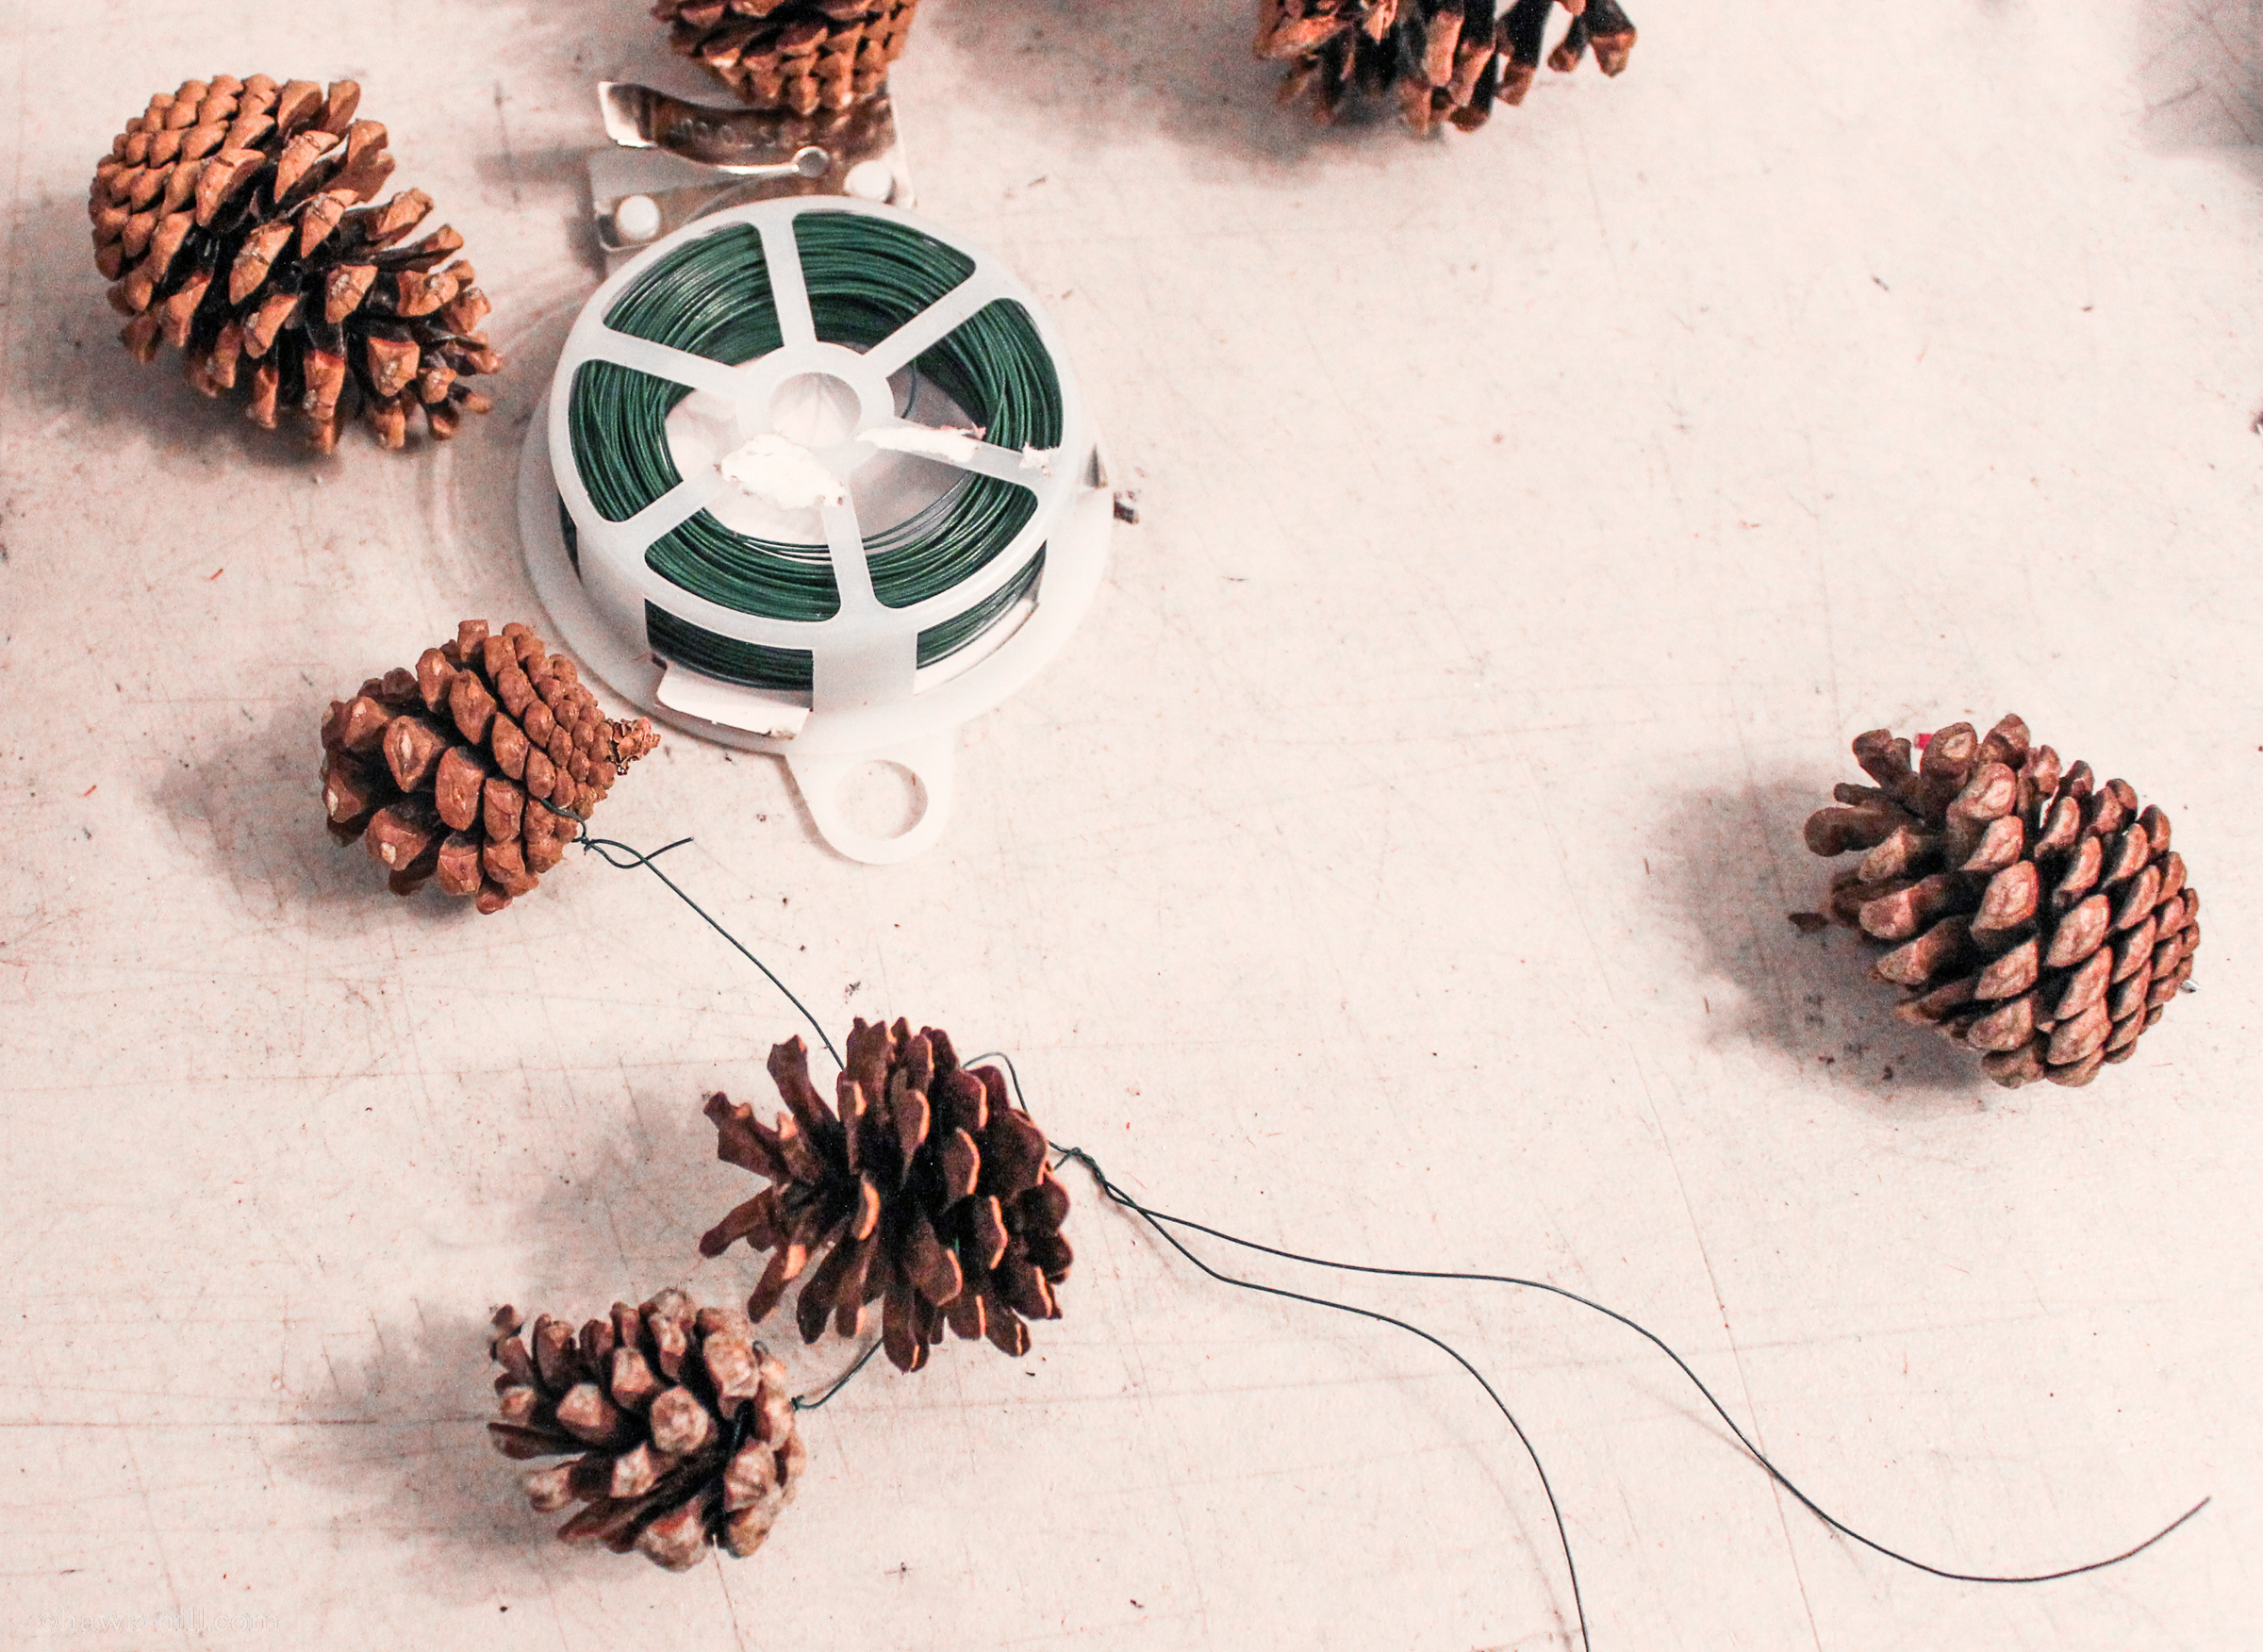
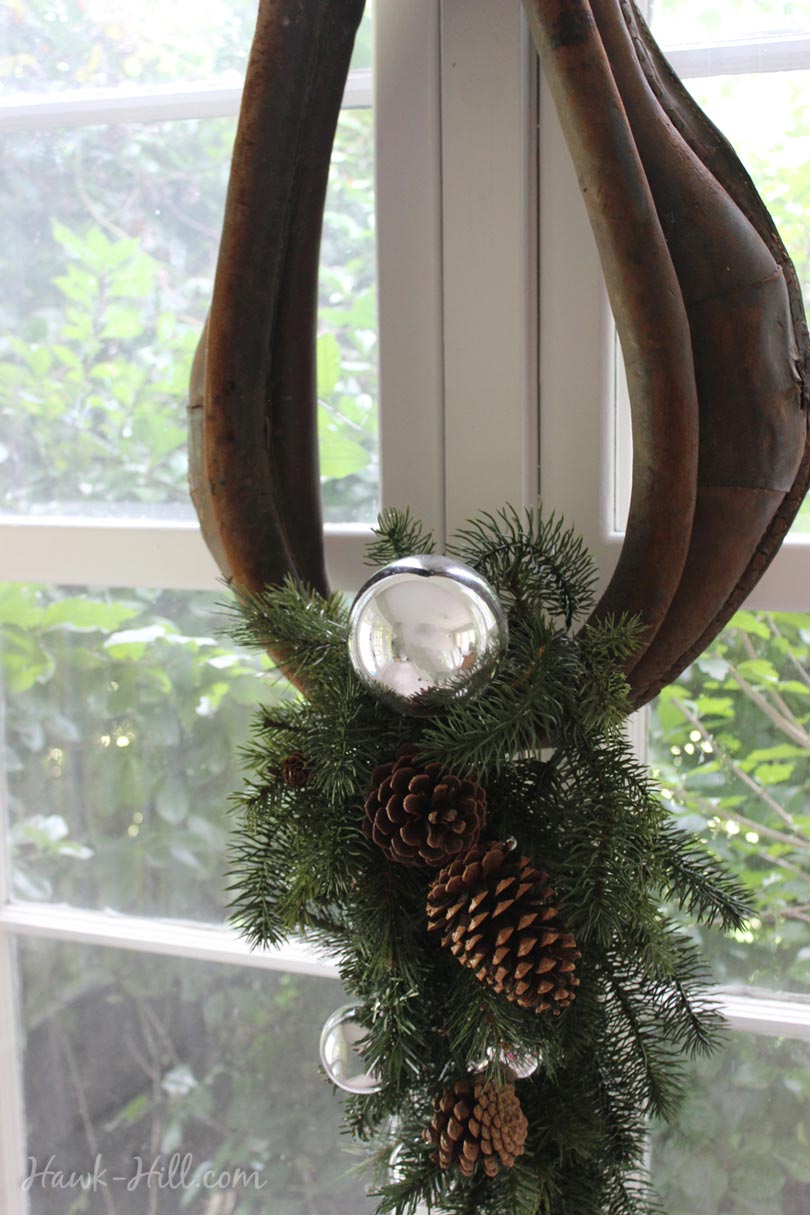
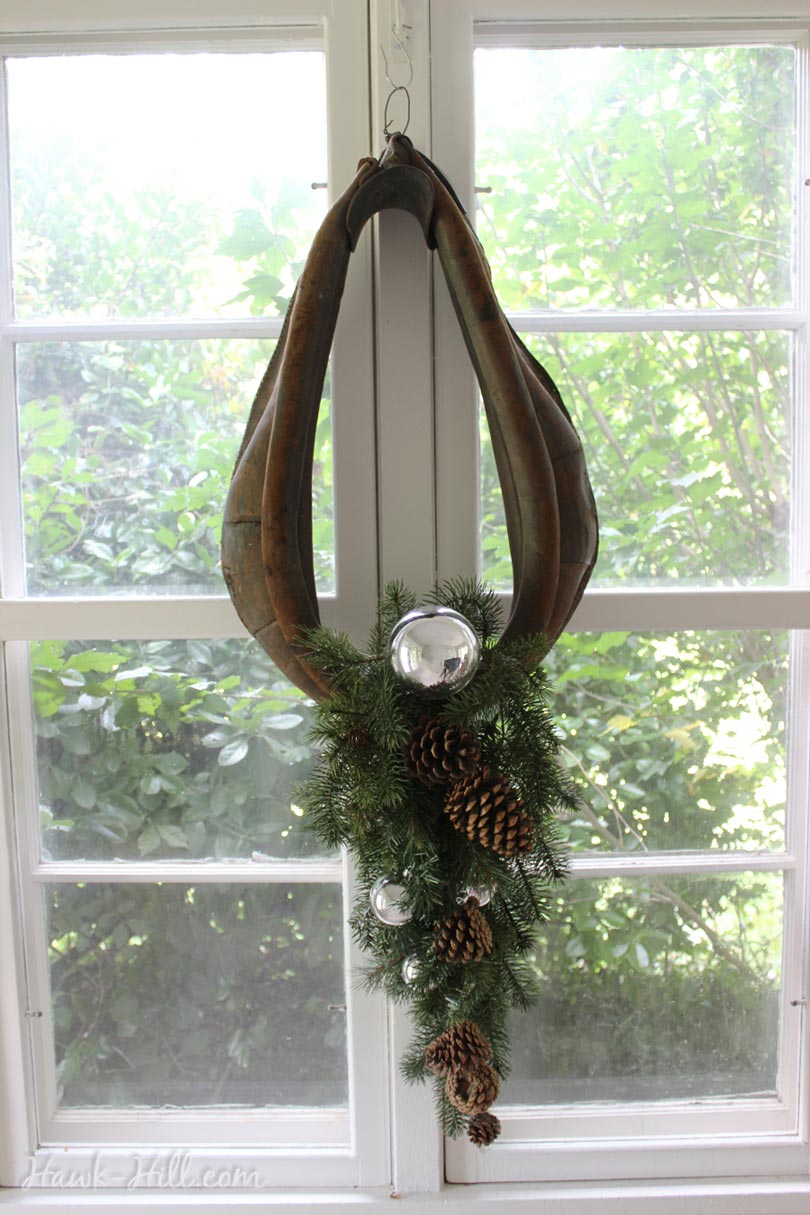
I then anchored my pine cone garland to the top, and nestled my pinecones into the greenery so they’d look natural. Be sure and intertwine the floral wire and the sprigs of greenery, so outdoor display in the wind won’t ruin your careful arrangement.

7: Add a Box (Optional)
You may want to add a bow to finish your wreath. I thought the red burlap complimented the aged leather well. And after three tries I came up with a decent, though a bit larger than I’d planned, bow. (I’ll skip the bow tutorial since there are literally thousands of how to videos on YouTube and I’m not skilled enough to add anything to that conversation!).
The final result: a horse collar wreath for display for many years to come!


Here’s a shot of a piece I saw that inspired this full-on wreath I’ve created and pictured above.
See Also:
Thank You for sharing with your readers another absolutely outstanding equine wreath idea! I love your site so much and refer many here! Thank You Again~!!!
Thanks so much, Susan! I’m just so glad to have someone appreciate my equestrian-centered style!
I SO LOVE this use of old horse collars!! I have my Grandfather’s saddle, horse collar, headstalls with blinders….and never knew how to display them! I have his saddle in my living room….also the horse collar which is in excellent shape….SO, thanks to you I use it as seasonal decoration and focal point! NOW, for my question…HOW do we hang it??? Mine is VERY VERY HEAVY ?? I have plaster walls….my front door is metal…so that is out….? Any suggestions? 🙂 <3 <3 <3 Any ideas for the headstalls?? Those will need cleaning and conditioning….one has a snaffle bit attached !!
Thank you so much! Can't wait to hear back with your suggestions 🙂
Dolores
Oregon
Hello I was wondering how do you hang the wreath outside? I have a metal door and I was wondering what kind of hook I could used and make sure the door can locked. Thanks for your answer and thank you for your awesome idea!
Hi Anik! Any sturdy wreath hook that hooks over the top of a door should work to display this horse harness wreath!