
I love that both felt art and embroidery are growing once again in popularity, rediscovered by modern crafters. In this post, I’ll show you how I combine felt art, embroidery, and collating to create unique art pieces made entirely of soft felted textiles.
Felt as an Art Medium
Recently, I’ve been experimenting with felt applique as an alternative to stitches for filling in large spaces with color in needle-art. I’ve never had the patience to seriously embroider, but by using blocks of felt cut to size I’m able to fill large areas with just a few stitches and finish entire wall hangings in one or two sessions instead of days or weeks.
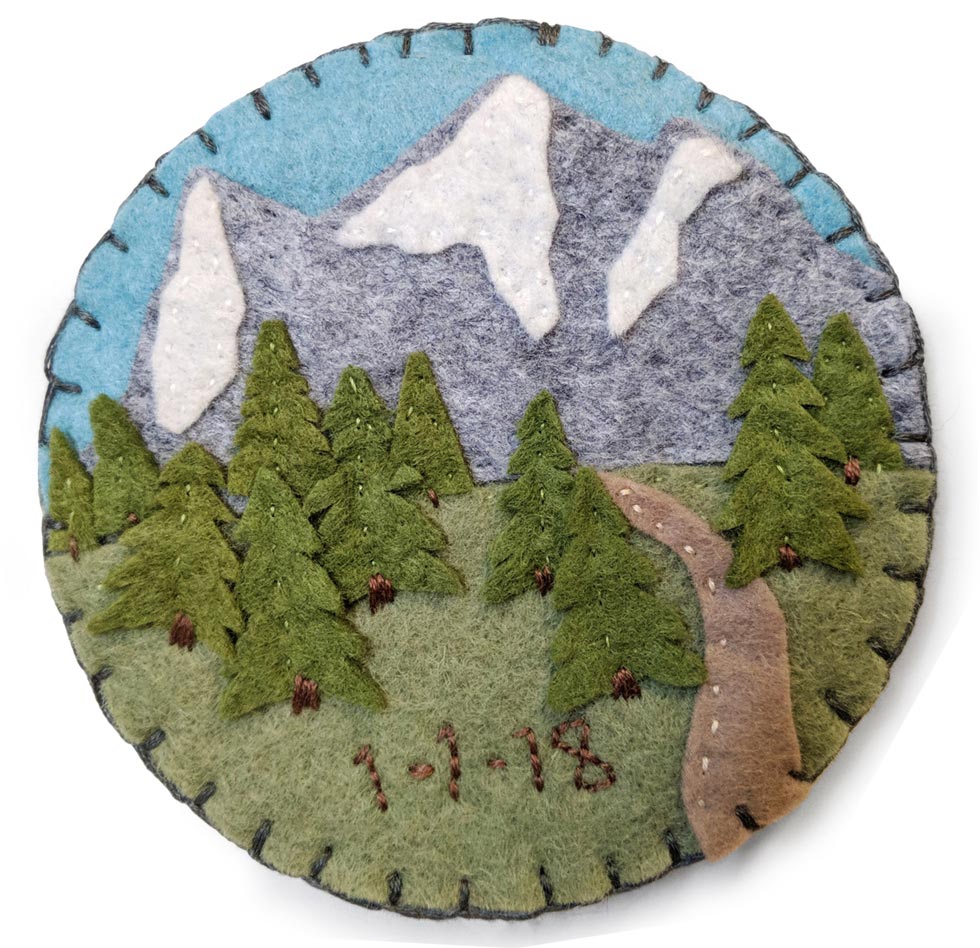
In this tutorial, I’ll be demonstrating how I made this mountain scene Christmas ornament from felt art embroidery. You can even download my template to make your own!
I just love the color pallet that came together for this piece and the hipster-camping vibe from this fiber art. I made this particular piece without an embroidery hoop- but it might make the process a little easier to start on a hoop until the layers build up enough to create some rigidity in the piece.
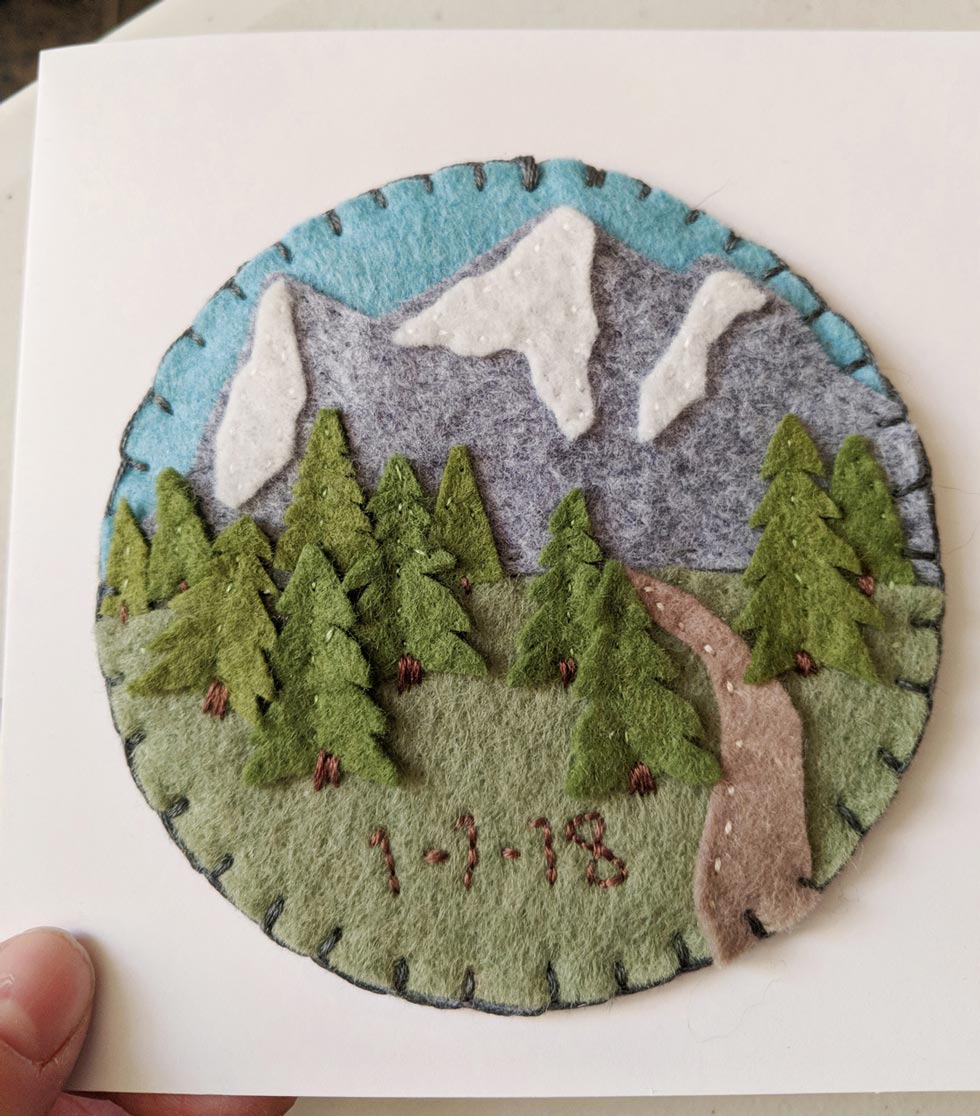
I created this mountain scene ornament for outdoor-loving friends who were married over the past holiday season. I used the finished piece to adorn a card, but also added a loop and loosely affixed the ornament, so they could remove and use it as an ornament on a Christmas tree. (Incidentally, I recently discovered wool-felt makes a superior diffuser for essential oils, so using something like this as a car air freshener is a perfect use too!)
Mount Baker in Washington state was the inspiration for the mountain in the backdrop of this woodsy PNW scene felt art. You can use your favorite mountain when making your version of this project for yourself. Just print and resize an outline of your favoirte mountain and cut the shape out of felt, substituting your silhouette for the mountain shown on the pattern.
Download the free printable PDF pattern
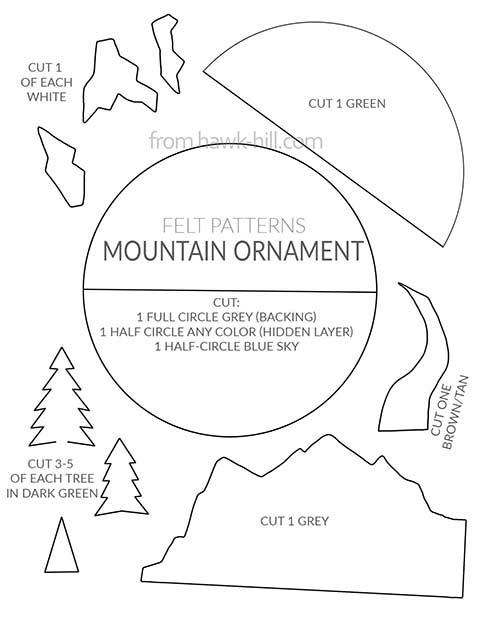
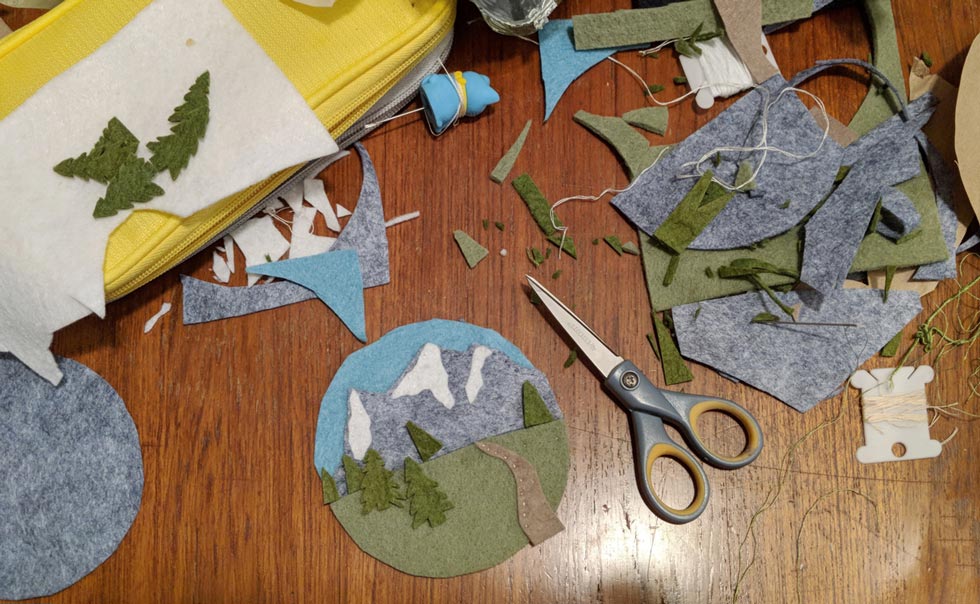
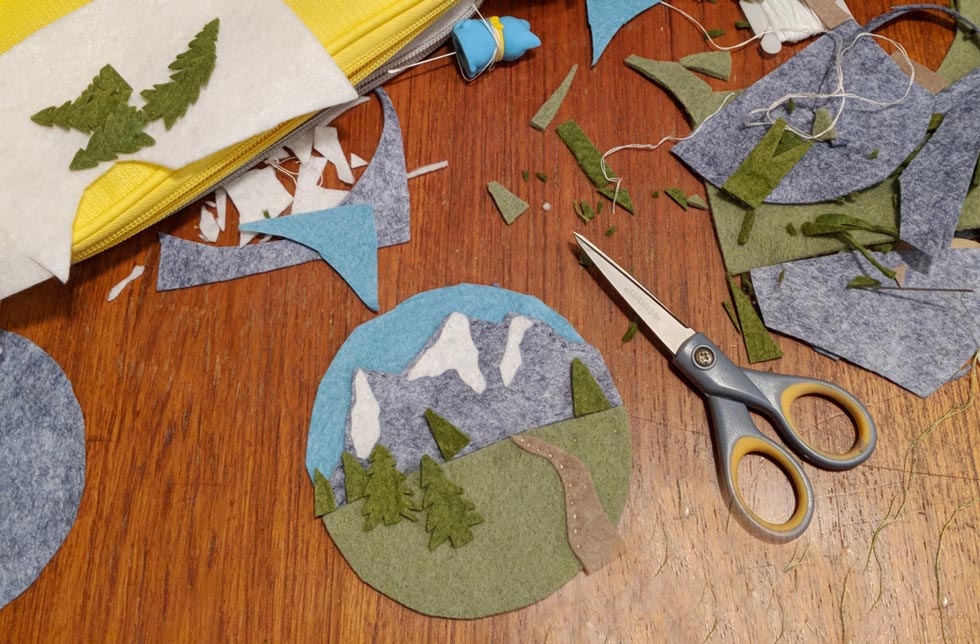
Step 1. Cut Out the Free Felt Art Pattern
Cut your pieces from felt. We always recommend wool felt for both durability and the availability of a large color palette. In this project, I used columbia blue, cloudy day grey, moss green, seagrass green, and white felt to create this scene of mountains and trees on a blue sky. Wool felt made it possible to create a muted color pallete- something that was never possible to do using the kool-aid-bright felt colors available at craft stores.
Step 2. Layer the Felt Pieces to Create Depth
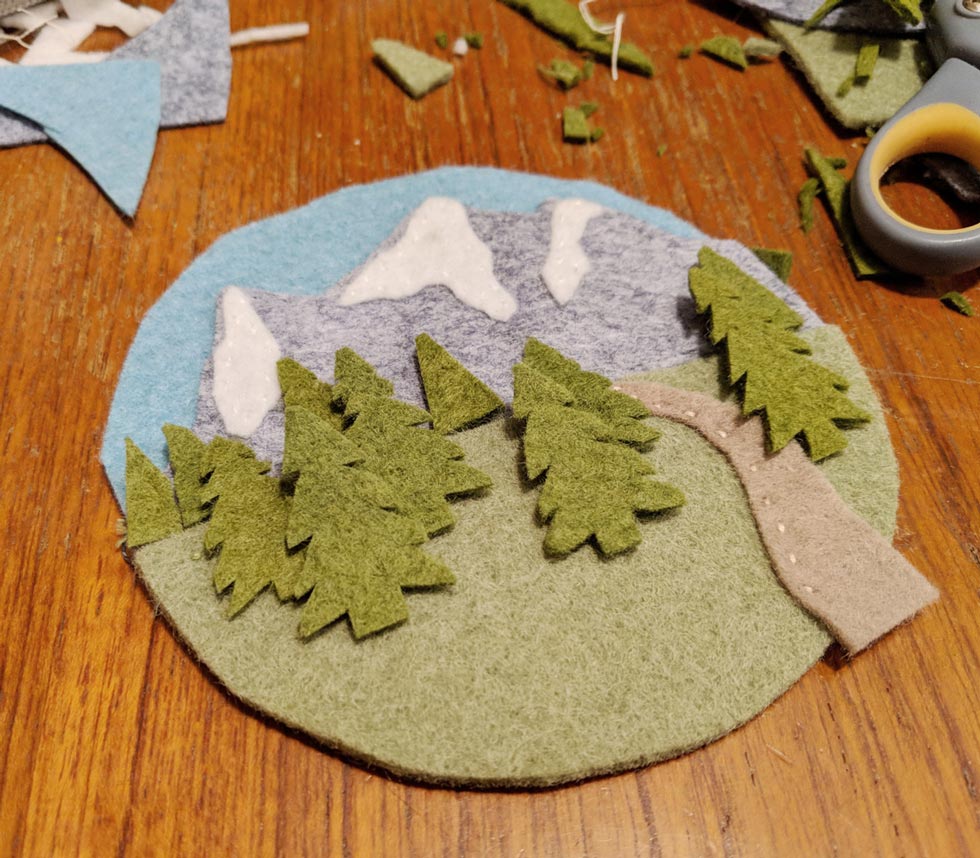
Begin layering. It will appear that there are extra layers, this is to create an even-ness through the entire circle. If the could/mountain upper half has more layers of felt than the lower grass/road half, then the trees that bridge these sections will look askew as they traverse the difference in thickness. Prevent this by building up layers as needed.
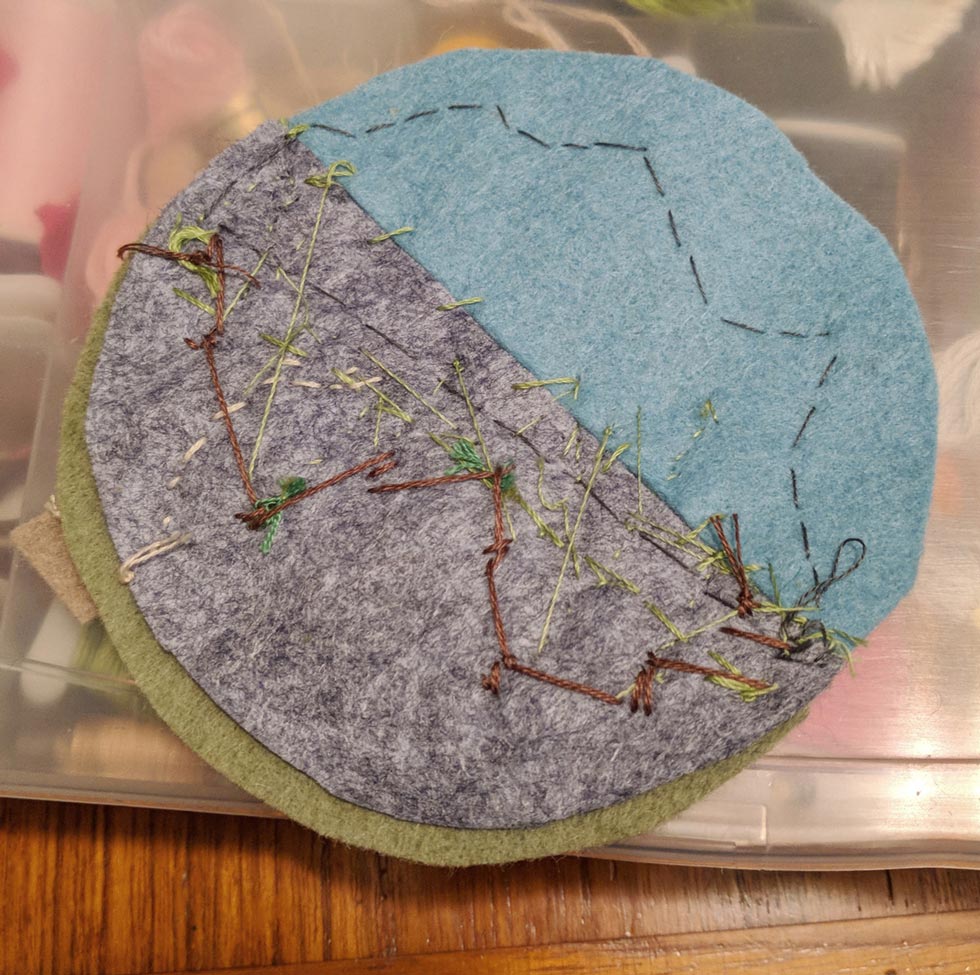
Use tiny stitches to hold things in place as you build up layers. It can feel like an easy cheat to just use glue to hold felt pieces in place, but if a later step requires a stitch in that area, pushing the needle through the glue can be really difficult.
If in doubt, use basting stitches (really long, semi-loose stitches) to just hold pieces in place until fine stitching is added)
Step 3. Add Tiny Felt Art Details
After your background is blocked into your felt art, add details like the trailing road, snow on the mountains, and the trees.
Feel free to experiment with stitches- the really lovely thing about working with good quality felt made from wool or would blends is that you can remove stitches and restitch an area over and over without leaving the felt mangled in that area. As long as you remove your stitches gently (cut and pull errant stitches, don’t rip!) and massage the felt gently after removing, you’ll be able to experiment with stitches without any mistakes showing.
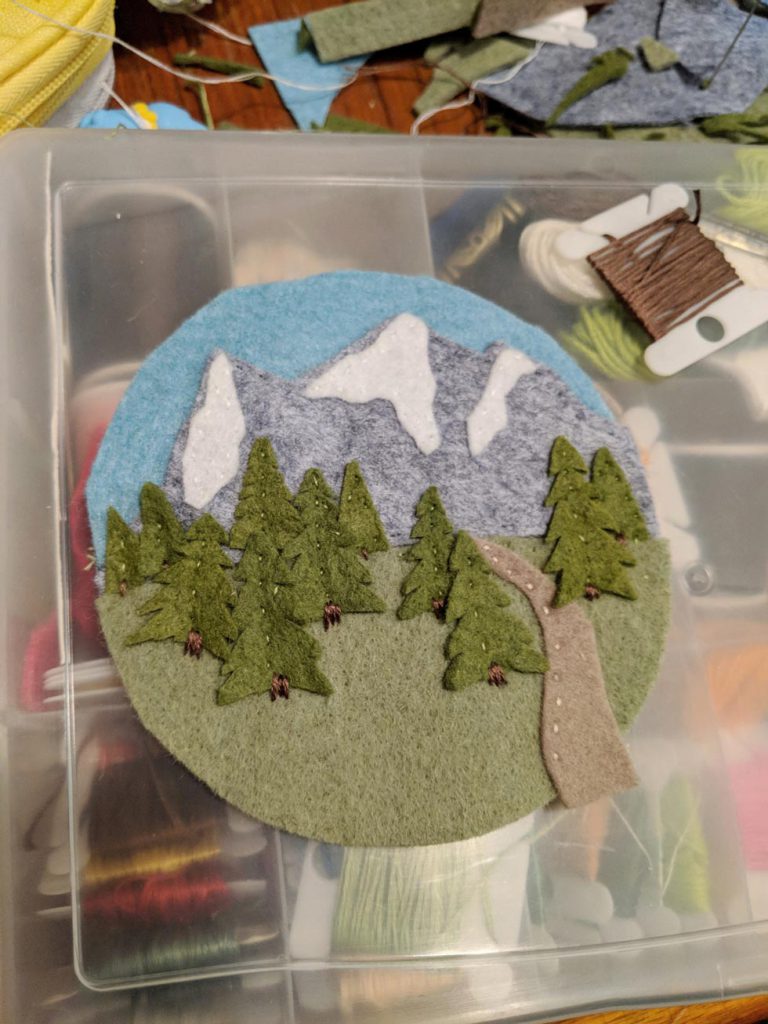
Step 4. Use Embroidery Stitches for Final Details
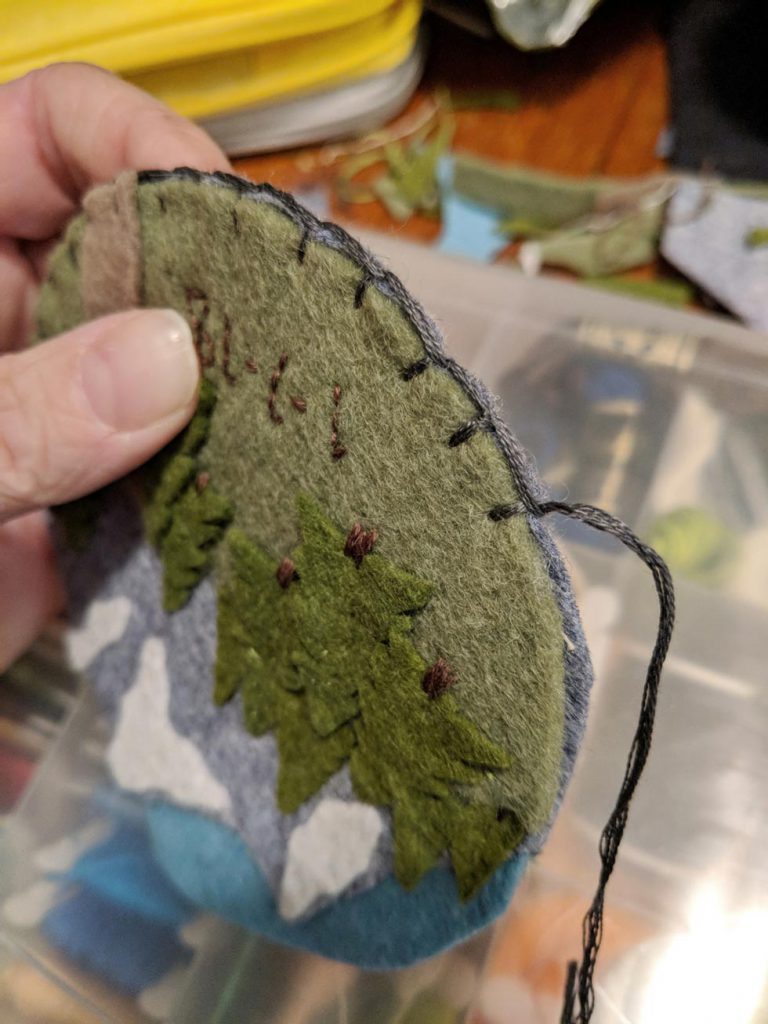
You can add find detailing over the felt color blocks using traditional embroidery. You don’t need to know any fancy stitches, just a few stitches can add detail and depth. For my ornament, I added brown tree trunks:
Step 5. Finish Back and Edges of your Felt Art
When you are happy with the front of your felt applique art, apply the last piece- the full-circle – to the back of your piece to cover up the backside of the stitches.
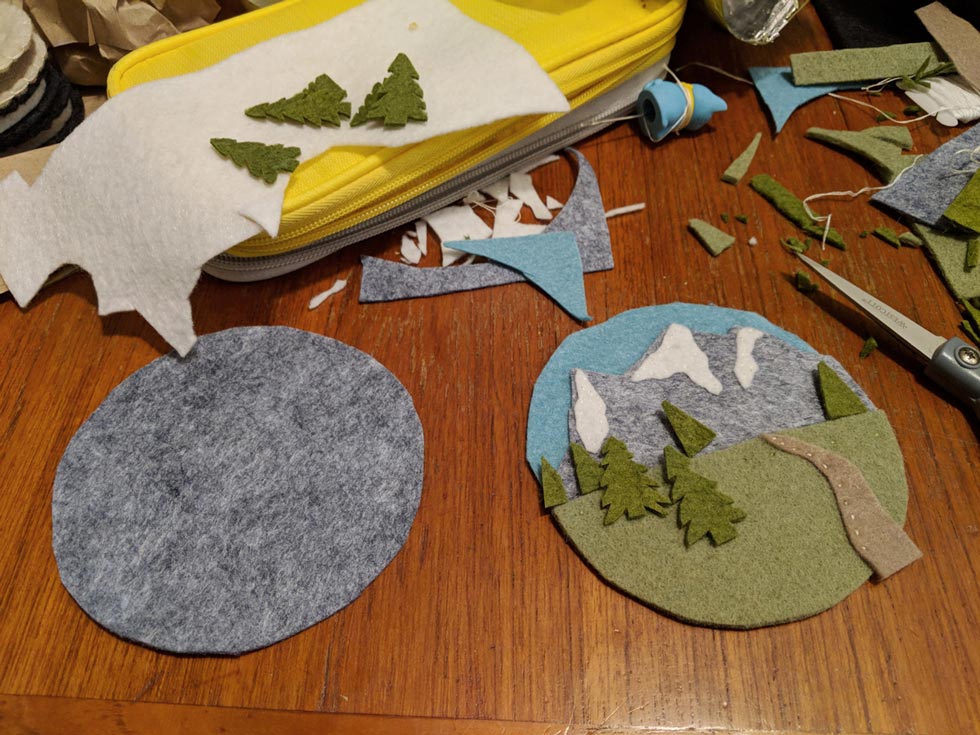
If you want your piece to be more rigid, pause here and cut a small circle of heavy paper (or lightweight cardboard) to place between the faux-embroidery piece and the backing.
Stack your layers, and begin stitching around the edge. You can overcast stitch but I prefer this simple blanket stitch using a cord of thick embroidery floss.
Add a large loop for hanging at the top and your piece will be ready for hanging, display, or gift giving!
Love this! Thanks so much for the tutorial!
Thank you! Just what I imagined but could not do myself. My trees don’t come out as perfect as yours but they will do.
I am using this design as a take off place for an ornament I am making for our daughter and son in law for Christmas this year. I saved one of the photos as a guide and just now I went back to look at it and was so confused as the background full of felt scraps and the box of embroidery thread is EXACTLY like my table right now. I thought I was losing my mind and had already cut it out…. I love felt for fabric projects, just so easy to work with and the results can be gorgeous.
Could you recommend your source for wool felt? The mountain scene is great and very inspiring! Thanks.
The PDF won’t work to download. It perpetually says that the cart is empty…could you help me figure out how to download this beautiful pattern?
Thank you for your patience. When you go to your cart and checkout with your email/ first and last name it will pull up a screen that says purchase confirmation and has different options. One option is to scroll to the bottom of the page and click on the purple lettering that says ,”Mountain Themed PNW Christmas Ornament- Felt Pattern”. The other option is that an email will be sent from Hawk-Hill.com to the email you provided at checkout (check your spam if it doesn’t show in your inbox) and it will have a purple link that you can download from as well.