
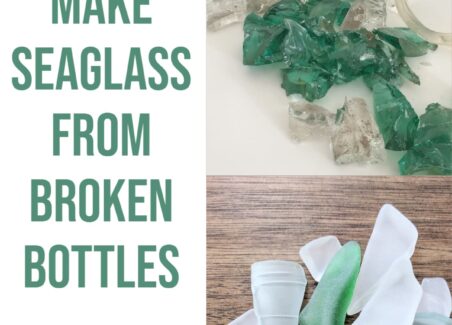
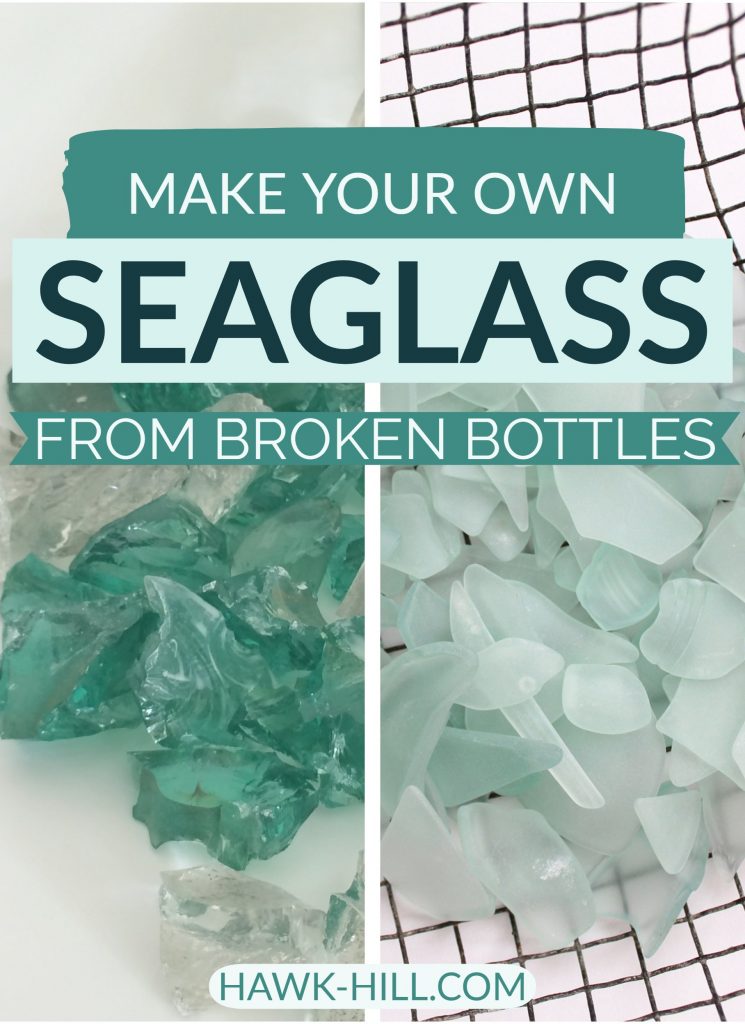
Making real sea glass at home is easy- and the process uses hobby supplies you may already have. While it takes a bit of patience, in this article I’ll show you how to make stunning sea glass gems using recycled glass. Here’s a quick roadmap of the process:
- You’ll find a short summary of the process followed by a detailed tutorial.
- A guide to the supplies needed and my best tips for finding glass to turn into sea glass,
- Answers to the most commonly asked questions about homemade sea glass.
Hawk-Hill.com is a participant in the Amazon Services LLC Associates Program, an affiliate advertising program designed to provide a means for website owners to earn advertising fees by advertising and linking to Amazon.com and any other website that may be affiliated with Amazon Service LLC Associates Program
Disappointed with the spray-on version of DIY’ing a sea glass finish, I wondered, could I make my own frost glass baubles using broken bottles and a rock tumbler? Spoiler: YES. Keep reading to learn my method for making your own sea glass.
So, Can you DIY Real Sea Glass?
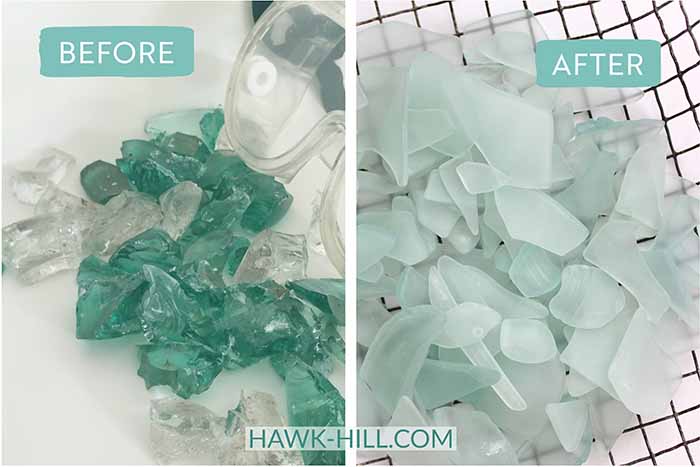
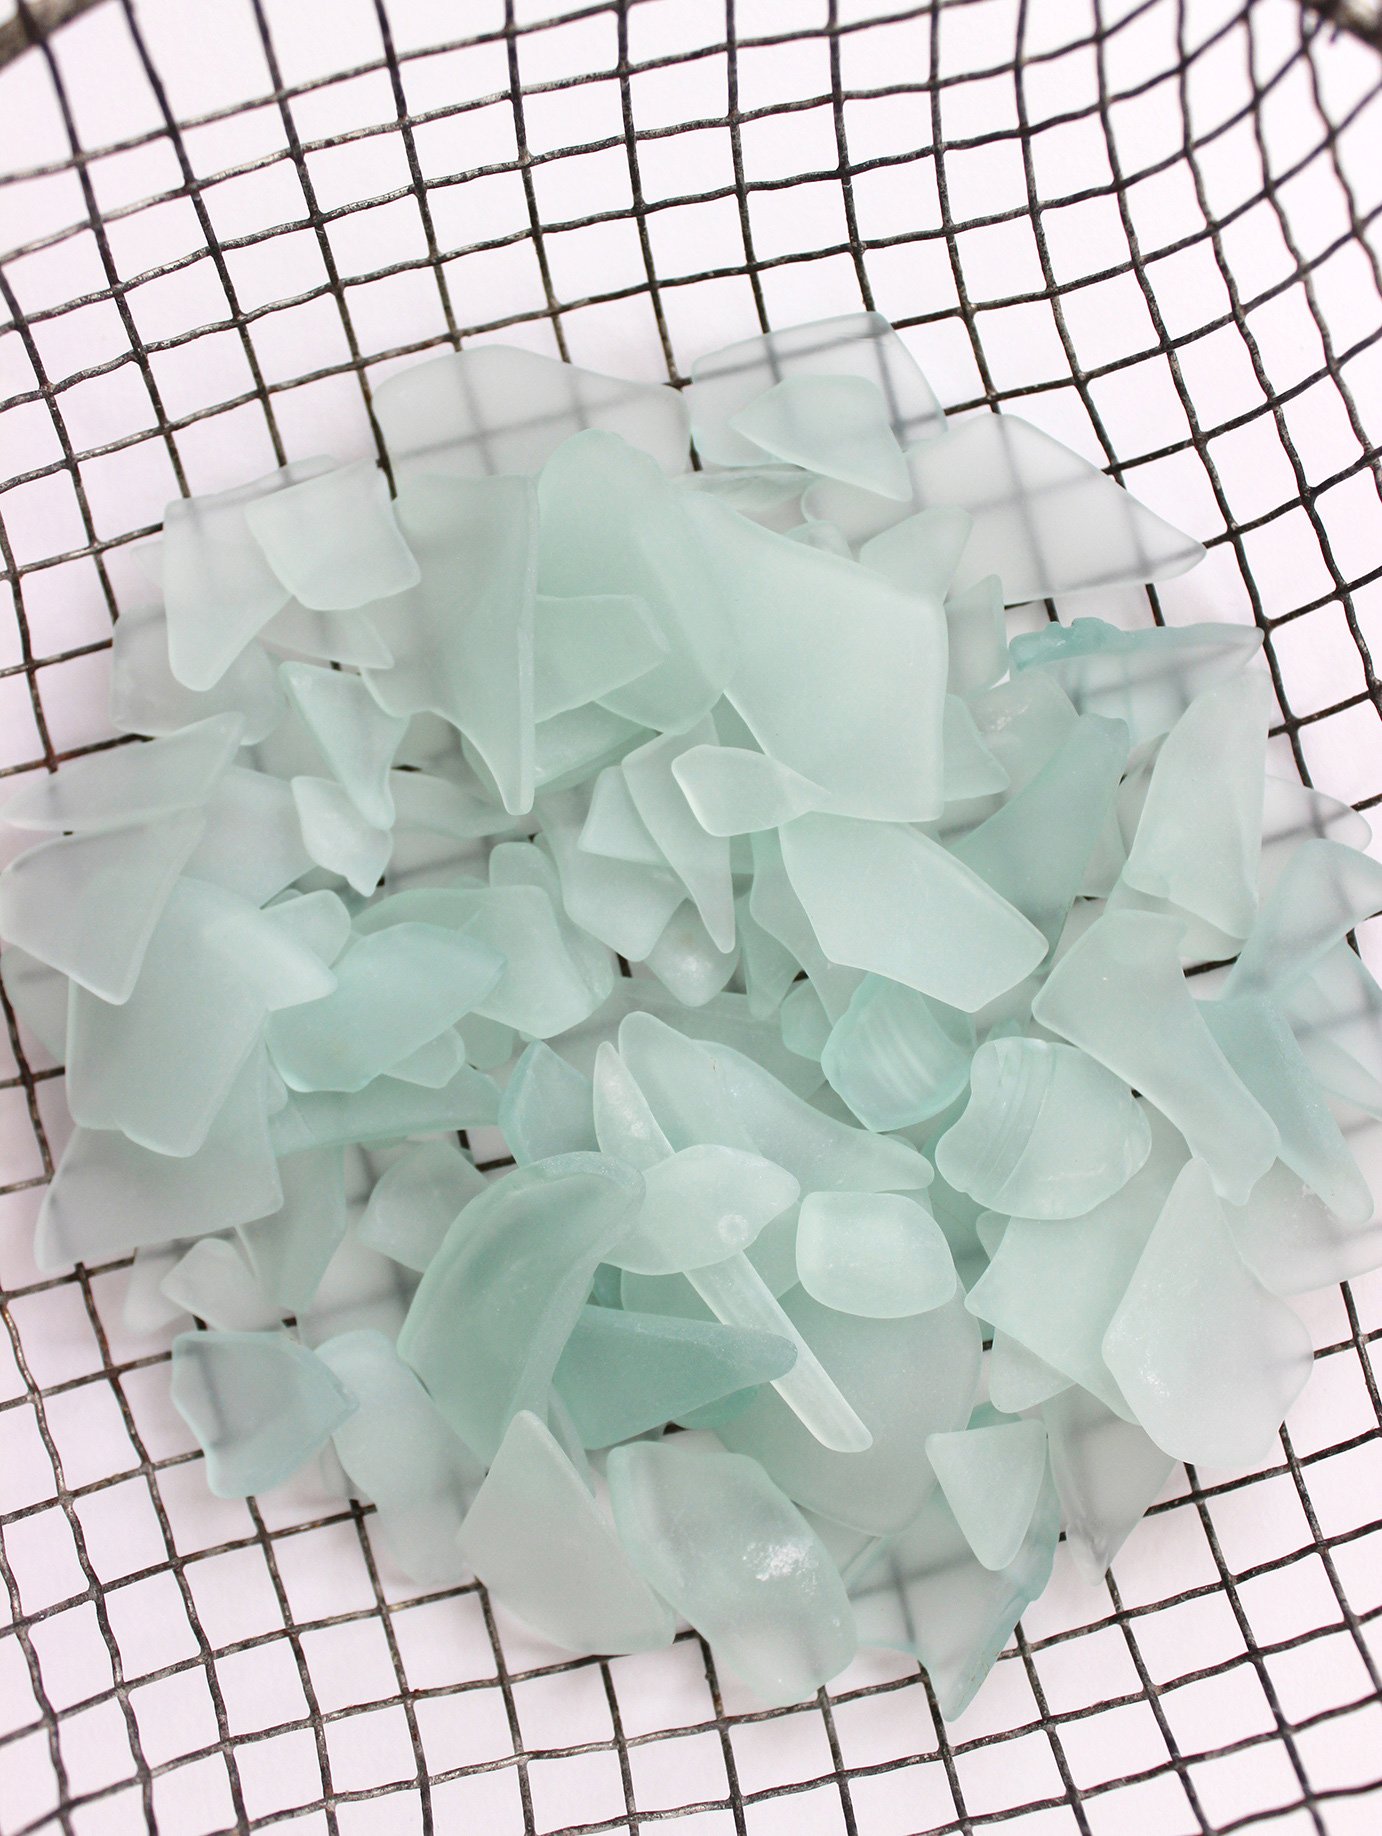
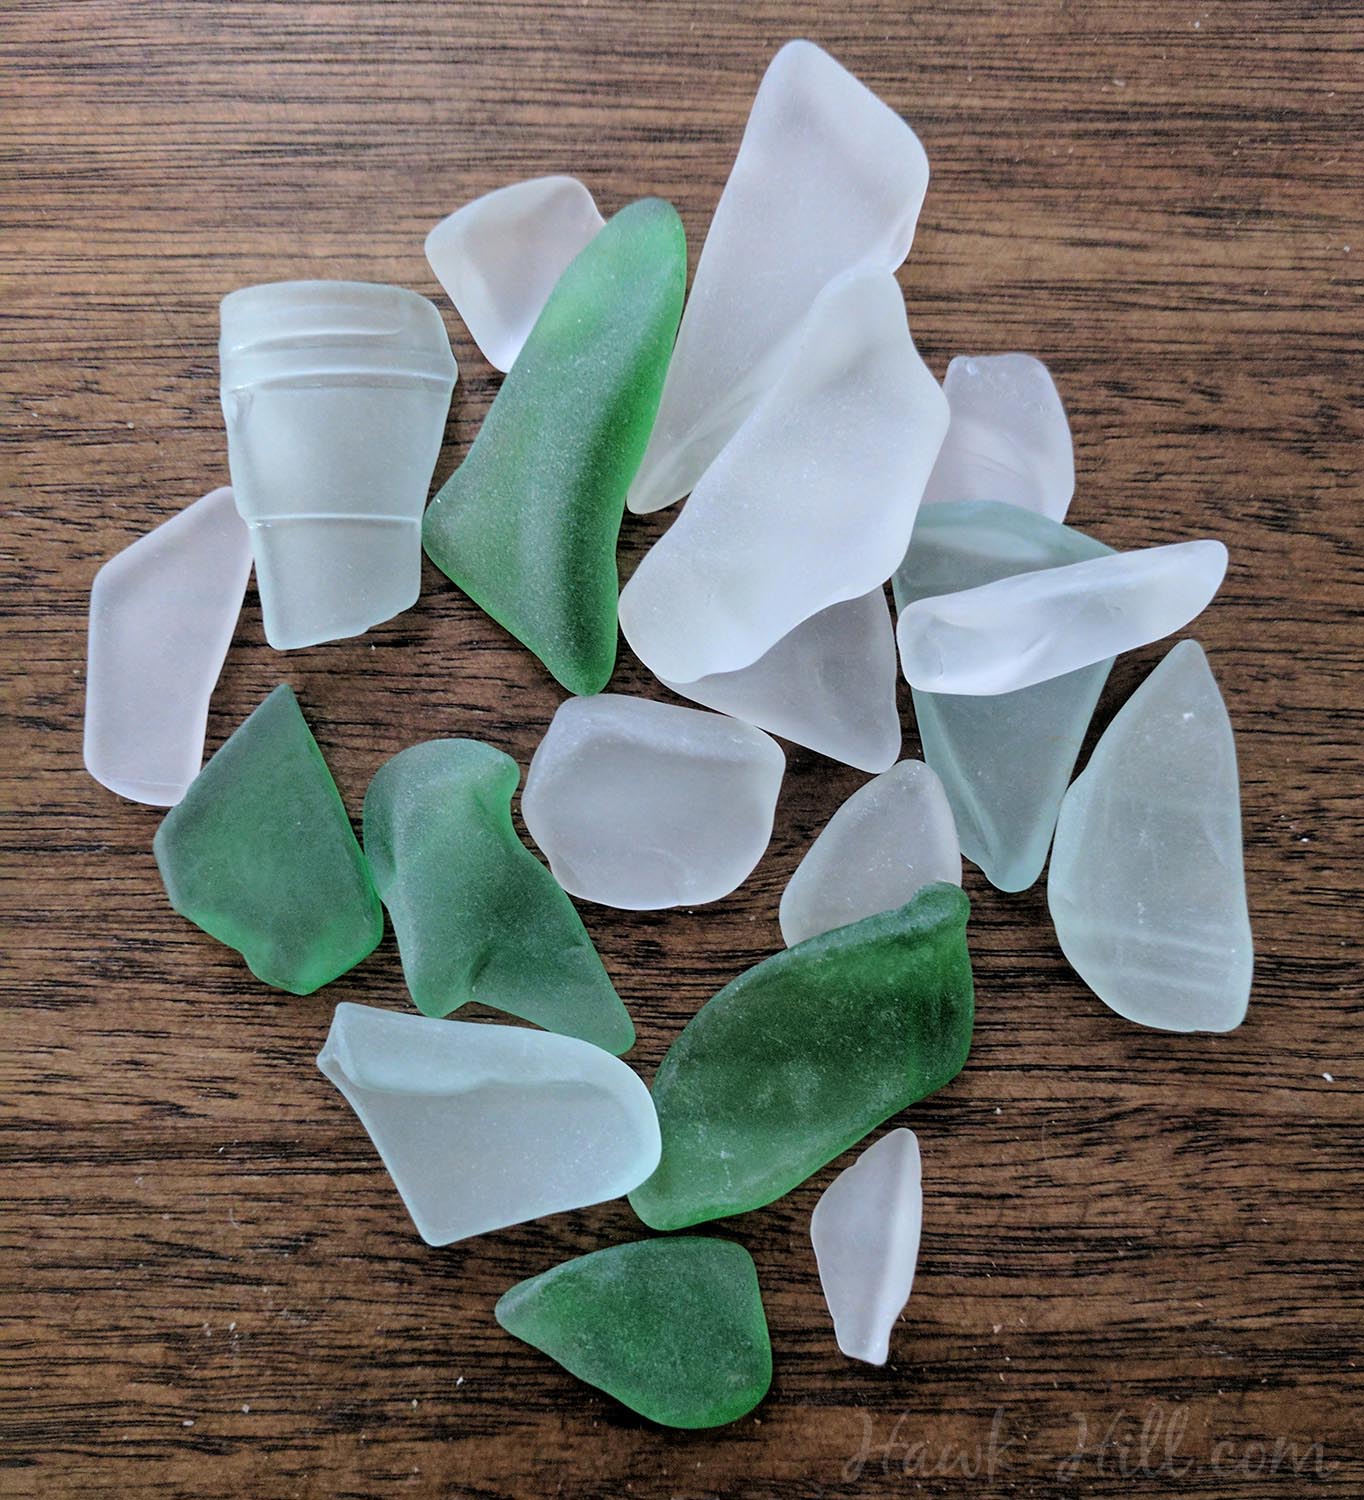
As you can see in the image below, the finish on the finished glass is frosty and matte. In every way it’s just like sea glass picked up on a beach. With this method you aren’t creating a faux sea glass finish- you’l be making the real thing! A rock tumbler prepared with these instructions creates an environment that forms real sea glass gems in the same way the ocean does!
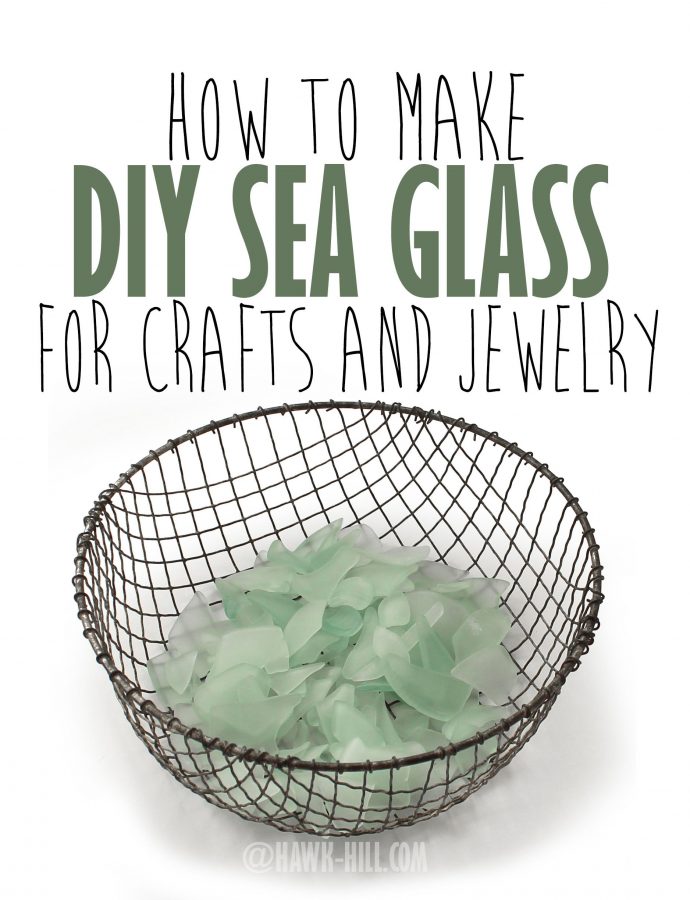
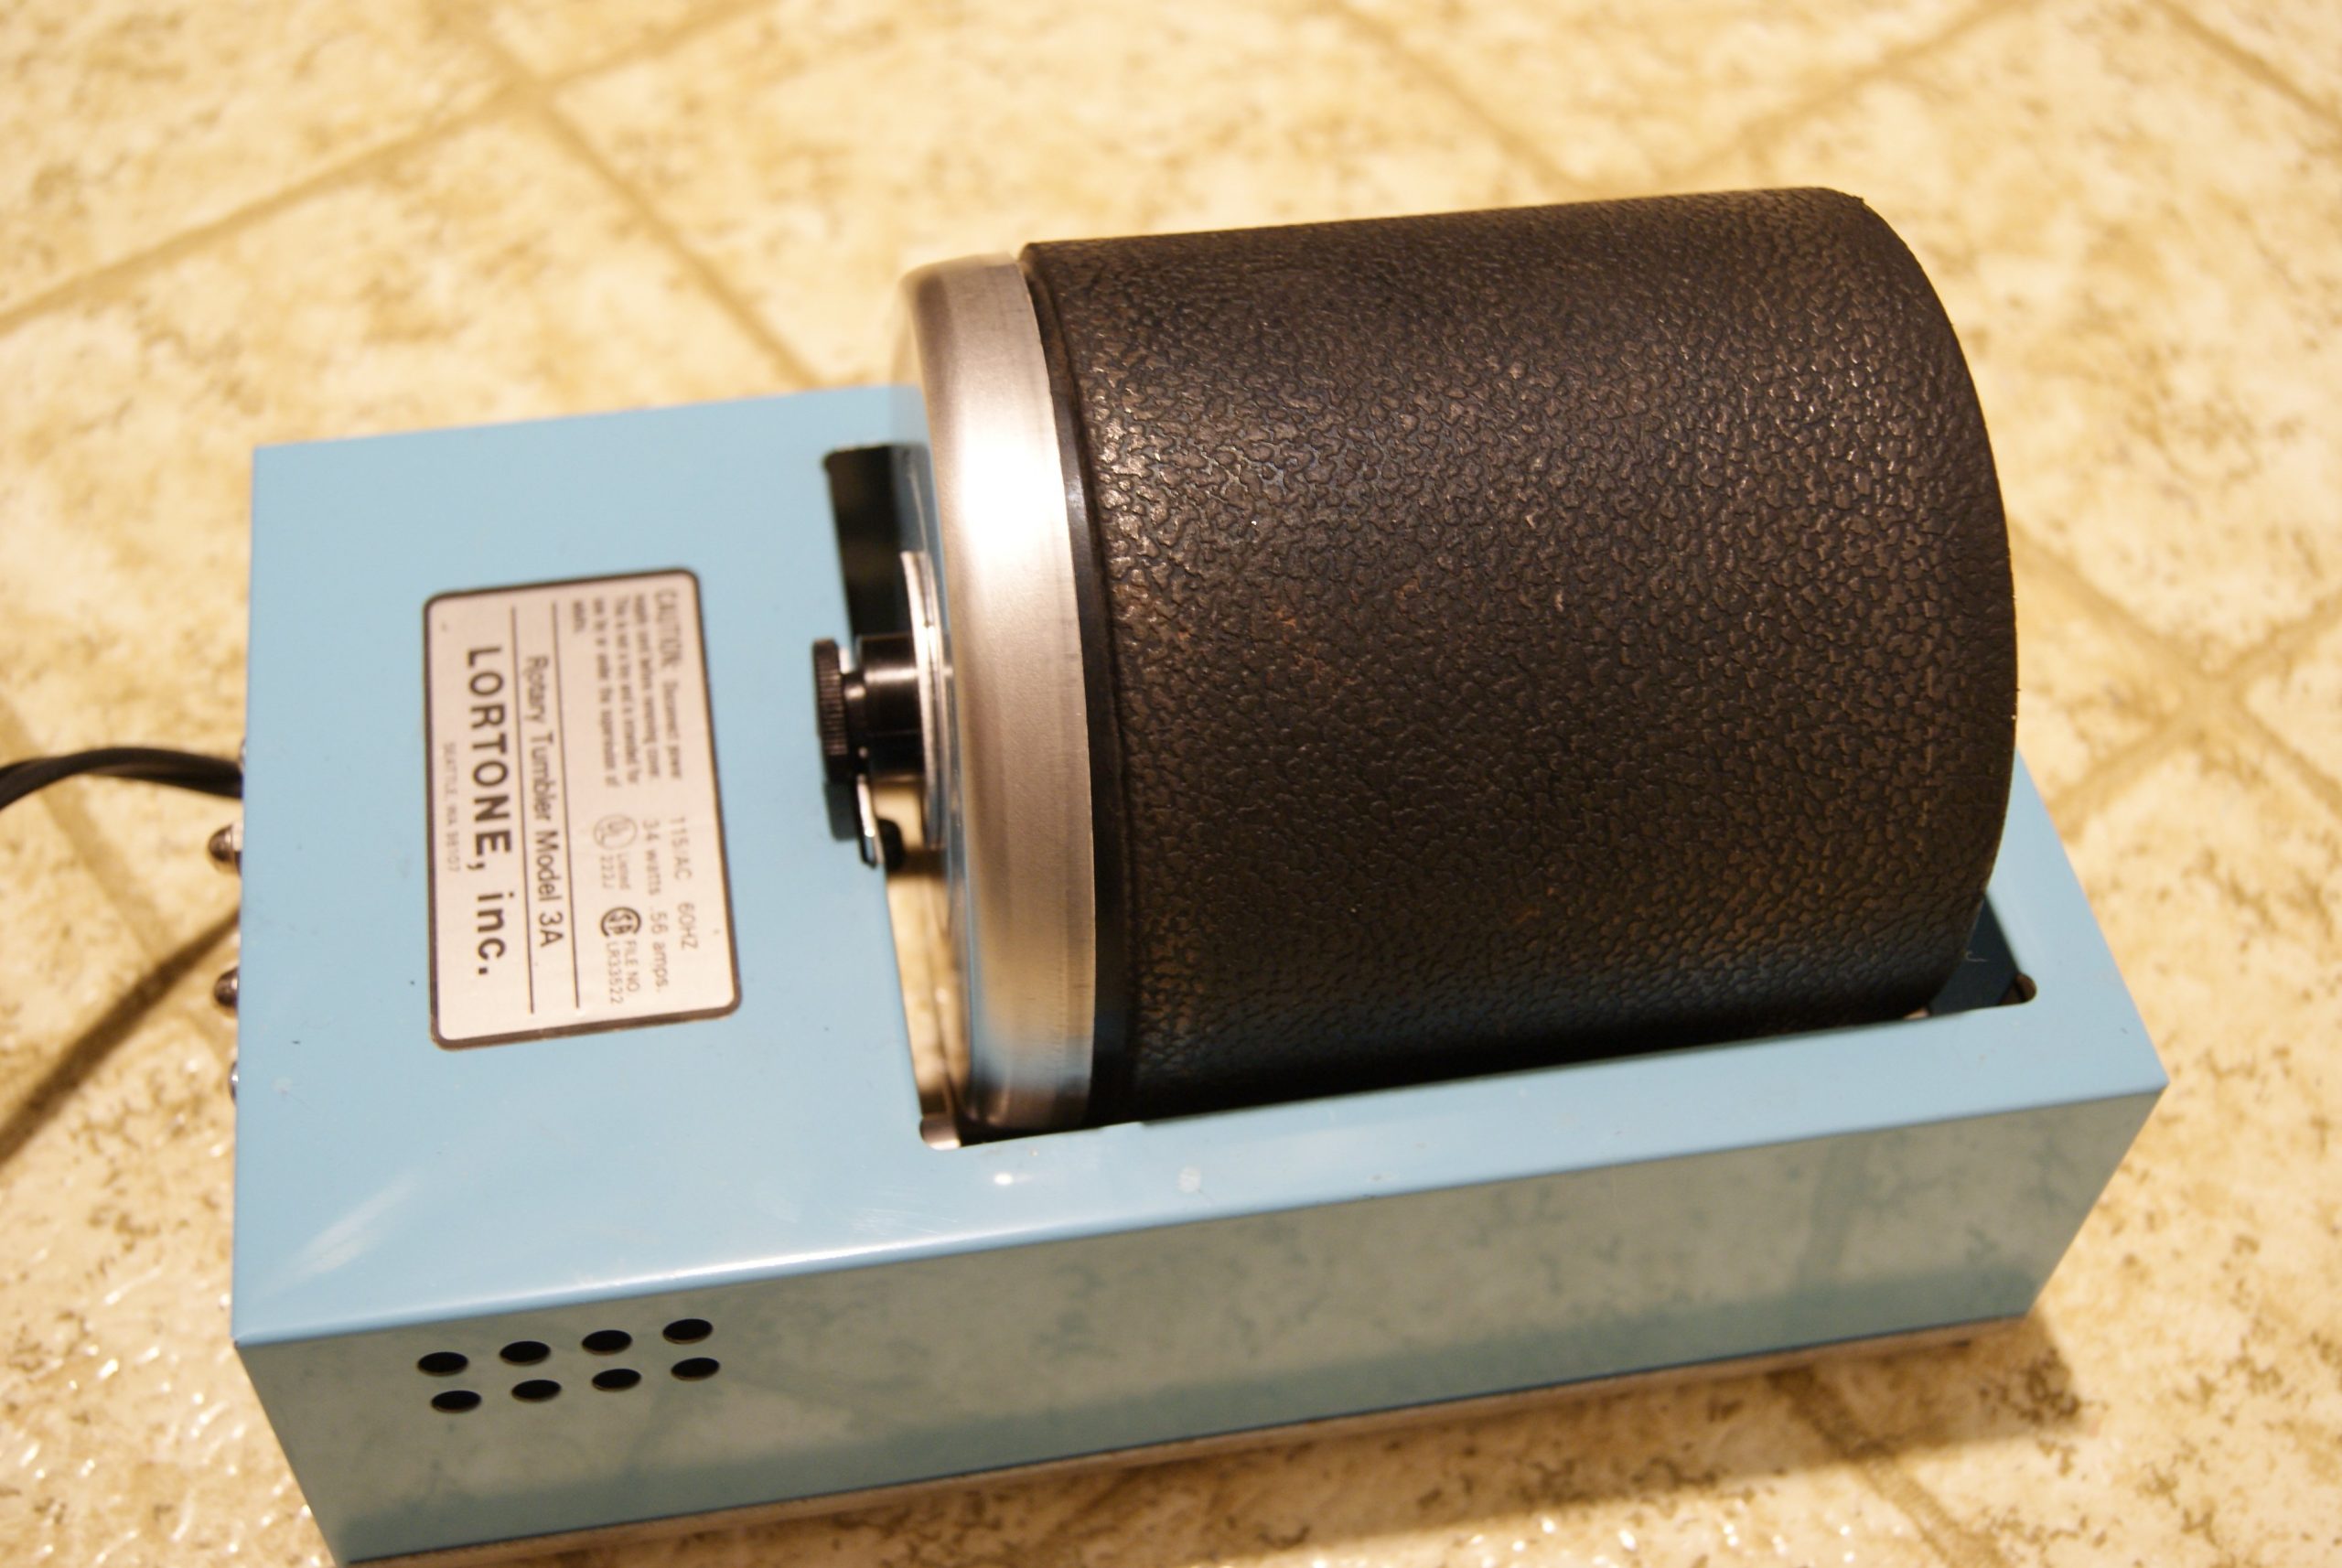
Making Sea Glass in a Rock Tumbler
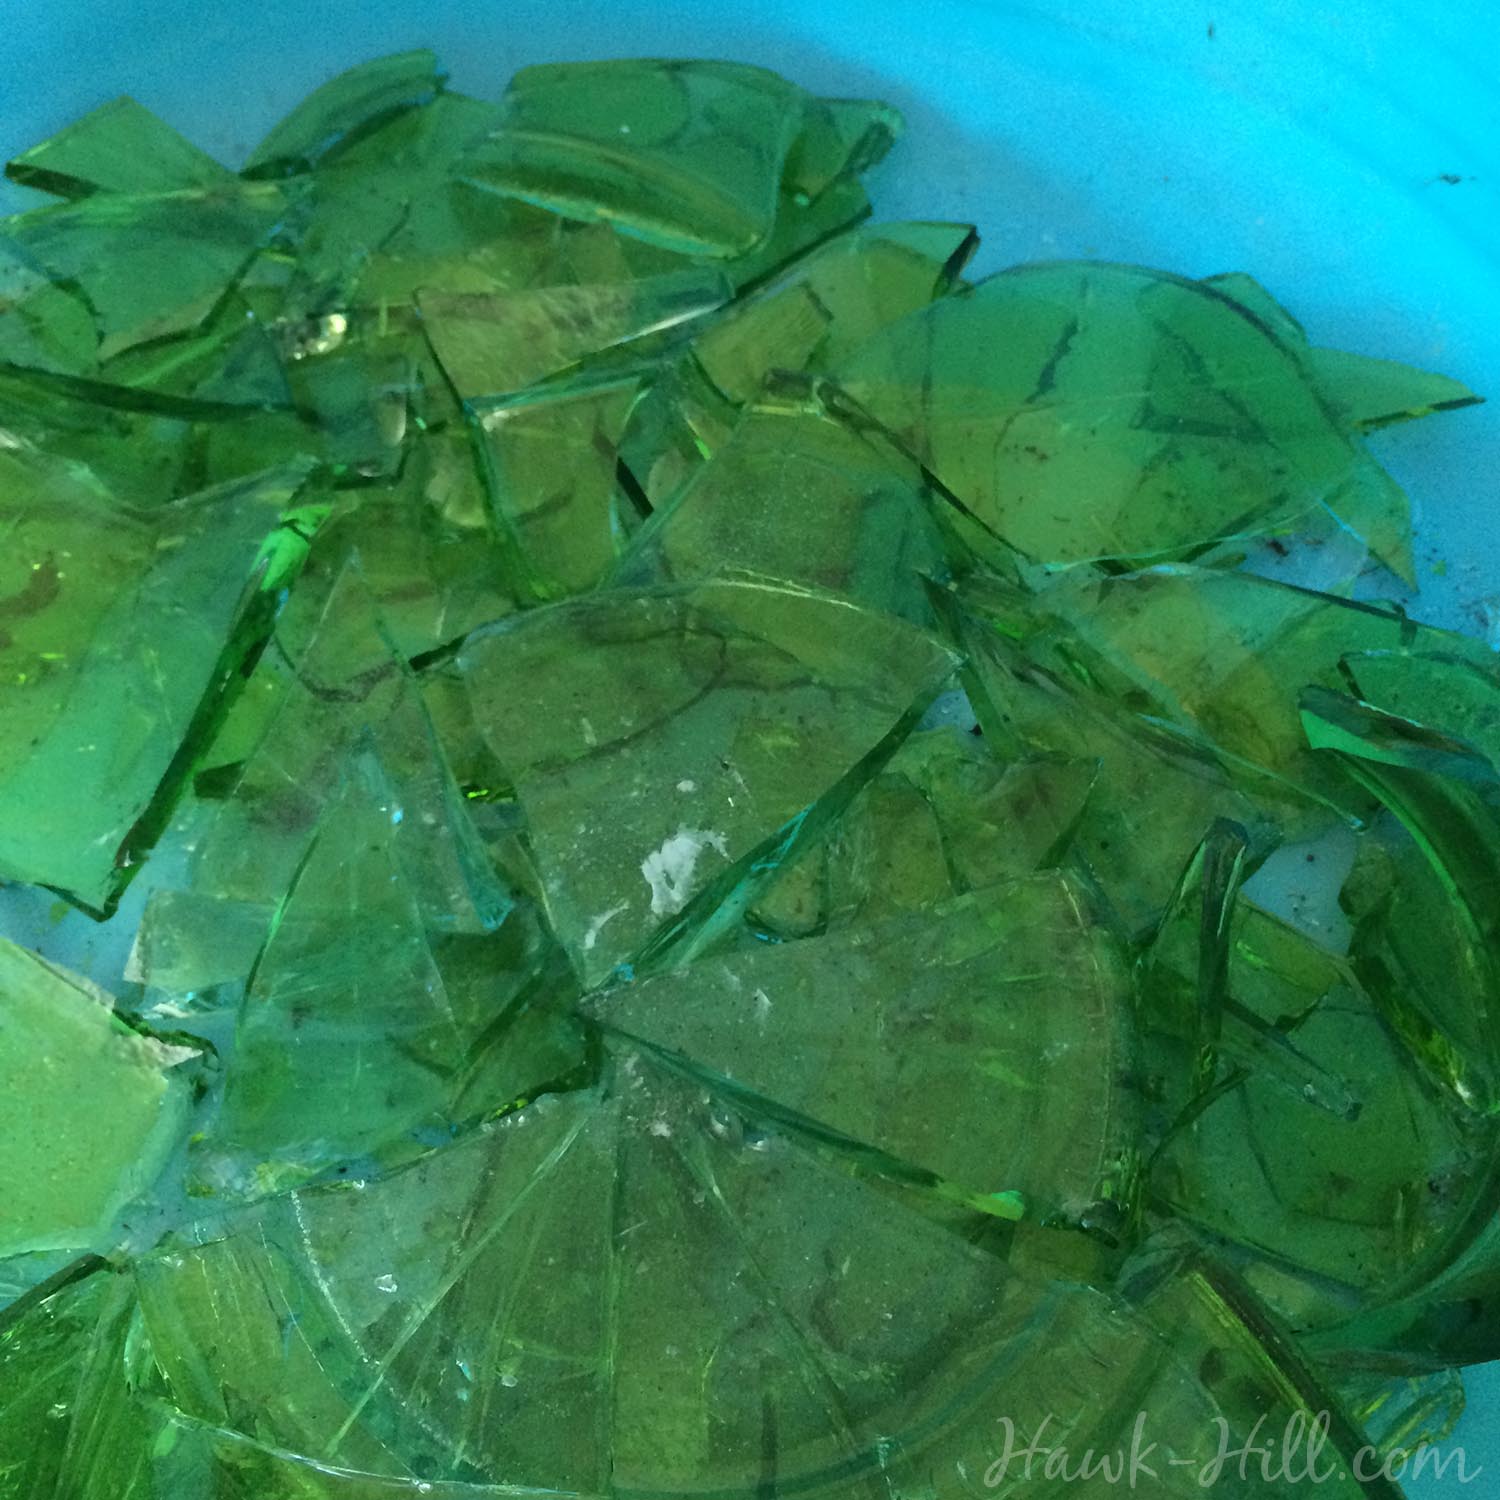
It turns out, making sea glass in a rock tumbler was way easier than I expected. For my first batch, I simply used a few tablespoons of sand. After a few days, I didn’t have sea glass- more like glass shards with slightly-less sharp edges. Determined, I then purchased a pack of carbide grit to try.
I found that using harder, coarser grit sped up the process of making glass shards into beach glass. Carbide grit, I learned, also gave me more control over how round and frosty these gems turned out.
Supplies You’ll Need:
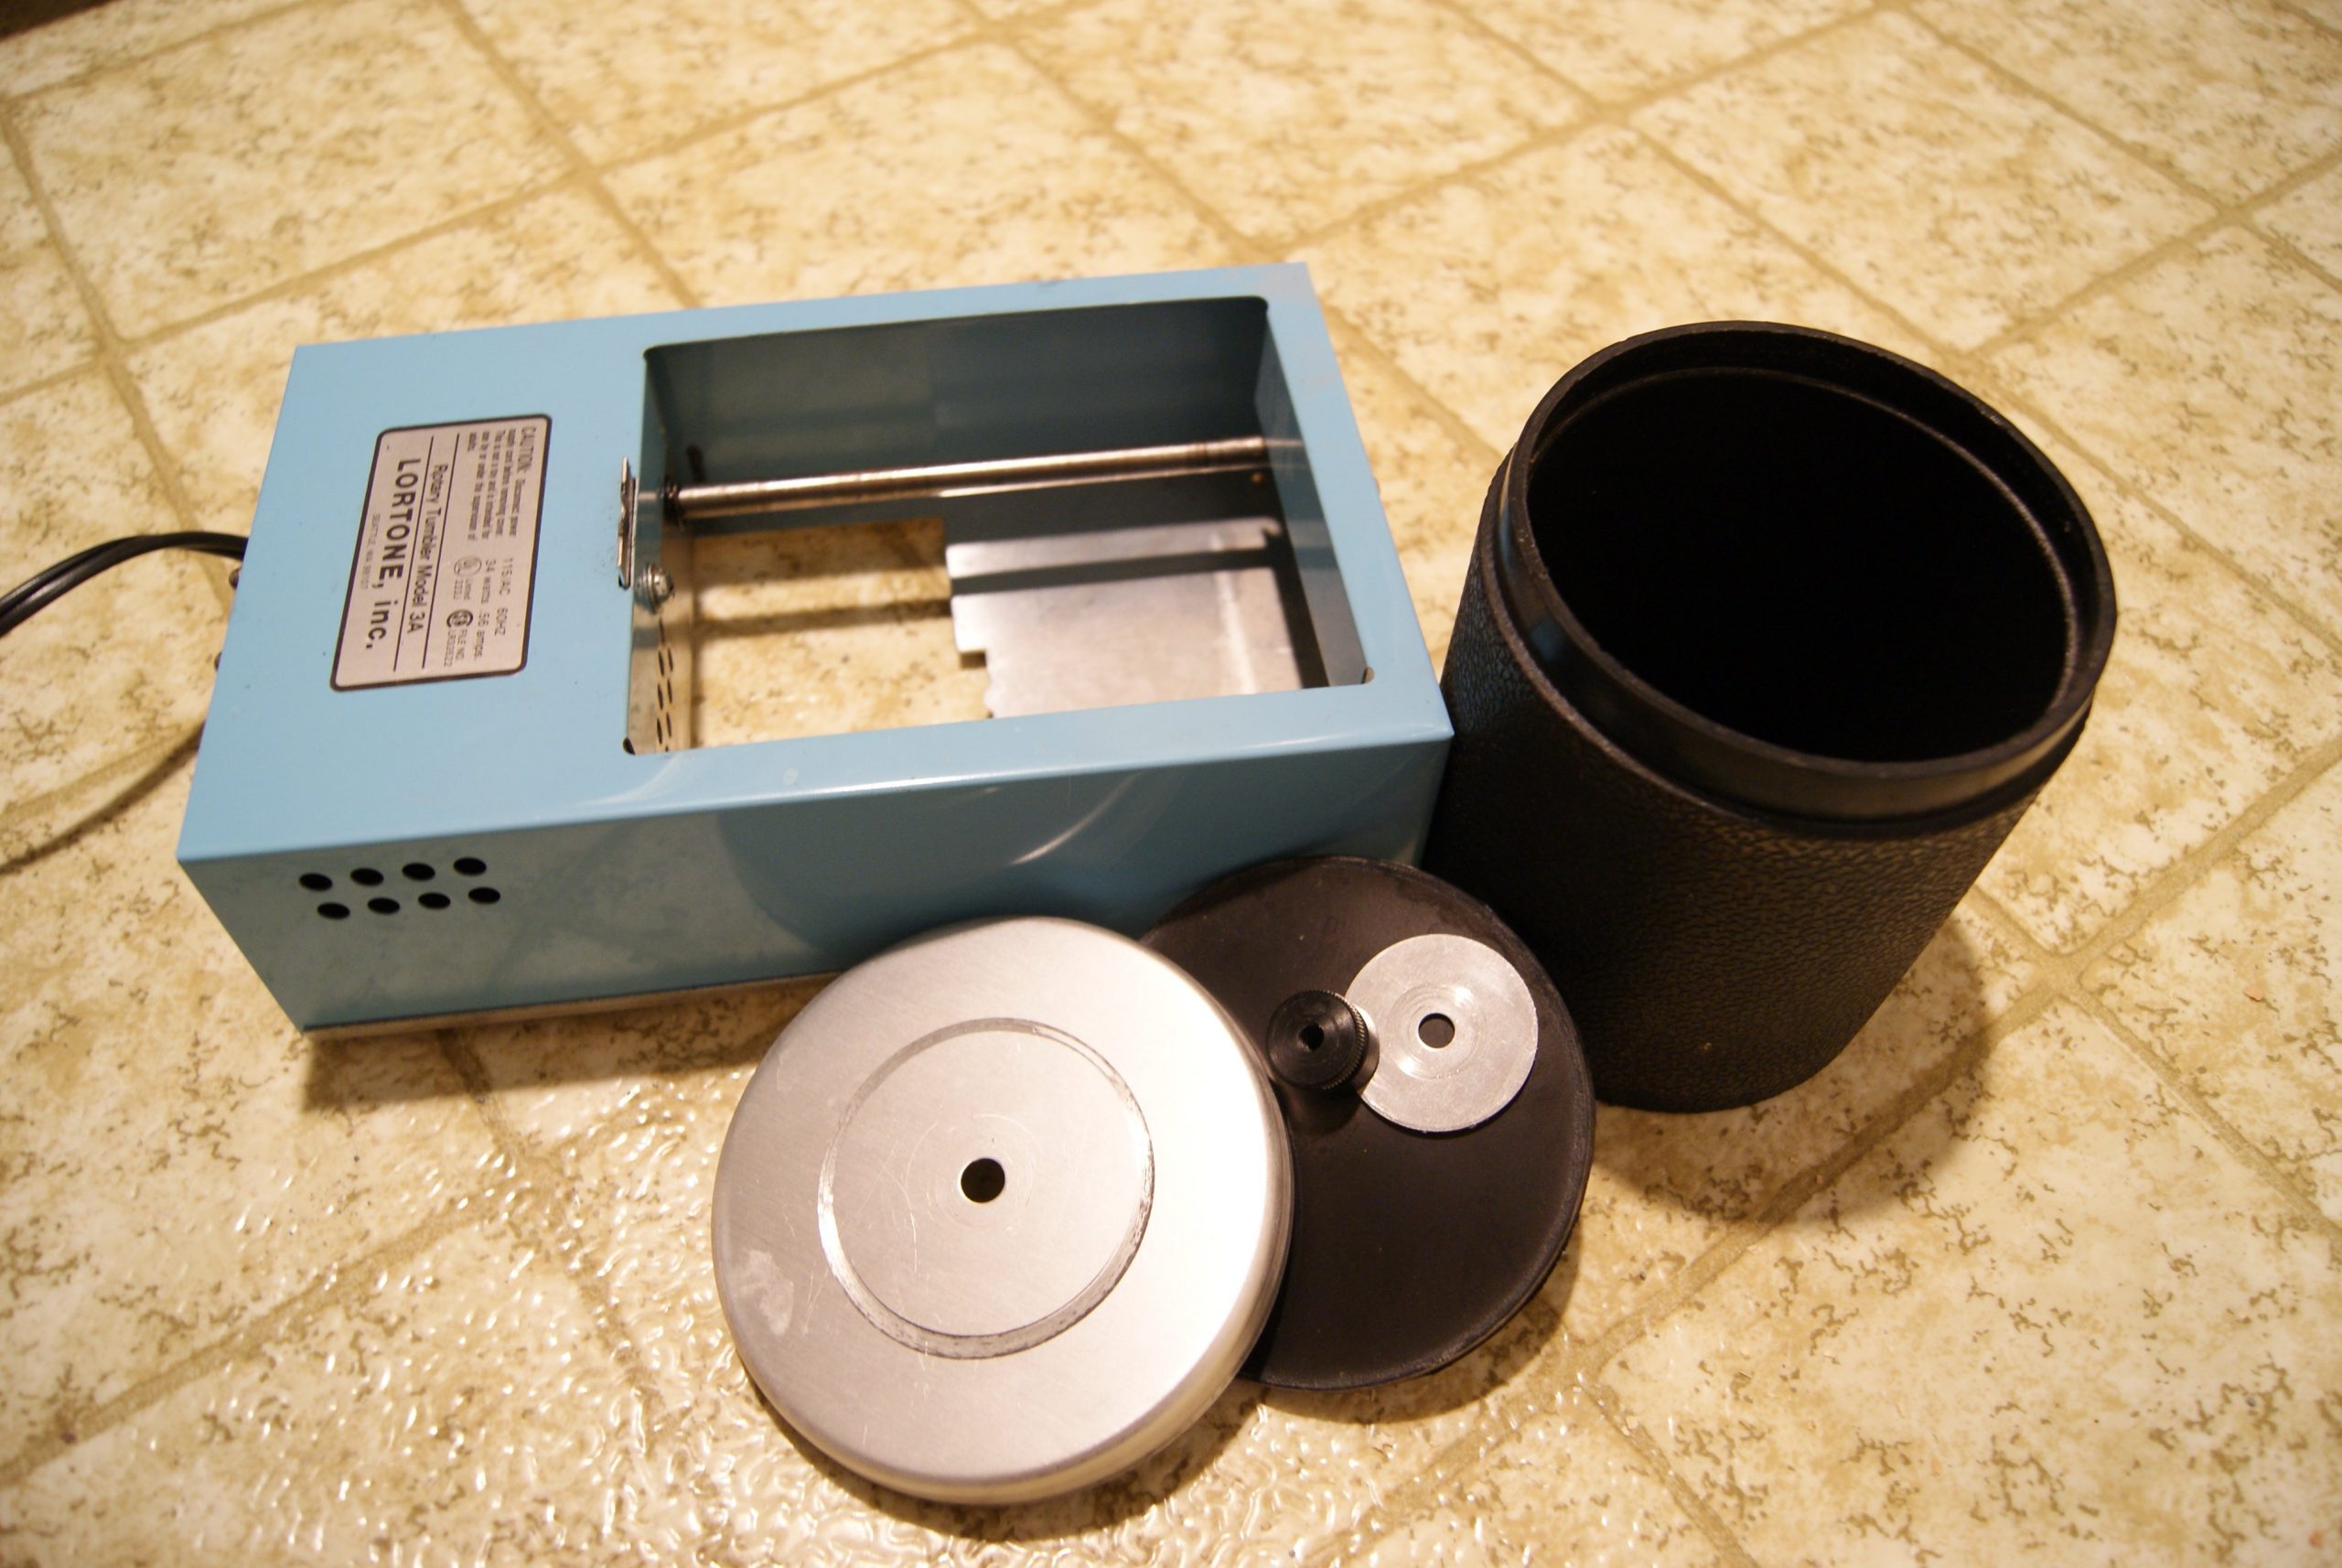
- Motorized Rock Tumbler – I use a Leegol 3lb Capacity Tumbler for fast, professional results. Budget-conscious DIY-ers should be able to get the same results with a kids’ rock tumbler and some patience.
- Glass (see below for tips on finding good glass to tumble. For hard-to-find colors, you can buy the colored glass chunks made for high-end firepits in red, black, and colbalt blue, )
- 5-gallon bucket
- 2 large thick plastic bags (clothing storage bags work great)
- a fry basket or a colander with big holes (fry baskets are perfect for sorting tiny glass fragments out from usable sea glass pieces)
- cut-resistant work gloves
- safety glasses (seriously, do not attempt this project without safety equipment)
- hammer
- shallow cardboard box (to contain small shards of glass)
- grit (you can use sand, but a coarser grit gets the job done with less time and electricity. If you think you might also tumble rocks, try a variety pack of abrasive media. For just making a few batches of broken glass into sea glass, you can buy coarse abrasive media in 1lb packs.

First, a Simple Walkthrough of How I Make Sea Glass:
(or click here to jump to the detailed guide)
How to make sea glass
Total Time: 3 days
Find or Make Broken Glass
Source glass from thrift stores, recycling, or garage sales. Read my tips for sourcing colored glass.
Tumble
Use the instructions below for replicating the ocean’s sea-glass making environment in a rock tumbler
Sift and Clean
Separate glass from grit using a water and a colander
Create or Display
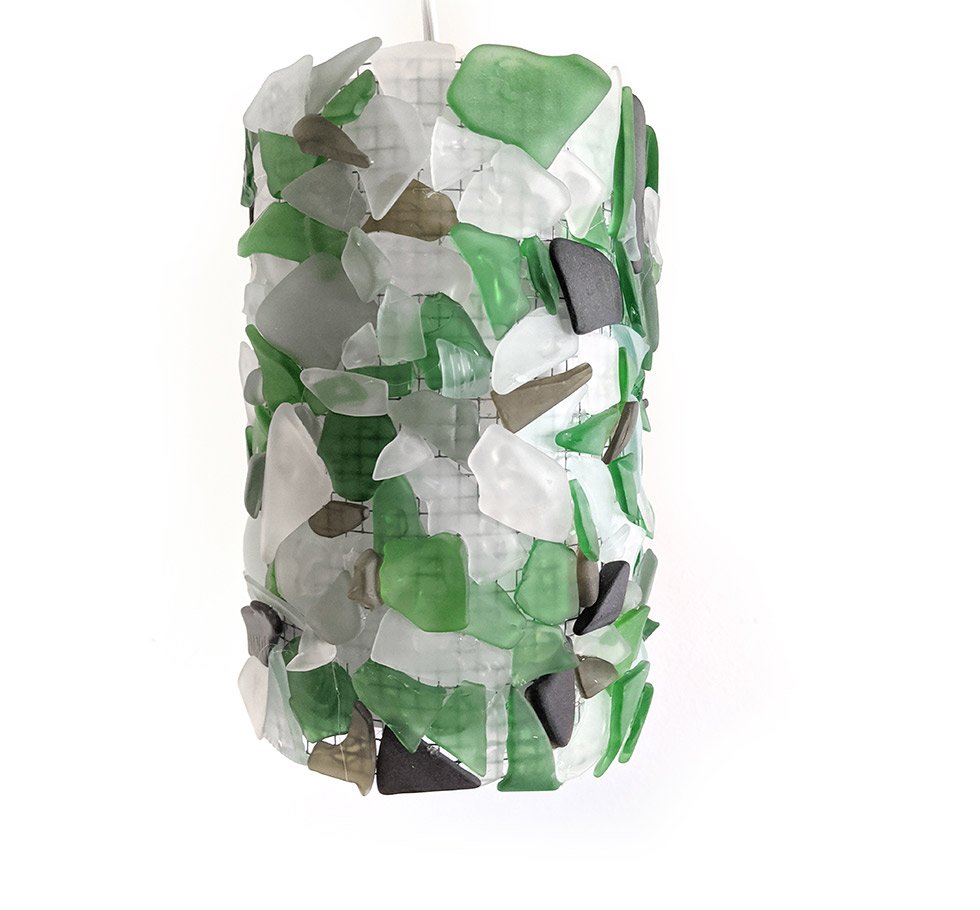
With your finished sea glass, you can create artful beach glass crafts and creations, like this beach house inspired sea glass pendant light.
Detailed Tutorial: How to Make Sea Glass
Step 1: Find Glass
Depending on how picky you are about color and thickness, acquiring the glass to make into sea glass can be the easiest or the hardest part.
Sources for colored glass:
- your own recycling
- yard sales
- recycling centers (although unusual, some will allow you to pick from donated glass)
- thrift stores
- garage sales
Wine bottles and liquor bottles can be used for making sea glass, although in my experience only the glass at the upper rim of the neck and the bottom of the bottle is thick enough to make pieces of sea glass that are substantial in size.
Recycling Center – this is by far my best source for good glass pieces to turn into glass gems. In Joplin, the main recycling center features huge open bins where glass is collected until it is hauled away once a week. Since re-purposing is the lowest-impact form of recycling, ask your recycling center if you can take glass for free. Joplin’s recycling employees were happy to provide bags for me to take all the bottles and jugs I wanted.
The recycling center gives me access to lots of different types of bottles. High-end liquor bottles and vintage glass pieces tend to be made from thicker glass and make great sea glass.
My BEST colored glass results were achieved using old telephone insulators. When I decided to smash an already-cracked, aqua-colored glass insulator, the resulting sea glass was a gorgeous blue-green color that created beautiful, thick stones of manufactured beach glass. (I’ve since discovered you can get the same result by tumbling the coarse stones of colored glass made for decorative fire pits, they even have glass stones in this vintage turquoise shade)
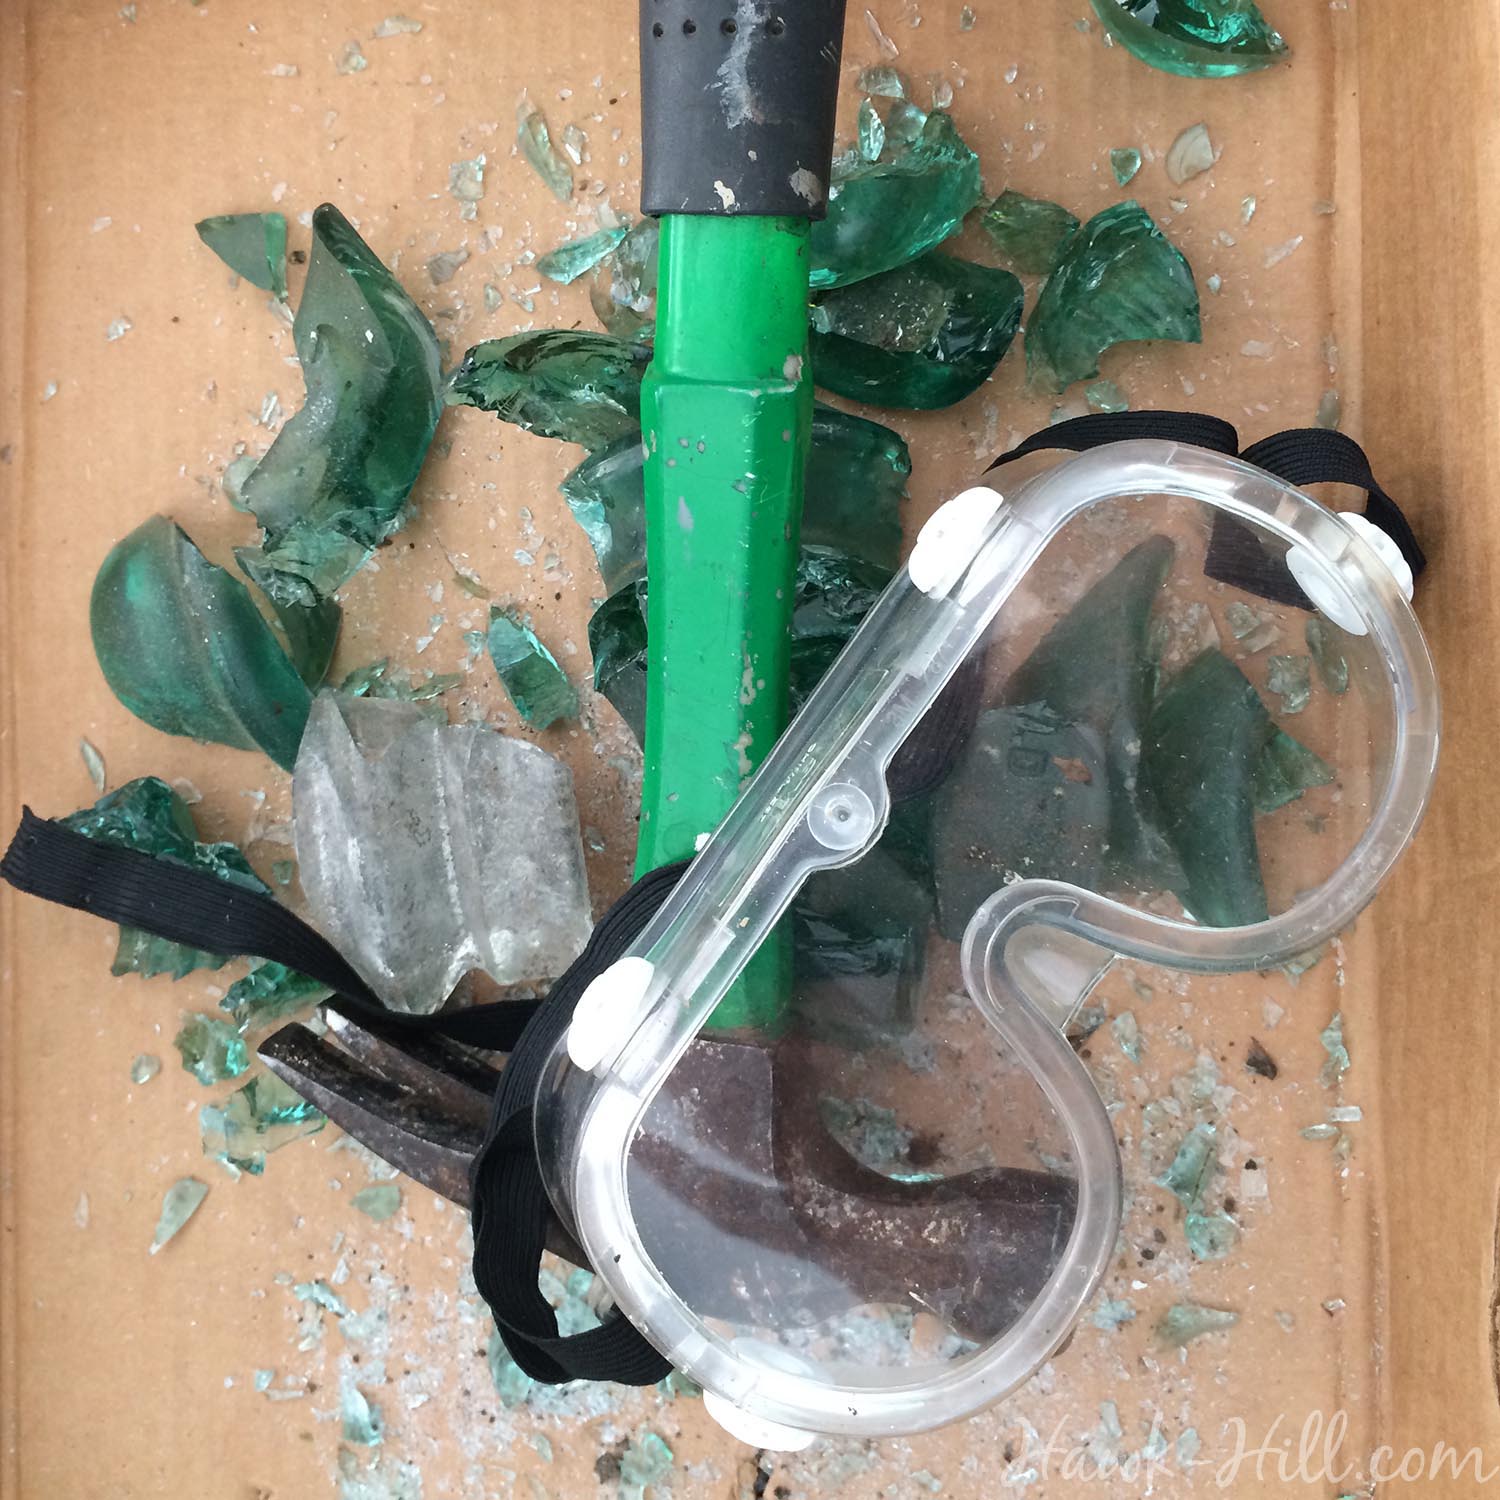
Step 2: Break Glass
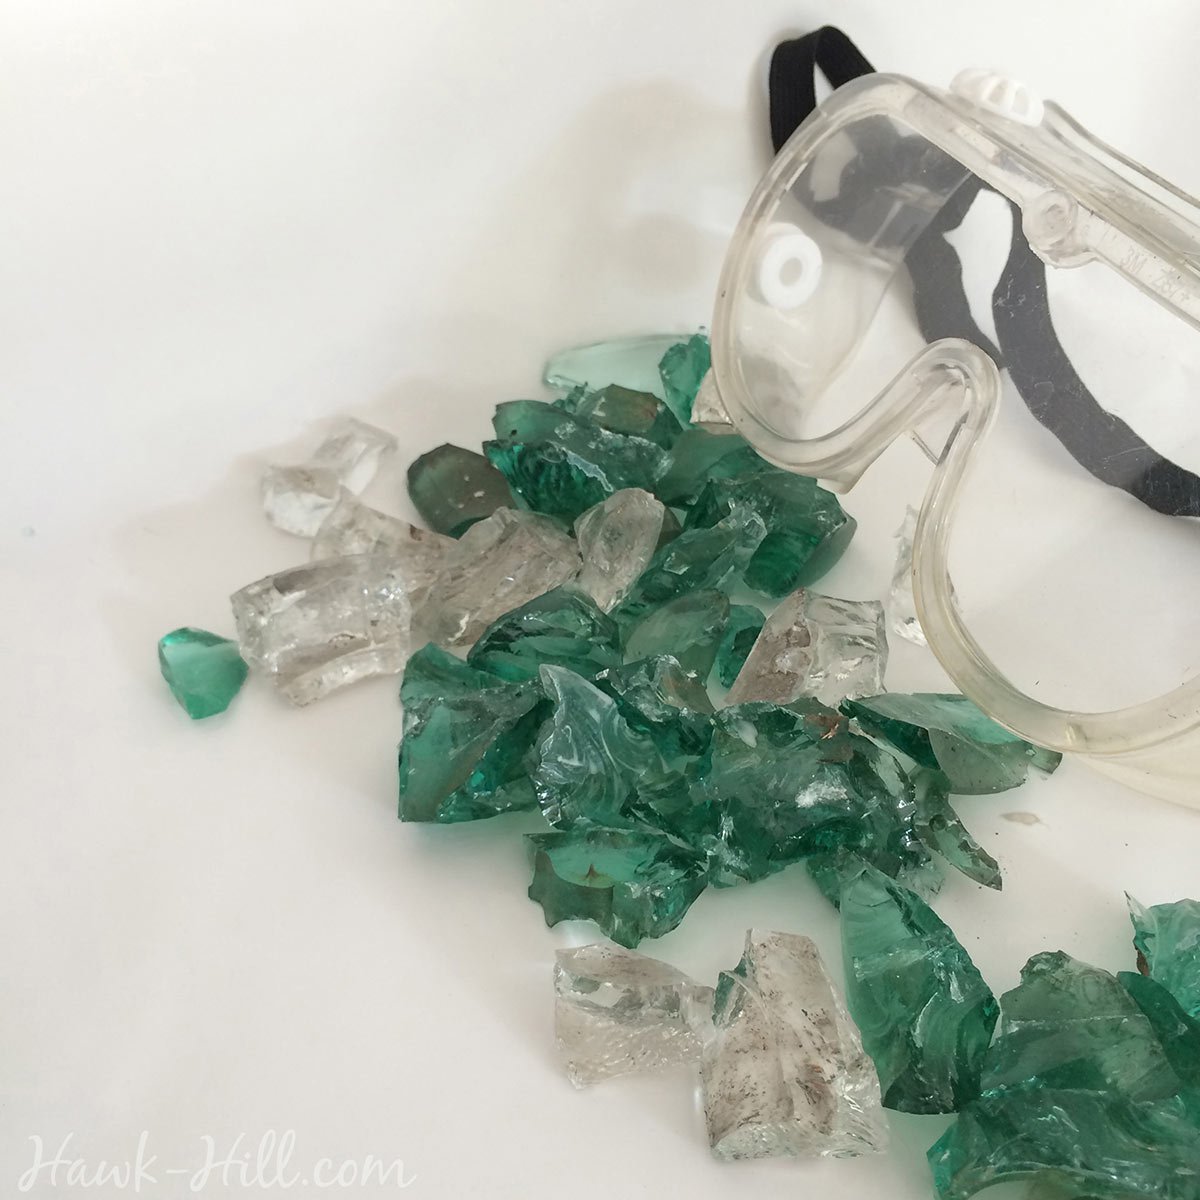
This is by far the most dangerous part. Please be smart, safe, and glass savvy. Glass is pointy and dangerous, handle with extreme caution and with all appropriate safety equipment. And for the love of your eyeballs, do not skip protective eyewear.
A. Have the barrel of your tumbler open and nearby. Place the unbroken glass in a heavy plastic bag, then place that bag into another heavy plastic bag. Put on goggles and gloves and place the bagged object inside a cardboard box.
B. With goggles on, use the flat side of the hammer to strike the object until it breaks. Continue striking the large pieces until the pieces are somewhat uniform in the size range you desire for your sea glass products (remember, tumbling will make pieces a bit smaller!).
C. Carefully, with hands protected by cut-resistant gloves, dump the contents of the plastic bags into your colander or egg basket (over a safe receptacle). Tiny shards of glass will fall through the basket leaving the big chunks behind. (When I do this part, I work over a double-bagged trash can, to minimize cleanup) Gently shake the basket of glass till the small shards are removed, then with gloved hands manually move the larger chunks of glass into the barrel of the rock tumbler.
Step 3: Turn Broken Glass into Sea Glass.
Now is the fun part!
A. Add glass until the barrel of your tumbler is about 1/2 to 2/3 full of glass (I usually fill to 2/3rd of the way full) If you don’t have enough glass shards, you can add a few clean rocks. IMPORTANT: The 1/2 – 2/3 fullness is required for the contents to tumble instead of slosh.
B. Check the manual for your tumbler, but for my 3lb capacity tumbler, I used about 3-4 tablespoons of grit. The coarse silicon carbide grit I linked earlier makes the process go about twice as fast.
C. Add enough water to cover the glass and abrasive but DO NOT OVERFILL. (You want a sludgy tumble with each barrel turn, not a constant slosh)
D. Run for 3-5 days. After 48 hours you can pop the barrel open and take a look if you are impatient like me. At this point, you should notice some frosting on the glass and significant dulling of sharp corners. Continue tumbling until the pieces are evenly frosted with rounded edges. The longer you tumble, the more the final glass pieces will have the appearance of being very, very old sea glass gems.
Step 4: Cleaning and Finishing Homemade Sea Glass
After a few days, your glass will be ready. To finish each round of tumbled glass, I hold my fry basket/colander over a bucket and gently pour the newly made frosted glass baubles from the tumbler’s chamber into the basket, allowing the water and grit to drip through leaving only the glass behind in the basket.
Take your egg basket, glass, and bucket to an outdoor area with a hose and hose down the sea glass, washing away all remaining grit and any grime picked up in the polishing process. (Do not wash the grit down your drains!)

TIP: Reuse the (kinda expensive!) carbide grit by leaving the bucket of rinse water to sit for a few hours. Once the grit settles at the bottom of the bucket, you can carefully dump off the water and save your grit for reuse.
Reader Comment TIP: [2023 article update] Stained Glass Artisans – I recently received a comment (below) from someone who specializes in creating stained glass artwork (what a cool thing to do!). They had the clever idea / suggestion of reaching out to local stained glass artists in your community to see if they have scrap glass, which will likely include many not-so-common colors. Please let me know below if you try this out – I’d love to hear about it!
Spread your homemade glass gems on a clean, dry surface to dry (a towel or a cooling rack from your kitchen works great). Once completely dry, your sea glass is ready for any project you have planned for it!
Tumbling colored glass: some tips on sourcing
Red, purple, orange, and aqua sea glass are all very rare to find on beaches as real sea glass. It turns out, manufacturing these colors in a rock tumbler is difficult as well! During the height of my sea glass-making phase, I scoured thrift stores, recycling centers, and garage sales for colored glass. Red, purple, yellow, green, and all other colors of decorative glass were easy to find and I was excited to turn them into colored sea glass – but that’s when I got my surprise…
It turns out, much of the “colored glass” that is used in decorative vases, drinkware, and figurines is colored by a pigmented coating on the outside of the glass. As soon as these colored glasses are broken, you can see the color variation from the surface to the inside of the glass. Once placed in a tumbler, the carbide grit quickly scours all the pigment off the surface of the glass, leaving plain white sea glass behind in the tumbler.
How to tell if a colored piece of glass is coated or actually pigmented glass? Check the bottom of the piece- usually, if the surface treatment has been applied there will be evidence on the bottom. Look for a clear mark where the pigment ends, drips, or varies in color. The vast majority of colored glass I found via garage sales and thrifting was, in fact, not colored glass.
You may have to look much harder to find authentic colored glass that you can put in your tumbler to get rare colors of sea glass. I had success with antique insulators, and to get that elusive red glass you may even have success going to auto salvage yards to score old warning lights and turn signals. You can also buy chunks of pigmented glass (including ultra-rare black glass), made for fire tables, which you can make into sea glass.
Conclusion
Homemade sea glass is beautiful for home decor, jewelry, fused glass art, dramatic light fixtures, and I’ve even used it in mixed media epoxy resin pieces with a lot of success.
What will you do with your sea glass? I’d love to hear your questions, comments, or stories about how this technique worked for you!
Thanks for Reading!!!
I hope you can tell that I love DIY, researching the best affordable solutions for every-day problems opportunities and documenting / sharing solutions!🙌 Hawk-Hill.com is reader-supported.
☕ Hawk-Hill.com is reader-supported. If this article saved you time or money, please consider donating $1 to help me cover the cost of hosting this website OR If you appreciate this information and want to throw a “Thanks!” my way by buying me a coffee – I would Of Course appreciate it! :]
Reader Questions and Recommendations
Readers, do you have any favorite topics / posts? What would you like to read more about in the future? As I hope you can tell from this and other articles on my site, I really enjoy DIY / a good challenge, and I’m not afraid to roll up my sleeves to figure out a great, and hopefully simple 😁 solution. So please feel free to let me know in the comments below (or reach out via social media)!
Ok Really – I’ll try to wrap this up now😂
Finally, if you’d like to continue to learn about interesting DIY options as well as how YOU can tackle creative new projects consider checking out the latest and most popular articles listed on the Hawk-Hill Home Page. I’m always trying to enjoy and write about the creative side of life so please don’t be a stranger – check back often!😍
Also chech our Pinteres account https://www.pinterest.com/curlylindsay/
If you enjoyed this post you may also enjoy reading / perusing / devouring😊 one or all of these articles as well!
- 💡4 Easy Steps to Make Your Own Sea Glass 🌊
- ❤️Bedroom Decorating Ideas for Single Women’s Master Bedrooms 🛏️
- 🏡Ikea Kitchen Cost: What I Spent for a 9×12 Kitchen Remodel 💵
- 3 Simple Ways to Make a Sea Glass Light: Pendant, Lamp, or Nightlight
- DIY: My Method for Painting an Antique Gold Patina Finish on Frames
Pin it now to find it later:
Frequently Asked Questions about DIY Sea Glass
Can I use broken glass to make sea glass?
YES. You can use broken glass from just about any source for this project. If you found this article while teary-eyed over a sentimental glass vase or even a ceramic plate you just broke, this is a beautiful way to repurpose the broken pieces of glass in a way that you can enjoy and appreciate for many more years. Even if you aren’t an artist, sea glass can make an elegant display dropped into the bottom of a clear glass vase. And broken plates with sharp edges removed make beautiful mosaics or stepping stones.
Can I make sea glass with a kid’s rock tumbler?
YES. This method works by harnessing time and friction. Professional tumblers and carbide grit offer lots of friction and can finish sea glass in as little as 48 hours. If you use a cheaper kid’s tumbler and/or sand, you’ll get a lot less friction- but if you have time to wait, you’ll still be able to create finished sea glass by running the tumbler for much longer (7-10 days).
How can you tell the difference between real sea glass and tumbled sea glass?
When done well, you can’t tell the difference! The tumbling method is literally using the exact same physics to create an identical effect on glass.
However, In my experience, both as someone who has tumbled many bathes of glass and someone who enjoys a lot of beachcombing in the Pacific Northwest, “real” sea glass often has pits and uneven spots that generally are not present in tumbler-manufactured sea glass. This isn’t necessarily a good indicator, though, because even this is very dependent upon the body of water that produced the sea glass. For example, in areas of the world with roaring, churning seas, and soft sandy ocean bottoms, very round, evenly worn sea glass could certainly wash up on the beach.
Can you drill holes in sea glass?
You can, but you’ll need a special drill bit that is diamond coated (don’t worry- they aren’t a fraction as expensive as they sound!). This ultra-hard drill bit is capable of drilling through glass. You’ll want to use medium to light pressure, to prevent breaking glass, and I personally have had better luck with a higher speed drill, like a dremel tool. You’ll need to keep the drill bit and your piece of sea glass from overheating. Follow the instructions that came with your glass cutting drill bit, as you may need to work under running water to prevent overheating and glass shards from going airborne.
Can you make a sea glass without a tumbler?
Traditionally, beach glass is made with naturally tumbling – the natural motion of the ocean and the friction where water meets sand naturally churns broken glass into sea glass over time. Without a rock tumbler to replicate this process, there really aren’t any effective ways to make real beach glass. What you can do instead, is used sea glass spray paint to create a similar, though not quite the same, finish.
Can you DIY beach glass by shaking a jar?
Can Sea Glass be manufactured in bulk?
Yes! While this tutorial covers a simple process for making a small batch of sea glass, the same process can be replicated inside of a cement mixer! The cement mixers’ high-capacity makes it possible to create a massive amount of faux sea glass in one batch- although it may be more difficult to preserve large pieces of glass, due to the pressure generated inside the mixing drum
With this higher capacity and manufacturing, you can create large quantities of tumbled glass which can enable a much wider variety of craft projects. While small-batch glass is perfect for making jewelry, home decor, or beach-inspired lighting, with a cement mixer you can create buckets of sea glass at a time, which you can then use for outdoor garden projects, setting into cement for dramatic sidewalks and walkways, and even using a binder to create dramatic sea glass embedded furniture or tables.
This is the exact model of Lortone I have been using for years, and have always been pleased with the results. I, too, initially used sand, and then later, realized I could simply scoop larger grit from a creek that flows behind our house. It seems my rock tumbler is rolling all the time.
Excellent tutorial ! Thank you very much for sharing all of your knowledge and great tips. Blessings …
As an avid seaglasser, the beaty of seaglass comes from the hunt for it on shorelines. The hunt, for these naturally tumbled treasures, is the best.
But isn’t it fun to make your own when you live in the Midwest and have never been to the ocean?
It’s definitely a more precious material in landlocked states!!
I have tried to use the children’s $65.00 tumbler and was able to make one batch. The tumbler broke after that. Irreparable. I loved the post easy and informative. I will purchase the better tumbler. Thanks for your post!
A most helpful, sincere and encouraging article- a proper tutorial. Thank you
Does the better tumbler(not the child one) use much hydro or electricity, please? Thank you for your time and consideration!
MK
Terrific. You answered all my questions. Can’t wait to start. I have a lot of blue wine bottles. What do you do with the middle too-thin pieces? OK, I guess I did have one more question.
It won’t hurt to leave the smaller or thin pieces in the batch, but they end up being very very very small pieces of sea glass. Good luck!
Super informative thank you can’t wait to start!
So I bought a tumbler from harbor freight 3lb.. And to start i have course sand.. I am home 1 day a week so my tumbler ran all week.. I got home Saturday and checked my tumbler sunday.. And nothing the glass looked the same.. I have a large piece of bottom glass green from a broken bottle i found and a 10 oz broken brown bottle.. So i think i might be using to much sand or water ??? Suggestions
Using sand will work, but it works very, very slowly. To see result sooner, try tumbling for a few days with the carbide grit mentioned above.
Is there a way to keep the glass from getting dull I would like to have it look like the bottle does before you start turning it
The same action that dulls the sharp edges down to soft contours leaves tiny scratches on the glass surface, which is what creates the clouded appearance. I’ve actually played around with coating sea glass with epoxy resin, and one of the effects I noticed is that once coated with a thin layer of resin, sea glass becomes bright and translucent again. Epoxy resin has a bit of a learning curve to use, but might be worth trying for your project!
Stainless steel shot in the tumbler is used for polishing metal in jewelry making. I imagine it would also polish glass. (Make sure it’s stainless steel so it doesn’t rust)
You can buy a powdery polishing grit to use. I purchased mine at a gem show.
@Lindsayanne, after rounding with coarse grit, you could proceed just like tumbling rocks to stage 2 and 3 grit and finally polish all in the tumbler which will give you smoothed and Roy Des but clear and shiny glass
Thank you for your instructions! I’m excited to see how my glass comes out! All of the glass I am tumbling is real sea glass that needs either another 50 years in the sea or 3 days in the tumbler! Since we are confined to home now, it’s a great time to dive into this project!
It was suggested on another site that when tumbling glass, (as opposed to rocks), gasses form, so it’s better to add baking soda to mitigate the swelling of the chamber. We did that and it leaked out of the chamber anyway. Do you have gasses form in your chamber?
Interesting! No, I’ve never had issues with gas building up or leaking (except when I didn’t close my chamber well!). I have a few thoughts though: 1. The tumbler I use and have linked above has rubber chambers, it’s very possible that the rubber may actually be slightly stretching to accommodate any gases that might be released. 2. I tumble with a pretty low fill in my tumbling chamber (see above). To get a tumble instead of a “slosh,” I find that it works best to have a lot of empty space inside the chamber, which may have also helped with preventing overfill if gases are released.
Thank you! You’re awesome! It worked great! No gasses! Funny thing, though: My black grit and sand mixture was completely pulverized by the end of three days…no sand, no black grit…just black water. (Did not let go down the sink.)
Thanks for the update! That’s great! And so interesting about the grit! Next time, try dumping off the sludge into a jar and letting it sit for a day or two- it would be interesting to see if what settled to the bottom is different from the grinding materials you started with.
@Lindsayanne, yes, gases sometimes build up with tumbling glass and obsidian, depends on the glass
I already have chunky pieces of glass that I don’t necessarily need to be shaped I just need to put a frosty finish on them. Should I use a coarse grit or a medium grit? I also learned about a vibrating tumbler as opposed to a rotary tumbler and wonder if that would work faster for me. Any insight?
Fine grit is perfect for clouding the surface without any reshaping, but if you only have medium or coarse grit, just tumble the glass for a few hours in the medium grit.
The only vibrating tumblers I’m familiar with are the commercial type. They work fast but are expensive and gallons worth of medium, if there is a home version sized for rock tumbler, though, that should worlk.
Aloha!
I was wondering about noise? Is that an issue with the tumbler?
Mahalo Laura
It can be! It’s loud enough that you probably wouldn’t want to run it in your living room while you are at home, but when I ran Imine I put it in my (attached) garage and then the sound was only a faint hum in the house. If you are in a tiny house or urban living, you can try running the tumbler only when you are out of the house and/or insulating a big cardboard box to drop over the top of the tumbler to muffle sound.
I have been doing this for 25 years, in a Lortone tumbler. Breaking the glass is the most difficult part. I put glass in a 13 gallon plastic trash bin, cover with trash bags to contain “blow back” and drop/smash with a sledge hammer. The glass gets embedded in the plastic, so I only use for this. Sometimes I score the glass to get better shapes and fewer odd long pieces from wine bottles.
Also, I recommend splurging on grit versus free sand. Consider the cost of the tumbler. Grit will turn it to sea glass in a day or two. I reuse my grit forever.
Thank you for sharing this absolutely FUNtastical and utterly PERFECT tutorial!! It is so thorough, I feel like I know exactly where to start and how to proceed, so A MILLION THANKS!! I’ve been wanting to do Sea Glass projects but haven’t been able to find an affordable resource and don’t live near the beach anymore, so your blog post hit me right in the middle of my SWEET SPOT!! I am so excited to get started and just ordered a rock tumbler. The one you recommended was sold out with no date listed for restocking, so I did some other research and hope to have it ready to go this week. As someone who writes craft tutorials and teaches workshops in various other mediums, i give you a WHOLEHEARTED BRAVO!! Seriously, this is one of the best and most easy to follow tutorials I have ever seen!! Thank you again!!!
So your original question was what are we going to make with our sea glass. I am going to add it to a mirror frame for my son. He just moved to the adjunct apartment on our property and goes to school full time. The apartment needed updating and had an older dresser which is a wonderful oak piece but the mirror — ee gads! So I am going to make a nice art piece for him. I am really excited since I have an overflowing bottle collection that will now become sea glass. Thanks so much for your very detailed and exacting tutorial. I’m thrilled to have something to do with all this glass I have collected!
Yeah. Good idea about the box to to muffle. Maybe even an old styrofoam cooler??
Have tried this with stained glass scraps and using sand and poultry grit initially. Not much difference after about 5 days in Lortone tumbler.
Recently tried again.. this time bought coarse tumbling grit (carbide) and ceramic pieces (for tumbling) and used those instead. Ran tumbler for a week and once more, disappointed with results, barely a change…. this time the barrel did swell and I got some leakage…
Any further advice is greatly appreciated. Very frustrated… Also my Lortone tumbler gets quite HOT while running…. hopefully not a fire hazard.
Hi Fiona, thanks for your question! I’m sure that’s disappointing to invest the time and not see the results.
Here’s my guess: I’m thinking your tumbler barrel may be overloaded. When there is too much water/grit/media in the barrel, the whole unit has to work harder to turn (resulting in a motor running hotter), the contents of the barrel “slosh” instead of tumble (resulting in a disappointing outcome), and there’s less room for any gasses to collect (resulting in bulges and leaks).
You are using all the right supplies and should be seeing results, so I think if you tinker with how much you put int the barrel you’ll start seeing faster results. I usually aim for the barrel to be 1/2-2/3 full, after all the elements are added to the barrel.
I didn’t know anything about “sea glass “ however I have saved many wine and whiskey bottles to try to make a concrete table top with glass pushed in top. I have a working tumbler that I use on gemstones or minerals. I’m gonna try the sea glass, but one question, is it the frosted look that’s desirable or can you go through the steps to have highly polished glass?
Hi Johnny, that sounds like a really cool project! I think most people like the frosted look that is distinctive to sea glass, but if you want to experiment with the finish, do a final tumble with a very fine grit media (like crushed walnut shells) and/or experiment with specialized polishing media. When tumbling rocks, tumbling for an hour or so with a tablespoon of grated ivory soap can help create a high-shine finish- although I have not tried this with glass.
After I typed all of that up, I realized epoxy resin might be perfect for this! I’ll go ahead and leave that text in case another reader might find it helpful, but I think I’d advise making your table with sea glass and then coating the finished tabletop- with seaglass embedded- with a layer of epoxy resin. The resin protects a surface and will restore a glossy finish to the tumbled glass.
TIP: be sure your resin is warm when applied, This way, the resin is fluid enough to fill all the tiny scratches that create the frosty appearance, and the final product will be free of bubbles.
thank you so much for this informative tutorial. i have opened up many of your links and might purchase some supplies. I have a couple questions before I get started
have you ever tried Perrier bottles and if i use them do i need to clean the paper off first or will the lortone just dissolve that?
also i understand the capacity but is it around two bottle a spin you would say?
any response is appreciate and I would love to follow your art if you have an instagram to provide.
Hi Grace- I have not tried Perrier bottles but they should work! It’s good to peel the label if it’s easy to do so. The grit will remove the paper and adhesive, but can also create a “sludge” in the tumbling barrel which may reduce efficiency.
How quickly you’ll be able to finish sea glass depends on the type of glass you are looking for (i.e broken glass with blunt edges vs very round gems) as well as the hardness of the grit you choose (carbide grit, for example, will make sea glass much much faster than using play sand). It’s all a lot of experimentation! Good luck!
thank you so much and I was just gifted a rock tumbler but I am going to buy my other supplies, thank you so much for writing back!
What can I use to get the cloudy film on the glass after the coarse grit run does the job of softening glass. It doesn’t come clean. A pre polish level of grit? Try sand? Something else ?
Hi Kim, you may want to try tumbling rinsed sea glass with filtered or distilled water and plastic pellet media.
Good idea, where do you purchase carbide grit?
In the USA, I always order resupplies through Amazon. You can find a link to the exact grit I shop at Amazon in the supply list above.
When I opened the barrels after tumbling for 3 days they had about 2 inches of sludge and glass that were trapped on the bottom. I had to scrape it out of the bottom cuz it was packed so hard. How can I keep it from doing that?
Hi Kim! The sludge is residue or potentially the result of chemical reactions from sand/grit breaking down the glass, which itself can be made from different material compositions. Also, tumblers can be persnickety and more likely to do this when they don’t have as much water as they’d “like” or have a little too much grit the “perfect” combination of which seems to vary slightly from tumbler to tumbler. In other words, I wish I had a great answer but there are lots of variables!
I recommend taking a note of what you did this past time (for reference, so when you find the perfect recipe you can stick to it) then rinse the partially tumbled glass in a colander and start the tumbler over with fresh grit. Commercial carbide grit is less likely to gum up- so I definitely recommend it- although it is more expensive than sand.
I live in the mountains and look for river glass. There’s so much! I started making it in my small rock tumbler but didn’t want to spend $15 on grit so I just scooped up some of the sand from the river and use that! That is, after all, what did it in the first place. I got great results after about 12 hours!
Can I use local beach sand instead of buying the grit? There’s a beach on Lake Erie a mile away.
Definitely! Sand works, but because sand is not as hard was carbide grit, sand will take up to 3x longer than grit to grind down glass into smooth pebbles- but if you have patience, it works!
Greetings!
I LOVE this blog post…thank you! I will be making pieces for jewelry.
I came across the Telephone Insulators, as well…however, was curious if they were ‘Leaded’ Glass, as some vintage/antique glass is.
Do you happen to know?
Many Thanks!
Hi Elan, That’s a really important point that I had not considered, actually. I did a quick google-searching episode and couldn’t find any indication that old glass insulators were leaded. It sounds like, from what I just learned, lead was added to glass to increasing the working time- so more delicate or ornate glass pieces could be made. All that leads me to believe that utilitarian glass insulators are probably not leaded, but of course, no guarantees.
I do the same. Thanks for your explanation. I have found that vases are a no-go, but vintage bottles, colored bowls, and drinking glasses are true to color.
Please don’t call it seaglass! Unless you walk the beaches and find it along the shores, it is not seaglass. It is manufactured glass, processed glass, man made glass, fake seaglass, tumbled glass. Call it anything but seaglass or mermaid tears please. I am quite sure a mermaid didn’t swim in your tumbler. Thanks!
@Donna M Carpentieri, yes, I agree with this.
I did see a shop call it ‘Cultured Seaglass’, like play on wording for cultured pearls.
That made sense to me, since this process is, certainly, not legitimate seaglass…and neither are cultured pearls (even though they have all the same aspects of each other.)
(on this note…I, personally, am quite sure that a mermaid, also, didn’t swim in the sea…but I’m just a realist that way, I suppose. hee! :))
I got a sea glass turner got to try it can’t wait
I will be buying a tumbler and trying this. Thank you for explaining this So well.
Some years ago I heard of a technique to make broken glass safe to handle: you put it into an oven and turn the temperature up to 500 degrees Fahrenheit and leave it in the oven for at least an hour once it reaches 500. I tried this out with some wine bottles and it really did work. Do you think the sea glass production would work on “cooked” glass and make it a safer way to go?
Beautifully worded intro.
Newbie to this art craft.
Good instructions – many thanks.
I just stared tumbling this month and I am very happy with the results. I used a whole tiny pack of the grit the first time and added some pebbles. Tumbled about 3 days. The next batch I reused the grit in the machine including the water added about 2 TB sand and more pebbles. 3 more days and another good batch. I am wondering now if I even need that coarse grit since I am using coarse decorative sand, & pebbles (from Dollar tree) I am on my 4th batch and still reusing the same grit and just adding more to it.
Its working for me. I have the National Geographic Hobby tumbler.
Thank you, excellent tutorial. My daughter and I walk the beach collecting sea glass when we can find it but we are both inspired by your piece to make our own!
Simon
p.s. someone in the comments sections mentioned being “landlocked”…, in England it is not possible to ever be more than 75 miles from the sea as the crow flies…, does this count? 🙂
Thank you for this post. I live in North Carolina and have been collecting sea glass from the beaches for years. Recently on hikes that go by historic homesites, I have found lots of broken glass in the usual green and brown colors but also a few different shades of blue and lavender. I cant wait to get a tumbler and start working on these pieces!
As a sea glass collector I can tell you that manufactured sea glass looks absolutely nothing like genuine sea glass and nothing like as fascinating to look at.
How lucky you are to have access to the beach and the opportunity to develop your eye for sea glass! I’ll keep your comments in mind!
This was very helpful. Thank you. I have a question. After you break the glass you remove the small pieces , why can’t they be added to the tumbler. I have some small pieces of glass found in a beach that the edges are not smooth and thought I could put them in the rock tumbler.
Hi Peggy- great question! The reason my tutorial includes instructions to pick out small pieces of glass is because, if you run the tumbler long enough to get the sharp edges of the large pieces nicely worn down, pebble-sized pieces of glass disintegrate into nothing! Well, actually they form a sort of sludge that requires a clean-out and restart of the tumbler chamber. You CAN tumble small pieces of glass, but for best results use a very fine grit and don’t run the tumbler for too long!
Great tutorial! I’m brand new to this and am trying to get it right the first time without waste money!
I believe your time and experience just saved me a bunch of time and money!
Thank you,
Jody
Can you use shattered tempered glass to make sea glass?
Great question! I have not experimented with tumbling tempered glass.
Thanks for the info/instructions! I hit “save” as soon as I read the tip that old insulators are perfect for this ~ I was hoping to find a purpose for the chipped & broken ones I’ve found!!! Collected them from an old (pre 1965) dump site. FYI: also a great source for cobalt (think Noxema), milk glass, and others as well.
On to my 7 th batch of sea glass! Thank you for guide!
How much shrinkage from the broken glass to after the tumbling?
Hi Beth! Great question. Shrinkage will vary, depending on how much of the glass-edge you grind. For example, if you only tumble long enough to take the sharp edges off a few chunks of glass, shrinkage is very minimal (Probably less than 5%). However, if you want to tumble broken glass into the perfectly smooth, round gems of 100-year-old sea glass, you’ll grind of quite a bit of the glass in the process- up to 40%. My advice is to check every day or so, and remove from the tumbler’s chamber when the glass hits the desired shape and texture.
I am currently in the stained glass art world and the amount of scrap glass I get is ridiculous. A good place to look for the hard to find colors is stained glass scrap bins, or scraps on Facebook marketplace. I look forward to using your method on my scraps so I can turn them into jewelry.
Loved your no nonsense guide to tumbling.I’ve been collecting sea glass for years.Lately I’ve been looking in second hand stores…I’ve found old red,teal,purple and pink glassware…..can’t wait to plug the tumbler in.
Oooh, sounds awesome! I’d love to see how the results look from your rare glass!
Hi can I use just any sand . And do I use water .
It’s not real sea glass if you make it in a tumbler. It’s fake sea glass.
Great tutorial. But this isn’t “real” sea glass or beach glass. This is tumbled glass. For those of us that search the shores (I live near Lake michigan my glass is beach glass. ) the hunt is what we treasure really. I do encourage you to re word your blog. And hope no one tries selling tumbled glass as the unique beach or sea glass us glassers spend time searching for. I don’t discredit tumbled glass, it is a great way to get tumbled glass when you do not live near large water. Your tutorial is spectacular and very detailed! Thank you for sharing.
I have several pieces of picture frame glass. Can this be turned into sea glass or is it too thin?
Yes, it can definitely be turned into sea glass….pieces will likely be thin when complete but very doable!
Hi, thanks for the information. I would like to know how do you make a polish efect at the final of processs ?
To get the desired polish effect is dependent on a couple of things. The type of glass you start with, whether or not grit was used while tumbling, and making sure to clean off any residue on the glass as you go. Please refer back to steps 3 and 4 and feel free to reach out with any other questions!
As an avid sea glass hunter myself, I have to say that if it doesn’t come from the sea, it isn’t real sea glass. True sea glass takes years and years of weathering through tides and storms and always has a story behind it. For instance, we lived at a military base on the ocean that had an old dumping ground on the beach near their officer’s club and where the guys would toss their beer bottles when home on leave. We collected many beautiful pieces there. There is also a sea glass beach at the bottom of a cliff off the coast of England where an old glass manufacturing company would toss their remnants. That is where some of the most colorful and rare pieces are found. I know I sound snobby, and don’t mean to, but real, genuine sea glass is a very special treasure! That being said, for those who love the look of real sea glass but don’t live near a sea glass beach, this looks like an excellent way of making faux sea glass
I would love to go to that beach in England. Sounds amazing. I’m blessed to currently live by the ocean and walk along the beach collecting glass a couple mornings each week. It’s therapeutic! Someday when I’m back to living inland I’ll be grateful to have my tumbler!