


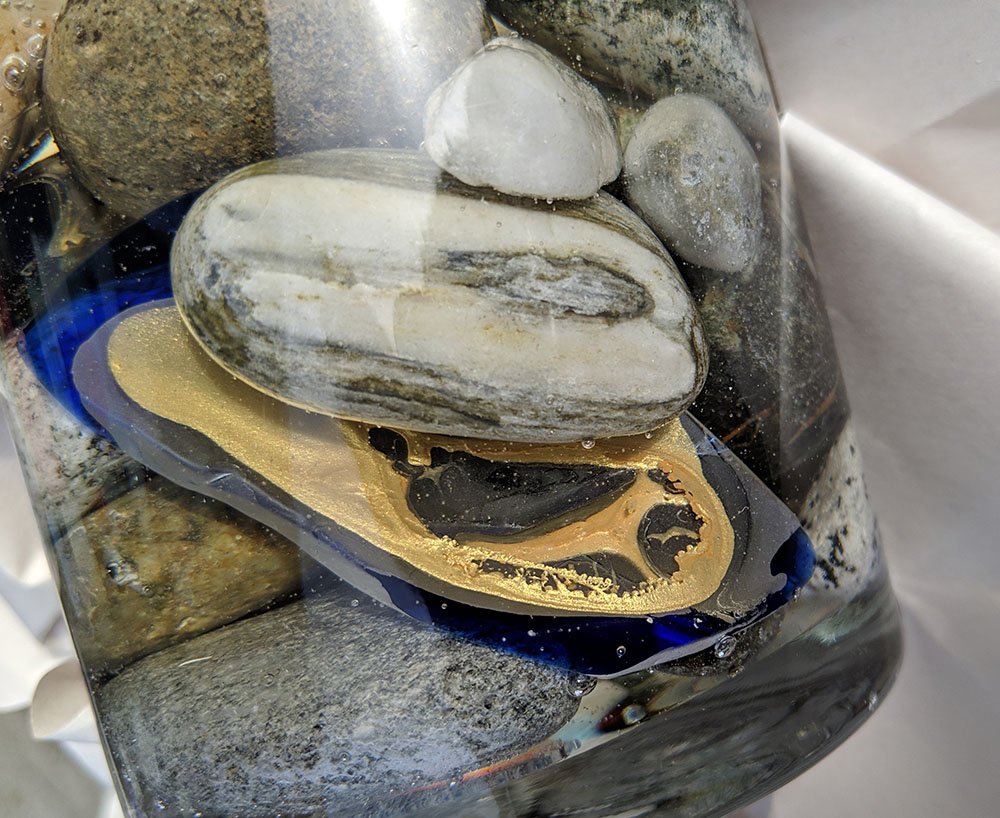
Resin pouring projects (such as my water-splash resin sculptures) often result in excess resin leftover after my primary project is complete. I love experimenting with this leftover resin and one of these side-project-experiments recently resulted in a method for creating the geode-like metallic blooms, shown below.
Developed to create a shiny and ultra-durable finish on surfaces, resin has evolved into a fairly common art supply. Artists use it to cast designs in molds, and to create the illusion of a wet watery substance, and as a sealant.
Epoxy resin can be tricky to work with – it requires a dust-free environment, slow mixing, protected skin, and a well-ventilated area- but the unique effects are worth the trouble for many artists, including myself.
I’ve always been someone who has trouble throwing away things that could be useful or even just fun to experiment with. Leftover resin is no exception. Every time I mixed a batch for my resin water splash sculptures I’d end up with a tiny bit leftover and this tiny amount lent itself to experimentation that resulted in this post: a quick tutorial on how to make geode like resin-encased “blooms” of metallic gold.
After I accidentally discovered this method of creating a synthetic geode–looking piece of dimensional art, I realized how great these would be for jewelry and for jewelry making– in fact, I purchased the hardware for making these into necklaces for just that purpose!
Step by Step Instructions to make Resin Geodes:
Hawk-Hill.com is a participant in the Amazon Services LLC Associates Program, an affiliate advertising program designed to provide a means for website owners to earn advertising fees by advertising and linking to Amazon.com and any other website that may be affiliated with Amazon Service LLC Associates Program
You’ll Need:
- High-Flow Liquid Acrylic in Metallic Silver or Metallic Gold (This only works with paint formulated as a highly pigmented fluid, like the one linked)
- Epoxy Resin
- Stones, wood, or other non-porus surface for “hosting” the gold bloom.
- OPTIONAL: Small hand-held torch-style lighter (Improves resin cast clarity by removing bubbles from poured resin.)
Instructions:
Begin with a solid object upon which to place the gold bloom. I have experimented with using stones and sea glass (see here for instruction on making your own sea glass). Place your object on a protected surface (preferably one with a rim, to catch any dripping resin).
Prepare your resin according to the manufacturer’s instructions and ready your metallic *fluid acrylic- having both ready and handy is essential to good results.
*Fluid acrylic is very different from regular acrylic paint and familiarizing yourself with it’s viscosity will be helpful before beginning. While typical acrylic paint has thickening agents it to help give it texture for the artist to work with, high-flow fluid acrylic does not have any thickening agents, it is simply pigment in a thin–liquid form. It flows and floods in a way that is even more fluid than ink-based pigments. Because of this unique feature, liquid acrylic is particularly fun to experiment with- and MESSY! It comes in many shades but the iridescent gold is my absolute favorite. It’s a metallic gold that looks expensive and elegant. Incorporated into this project it creates a metallic bloom that appears to be suspended in clear water.
Step 1:
Place a drop – only one drop – of the iridescent gold liquid acrylic on to your base object (the stone, sea glass, or another object that you have selected). The drop of liquid acrylic should stay in a droplet form. Don’t force it to spread yet.
Step 2.
On top of the droplet of iridescent gold liquid acrylic, place a small amount of resin – perhaps just a half a teaspoon – directly on top of the droplet of gold paint. Instantly, you’ll begin to see these two substances react and influence the movement of one another.
Step 3.
If you’d like, you can use a toothpick or gentle tilting to influence the flow and movement of the gold underneath and through the resin. Application of direct heat via a handheld torch can be helpful in removing bubbles and influencing a change in how the liquids react.
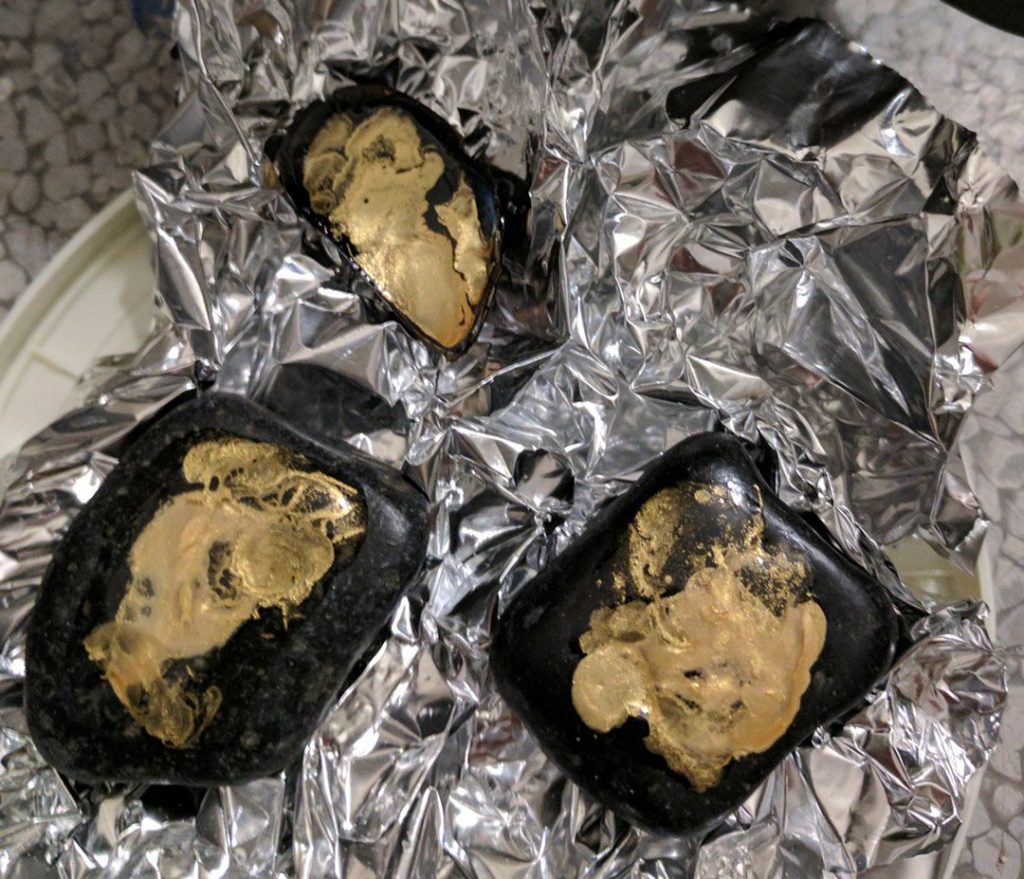
I won’t tell you to stop when you like how it looks, because this project has a mind of its own! Like painting with pouring media or doing alcohol ink blots, what you see in front of you is likely not how your project will look once it is fully cured – and that’s kind of the fun of the project. I usually do no less than six of these at the time and toss out two or three of them. In very lot there’s a mix of quality in the final results.
Step 4. Curing
Once you are satisfied with how the gold is blooming under the resin, you’ll want to set your gold blooms aside in a place where they won’t get bumped for at least 24 to 48 hours. Make sure it’s not too cold or too warm (Most expoxy cures best in low humidity 80-degree temps), and is reasonably dust free. If the resin has small bubbles in it you can remove the bubbles by waving a heat source over it – professionals use a kitchen torch or a heat gun for this use but you may find a blow dryer or even just a lighter is able to heat the resin up enough to allow the bubble to rise to the surface and pop.
Once your resin has cured you might be satisfied with your design, or you might wish to add a second layer of resin by repeating the whole process or just adding a second layer of plain resin. The second layer of resin can create a deeper effect – layering the bloom of iridescent gold under a thick layer of resin.