

Whether you’re in the investigation/planning stage of installing a doggie door or if you’ve already installed one and discovered the freedom a doggie door gives owners and pets, this article is for you! I love pet doors. The confidence that pups get from having their own freedom to go outside when needed is such fun for the dogs, and the convenience of not having to attend to early-morning potty breaks or late-night upset stomach issues is amazing.
This article actually isn’t about doggie door installation. (Although, let me say, installing a doggie door into an exterior wall of my 100-year-old brick home was worthy of a novel itself!) Instead, we’re talking about style, cleaning, and convenience upgrades to a standard doggie door – plus a few tips on training a dog to use a pet door- adapted from an article I wrote a decade before I even dreamed of starting this blog!

1. CLEANING: DOGGIE DOORS AND DIRT
Mud and debris tracked into the house is one of the most solid arguments against doggie doors. With a few strategies, though, you can minimize cross-contamination of outdoors with indoors.
I battled for years with fluffy poodle-paws and Hawk Hill’s Bald Cypress trees (which shed clingy pine-needle like debris constantly) and developed a few tricks and tips to keeping paws clean for pups who use doggie doors:
Hawk-Hill.com is a participant in the Amazon Services LLC Associates Program, an affiliate advertising program designed to provide a means for website owners to earn advertising fees by advertising and linking to Amazon.com and any other website that may be affiliated with Amazon Service LLC Associates Program
A. CONTAIN MUD AND DEBRIS ON THE EXTERIOR SIDE
Prep the entry to your door so paws naturally get wiped on the way inside. Help paws naturally clean by using pea gravel around the exterior entrance.
Gravel – But hang on- just dumping gravel outside the doggie door can potentially make MORE of a mess. You’ll want to be sure to get “pea gravel” (a grade of gravel sorted so most pieces are pea-sized, creating exceptional drainage) and underlay the new gravel with gravel grid pavers, which keeps paw-traffic from smashing the gravel into the mug. The pavers keep the gravel in place above the mud, ensuring any new mud tracked onto the top of the gravel washes down with the next rain or hose-washing- helping keep paws- and your house- clean.
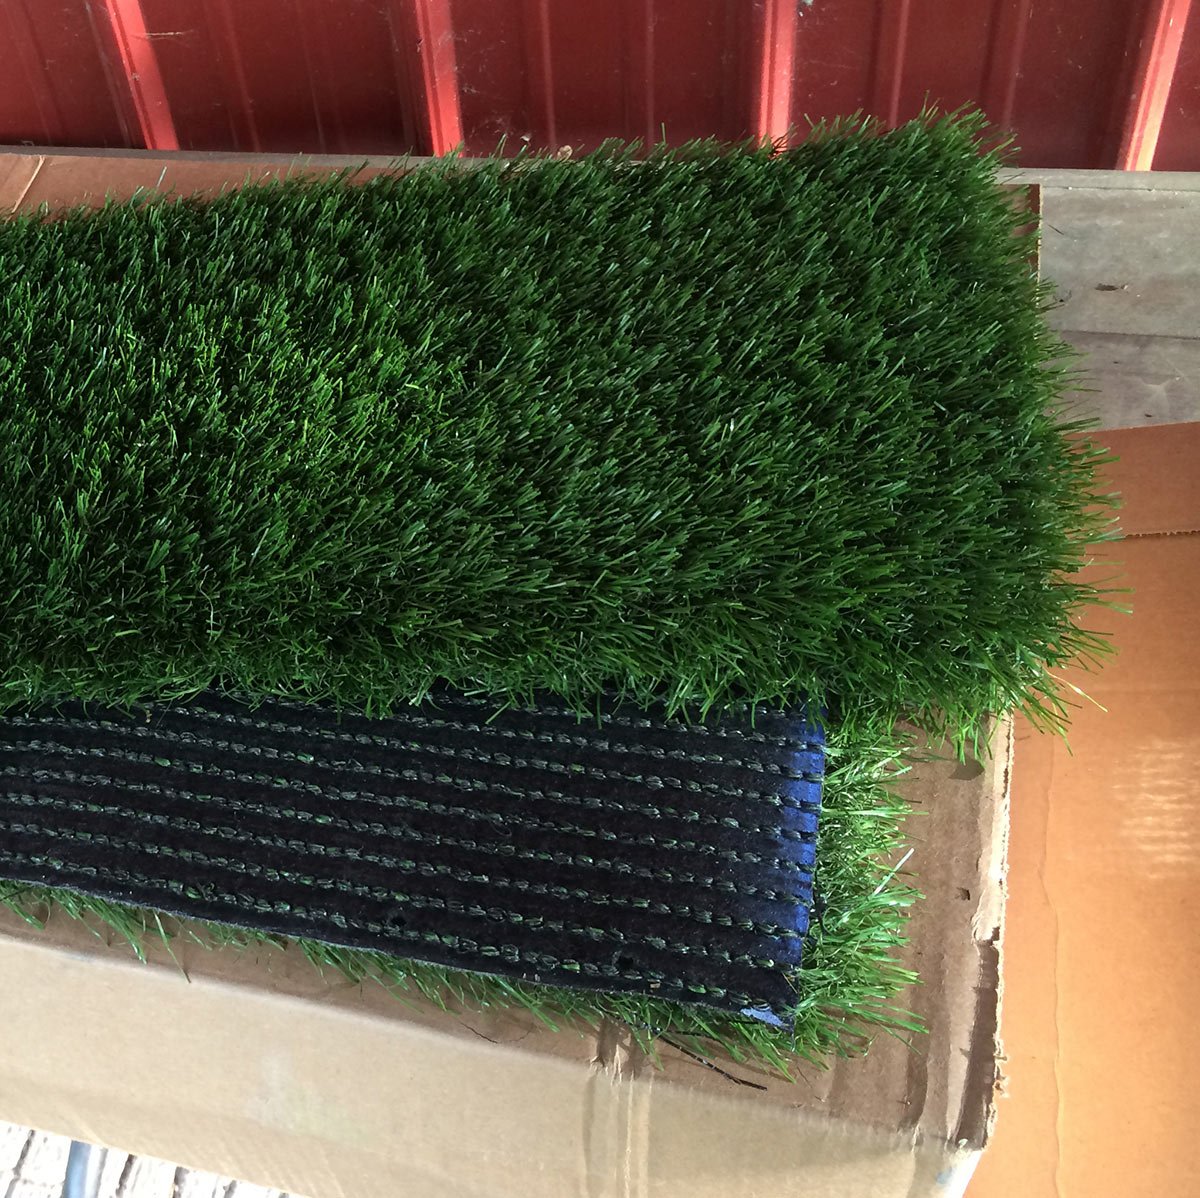
Astroturf – Even better than gravel is a patch of AstroTurf outside. Gravel can help dry paws but does nothing to rid the paws of debris, pine needles, or dead leaves. The soft pieces of grass in deep astroturf (note: NOT putting-green turf) help pull leaves and debris from paws. Because astroturf can be hosed off regularly, it’s a great way to minimize mud as well. I use and love this type of turf for my doggie door entry: Product Link.
B. INSTALL AN INDOOR BUFFER
On the interior side of the doggie door, as dogs enter the home, place a rug. Ideally, a few feet of rug along the track the dog(s) are most likely to take as they enter will work best. We love this non-slip microfiber runner, but a jute-fiber rug, like the one below is also great at collecting debris from paws and looks a little higher end.

2. HOW TO KEEP A HOME WITH A DOGGIE DOOR SECURE
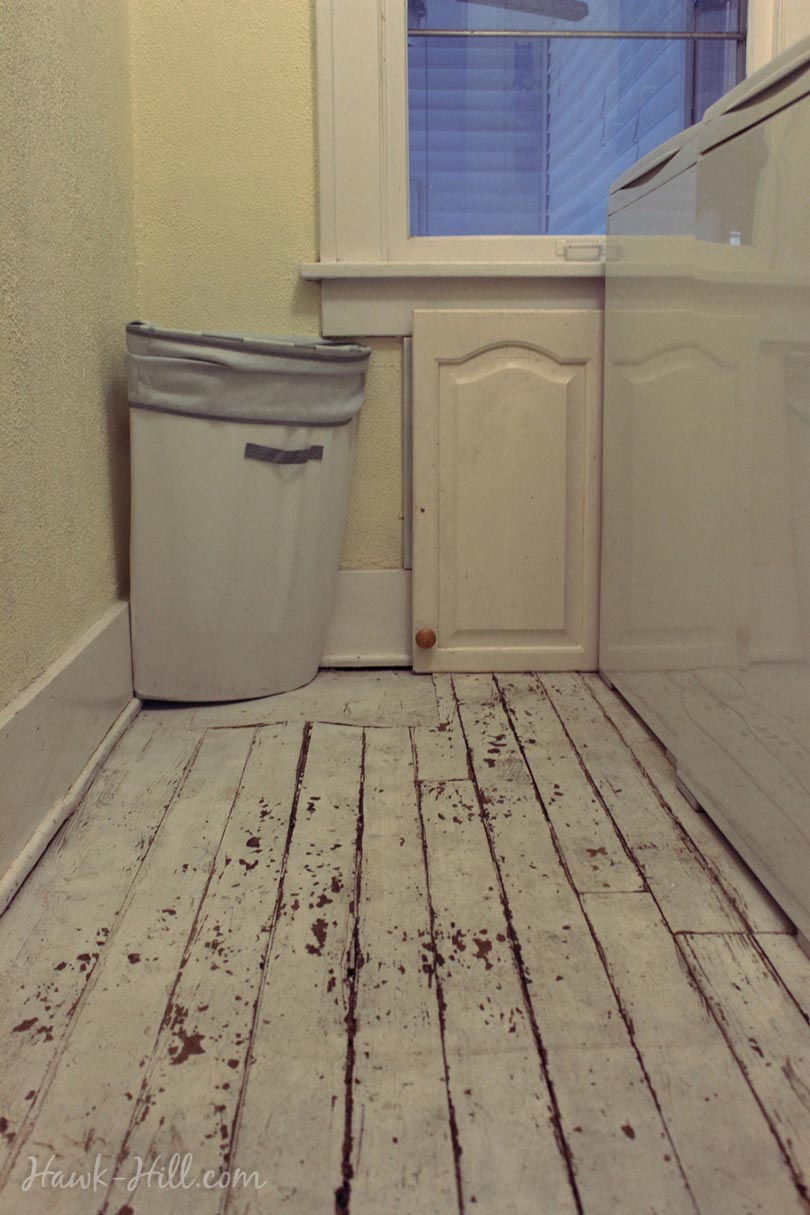
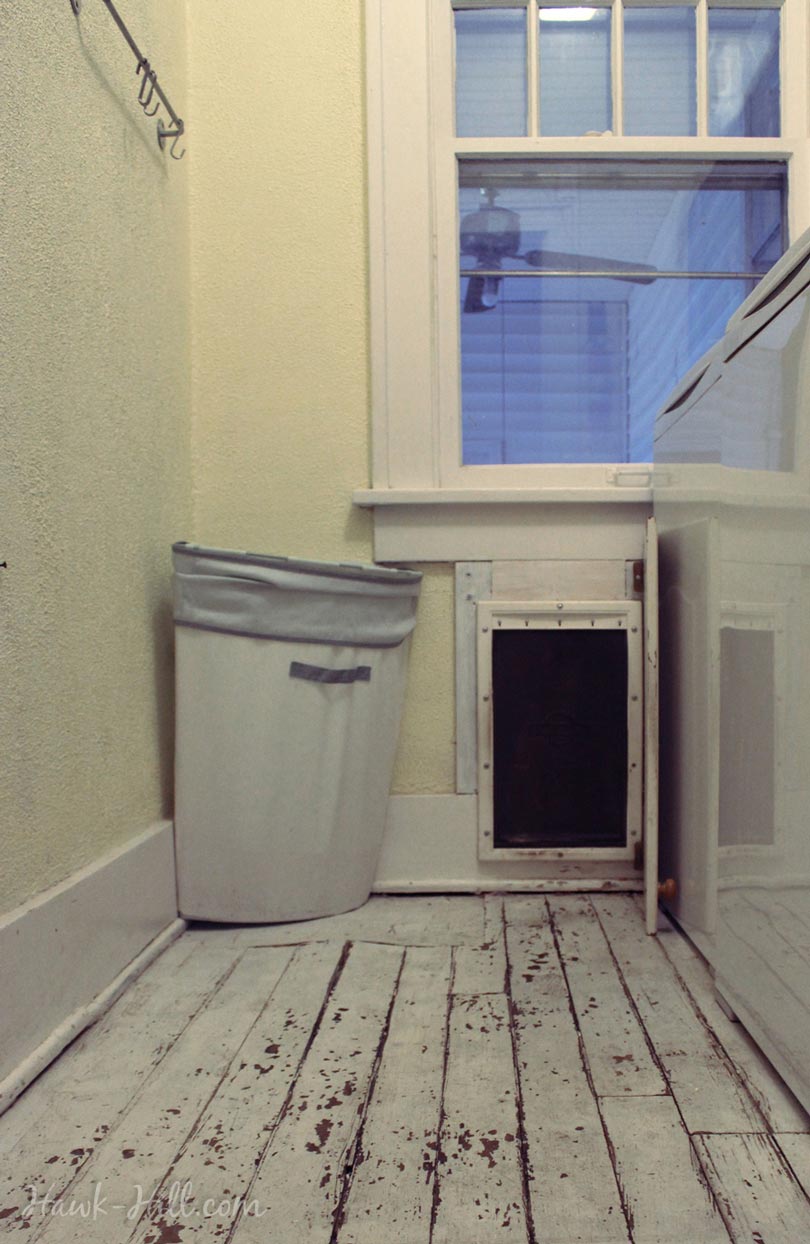
Although most pet doors have a locking mechanism, they are usually plastic and not my most trusted link in my home security. To add more security to my XXL dog door, I reused a solid wood cabinet door (salvaged from a Habitat for Humanity ReStore) to replace the included plastic door cover so that I could close the doggie door at night, during storms, during fireworks, or other times I wanted to make sure my dog stayed securely in the house while intruders stayed securely out.
This additional level of security mainly came out of a need to deal with an extremely anxious Airedale terrier whose storm anxiety was so bad that she would throw herself against the flimsy plastic cover until it popped off the Pet Safe door from the sheer force of her effort! In order to help this high anxiety dog stay safe during storms, I needed a better cover. My situation required a more solid solution: a wood door.
The first step was to frame my pet door with wood. This improved the aesthetic of the doggie door and gave me a secure place to attach hinges.
Next, I located a piece of wood to use as a cover. My local ReStore stocks cabinet doors in all sizes, so I knew exactly where to go. For $2 I picked up a finished and trimmed piece of wood that already had a knob and stain-resistant finish that was easy to wipe clean.
Attaching hinges to my cabinet door and then attaching the door, via the hinges, to the trim around my doggie door was an easy, beginner-level home improvement DIY.
This quick project produced a secure cover for my doggie door that quickly worked great for keeping the doggie door shut. I later installed a latch to keep the doggie door cover in place if pressure was applied from the exterior.
3. MOULDING FRAMED DOGGIE DOORS
I regret that in the time before my career change that required a move to Seattle I didn’t get a chance to finish this project. I always thought this doggie door would look charming if the interior, which opened into my laundry room, was framed with a few scraps of crown molding.
4. TRAINING A SHY DOG TO USE A DOGGIE DOOR
The majority of dogs readily pick up how to use a dog door are within a few minutes of being introduced to. A few tasty treats and favorite people have them leaping through the doggie door without hesitation. For more timid dogs, however, learning to use a pet door can be really difficult. After training a few rescue dogs to use doggie doors, I have a few tips. The timid times are harder to train to use a doggie door their confidence sores once they figure out they can come in and go as they please
First, totally remove the flap that covers the doggie door. If you have a brand that doesn’t have a removable cover, use duct tape (a lot of it!) to tape the cover all the way up and out of the way. Be sure the dog can see completely through the opening. Then, sit on the opposite side of the door from your dog with a pile of delicious treats (or perhaps just their dinner kibble) and feed them through the door, slowly coaxing them to come farther and farther.
For timid dogs, it’s best not to make a huge celebration when they do it properly, but a quiet “good dog” and treats should make them know they did it right without giving them a frightening surprise to associate with the doggie door.
When they finally make it through the doggie door opening for the first time, do something else for a few minutes – you don’t want to associate coming through the dog door with getting immediately put back outside again! Start a game of indoor fetch that continues back outside, or put the leash on and go for a fake walk around the house before ending up outside again on the other side of the pet door for another training session.
Second, once the dog is moving competently through a completely open pet door, keep the regular flap off or out of the way but install a towel or cardboard flap that only partially covers the opening. Get the dog moving through the opening with more and more cover. Some dogs will need to get used to not being able to see through the door or used to the feeling of the material touching her body. This may actually take a few days or a few training sessions, but if you choose to do this during good weather you can let the dog learn at their own pace.
Third, once your dog is moving through the pet door with an alternate cover, it’s time to let them start experiencing the pet door’s actual flap. How you’ll need to do this may depend on your dog: you may need to tape the flap in half, or just tape one edge up so the dog can see a bit of an opening. Your dog, now used to this training routine, should readily adapt to the installed flap as it gets more and more coverage over the doggie door opening.

Thanks for Reading!!!
I hope you can tell that I love DIY, researching the best affordable solutions for every-day problems opportunities and documenting / sharing solutions!🙌 Hawk-Hill.com is reader-supported.
☕ Hawk-Hill.com is reader-supported. If this article saved you time or money, please consider donating $1 to help me cover the cost of hosting this website OR If you appreciate this information and want to throw a “Thanks!” my way by buying me a coffee – I would Of Course appreciate it! :]
Reader Questions and Recommendations
Readers, do you have any favorite topics / posts? What would you like to read more about in the future? As I hope you can tell from this and other articles on my site, I really enjoy DIY / a good challenge, and I’m not afraid to roll up my sleeves to figure out a great, and hopefully simple 😁 solution. So please feel free to let me know in the comments below (or reach out via social media)!
Ok Really – I’ll try to wrap this up now😂
Finally, if you’d like to continue to learn about interesting DIY options as well as how YOU can tackle creative new projects consider checking out the latest and most popular articles listed on the Hawk-Hill Home Page. I’m always trying to enjoy and write about the creative side of life so please don’t be a stranger – check back often!😍
Also chech our Pinteres account https://www.pinterest.com/curlylindsay/
If you enjoyed this post you may also enjoy reading / perusing / devouring😊 one or all of these articles as well!
- 💡4 Easy Steps to Make Your Own Sea Glass 🌊
- ❤️Bedroom Decorating Ideas for Single Women’s Master Bedrooms 🛏️
- 🏡Ikea Kitchen Cost: What I Spent for a 9×12 Kitchen Remodel 💵