
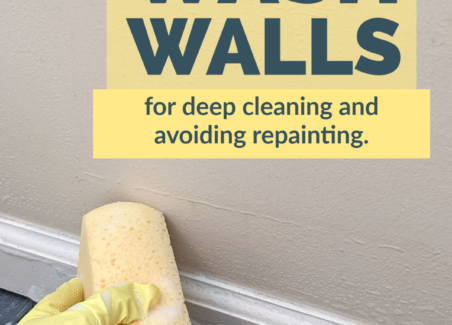
Washing walls is a tedious task that no one looks forward to. However, when you are doing a deep clean before moving into a new home washing walls is essential.
In this tutorial I demonstrate you how to use a broom, scrub brush, and degreasing cleaner to remove years of stains, dirt, and grime from interior walls using two methods: a light cleaning suitable for cleaning between tenants or before painting, and a heavy duty cleaning suitable for last-ditch-efforts to avoid repainting a room.
TIP: Washing walls is especially important if the previous owners had pets that you or a family member may be allergic to. No matter how carefully you mop floors or wipe down baseboards, without washing, pet dander will remain on walls and potentially cause allergies.
Typically, washing walls requires rags, buckets, and ladders, and lots of reaching (complete with water dripping down your arms!) to get the walls fully washed from top to bottom. In this tutorial, I will show you how I wash walls. This method for how to wash walls saves time and energy – and you may even have a few of these materials already on hand!
Using this method for washing walls, you can do a quick wipe down of a tiny house or one bedroom apartment in about a half an hour, or a more thorough wash- including some scrubbing- in only a bit longer.
Hawk-Hill.com is a participant in the Amazon Services LLC Associates Program, an affiliate advertising program designed to provide a means for website owners to earn advertising fees by advertising and linking to Amazon.com and any other website that may be affiliated with Amazon Service LLC Associates Program
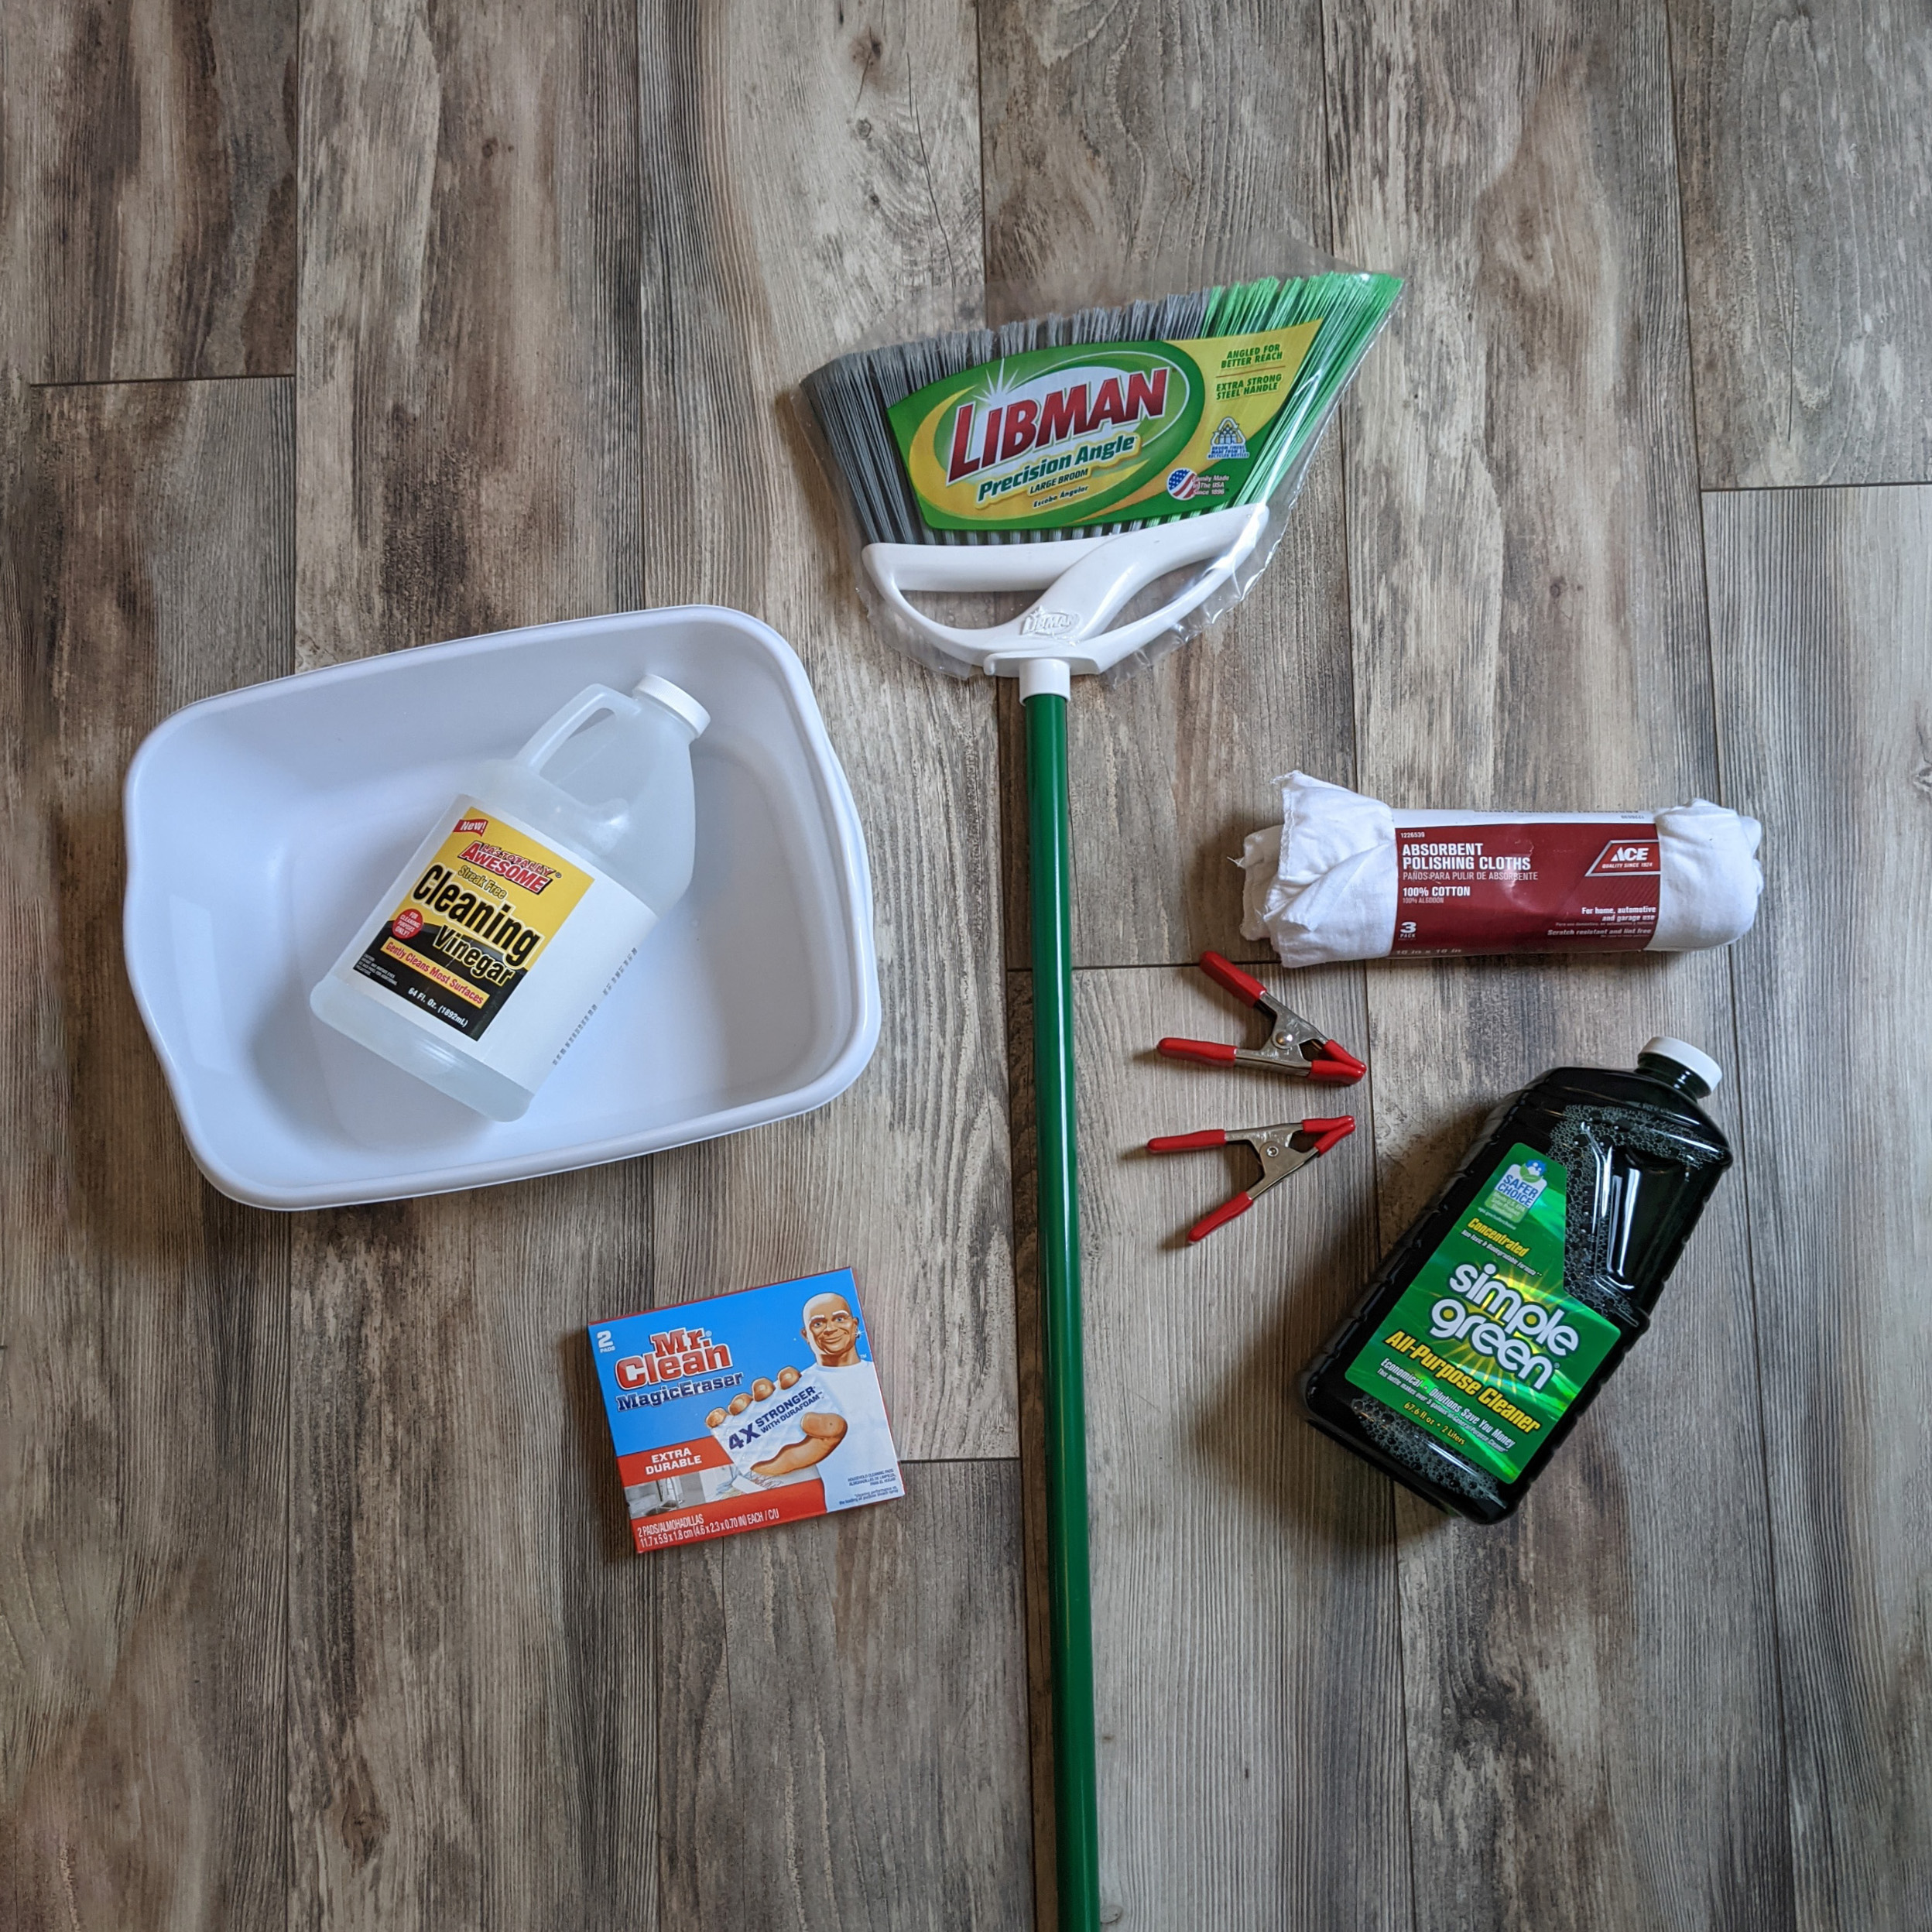
Supplies you’ll need:
- A good broom with stiff bristles that are not too soft, like this one.
- Cotton rags. You can use diaper clothes like I do in these images, or even torn-up sheets, old towels, or any other clean soft rag.
- Spring clamps (two)
- dishpan or bucket.
- Simple green cleaner or just white vinegar diluted in water.
How to Wash Walls with a DIY Wall Cleaning Tool

Make a Wall-Cleaning tool using a broom and rags.
This gentle cleaner works better on walls than a mob because it works at every angle.
Your broom should be as clean as possible before using it to wash walls- even covered. Brush the head of your broom on a clean surface outdoors to remove extra dirt and debris or, for very soiled brooms, use dish soap and a garden hose to fully shampoo out the dirt. This will prevent dirt from transferring to your walls during the cleaning process plus you’ll have a fresh, clean broom the next time you sweep!
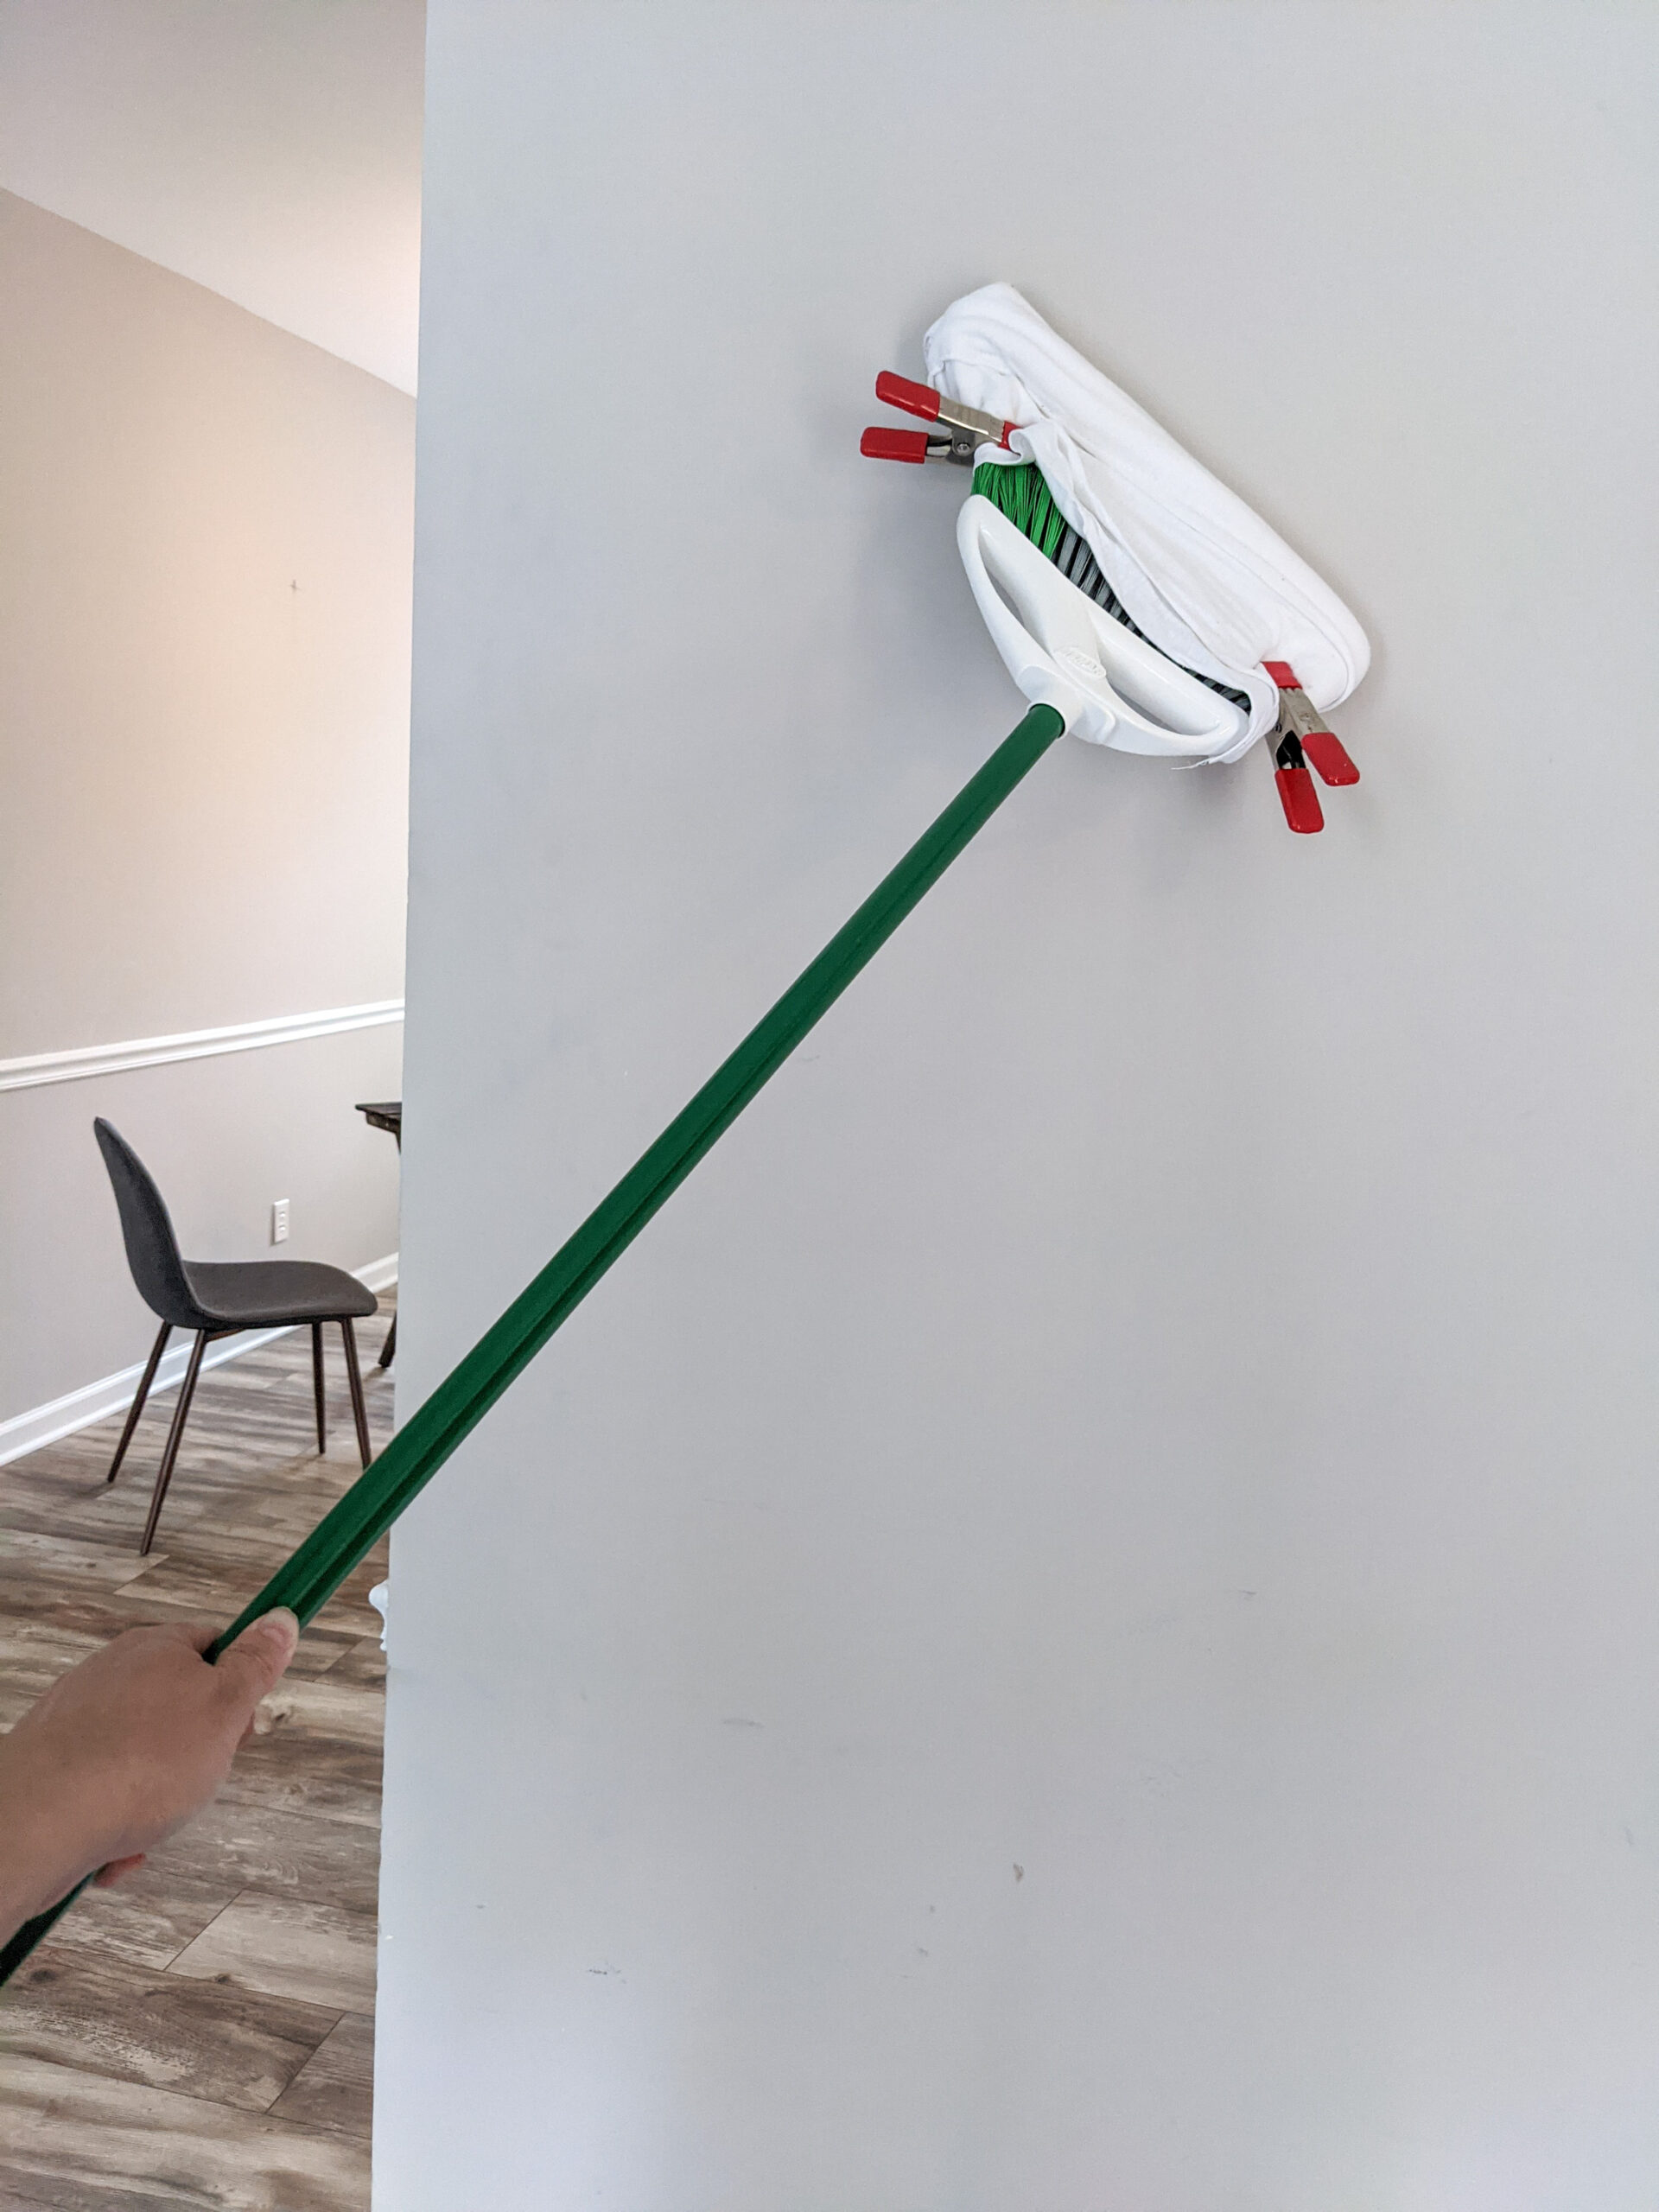
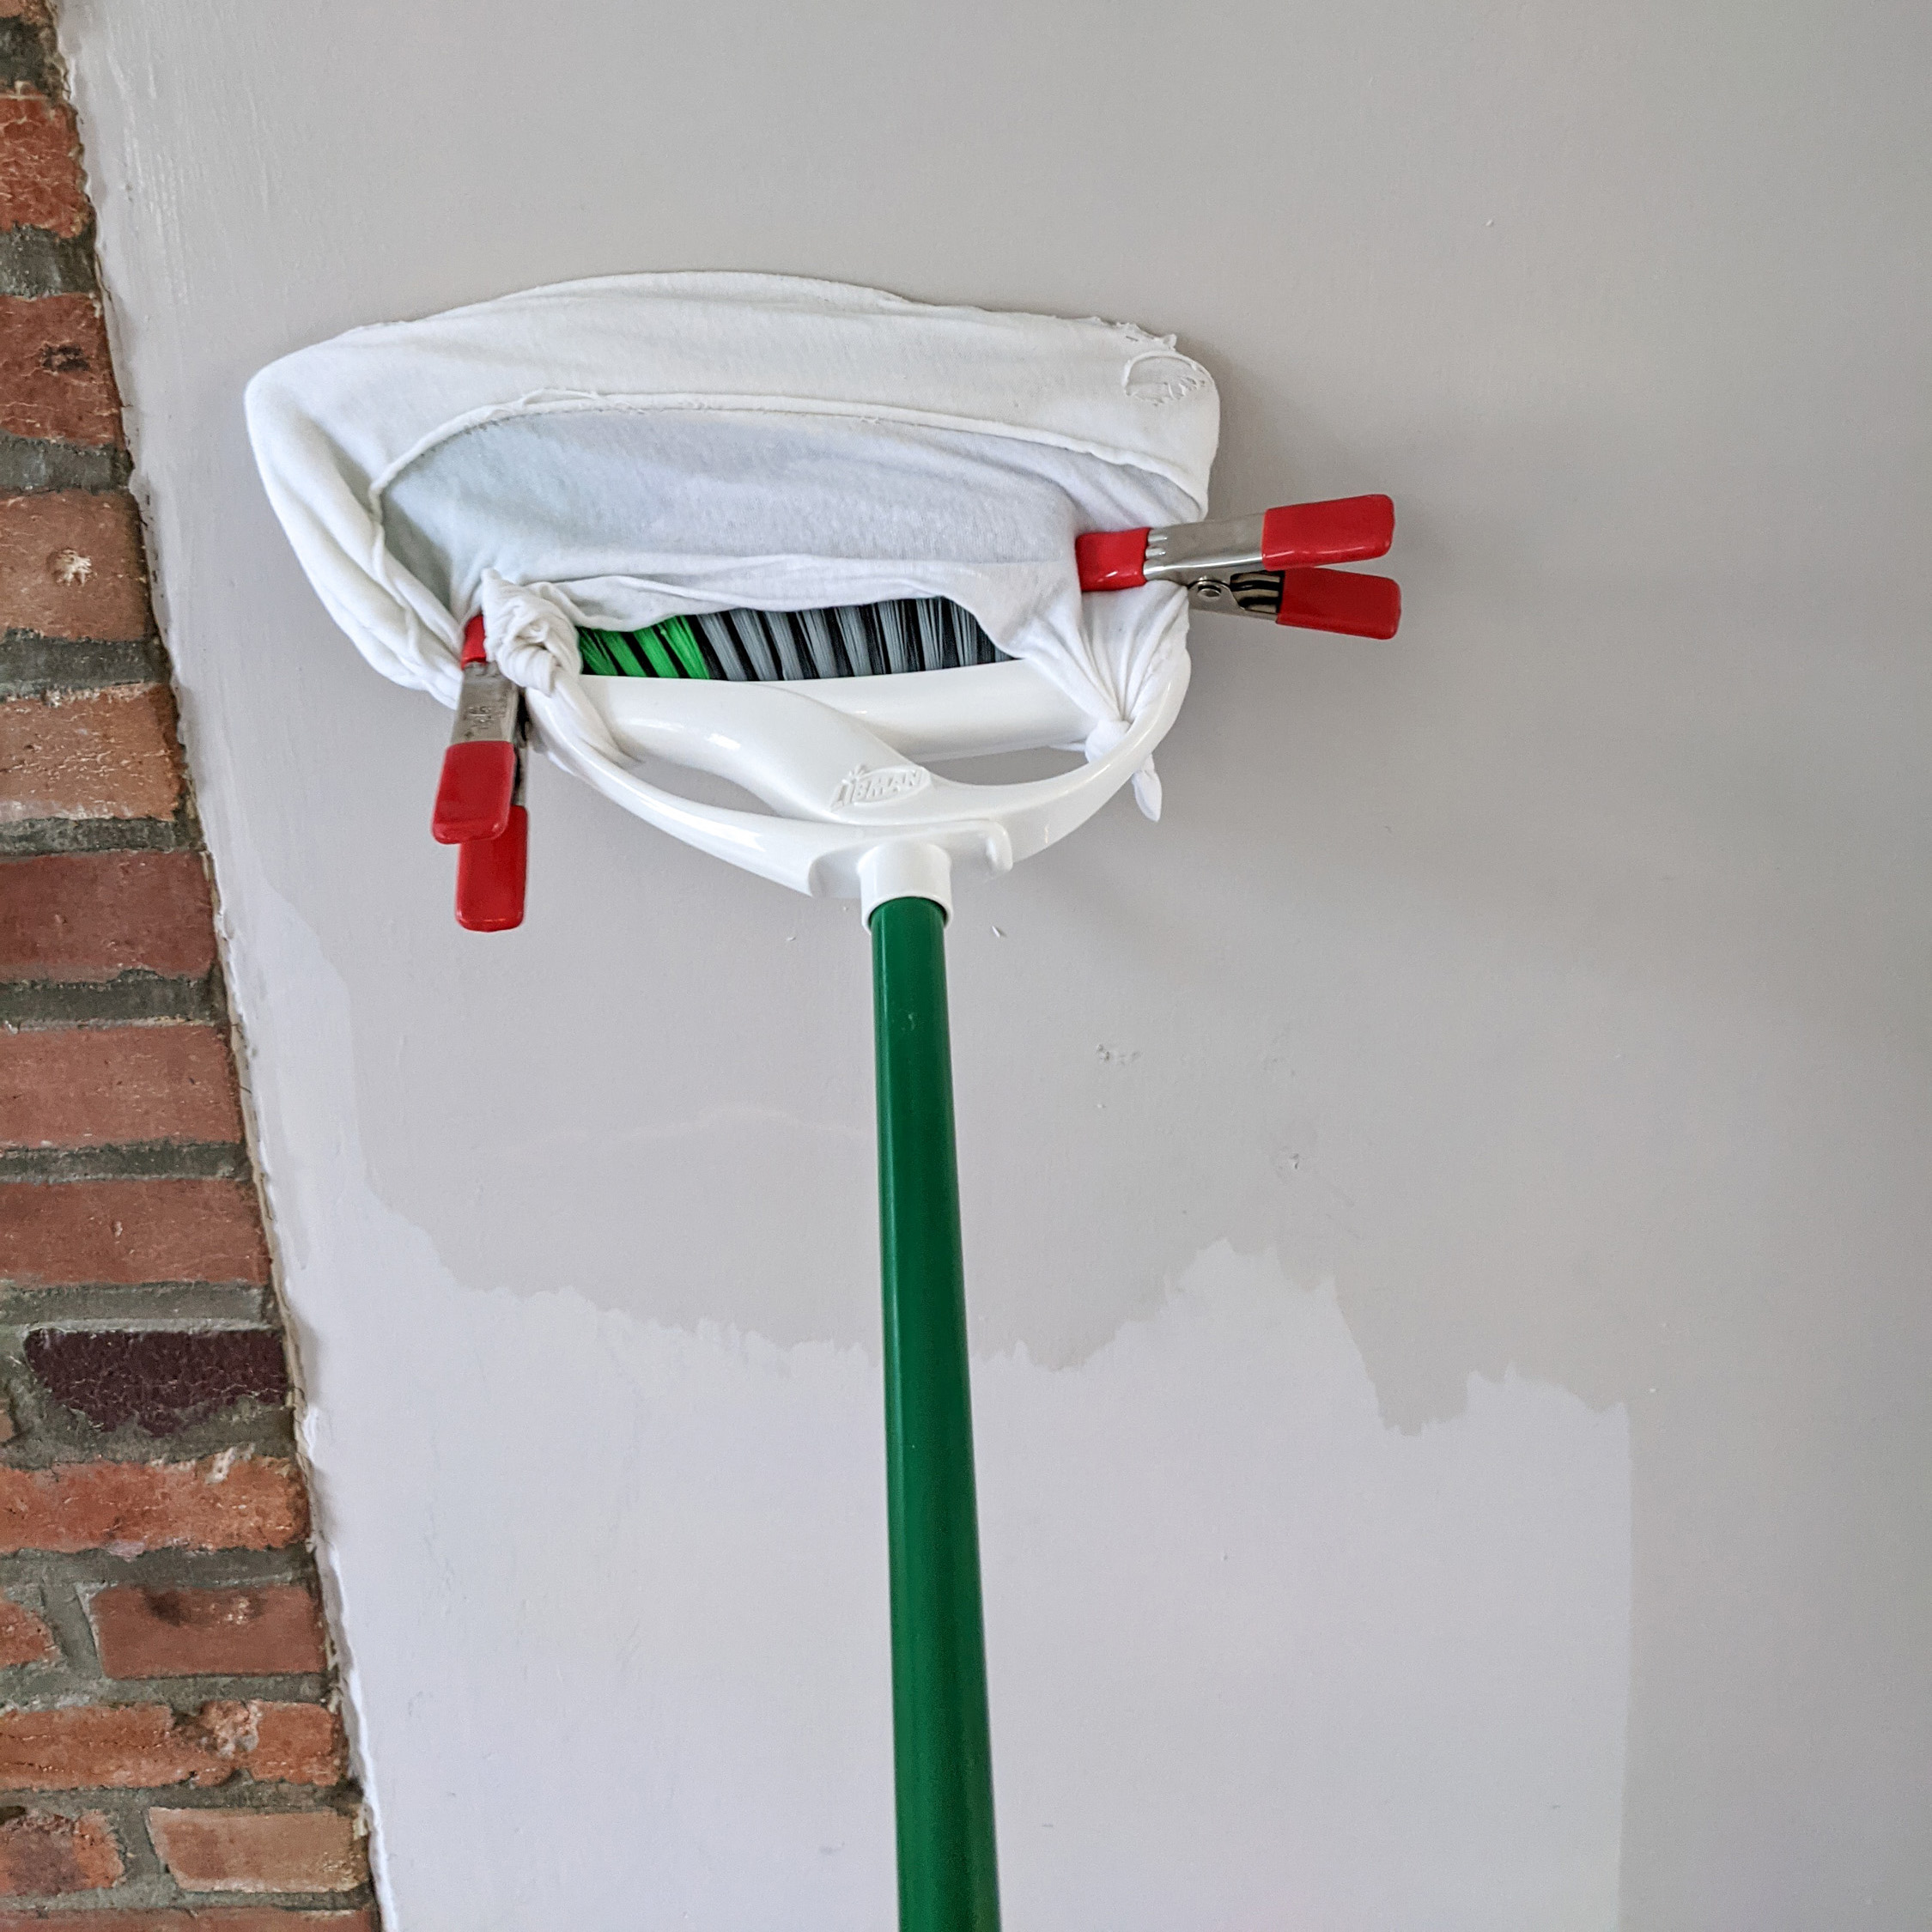
1. Place a clean rag over the head of a broom.
Fold the edges of the cleaning rag over and around the head of your broom’s bristles to fully envelope the bristles with clean, soft cloth.
You may want to double up on rags and go with two layers to be sure that a gentle, not-too-abrasive cleaning is applied to the walls. This can help prevent damage to the paint finish.
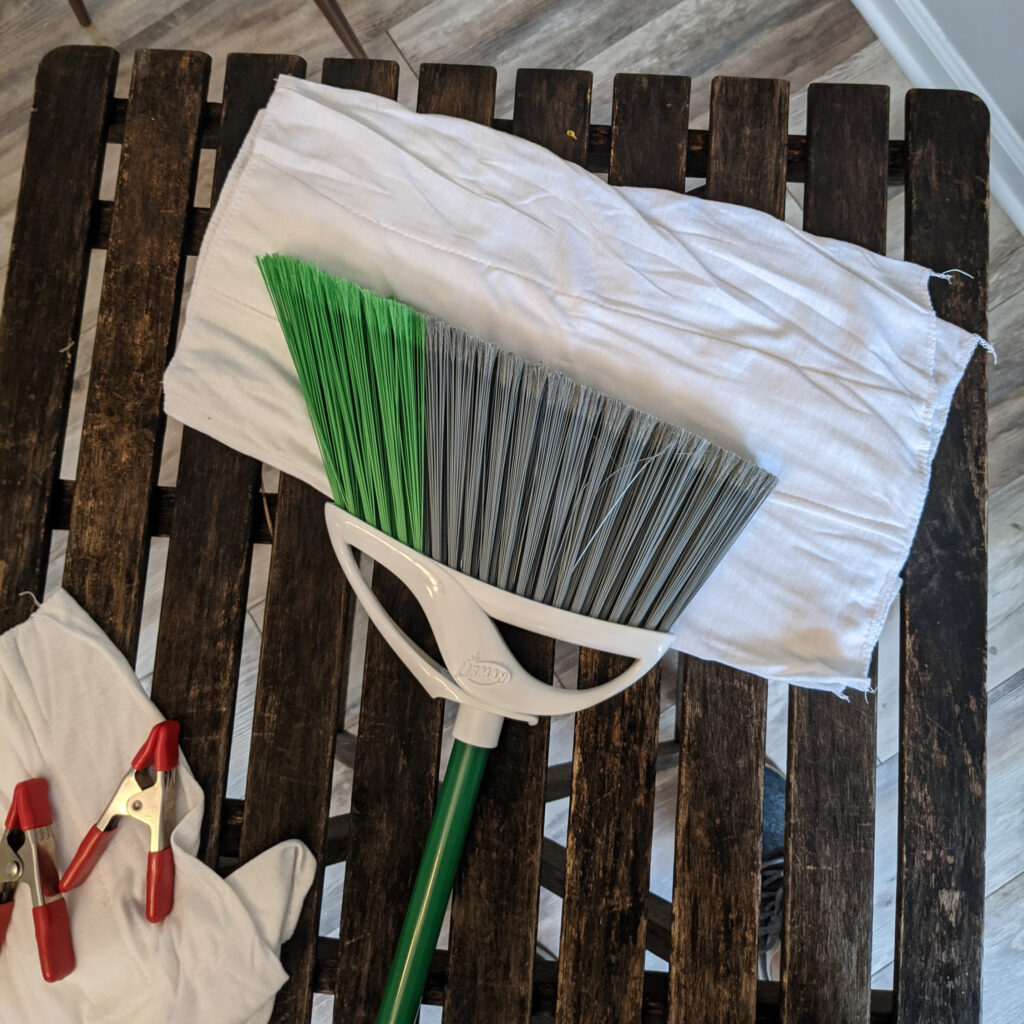
3. Secure the cleaning rag in place
Attach the spring clamps to each side of the broom head to secure the rag in place.
Using strong spring clamps will ensure that the rag is held in place over the broom’s bristles until you are finished washing your walls or the rag is soiled enough to require changing.

4. Use the DIY wall washing tool
With your DIY tool for wall washing completed, you can start the process of washing your walls, cleaning the grime of the previous tenants off your walls, and leaving behind clean, fresh walls.
This method for wall washing is also suitable for prepping walls for painting. The extra step of washing walls before painting can help paint adhere better, resulting in more professional results than typical DIY wall painting.
How to Quickly Wash Walls: A Step by Step
How to Wash Walls in a House or Apartment
Total Time 1 hour
Fill a Basin with Cleaning Solution.
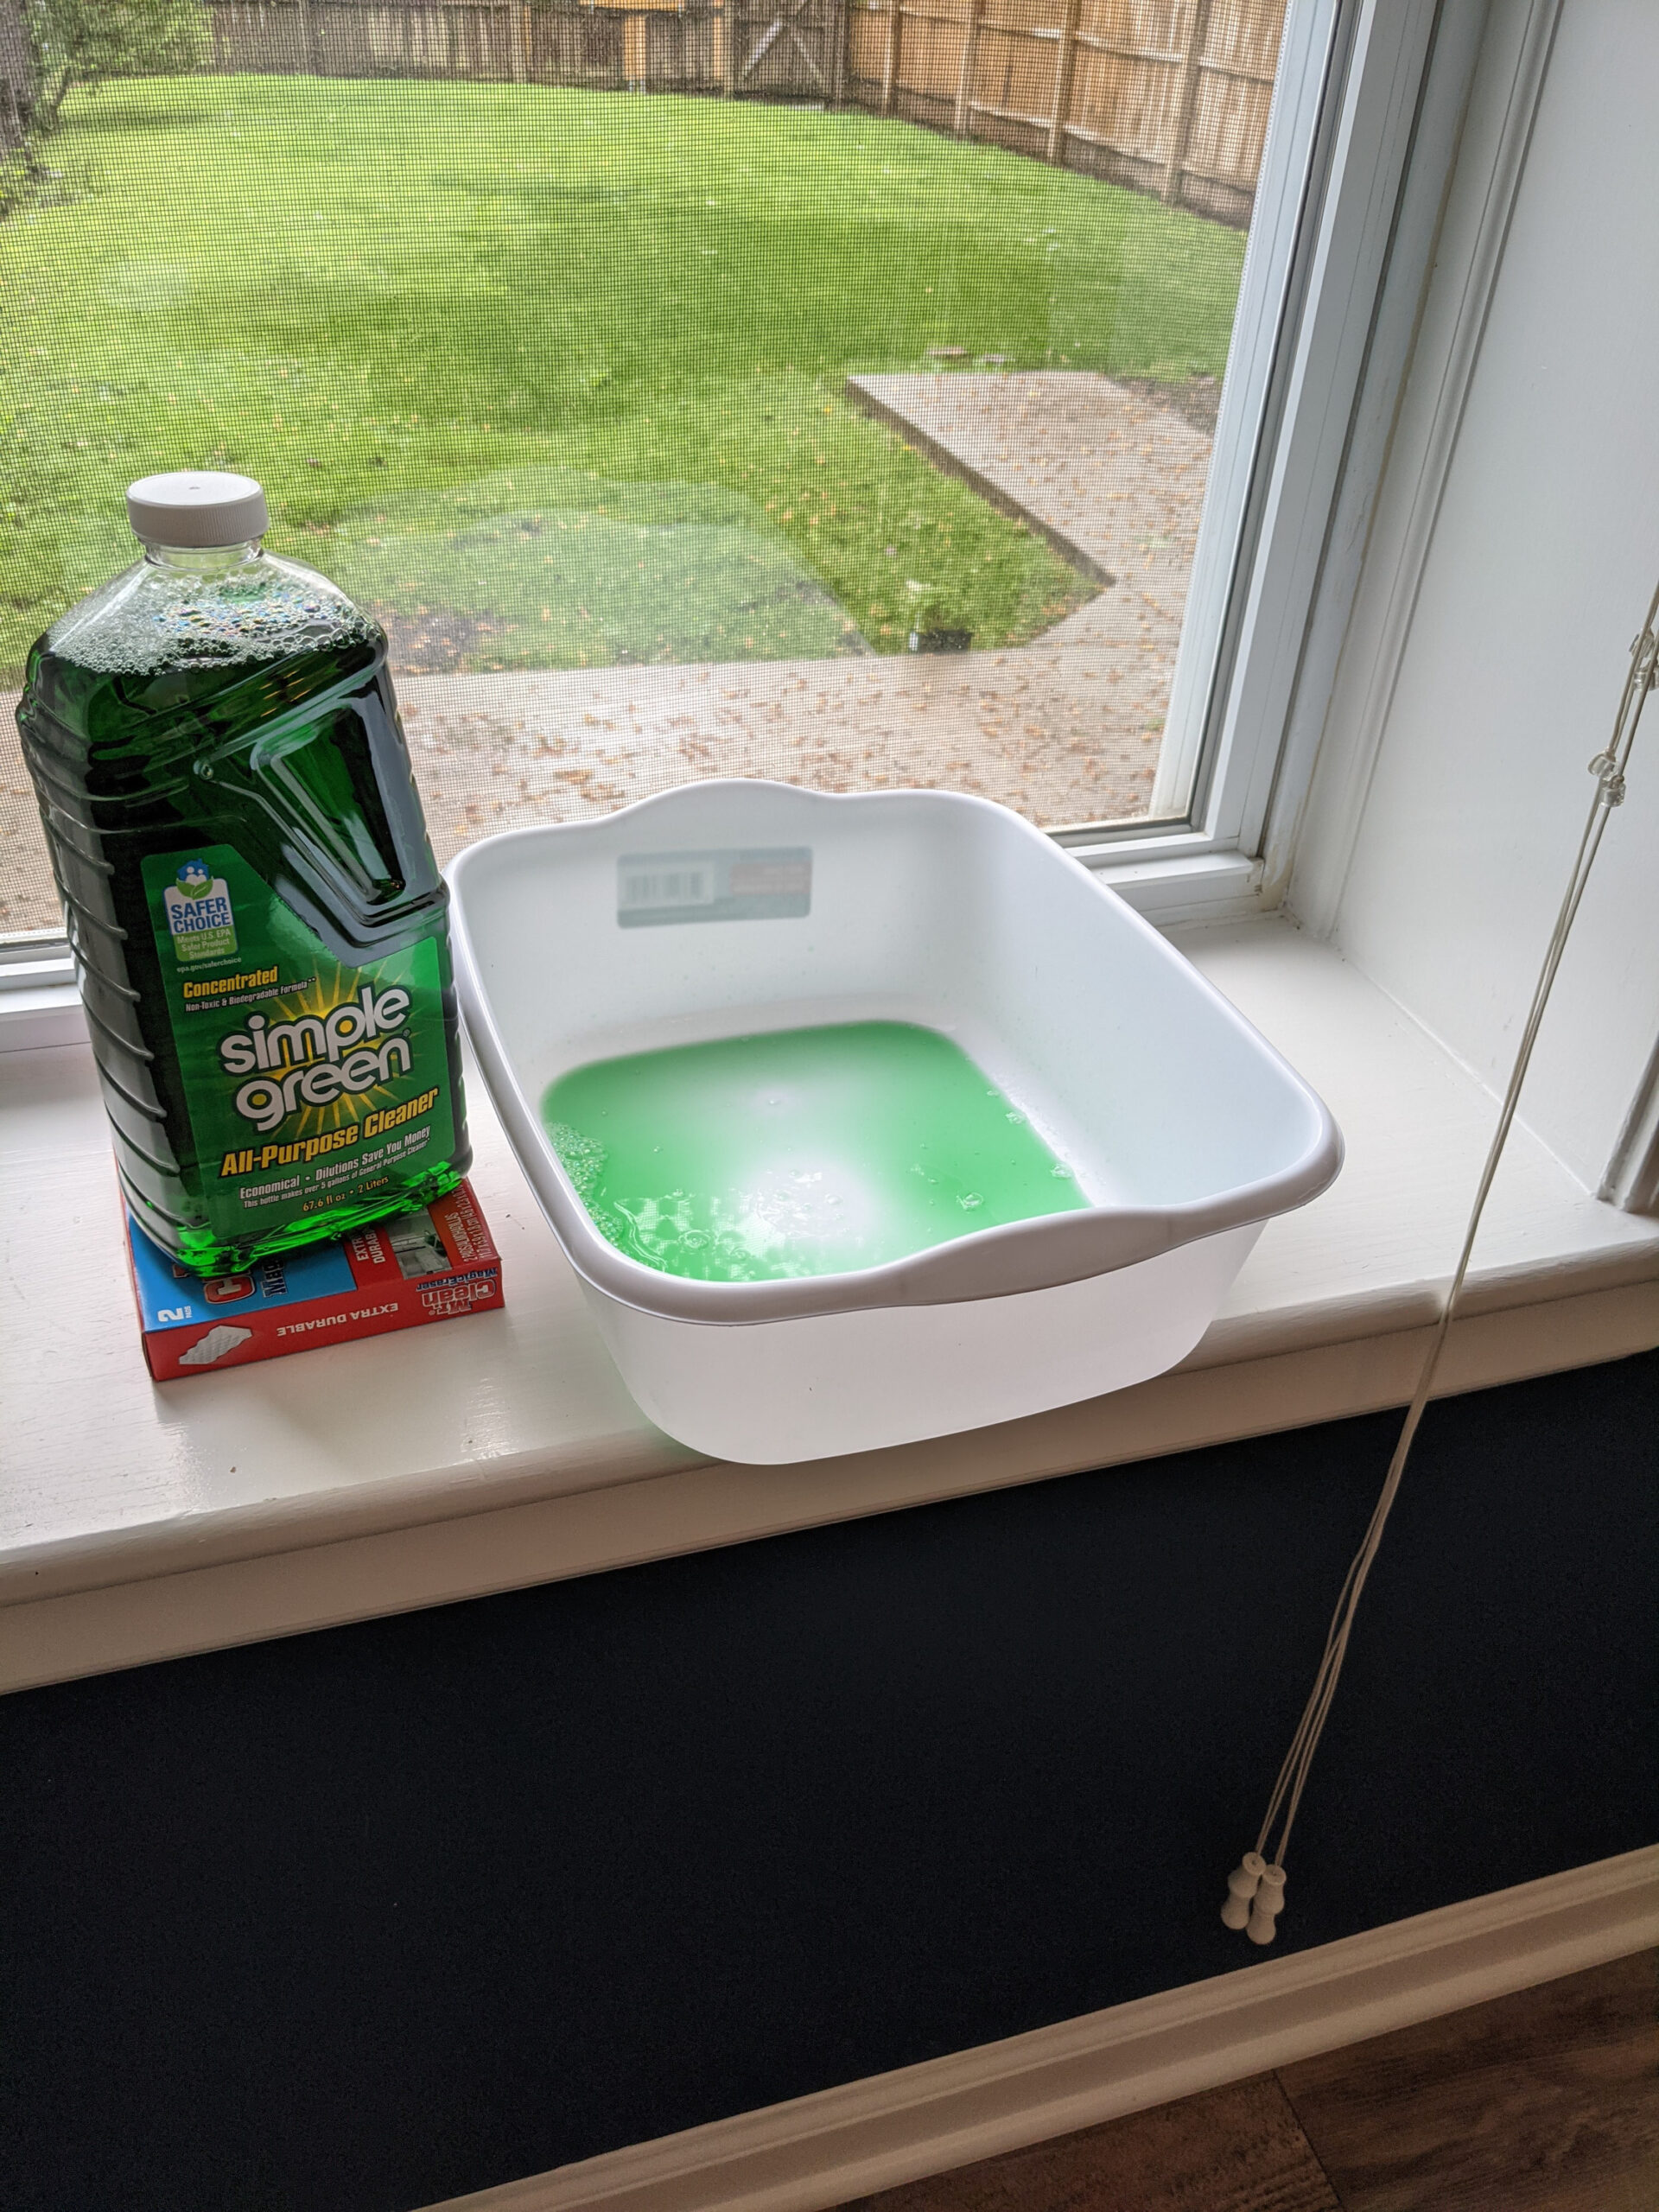
Mix a cleaning solution. I use a few tablespoons of simple green and about 2 gallons of water. Using a very weak dilution prevents the need to rinse walls after cleaning. Vinegar is another good option for cleaning walls. Whatever you use you clean, test it in an inconspicuous place (and let dry) before progressing to washing your walls.
Dip the Wall Mop in the Cleaning Solution
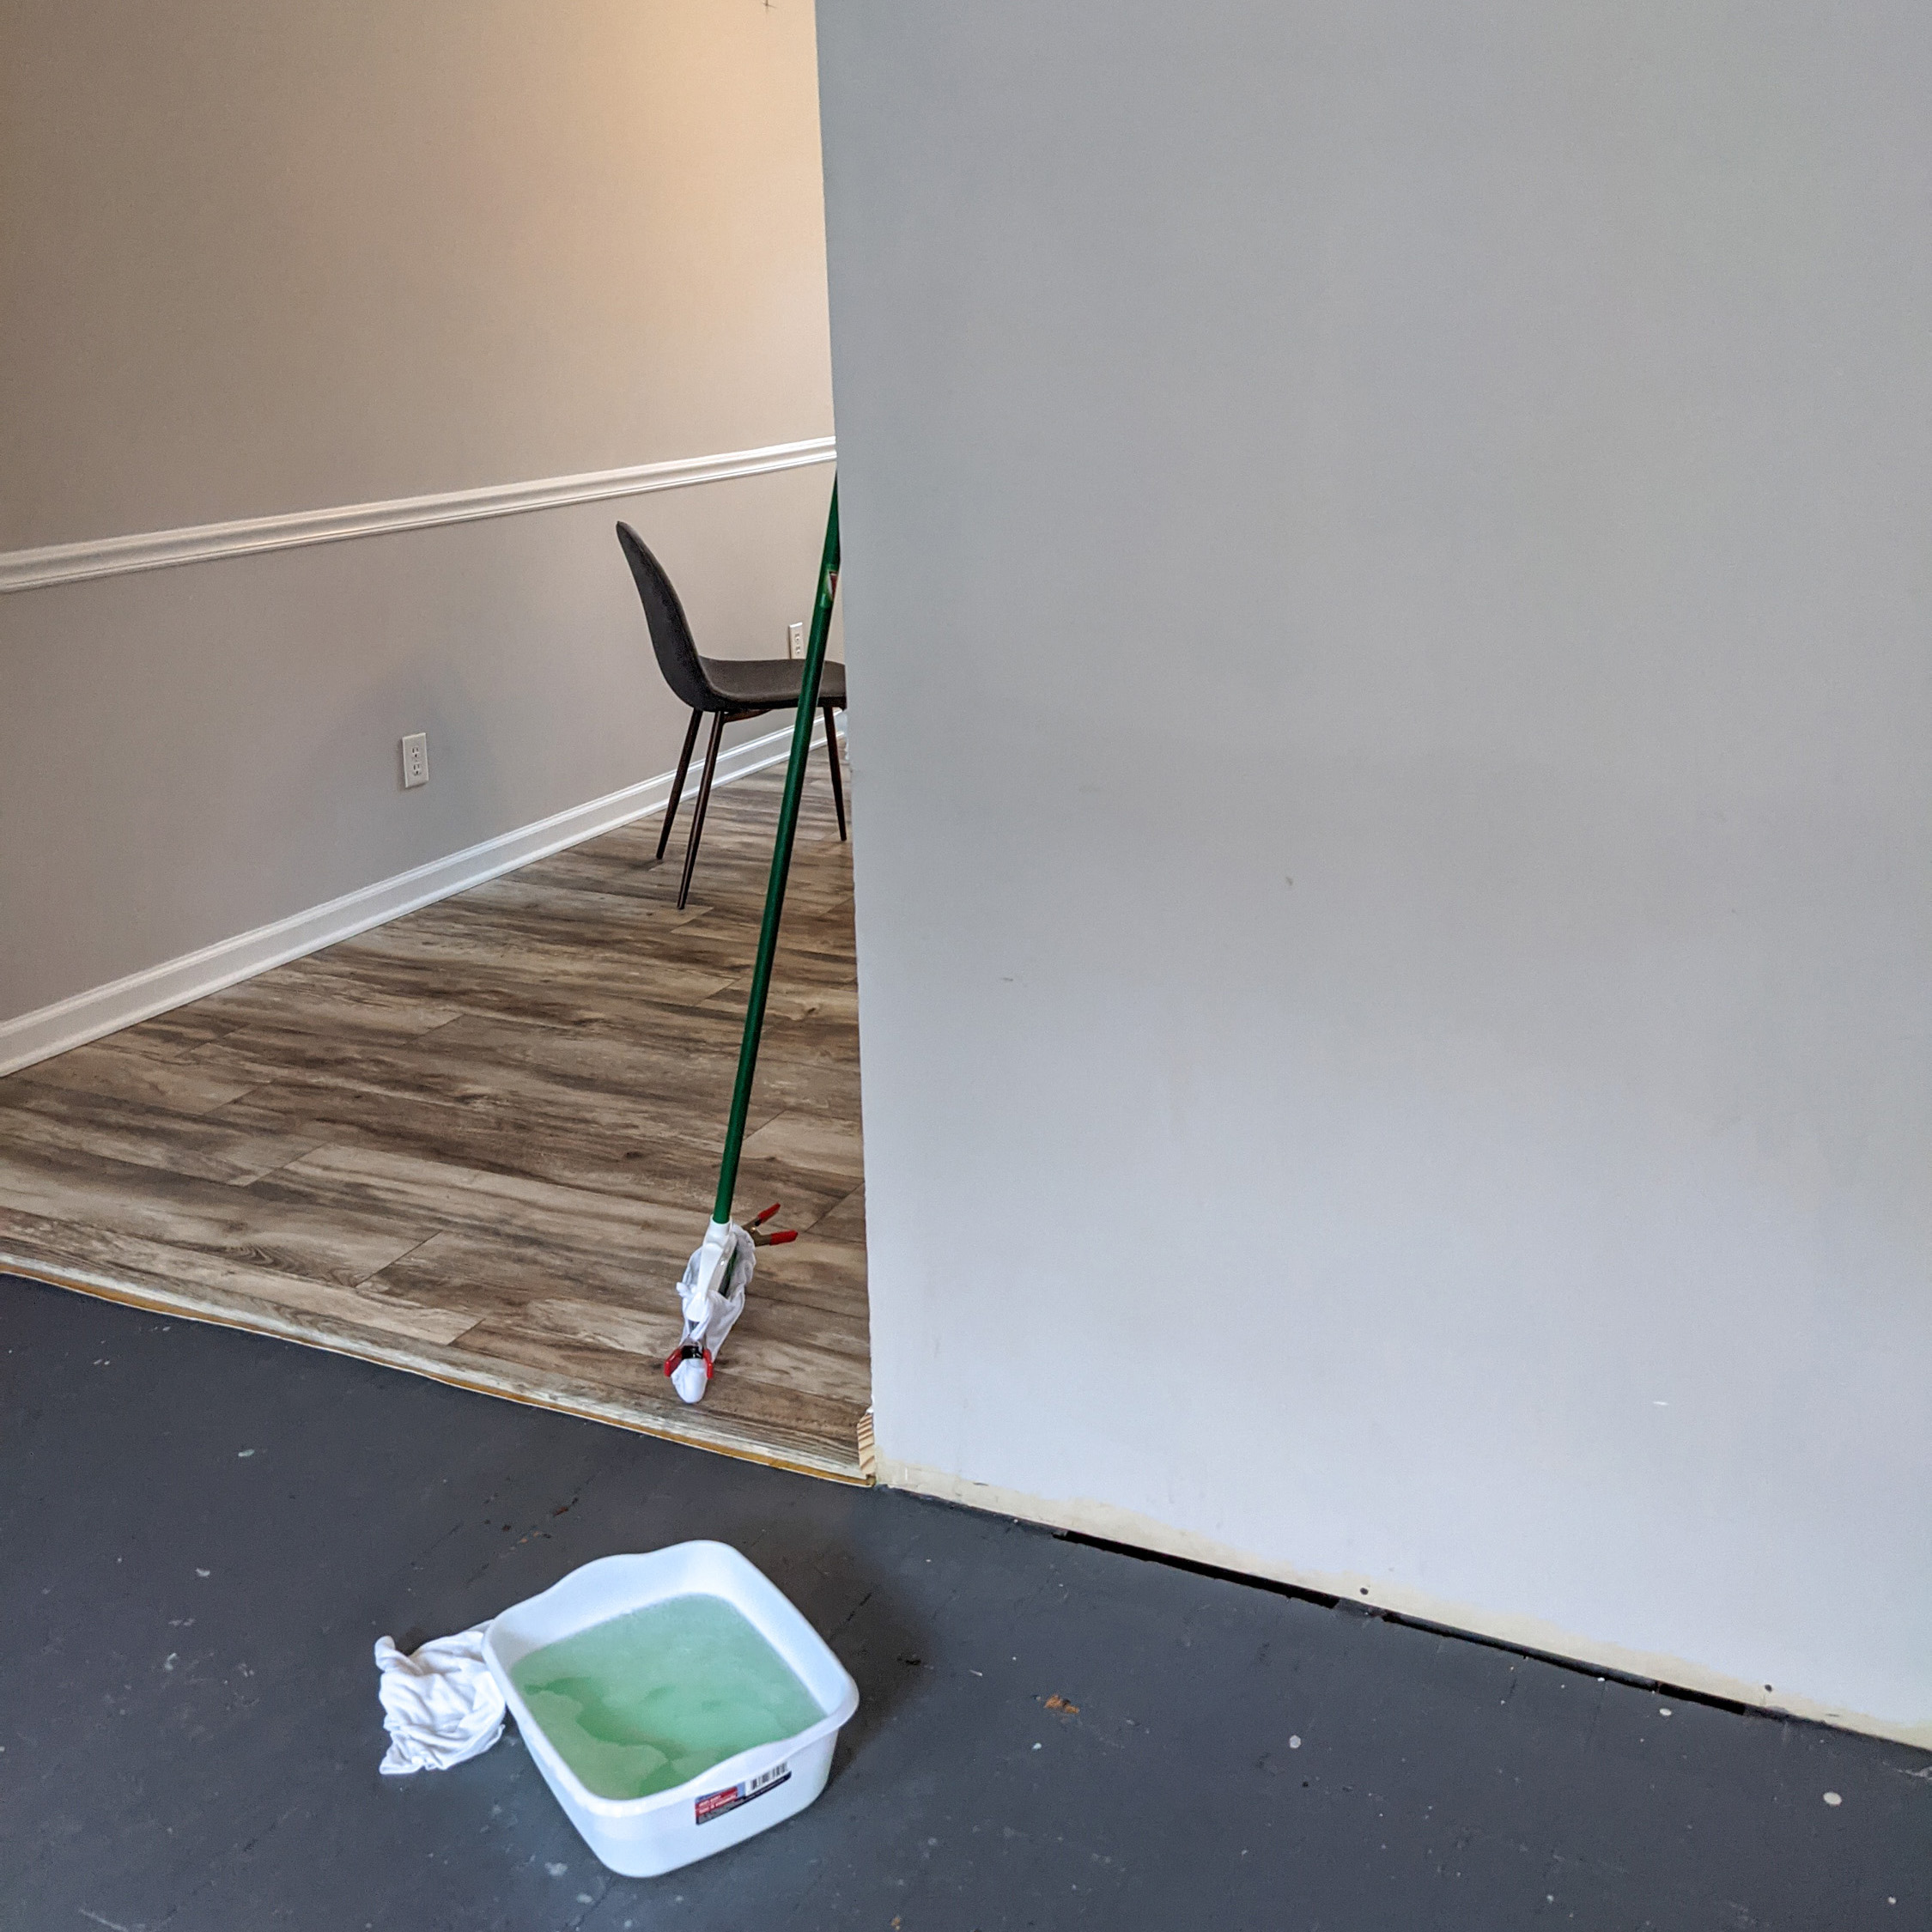
Dip just the front edge of your broom turned wall washing tool in a basin filled with cleaning solution.
brush off excess water by raking the leading edge of the broom across the rim of the bucket or bin of clearing solution.
Apply the Wall Washer to the Wall
Starting at the top of the wall where the wall meets the ceiling, place the leading edge of your covered broom against the wall and, pressing down slightly to press the broom into the wall, pull the broom downward. Much like mopping, you should see an even streak of wet, clean wall left behind your modified broom.
Drag the tool down the wall in a sweeping motion.
Working from top to bottom, continue slowly sweeping the covered broom over the surface of your walls. Change the rag or your cleaning solution as often as necessary to ensure that you aren’t just spreading grime around the walls but are actually removing it.
Repeat if Necessary
Some particularly soiled walls may need more aggressive cleaning, read on to learn how I tackle these walls and baseboards.
Washing walls to remove cigarette smoke residue
Removing cigarette residue from walls is an area of expertise in which I can’t claim to be an expert. However, this DIY wall washing tool made from a broom, rags, and spring clips, should be a helpful tool when paired with appropriate cleaning solutions or detergent designed to remediate the yellowing effects of nicotine and cigarette smoke on walls.
Extreme Clean: How to Clean Really Dirty Walls
While the method above works for a gentle cleaning between tenants, some very dirty walls may need a deeper clean.
If you like the color a room is painted but are dreading the process of repainting to brighten the walls, this deep clean method is a good last-ditch effort to avoid having to repaint.
Wall Washing instead of Painting: It worked for me!
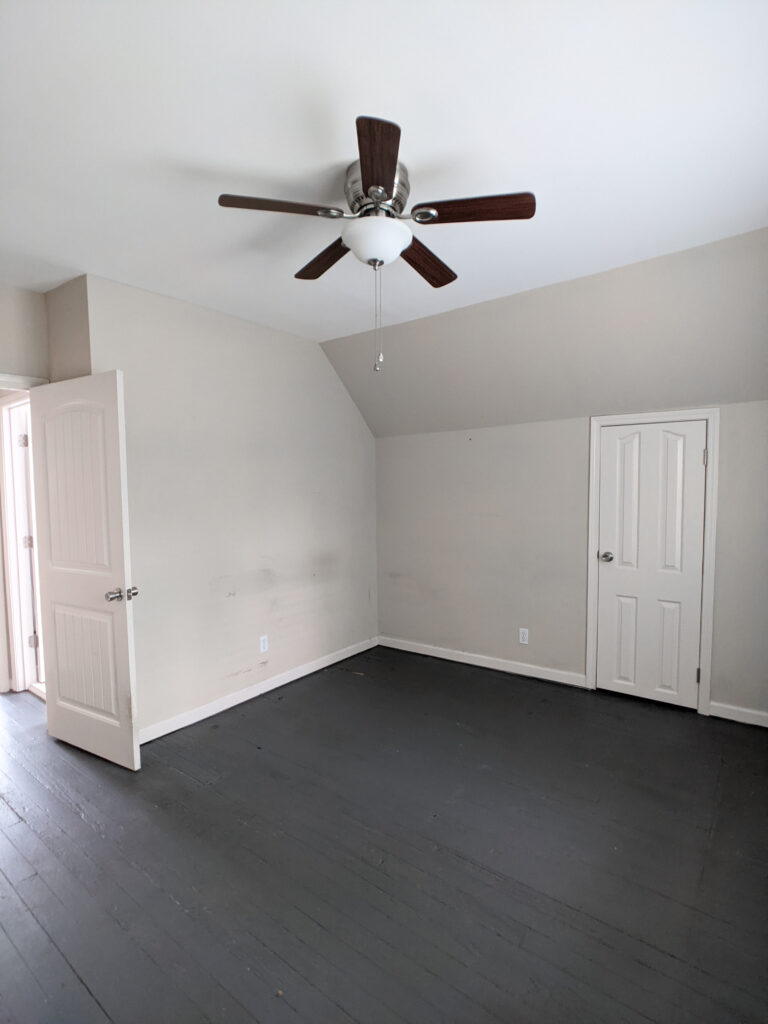
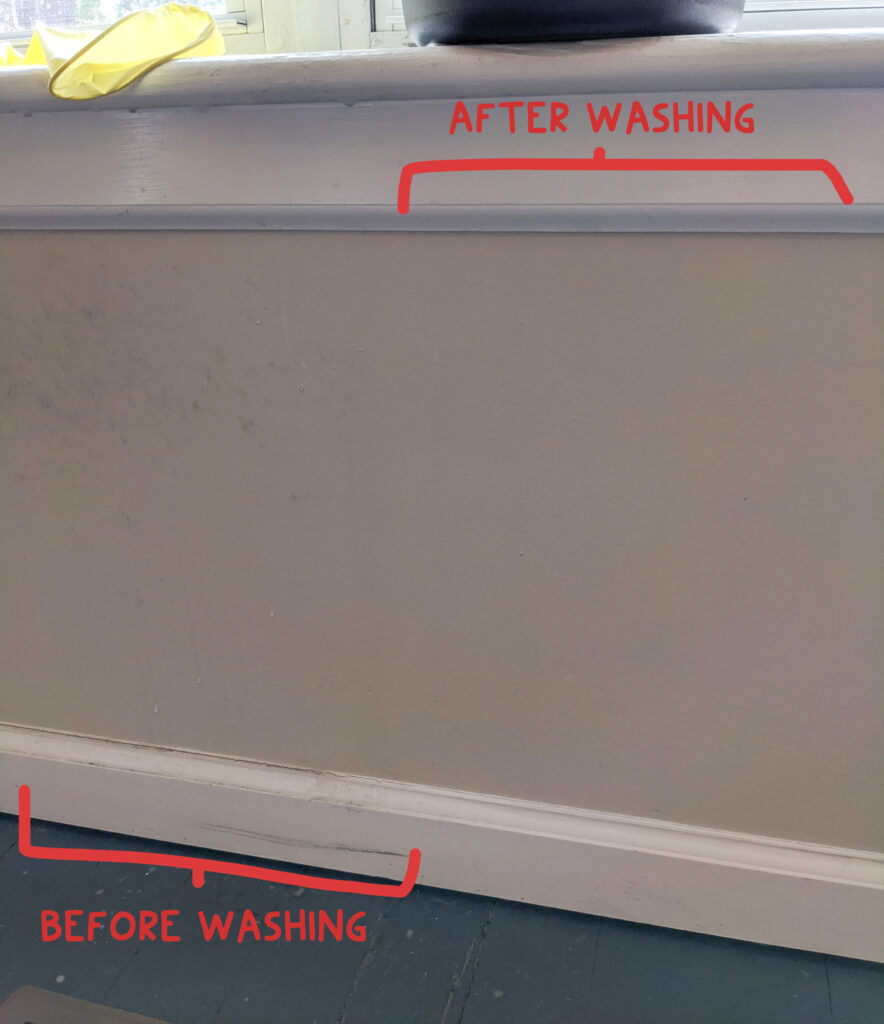
In my Saint Louis cottage, the bedrooms upstairs where the previous tenants’ pets had slept had gross, grimy walls. After spending hours repainting bedroom #1, I decided to use this method to try deep cleaning the walls and baseboards instead of repainting bedroom #2.
As I scrubbed my way around the room, I was thrilled to discover that with a little bit of scrubbing, the walls washed clean, the baseboards looked pristine, and I was able to completely avoid painting. Scrubbing the entire room took around 1.5 hours, but compared to the 4 hours I had spent repainting the other, identically sized, bedroom, it was time well spent and money well saved on not having to buy paint.
How to Deep Clean Really Dirty & Discolored Walls
Modern paints are so durable they can stand up to scrubbing, in this tutorial I show you how to use a scrub brush, degreasing cleaner, and wash buckets to remove years of stains, dirt, and grime from interior walls.
Supplies you’ll need:
- Simple green cleaner & degreaser
- two buckets (one for soapy water and one for wash water) I like Rubbermaid 15-quart buckets.
- 2 large sponges (I used these car washing size sponges but if you are a sustainable household you can use large natural sponges)
- clean, soft rags
- a palm grip scrub brush (avoid handles, they increase torque on wrists. A palm brush lets you apply more pressure with less effort)
- (optional) rubber cleaning gloves to protect your skin.
Prepare your wash solution
Degreasing soap is the workhorse of this cleaning tutorial, but it needs to be washed off completely. Use two buckets so you can have all the supplies ready to wash and rinse.
Fill a bucket halfway with water and then pour in about 1/2 cup of simple green cleaner (a degreasing detergent that tends to suds less than many household cleansers). Assign a sponge to each bucket and don’t mix them- you don’t want soap in your rinse the sponge.
Prewash the wall to start breaking down grime
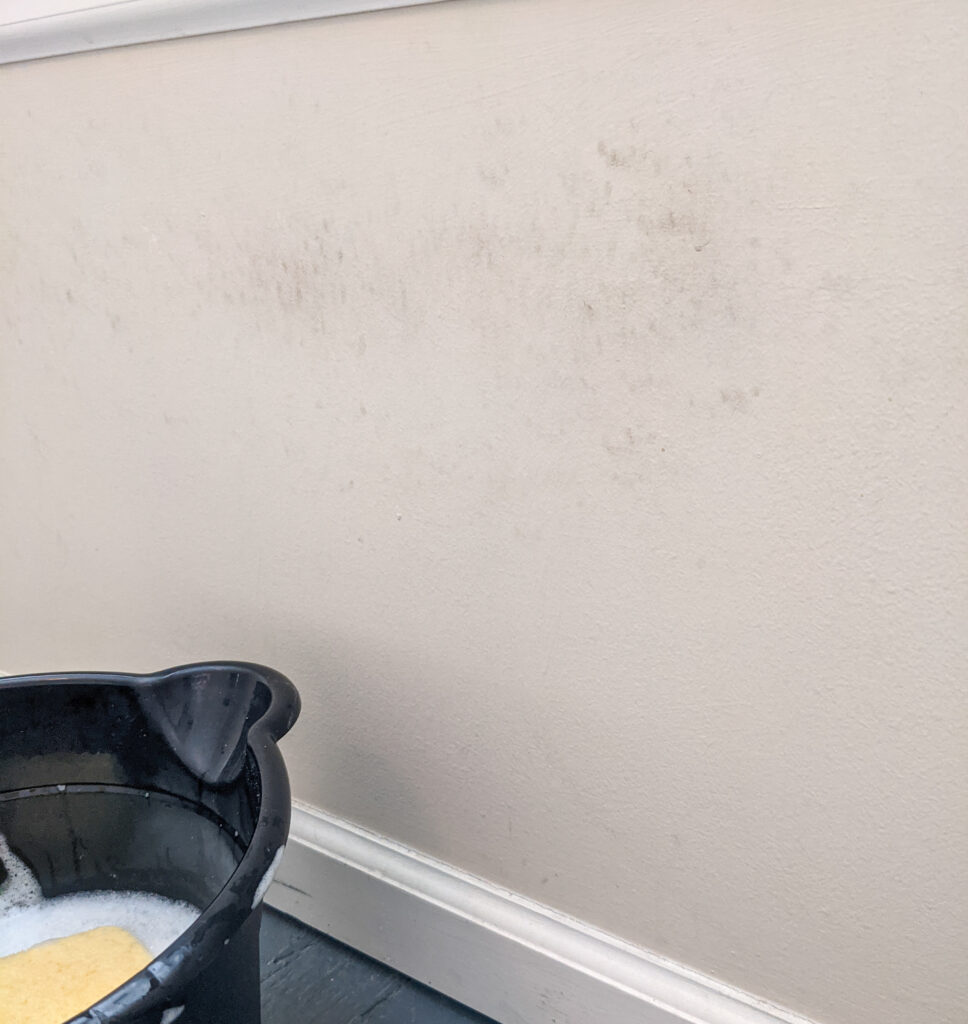
Sitting or standing in front of your wall, dip the cleaning sponge into the degreasing detergent and wring halfway. Then take the sponge and gently rub it on the wall covering the area of your reach (about 4×4 sections work great. If working sections are too large they may dry while you are working on them). After wiping with the sponge, the wall should look wet but not dripping.
This step jump-starts the cleaning process. By doing a bit of a presoak before starting on the wall with a scrub brush, dirt and grime have a chance to start breaking down.
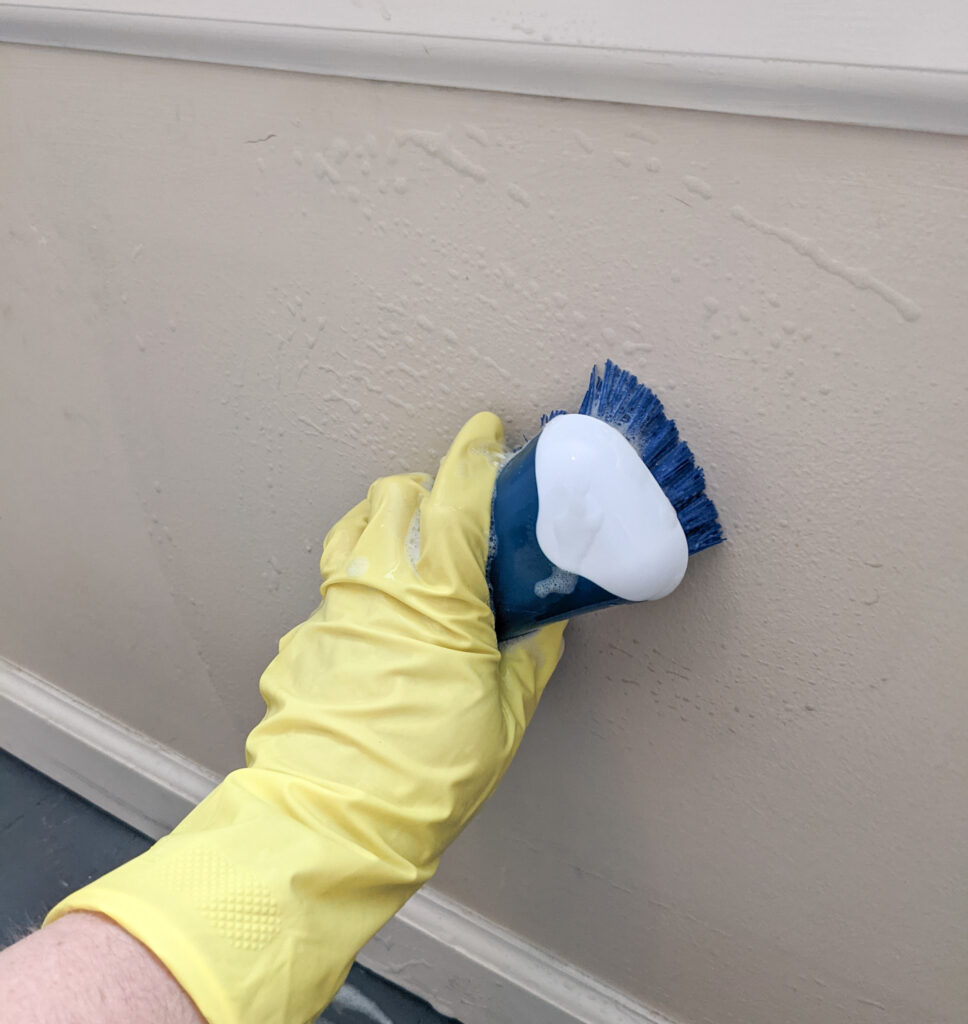
Begin scrubbing
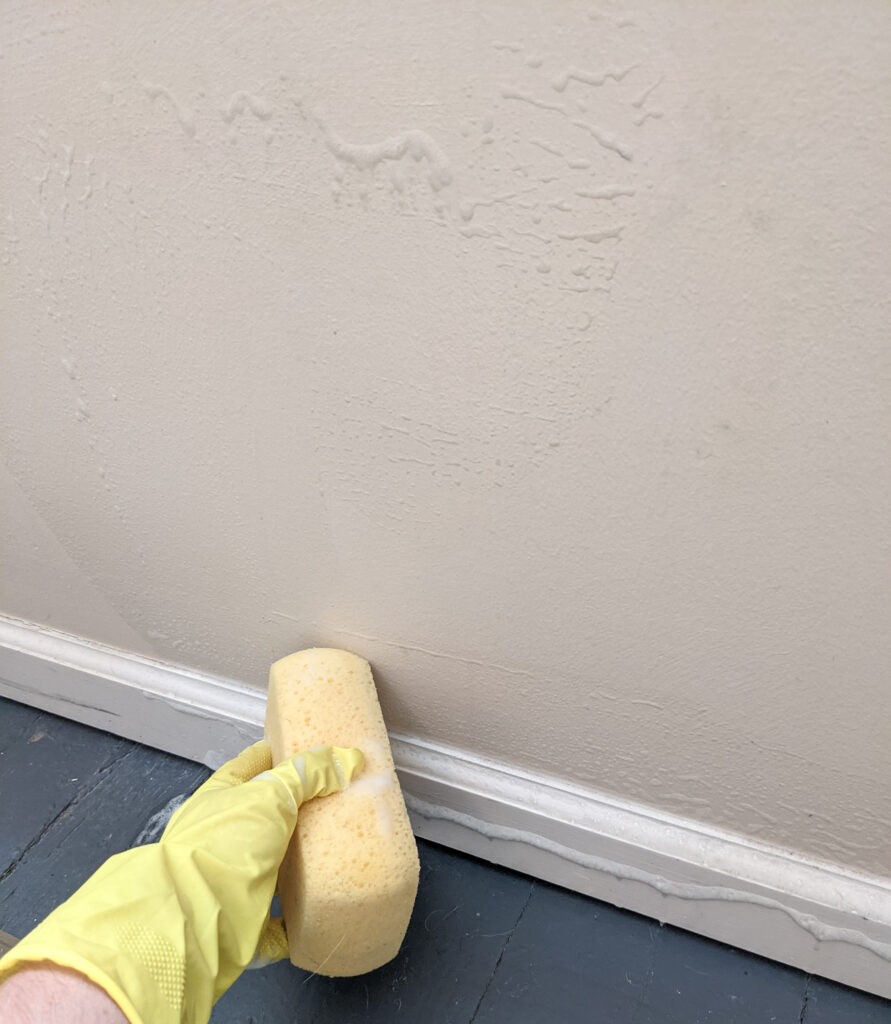
After testing an inconspicuous area of the wall to confirm that your brush’s bristles won’t damage the surface of the paint, dip the scrub brush in the cleaner and begin scrubbing the wall. You probably won’t need to use very much elbow grease, the hundreds of bristles on the brush will do much of the hard work for you.
Be sure to give your baseboards a good scrub while you’re washing the wall- baseboards collect a lot of grime and a simple scrub with this cleaner will have them glowing when you’re done.
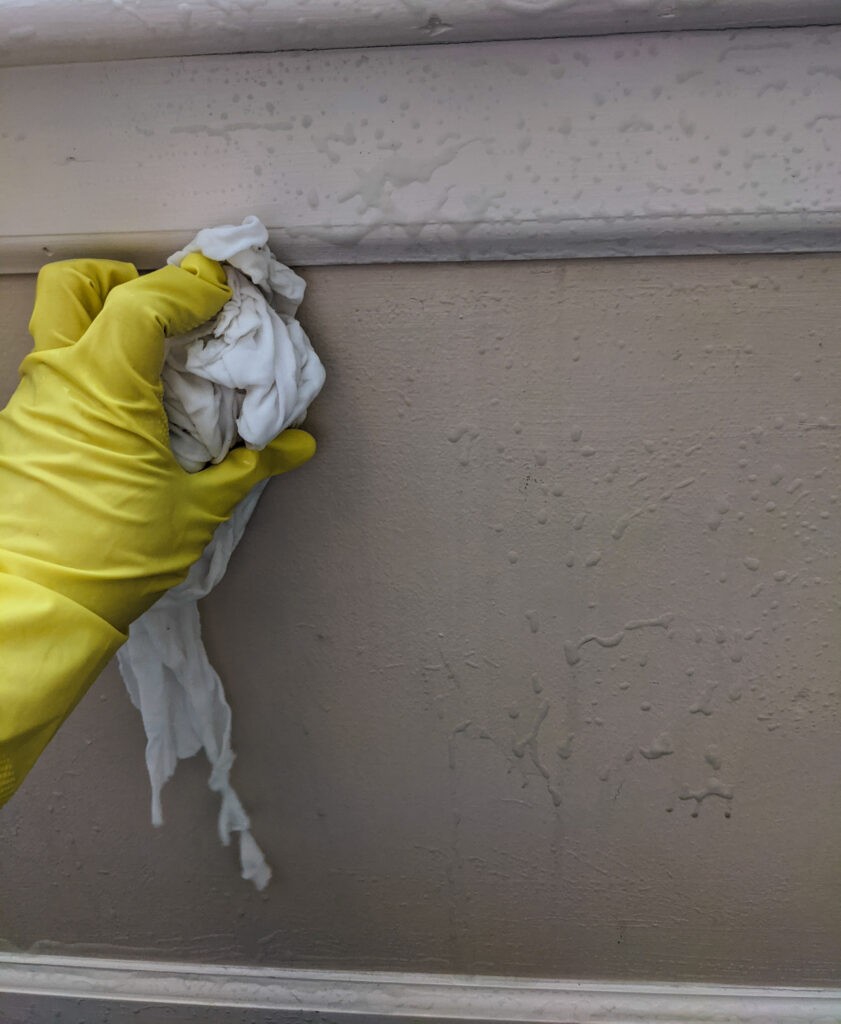
Remove excess soap and cleaner from the wall
Before rinsing, I take a rag and wipe up any excess water or bubbles from the wall or baseboards. This helps my rinse water stay clean and last longer between changes.
This post-scrub wipe-down can also reveal marks or spots on your wall that were missed by scrubbing. Return to the spots with a scrub brush or rag dipped in the cleanser to see if additional elbow grease can remove the spot.
Wash the wall with clean water
Using the rinse sponge from the bucket of clean water, wipe down the wall with the clean sponge, wringing it out as necessary. When you are cleaning very soiled walls, this is where you can expect to see the magic happen: gray dirty soap water rinses away to reveal vibrant paint underneath.
Dry the wall with a clean rag
Wiping the wall down with a dry rag when you’re done serves a few purposes. By removing excess moisture from the wall you can cut down on drips and potential damage to flooring. Drying the wall with a clean rag also gives you the opportunity to do a bit of a final inspection. If a clean white rag wipes away after the final rinse with a line of discoloration, you’ll know that you need to repeat the wash rinse cycle a second time.
Conclusion
Using these two methods for washing walls, you can either do a light spring cleaning on your walls or a complete scrub down to refresh walls and avoid repainting.