Chickens are hardy birds that adapt well to a wide range of temperatures if given the resources needed to keep themselves warm. In this article I’ll share a few tips to insulate your chicken coop, winterize your chicken keeping practices, and adjust lighting- all to help keep your chickens warm and happy through the coldest months of winter!
You’ll learn: 6 steps to insulate a chicken coop plus how to get eggs from your chickens in winter.
6 Steps to Insulate a Chicken Coop
Like your house, your chicken coop may need seasonal weatherproofing to be better insulated for winter wind and chill.
1. In Winter, Cover (or Partially Cover) Wire Screens
In hot summer months, large screened windows and doors help improve airflow through a coop. This helps in cooling it, improving flock health, and boosting air quality. In the winter, if these windows and door screens are left exposed, all that moving air can result in dangerously cold temperatures inside the coop.
The first step in winterizing your coop should be to block these giant drafts and add an insulating cover. You’ll still want to allow for some air flow, but large openings should be 75% or more covered with an insulating layer.
Hawk-Hill.com is a participant in the Amazon Services LLC Associates Program, an affiliate advertising program designed to provide a means for website owners to earn advertising fees by advertising and linking to Amazon.com and any other website that may be affiliated with Amazon Service LLC Associates Program
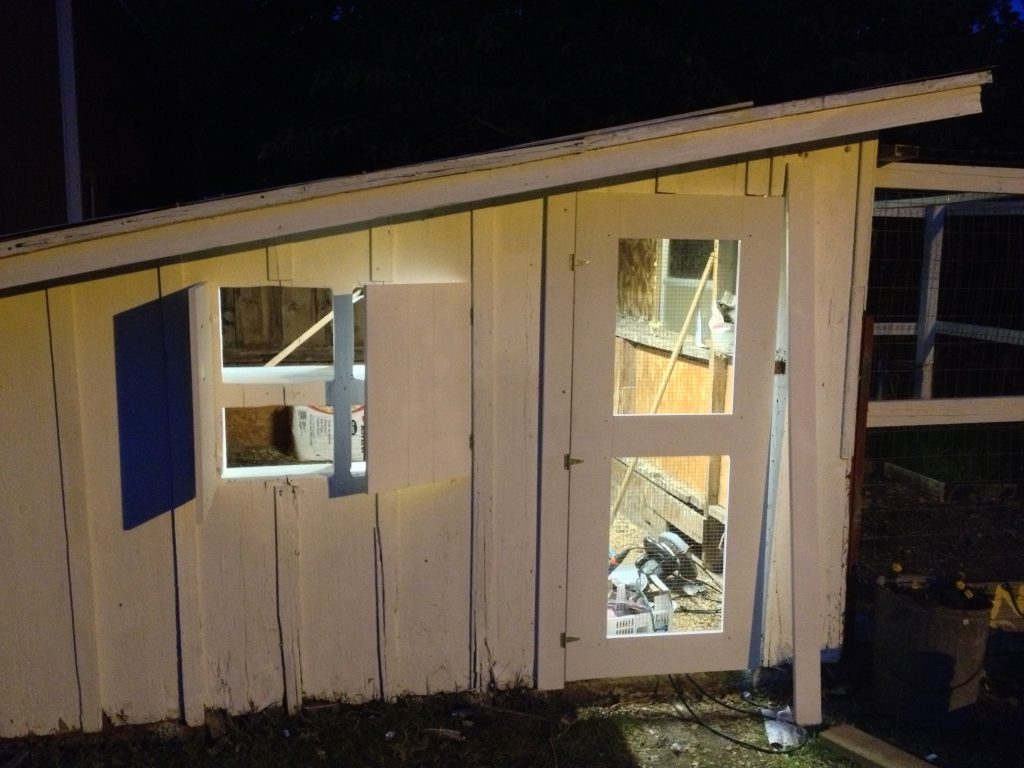
For our chicken coop, we fit rigid foam sheets* (the kind designed to insulate garage doors) to fit over most of the screened panels in doors and windows. We leave small openings for fresh air to circulate. This easy chicken coop insulation step in the fall takes two minutes to install but makes a huge difference in the temperature of the coop during the coldest nights.
Remember: Be sure and allow some ventilation. You can do this by offsetting foam insulation panels to leave a gap or by using a hole saw to cut 1″ holes in the panel.
2. Insulate your Chicken Coop (Walls, Roof, & Floor)
Insulation is a fundamental and basic way to winterize your chicken coop- and it doesn’t have to be fancy! Scrap boards, recycled insulation, and even packing styrofoam can be attached to the interior walls of your chicken coop to help keep drafts out and warmth in.
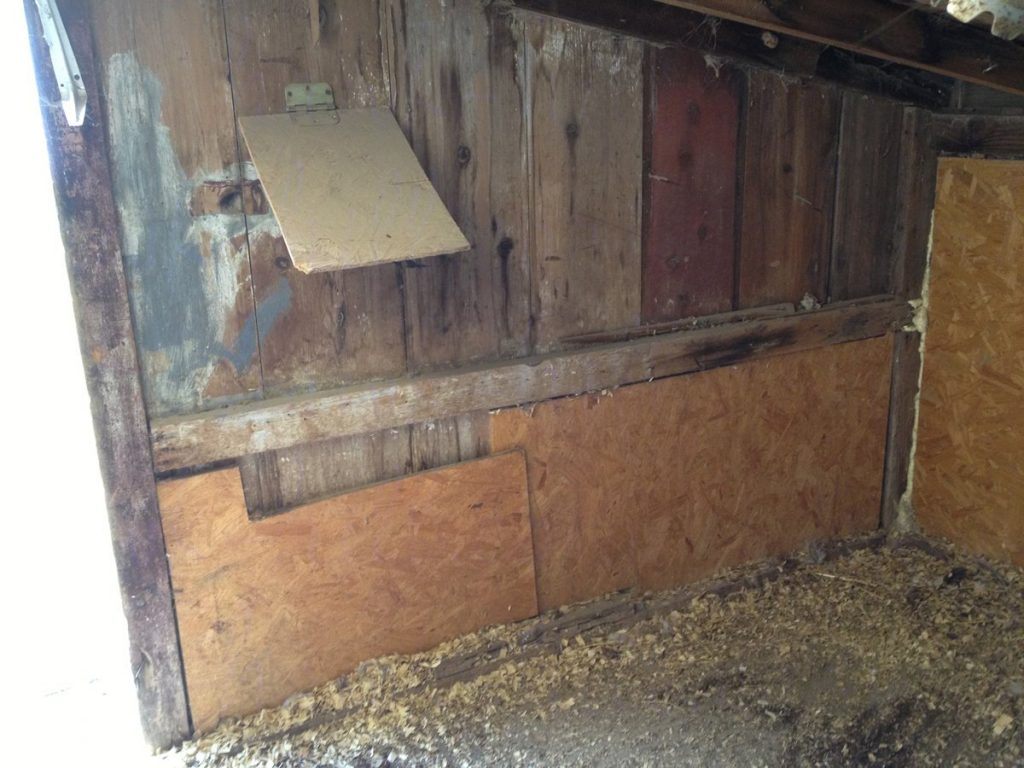
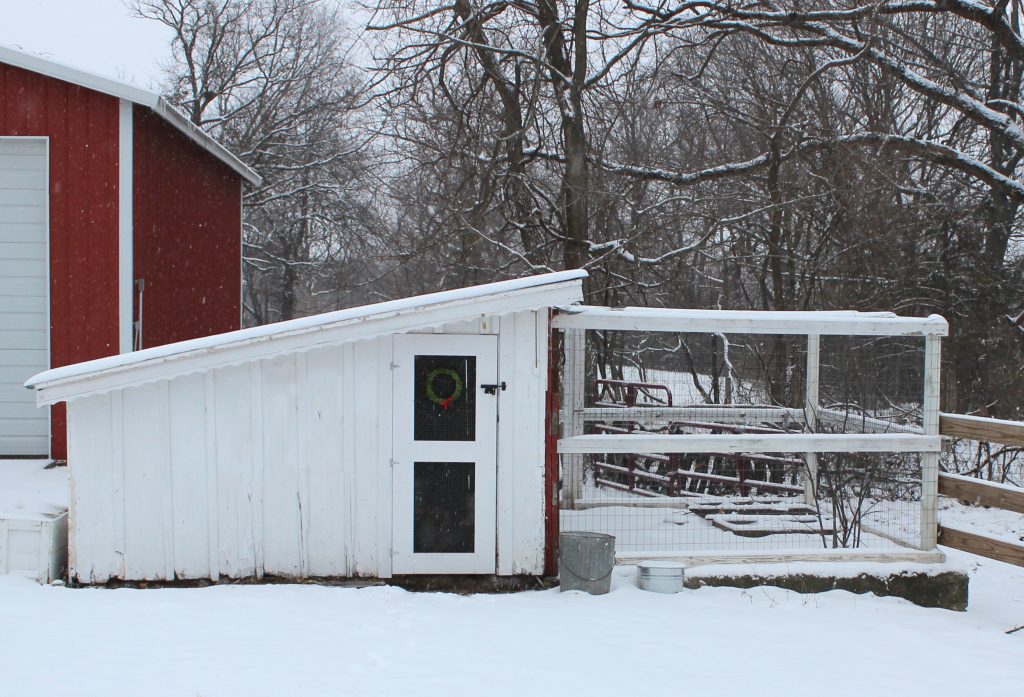
When I insulated my 100-year-old chicken coop, pictured above, I simply repurposed 1″ plywood sheets leftover from another project. The density alone added significant protection and warmed the coop significantly.
Best Materials to use to Insulate a Chicken Coop:
Insulating a chicken coop with top-quality materials is expensive- and unnecessary! There are many different types of affordable insulation that can be used in chicken coops.
Recycled and/or Scrap Insulation Materials
Brush off your thrift store shopping muscles and hit your local Habitat for Humanity ReStore. There, you can buy small quantities of used or overstocked building materials- including all types of insulation. At a ReStore, you can shop donated building supplies for a fraction of the price of new. Leftover insulation is a common donation to lumber yard resale stores. Scrap insulation is often sold for 80-90% less than retail!
Insulation scraps can be used in a number of ways to insulate a chicken coop. The best way to start insulating a chicken coop is to line the walls of the coop with the insulation. This will help to keep the warmth in and the cold out. When that’s done, consider insulating the floor. Coops that are elevated off the ground may need insulation under the floor of the coop.
Repurposed Styrofoam
Styrofoam is very difficult to recycle through traditional means, but styrofoam sheets are easy to reuse! Recycled Styrofoam is an excellent insulation material for chicken coops because it is light weight, easy to install, and provides great insulation.
When you purchase a product that comes with a sheet of styrofoam, set it aside to add to the inside of your coop. I’ve been adding styrofoam panels to the ceiling of my chicken coop- the underside of the roof. This small change is making a huge difference in the temperature of my coop: keeping it warmer in winter and cooler in the summer. Styrofoam can be tricky to glue but Elmer’s Probond Glue* works great for me.
TIP: Ready to get this project done in a weekend? Head to a big box store and buy a 4×8 foot panel of rigid foam garage door insulation. Cut to size and glue to the ceiling, and roof of your coop for an immediately warmer coop.
Interior Paneling
Chickens are curious and messy- this can make a chicken coop slightly more complex to insulate than a storage building. In a chicken coop, fiberglass insulation can’t be left exposed. Chickens might peck at the fiberglass, eat the styrofoam, and harm the building- or themselves! The solution, however, also has the benefit of more insulation: paneling!
When I say paneling it might conjure up images of smokey studies filled with cigar-smoking one-percenters, but trust me, paneling doesn’t have to be fancy! Again, a quick trip to a Habitat for Humanity Restore should turn up inexpensive plywood half-sheets and quarter-sheets. Use a jigsaw to cut these sheets to the contours of your coop, and cover the insulation you’ve added along the walls.
3. Keep Water from Freezing in your Chicken Coop
If your coop has electricity, keeping water thawed is easy: bucket heaters* are an easy option.
For less energy use, we’ve found low-voltage birdbath deicers* to be sufficient for keeping water thawed in the winter in an insulated coop.
Keeping Chicken’s Water Thawed Without Electricity
Keeping your chicken coop’s water thawed during cold snaps can be a challenge without electricity- but not impossible!
Many chicken owners in climates that only have a few bitterly cold nights each year simply allow the water to freeze overnight and provide fresh water in the morning.
Boost the effectiveness of all of these winter chicken watering options by harnessing the ambient heat of deep litter bedding (read on to learn more about this method).
4. Insulate through Deep Litter Bedding
Composting manure creates heat. This heat can be used to warm a chicken coop. Deep litter bedding is a chicken-keeping practice borrowed from the equestrian world. If the coop is well insulated, dep litter bedding can raise the temperature inside by up to 15 degrees. To utilize the heat-generating power of compost, use this practice instead of your typical coop cleaning method:
The Deep Litter Method:
- 🚫💩🧹 Beginning in late summer, stop sweeping, scooping, and removing used chicken coop bedding
- 👃🏻💨 Instead, when the coop develops an odor and needs cleaned, cover the existing bedding with 1-3 inches of new wood shavings.
- ✅♻️ Repeat as needed, adding shavings without removing the underlying layer.
Why it Works:
- 👃🏻😄 With deep litter bedding, each additional layer of bedding insulates the air in the coop from the odors beneath, so the coop stays fresh and clean while the composting process begins in the lowest levels of bedding.
- 🛌🏻 Over the course of weeks or months, several inches of bedding build-up. Slowly, the bottom layers of bedding begin to generate small amounts of heat as composting begins. The nitrogen in chicken waste combined with the warm blanket of insulation provided by the upper layers of bedding causes rapid decomposition of the lower layers.
- 🔥 A small amount of heat is naturally generated by decomposing manure. This rises and warms the coop. This heat can be helpful for providing natural ambient heating in your coop.
As long as the upper layers of bedding are fresh and sufficiently thick, odor/air quality in the coop is not affected. In spring, you rake out the composted manure and start again.
While this method does not involve adding insulation, there’s a synergistic process that can occur if the coop is well insulated: An insulated chicken coop keeps the litter a little warmer. This keeps the composting process more active, which generates a bit more heat. That extra heat gets held in by the insulated coop and further supports the thermal warming of deep litter bedding.
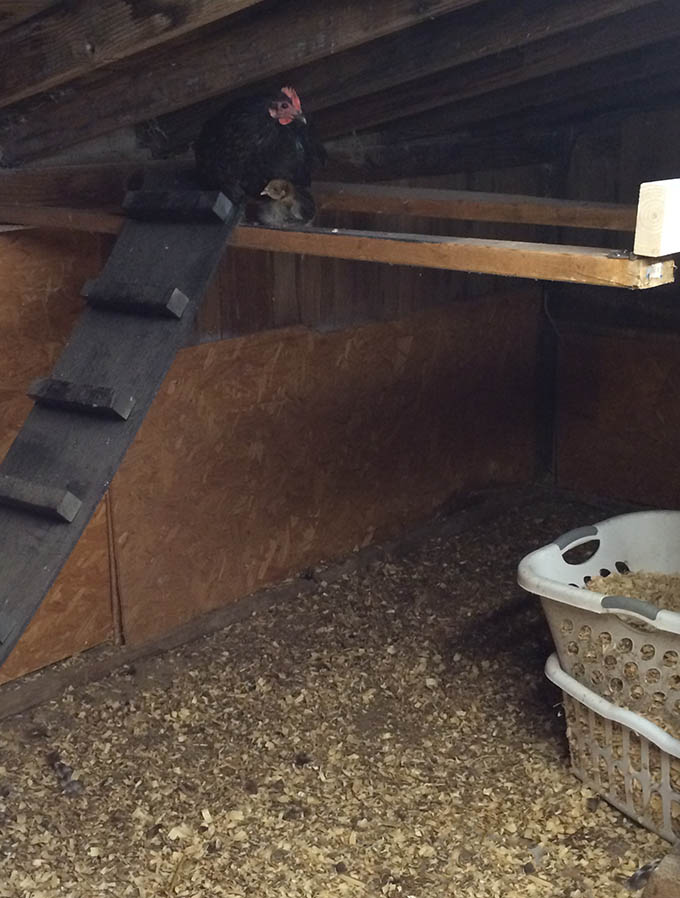
5. Modify your Coop’s Roosts for Cold-Weather
Chickens have natural insulation: feathers! These feathers are pretty incredible at keeping hens warm, but their feet can be vulnerable. In the wild, chickens roost on wide branches that allow their feathery fluff to cover their whole feet (including toes)
Many chicken coops have cheap, narrow roosts. This means that instead of roosting on top of a broad surface (allowing their feathers to cover and insulate their feet) toes are curled around the roost, extending away from the warmth of feathers and body heat.
Chickens are most vulnerable to cold, frostbite, and hypothermia at night – especially when roosts are narrow.
An important step to Winterizing your chicken coop is to replace any narrow roosts with wider boards. We use the broad side of a 2 x 4.
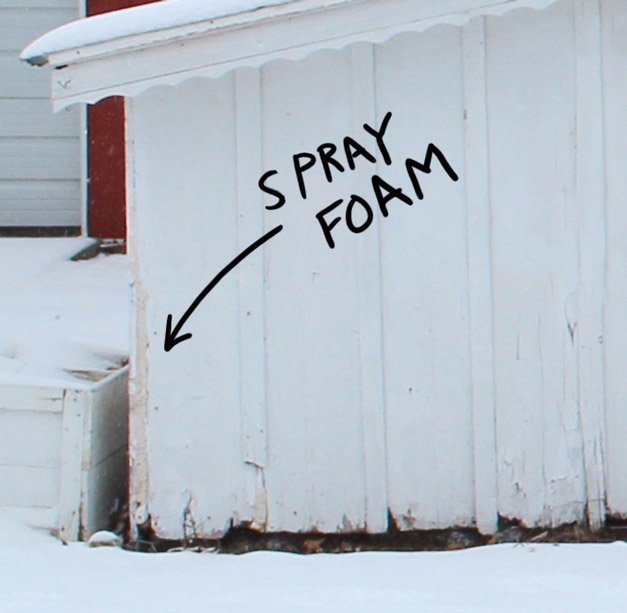
6. Block Winter Drafts with Spray Insulation
The best way to determine how to better insulate your coop is to stand in your coop on a rainy, windy day. Does water leak in? Where does it come from?
The entrypoint of water is a sign that cold drafts enter via the same route. Mark the locations and return, when dry, to plug the gaps with spray foam insulation.
Locating these vulnerable spots can help you winterize your coop and prolong its life.
A spray can of insulation foam* can make a BIG difference in keeping your coop warm all winter.
💡 HINT: Spray foam doesn’t keep, so empty any leftover into the cavity between wall panels and insulation panels, to boost their insulation power.
Spray foam is an excellent insulation material for chicken coops because it is durable, easy to apply, and provides good insulation against the cold. Spray foam is excellent for sealing big gaps and hard-to-insulate areas, but remember that it is important to make sure that the chicken coop can get some fresh air in. A coop that gets some fresh air- even in winter- is healthier for chickens.
Part 2: How to Get Hens to Lay Eggs in Winter
It is not only possible, but easy to get hens to keep laying eggs in November, December, January, and even February. I do this through two methods:
1. Adding Artificial Light to a Chicken Coop in Winter
Of course, keeping your coop warm during cold winter months is only part of keeping your flock laying eggs through the winter. In addition to these techniques to keep your coop warm and comfortable, one of the best techniques to keep your hens laying in the winter is by extending the daylight hours.
🌞🕘 Chickens stop laying eggs in the winter due not to cold but primarily in response to the shortened amount of daylight during the winter when days are shorter. Electric lighting lets us fix this.
Artificial lighting is very effective to keep hens laying in the winter. It’s how commercial egg farms consistently meet demand during the winter months. If full-spectrum light is provided in your coop that extends the amount of time that chicken’s bodies experience daylight to 12-14 hours, you can expect your hens to lay eggs all winter. (Although you’ll still collect fewer eggs than spring and midsummer).
What You’ll Need to Set up Winter Egg Laying Lighting:
Any light source that delivers full-spectrum light in sufficient quantities should work for keeping hens laying in winter. For backyard-sized coops, the most budget-friendly setup is this one:
1. Clamp-on Light* – mounted in an upper corner of the inside of the coop.
2. an LED Lightbulb formulated for plants* – this takes the guesswork out of buying and combining multiple bulbs in multiple spectrums. Any light labeled as a grow light should give out full spectrum light that will work for replicating daylight for your chickens.
3. Mechanical Timer* – A timer can automatically turn lights on before dusk and flip them off a few hours after dark. Skip the computerized versions, in my experience mechanical timers holds up much better to coop dust and the rigors of life on a farm.

Set the timer to turn the interior coop light on from about 7 am to 9 am, and then again from 4 pm to 9 pm. Doing so will imitate the amount of sunlight of a 12 hour summer day.
For larger coops, you can use multiple lights or a fluorescent shop light with one fluorescent tube of “cool” light and one fluorescent tube of “warm” light.
How Long it Takes for Artificial Lights to Help Chickens Lay Eggs:
If you introduce lights in midwinter, it may take a few weeks to get your chickens to lay eggs again. You’ll know it’s working if, a few days after installing the light, your chickens are active and milling about the coop well after natural sunset.
In my experience with creative chicken keeping practices like this, backyard flocks of chickens that are kept under light tend to produce about half as many eggs in the winter as they do in the summer. This is due to some hens not laying it all, and others laying less frequently under artificial light. Breed seems to be a factor as well. Some breeds of chicken – and some individuals – will respond differently to the added light than others.
Full Spectrum Light for Winter Chicken Coops
You can experiment with the right amount of light to add to your coop to get your chickens to lay eggs in the winter. It should be bright enough to fool the birds’ bodies into thinking it’s daylight: a dusty 60W bulb in the corner won’t be bright enough to have an effect!!
I’ve had the best luck using LED lighting – right now I’m using the Sylvania 4ft Led Shoplight*. Be sure that whatever light you choose includes a full spectrum of light – using only warm light or only cool light is unlikely to be effective at getting chickens to lay eggs in the winter.
2. Using Supplemental Feeding to Boost Egg Production in Winter
For most backyard chickens, kitchen scraps will be the only fresh food they have access to it until spring. If your chicken run gets some light, however, you can use grazing boxes and cold-weather grasses like oat grass* to provide access to greens through much of the winter.
Providing these fresh nutrients (and something to do!) can help keep chickens thriving through the cold winter months. Read our separate article on building and maintaining chicken grazing boxes.

Insulating your Coop on a Budget
Most of us don’t have a lot of money to spend on our chicken-keeping hobby, but insulating your chicken coop doesn’t have to be an expensive project. A chicken coop is a great place to use up leftovers from other construction projects, use a mishmash of different materials, and repurpose items found at thrift stores, flea markets, or even recycling centers.
Final Thoughts
Insulating your chicken coop might seem like a huge job, but it’s actually an easy one-person DIY. Don’t worry, you don’t have to do every item on this chicken coop winterization checklist at once. Pick one or two ways to add insulation each season and by next winter you’ll have a toasty coop ready to keep hens laying all winter.
Thanks for Reading!!!
I hope you can tell that I love DIY, researching the best affordable solutions for every-day problems opportunities and documenting / sharing solutions!🙌 Hawk-Hill.com is reader-supported.
☕ Hawk-Hill.com is reader-supported. If this article saved you time or money, please consider donating $1 to help me cover the cost of hosting this website OR If you appreciate this information and want to throw a “Thanks!” my way by buying me a coffee – I would Of Course appreciate it! :]
Reader Questions and Recommendations
Readers, do you have any favorite topics / posts? What would you like to read more about in the future? As I hope you can tell from this and other articles on my site, I really enjoy DIY / a good challenge, and I’m not afraid to roll up my sleeves to figure out a great, and hopefully simple 😁 solution. So please feel free to let me know in the comments below (or reach out via social media)!
Ok Really – I’ll try to wrap this up now😂
Finally, if you’d like to continue to learn about interesting DIY options as well as how YOU can tackle creative new projects consider checking out the latest and most popular articles listed on the Hawk-Hill Home Page. I’m always trying to enjoy and write about the creative side of life so please don’t be a stranger – check back often!😍
Also chech our Pinteres account https://www.pinterest.com/curlylindsay/
If you enjoyed this post you may also enjoy reading / perusing / devouring😊 one or all of these articles as well!
- 💡4 Easy Steps to Make Your Own Sea Glass 🌊
- ❤️Bedroom Decorating Ideas for Single Women’s Master Bedrooms 🛏️
- 🏡Ikea Kitchen Cost: What I Spent for a 9×12 Kitchen Remodel 💵
- Plants for Chicken Coop Runs | Landscape for Shade and Forage
- 🐥Chicken Grazing Boxes: Download Free PDF Plans
You might also be interested in: