
I’m no stranger to a miter saw and repurposed wood, but sometimes wood isn’t right for the project.
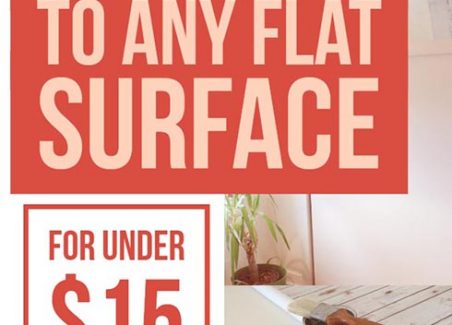
Whether it is concerns about chemical contamination on pallets, excess weight added to a wall via reclaimed barn wood, affordability concerns due to the 2021 lumber shortage, or just hesitation about the environmental impacts of the lumber industry, there are many good reasons to swap out an expensive and difficult wall treatment for cheap shiplap paper to create the look of shiplap without the complications.
My friend Merre and I spent weeks tossing around ideas to easily update a closet with old sliding doors.
Open shelving, replacement with old doors, and even resurfacing with distressed metal were considered until we came up with the perfect, cheap solution: using giant pieces of photo backdrop paper (printed on XXL paper with no seams or pattern repeat) to add the look of wood shiplap without adding any additional weight or thickness to the closet doors. The smooth whitewashed faux shiplap wood-look surface adds interest and texture to the room while still reflecting lots of light back into the bright white room.
Hawk-Hill.com is a participant in the Amazon Services LLC Associates Program, an affiliate advertising program designed to provide a means for website owners to earn advertising fees by advertising and linking to Amazon.com and any other website that may be affiliated with Amazon Service LLC Associates Program
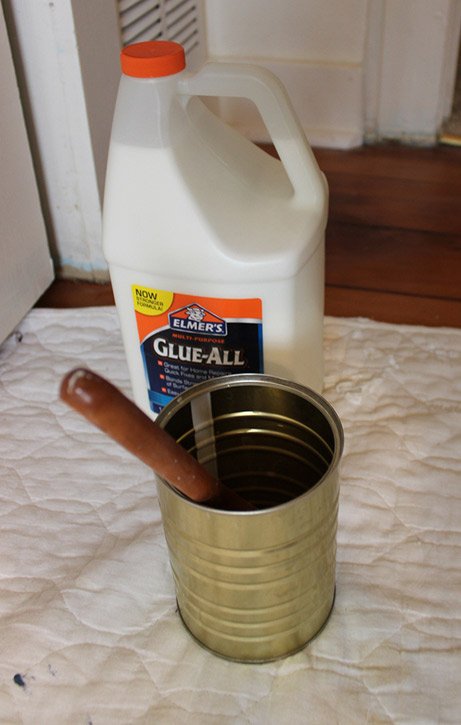
Materials Needed
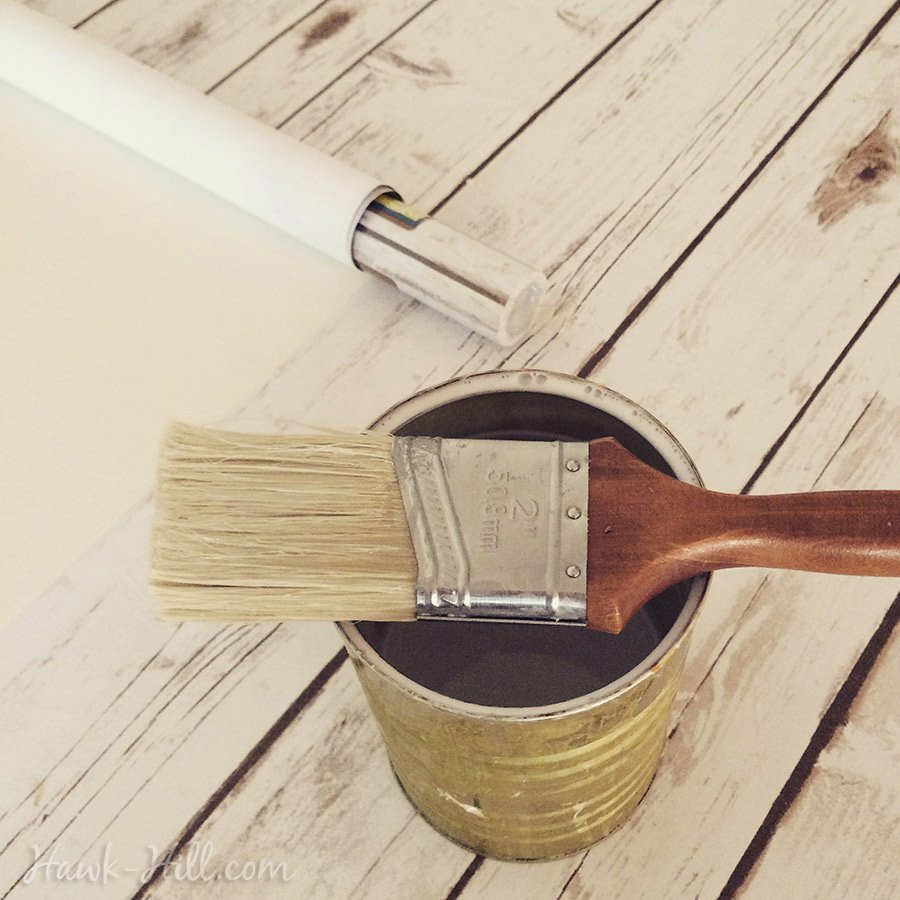
- Elmer’s E3850 Multi-Purpose Glue-All, 1 Quart – for gluing paper to door
- Plastic Smoothing Tool – a flexible wallpaper smoother is NOT an optional tool! This project uses very thin paper- which works great EXCEPT the paper, once wet, will tear very easily if smoothed with a basic straight edge or scraper.
- Mod Podge Matte, 32-Ounce – for the top coat (Matte finishing spray can work but will protect less)
- A good quality 2″ paintbrush. Skip the foam brushes on a project this large- my favorite brush is the Shur-Line Rubbermaid 2-Inch Small Area Brush
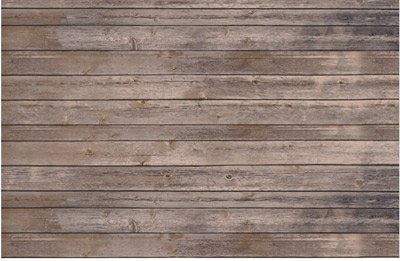
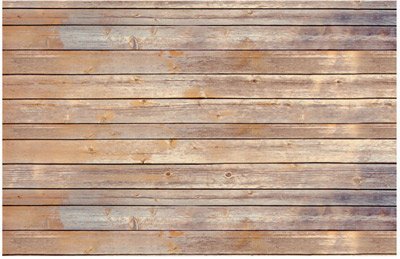
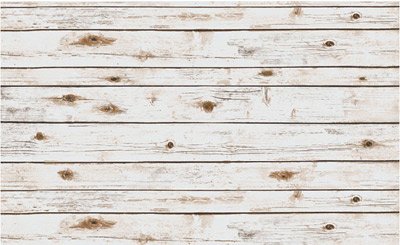
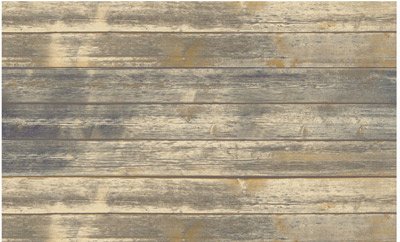
- 1 roll of Ella Bella Photography Backdrop Paper, we used White Washed Wood:
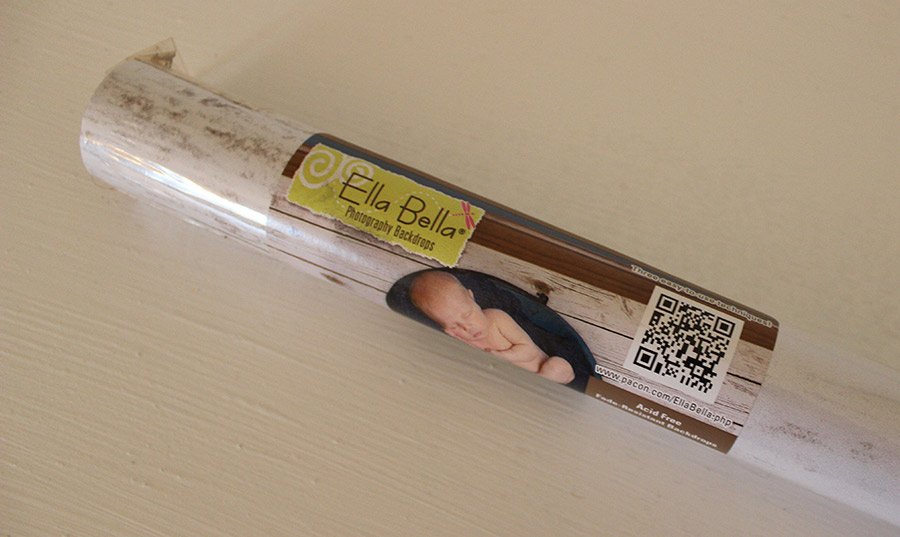
I’m in love with this product! This 4 ft x 12 ft sheet of paper with a seamless design inspires so many ideas and comes in several wood finishes:
Before you Start:
Dilute the Elmer’s Glue. The Elmer’s Glue website suggests diluting their glue for decoupage by mixing 3 parts glue with 1 part water. This formula worked great on this project and was much easier to paint on and apply thinly than pure glue would have been.
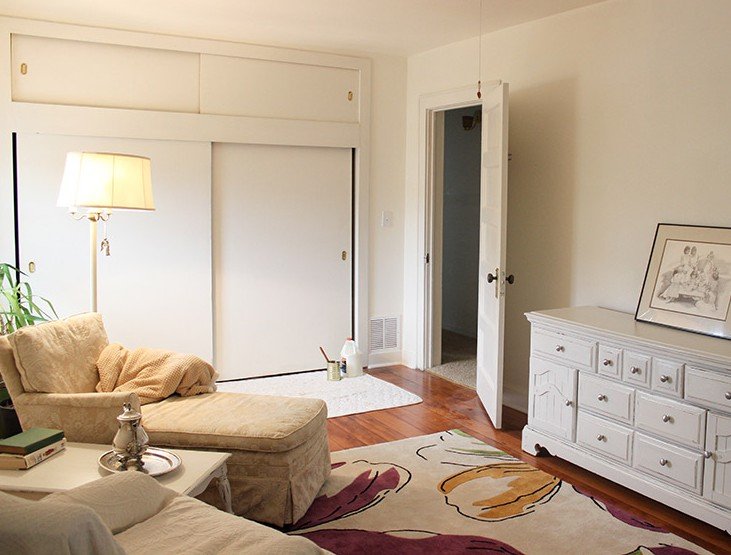
BEFORE: Solid white closet doors in a 1980’s style
Prep Surface for Faux Paneling
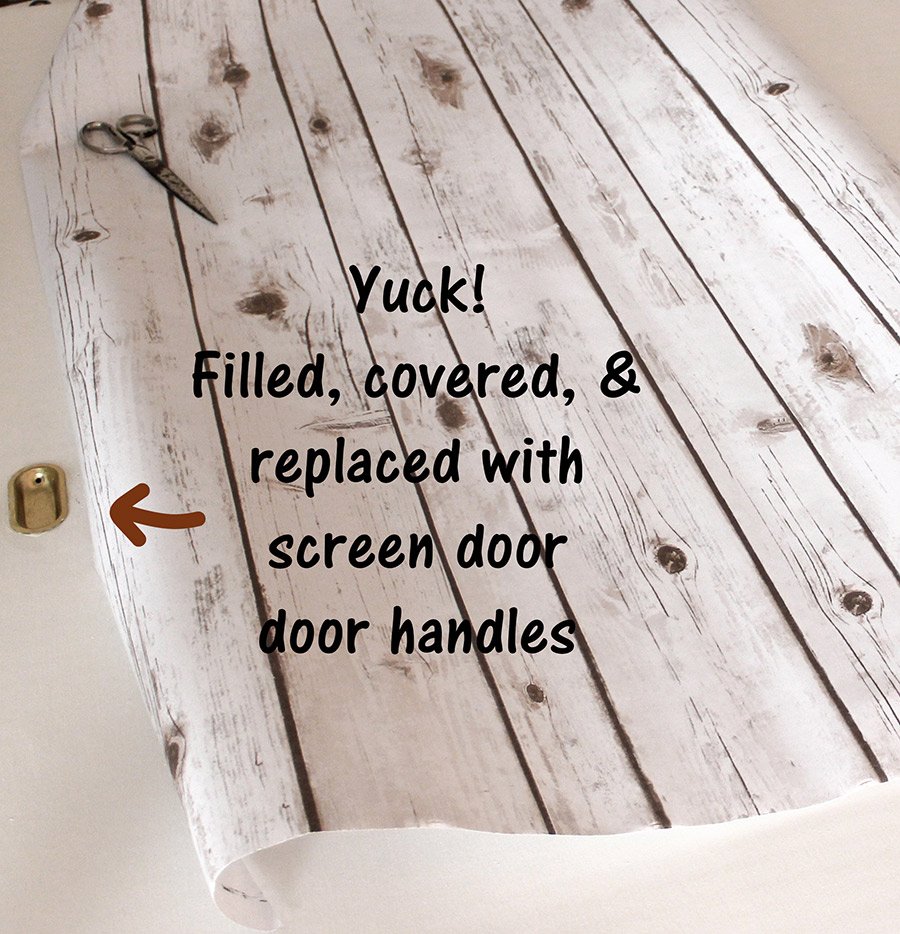
Remove the door and lay it down on a horizontal surface. Remove any hardware from the door. In our case the handles were recessed so we had to remove the hardware and then fill the hole before applying the paper.
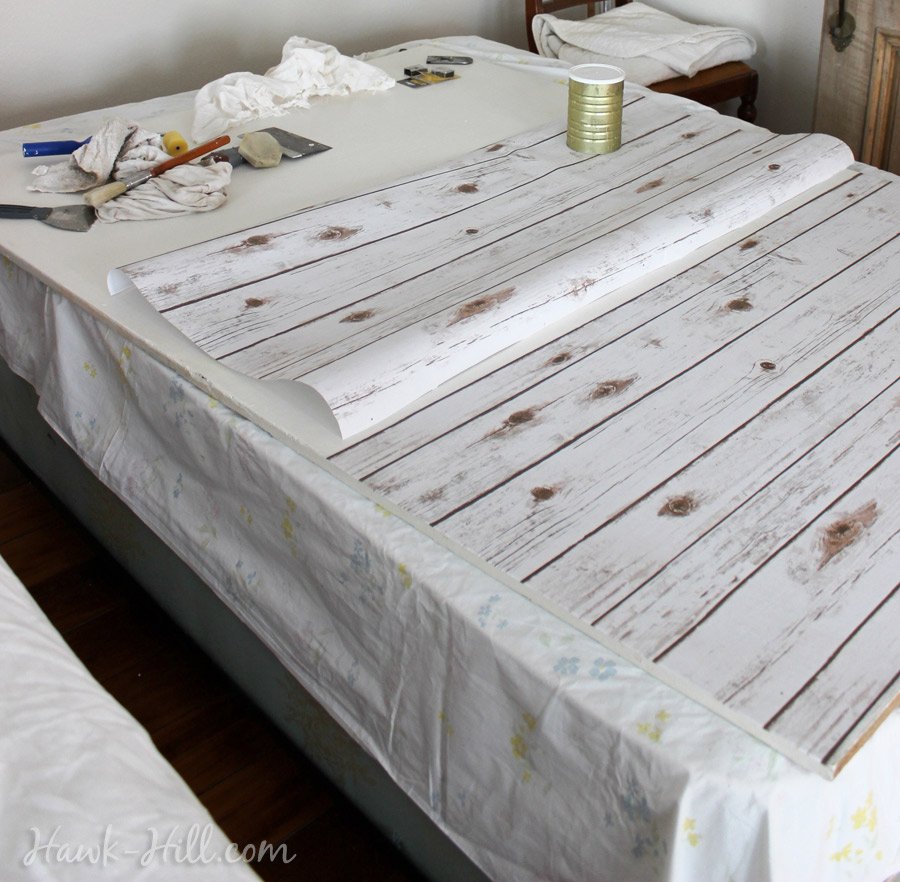
Step 2. Cut Fake Shiplap Backdrop Paper into Sections
We learned (the hard way!) that it’s helpful to cut the paper into smaller, manageable pieces. (Don’t worry, seams won’t show!).
Pieces of paper 4ft wide (the full width) by 24-36″ were the easiest to handle.

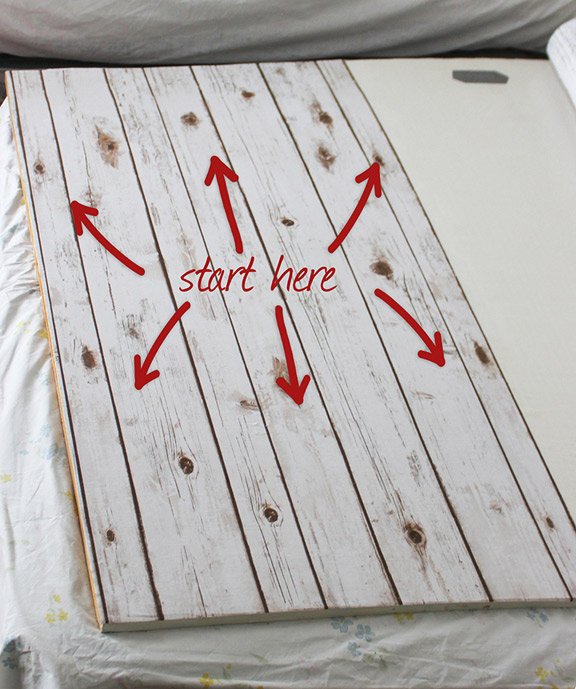
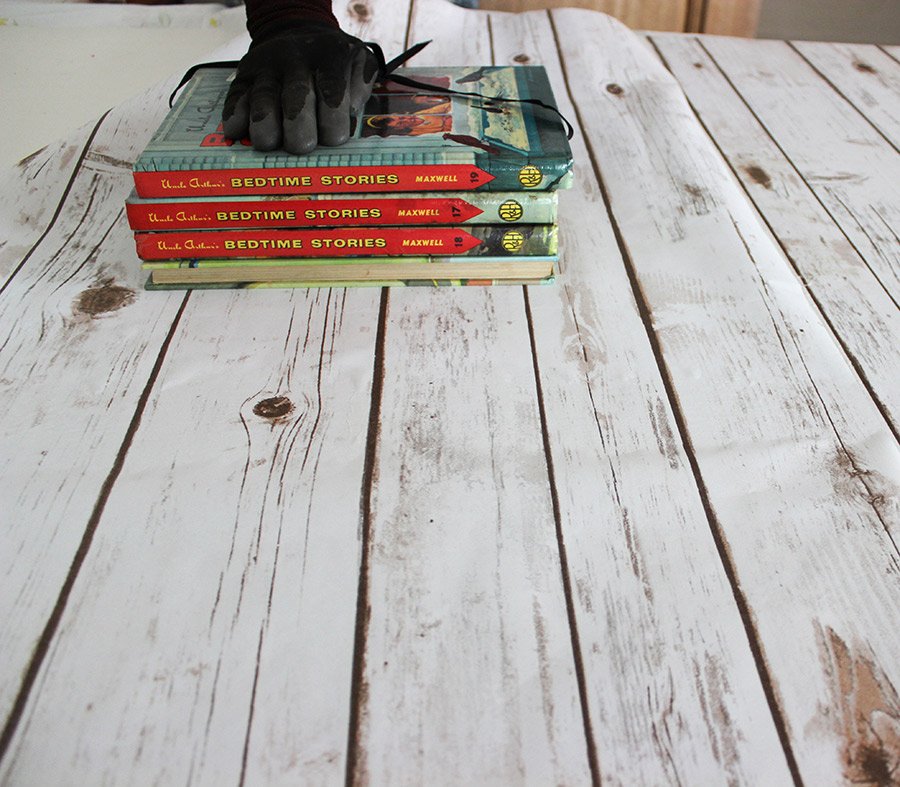
Step 3. Align Faux Shiplap Paper & Stabilize
Line up the paper straight, perfectly straight, along the edge of the door. While holding it in place, have a helper place something heavy and smooth (like a stack of books) near the center to keep the paper from shifting out of place:
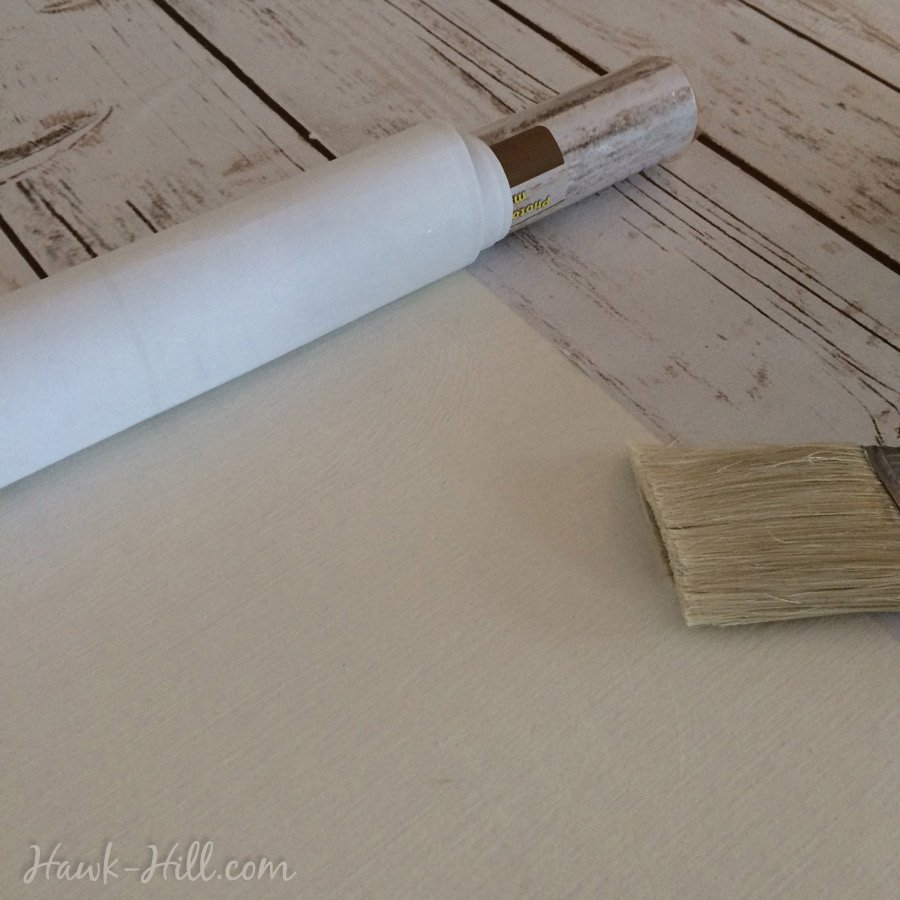
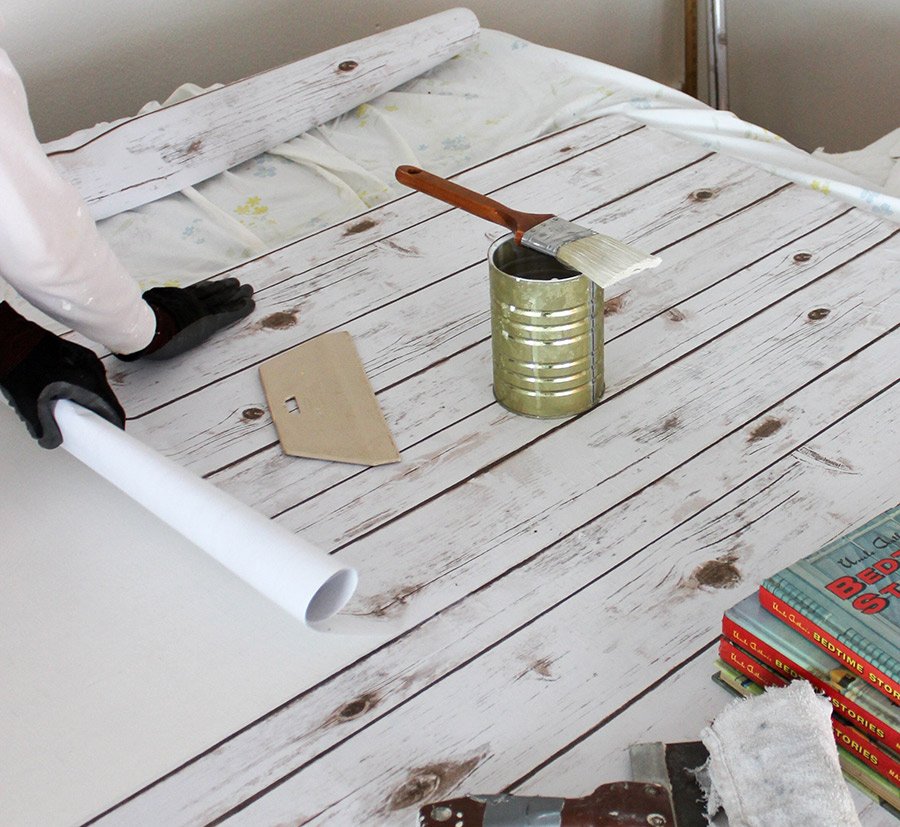
Step 4. Begin Gluing Paper to Wood
Pick a side and roll the paper up from the outside towards the center. Add a moderate amount of glue to your brush and spread a thin, even coat across the width of the section, but working in sections no more than 6-8″ long. IMPORTANT: Do not use an excessive amount of glue. The more moisture you add the more likely the paper is to fully saturate and tear when being smoothed- so you want just enough glue to get the paper to adhere.
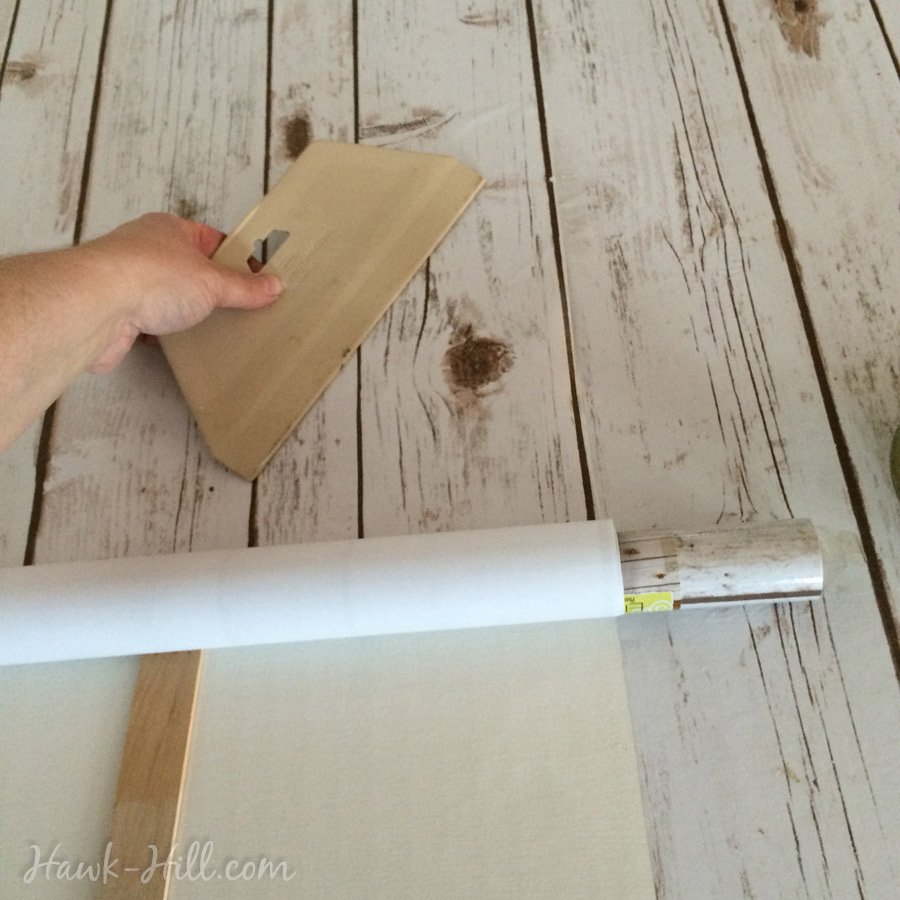
Step 5. Attach and Smooth Faux Textured Paper
Roll the paper down, carefully, over the area you just applied glue. Working from the center out, smooth the paper with the wallpaper smoother, easing bubbles to the edges or bottom and making sure the paper is flat and fully adhered to the surface below. (You won’t be able to get a “perfect” surface, but the vast majority of remaining creases and bubbles will disappear when the paper dries)
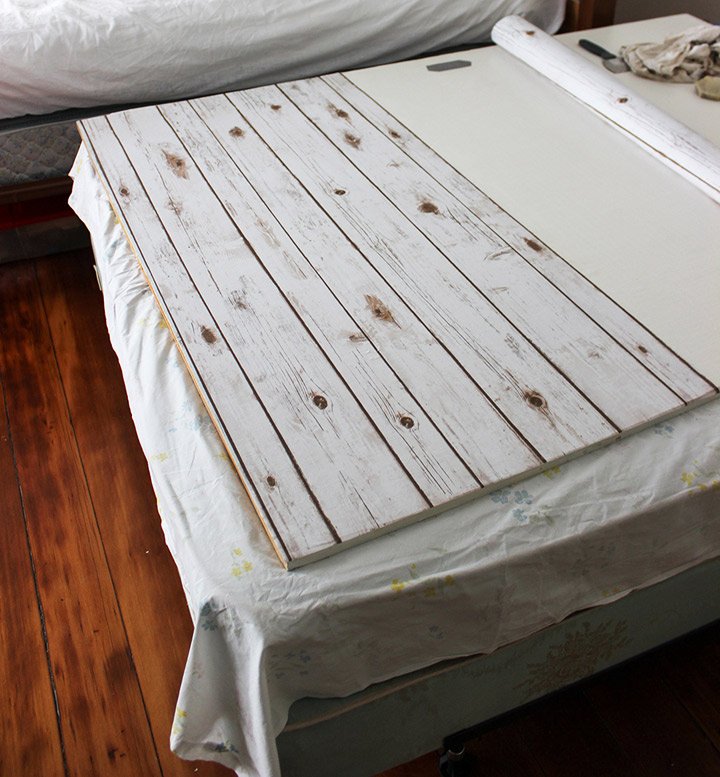
Repeat steps 4 & 5, working down the same side until you reach the end. (don’t panic if you have excess paper hanging over the that edge you did not measure for- smoothing the wet paper stretches it!)
Step 6. Repeat on full width
Once one side is fully adhered, remove the books that were weighting the center, roll the loose side up until you reach the beginning point of where you’d previously glued, and repeat steps 4 & 5, working your way down this side.
Step 7. Cover Surface Fully
Once you get the hang of how much glue to use and how the paper smooths best, this project goes quick! For each section of faux shiplap paneling finish, simply line the top edge up with where the last section ended, weight the center, and continue gluing small sections at a time.
When you are done applying the paper to the entire surface- let the glue dry completely- at least 4-6 hours before applying a top coat to seal the paper.

Step 8. Seal the Fake Shiplap Paneling
You’ll want to seal the top of this paper so it can be wiped clean when it gets fingerprints and dust. IMPORTANT: Be sure and use a sealer with a MATTE finish. A glossy or semi-gloss finish will make the surface look flat and slick, ruining the barn wood look, so you’ll need to use matte finish Mod Podge or matte finish Glazing Medium (the artist’s equivalent of the former) Don’t panic if the wet sealer makes the paper buckle. Ours did, but after drying the paper was again flat.

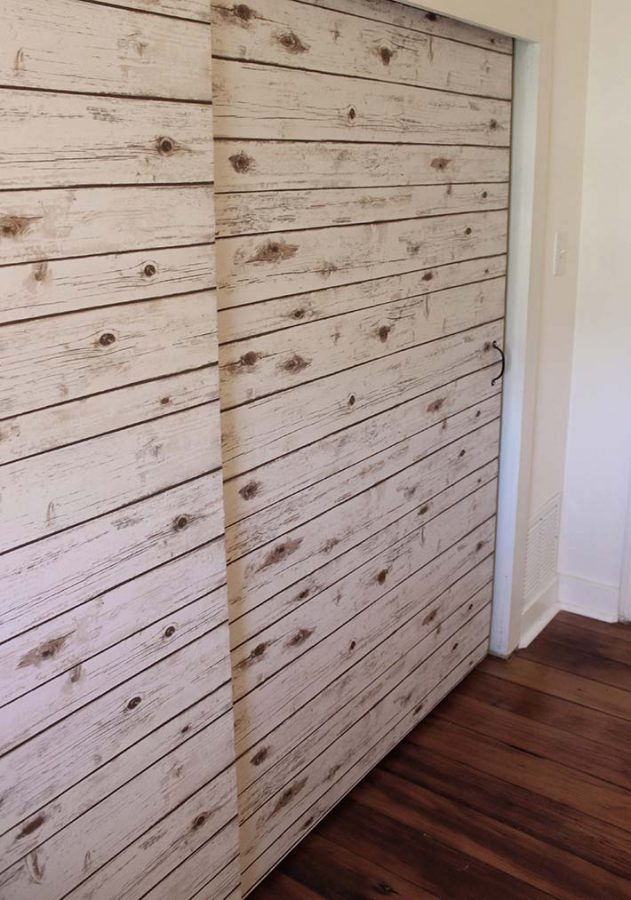
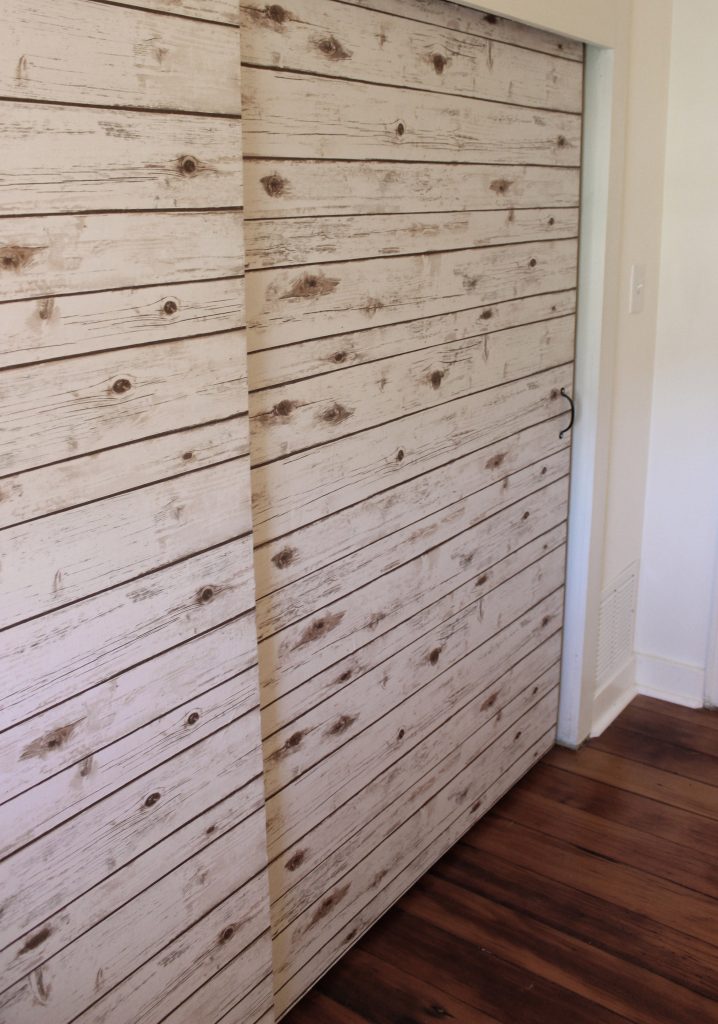
FINAL RESULT:
My photos just don’t do this project justice! I will keep looking for better light and a better angle to catch a shot of these doors!

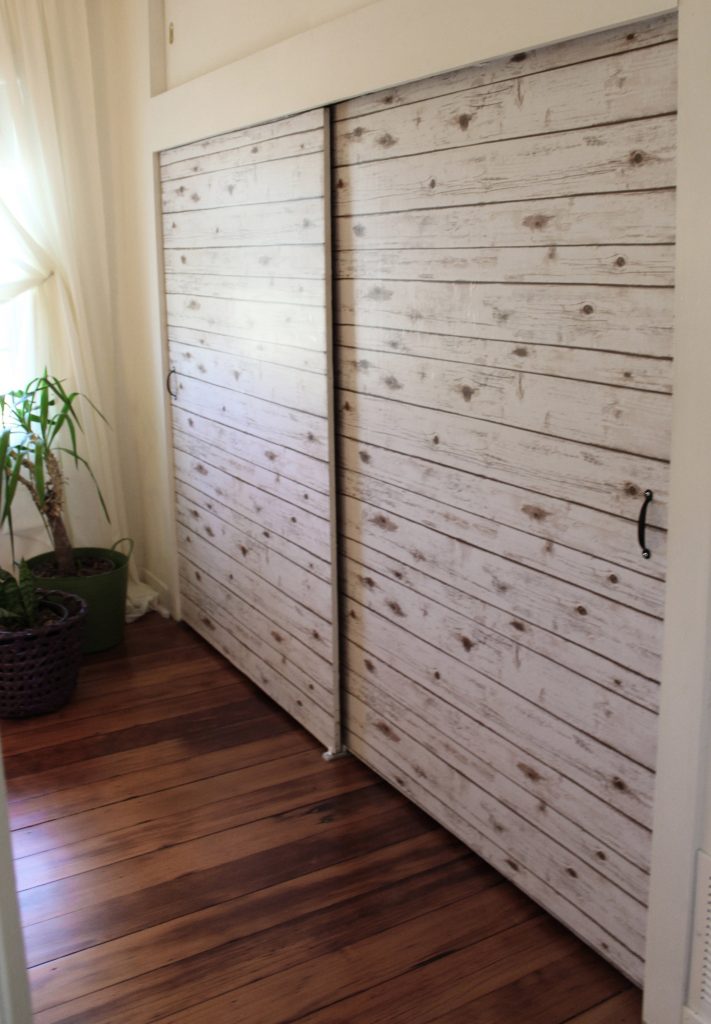
And here’s a shot of the other end of the same room- where the branches placed behind the headboard make a perfect companion to the faux barnwood doors.

Can this be done on a wall?