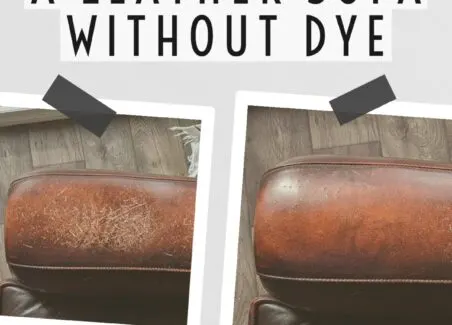
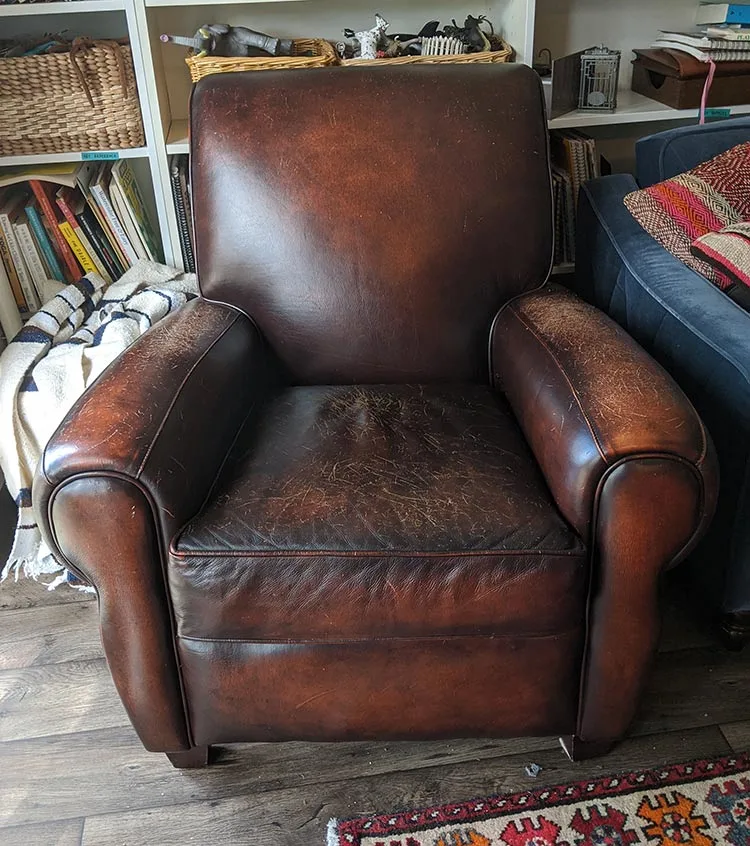
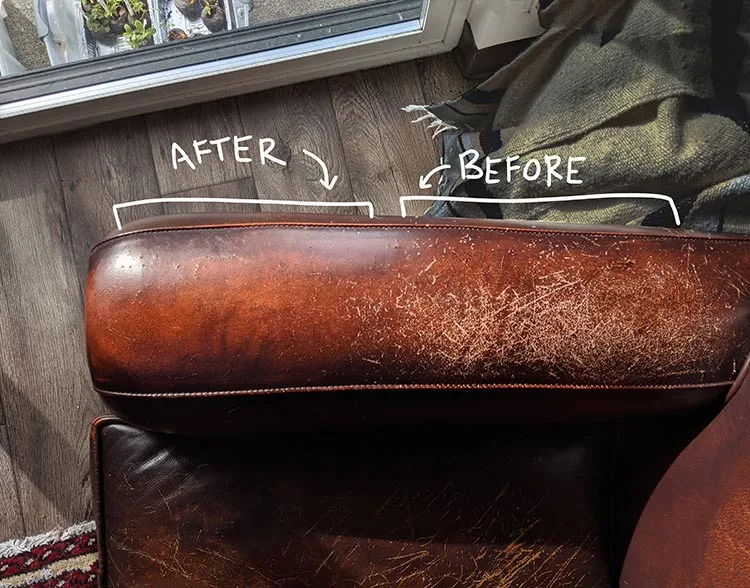
The Internet is filled with tutorials for fixing scratches on leather chairs and sofas- I know because I read at least a half-dozen of them when I adopted my leather Broyhill armchair from Craigslist. In excellent condition other than surface scratches, this find from the free section of Craigslist was well worth the short drive out to one of Seattle’s swankier suburbs. More comfortable and sturdier than the budget furniture in most stores, this Broyhill armchair was perfect – except for the scratches.
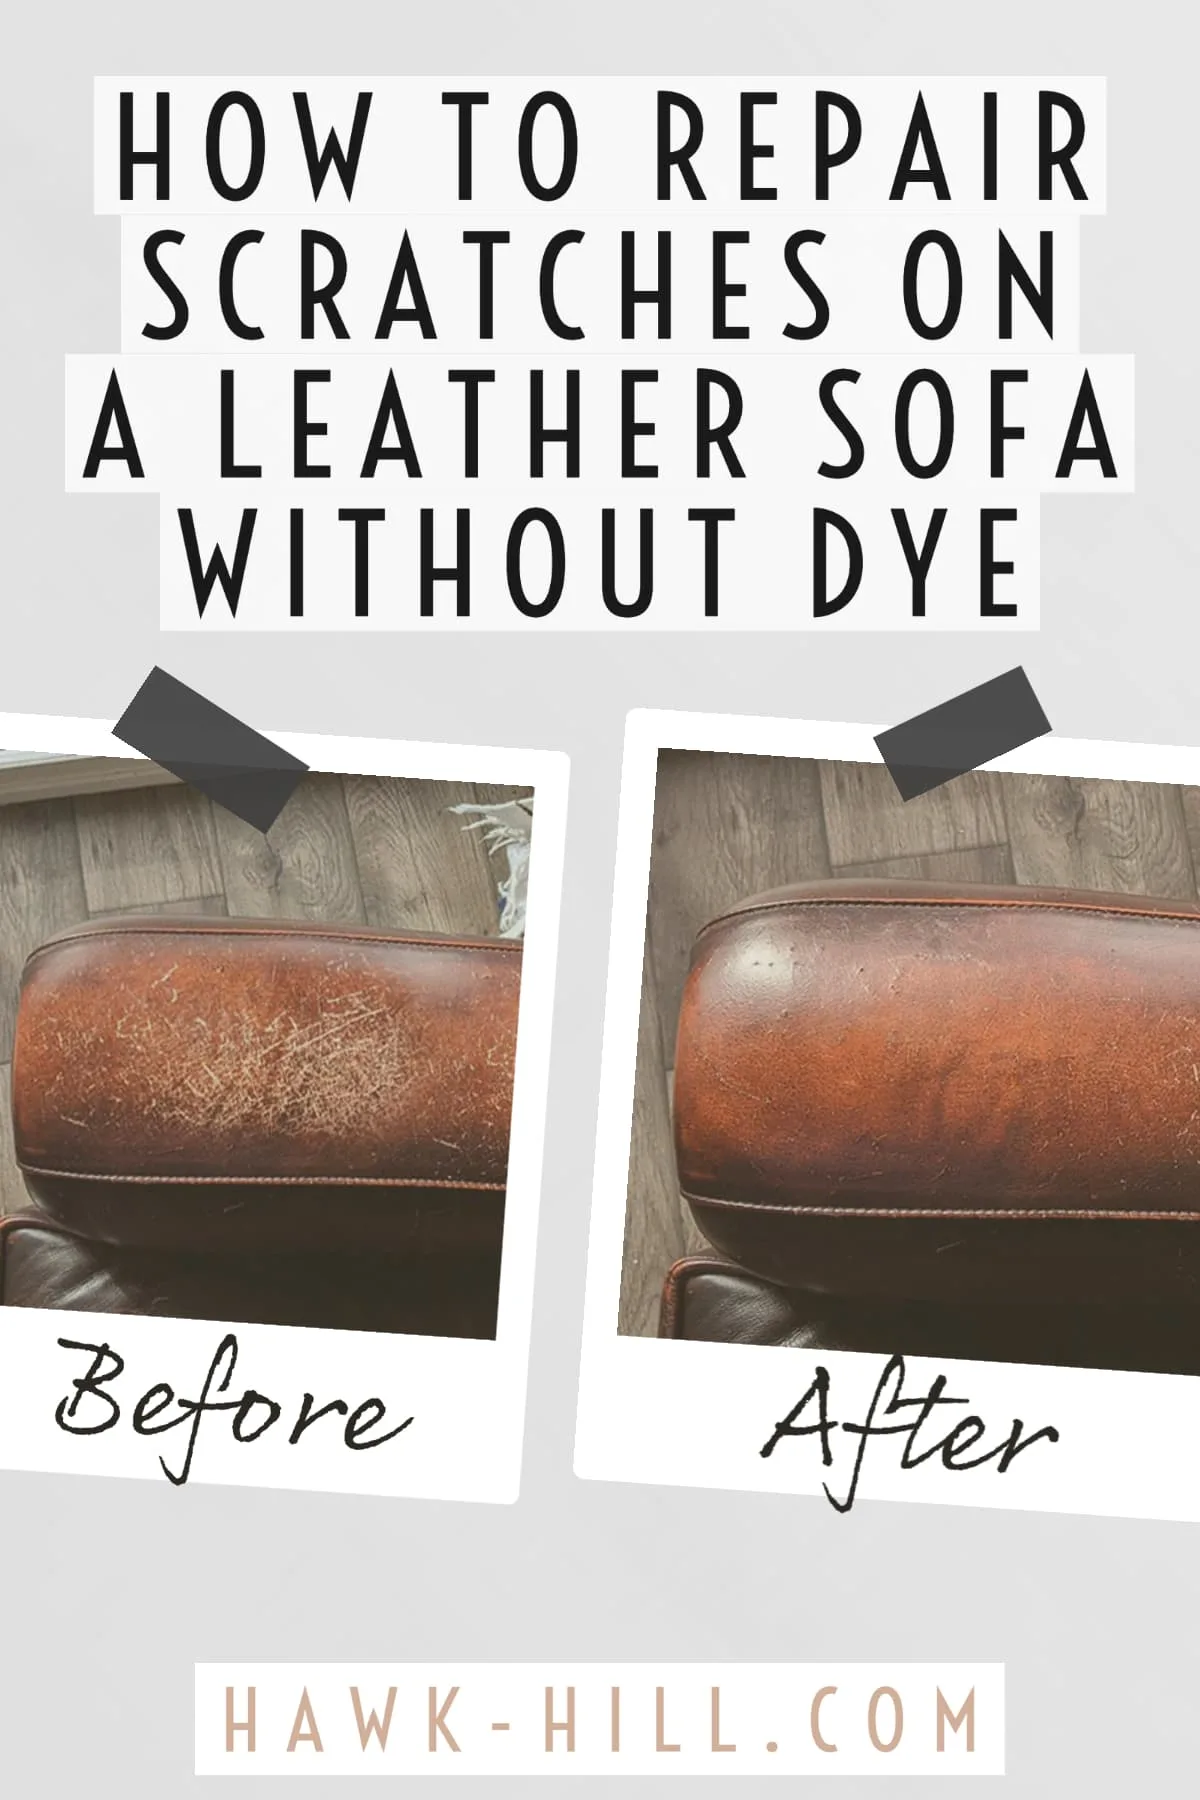
While rehabbing this chair, I first tried one or two tutorials I found for refreshing the dye. Tested on inconspicuous spots, I wasn’t impressed with the results. The problem is, when you add a new coat of dye, you dye not only the scratches but also the surrounding area darker – so scratches aren’t removed so much as they are just darker scratches on a darker surface. After two attempts at failing with re-dying, I began experimenting.
The following section may contain affiliate links. As an Amazon Associate, we earn from qualifying purchases.
New Life for an Older Piece of Furniture
This quote from Julia de Bierre and James Bain Smith’s book “Restoration Recipes” resonates deeply with me. These words beautifully capture the essence of my passion for working on furniture and DIY projects in general.
“Coaxing furniture back to life using traditional methods requires time, thought, and patience, but when we survey the results, it is clear that the process was not just hugely enjoyable but well worth the effort.”
Restoration Recipes
To me, there’s something incredibly satisfying about taking old, worn-out pieces and breathing new life into them through careful restoration and creativity. The process of bringing them back to their former glory is often slow and requires a great deal of patience and attention to detail, but the end result is always worth the effort.
Whether it’s refinishing a scratched and battered table or reviving this leather couch, each project represents an opportunity to revive something that might otherwise have been discarded. And in doing so, I feel a sense of connection to the past and a deep appreciation for the craftsmanship and attention to detail that went into the original design.
I think this article and the quote above does a great job of capturing in a small way why I love working on furniture and DIY projects in general…giving new life to things that have been discarded and ultimately why I love doing my best to document what I learn here on Hawk-hill.com!
Common Approach to Restoring Leather
Most of us are familiar with those markers and crayons designed to hide blemishes on wood furniture, I wondered if a marker that had a similar makeup to the formulas used in leather dye could make it possible to color only the scratch. With a precision application, could it be possible to make only the scratches darker, evening the tone overall and helping them blend into the backdrop invisibly? I set out to try.
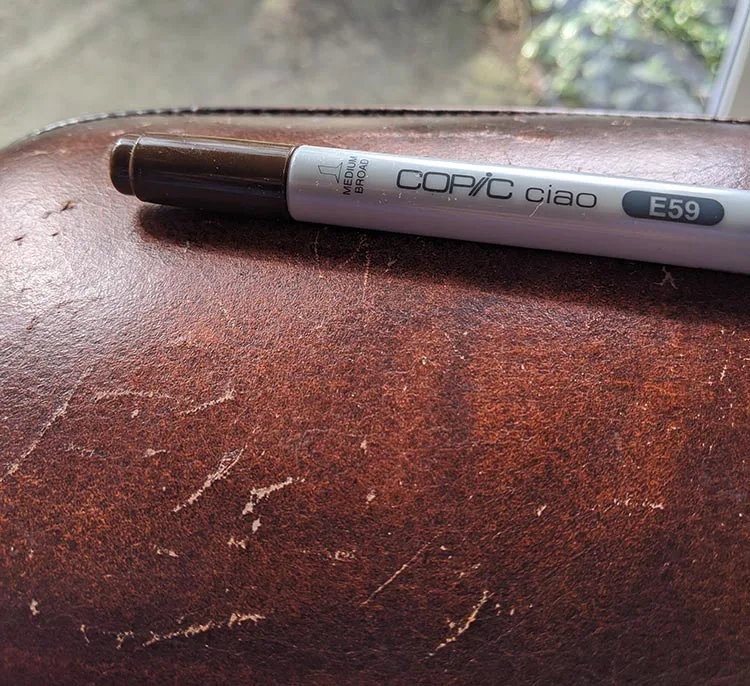
Leather dye is generally alcohol-based, so any alcohol marker with a wide range of brown tones available would be the best candidate for substituting a marker for leather dye. Thankfully, I had my case of art markers nearby and decided to give them a shot. Although it took a bit of testing to match my chair’s leather color to a brown in the Copic color line, Color E57 and E59 were a PERFECT match to the original finish on my armchair (portions of my chair where the distressed leather was a bit darker need the slightly darker marker color). Here’s how I did it:
Supplies I used:
You can find most colors with free shipping here, or create a custom scratch-coverup marker.
Picking a Color
First, and the hardest part, was matching colors. This method works great but totally depends on getting an accurate- or very close to accurate- color match. Copic markers aren’t cheap to experiment with, however, the wide range of various tones and shades of tan and brown make it a great choice for this repair project- and a small fraction of the price of having the leather professionally repaired.
Thankfully, there’s an excellent Copic color charts online that should help you narrow down which color would be best. You can find most colors with free shipping (linked above). When in doubt, go a little bit darker on the marker shade – you can always dilute the pigment with rubbing alcohol but it’s very difficult to make a darker (a second coat can make a small difference, but not much.)
Copic also has the materials available to make a custom color marker- if you are trying to repair a sofa with a custom shade of leather such as dark red or purple, you can try mixing reds/purples and browns to create your own custom scratch-coverup marker (linked above).
One marker should be enough to do a badly scratched armchair, but if you are repairing a couch or a couch, loveseat, and chair set you may need to order an ink refill to keep the dye flowing from the marker into the porous leather.
Fixing the Scatches
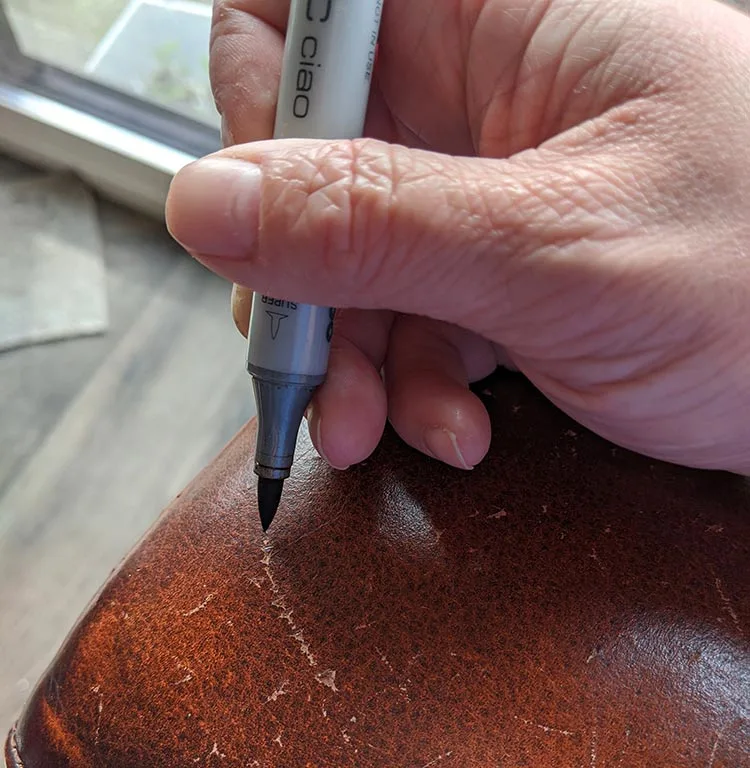
Second, the actual coloring in of the scratches is super-easy: Just use the fine tip end of the marker to color in scratches, avoiding getting ink on the undamaged leather.
Take time to go slowly. You’ll want to hold the marker against the scratch for a few seconds at a time. Simply wiping the marker across the surface will make a visible difference, but for best results, you want to let the ink flow and transfer deeply into the leather pores. This ensures that as the couch or chair is used and as clothing acts as a slight abrasive, the scratches will remain dark-colored and invisible and the repair permanent.
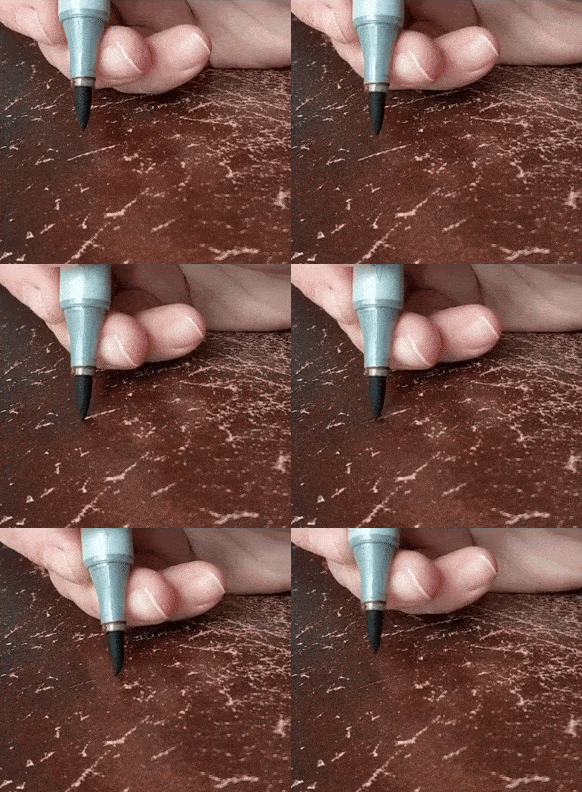
Work one section at a time, Over time, you will probably notice that you need to pause a bit longer as you go, to get enough ink to flow. This is normal, you can either refill the marker with fresh ink, give the project a break in order to let the ink flow into the nib, or slow down and mark slowly enough that the marker flow can keep up.
Here, you can see the before and after of my favorite armchair. Unlike repair tutorials that require surface prep, protective gear, and sealants, this simple repair requires just a marker and a little bit of time. I think you can see clearly from the photos it creates an impressive result- with every evidence in my home that the fix will last for years.
Fair warning: This repair works GREAT, but isn’t fast. It requires coloring in each scratch by hand, so if you are working with a well-worn piece or a large sofa, it’s going to be a longer project. I haven’t quite finished my chair yet, but I work on it a bit at a time, instead of a craft project while watching TV. I’ll be sure to post the final result when it’s complete!
Fair Warning Rebuttal: Repairing leather furniture is a worthwhile investment that can extend the life of your beloved pieces. By repairing leather furniture, you can avoid the cost and waste of purchasing new items, while also preserving their unique character and sentimental value. Repairing leather furniture also promotes sustainability and allows you to showcase your personal style by customizing the repairs to your preferences.
In addition, repairing leather furniture can be a rewarding and creative process. By taking the time to repair your leather furniture, you are not only saving money and preserving the history and craftsmanship of the piece, but also creating a personalized and unique piece that reflects your individual taste and style.
Thanks for Reading!!!
I hope you can tell that I love DIY, researching the best affordable solutions for every-day problems opportunities and documenting / sharing solutions!🙌 Hawk-Hill.com is reader-supported.
☕ Hawk-Hill.com is reader-supported. If this article saved you time or money, please consider donating $1 to help me cover the cost of hosting this website OR If you appreciate this information and want to throw a “Thanks!” my way by buying me a coffee – I would Of Course appreciate it! :]
Reader Questions and Recommendations
Readers, do you have any favorite topics / posts? What would you like to read more about in the future? As I hope you can tell from this and other articles on my site, I really enjoy DIY / a good challenge, and I’m not afraid to roll up my sleeves to figure out a great, and hopefully simple 😁 solution. So please feel free to let me know in the comments below (or reach out via social media)!
Ok Really – I’ll try to wrap this up now😂
Finally, if you’d like to continue to learn about interesting DIY options as well as how YOU can tackle creative new projects consider checking out the latest and most popular articles listed on the Hawk-Hill Home Page. I’m always trying to enjoy and write about the creative side of life so please don’t be a stranger – check back often!😍
If you enjoyed this post you may also enjoy reading / perusing / devouring😊 one or all of these articles as well!

