
Making DIY vinegar-based wood stain art is cheap, fast, and effective. In this post, I’ll show you:
- How to make your own vinegar based wood stain using 3 ingredients you can find in any dollar store, grocery store, or your own home.
- Learn the chemistry behind how and why homeade wood stains work.
- Tips for using homemade vinegar based wood stain to darken the stain, get rid of the dull finish of most homemade wood stains, and highlight the grain of the wood.
- Finally, I’ll show you step by step how to make cheap dollar-store wood products look expensive and rustic by using this homemade stain to create a reclaimed-finish on cheap unfinished wood.
Keep reading for a recipe for homemade vinegar-based wood stain & instructions to use it to bring unfished wood to life.
Wood products from the dollar store are inexpensive ways to add design to a home or event on a budget, but anyone using these cheap unfinished wood objects for a project is likely to be a disappointed by the raw wood finish.
In just a few minutes- using inexpensive products you already have on hand- you can take dollar store wood frames, signs, easels, and other wood products and make them look rustic and expensive – all without using paint or traditional wood stains!
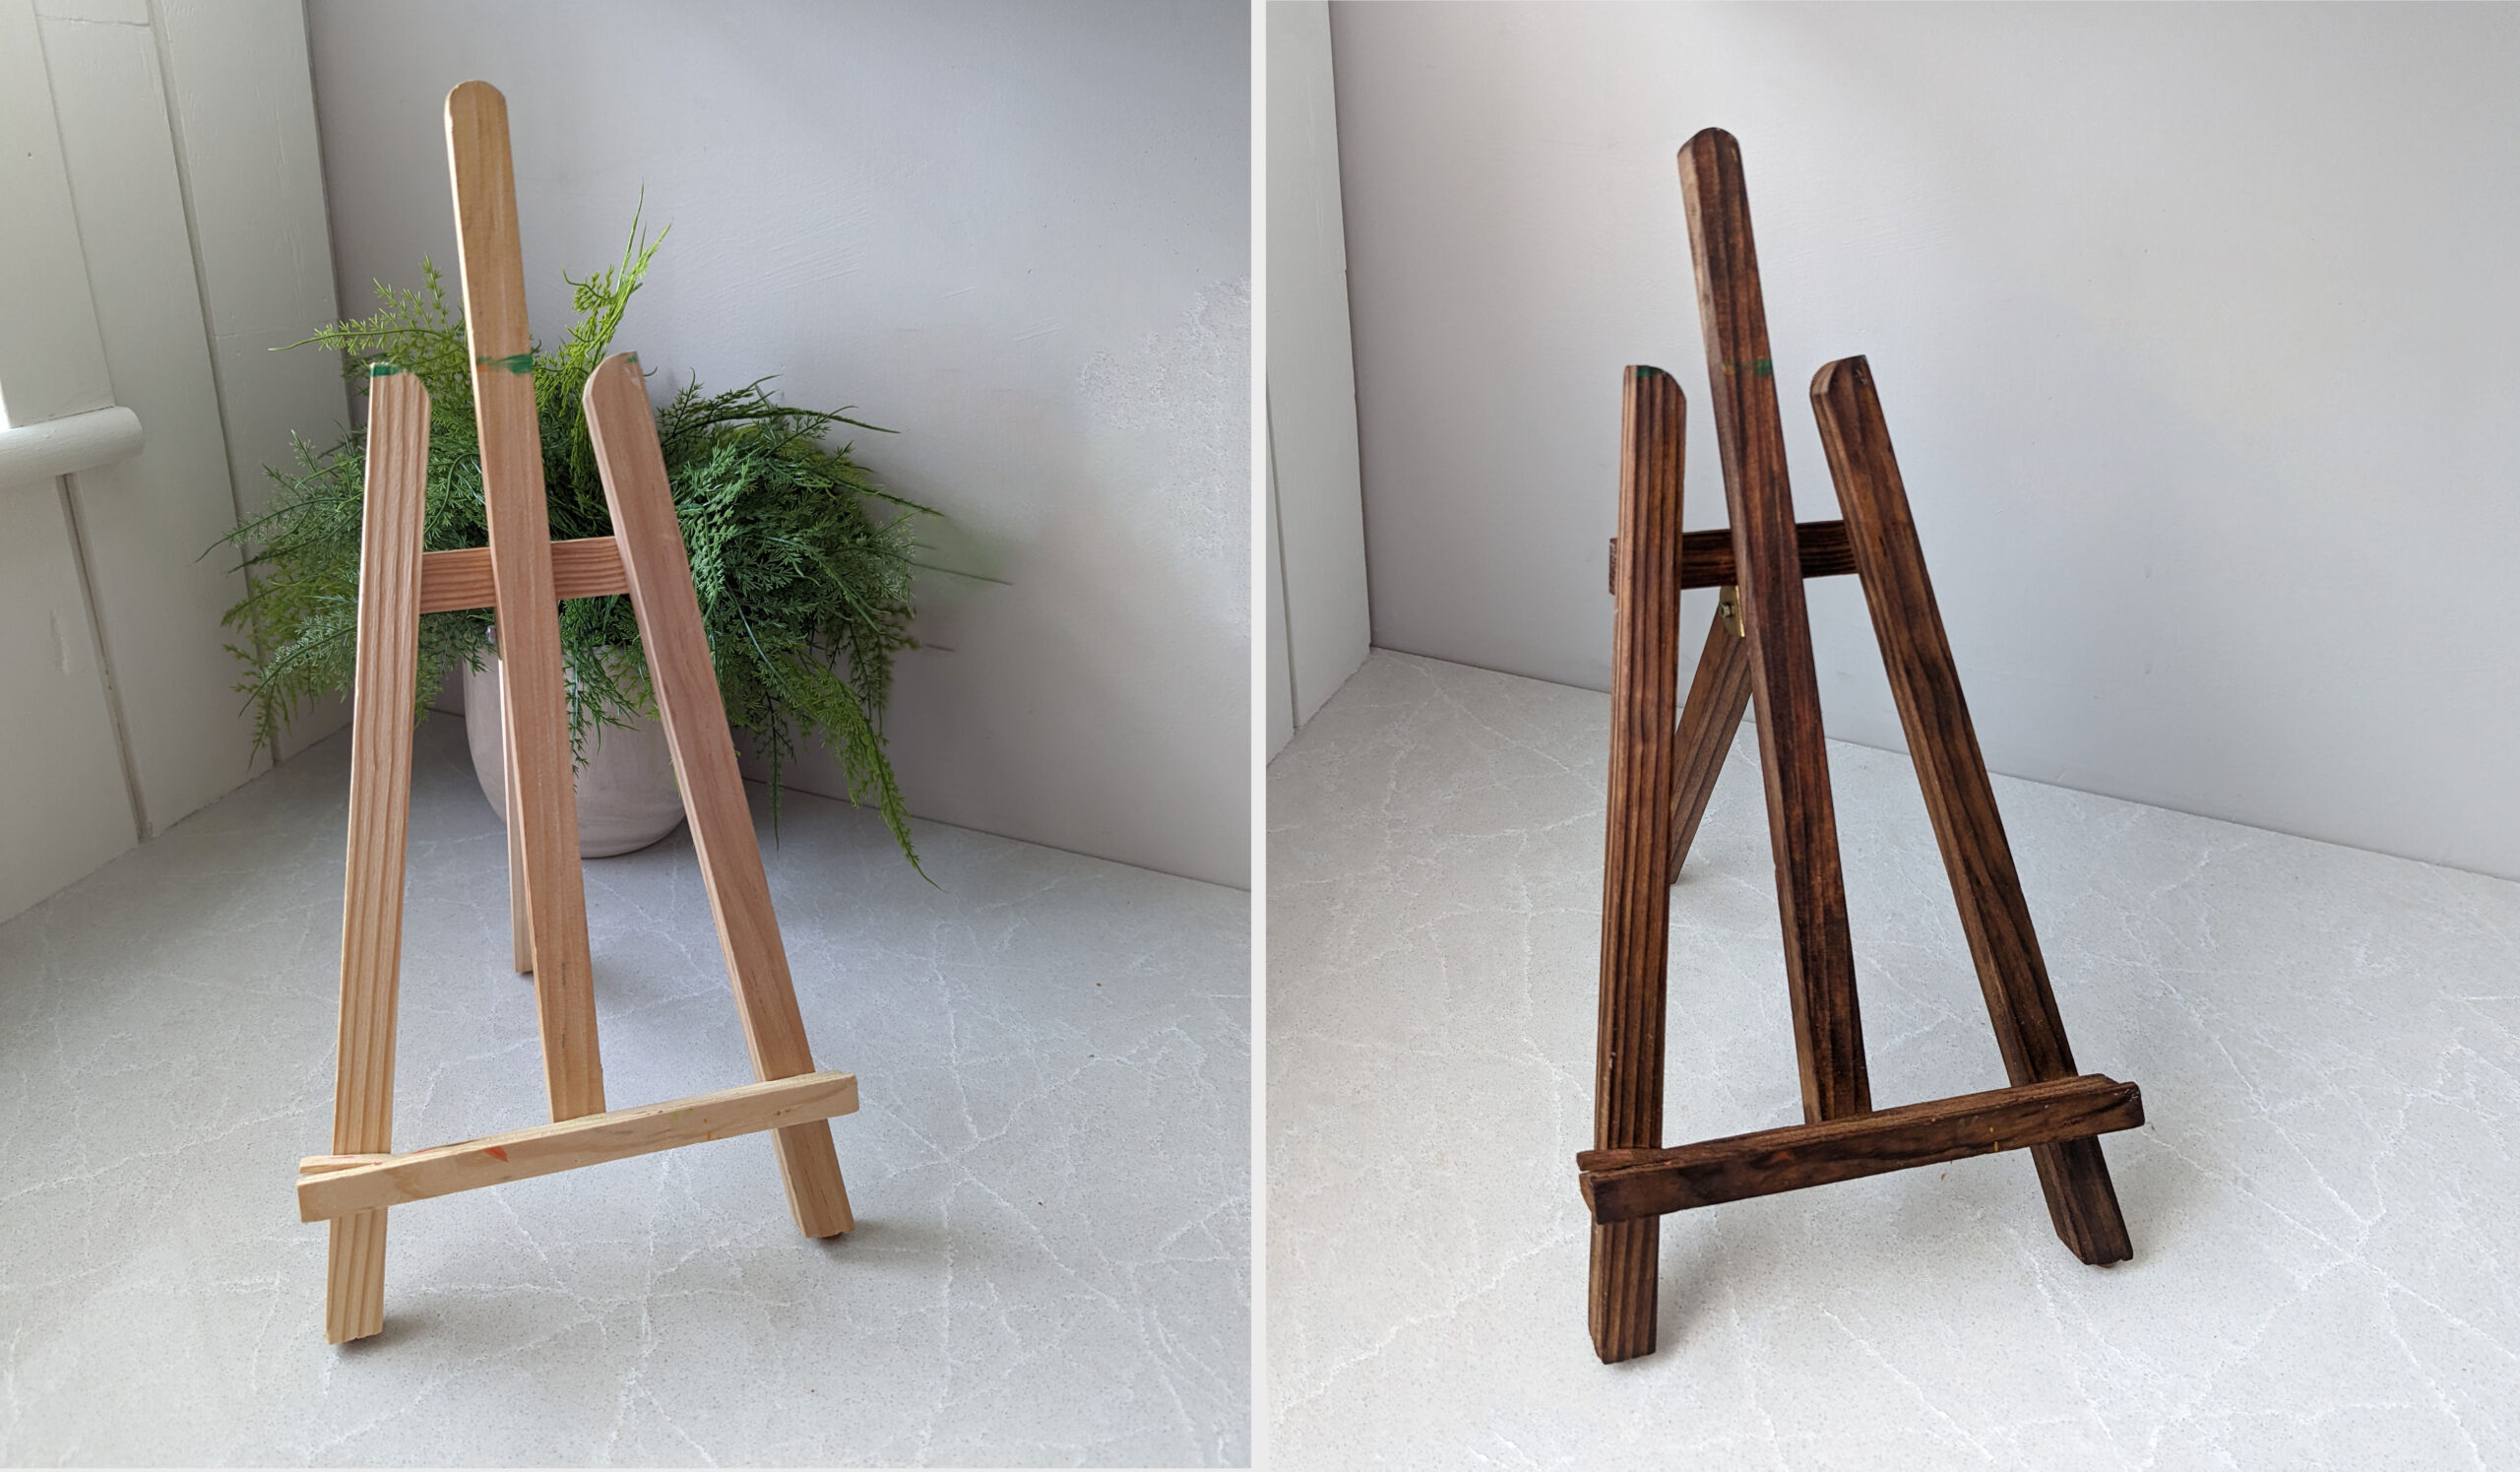
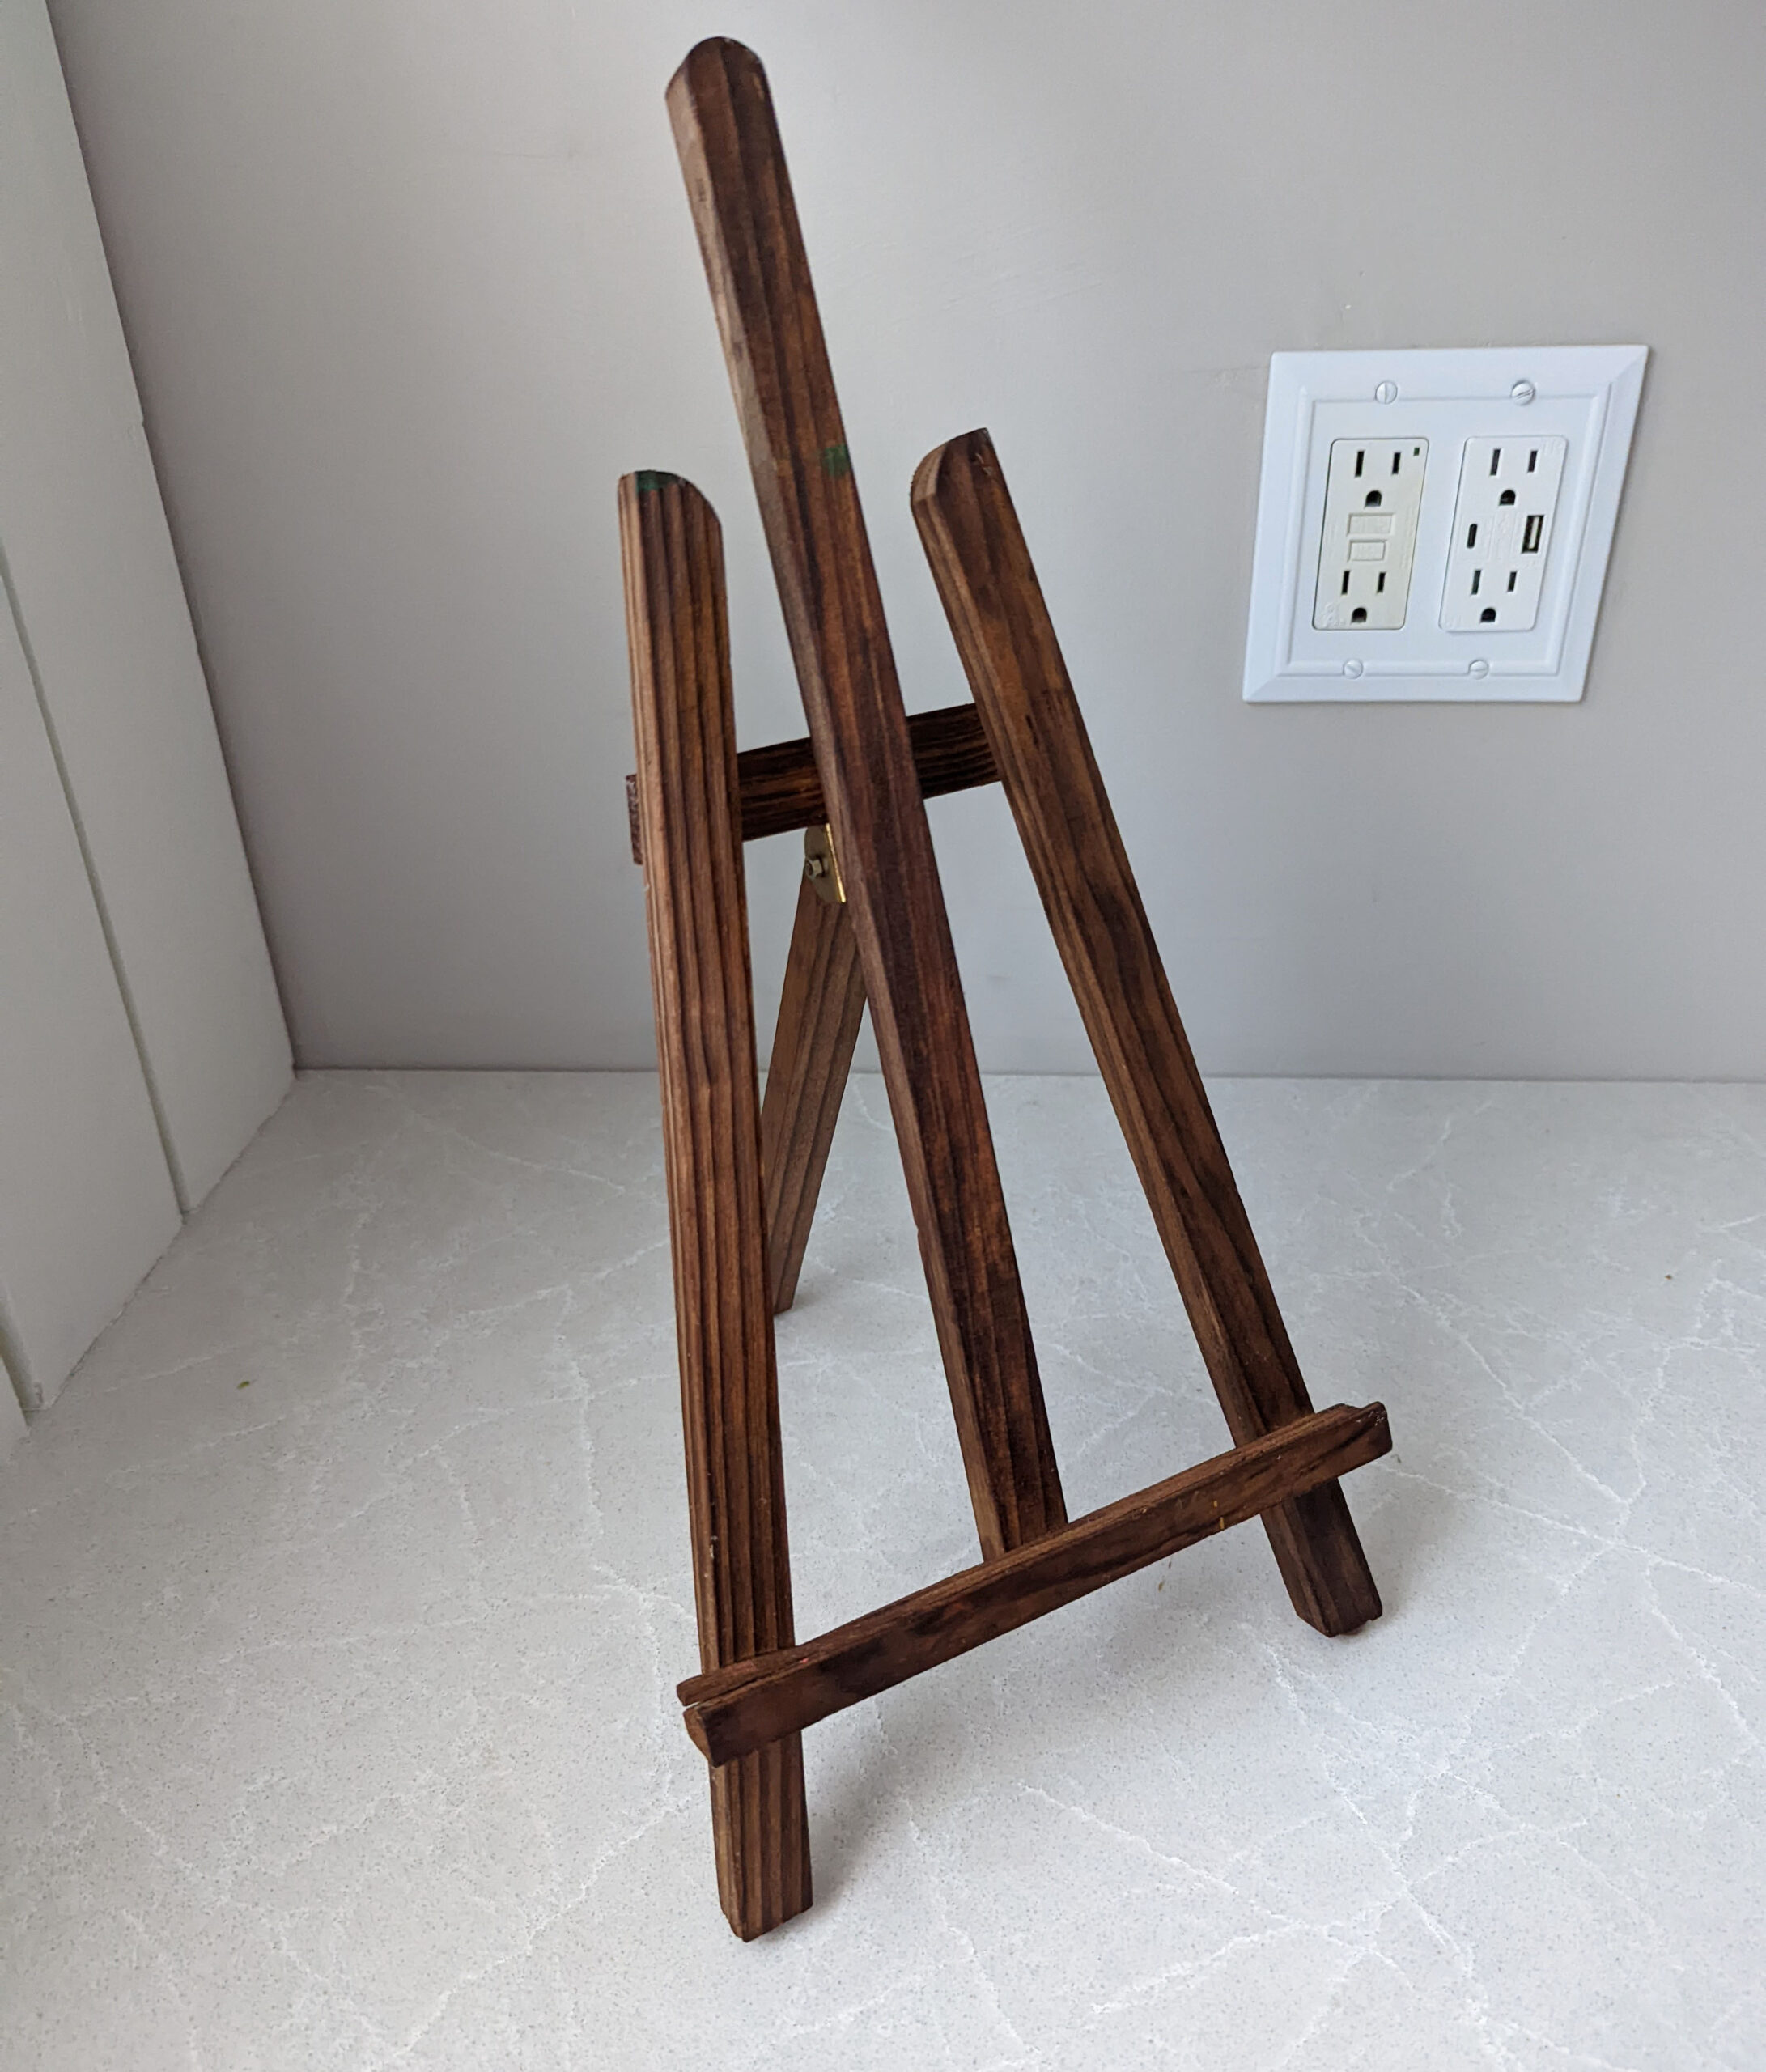
How it started: I needed a wooden tabletop easel
To be honest, I spend more time at the goodwill outlet than I do at the dollar store – and while I frequently find priceless treasures at thrift stores, just as often I find products that are useful but cheaply made. With goodwill outlet prices at around about $.50-$2 USD per pound, the Goodwill Outlet is even cheaper than the dollar store.
So, when I found the tabletop easel I was looking for in “the bins,” I bought it. I knew (well, I suspected) that an old trick I used on my DIY sawhorse table would work to make this cheap and unstained wooden easel into a more attractive dark-stained wood decorative piece.
How to stain wood without wood stain
When you think about staining wood, you probably think about messy oil-based stains, paintbrushes that have to be cleaned with solvent, and the endless frustration of trying to get an even coat of stain with the typical wood stains (which are expensive and make even application a difficult endeavor for amateurs).
Imagine my shock when I learned a few years ago about a method for staining wood that uses the basic chemical reaction between two products that most people have in their home. By creating a chemical reaction suspended in a liquid, this DIY wood stain can be applied to any unsealed wood that you want to look darker.
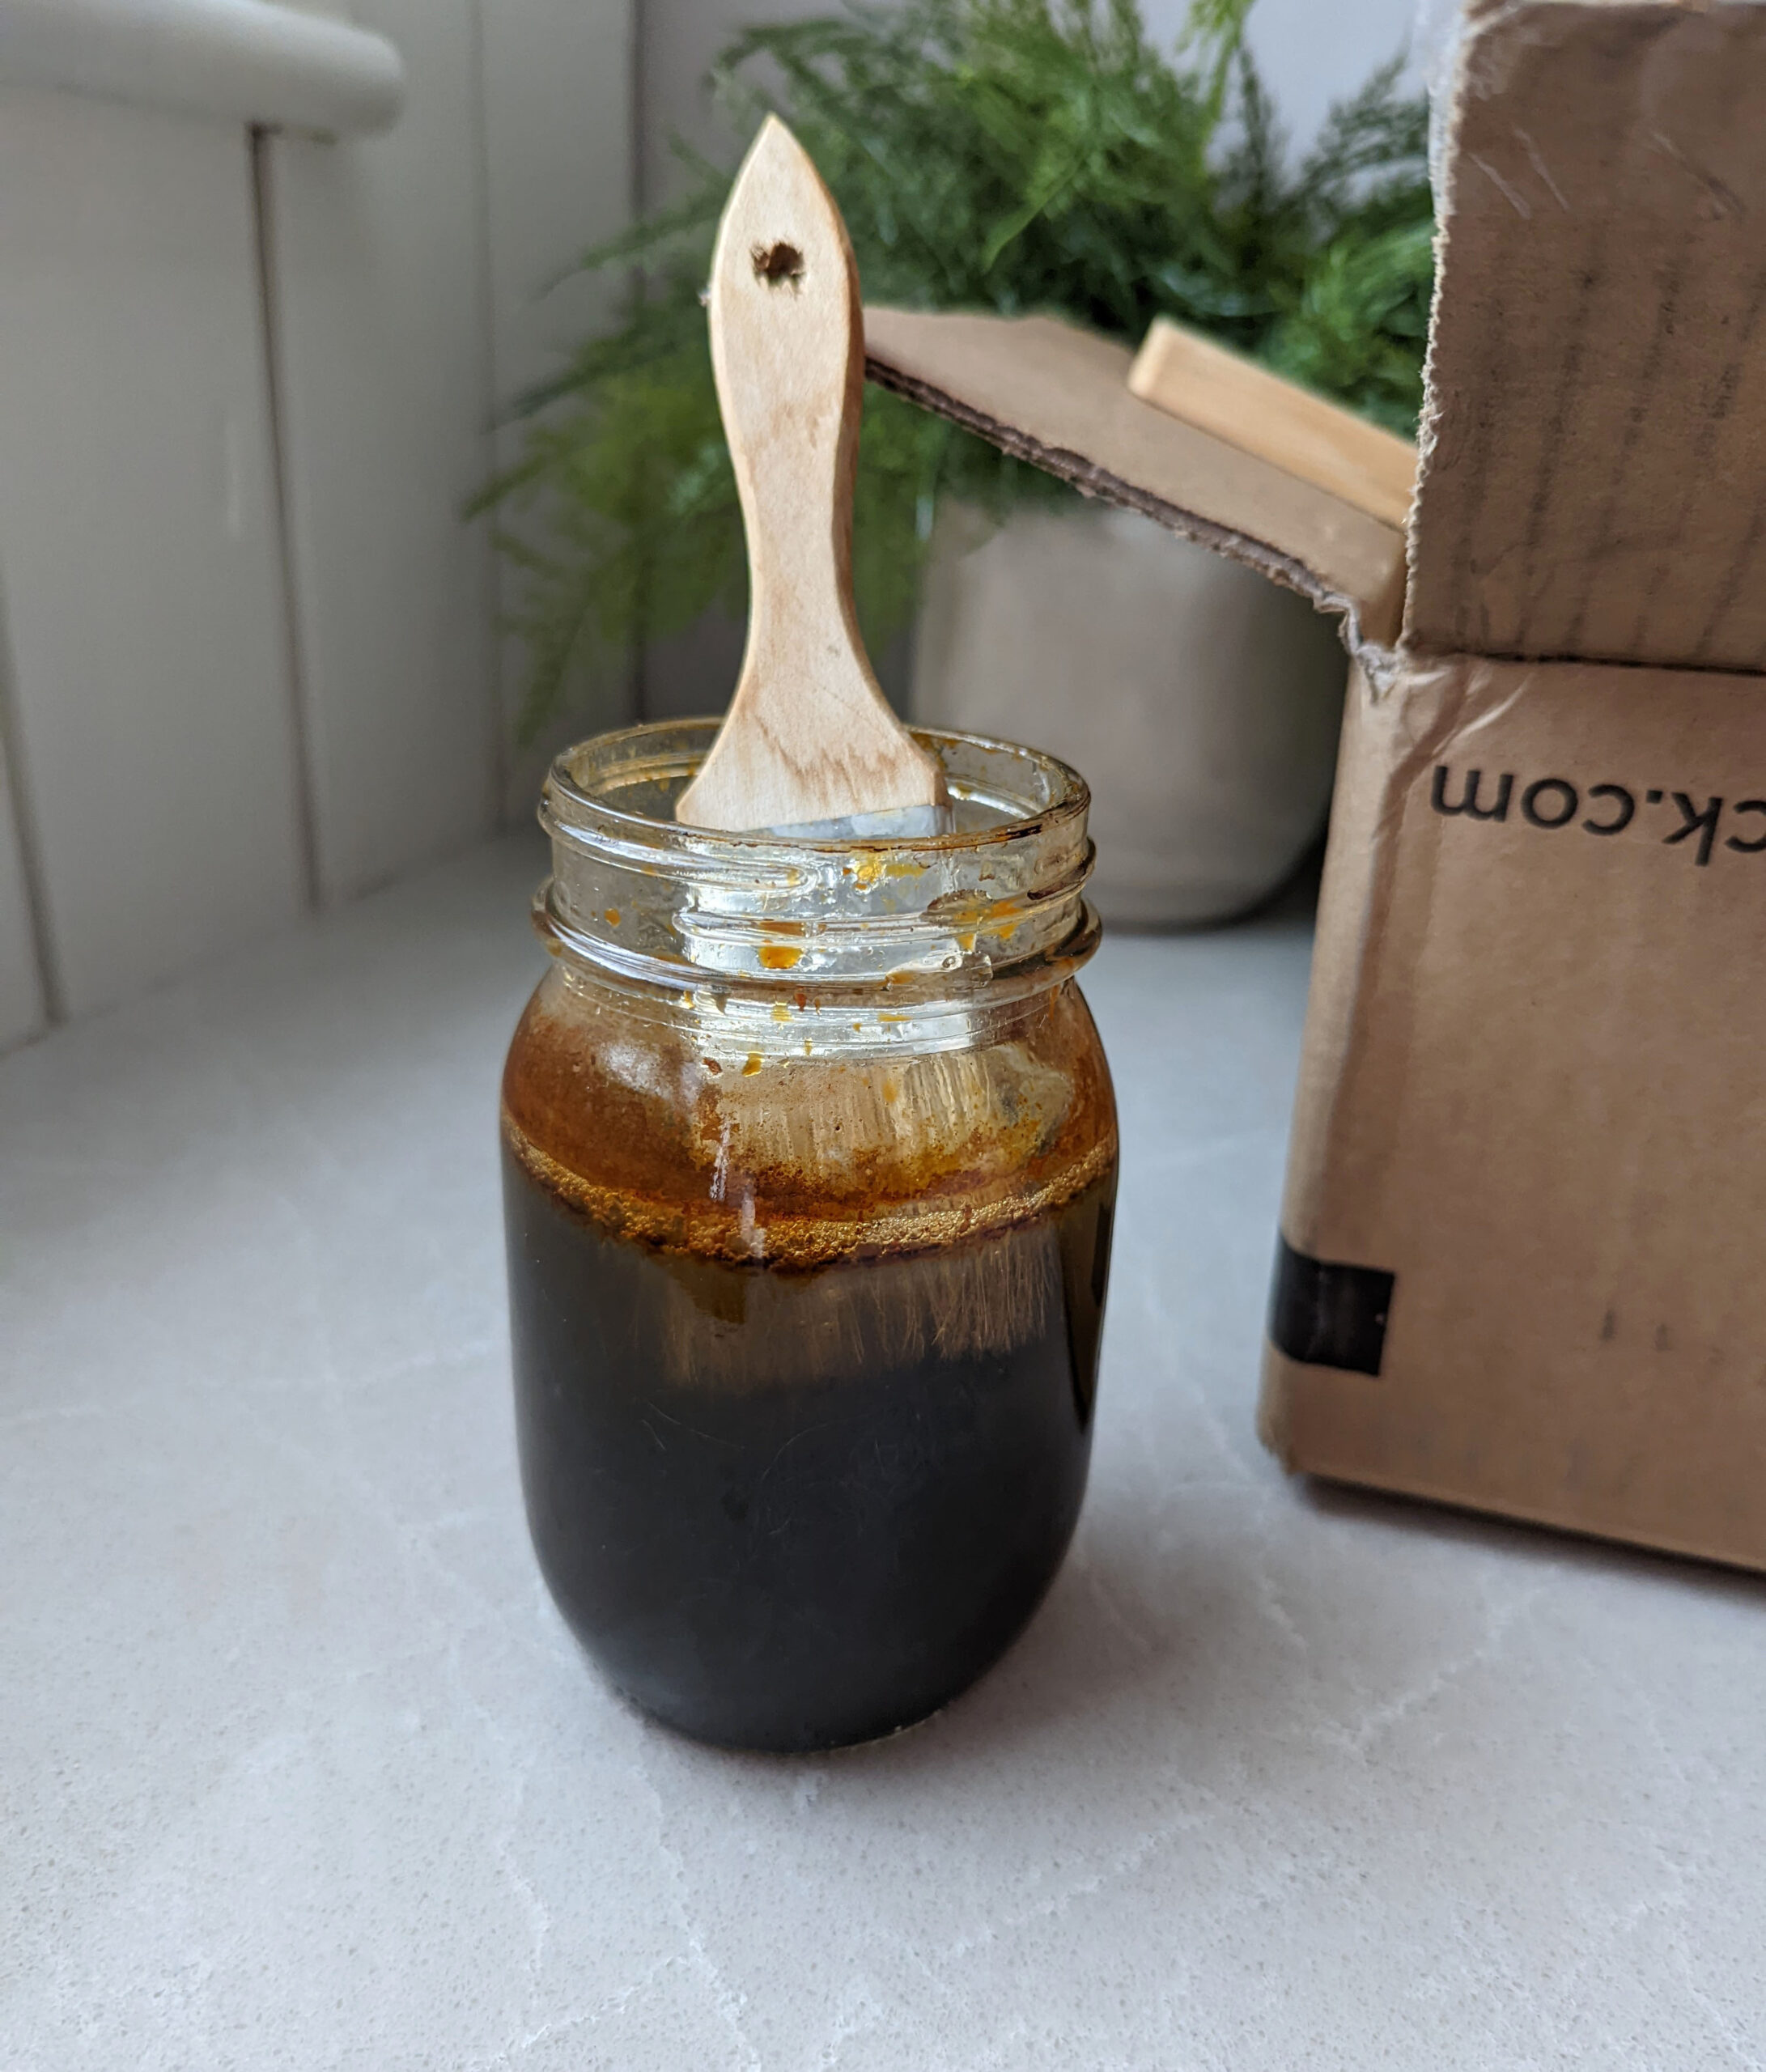
Recipe for DIY Vinegar Wood Stain
Place a steel wool pad into an empty mason jar
Pour vinegar over the steel wool to cover.
(optional) add 3 Earl Grey Teabags to the jar
Seal mason jar and let sit undisturbed for 2 weeks
Shake jar before using to distribute sediment.
For Faster DIY Stain
For faster results, soak and rinse steel wool with dish soap before covering it with vinegar, and shake the jar every 12 hours.
Adding Earl Grey Tea to Homemade Wood Stain
For my sawhorse tables, I used an additional ingredient suggested by DIY forums: Earl Grey tea bags. Something about Earl Grey tea bags – likely the bergamot and tea itself – tends to give this wood stain a gray/black tone rather than just brown.
How Long till Homemade Stain Can be Used?
After you’ve added the ingredients to your mason jar, seal the jar and let it sit undisturbed for a minimum of three days. I keep a jar mixed up in my basement year-round just in case I need to pop some stain on an unfinished piece of wood.
Using Homemade Wood Stain
To use your homemade wood stain, shake the jar to re-suspend the sediment that has settled at the bottom of the jar, open the seal, and use a paintbrush to apply to the surface of the wood.
When you use this vinegar-based homemade wood stain, you may at first think it’s not working. When first painting this homemade wood stain onto unfinished wood, the wood may only look just a bit wet – not at all like the deep, rich stain wood stain desired.
Never fear, and have a little patience. This homemade wood stain works through a chemical reaction that doesn’t happen instantly.
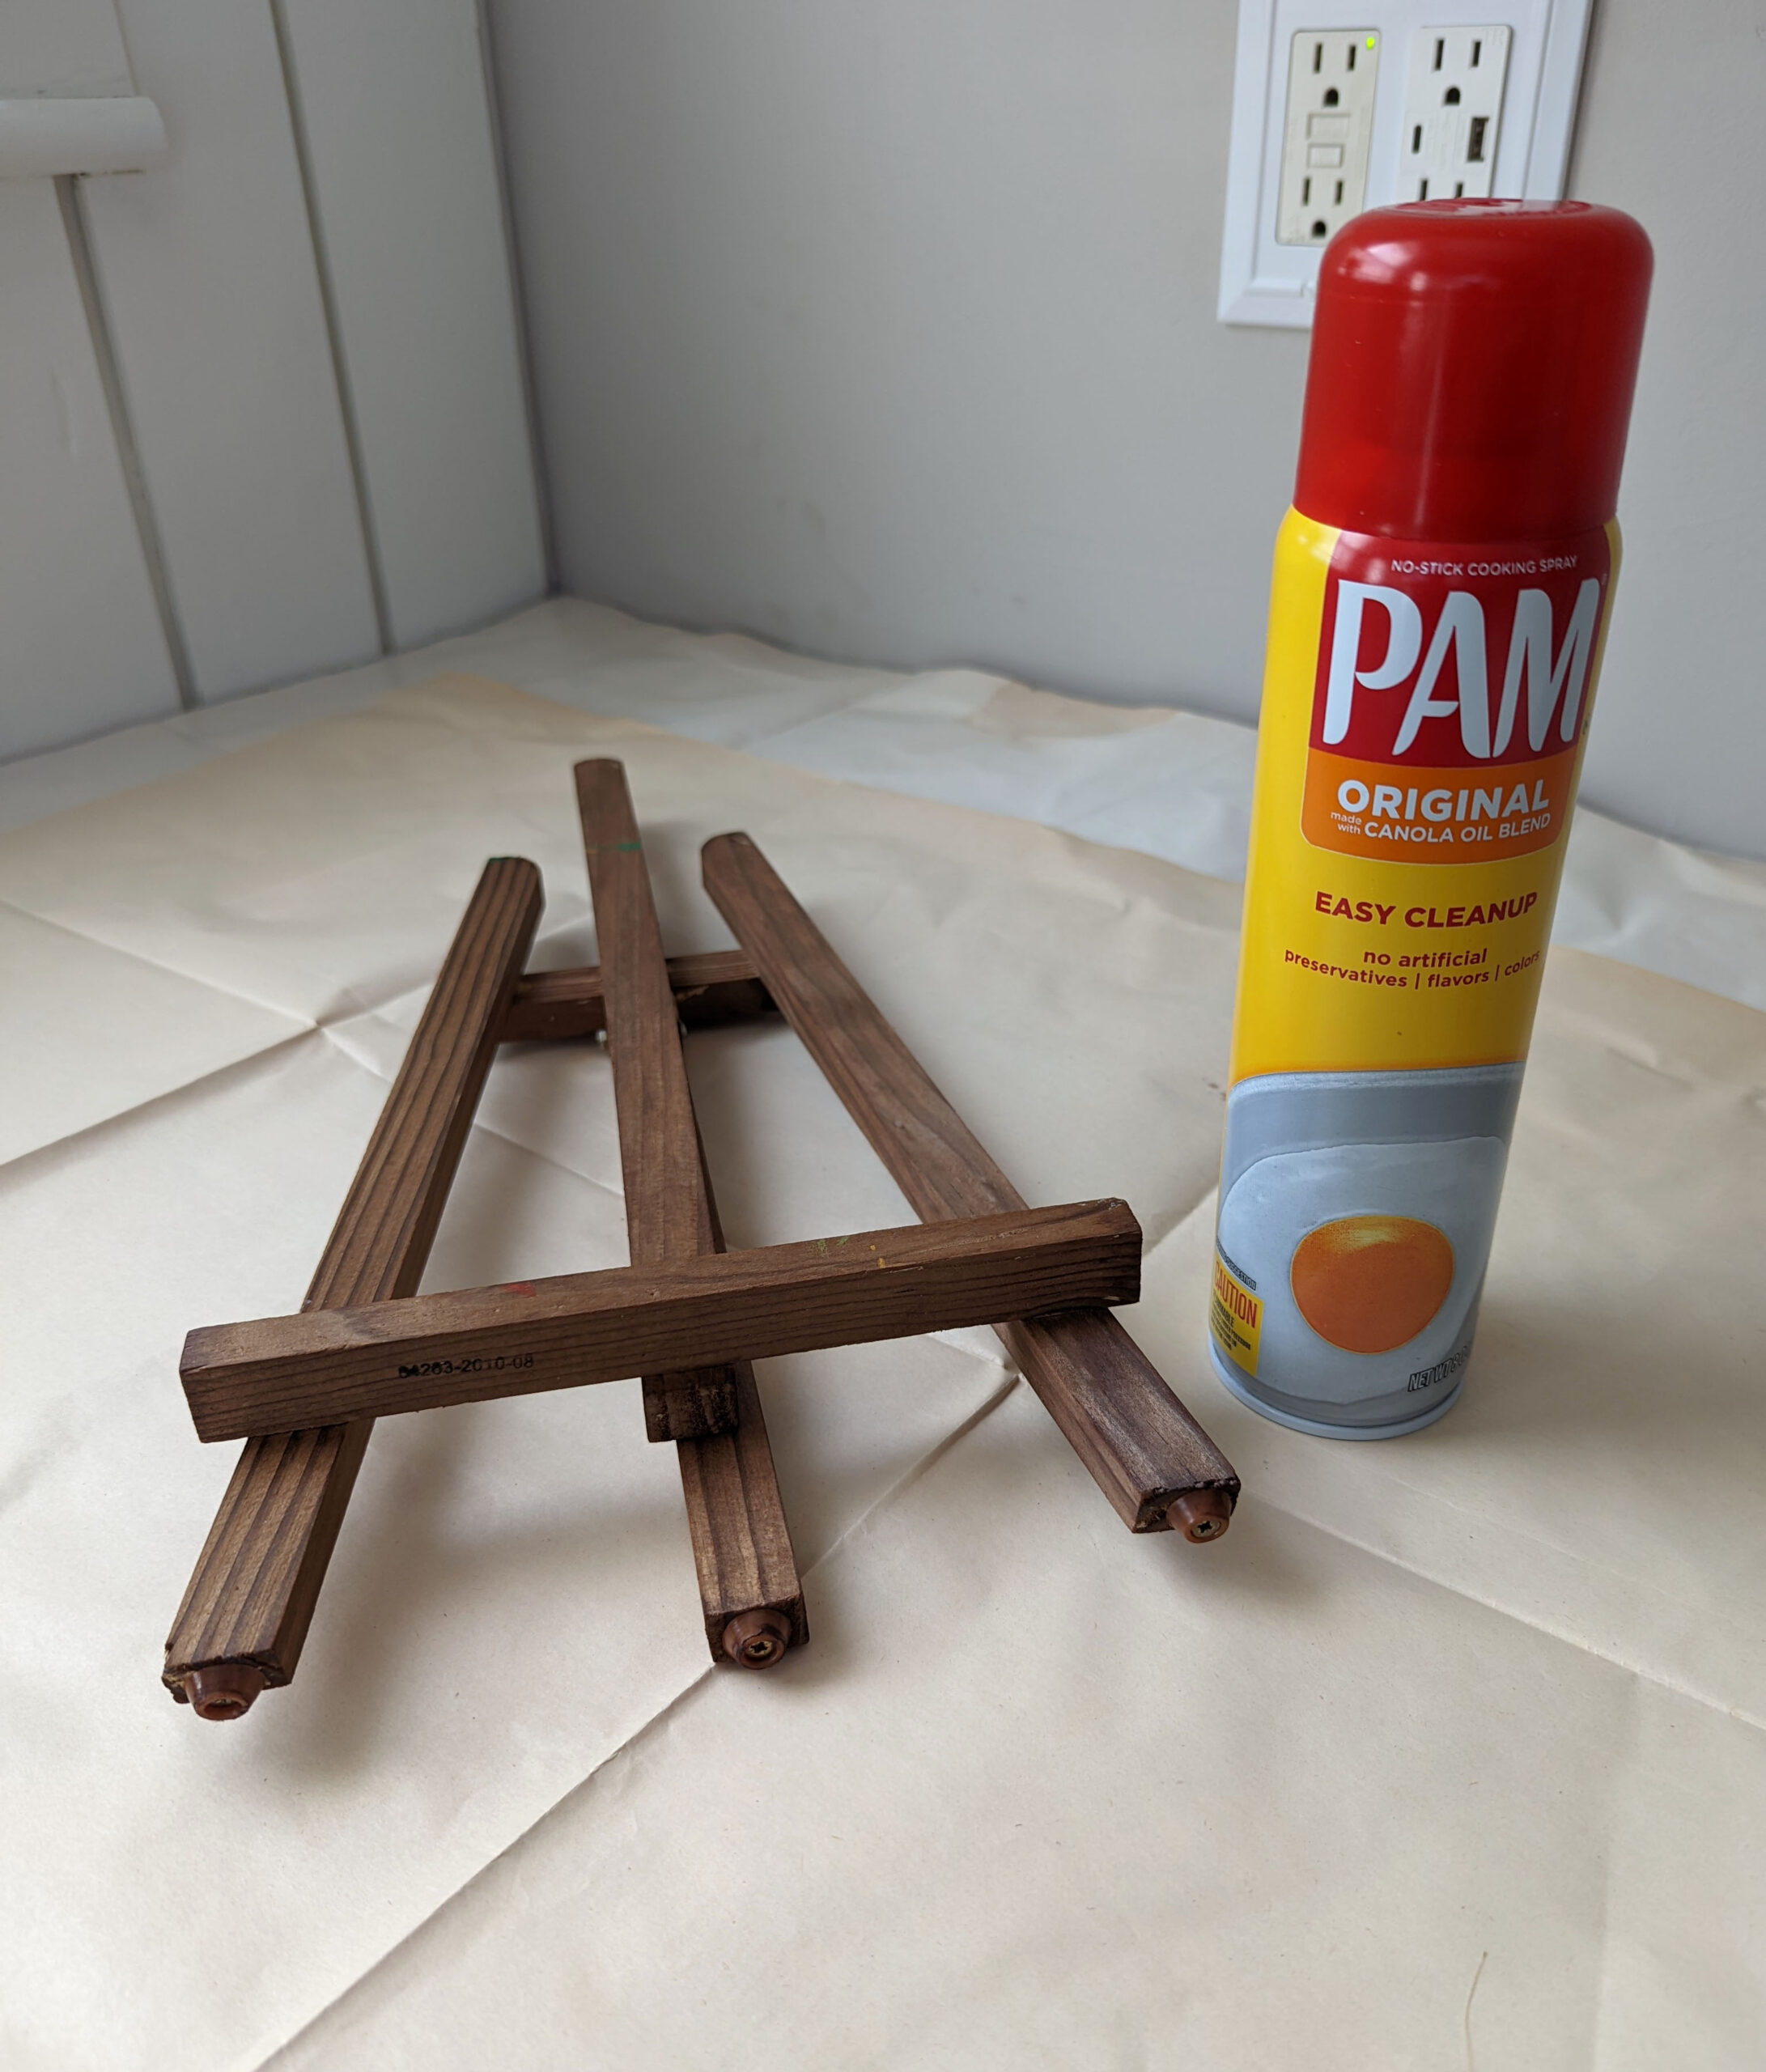
By the time your wood dries with the homemade wood stain on it, the wood will have darkened to a rich deep brown. Even cheap dollar store wood darkens to an almost walnut shade using this method.
If the results aren’t quite what you hoped for, you can reapply a second coat or leave your jar of stain to sit for a week or two to produce more of the iron sediment needed for a dramatic effect.
How to Even the finish of Homemade Wood Stain
While oil-based commercial wood stains leave a beautiful sheen on the surface of treated wood, this vinegar-based homemade wood stain dries to a dull grayish finish. For some applications, this may be sufficient to call the project finished, but I like to finish my homemade stained wood and bring out the grain by applying a layer of oil.
Just like in my homemade cutting board tutorial, I use oil to restore moisture to the wood’s surface and leave a soft sheen that looks like rich, stained wood.
It’s important not to use just any oil you happen to have around the house but instead opt for oils that are less likely to go rancid over time – like mineral oil or grapeseed oil.
How vinegar based wood stain works:
Vinegar-based wood stain is actually kickstarting a chemical process called Ebonization. Ebonization occurs when iron acetate (that’s the particles suspended in the solution after steel wool and vinegar have had time to react) comes in contact with the tannins naturally present in wood.
Applied liberally, in multiple coats, or in a heavy concentration to the right kind of wood, ebonization can turn unstained wood so dark it looks almost black! Iron Acetate is not food safe (click here for the material data safety sheet) and in some concentrations can cause skin irritation, so do not use it on items that will come in contact with food, and consider using gloves during application.
How to Make Dollar Store Wood Look Rustic
Wood products from the dollar store, in order to keep their price at or around the dollar, are virtually always unfinished. The raw, sometimes splintery, wood is used as-is by most customers, but if you’re planning to use dollar store wood items for a rustic wedding or modern farmhouse home decor in a cottage, you can use a vinegar-based homemade wood stain to make the dollar store wood look aged, rustic, or even reclaimed.
To age and stain dollar store wood, simply prepare the vinegar-based wood stain as described above, and let sit for a minimum of 2 to 3 days but ideally for several weeks (if you let this homemade wood stain set for long enough, the steel wool pad actually dissolves completely in the vinegar solution!)
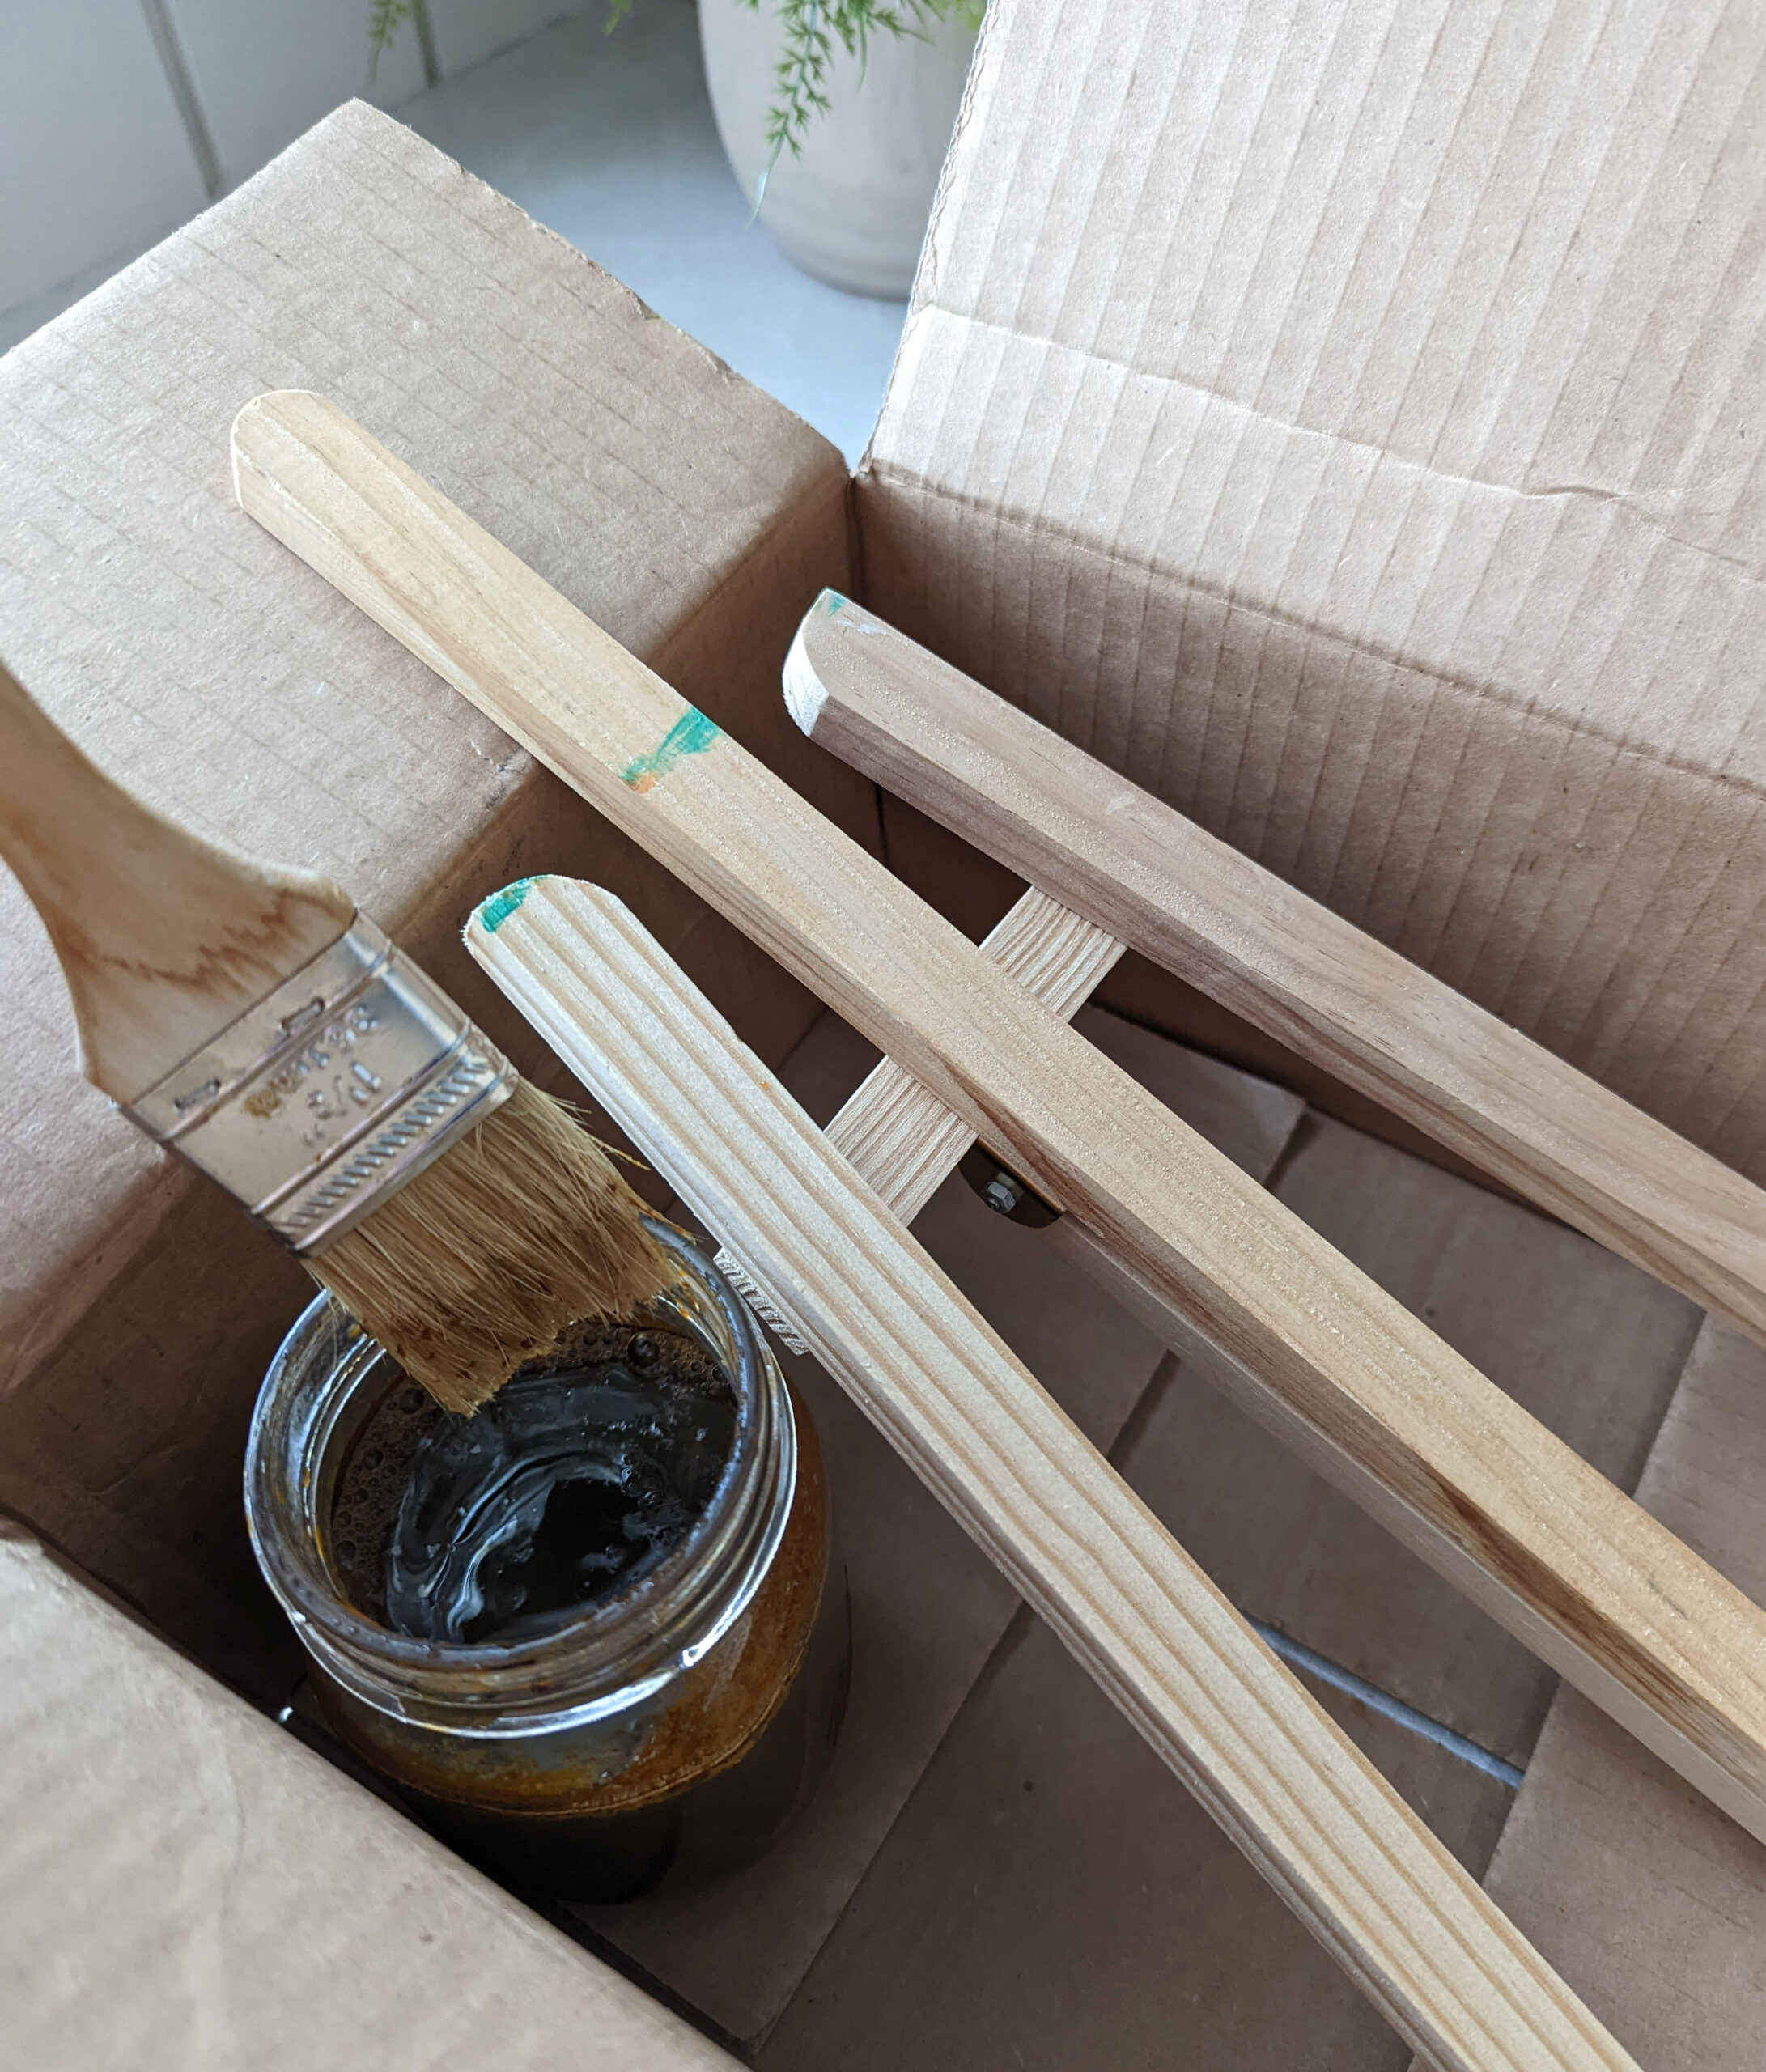
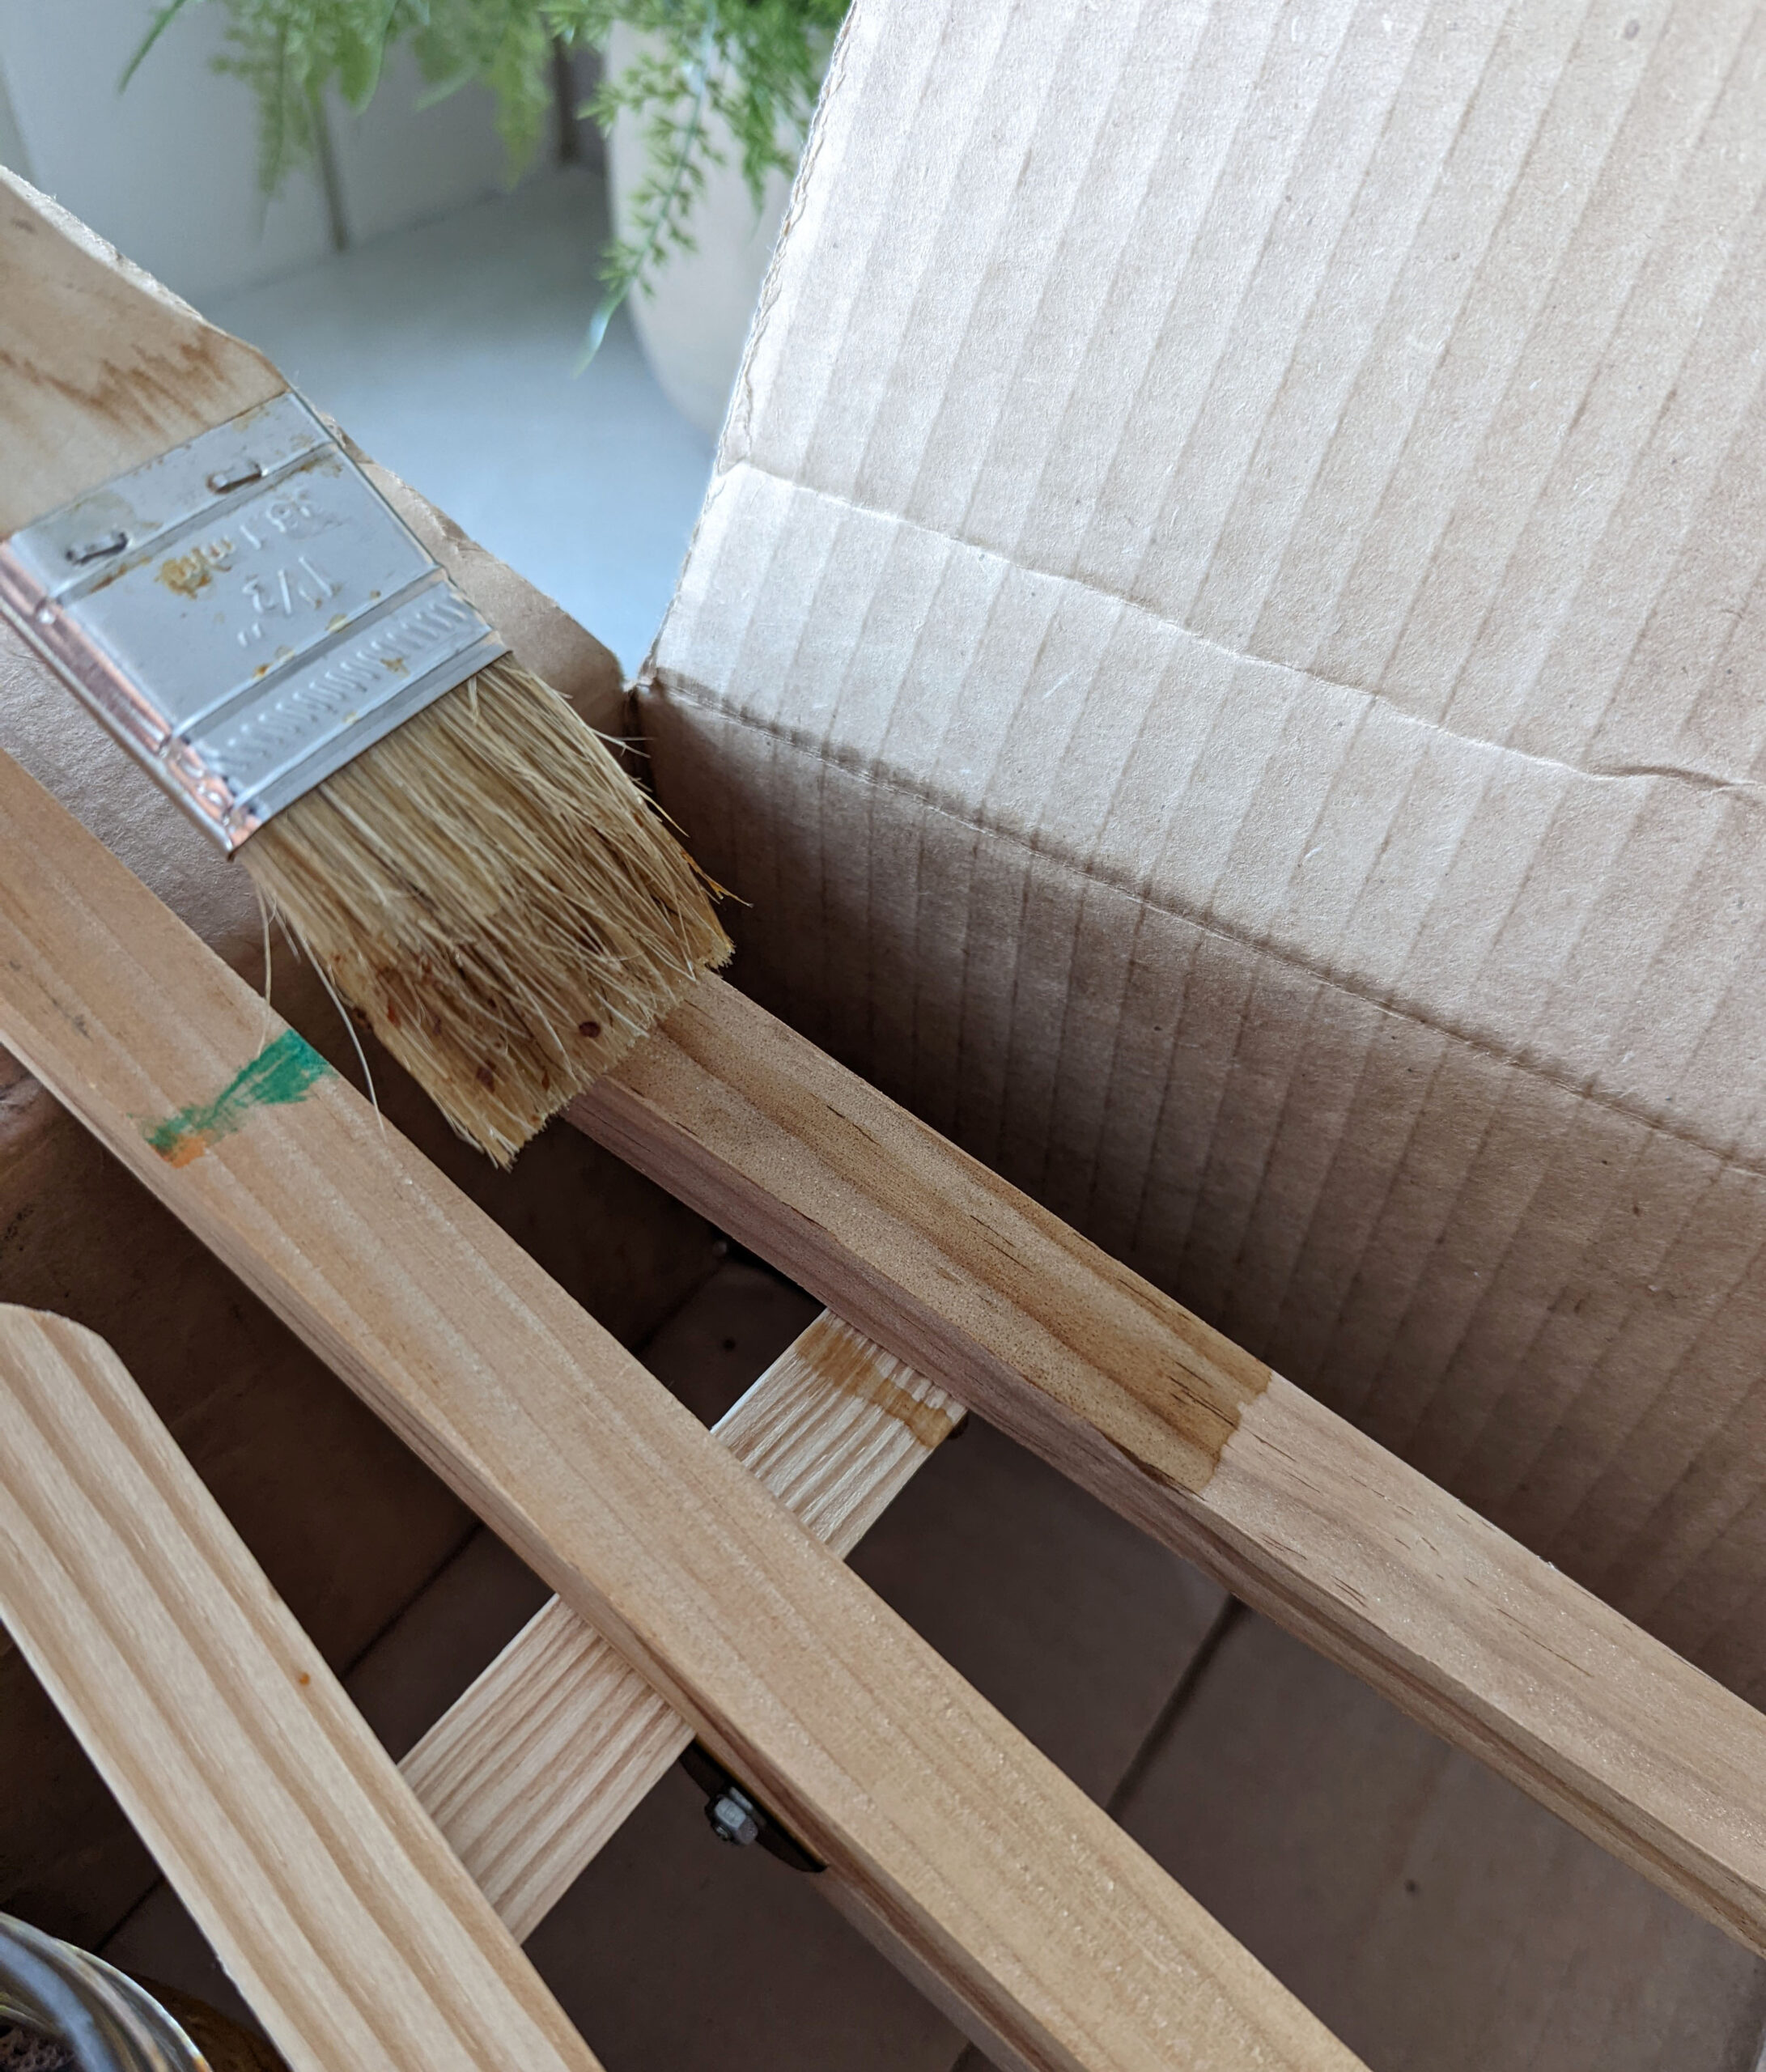
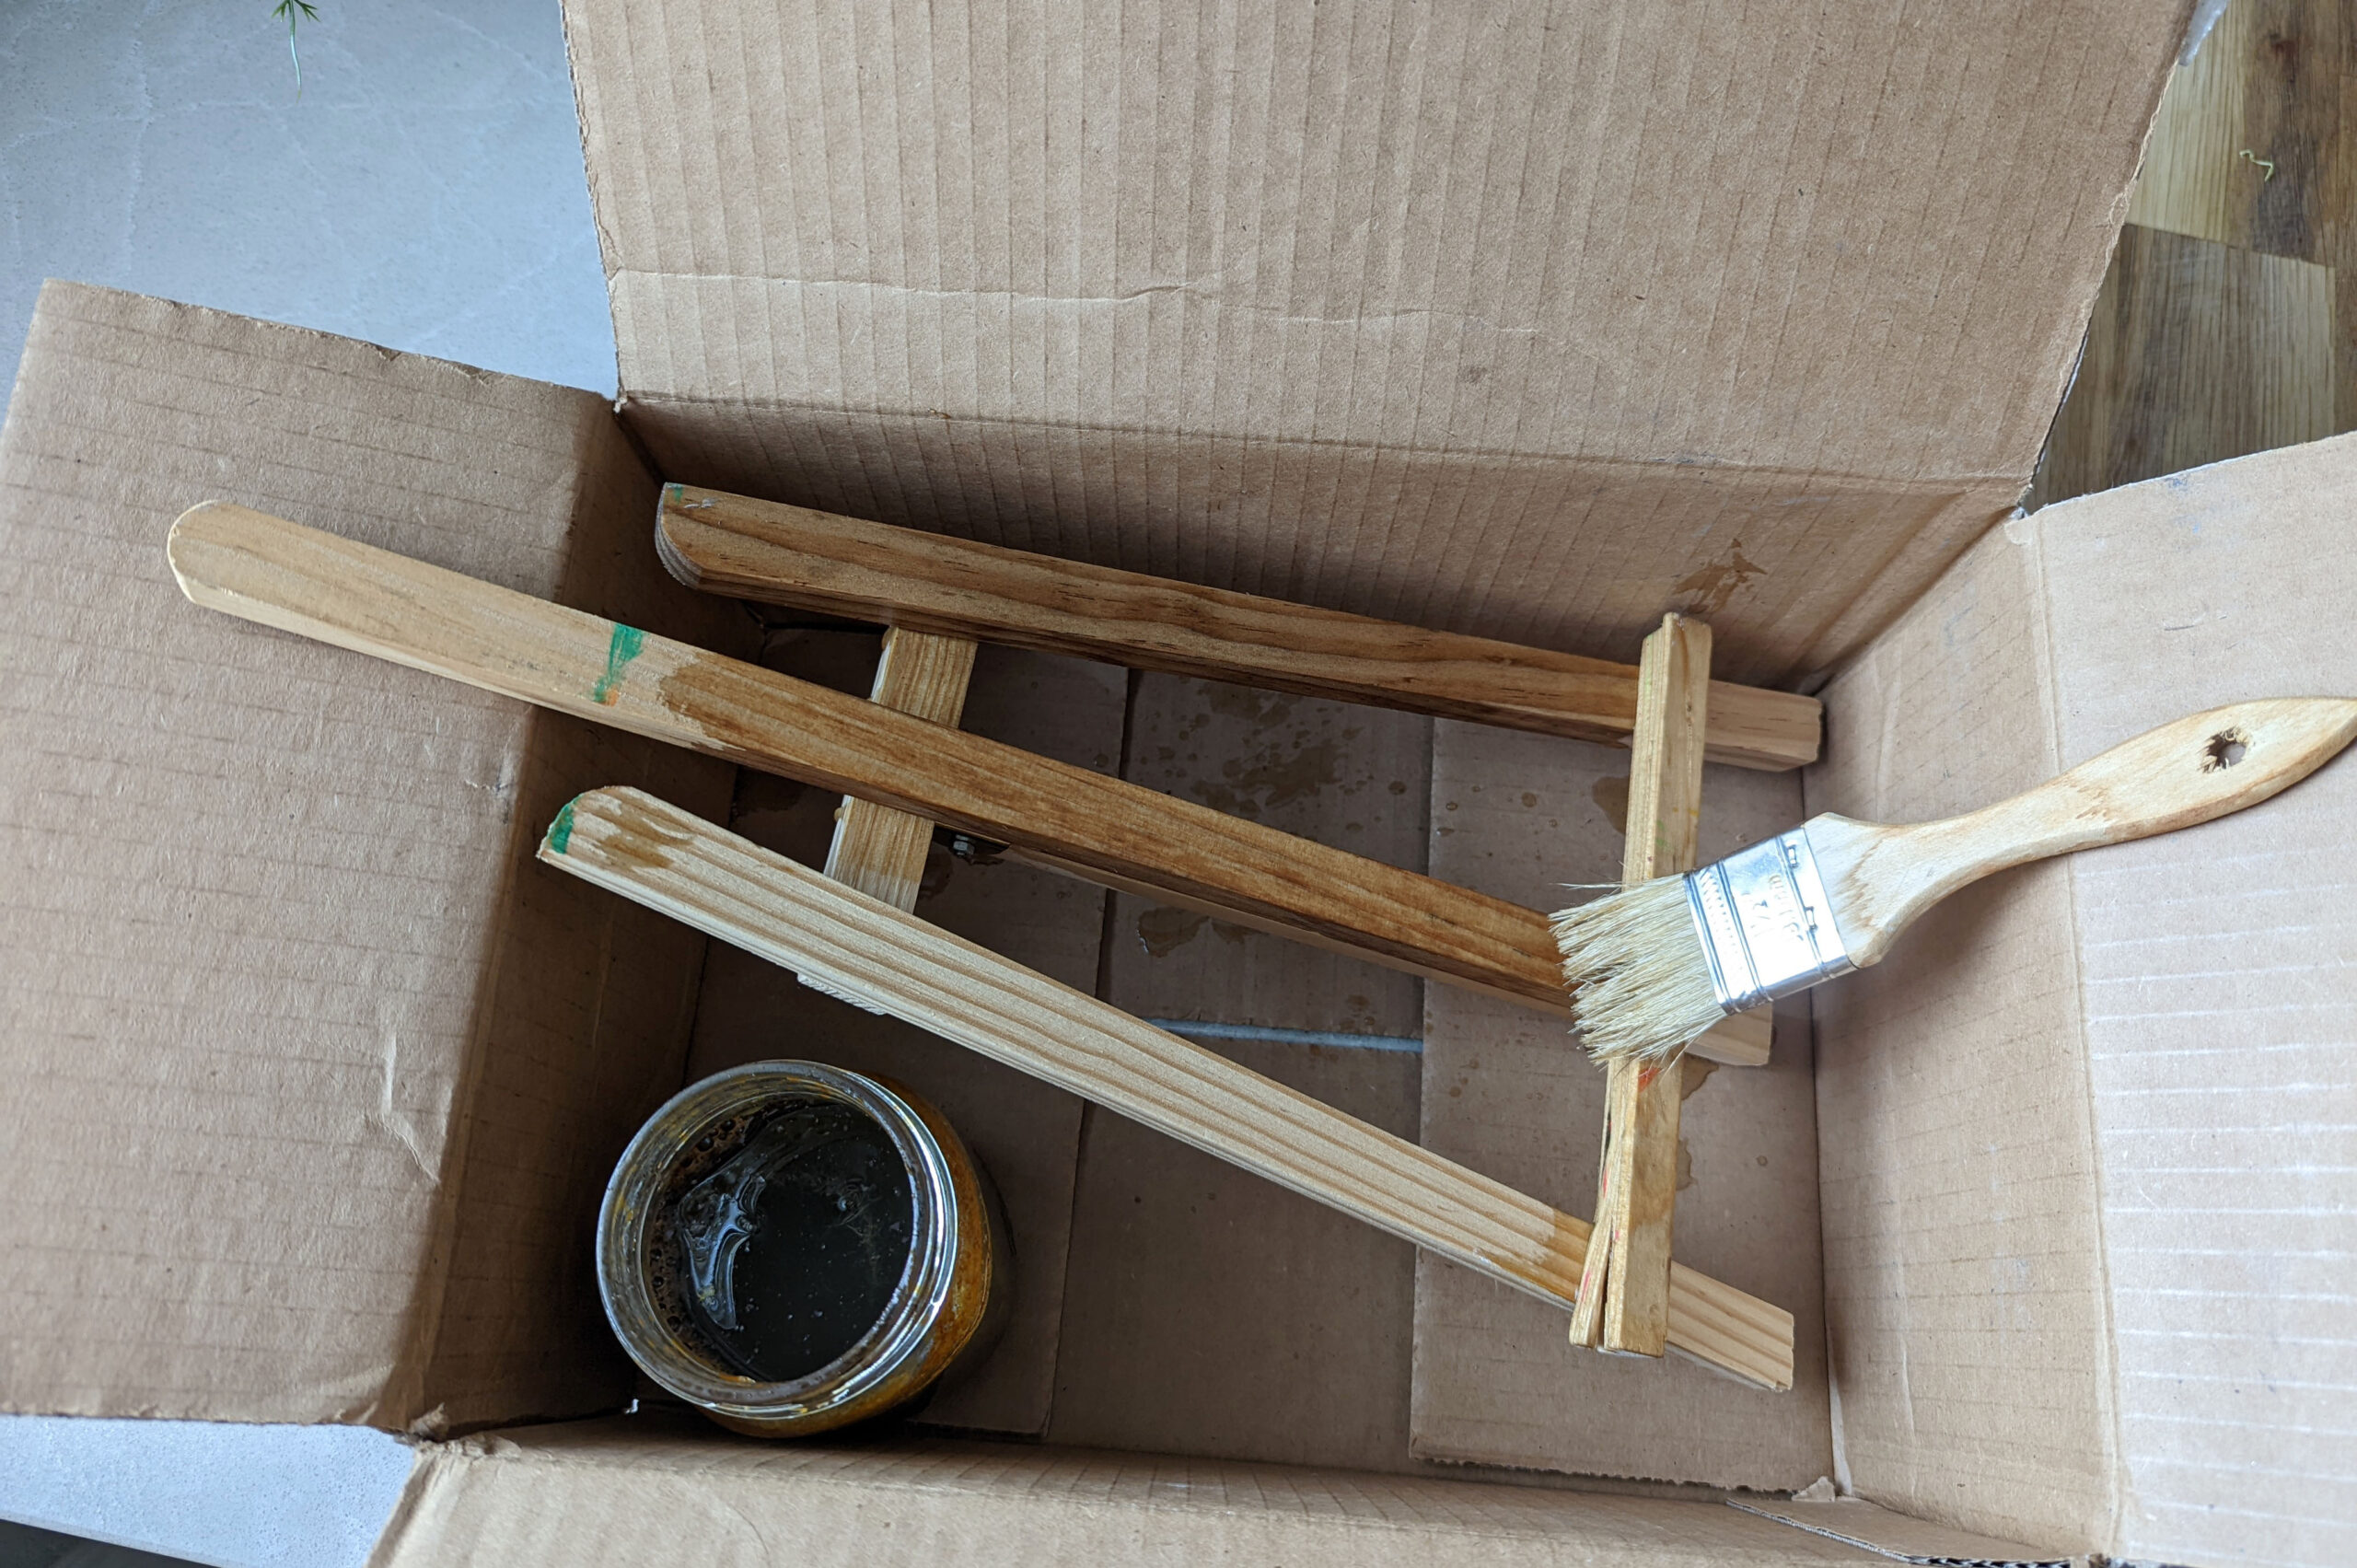
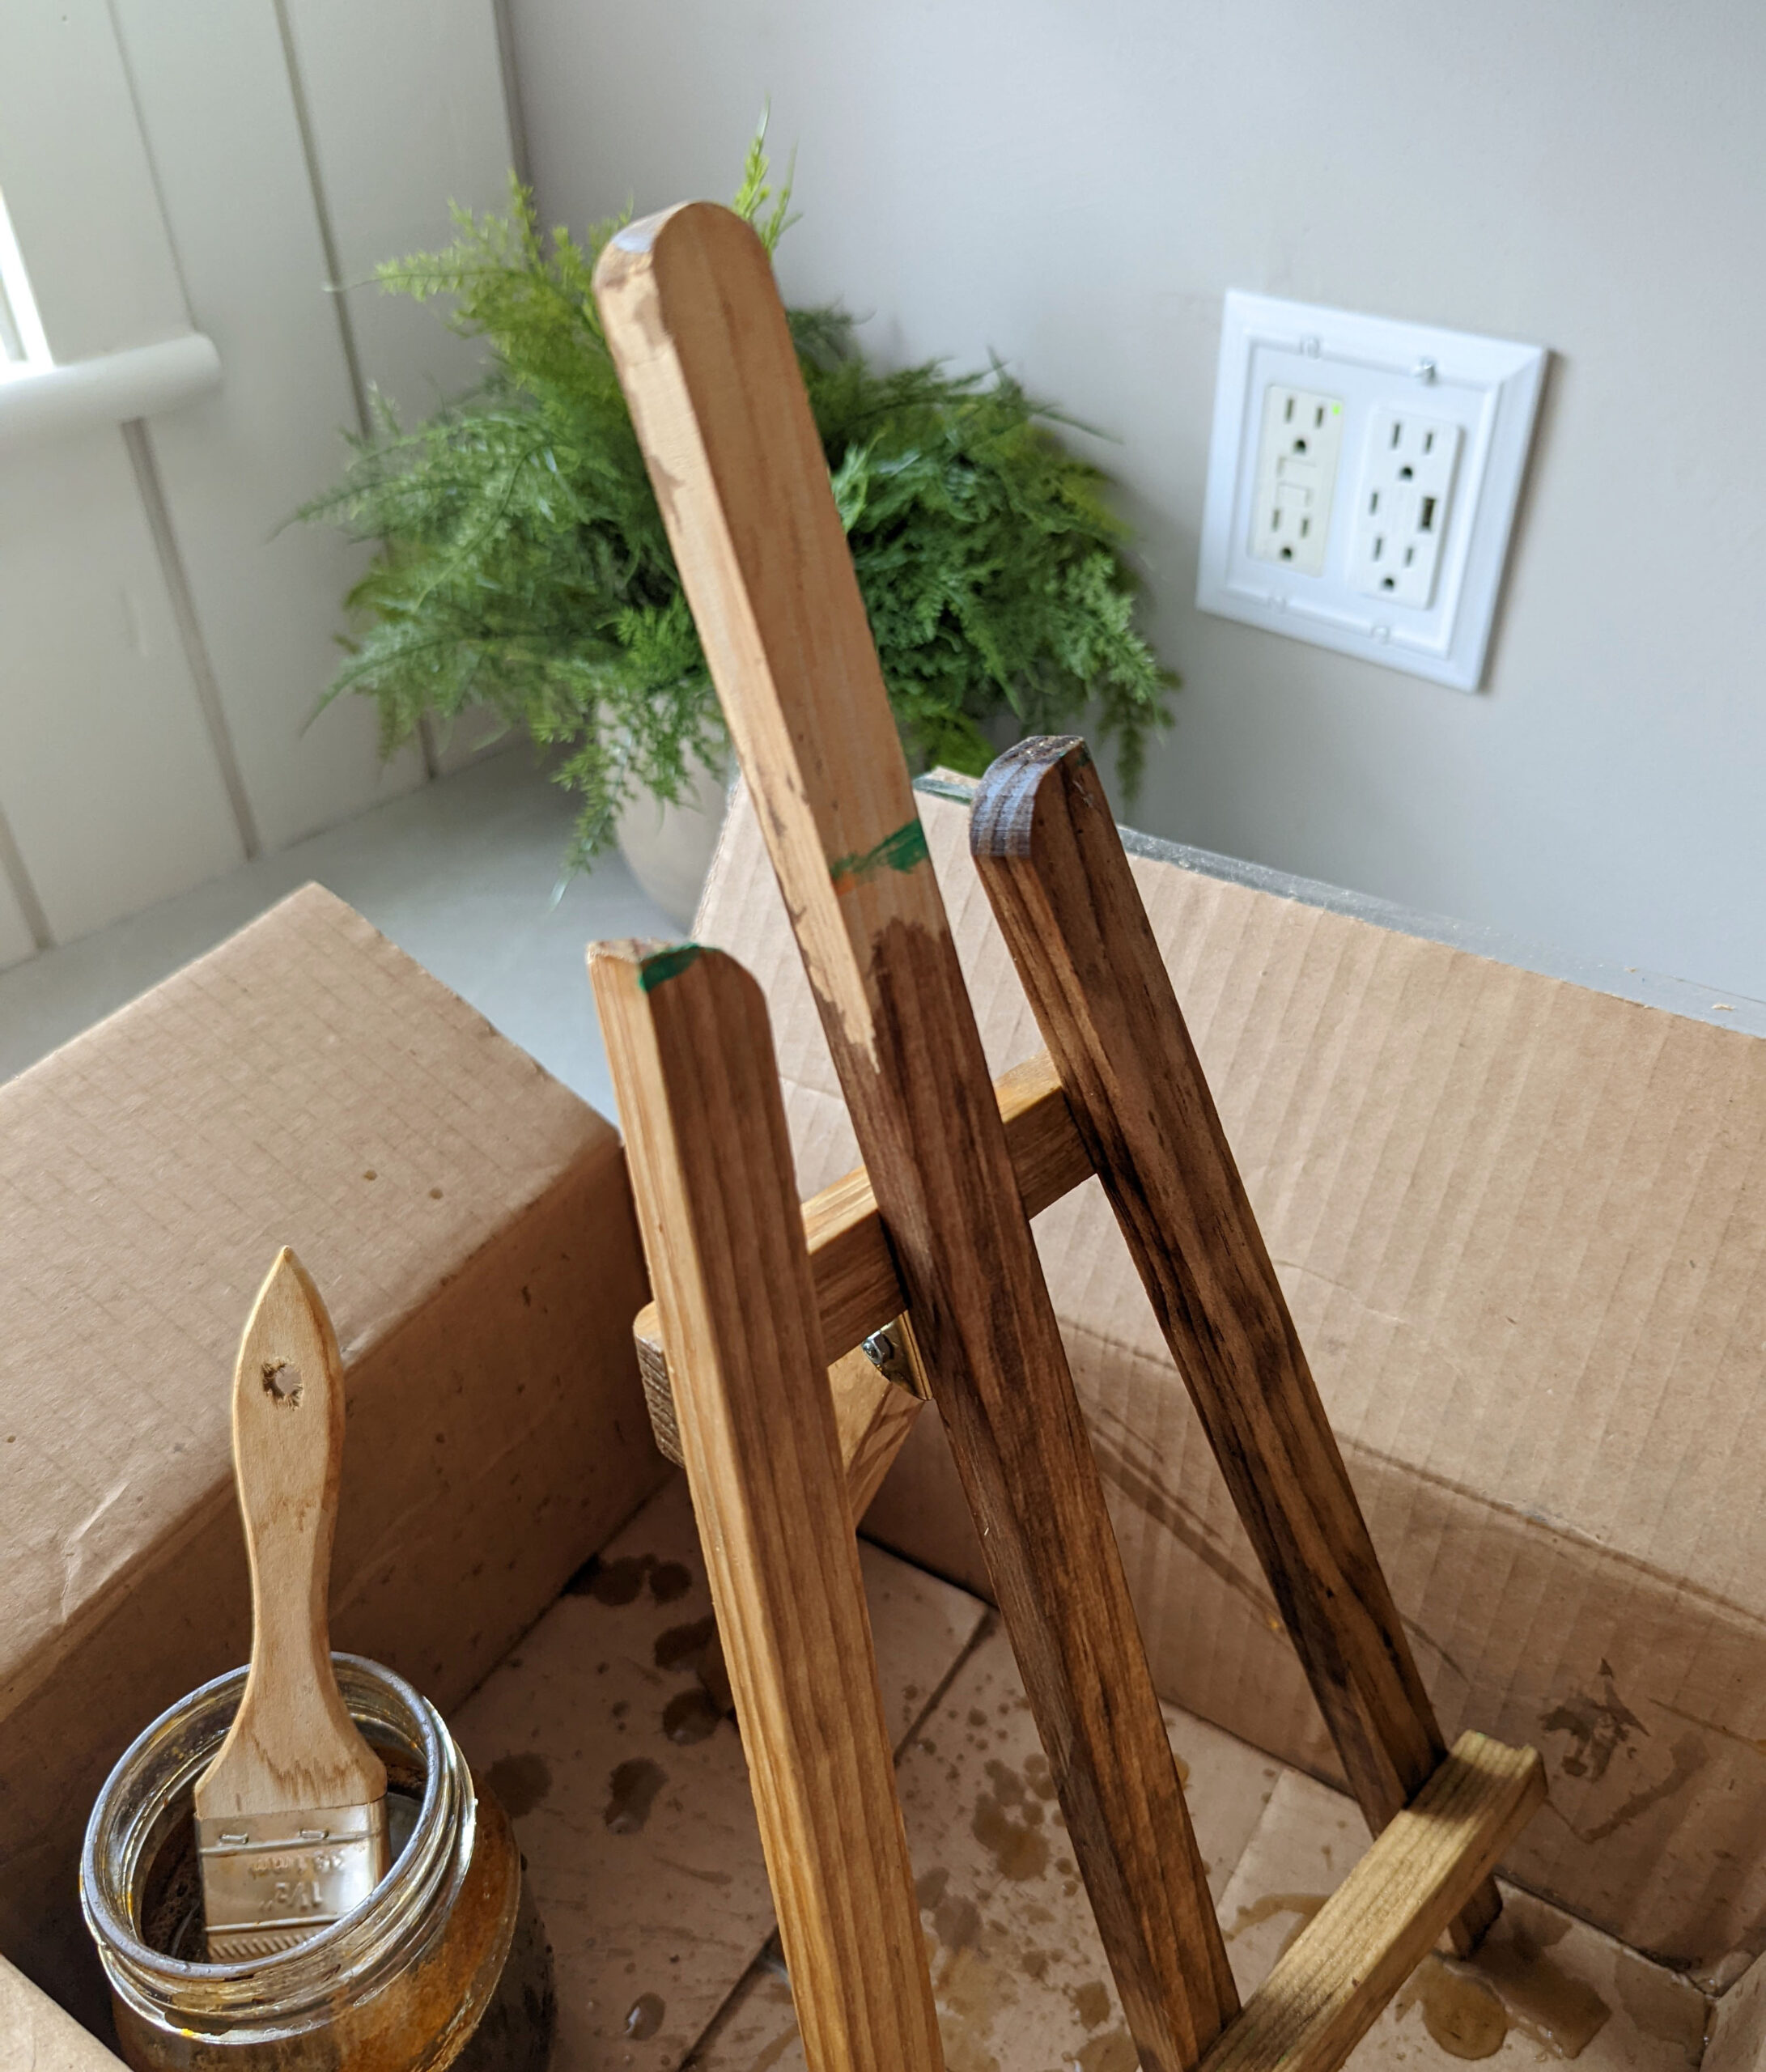
Use a paintbrush to apply the homemade wood stain to every single surface of the wood. For my easel, that meant the top, bottom, front, back, and both sides of every single strip of wood used in its construction.
Hopefully, your dollar store wood item won’t have too many excess glue marks, as glue forms a waterproof barrier on the surface of the wood which prevents the penetration of the homemade wood stain.
In some cases, with very messily glued wood products, this can really ruin the appearance but most over glued items can be fixed with a little bit of sandpaper that removes the drag glue and exposes the wood grain. Once the glue is removed and the woodgrain is exposed, it can be stained.
After applying the wood stain, wait. As it dries the chemical reaction will darken the surface of the wood. You’ll also want to make sure the wood product is completely dry before continuing to the next step, as trying to oil the wood before the stain has a chance to dry can create a weird finish on the surface.
When the homemade wood stain has dried completely on the surface of the wood, you’ll already notice how your wood has aged and looks deeper and more rustic. To really bring out the grain of your newly stained wood, spray a shelf-stable oil on the surface of the wood. For projects like this easel that have lots of sides, nooks, and crannies, I use oil from the cooking spray. This helps the oil apply evenly and reach all surfaces and crevices.
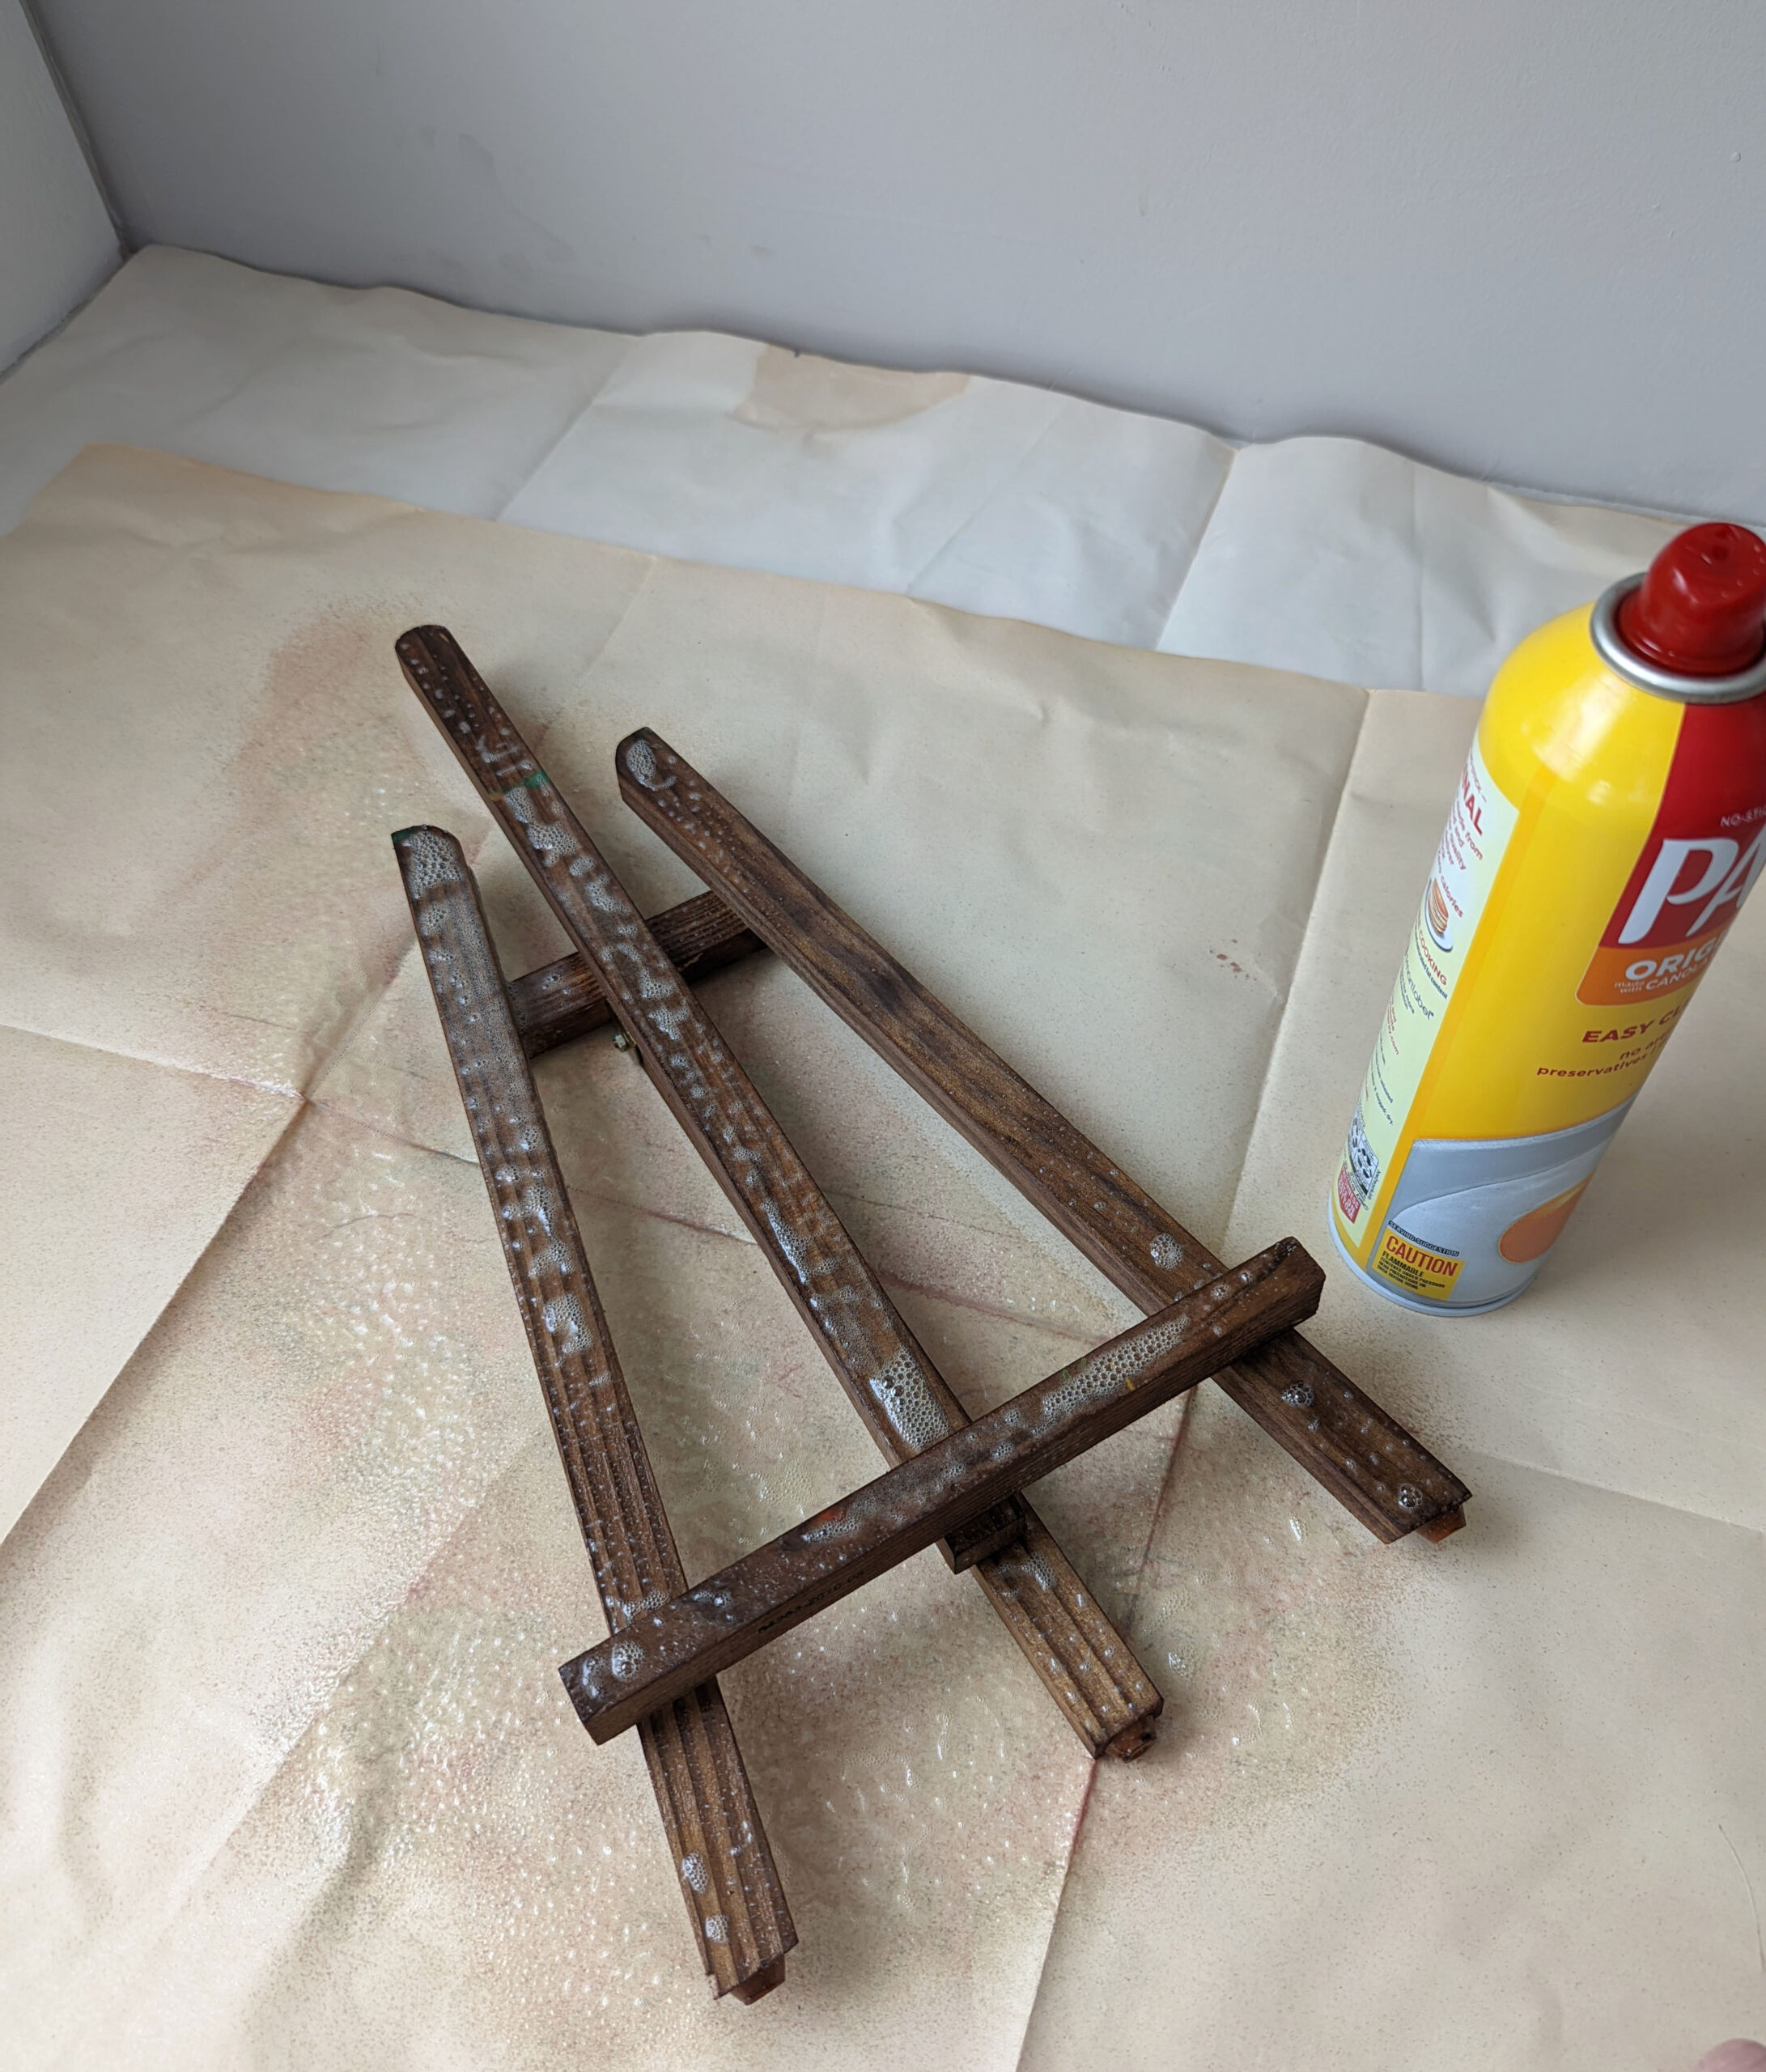
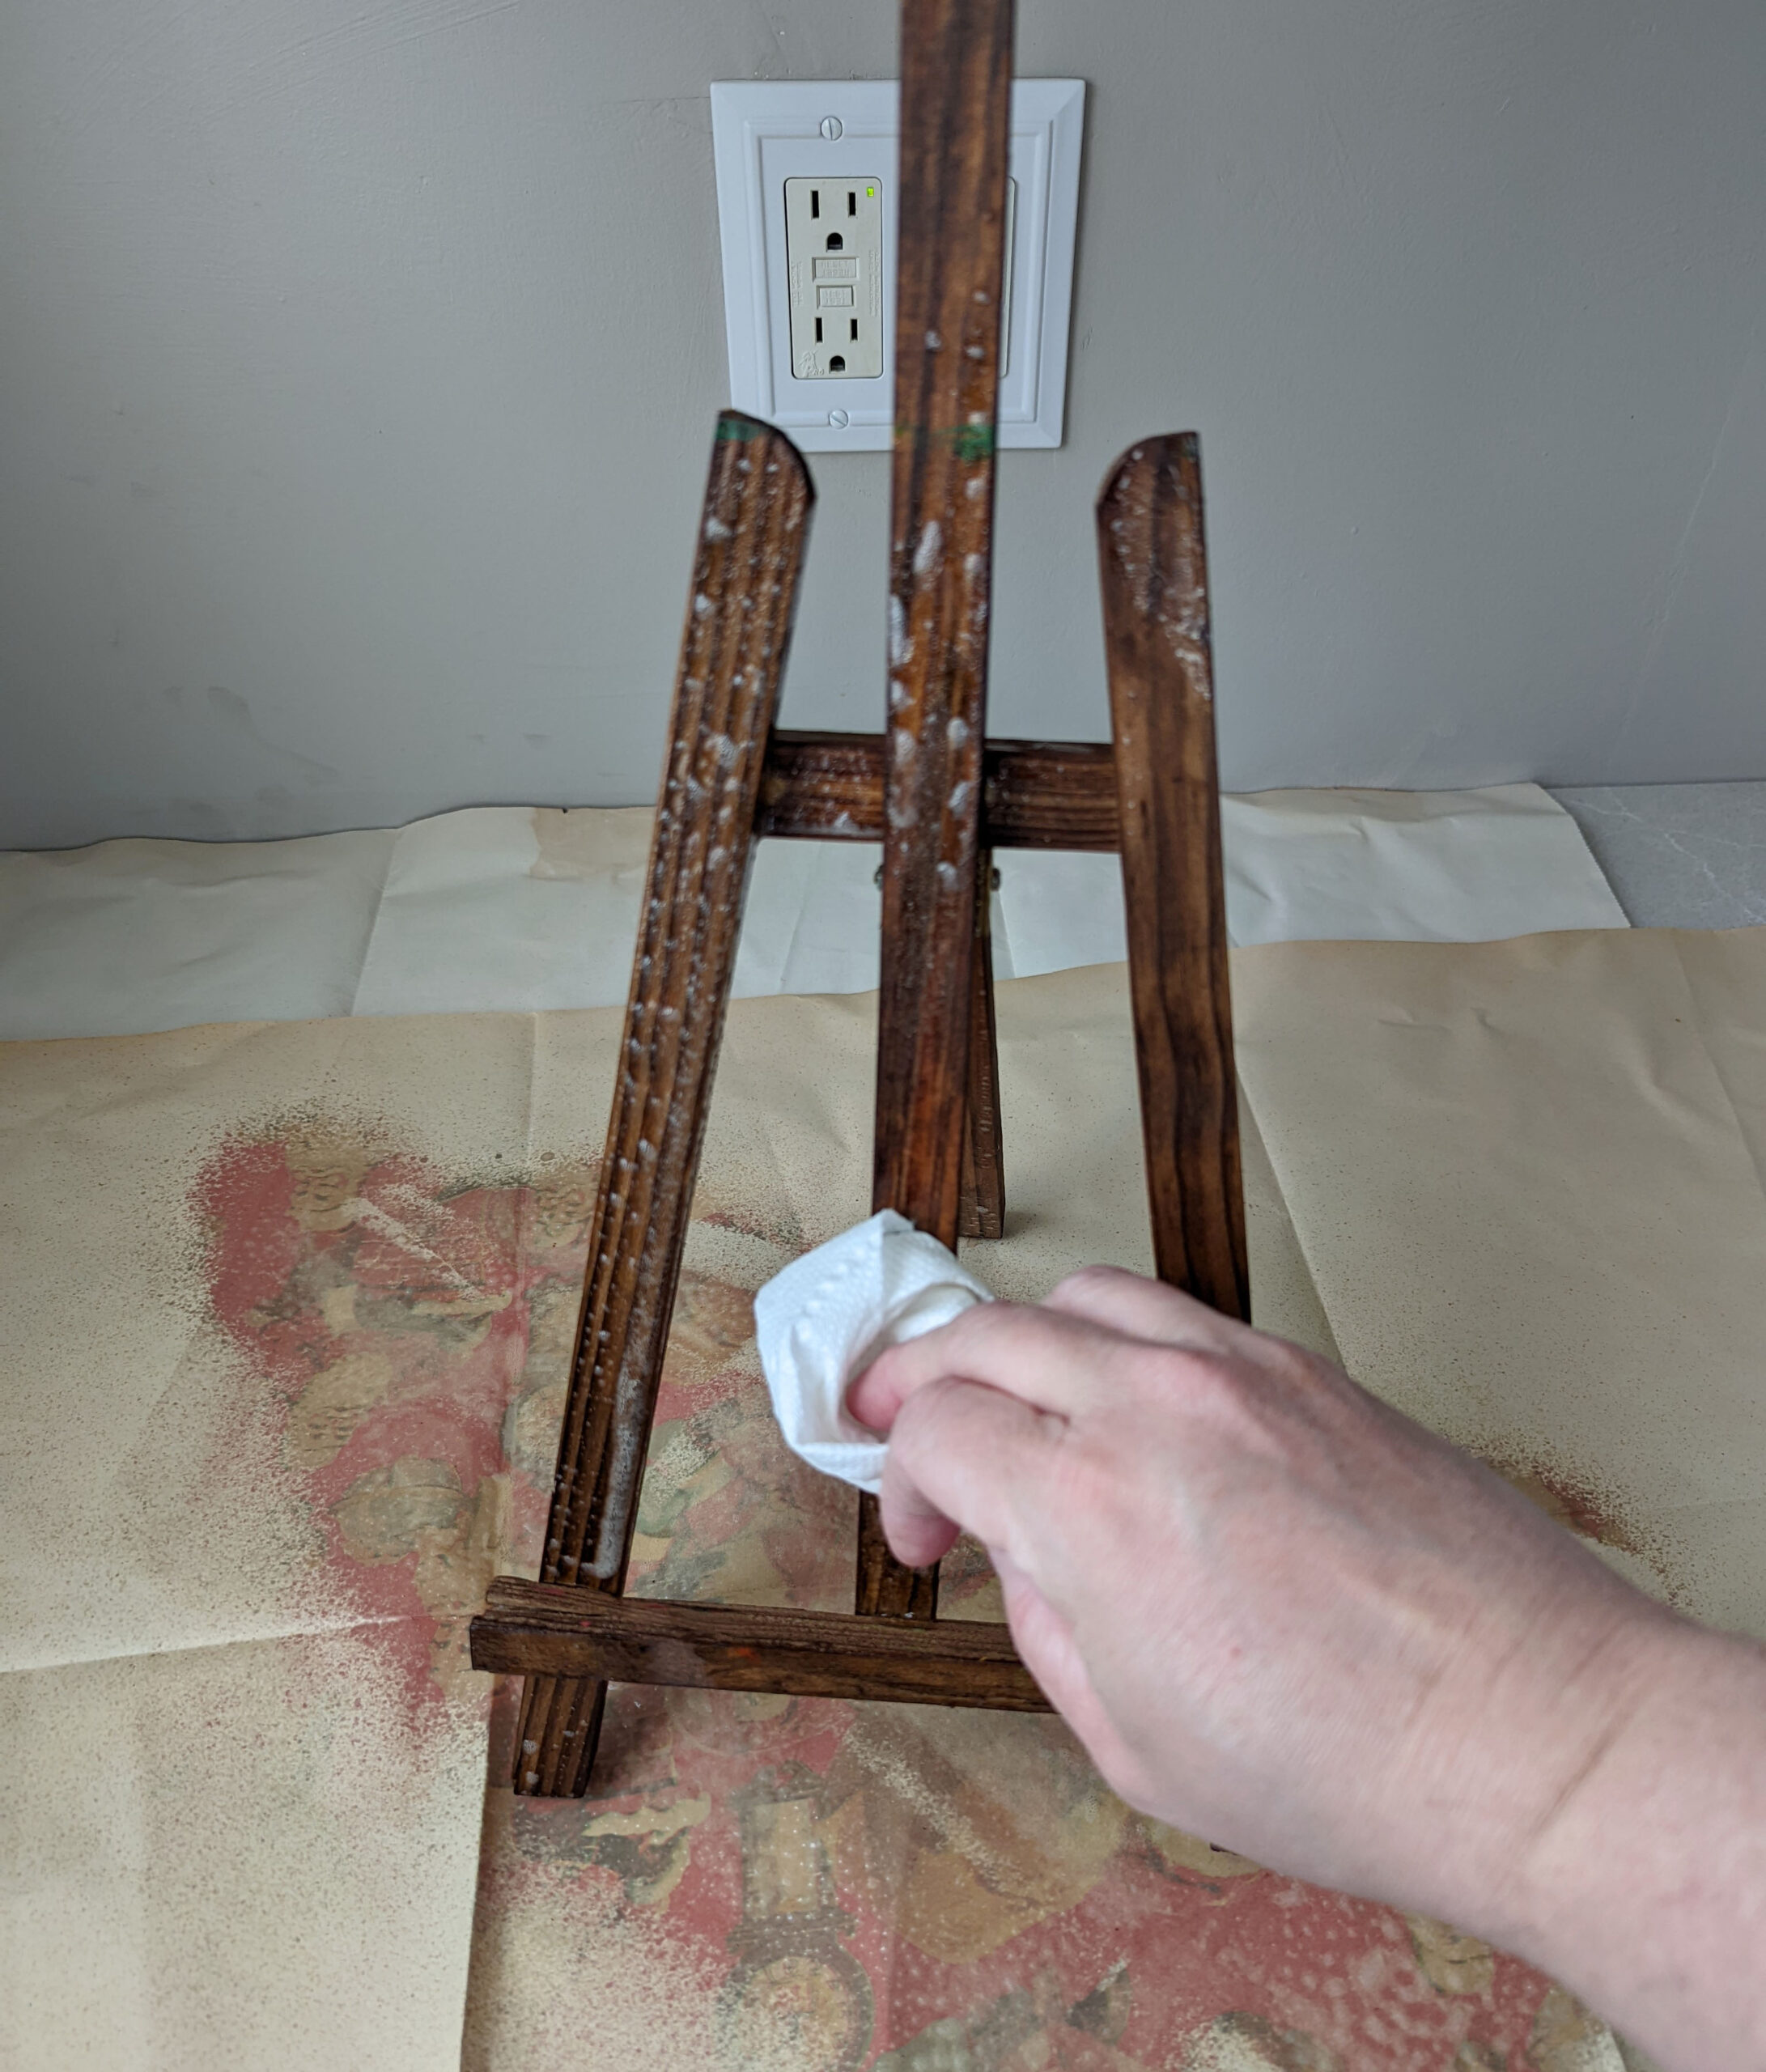
After spraying with oil, allow the oil to soak in for a few minutes, and then wipe off. It’s best to use lint-fre clothes to wipe the oil from cheap wood (like wood products from the dollar store), since small imperfections can snag fibers.
Pro tip: Use a coffee filter instead of a paper towel to spread oil on wood– the filter’s fibers will absorb the oil but won’t leave tiny white fibers behind.
Making homemade vinegar-based wood stain is easy and cheap – enough wood stain to cover a small piece of furniture can be made for less than a dollar in supplies!
You can make this homemade wood stain without even having to head to the hardware store or big box home improvement shops, since everything you need to make a vinegar-based wood stain is likely already in your kitchen or garage.
Thanks for Reading!!!
I hope you can tell that I love DIY, researching the best affordable solutions for every-day problems opportunities and documenting / sharing solutions!🙌 Hawk-Hill.com is reader-supported.
☕ Hawk-Hill.com is reader-supported. If this article saved you time or money, please consider donating $1 to help me cover the cost of hosting this website OR If you appreciate this information and want to throw a “Thanks!” my way by buying me a coffee – I would Of Course appreciate it! :]
Reader Questions and Recommendations
Readers, do you have any favorite topics / posts? What would you like to read more about in the future? As I hope you can tell from this and other articles on my site, I really enjoy DIY / a good challenge, and I’m not afraid to roll up my sleeves to figure out a great, and hopefully simple 😁 solution. So please feel free to let me know in the comments below (or reach out via social media)!
Ok Really – I’ll try to wrap this up now😂
Finally, if you’d like to continue to learn about interesting DIY options as well as how YOU can tackle creative new projects consider checking out the latest and most popular articles listed on the Hawk-Hill Home Page. I’m always trying to enjoy and write about the creative side of life so please don’t be a stranger – check back often!😍
Also chech our Pinteres account https://www.pinterest.com/curlylindsay/
If you enjoyed this post you may also enjoy reading / perusing / devouring😊 one or all of these articles as well!
- 💡4 Easy Steps to Make Your Own Sea Glass 🌊
- ❤️Bedroom Decorating Ideas for Single Women’s Master Bedrooms 🛏️
- 🏡Ikea Kitchen Cost: What I Spent for a 9×12 Kitchen Remodel 💵
Interesting that you like to use oils that don’t go rancid. For cutting boards it makes sense. But guess which oil is the least stable? Linseed oil. The one universally used for wood finishing and a base oil in traditional varnish. Goes rancid very easily because it polymerizes (I think that’s the term) more quickly and thoroughly than oils that don’t go rancid, like say, olive or coconut oil. That’s why you have to refrigerate it for consuming.
For finishing wood that you are not going to eat on and might like for it to dry out and stay where you put it, try Linseed oil. “Boiled” linseed has drying additives to speed up the process of going rancid. Thought you might like to get a better sense of oils.
Walnut oil is another. Tung oil is another.
Oh, and for people who don’t have the habit of using disposable things, rags work better than paper.
Finally, oil soaked rags or paper need to be treated with respect. The oil can make them spontaneously combust with little heat. Woodworkers sometimes submerge them in water.
Cheers
If there’s a project that requires a turquoise finish, try using copper acetate. It’s basically the same process, but instead of using steel wool, use either copper shavings, some offcuts of copper tube/pipe. Put them in a plastic container with 1:1 vinegar, hydrogen peroxide solution and let it react for 12 hours.
It’s a winner follow up if you like ebonizing using iron acetate.