
Deciding what something is worth- and what a customer will be willing to pay- can be one of the hardest parts of having a flea market booth. How you price determines how quickly your inventory will turn over, which impacts how customers experience your booth. If items catch the eye but the pricetag turns them away, the customer might not stay in your booth and shop!
In my successful flea market booth, I use a few tricks and formulas to find a price point for items that help me balance between having a quick turnover and pocketing a bigger profit. Read on for advice on how to price second-hand items in a flea market booth, secondhand shop, or swap meet- plus at the bottom I’ve included some tips on reducing effort and expense when actually affixing price tags to products.
1. Be a Shopper First
Shopping other flea market booths will help you build a sense of what items are worth. With practice, you’ll be able to price things by “going off your gut,” saving lots of time.
Hawk-Hill.com is a participant in the Amazon Services LLC Associates Program, an affiliate advertising program designed to provide a means for website owners to earn advertising fees by advertising and linking to Amazon.com and any other website that may be affiliated with Amazon Service LLC Associates Program
2. Research eBay and Etsy
eBay and Etsy can provide helpful pricing data for reference. I tend to use eBay to calculate pricing for bargain-type flea markets and Etsy to calculate pricing in classier antique malls. While eBay has been in decline for years, Etsy’s vintage section has exploded in volume, making it a valuable reference resource to local flea market sellers.
To price check, just search for similar items and, on eBay, turn on the “completed sales” search filter. Be sure and look for successfully completed sales, rather than items that ended without bids.
NOTE: eBay or Etsy is the best way to sell small, highly valuable items when you find these treasures while buying inventory for your flea market booth. My rule is: If it’s easy to steal and expensive enough for a thief to be willing to risk it, I sell it online. eBaying the item generally means being able to get the best price and not risking theft- it’s also perfect for very “weird” items like highly specialized tools that would be difficult to sell to average shoppers in flea markets.
3. Calculate Cost x 2 + booth fees
One classic retail pricing formula is to take the price paid and double it. Because you may be sourcing your inventory from free sources or counting on reselling thrift store treasures, this usually isn’t the most reliable method for pricing items in a flea market, although is still a helpful standard to have in mind.
4. Don’t Price with Emotion
For those just starting a flea market booth, your booth can be a great way to sell belongings that you no longer use or that no longer fit your style, but it can be hard to price personal belongings- especially items with sentimental value.
Be mindful of what the product may realistically sell for, and if the sentimental value exceeds that value- do not sell.
Best Practices for Placing Prices on Flea Market Items
In most stores, pricing is simple and standard- tags stuck to packaging or barcodes. In a flea market, affixing prices to products is both an art and a science. Without packaging to which to apply prices, and with many vintage items having vulnerable or impossible-to-stick-to finishes, pricing creativity is called for.
You can read more about my advice on how to display items to boost sales on another post, but here are some basic tips for pricing:
1. String Tags
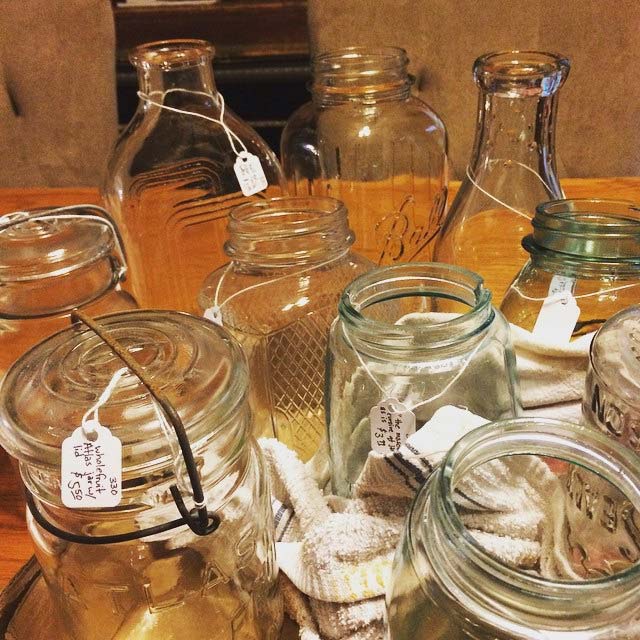
At about 1.5¢ each, String Tags are an affordable way to price flea market items and are the most common pricing method in most markets. Although not quick to apply (and thus, a little more expensive in regards to pricing labor), string tags are relatively visible and don’t fall off easily.
2. Address Labels (or round stickers)
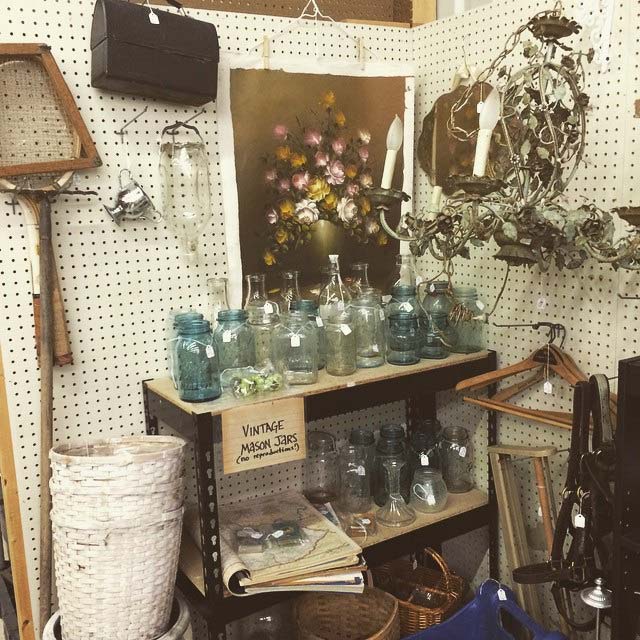
You can buy a huge assortment of blank stickers in a billion styles, but I find the best pricing value is Avery 8160 labels divided at the perforations and then cut in half, meaning you get 60 price tags per sheet.
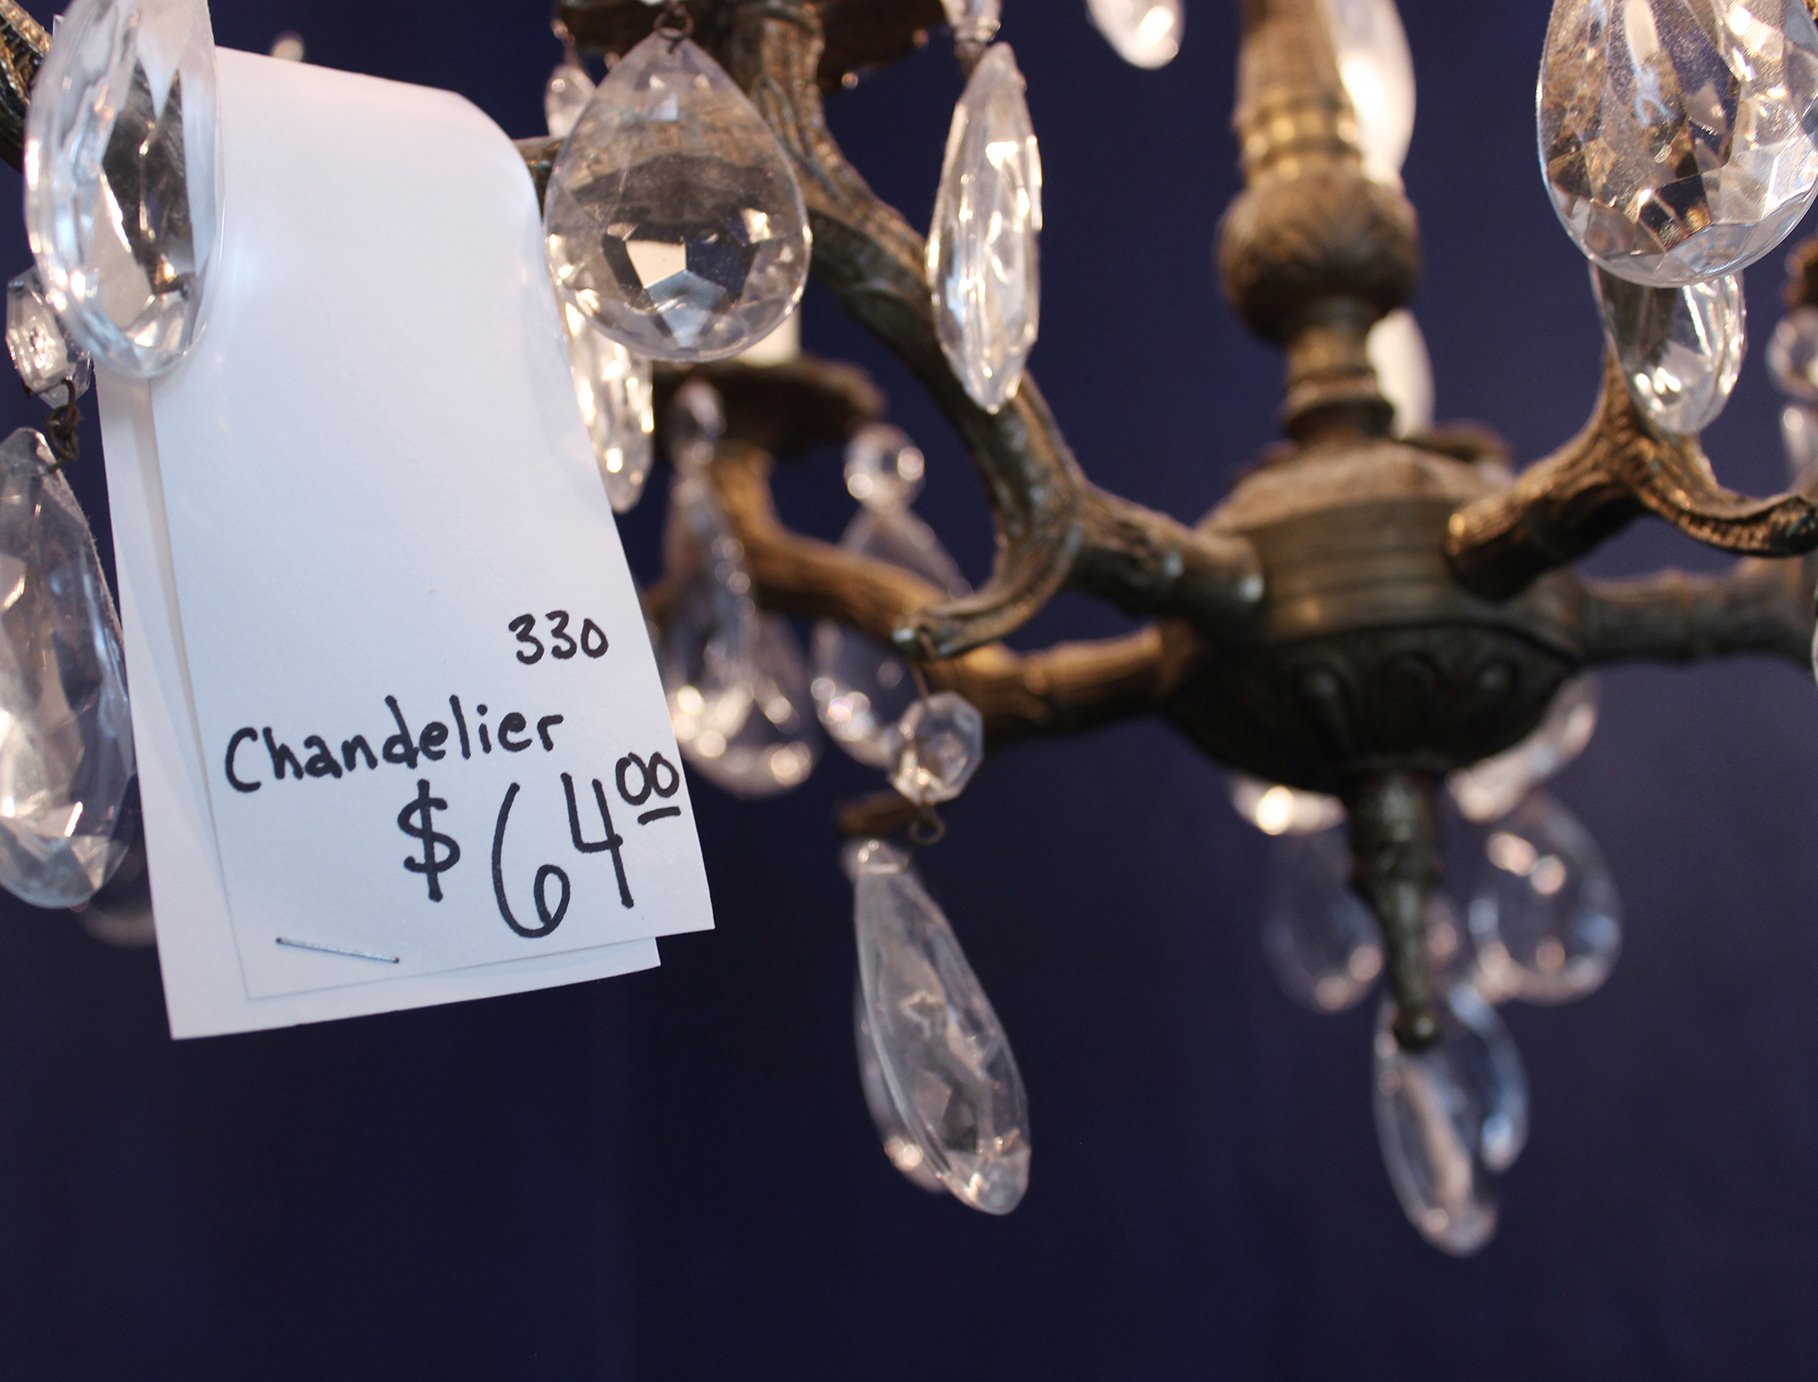
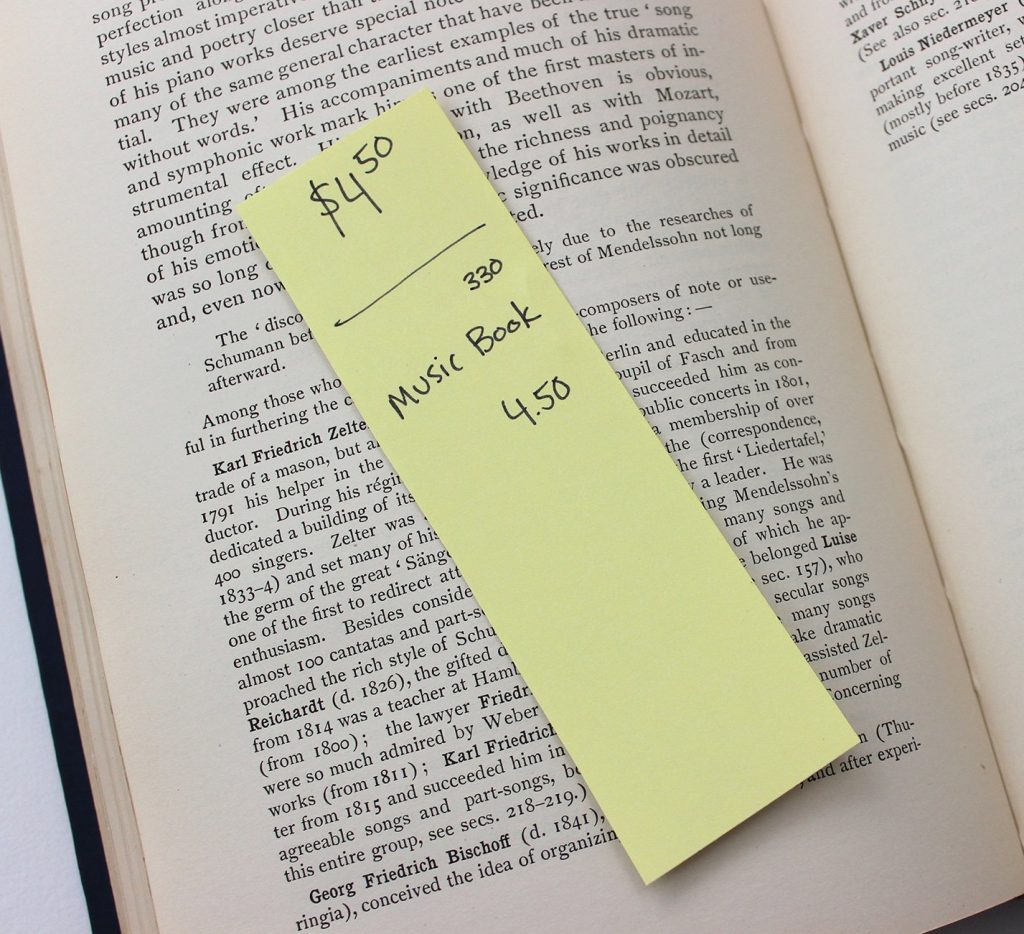
3. Cardstock and (sometimes) Staples.
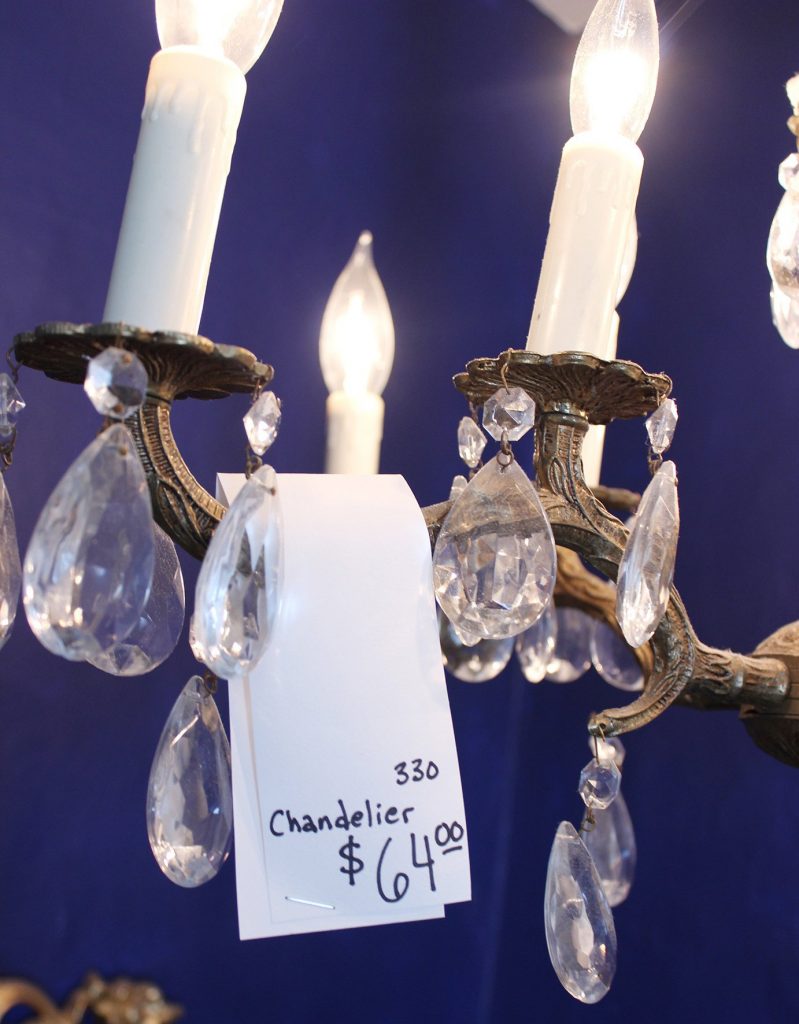
LARGE pricetags are more visible, and more visibility means fewer customers asking questions about pricing or handling the item (both potential profit killers). Cardstock is great for pricing large or expensive items.
For books- use a strip of cardstock placed in the book like a bookmark. Have the price extend above the pages (add the price again, lower, if your market requires a pricing format with booth number at upper right)

For some items (light fixtures, wall hangings, etc) the cardstock can be looped over and stapled.
4. Cheapest: Invest in a paper cutter, cardstock, and a tagging gun.

A tagging gun is the best purchase I ever made for my flea market- and never leaves my pricing kit. Tagging guns can be used on a variety of products to pierce a porous part of the product and affix a tag. Loop tags create a looped connection- making it possible to add price tags through handles or rings on a product in literally a fraction of the time affixing a string tag requires.
Pricing guns usually include a sharp needle nose, making it possible to pierce through a square of cardstock pricetag and affix the tag in a single motion.
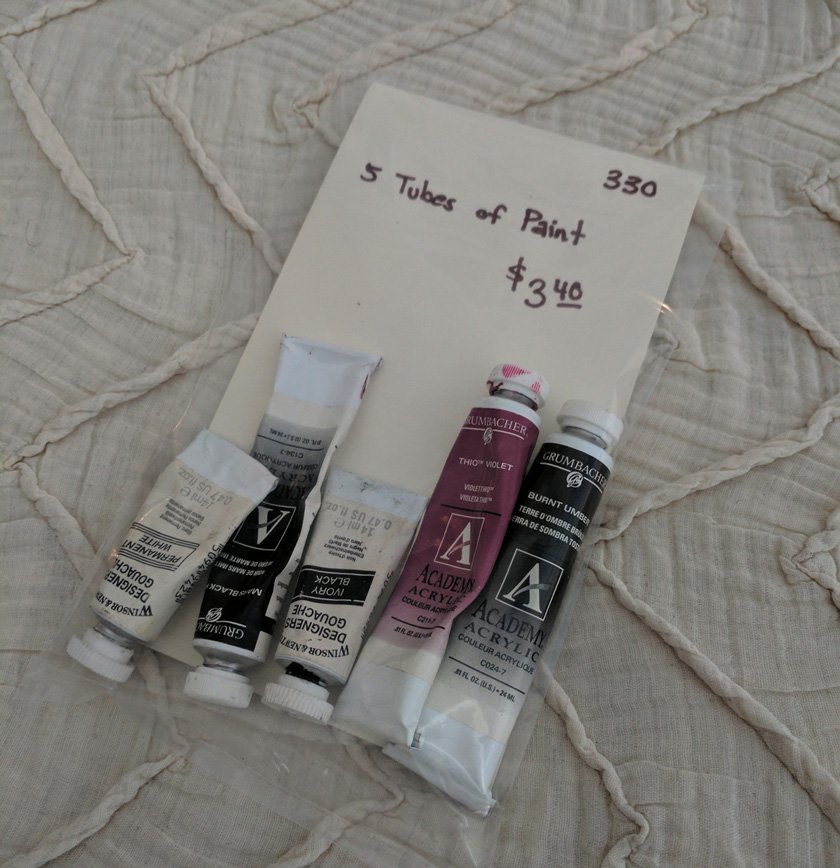
5. Use an Impulse Sealer to Group & Price

My favorite way to clear “smalls” out of my booth without risking theft of these easy-to-pocket items is by using an impulse sealer and plastic bags to make larger grouped units with clearly marked price tags inside the bag (eliminating any price tampering):
These are just a few pieces of advice about how to choose prices for your flea market or swap meet booth items. Once you’ve picked a price, affix your pricetags in a way that keeps your material and time expenses low so you can enjoy a bigger profit from your booth. Got more tips? I’d love to hear how you calculate prices and affix price tags in the comments below!
Thanks for Reading!!!
I hope you can tell that I love DIY, researching the best affordable solutions for every-day problems opportunities and documenting / sharing solutions!🙌 Hawk-Hill.com is reader-supported.
☕ Hawk-Hill.com is reader-supported. If this article saved you time or money, please consider donating $1 to help me cover the cost of hosting this website OR If you appreciate this information and want to throw a “Thanks!” my way by buying me a coffee – I would Of Course appreciate it! :]
Reader Questions and Recommendations
Readers, do you have any favorite topics / posts? What would you like to read more about in the future? As I hope you can tell from this and other articles on my site, I really enjoy DIY / a good challenge, and I’m not afraid to roll up my sleeves to figure out a great, and hopefully simple 😁 solution. So please feel free to let me know in the comments below (or reach out via social media)!
Ok Really – I’ll try to wrap this up now😂
Finally, if you’d like to continue to learn about interesting DIY options as well as how YOU can tackle creative new projects consider checking out the latest and most popular articles listed on the Hawk-Hill Home Page. I’m always trying to enjoy and write about the creative side of life so please don’t be a stranger – check back often!😍
Also chech our Pinteres account https://www.pinterest.com/curlylindsay/
If you enjoyed this post you may also enjoy reading / perusing / devouring😊 one or all of these articles as well!
- 💡4 Easy Steps to Make Your Own Sea Glass 🌊
- ❤️Bedroom Decorating Ideas for Single Women’s Master Bedrooms 🛏️
- 🏡Ikea Kitchen Cost: What I Spent for a 9×12 Kitchen Remodel 💵