My chicken coop, originally built in 1920, includes an ingenious design that makes the interior easy to clean. In this post, I’ll show you how a few simple changes to your coop plans can create a chicken coop floor that’s easy to clean without backbreaking shoveling.
Since I published my post showing the exterior of my restored 1920’s chicken coop, I’ve received several comments requesting a look at the interior of my coop.
The interior is a bit less charming than the whitewashed exterior, but is functional, clean, and spacious. About half of the upgrades I have done to bring this old chicken coop back into functional use for modern chicken-keeping have involved upgrades to the interior.
Vintage Chicken Coop Builders were Experts:
100-years ago, everyone kept chickens. It was common knowledge- even for builders and carpenters- what was important in a chicken coop design.
Today, chicken coop designers are often far removed from the realities of keeping a flock of backyard chickens. Instead of being designed for easy-to-clean interiors, chicken coops are now designed with different priorities. Modern coops value lightweight construction, prefabricated parts, and easy assembly. That’s a problem.
It was only in the mid & late twentieth century that home chicken keeping fell out of popularity. Because it was so common, and building coops something most people were familiar with, previous generations had some great ideas about coop design that was functional, practical, and cost-saving.
Most of these old fashioned chicken coop features are no longer common. I think we have a lot to learn by studying these old coops. By using them and researching how and why they were built, we can learn through experience. I’ve outlined many of these elements on my post about the exterior tour of my 100 year old chicken coop, but here’s one more:
3 Ways to Build an Easy to Clean Chicken Coop Interior:
1. Double Entry Doors:
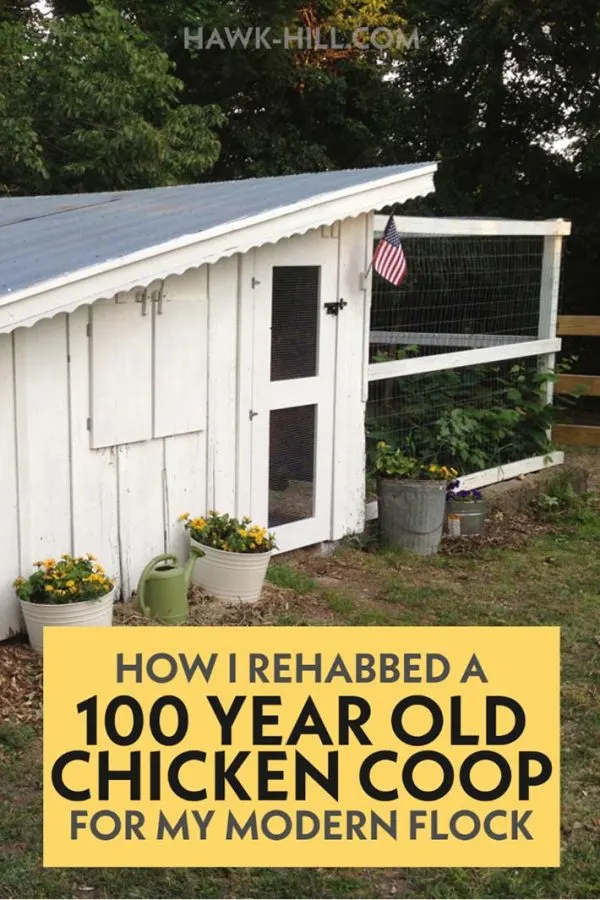
As you can see in the photo above, my coop has two entry doors- one on each side of the building under the highest end of the roof.
Double doors allow easier cleanout- making the coop much easier to clean. Instead of having to stand in the muck of the coop and shovel it out, I can simply stand in one doorway and push dirty chicken litter into a wheelbarrow waiting under the opposite door (more on that in tip #3)
Multiple doors to my coop interior also maximize air flow in the summer. Positioned across from each other, they allow the breeze to flow through the coop improving air quality for my hens.
2. Bank-Barn Style Construction:
Traditionally, a bank barn is a barn that’s built into a hill. A small portion of the barn is underground. This helps keep the barn (or coop) warm in the summer and cool in the winter. The ground temperature, which is more stable, helps to regulate the temperature in the coop.
While my coop is not a true bank barn style- since no part is underground- it shares a similar feature: it’s built into the contours of a sloped yard. The level foundation ends 2ft off the ground by the end of the run.
How does this make the interior of my chicken coop easier to clean? Simple: Less mud in the chicken coop run (thanks to a raised chicken run) means less muddy chicken feet making a mess of the interior bedding. The raised chicken run allows rainwater to drain through the soil quickly. This prevents mud even in a well-scratched dirt run without chicken coop landscaping.
The following section may contain affiliate links. As an Amazon Associate, we earn from qualifying purchases.
3. Elevated Floor: Gravity-Assisted Clean Up:
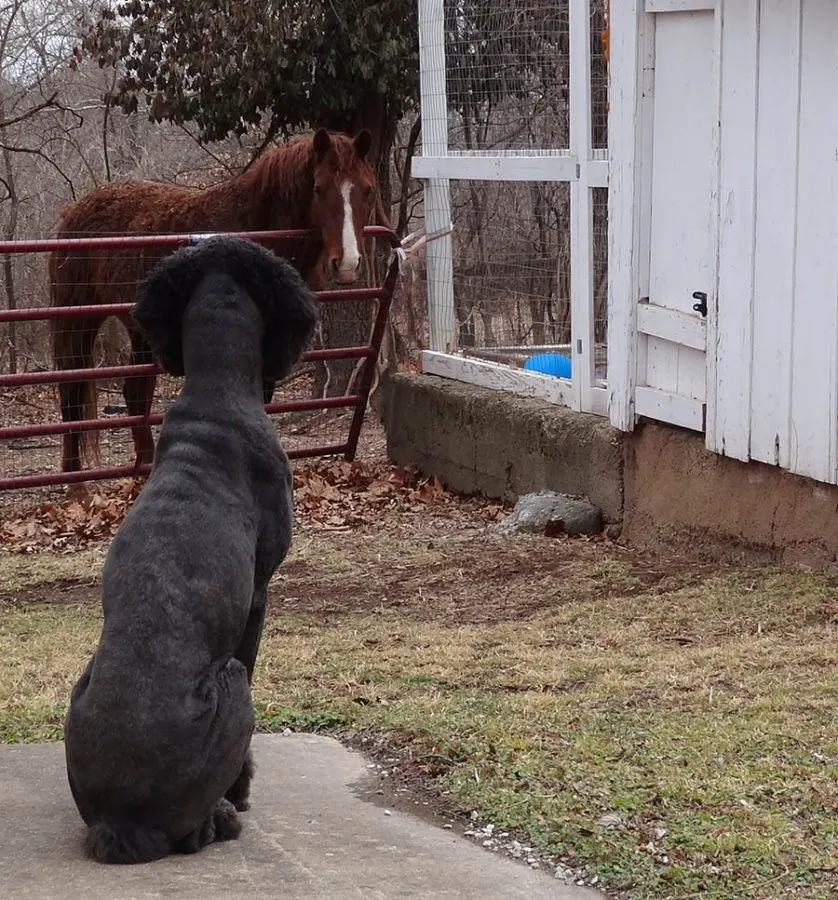
As you can see in the photos, the contours of my sloped yard meant that a foundation flush with the ground on the west side created an 18-24″ rise from ground to coop-floor on the east side. Rather than see this as a problem, the original builder added a door and used this as a place to “dock” a wheelbarrow during cleanout.
Cleaning out my coop is so easy. All I need to do to clean out bedding is park a wheelbarrow under this west door and use a turf rake to push soiled bedding into the waiting wheelbarrow.
🧹A turf rake is like a push-broom with stiff plastic tines that cleans an unfinished floor really well without getting stuck on bumps and ridges like a shovel does. No scooping. No lifting. For this, I could kiss the person who designed my old coop!
4. Replacing Nesting Materials with a Washable Alternative
I used to buy straw, lug the bales home, and carefully line each nesting box. Of course, my hands would immediately scratch half the staw out of the box, soil the rest, and lay their eggs on the hard bottom of the nest.
So way back in 2012’ish (long before it became a popular backyard chicken keeping technique, thanks to my viral pin) I began experimenting with turf lined nesting boxes. You read my tutorial for making DIY nesting box liners that are easy to clean if you’d like to try this method for easy cleaning a chicken coop interior.
Switching from straw to synthetic turf is a switch that can help make your chicken coop’s interior easier to clean. Although it is a switch from a natural material to synthetic, my nesting box liners last for years and years (I’ve replaced them once since 2012!). Over time, that’s a lot of straw that hasn’t been grown, baled, transported to the store, and hauled home! When my nesting box liners need cleaned, I soak them in vinegar water for an hour or two and then simply hose them off.


More tips on keeping modern chickens with a vintage coop:
Adding Reach-Through Nesting-Boxes to my 100 Year Old Chicken Coop:
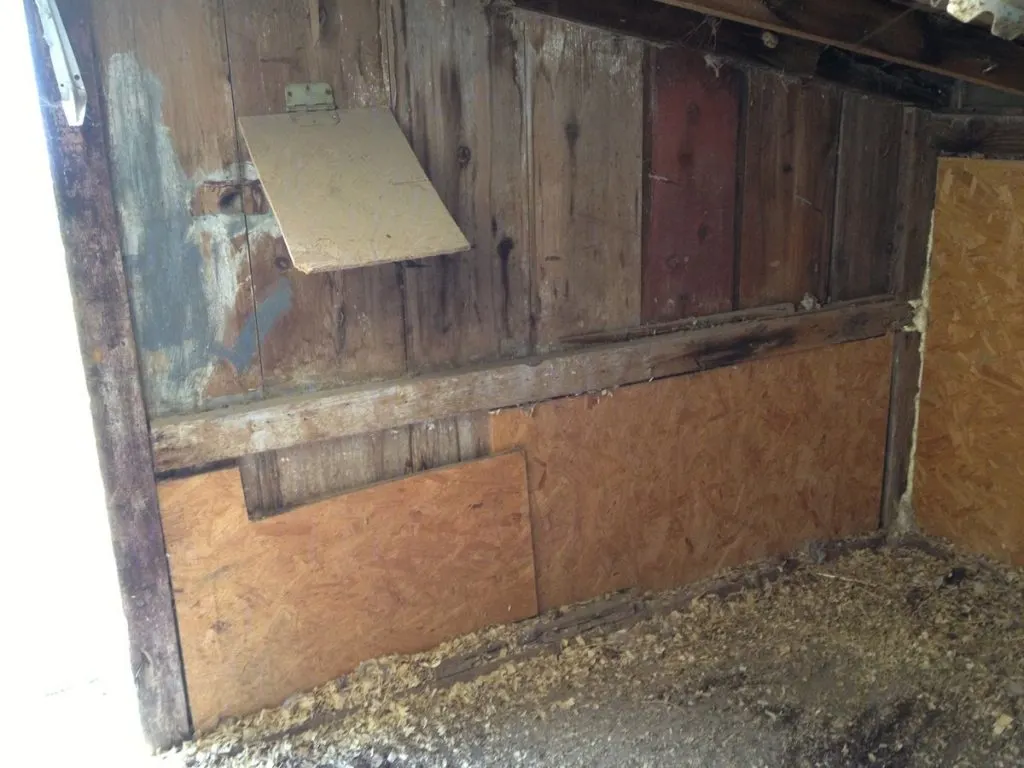
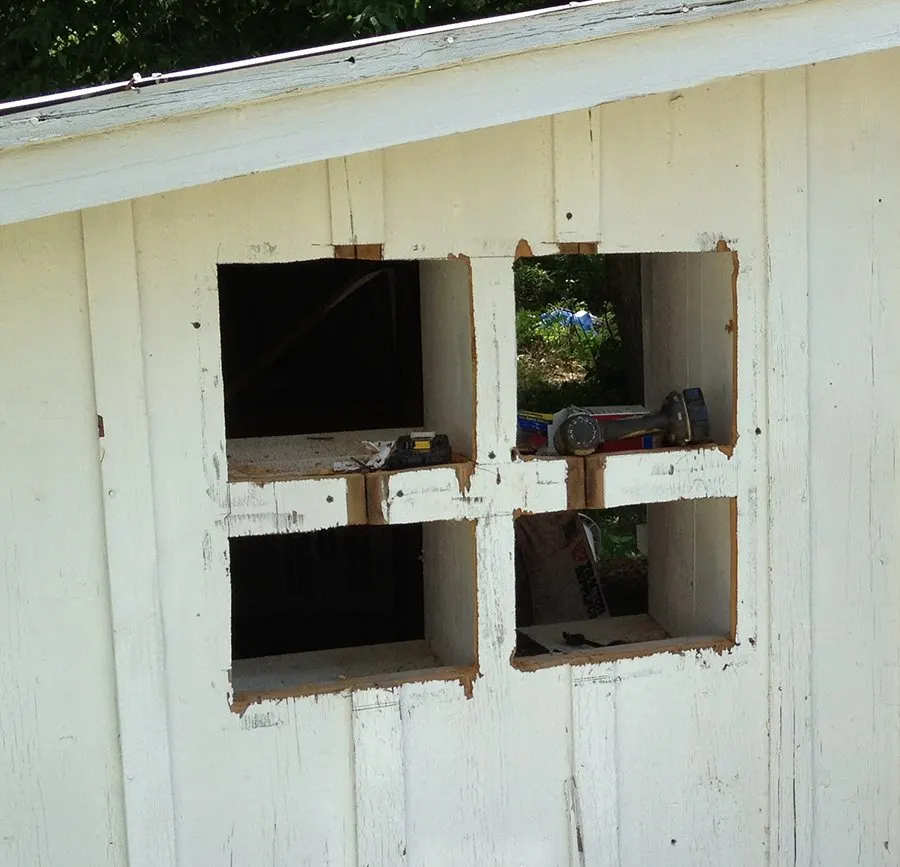
When I purchased the property, using scrap plywood to insulate walls was the first order of business, but I was itching for nesting boxes.
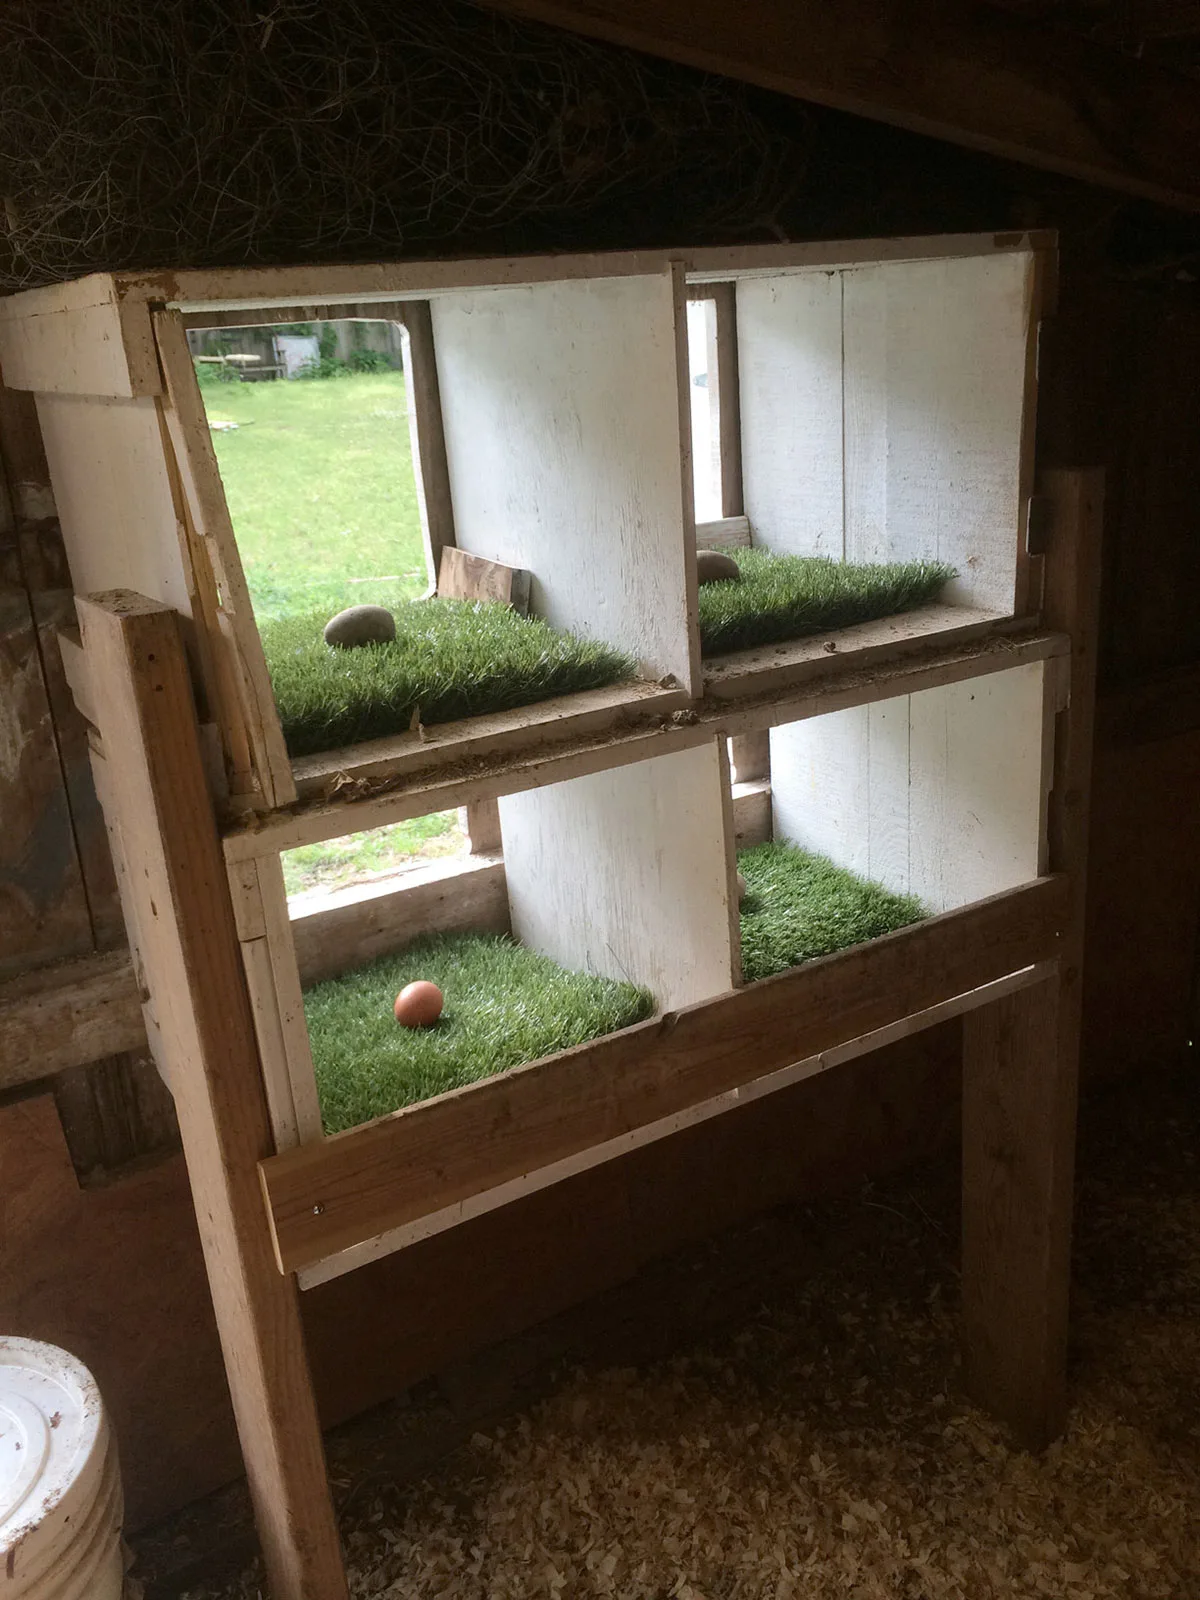
Before & After Photos of My Chicken Coop’s West Wall:
How I Made my Coop’s Nesting Boxes:
My father picked up partitioned wood shipping crates at a salvage yard, so I was able to create these for nesting boxes for under $20. I removed the bottoms from the crates, turned them onto their side and stacked two crates, then mounted them on the wall and cut holes in the exterior wall behind them. Read more about installing my reach-through nesting boxes here.
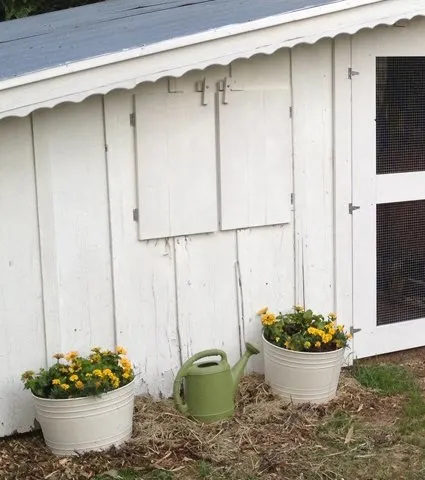
The final step was to use my kreg-jig to make a pair of cute doors to secure privacy and predator protection for my hens.
Thanks for Reading!!!
I hope you can tell that I love DIY, researching the best affordable solutions for every-day problems opportunities and documenting / sharing solutions!🙌 Hawk-Hill.com is reader-supported.
☕ Hawk-Hill.com is reader-supported. If this article saved you time or money, please consider donating $1 to help me cover the cost of hosting this website OR If you appreciate this information and want to throw a “Thanks!” my way by buying me a coffee – I would Of Course appreciate it! :]
Reader Questions and Recommendations
Readers, do you have any favorite topics / posts? What would you like to read more about in the future? As I hope you can tell from this and other articles on my site, I really enjoy DIY / a good challenge, and I’m not afraid to roll up my sleeves to figure out a great, and hopefully simple 😁 solution. So please feel free to let me know in the comments below (or reach out via social media)!
Ok Really – I’ll try to wrap this up now😂
Finally, if you’d like to continue to learn about interesting DIY options as well as how YOU can tackle creative new projects consider checking out the latest and most popular articles listed on the Hawk-Hill Home Page. I’m always trying to enjoy and write about the creative side of life so please don’t be a stranger – check back often!😍
If you enjoyed this post you may also enjoy reading / perusing / devouring😊 one or all of these articles as well!


Paul
Thursday 11th of December 2014
How do you keep greens growing in the chicken run? I've never seen anything a chicken won't try to eat.
Lindsayanne
Thursday 11th of December 2014
two words: grazing boxes!