
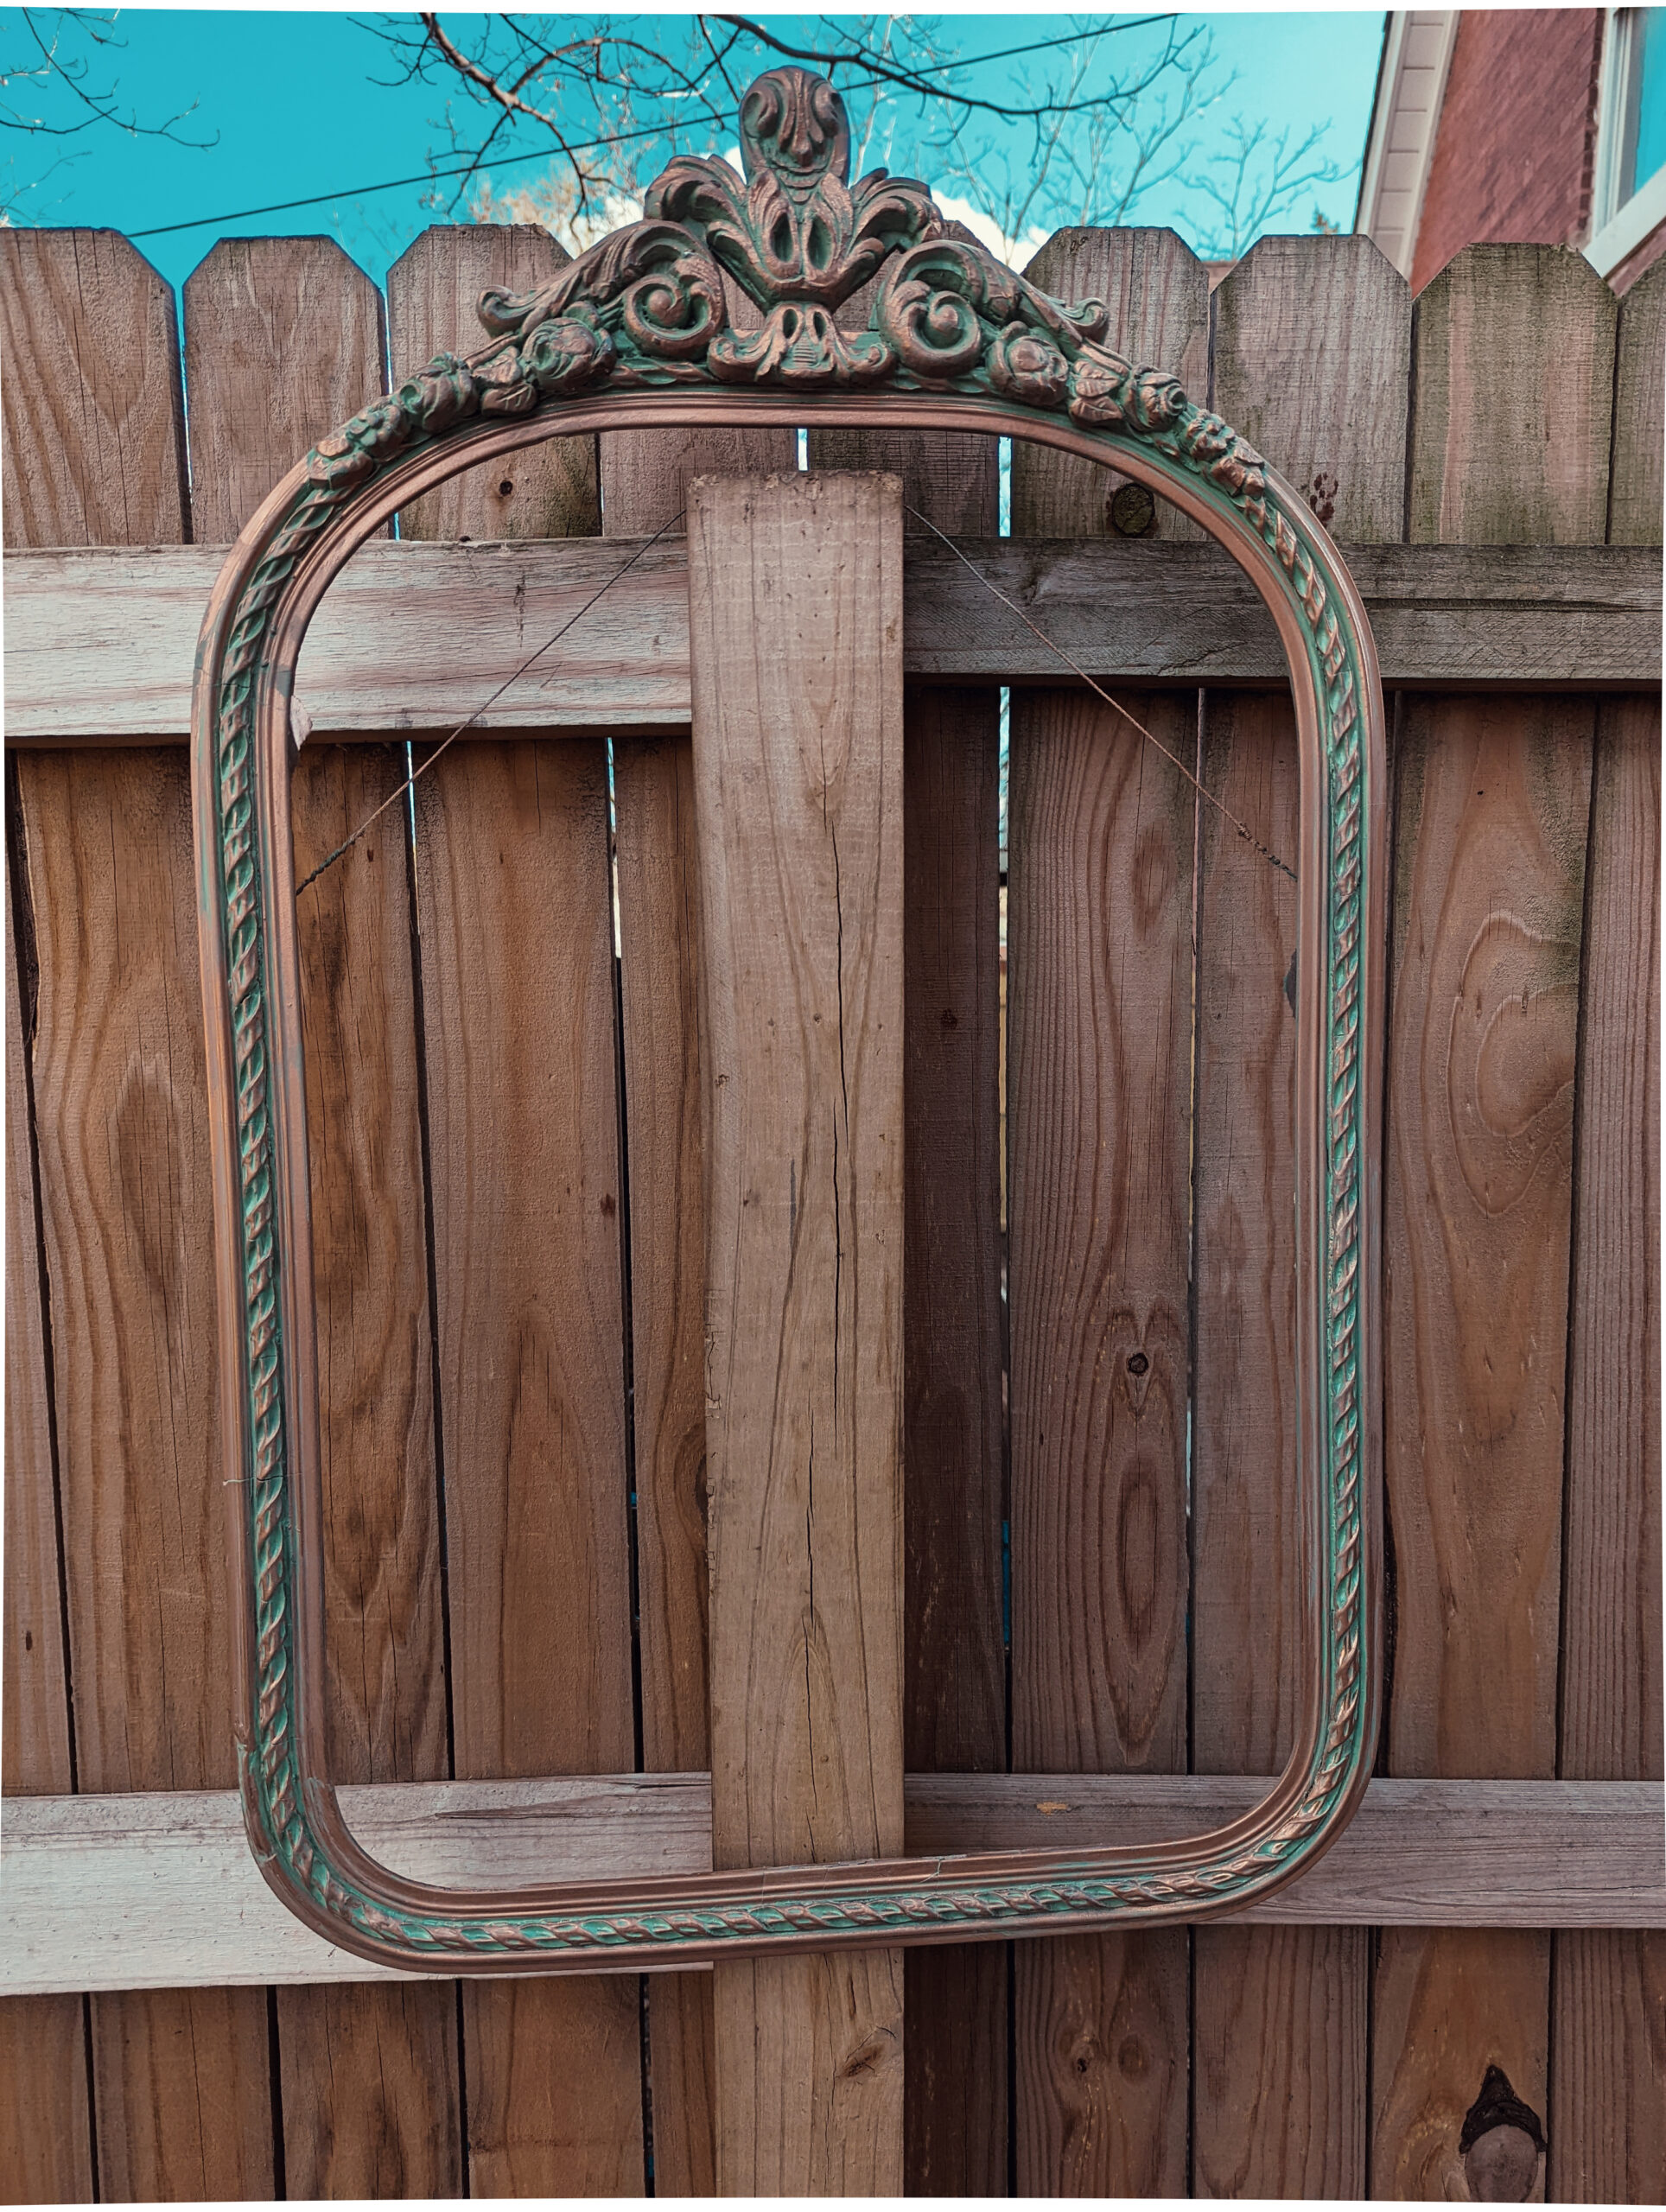
With this method, it’s easy to paint a faux antique copper finish on any surface that can be spraypainted. Using this painting technique, you can create the look of real oxidized-patina copper on frames, planters, textured walls, and many other objects.
In this article, I demonstrate:
- I’ll show you step by step how to create the look of antique oxidized copper using spray paint and a simple technique I’ve developed over years of flipping thrift store products for sale in my flea market business.
- The best paint to use to get that true oxidized patina look
- Plus 2 tips to add even more vintage authenticity to your antique copper paint finish
follow along to learn this copper patina faux finish painting technique step by step!
To paint your antique copper frames, you’ll need the following supplies:
Hawk-Hill.com is a participant in the Amazon Services LLC Associates Program, an affiliate advertising program designed to provide a means for website owners to earn advertising fees by advertising and linking to Amazon.com and any other website that may be affiliated with Amazon Service LLC Associates Program
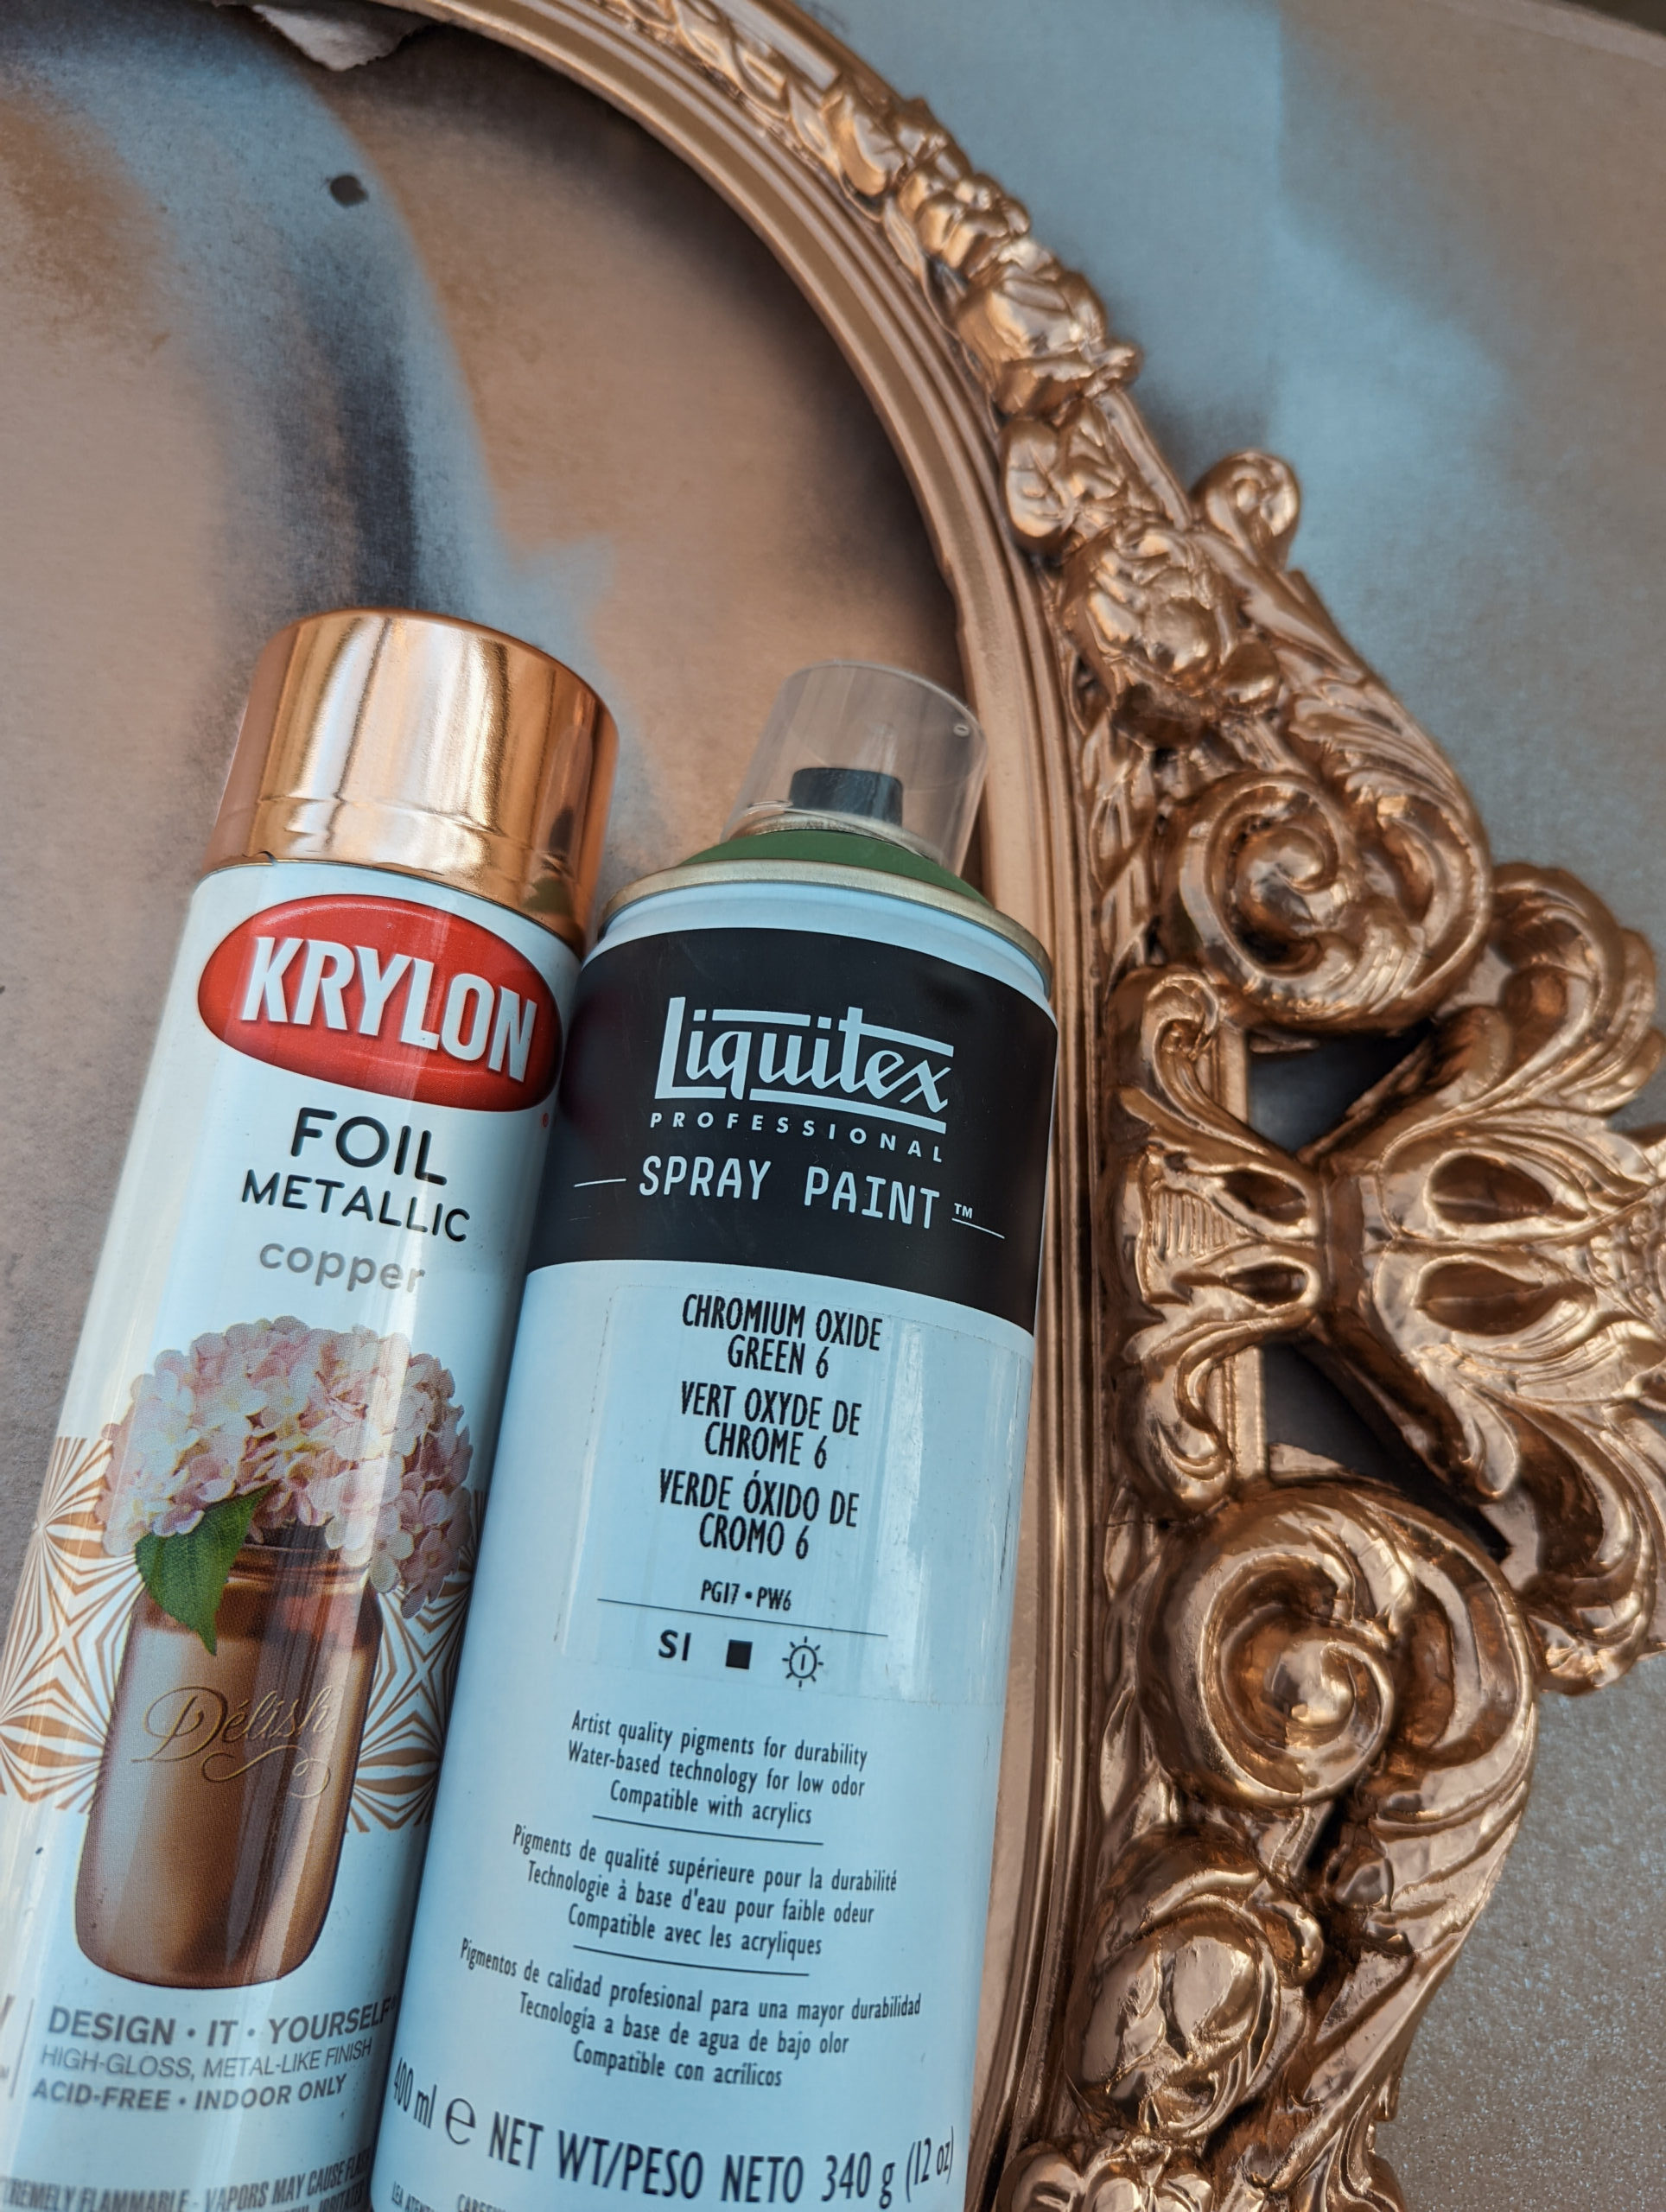
- Spray paint in copper or foil copper from Krylon. (In my tests, I discovered that once the faux finish was applied, the differences between the finishes were virtually undetectable between Krylon’s two “premium” copper paints)
- Chromium Oxide Green #6 Liquitex Professional Spray Paint (Do NOT purchase the kelly-green tinted Chromium Oxide Green, you must get the #6 color variant to accurately reproduce the color of aged copper).
- 10 to 15 sheets of paper towels, depending on project size (premium paper towels actually do help)
- A few moist paper towels (that have been wrung out) or a spray bottle that has been adjusted to spray an ultra-fine mist of water.
Steps to paint an antique copper patina with paint
Choose and clean the object
Vintage items often require a thorough cleaning before painting. Wash the object gently with water, paper towels, and a small amount of vinegar – and allow it to dry completely before moving on to the next step.
(Optional) Prime the surface
Because Krylon metallic spray paints are of high quality, you should be able to skip this step if you are painting over an already painted surface.
If you’ll be applying this antique copper painting method to bare unfinished wood, raw metal, or surfaces that aren’t completely smooth, go ahead and use a primer. It won’t hurt!
If you are priming, be sure to read the label on your primer and only proceed once the label indicates that the primer is dry and the primer feels dry and hard to the touch.
Spray paint the item with metallic copper spray paint
Paint the object using spray paint with foil copper finish or metallic copper finish.
Be sure that all sides of the object are covered- with my frame, this was tricky! The trick is to paint multiple light coats rather than a single heavy coat. A too-heavy application can leave drips dried in the finish of the paint that will be a dead giveaway of a poorly done faux patina.

Allow the copper paint to dry completely
Really take time here and let the copy paint dry completely – and I mean completely – before applying the second coat. As I tested this method for painting an antique copper finish, I learned that if I started the antiquing process before the bottom layer of metallic copper spray paint was completely dry, the finish of the copper paint would be damaged. In those trials, the copper highlights of the object I was painting took on a grayish dull tone as a result of being damaged by the antiquing process.
While you Wait for the Copper Paint to Dry…
Read and reread the next steps. For success, preparation and quick work is key, so read through the following steps. When you’re antiquing your copy object with faux oxidation, you must move through them as quickly as possible in order to prevent the layer of oxidation-looking paint from drying before the finish technique is applied to the surface.
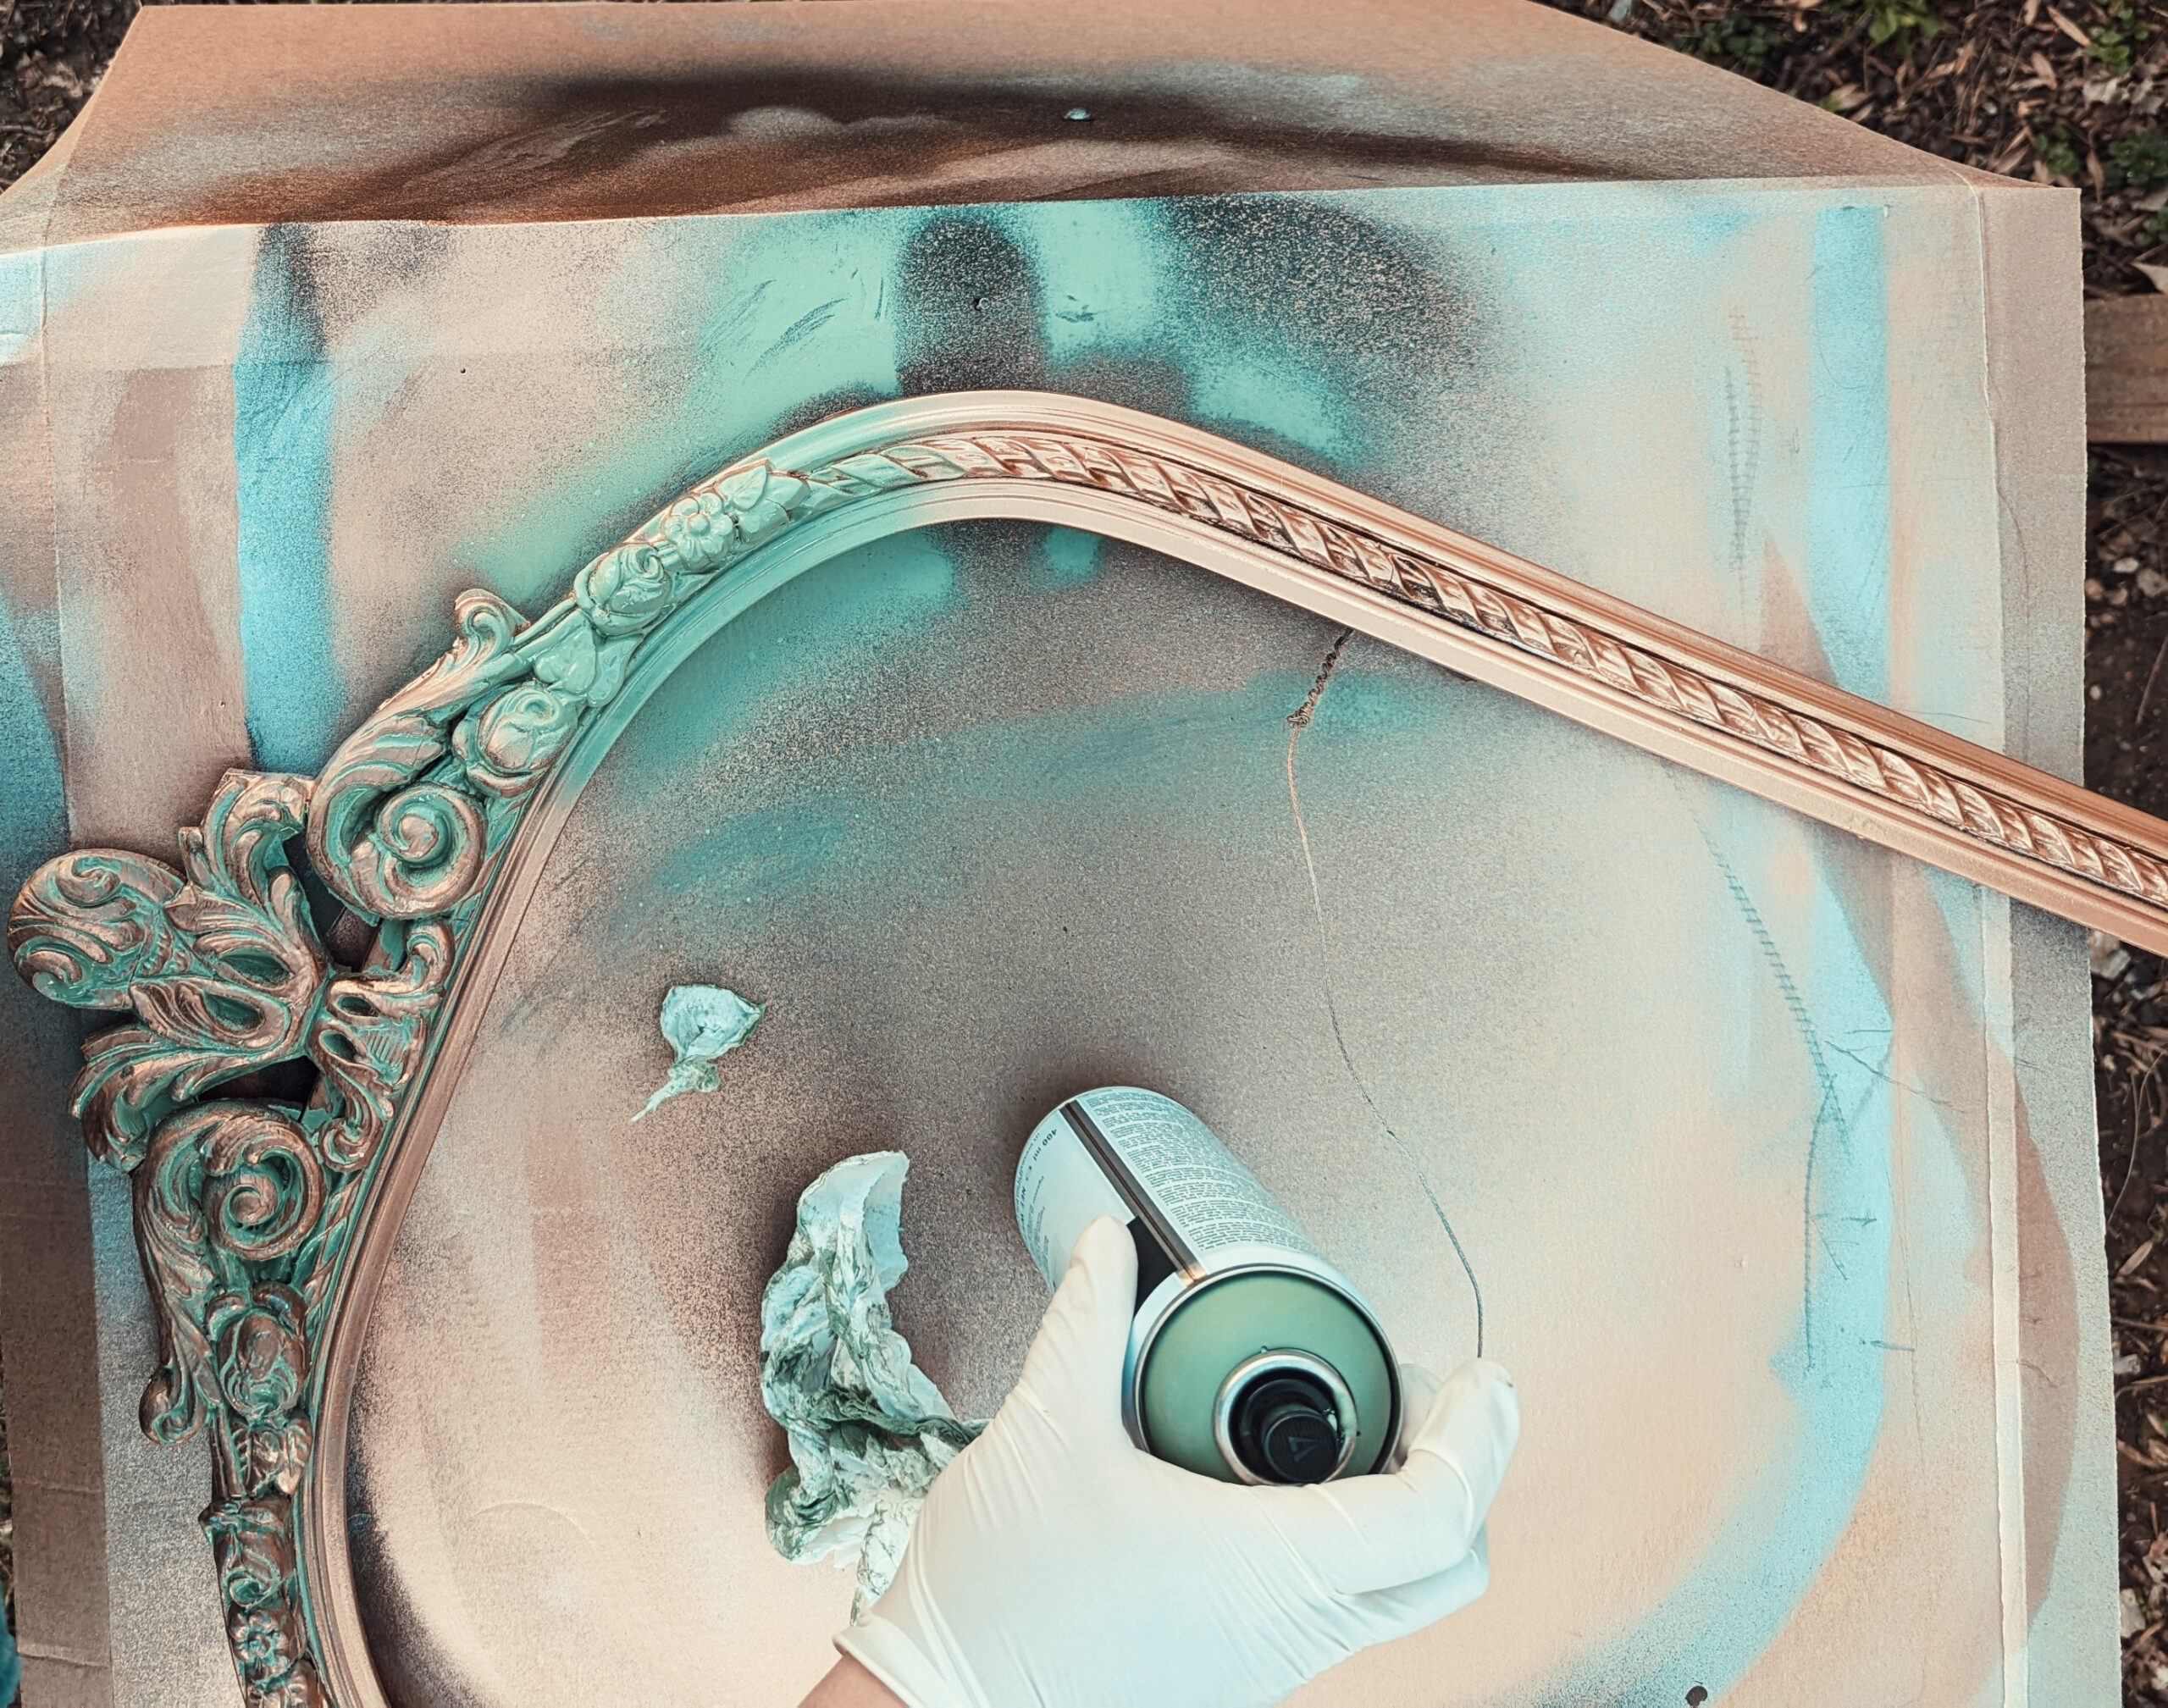
Spray Object with Chromium Oxide Green #6
(remember, ONLY use #6 variation of this color, standard chromium oxide green is too vibrant to replicate copper’s natural oxidation in this faux finish)
The Liquitex artist spray paint is highly recommended for this step; I’ve tested this method with both generic brand green paint (too translucent) and even higher-end Montana artists’ spray paint (too quick-drying), and nothing produces the antique copper patina effect quite like Liquitex does.
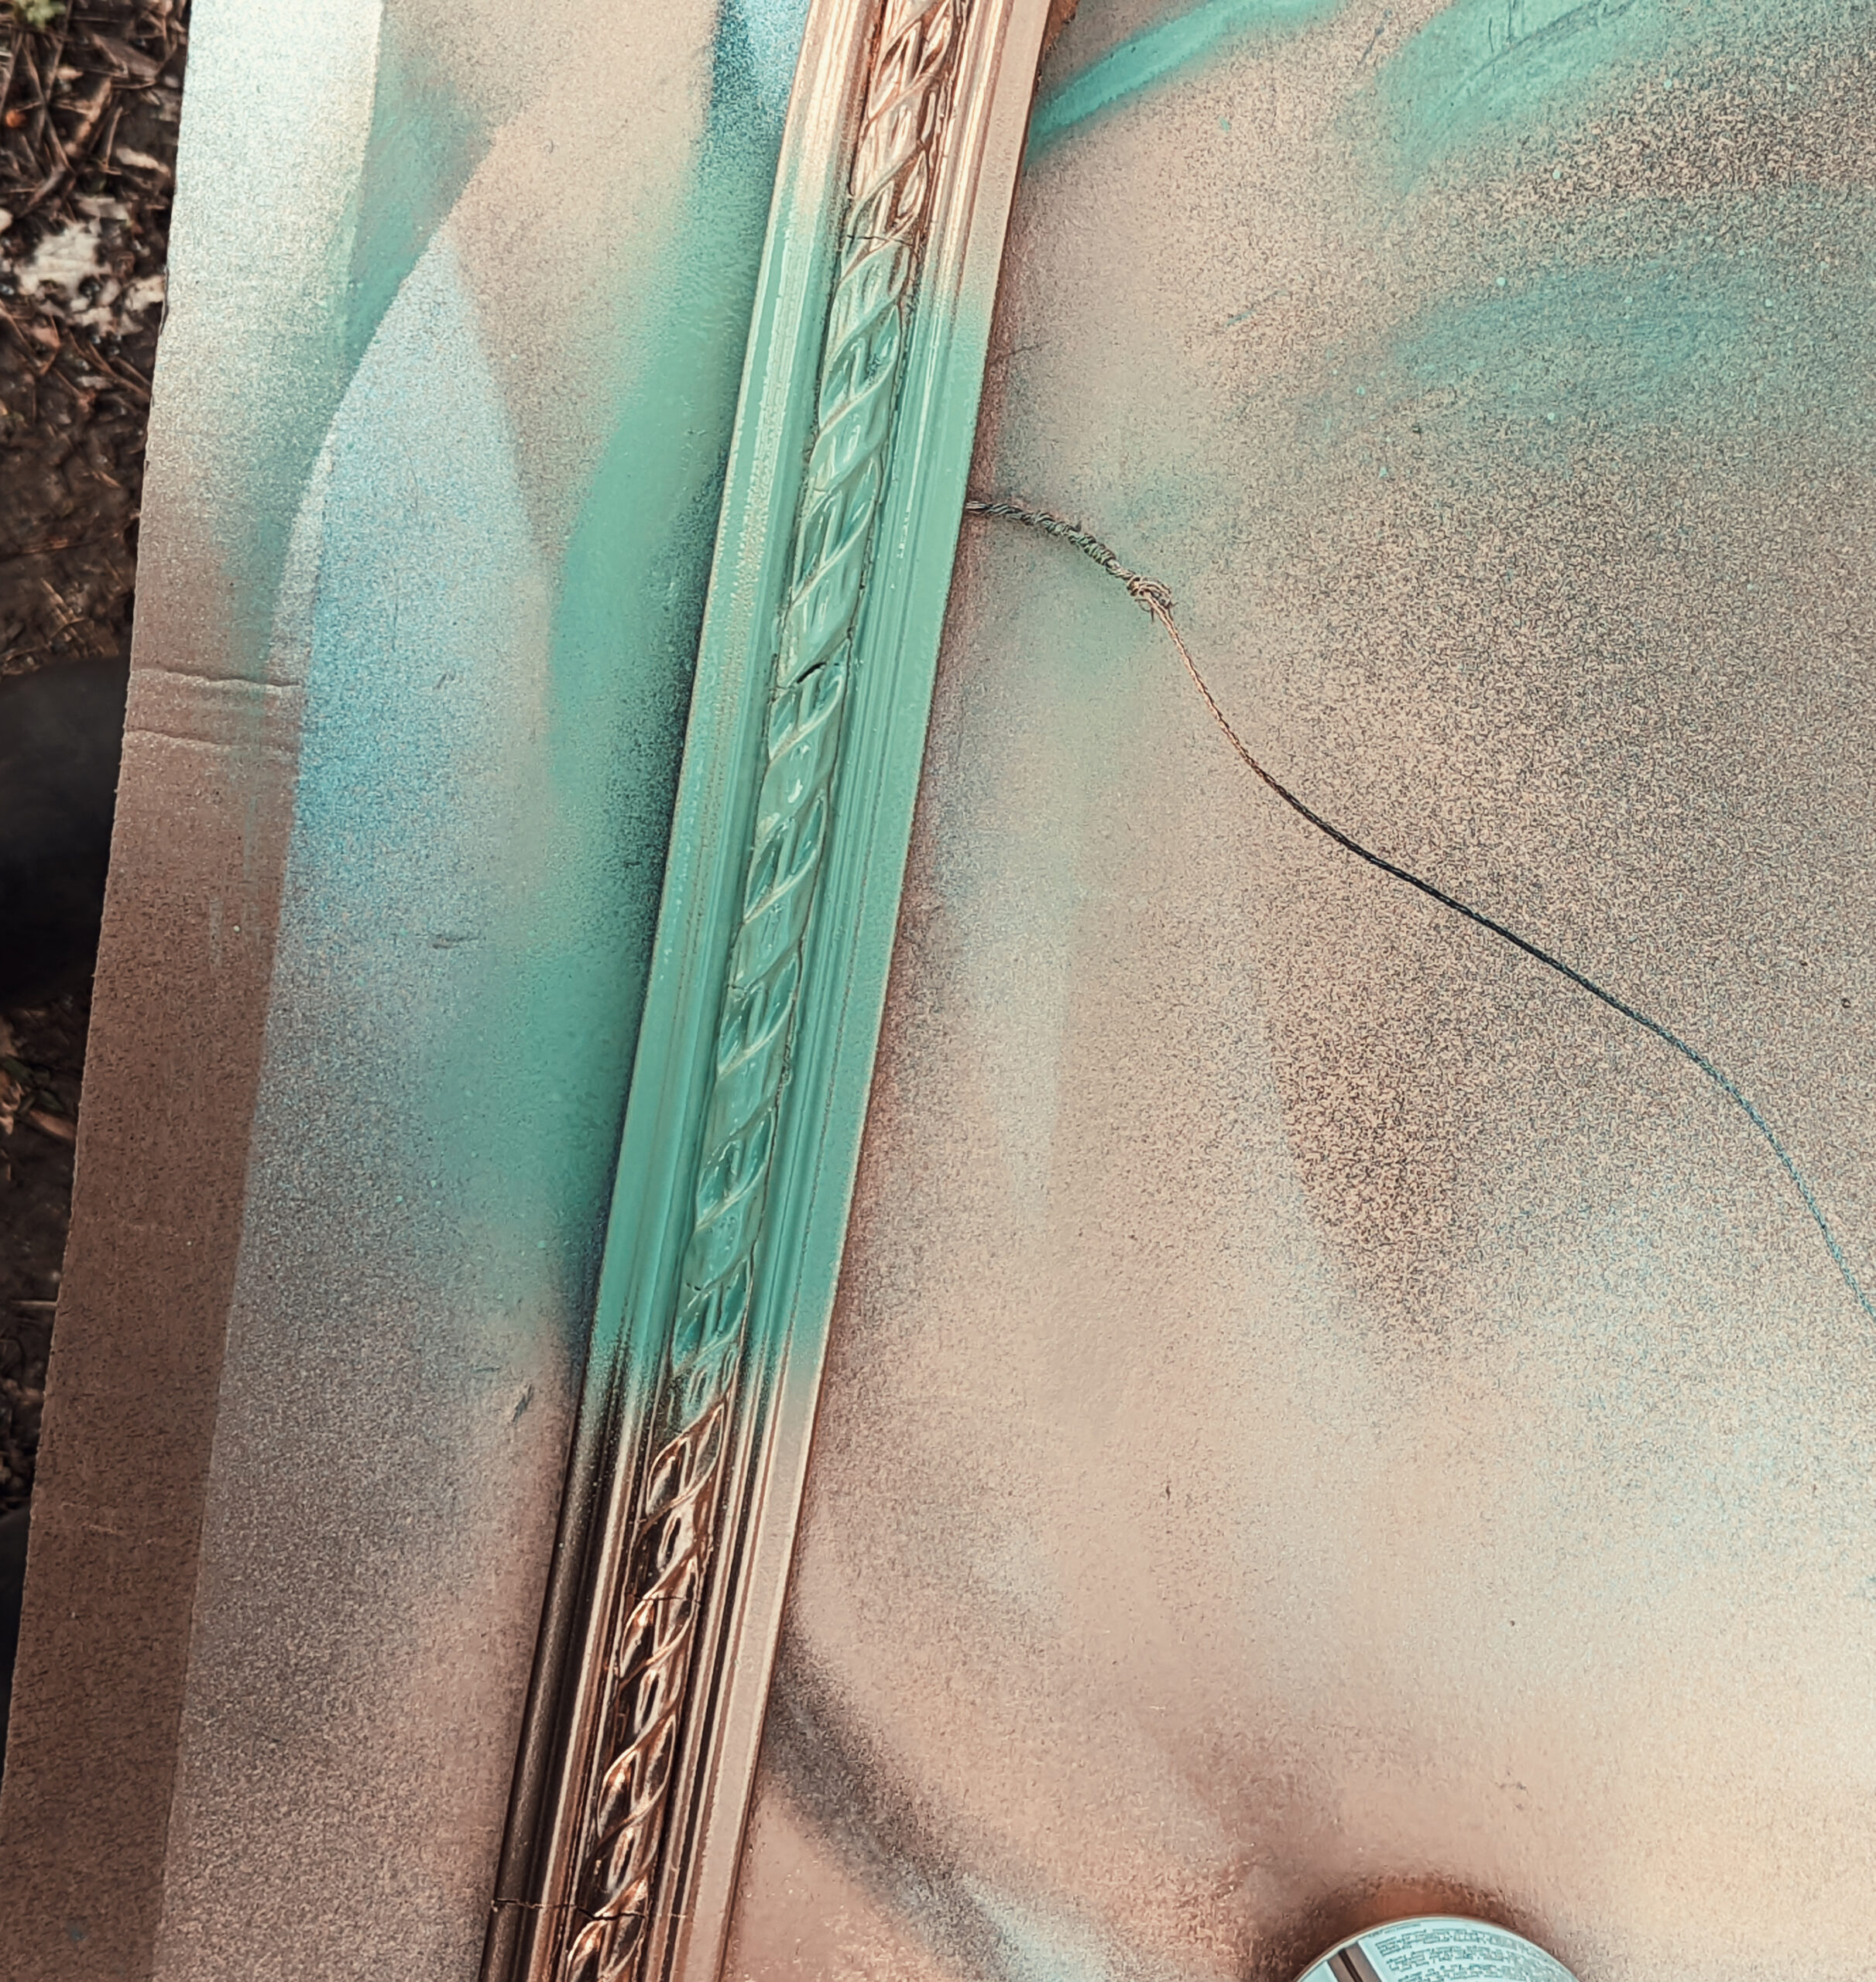
Use the green spray paint to cover the base coat of metallic copper spray paint. Spray a small section with a thin, even layer, making sure to paint only a small section at a time and to move the flow of the paint so that it covers multiple sides at the same time, as shown.
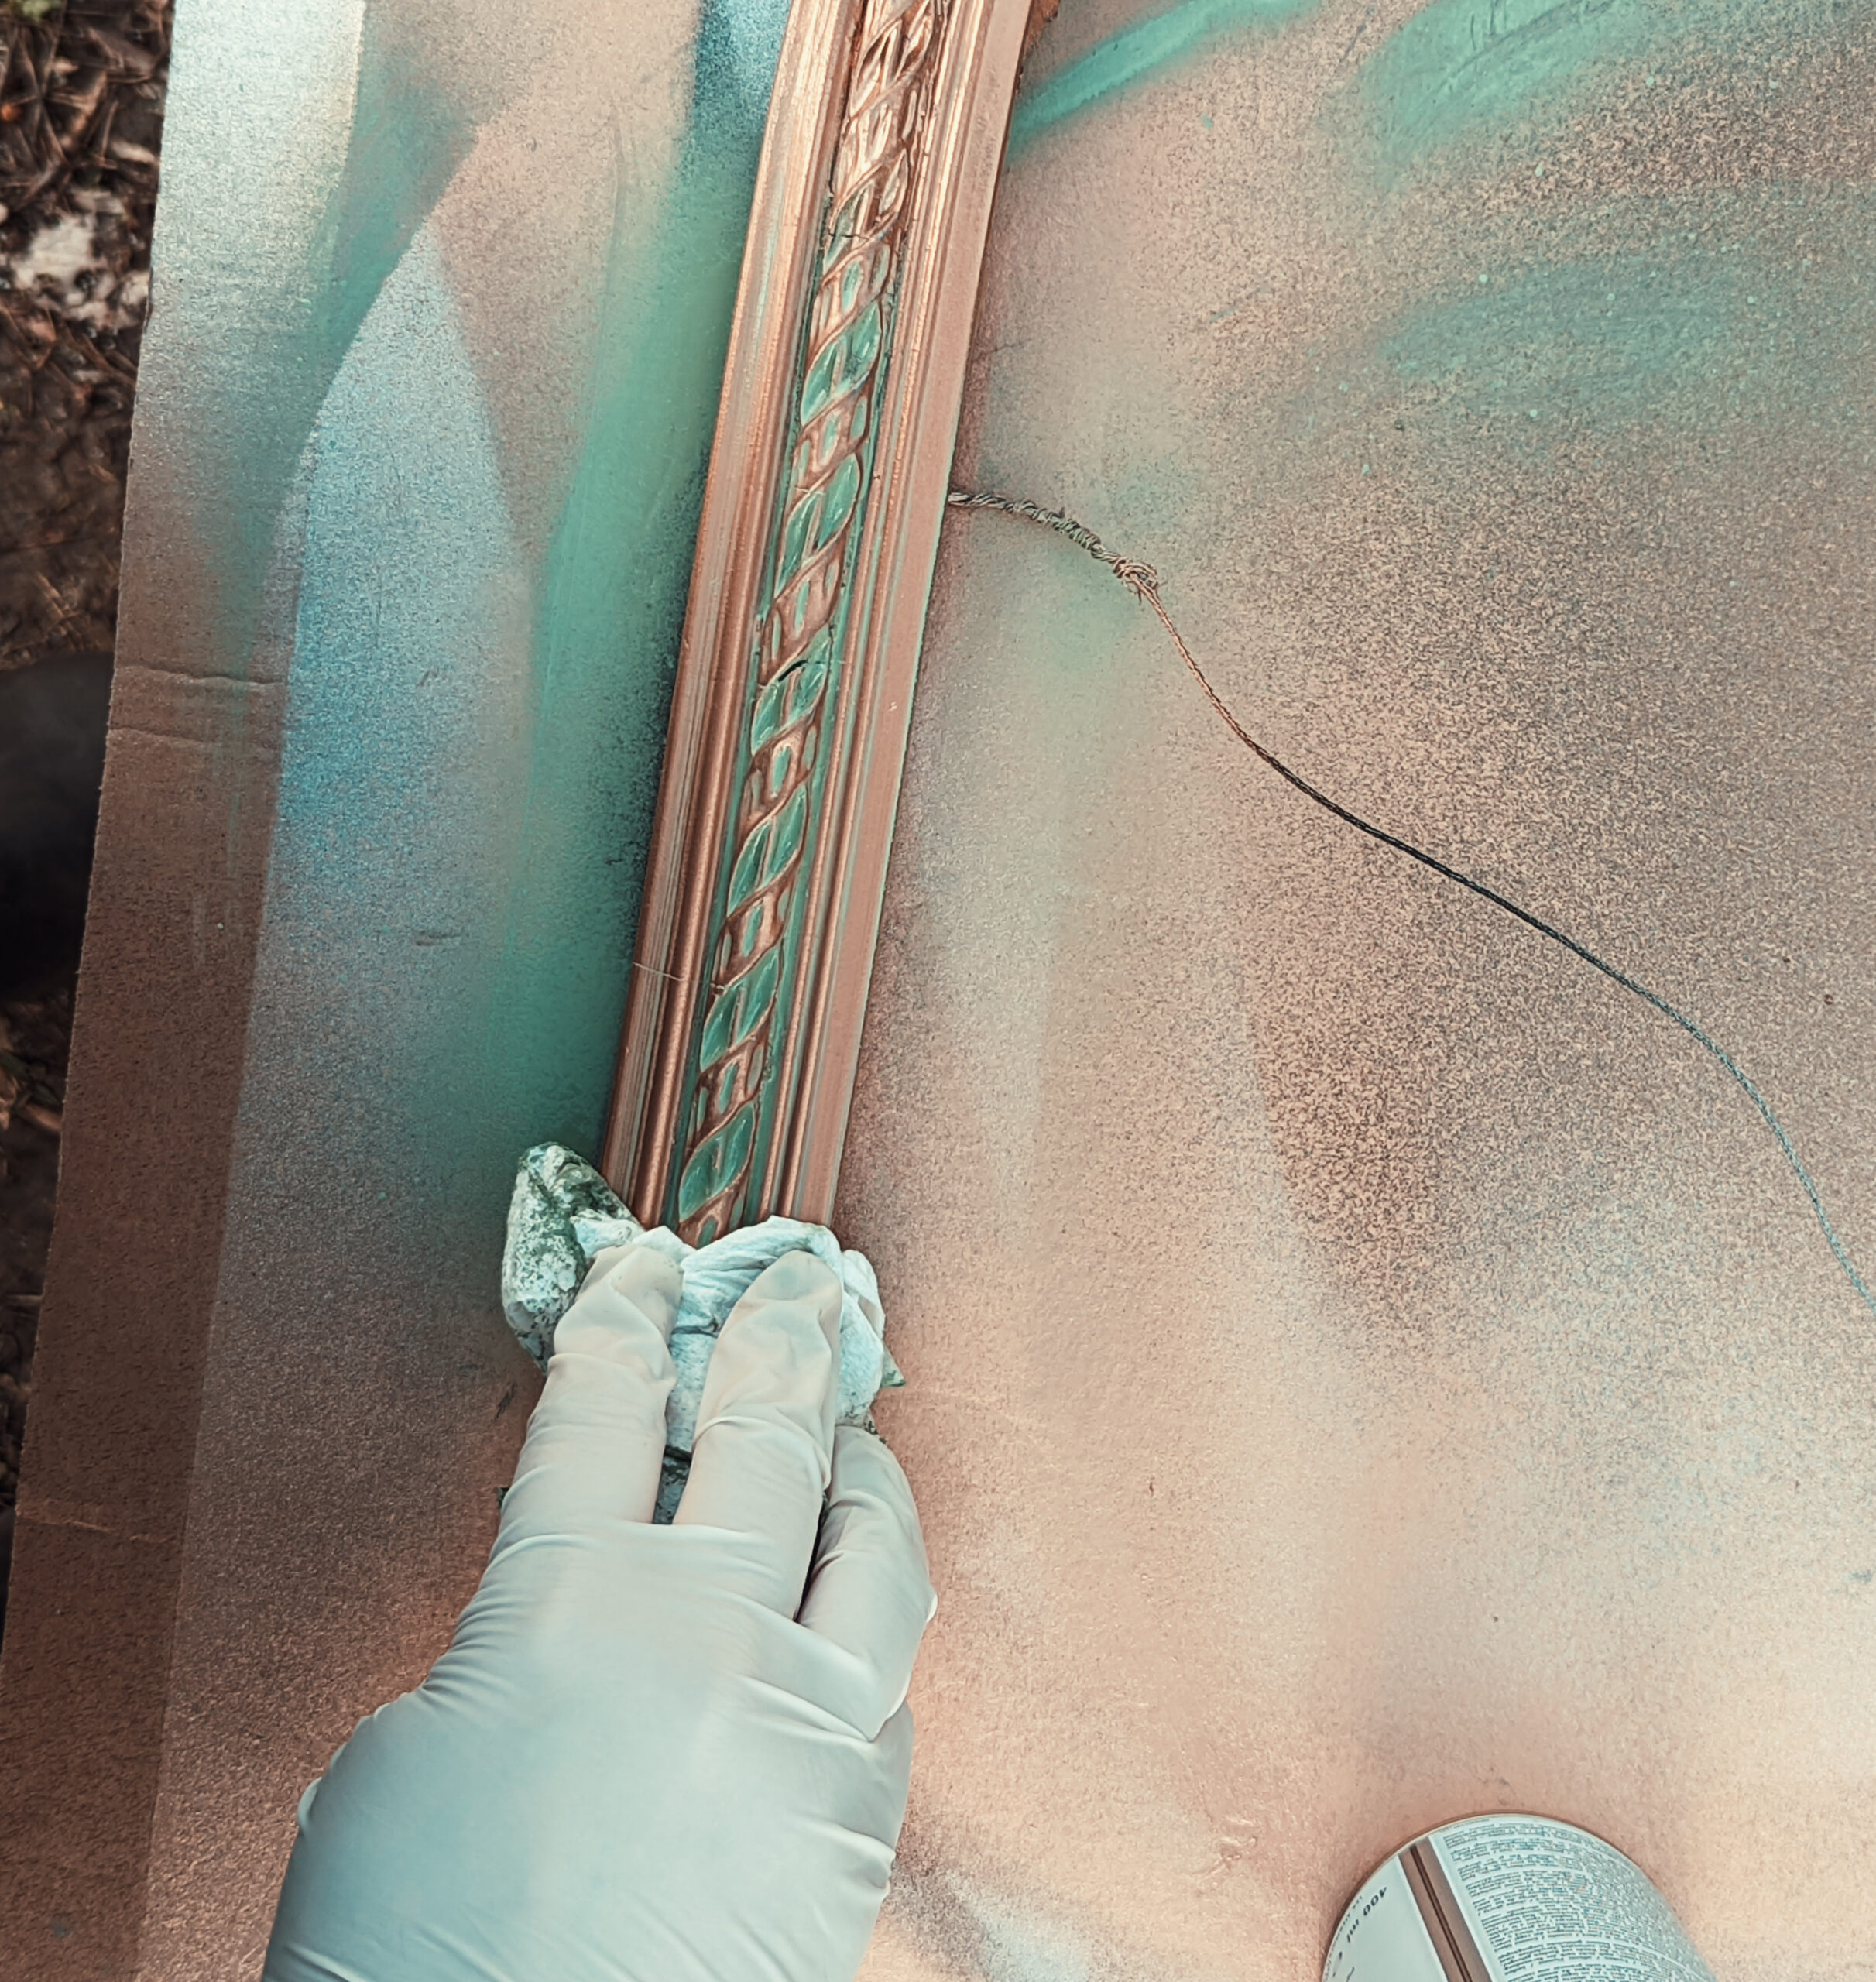
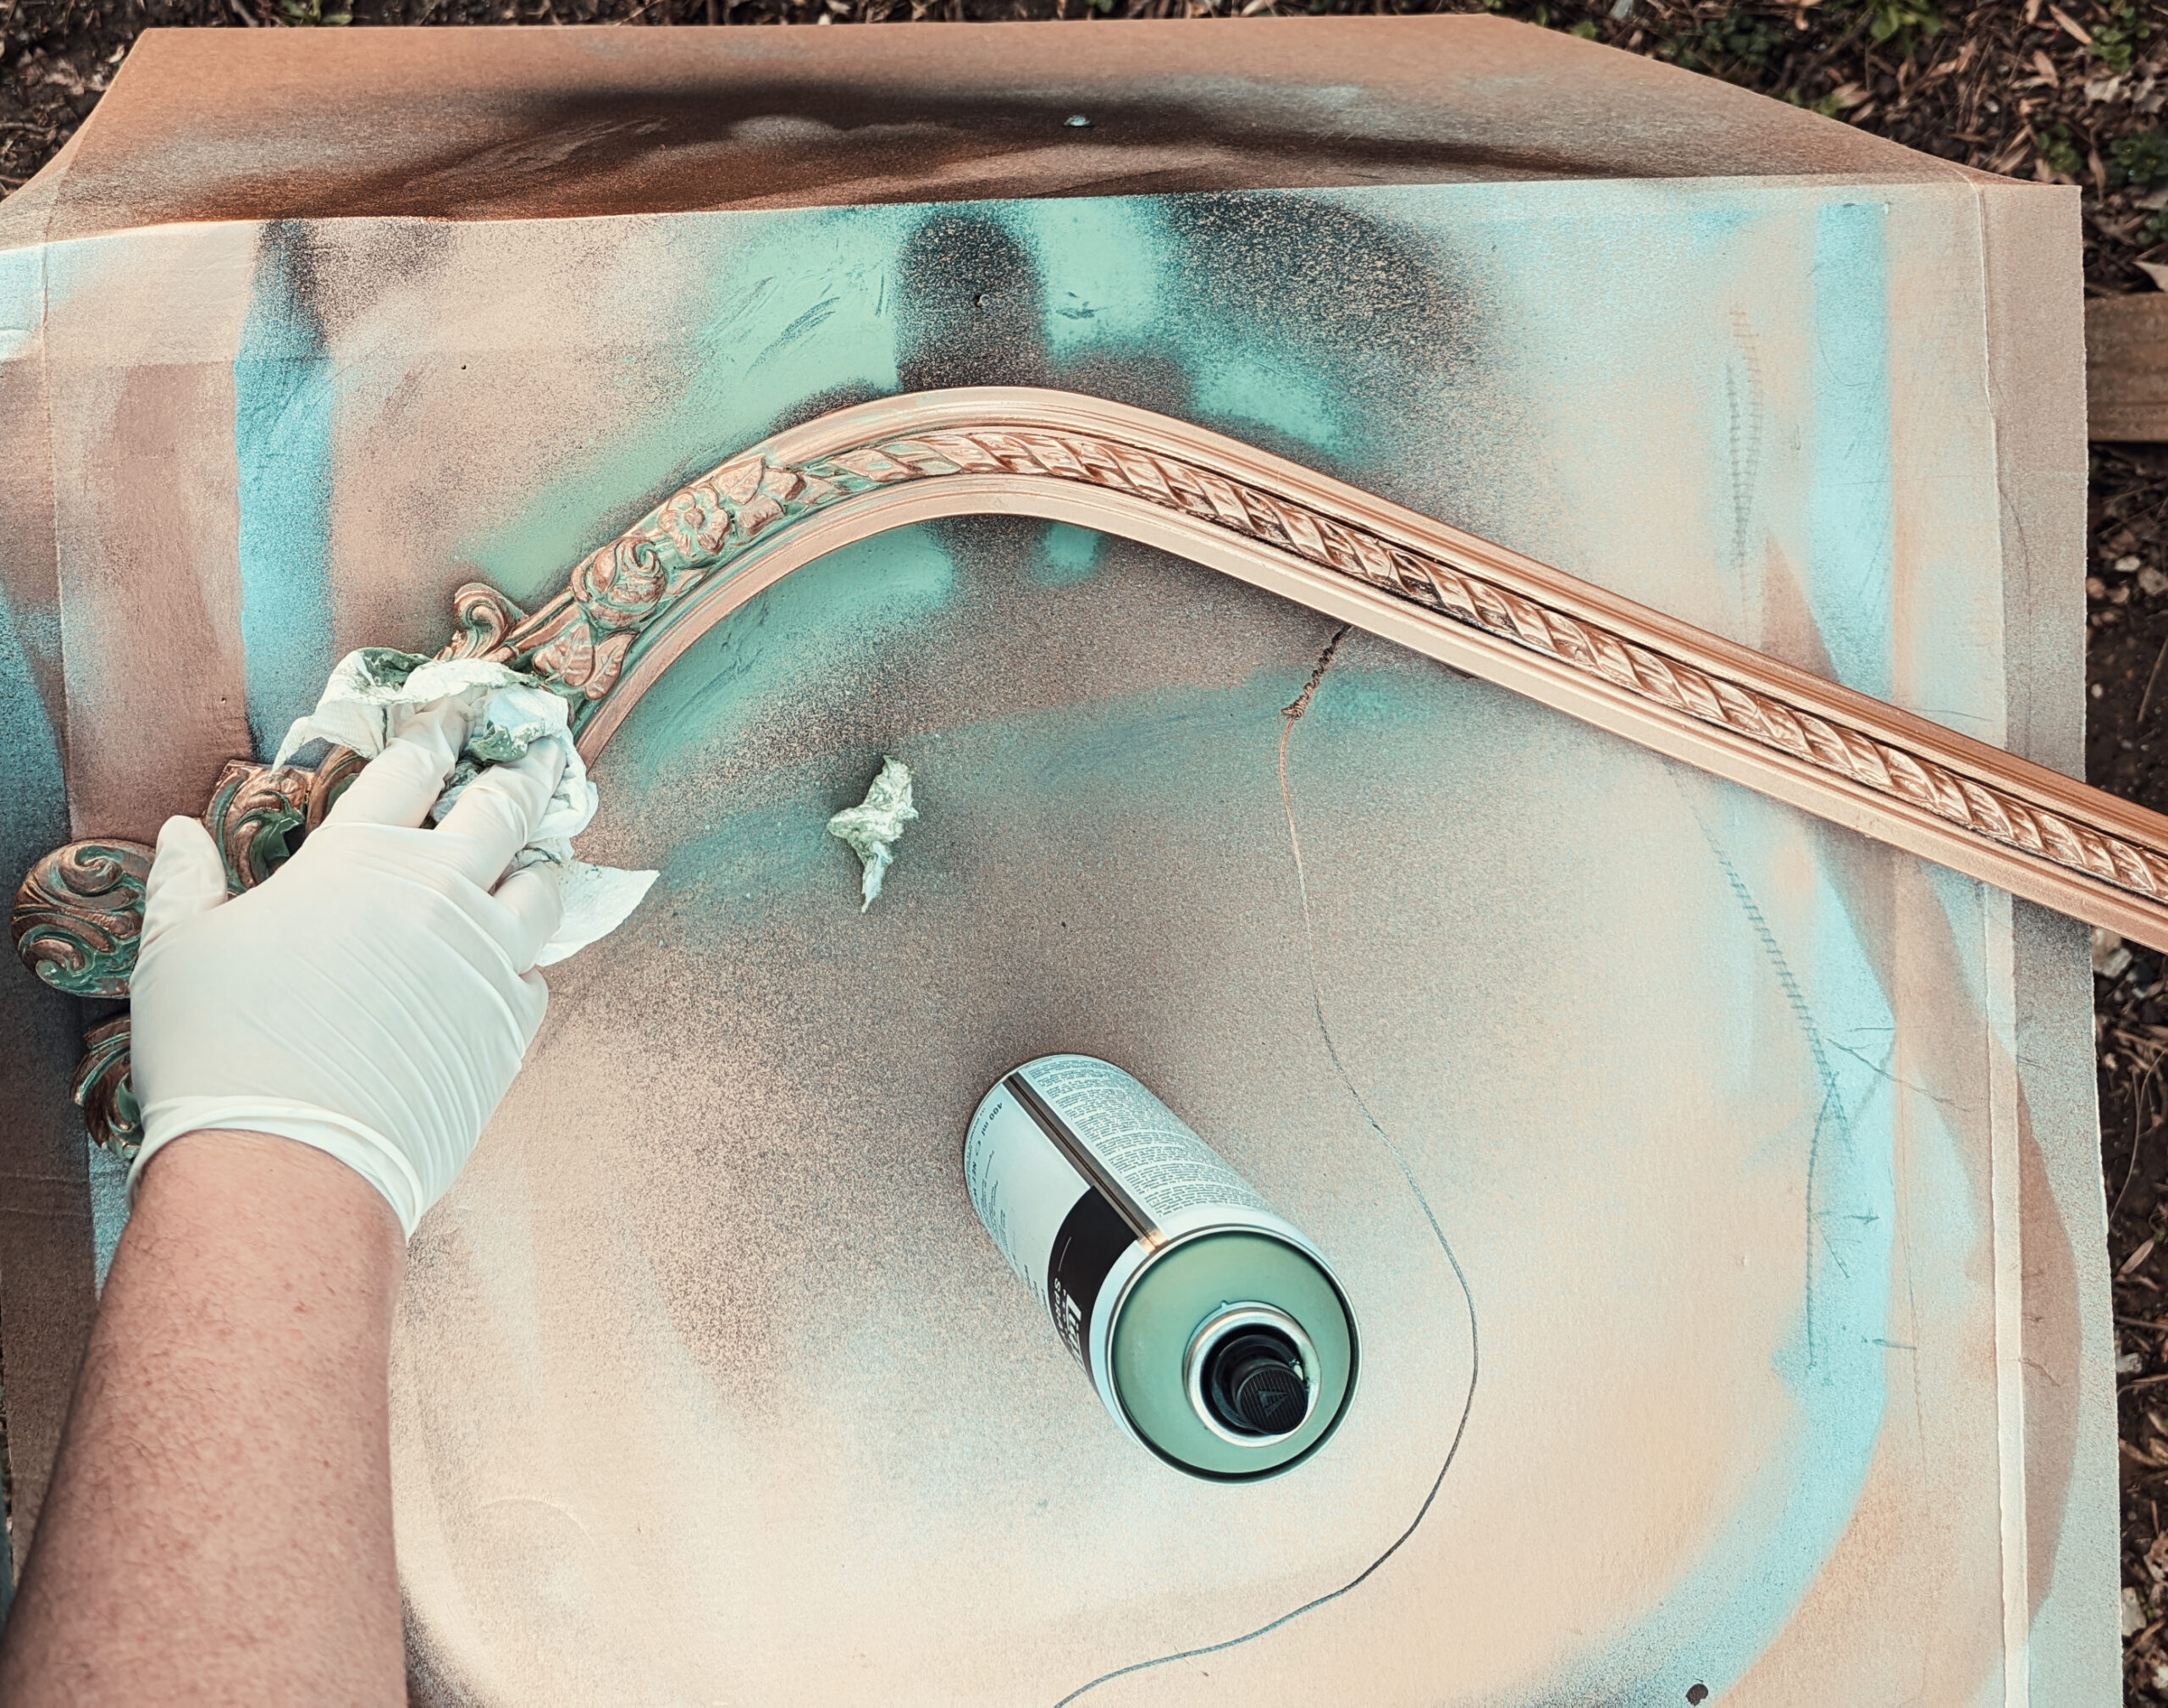
Create Faux Finish by Wiping with Paper Towels.
Grab a handful of paper towels and vigorously wipe the surface of your object to remove all excess green spray paint before it has a chance to dry (and it dries quickly!). Turning or folding the paper towel as needed will ensure that you are wiping with a clean surface that will absorb any excess paint that has accumulated.
During this step, the green paint is almost completely removed from the high points of your object, but it is still visible in the grooves and depressions. When you use this method of leaving green paint (which simulates the appearance of oxidization) in the grooves, your shiny metallic copper object will be transformed into a vintage copper paint job that looks aged and worn.
Pro tip: Make sure you have a container ready to put your paint-soaked paper towels in. It’s far too easy to stain your clothes or even your trashcan when you use this method, so be careful. The first time I experimented with different methods of painting a copper finish in my backyard, I made a point of having a cardboard box nearby so that I could toss paint-soaked rags and paper towels into without having to worry about splattering paint on anything valuable.
Remove as much green paint as possible.
I find the best results, the ones that most accurately reproduce oxidized copper in this faux finish is achieved by removing the vast majority of the green paint.
You can extend the time you have to work with the green spray paint by working in smaller areas or using a little water – dampening your paper towels or spraying an ultra-fine mist of water over the green spray paint while it is still wet.
Allow Object to dry completely & Seal (Optional).
Once you’re satisfied with the appearance of your now vintage-looking antique copper painted surface, leave it undisturbed for at least 24 hours to allow the paint to dry completely. If your object will be exposed to high humidity or extreme temperatures, you may want to seal it with a clear sealant; however, modern paints are extremely resistant to indoor environments, so you can usually get away with skipping the sealant step without causing any problems.
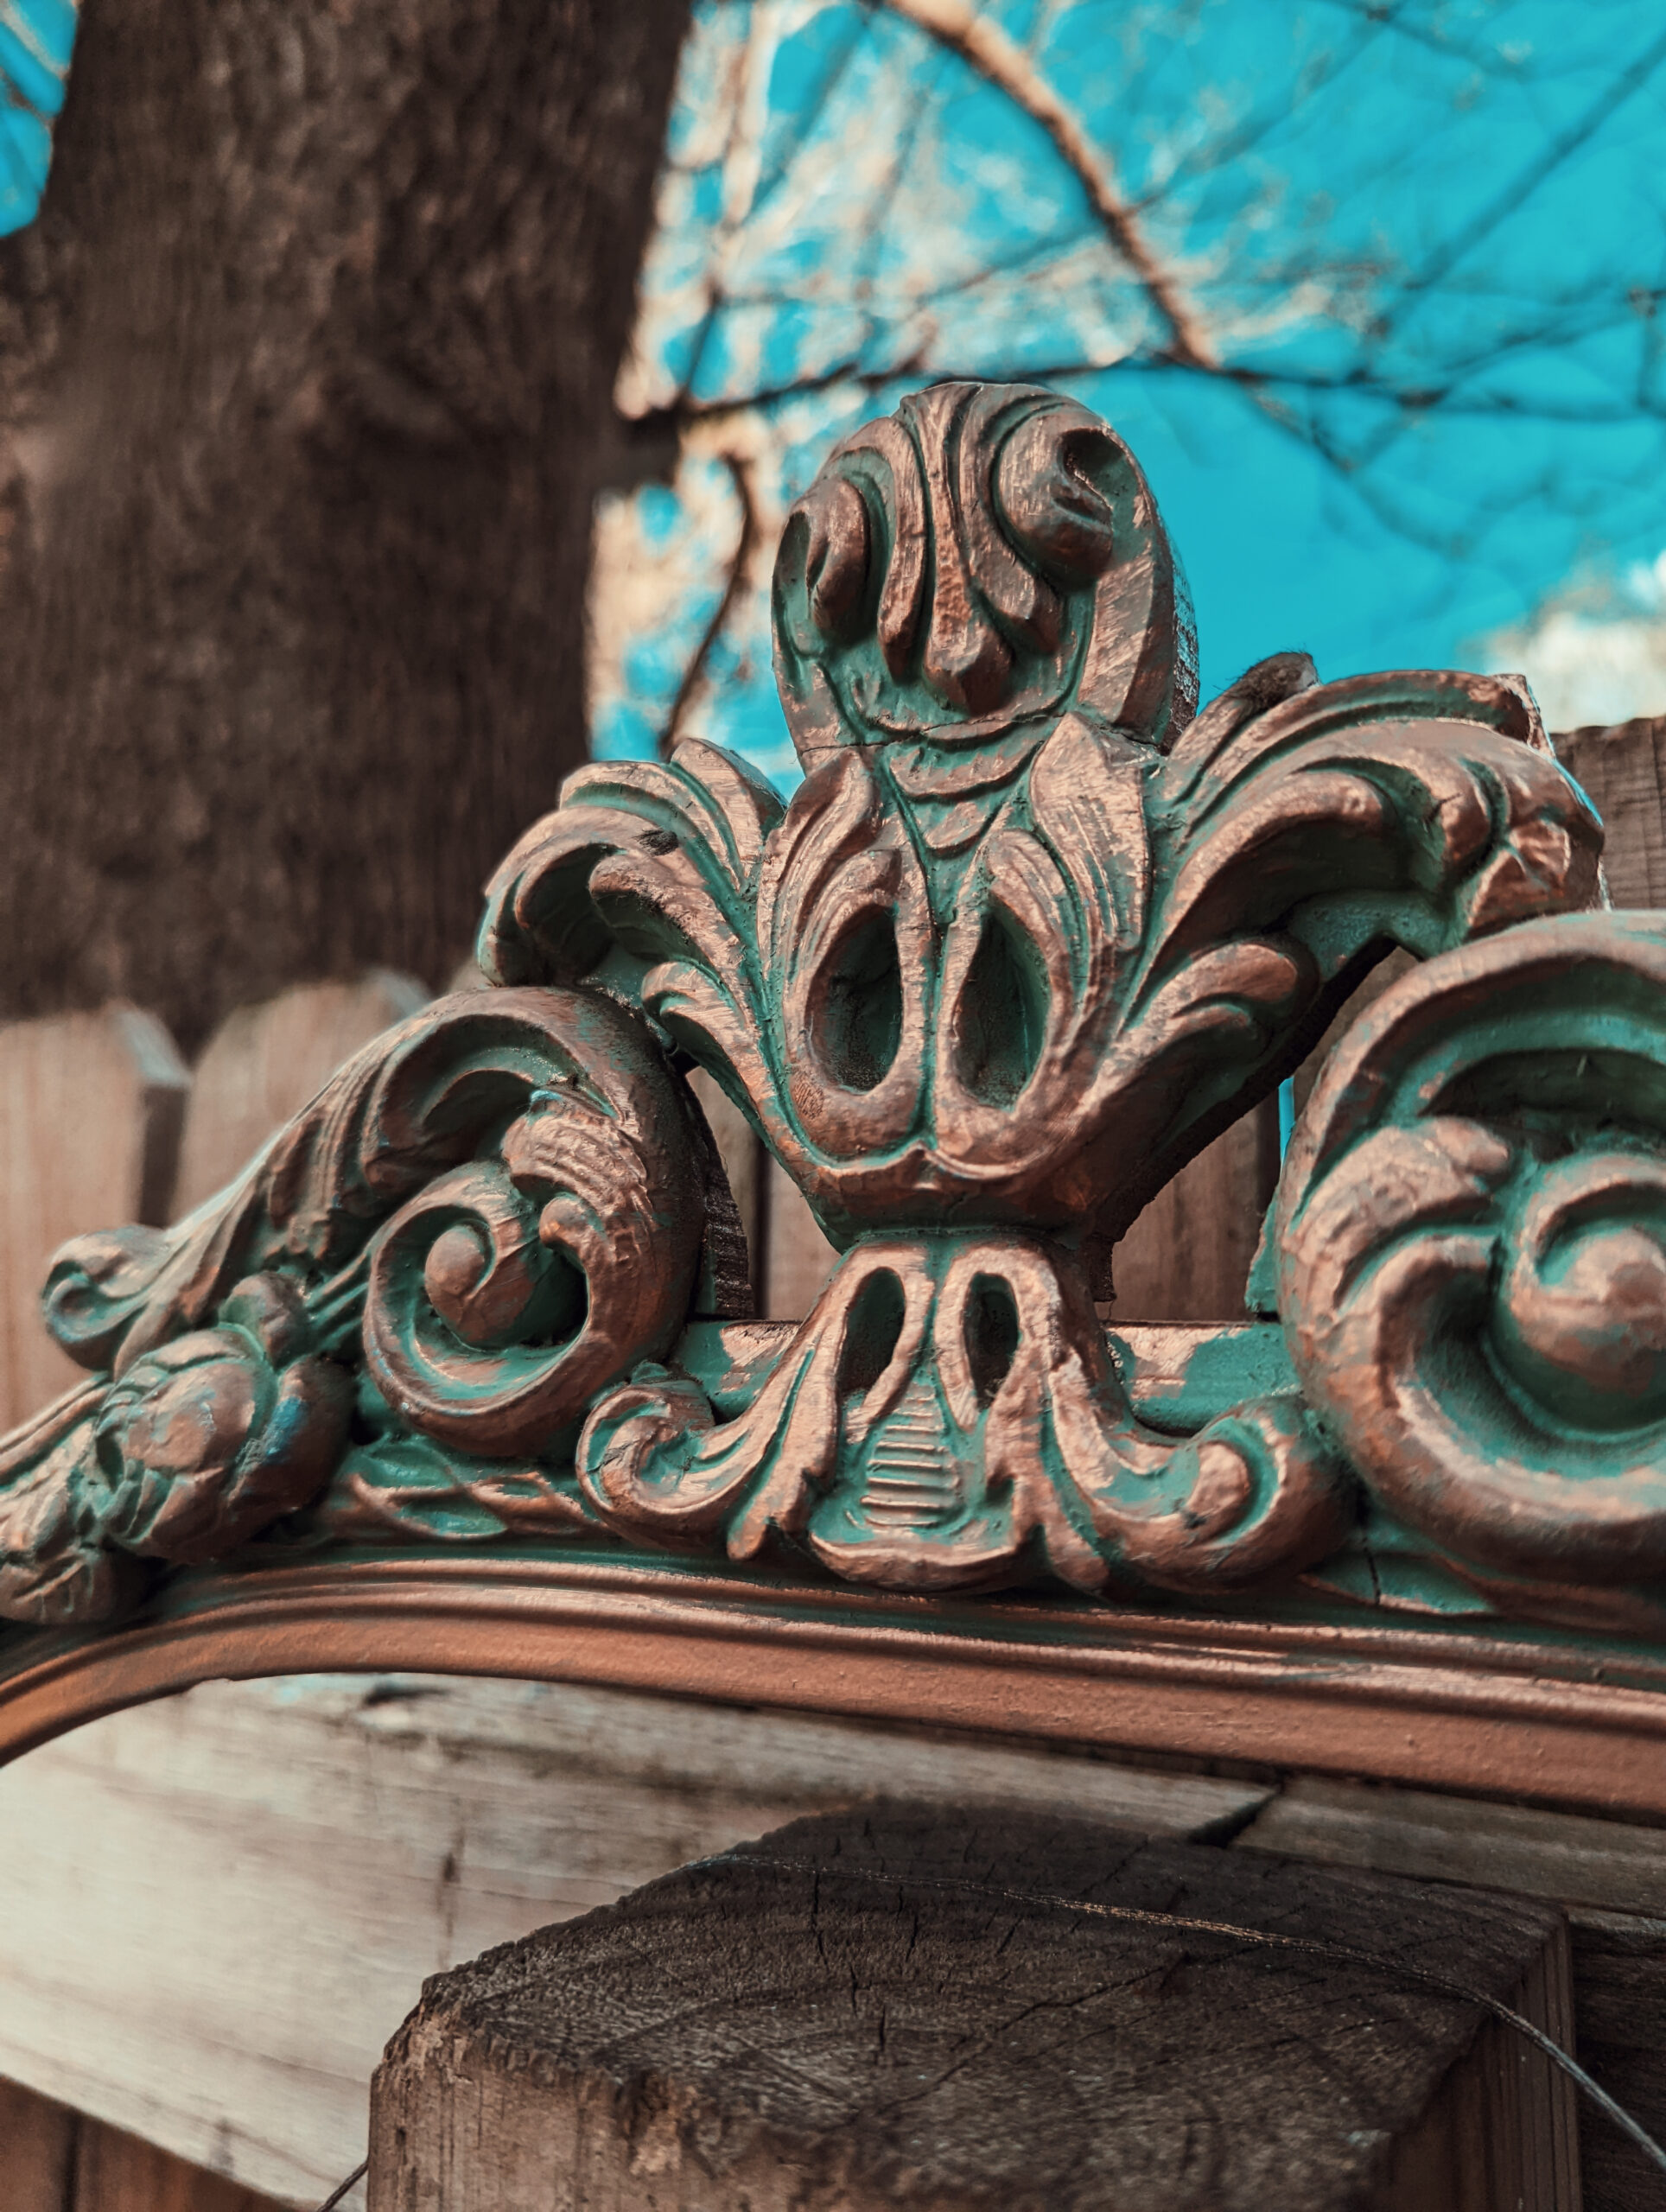

That’s all there is to it! Painting an antique copper patina faux finish is just as simple as painting antique gold, and it takes no more than a few minor adjustments to the color and tone of the spray paints that you use to achieve the desired effect!
It is possible to complete this project using paint applied with a paintbrush, as I did in my antique gold painting tutorial; however, the process will take a little longer, and I believe the effect will be a little less authentic due to the appearance of brushstrokes in the crevices where the faux-oxidize paint settles.
How I learned to Create the look of Antique Copper with Paint
This article was inspired by my popular tutorial on how to paint an antique gold patina. It was 2014 when that tutorial (which was one of the very first DIY’s on Hawk Hill!) was created. As I have gotten even better at my painting method for creating the warm tones of antique gold, I’ve tweaked my method and experimented with various techniques.
When I moved to St Louis and had more space to work in my new workshop, I used this knowledge to begin experimenting with how to replicate a similarly aged metal patina on top of metallic copper paint. It took me a few tries, but I believe I’ve finally perfected my technique for creating the look of real oxidized copper with only a few basic craft supplies.