

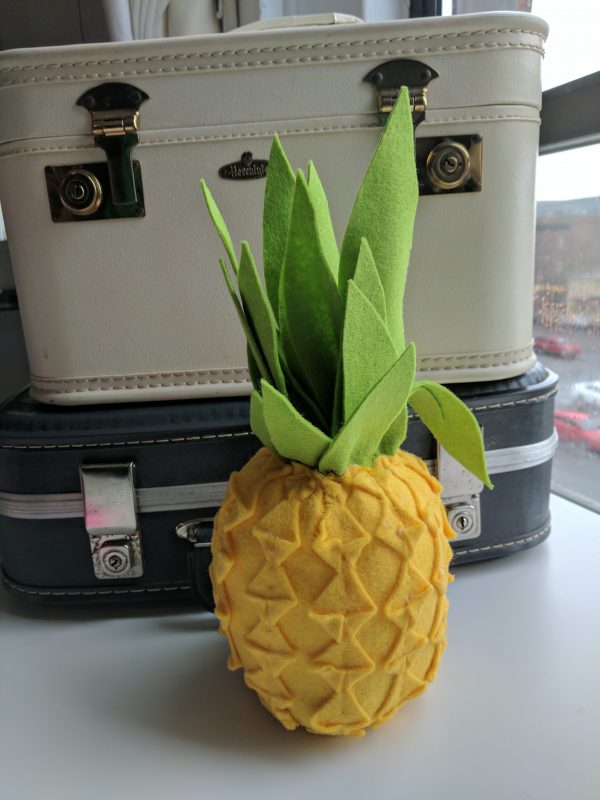
I first saw this pineapple in Anthropologie for $75. I fell in love with it but not with the price, so I made my own version!

Anthropologie’s was $75, mine comes in about $8 using wool felt that’s pretty high-end, so if you use craft-grade felt the supplies will be under $5 total. It’s a little complicated to get the texture but I think it’s worth it. Today I’m going to walk you step-by-step through all of the steps- including creating the cool texture like Anthropologies’ pineapple.
Hawk-Hill.com is a participant in the Amazon Services LLC Associates Program, an affiliate advertising program designed to provide a means for website owners to earn advertising fees by advertising and linking to Amazon.com and any other website that may be affiliated with Amazon Service LLC Associates Program
Things You’ll Need:
- fabric marker
- ruler
- felt
- sewing supplies
- poly-fill stuffing
- weighted poly beads
- glue gun
- pattern (see below)
Free Pattern for Sewing a Felt Food Pineapple

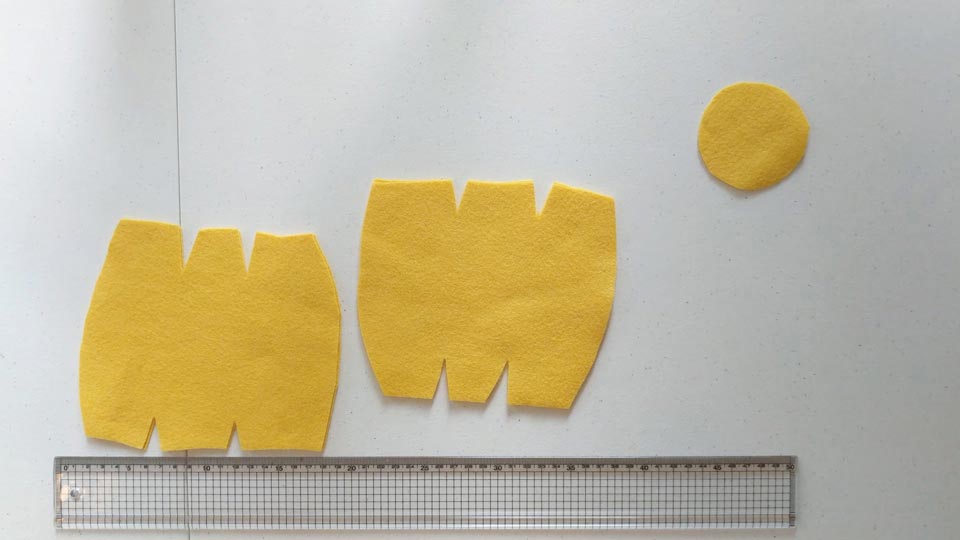
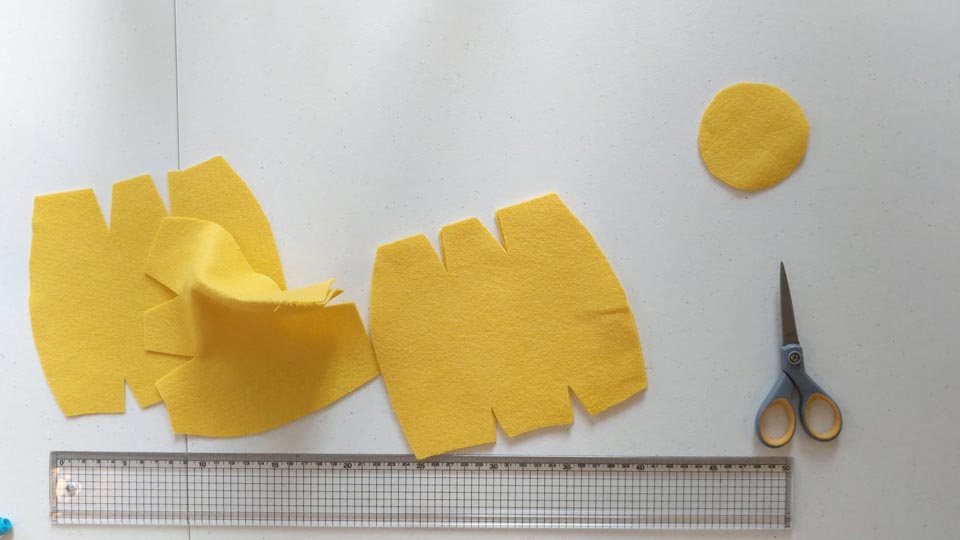
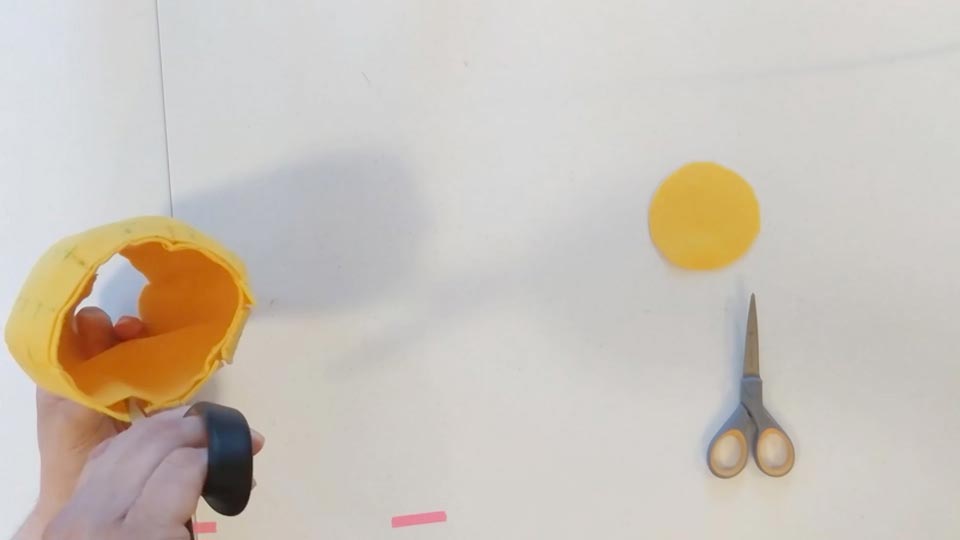
1. the first thing we’re going to do is cut out four of the big shapes that will turn into pineapple sides. The first step will be to stitch each of these large pieces into curved pineapple sides.
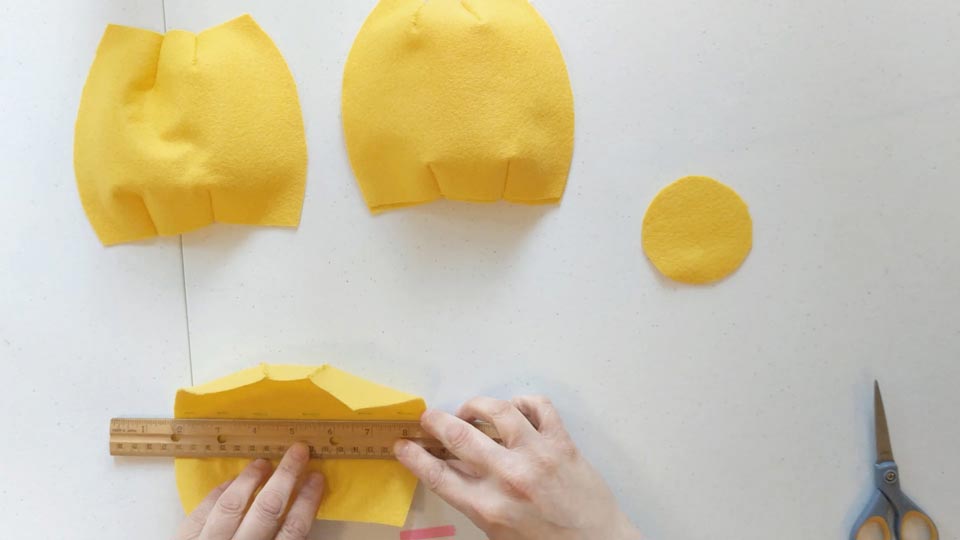
for all four pieces, stitch together the darts at the top and bottom. Stitch only one layer at a time.
We’ll do two layers on each side- basically, we’re making two spheres. One sphere will fit inside of the other sphere. The outside sphere will end up being the one that is the texture and then the under-sphere is what forms the backdrop for the texture.
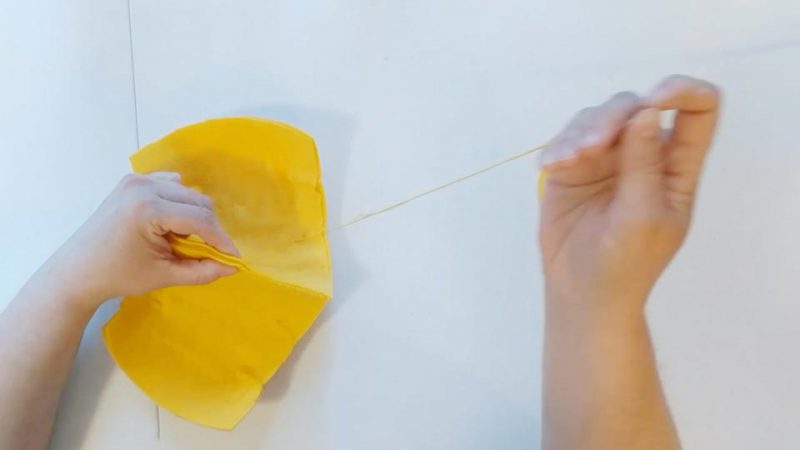
Now are just going to stitch these spheres together. The only difficult part about this is to make sure that your stitches show on the same side so that when the piece is formed into a curve, the stitches are hidden on the inside of the curve. Make them nice and tidy before stitching them into a three-dimensional sphere to form the pineapple body.

I’m going to add lines, at this point, so I’ll know how to create even texture later on in the tutorial. I use a ruler to create a grid. You’ll need a fabric marking pen for this project it’s the only thing that you really can’t substitute- washable fabric marker is essential for creating the texture evenly.
Make sure the grid on one-sided even with the grid on the other half of the sphere, otherwise your texture will have an awkward seem.
The fabric marking pen washes off with just a damp rag. It’s super easy to use.

Once they’re all marked the next step is stitching up a little vertical line on the vertical dotted lines that we drew. What this does is anchors the decoration layer to the pineapple body. Otherwise, if you try to create a texture with the top layer without securing it, it won’t work very well. I did try gluing it but that didn’t work at all, because the glue prevents it from being flexible.
If you have a sewing machine, these rib stitches will be quick work. I do not currently have a sewing machine so I’m doing it the old-fashioned way.

Now that I’ve done all those vertical ridges it’s time to actually put the pineapple together. Put the two halves together marked-face to marked-face and then so the seams at the sides through all four layers at once.

I use a couple of embroidery floss strands here because this stitch will hold a lot of pressure.
It should start to look like a pineapple pretty soon, which is exciting!
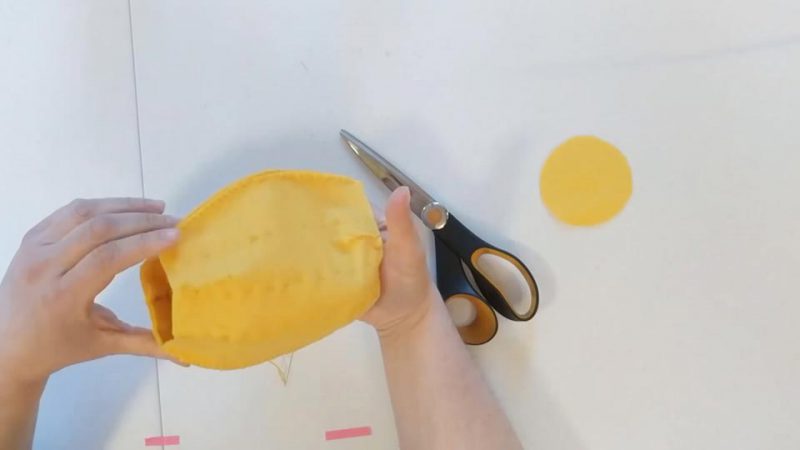

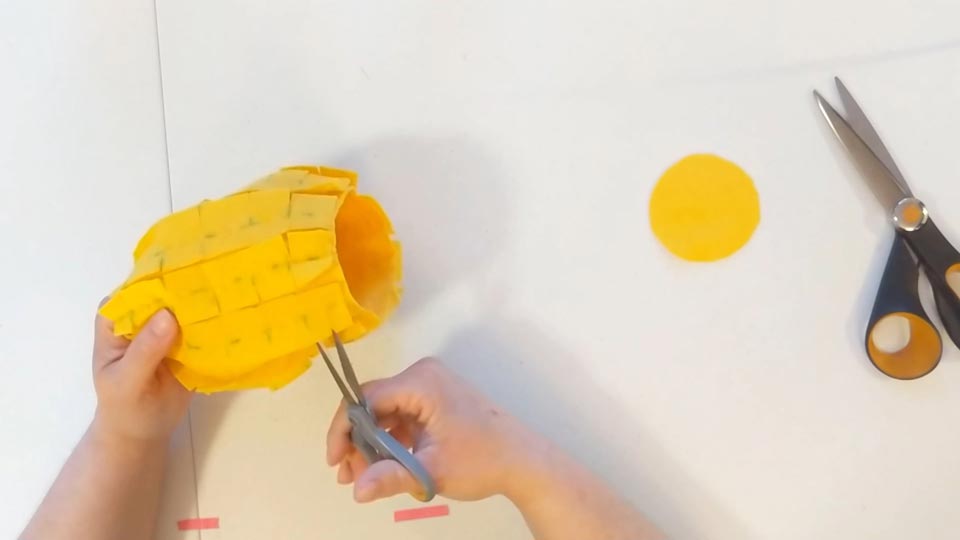
Next we turning it inside out, and then cut in between the vertical stitches that were made going upwards. You can see I’m very careful to only be cutting through the top layer of fabric.
I find scissors that have just a little bit of a blunted edge work better for this, that’s why I’m not using the sharp scissors visible in the photos.
This step is quick: cutting vertical slits from top to bottom.

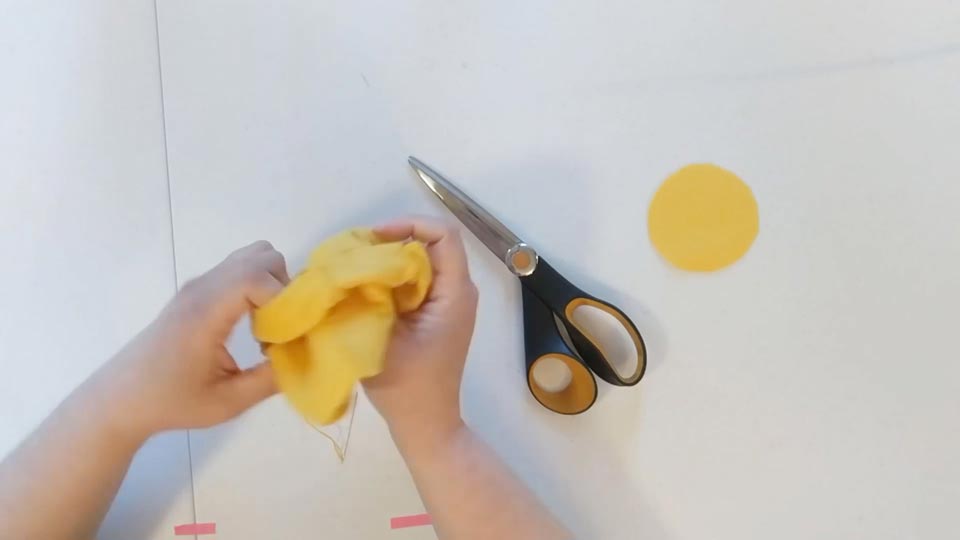
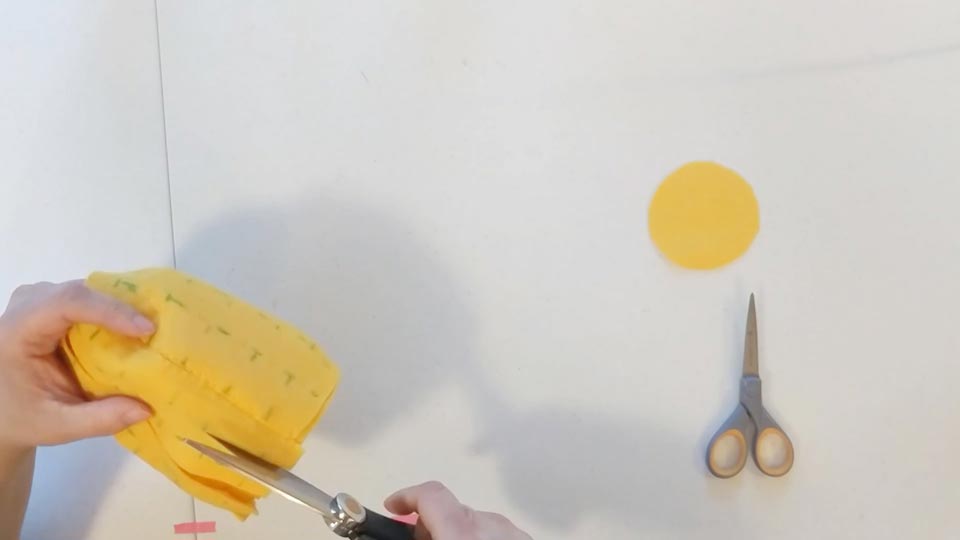
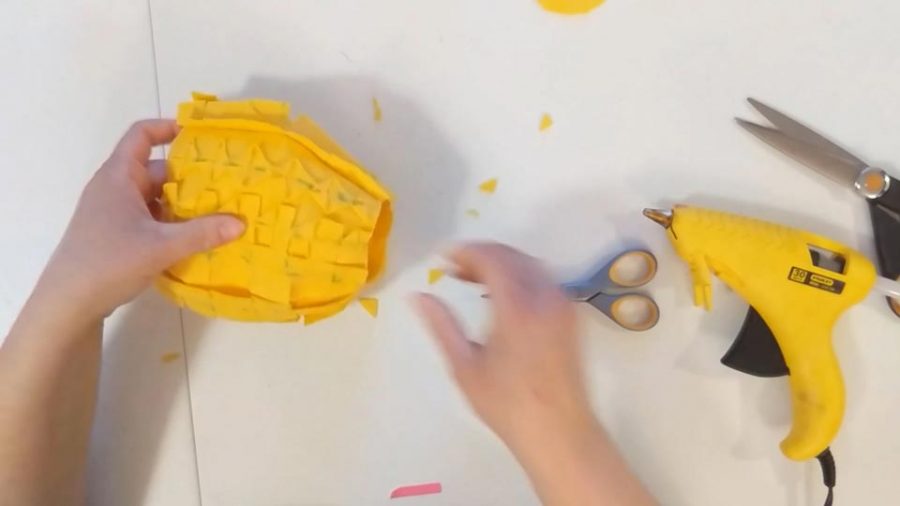
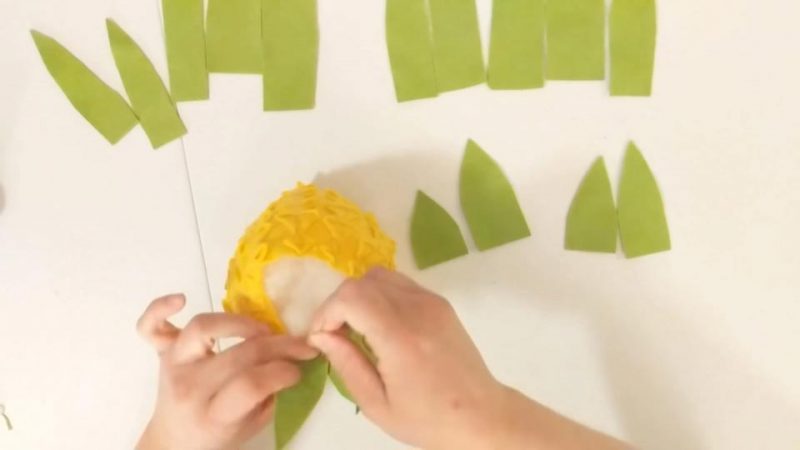
Next, I’m going to go through and cut the flaps horizontally at the places where the marks were made. This part is, honestly, tedious but I really love how this particular pattern style actually creates a pineapple texture.
I cut lots of little flaps that almost look like fringes.

This next part involves a little bit of a hot glue, so plug that in and get it going. I like to use a Stanley hot glue gun. The hardware-grade hot glue guns are often better made than the craft store equivalent. I bought this one many years ago and it just keeps going and going and going.
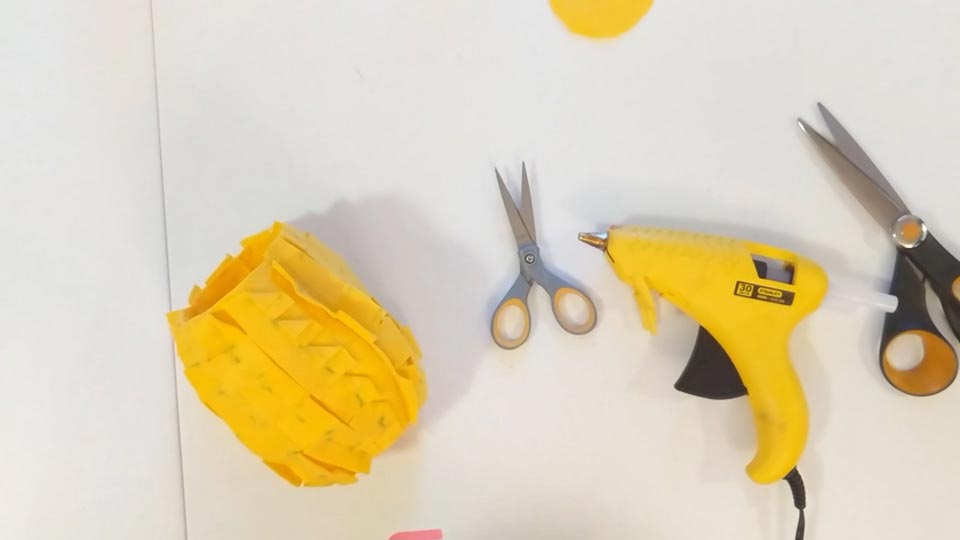
Next step: you’ve cut little cubes that are stitched in the down the middle, and so what you’ll do next is fold the corners of the cubes inwards so both sides will come down. If you use tiny amounts of hot glue this project actually works a lot better.
The more you glue you use, the messier it is, and the more likely you are to get a burn from excess hot glue.
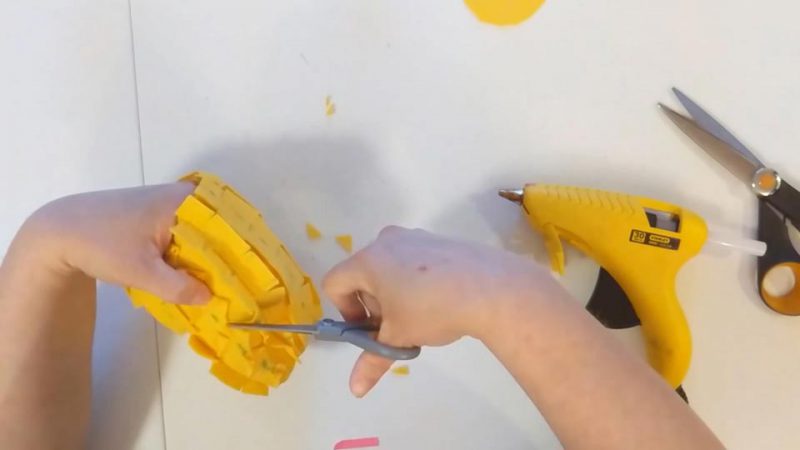
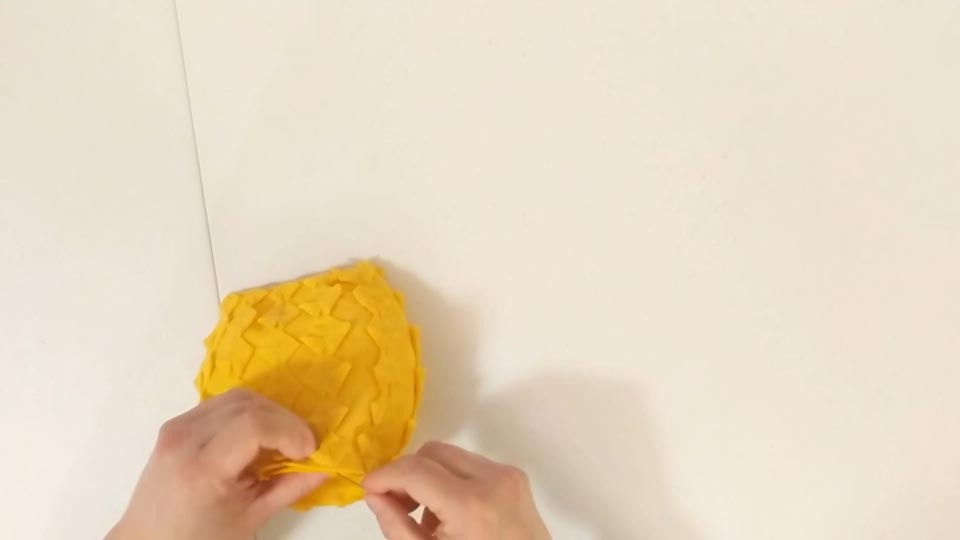
After gluing, come back and cut off the bottom triangle. So instead of folding the bottom triangles up you’re actually just cutting them off. It’s tedious, but creates a cool texture, so put a movie on and have at it. You’ll have to work around the little gussets that we stitched to make the pineapple have a curve on the bottom. As long as you glue securely you should be able to cut through the gussets on the top layer and not have a problem.
Sometimes when you’re using a tiny amount of glue you’ll see corners pop back up as you keep working- I far prefer having to add just a tiny bit of glue to the alternative – messy, visible excess glue.

Below you can see that I’ve finished up the texture on the outside and I am wiping off all of the marks left from my fabric marking pin. Just dabbing with a damp washcloth removes the marks completely.

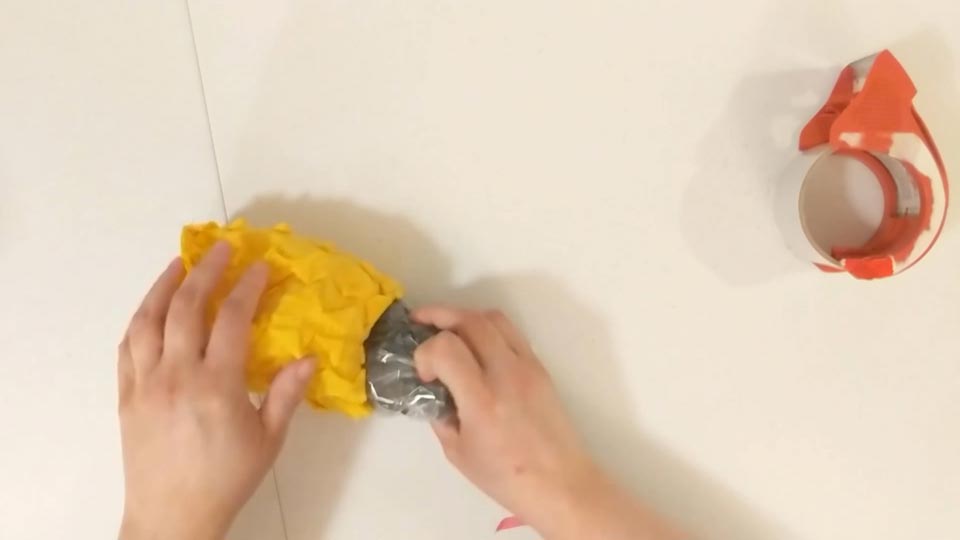
Now, I’ll stitch the bottom of the pineapple onto the pineapple. I’m just taking the disc-shaped piece of felt and began stitching it on to the wider opening at the bottom of the pineapple. You can tell the top from the bottom because it’s a bit narrower at the top.

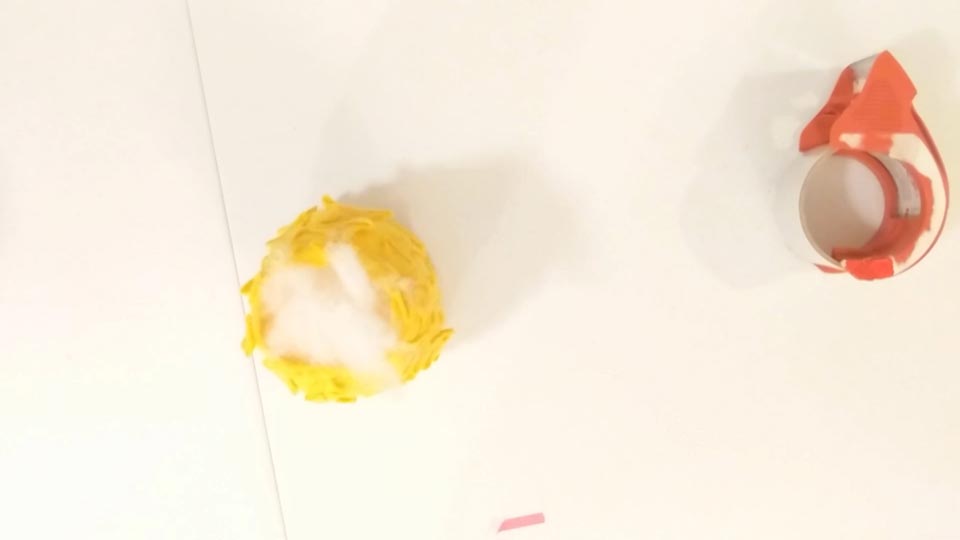
Once it’s all stitched together you’ll want to stuff the pineapple- but don’t just stuff with regular filling! To make this sit with a nice bottom on a shelf you’ll want to add weight to the stuffing. I actually put a Ziploc full of beans at the bottom of mine but small plastic beads are preferred for durability. You can use a lot of weight or very little –Anthropologie’s Pineapple is actually designed as a bookend and it’s really heavy!


When that’s done I can start putting my polyfill in to top off the pineapple. I like to over-stuff a little bit.
Adding Pineapple Leaves to Your Felt Pineapple
Once you’ve finished the pineapple’s body, it’s ready to finish with a crown of spikey felt pineapple leaves.

I cut lots of different lengths and some different widths. The only hard and fast rule is that you need some short ones and some long ones, because on natural pineapples the leaves in the center are taller and the ones on the outside are short and stubby.

FLOPPY OR STRAIGHT? I like how my floppy leaves turned out, but if you don’t like how yours naturally fall when it’s done, you can mix up some felt fabric stiffener and then dip the top of your pineapple in it. When it dries your felt leaves should be stiffer and more upright.
Another method to make leaves more upright is to create 2-ply leaves. Taking a bit of time to make your leaves with two layers stitched together will create visual interest and make the leaves easier to stand upright without stiffener.
The next step is to stitch the short leaves around the top just like this. Overlap just 1/4 inch or so with each of the short leaves.

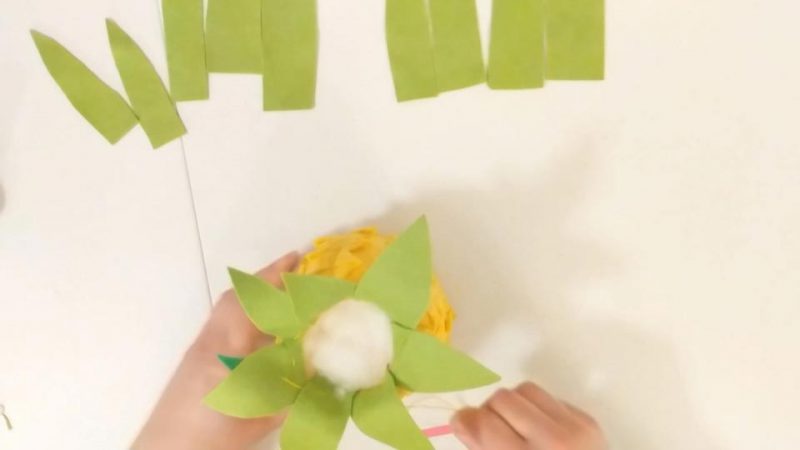
I stitch them together along the side, and then cinch up the outer leaves and then push the inner leaves into the center.

Next, gather it up some more, and stitch all the leaves together with some good solid stitches all the way through the top of the pineapple.

In this project, I have used wool felt. Wool felt is a little bit stiffer, slightly thicker and it comes in far more colors than the craft felt you can shop at the craft store. It is more expensive, though. Regular felts at a craft store (made from recycled fibers) will run about 25-50 cents a sheet and WoolFelt will run a dollar to two dollars for the same amount of fabric. I do think it’s worth it, for quality and longevity as well as ease of crafting- the long wool fibers make woolblend felt a lot easier to sell, cut, and work with.
WOOL FELT COLORS – Instead of just a primary yellow or fluorescent color (the extend of options at most craft stores) for this project I use a pale goldenrod yellow and pistachio green, shades which work really well for making a plush item like this pineapple a bit more sophisticated.
Bonus Tips:
1: Stiffening Felt on Pineapple Crown

There is a good chance, especially if you used a thin brand of felt, that your pineapple will look a bit more like the one pictured above than a pert grocery store pineapple. Never fear, a quick stiffening treatment on the pineapple leaves will have them displaying a more dimensional look in no time.
Just mix up the recipe from our felt stiffening tutorial, and place it in a Ziploc bag. Turn your pineapple upside down and dip the leaves in the bag, squeezing to make sure that the stiffening mixture impregnates the fabric. Make sure that the stiffening solution reaches the base of the leaves as these bases support the rest of the leaf and need to be strengthened.
Lift the pineapple out of the bag, wring out the leaves, smooth them flat with your fingers, and allow the pineapple to dry upside down in a dry space. Once dry, the pineapple leaves should stick straight upright like a real pineapple but still be soft to the touch.

1: Adding even more Dimension
working in three dimensions without can add so much texture and dimension, but to make an even more realistic faux felt food, use alcohol ink. This waterproof ink is perfect for drawing on felt food to add grill lines, shading, or details.

In the photo below you can see how subtle shading with brown makes the texture of the fabric even deeper- like a real pineapple. To get this coloring, I used a Light Walnut colored Copic Marker.

Find more felt food projects via my guide to getting starting sewing felt food toys.
This is fabulous. I want to make a similar bookend that’s sold in Marie Kondo’s shop so I’m grateful for your efforts recreating the Anthropologie/Fiona Walker England pineapple. You did a great job with the texture. I have a couple of questions if you happen to recall the answers (I know this post is 2 years old): Do you remember how many yards/sheets of wool felt were used for the pineapple and leaves? How tall was the final product, roughly? Cheers.