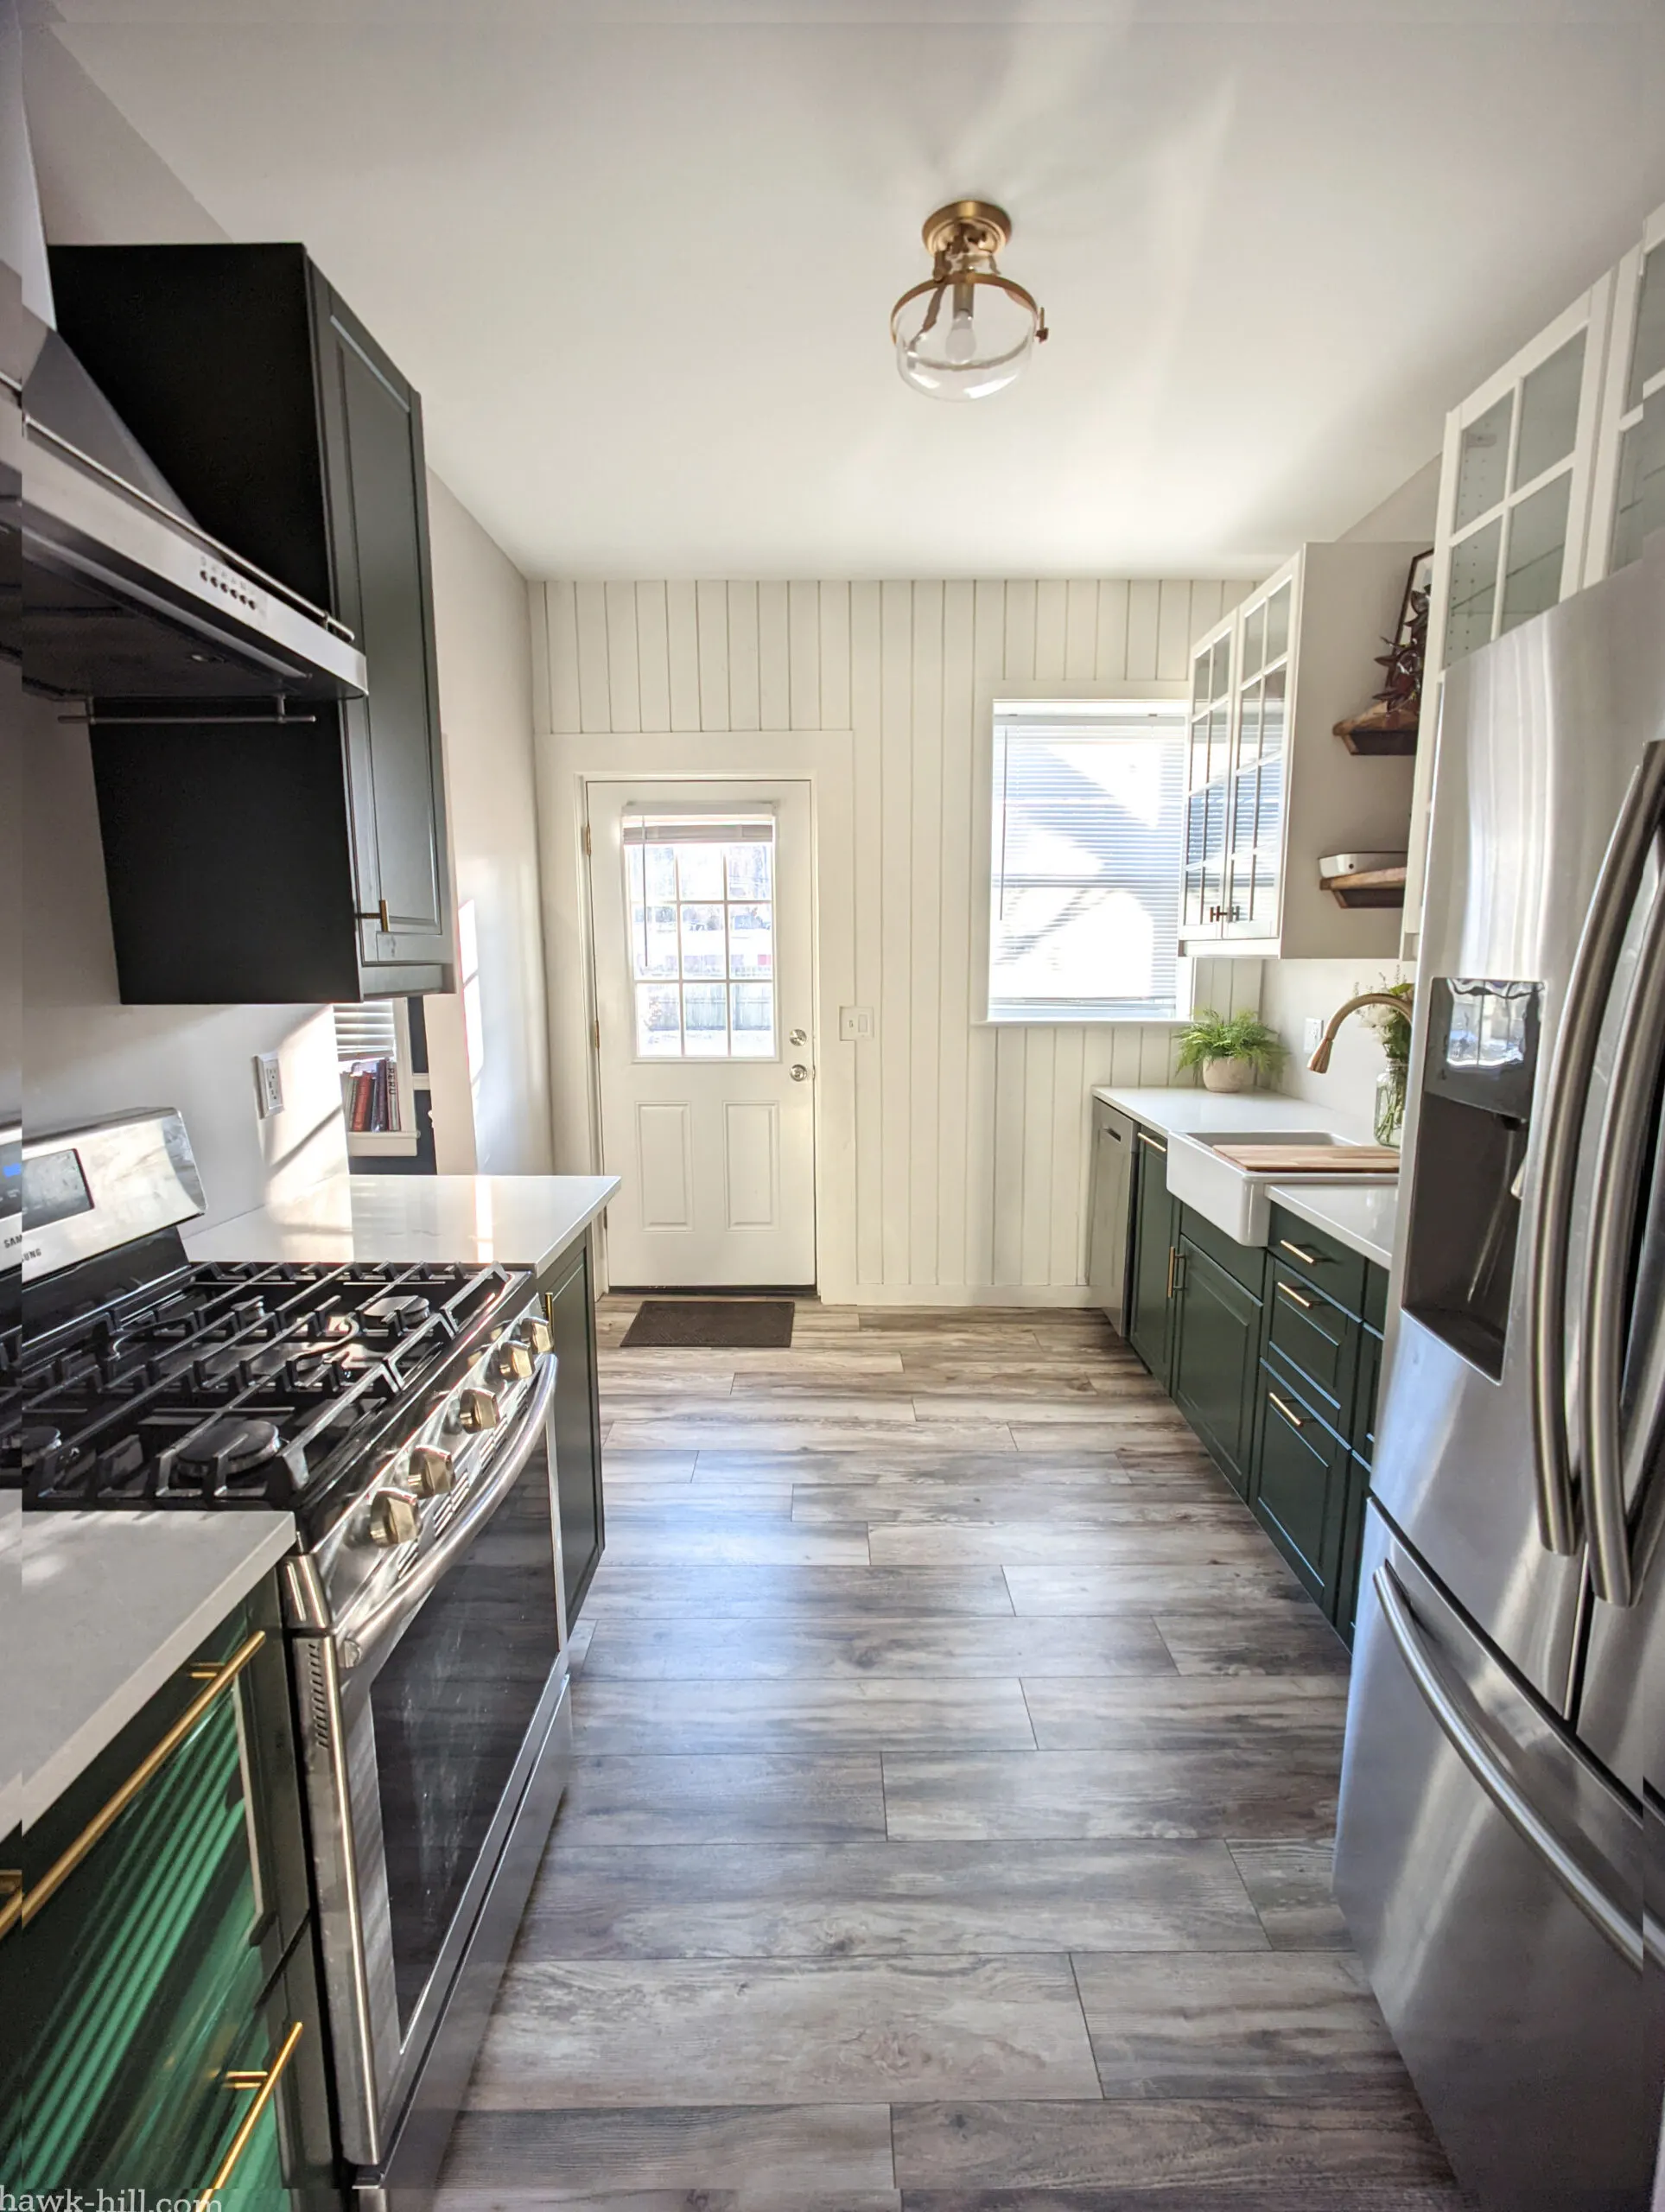
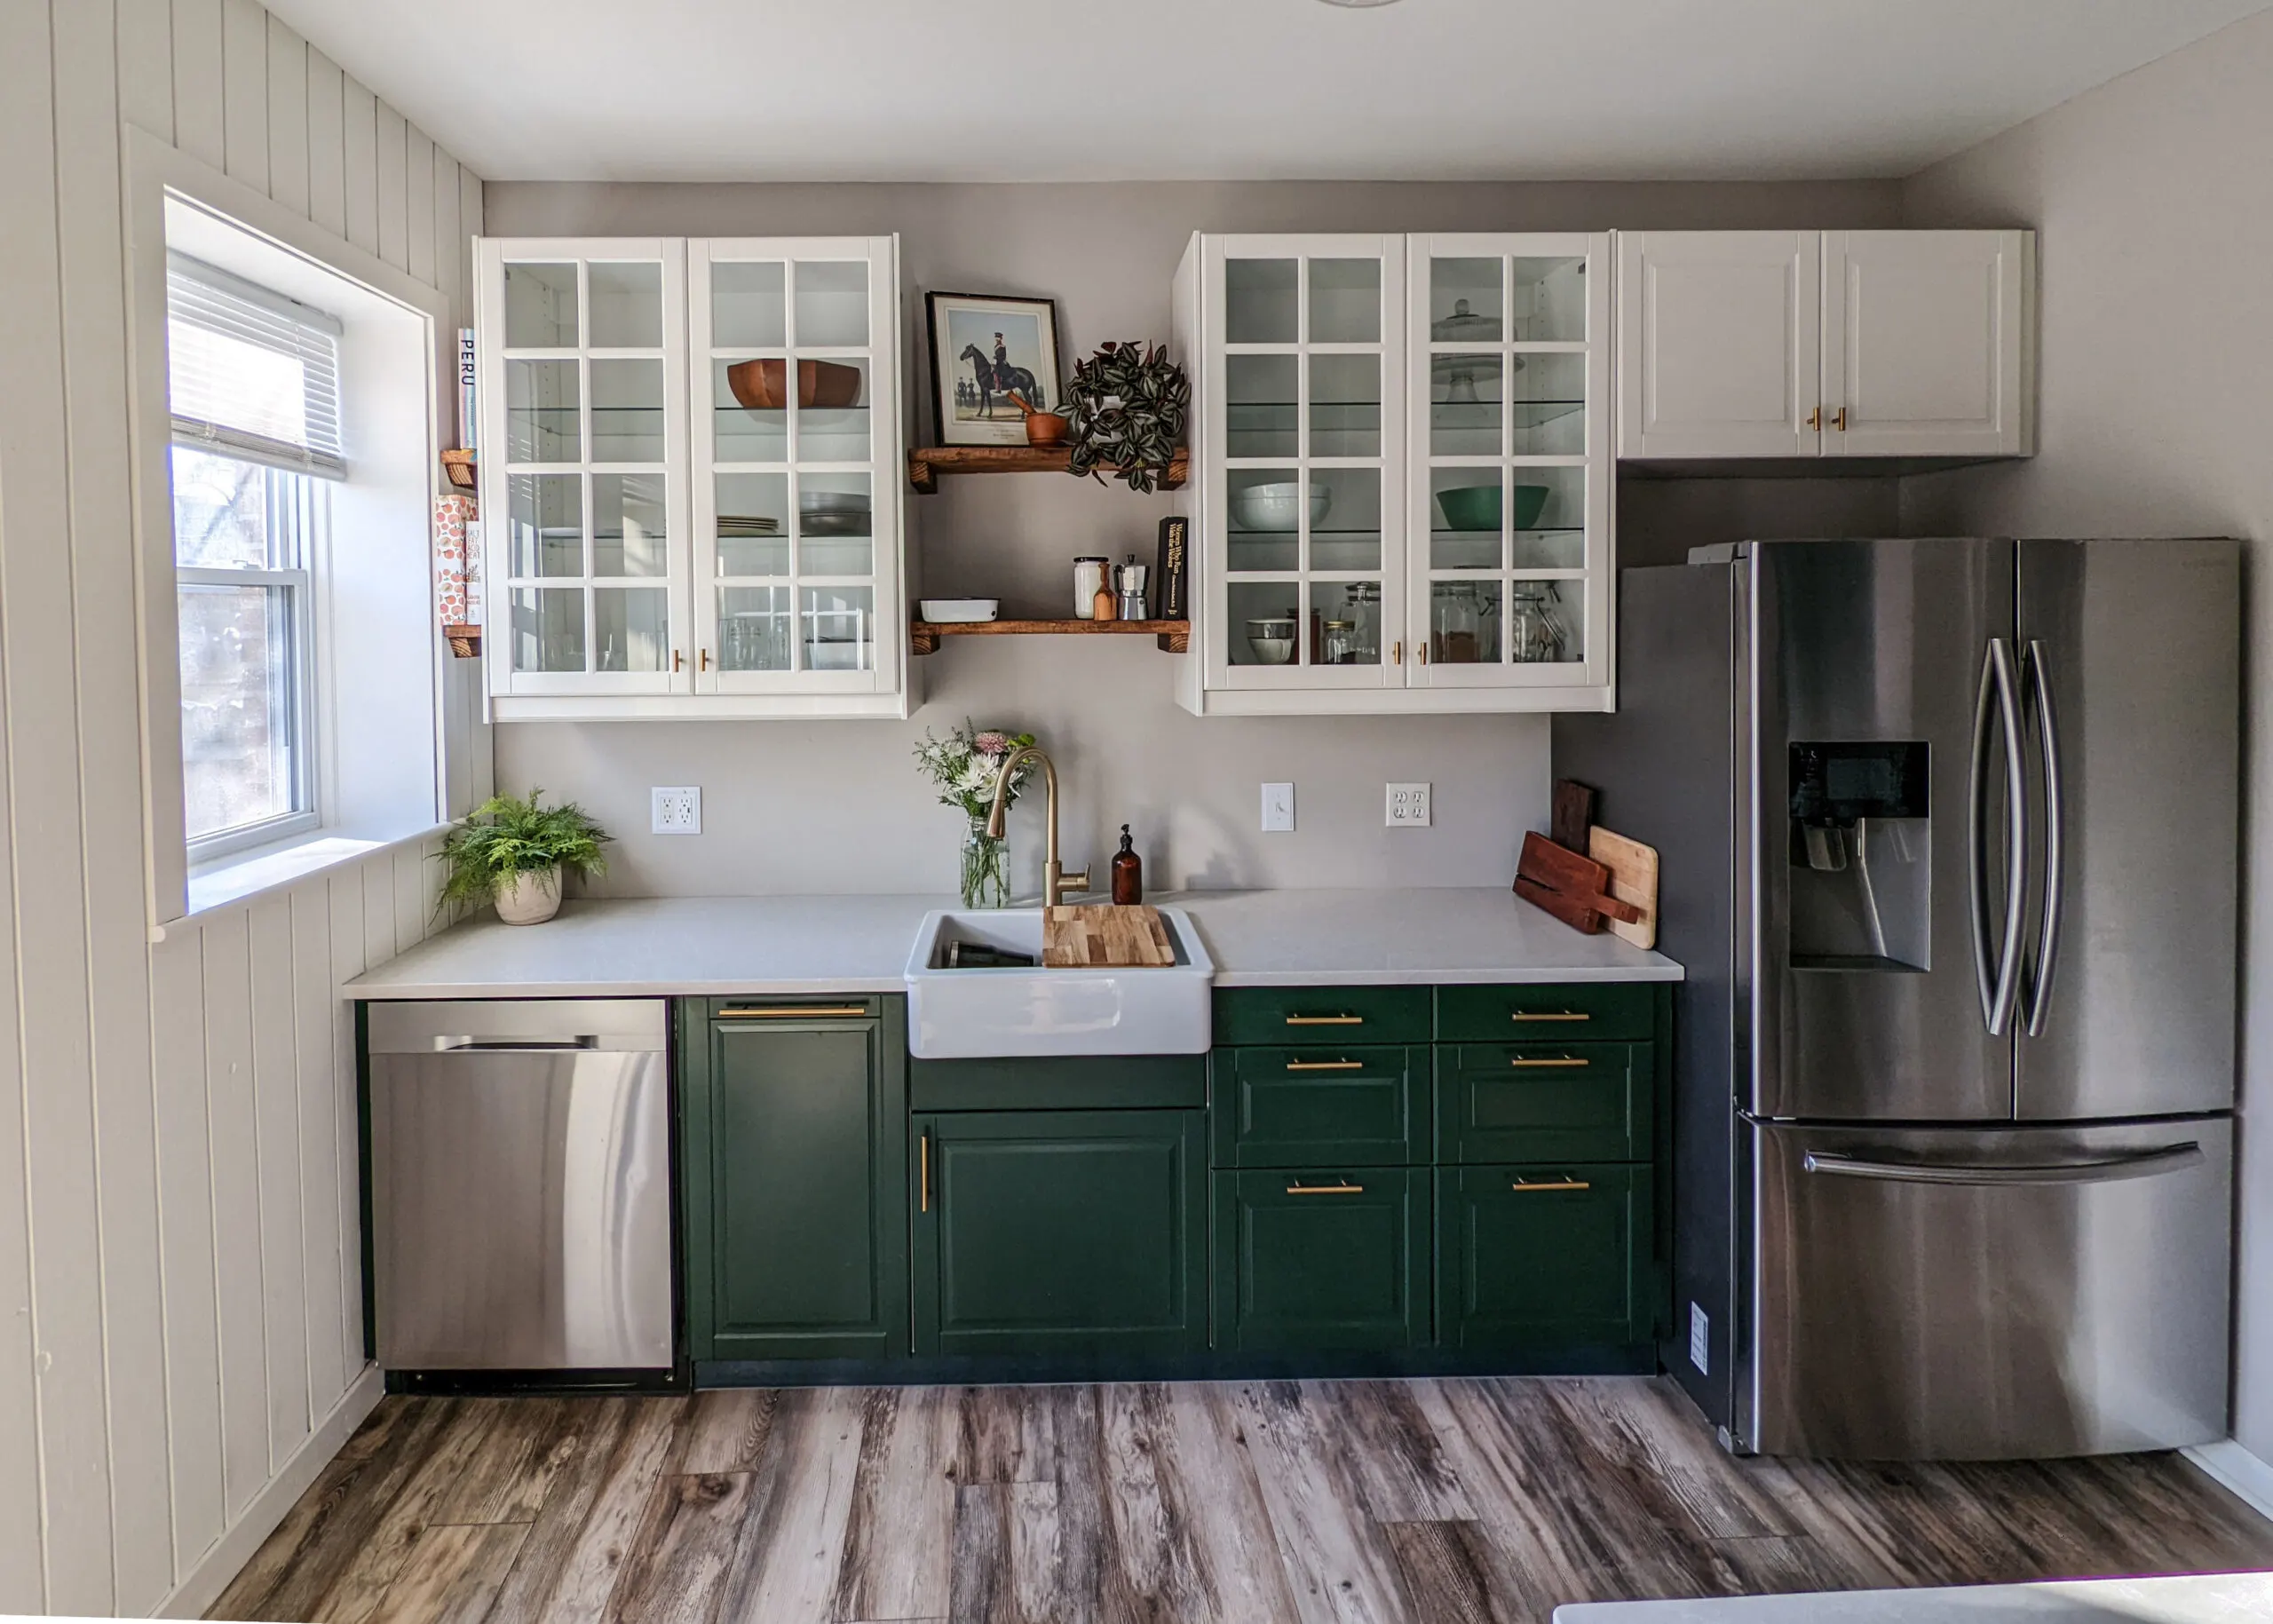
In 2022, I took on the biggest project in the Saint Louis Cottage: a newly remodeled kitchen with diy-assembled dark green kitchen cabinets from Ikea. In this article you’ll find:
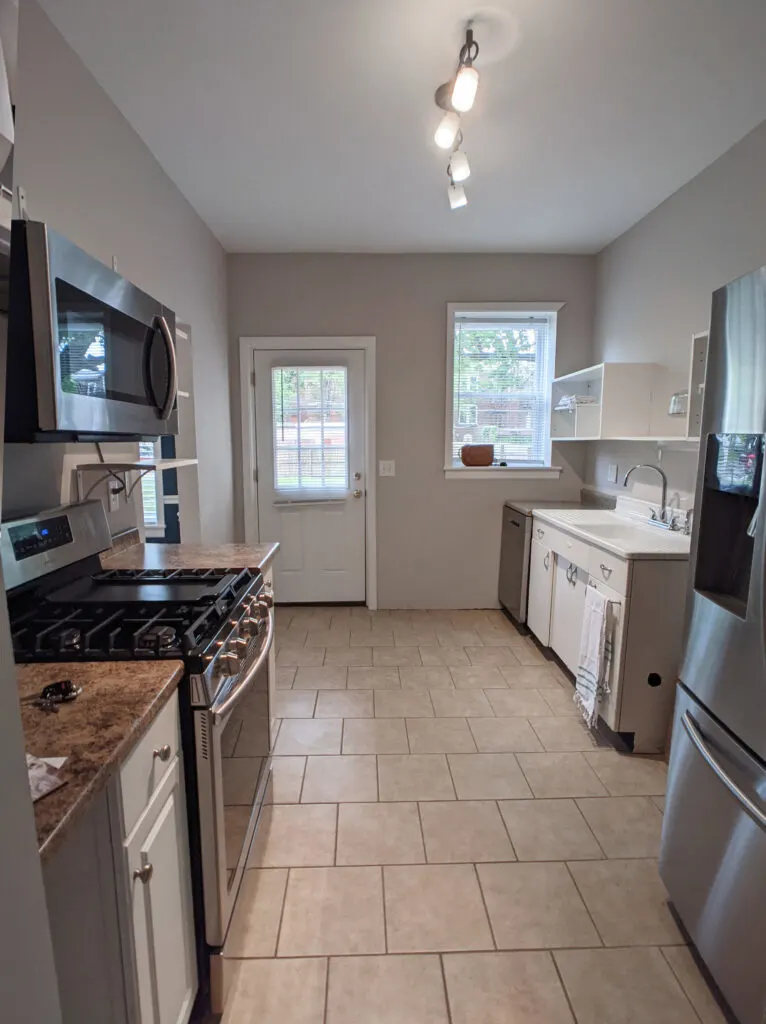
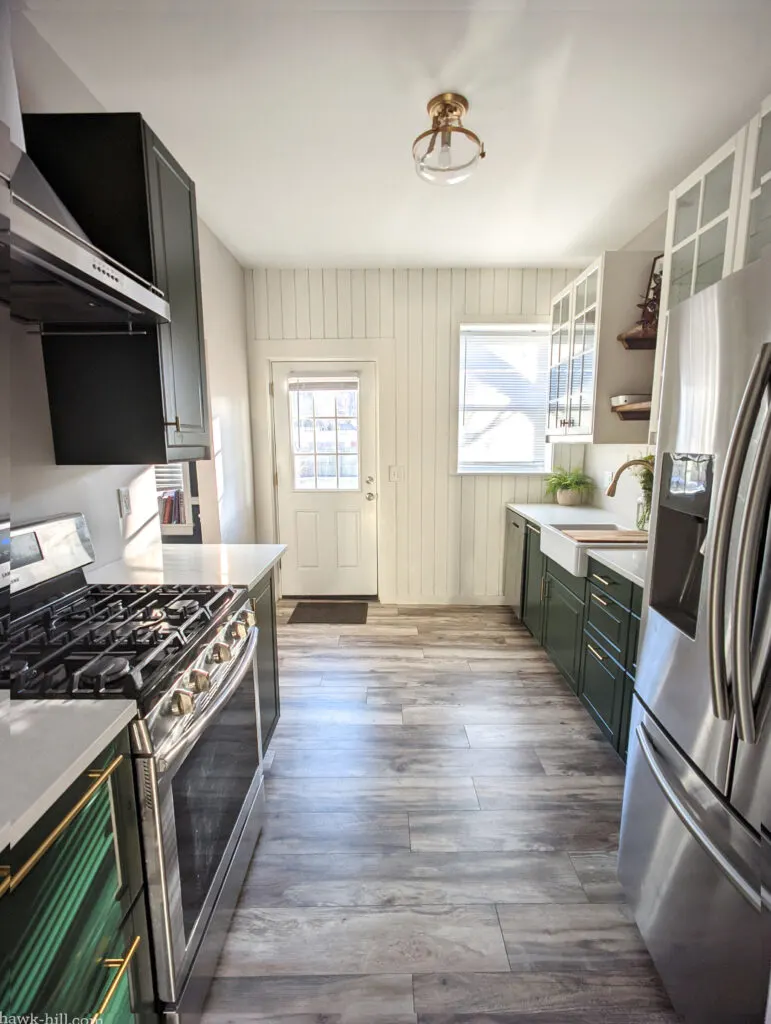
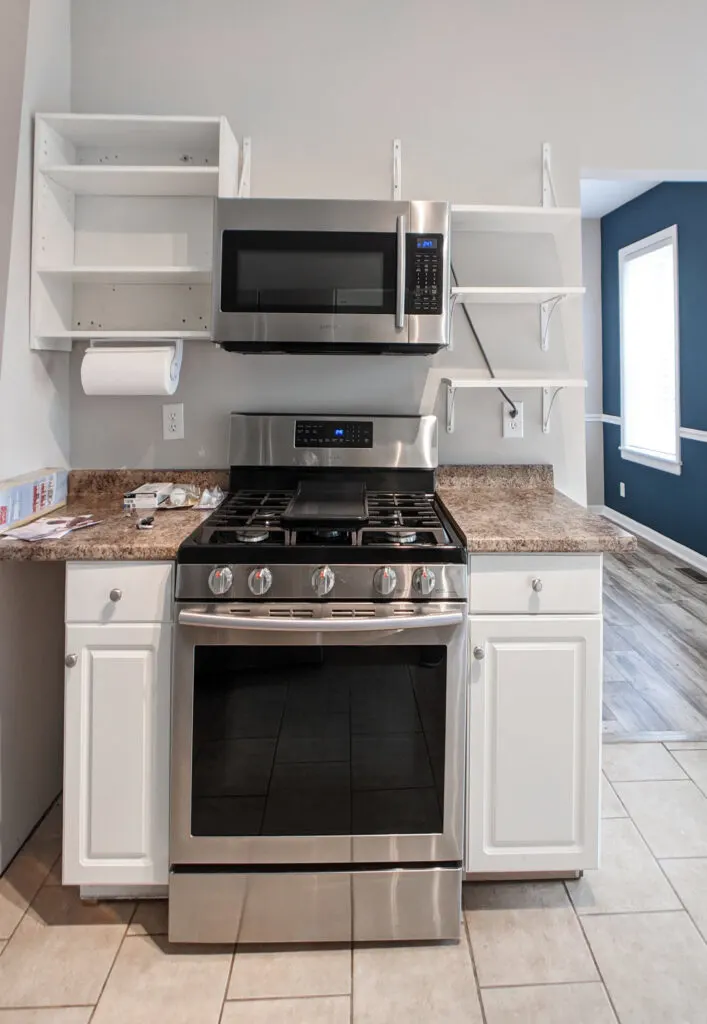
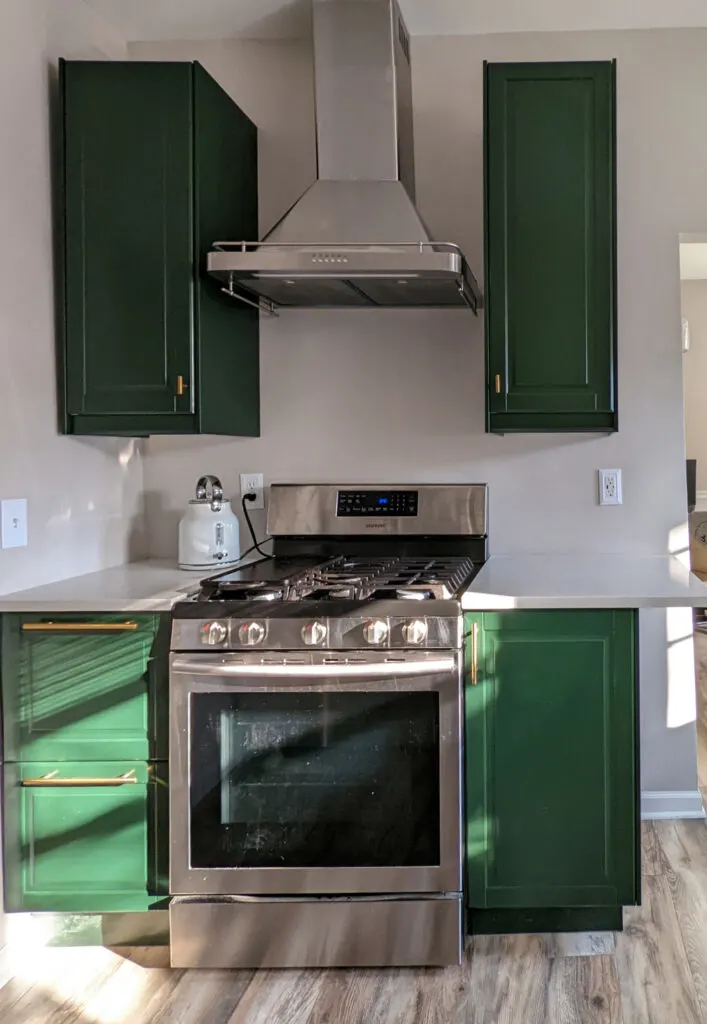
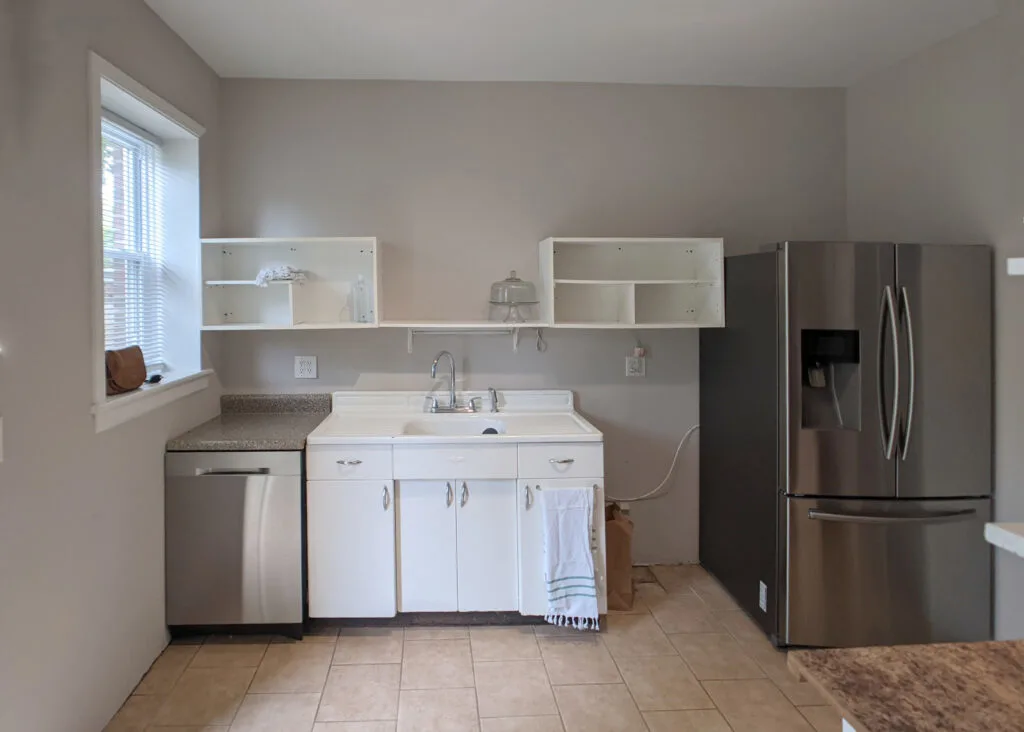
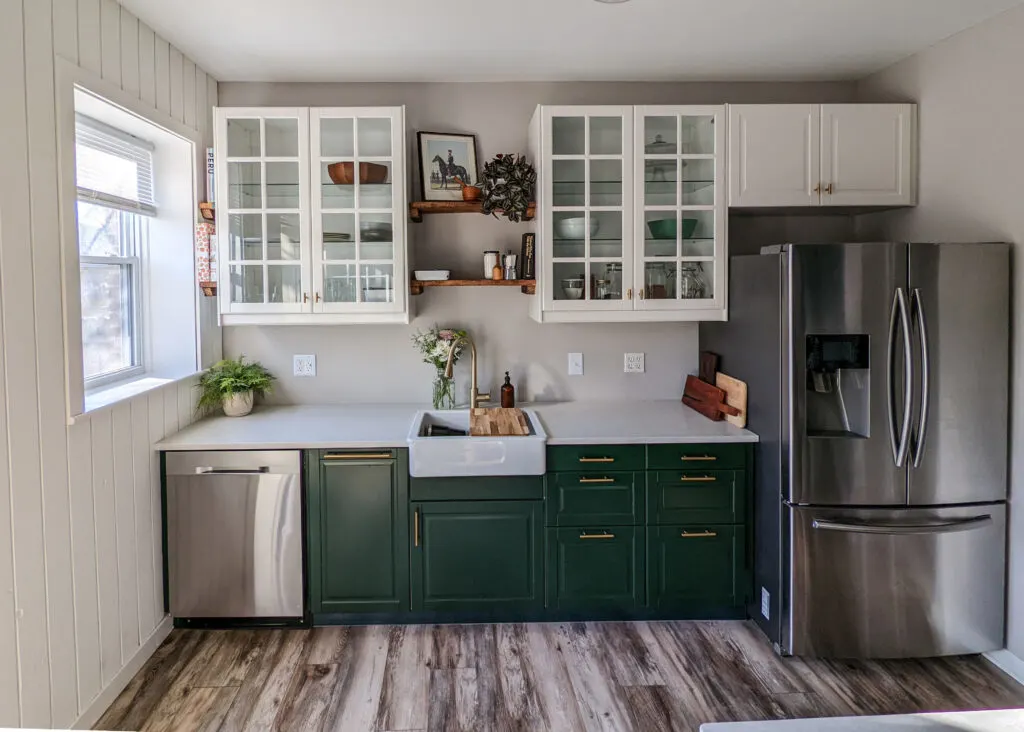
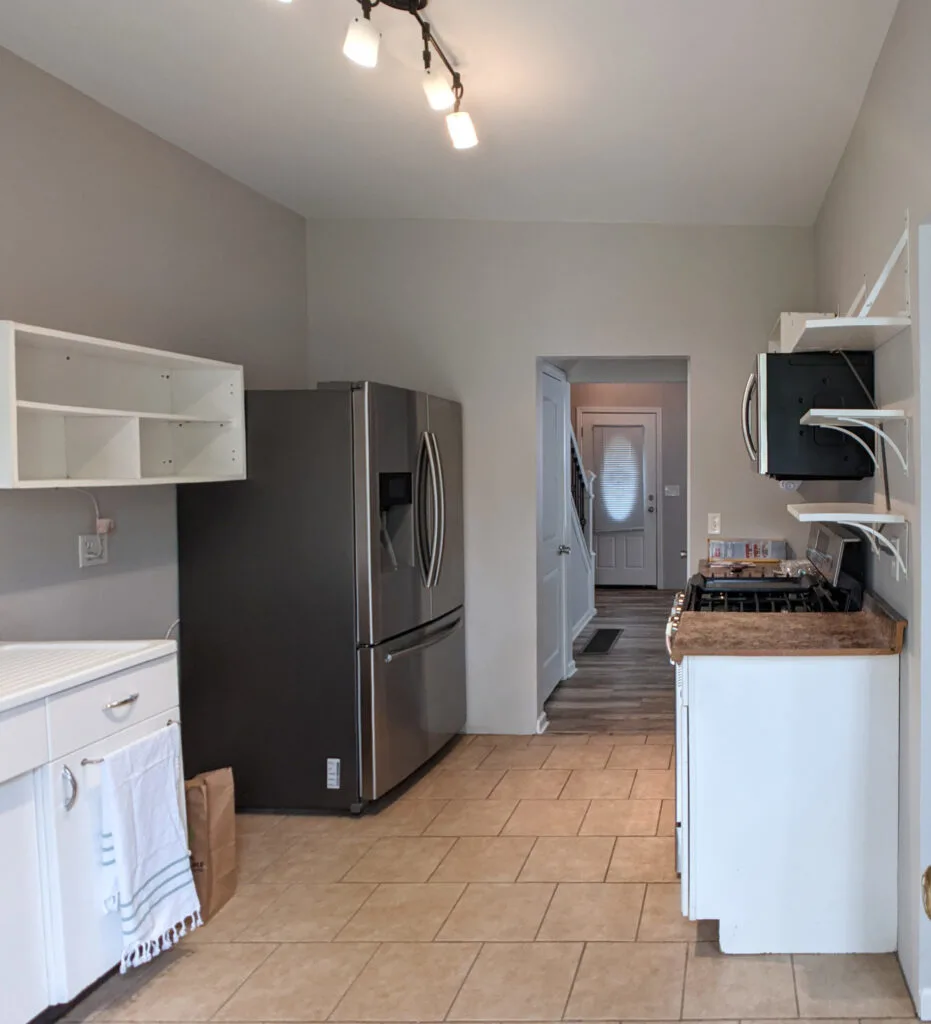
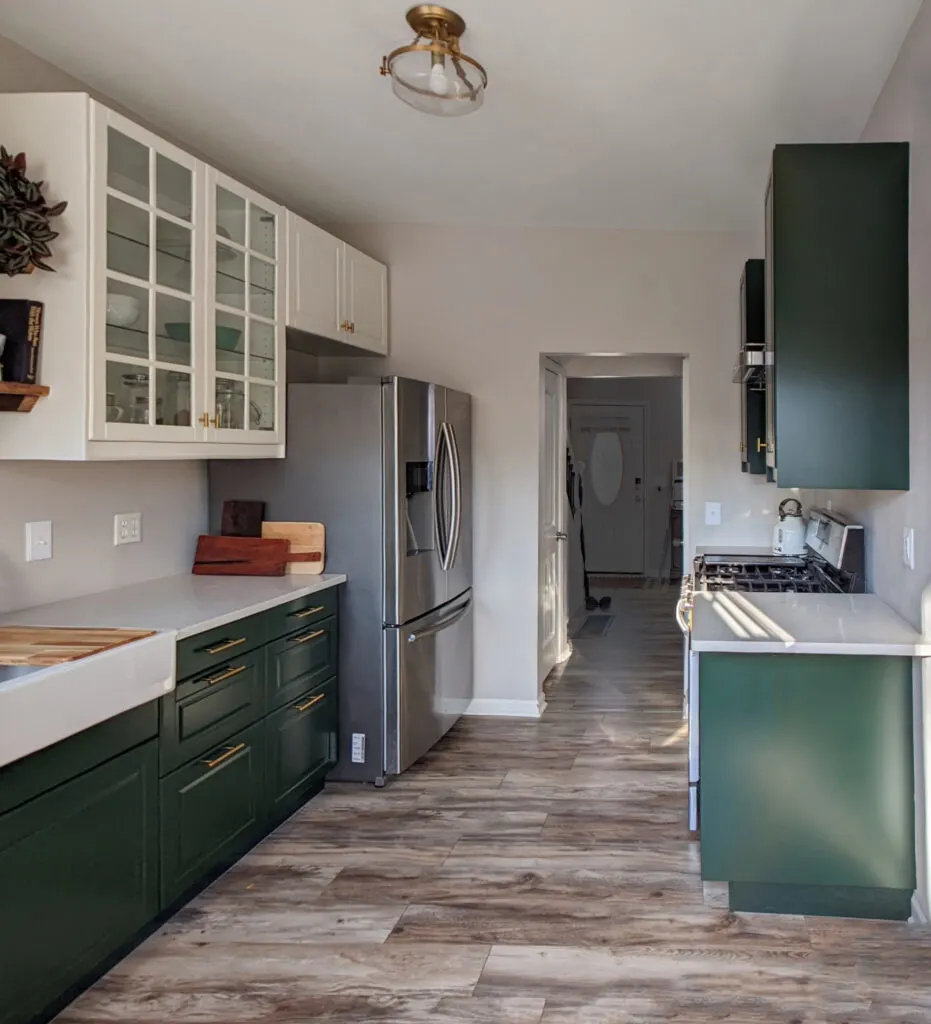
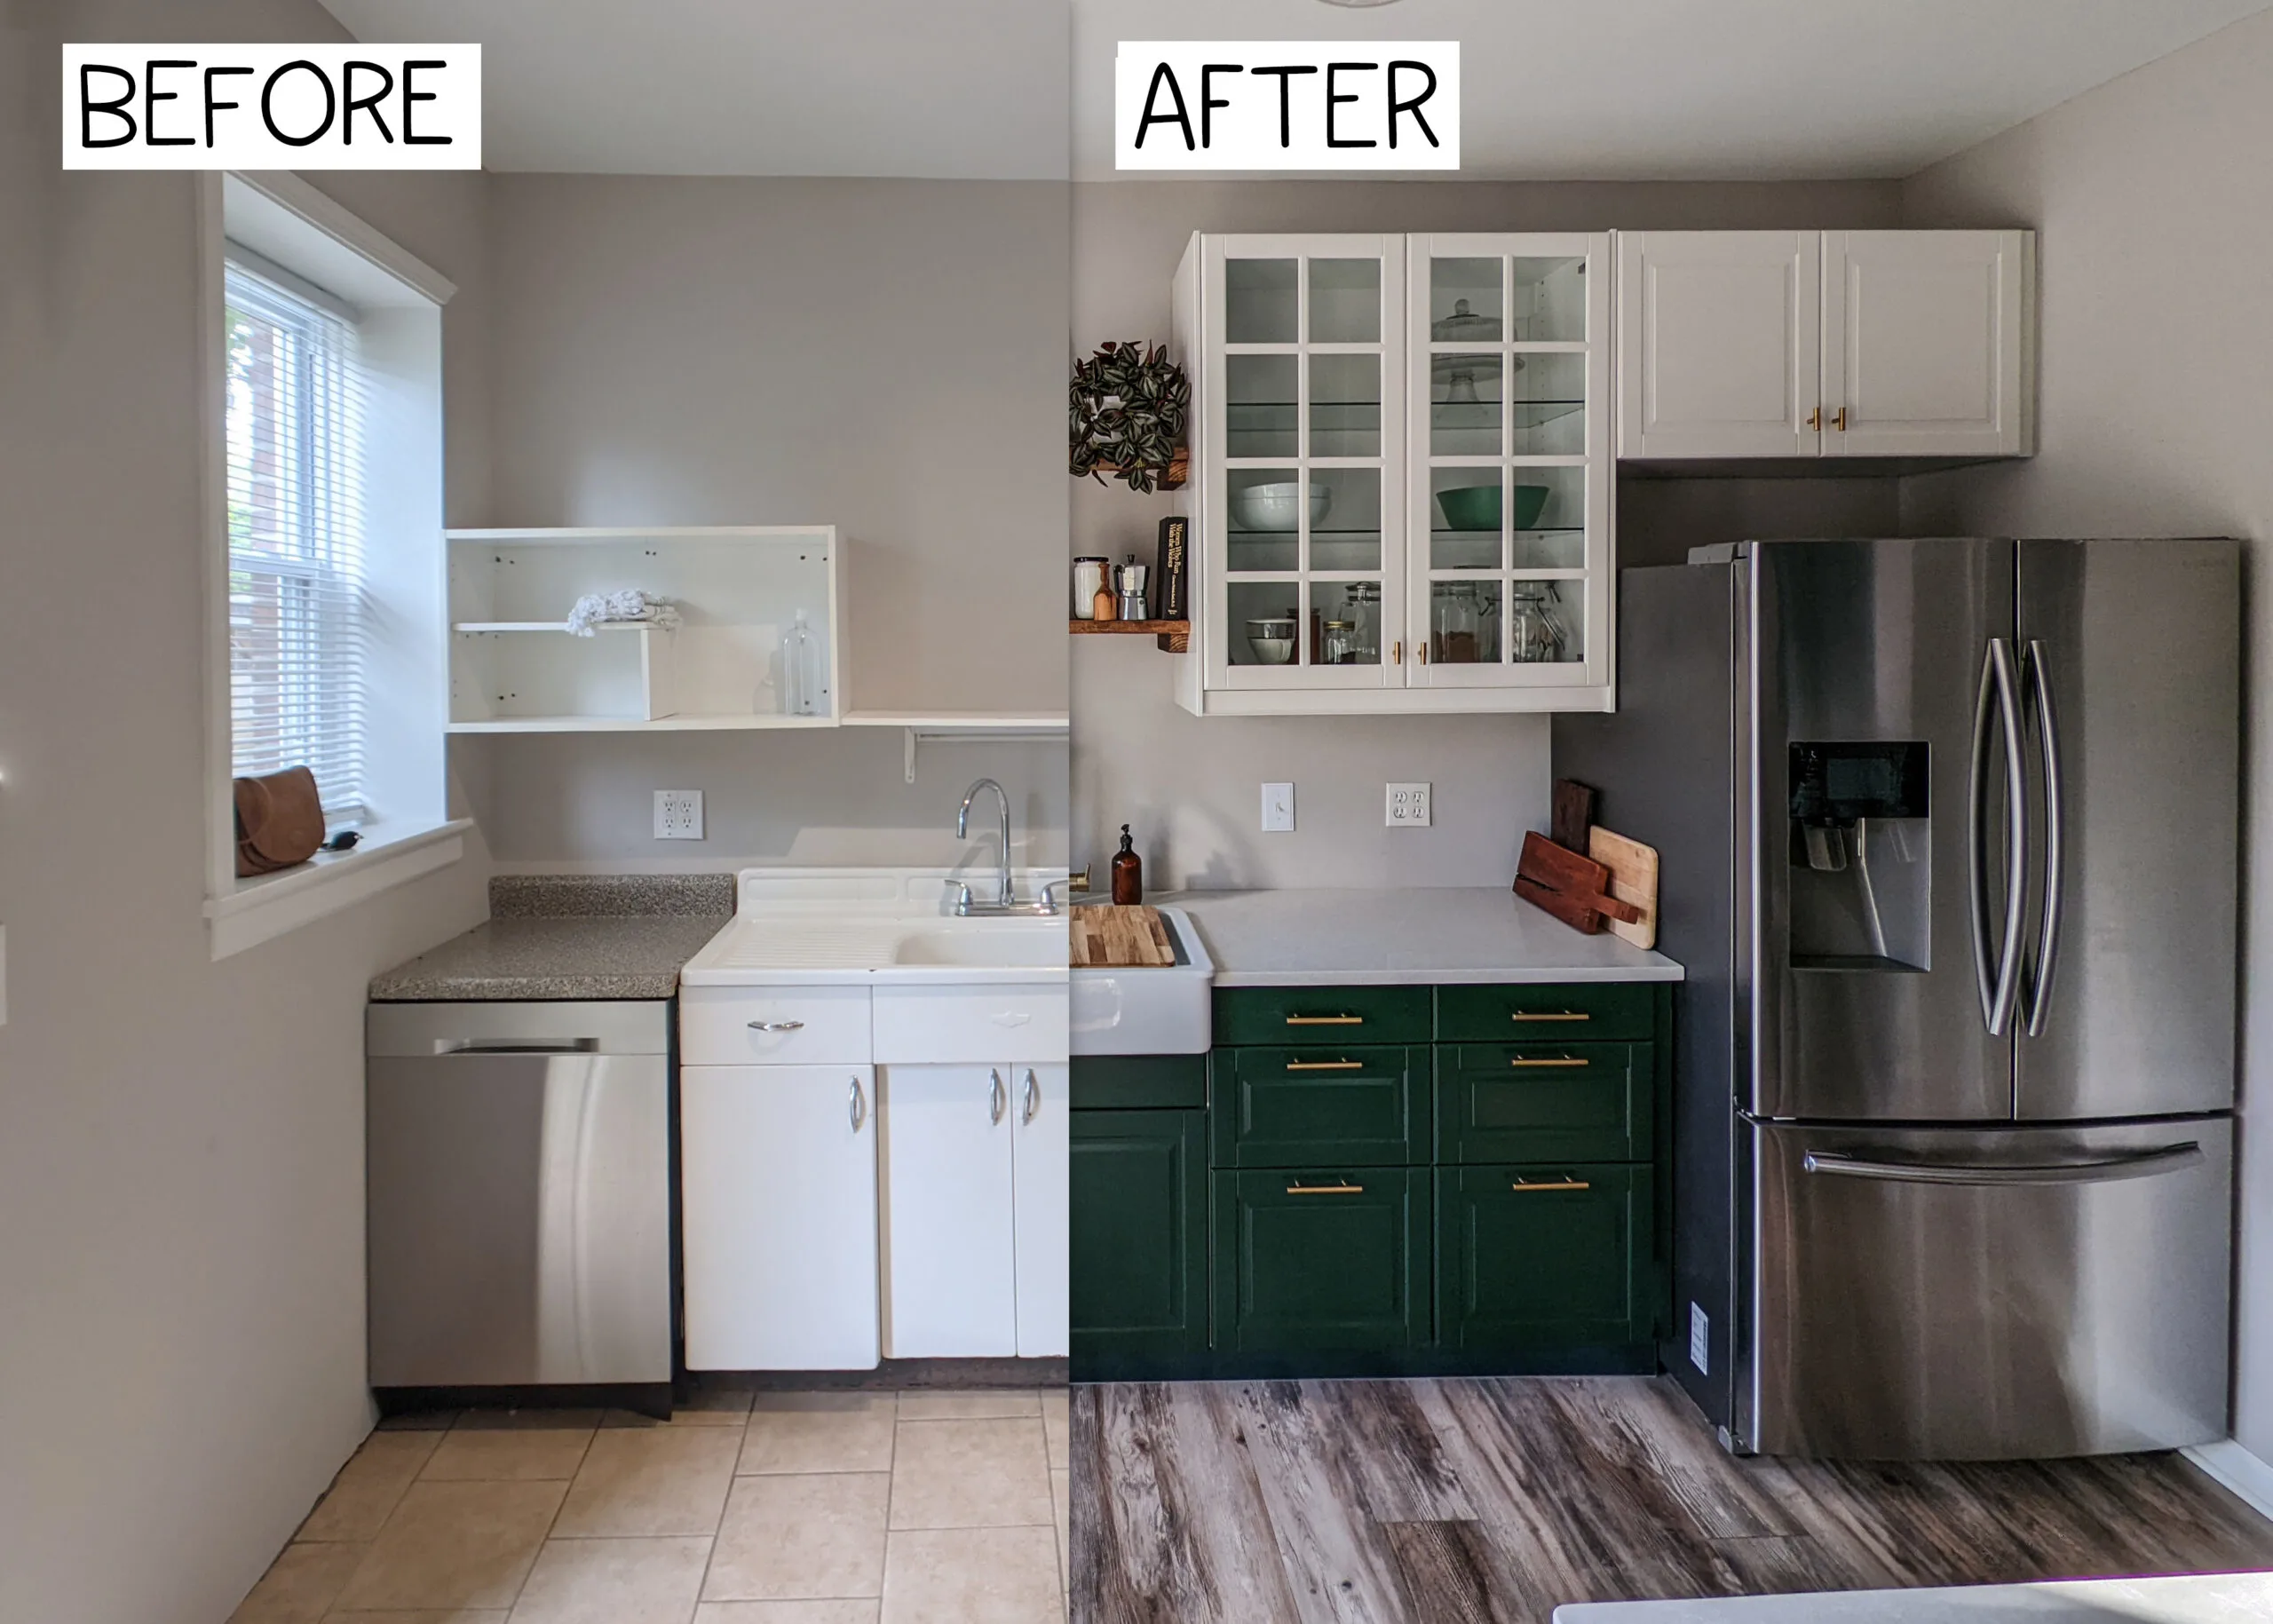
- Before and after photos of my 9 x 12 foot kitchen remodel.
- Thoughts on the Ikea kitchen remodel process in 2022
- Tips for taking on the rather-intimidating project of assembling your own flatpack kitchen cabinets.
Keep reading to see a video, before and after photos, and my advice on buying Ikea cabinets in 2022.

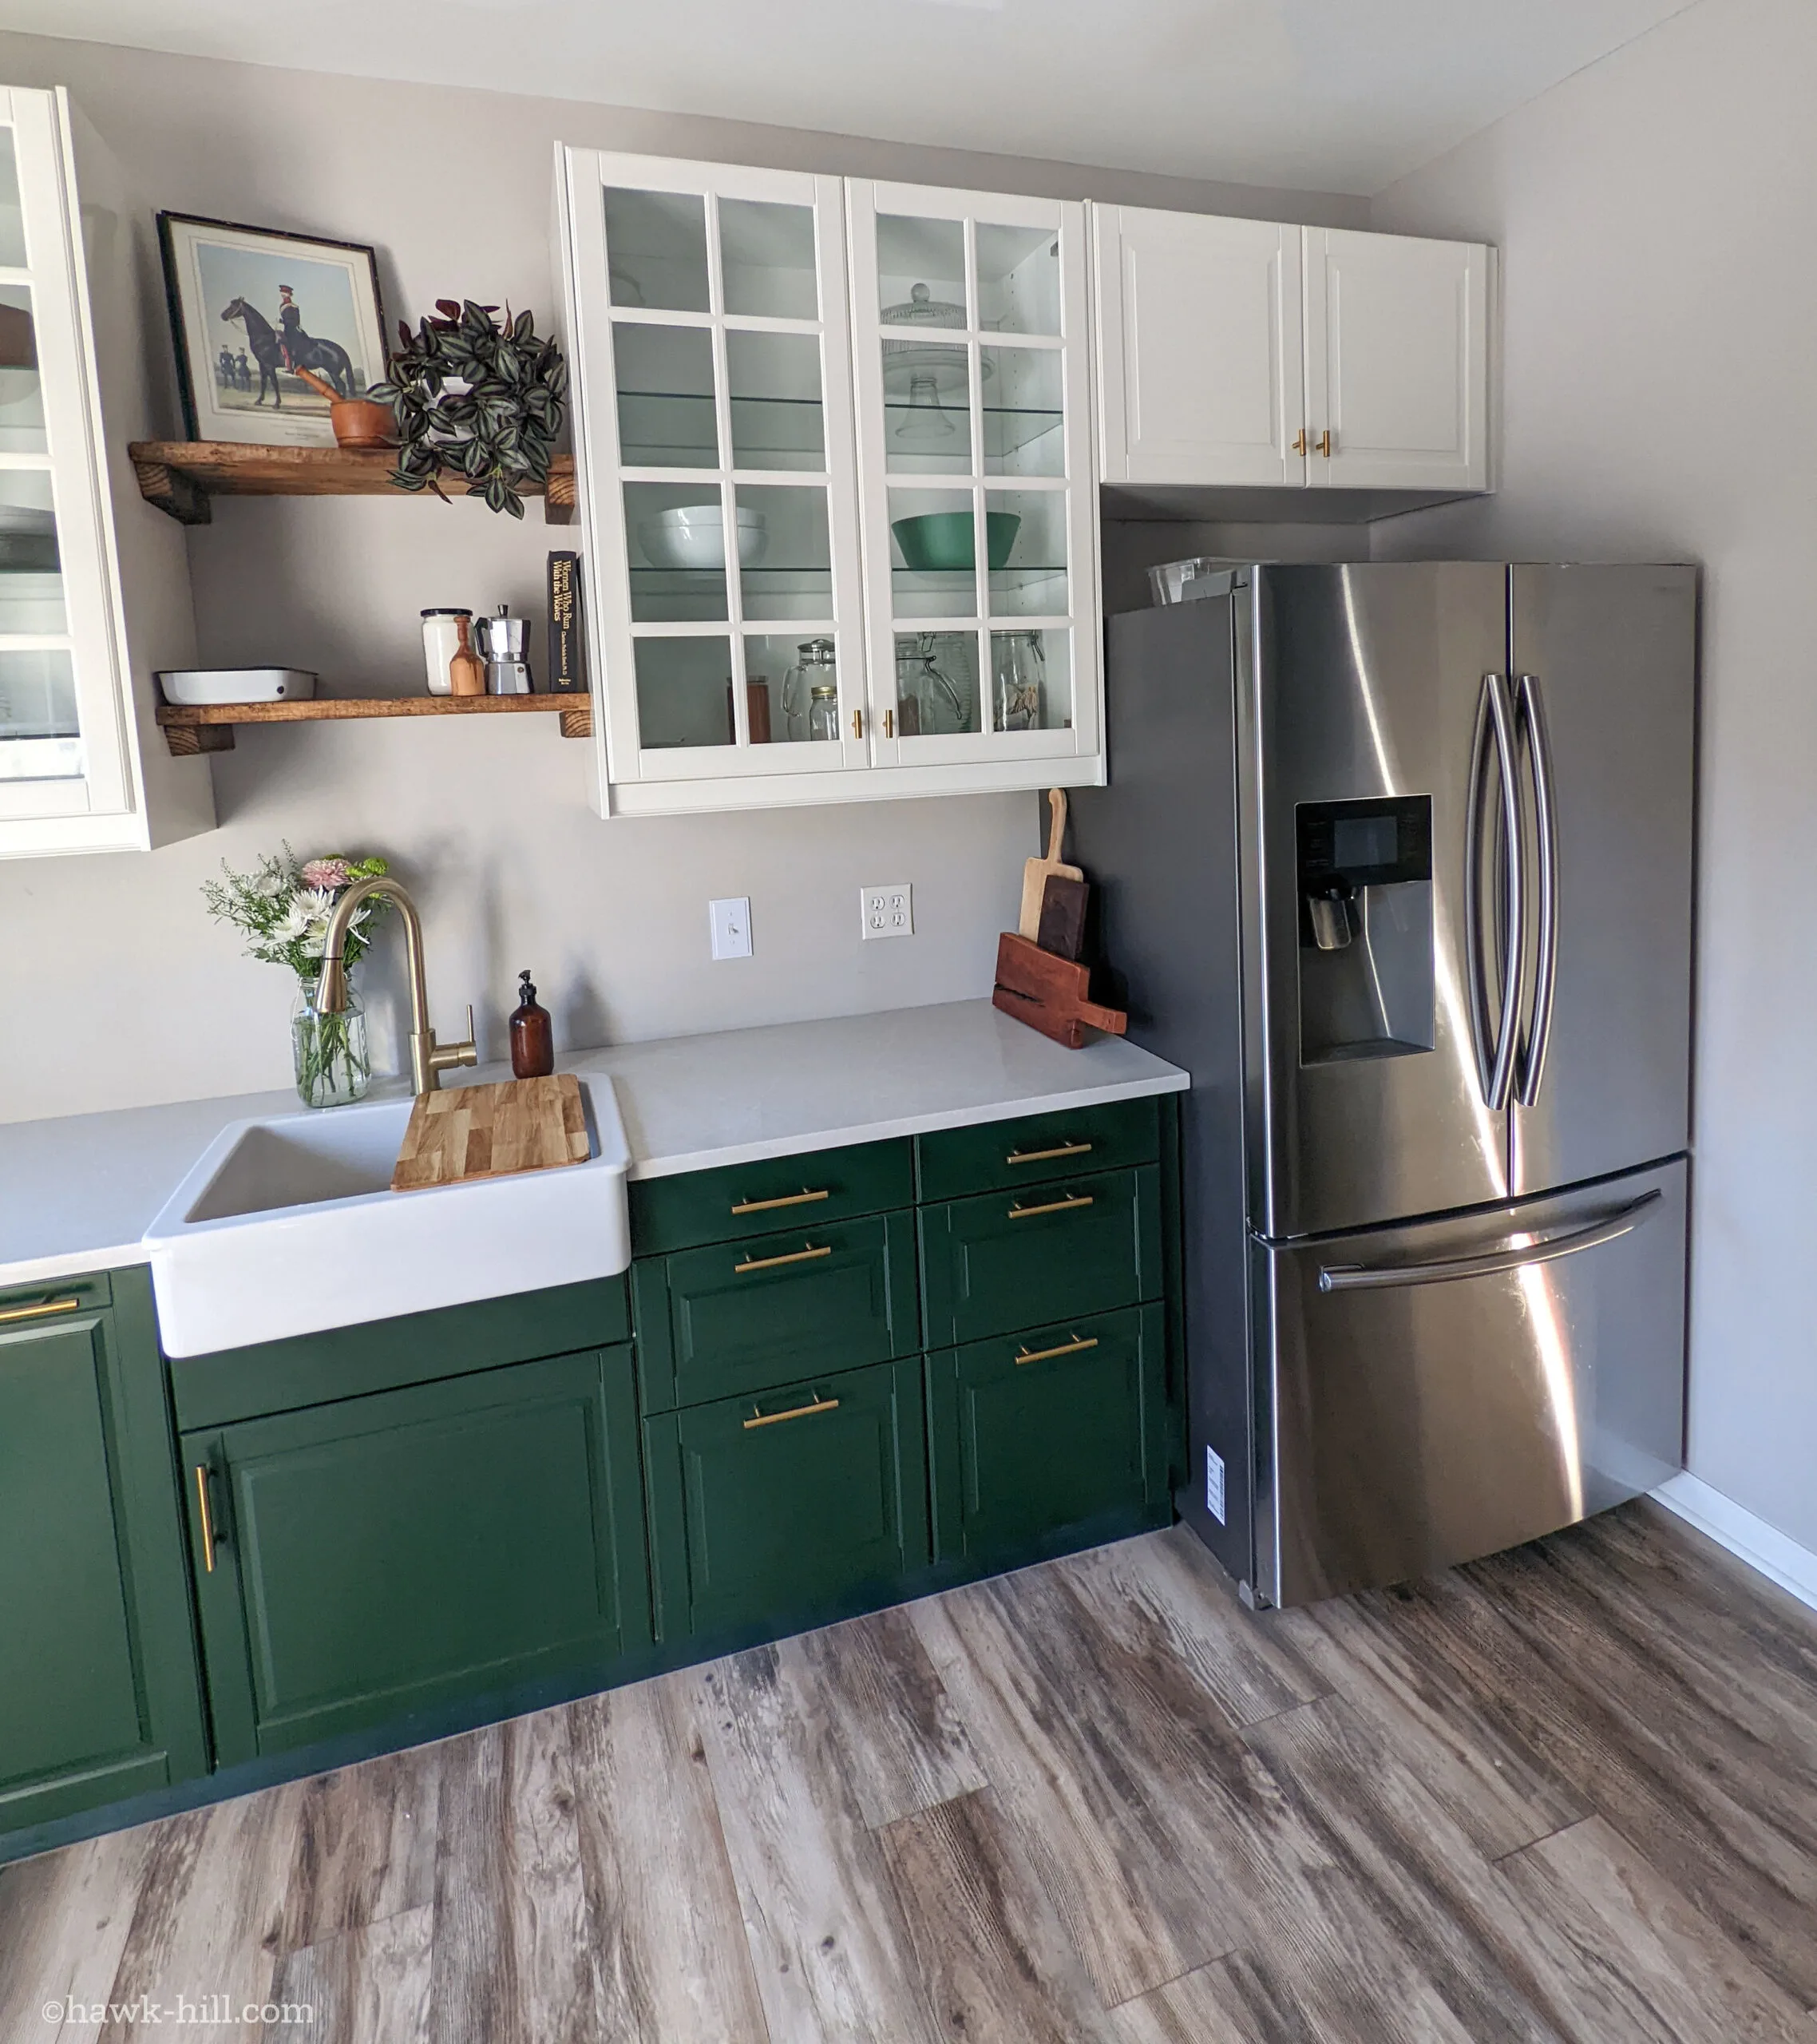
When I moved to my cottage in St. Louis the kitchen was a disaster – well, disaster implies that an attempt was made to the together kitchen and failed, in this case, it sort of appeared that no attempt was ever made.
Instead of the cabinets and countertops you’d expect from a typical American kitchen, my cottage’s kitchen was a Frankenstein-esque assemblage of various kitchen parts! All these parts (and some materials that had no business in the kitchen) were smooshed together to form a sort of food preparation area. I jokingly referred to my kitchen for the first six months as a “bachelor kitchen.”
See, my 1910 cottage has a bit of a storied past. The original owner, according to the 1912 census, was an electrician and his typist wife. The surrounding neighborhood, along with St. Louis, changed drastically between 1910 and 2022.
By the late 1990s, the surrounding neighborhood was blighted by crime and unmitigated drug activity. It was around that time, my neighbors who lived on the street for decades report, that this cute little cottage suffered fire. After the fire, the house sat vacant for several years exposed to the elements.
Get Closer Look at my Forest Green Kitchen in this Video
But, like the city of St. Louis itself, the brick houses in the historic parts of the city remain resolute. As one contractor explained to see me shortly after I moved to the city, St. Louis is brick homes are near “infinitely repairable”.
And as one of the lucky ones, the cottage was repaired by a gentleman who slowly rebuilt the house in his free time and, eventually moved in to do the finishing work over the course of a decade. Gone was the original plaster, plumbing, electrical, (and sadly the original baseboards, pocket doors, and hardware), and in their place was a modern interior cloaked in the adorable 100-year-old cottage exterior. The work inside was done with high attention to detail, but not necessarily a high-end budget – hence the kitchen.
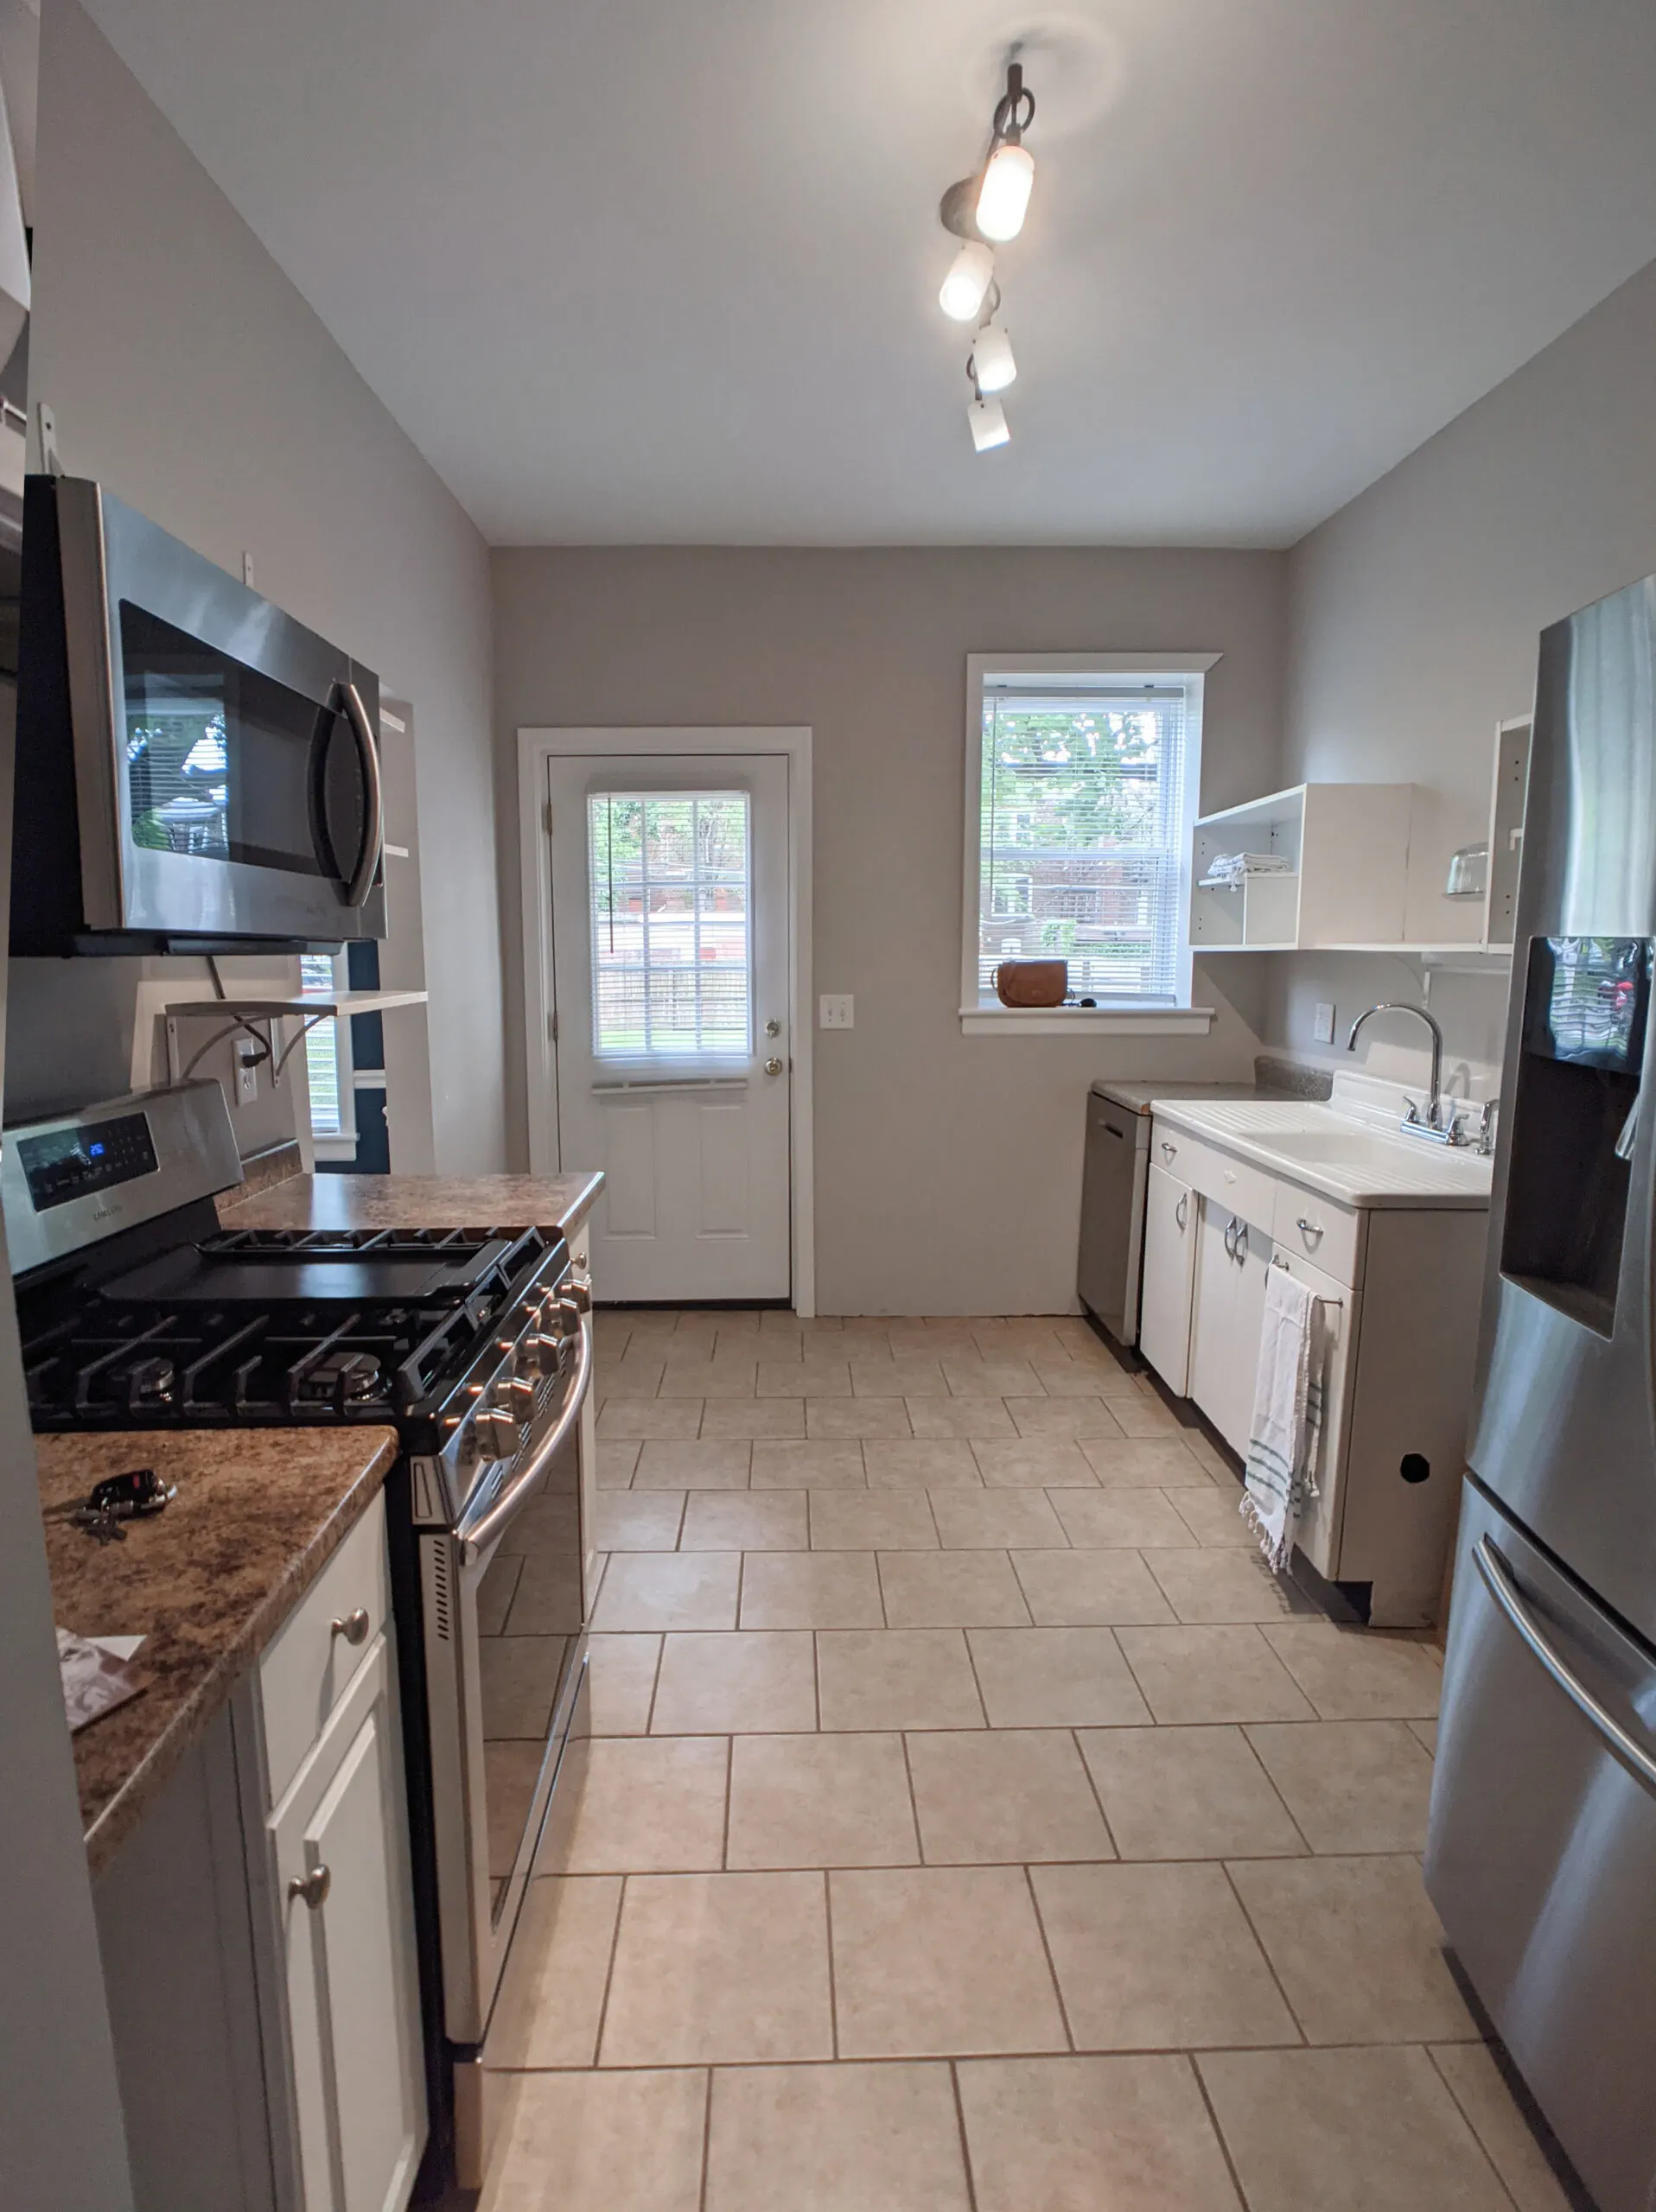
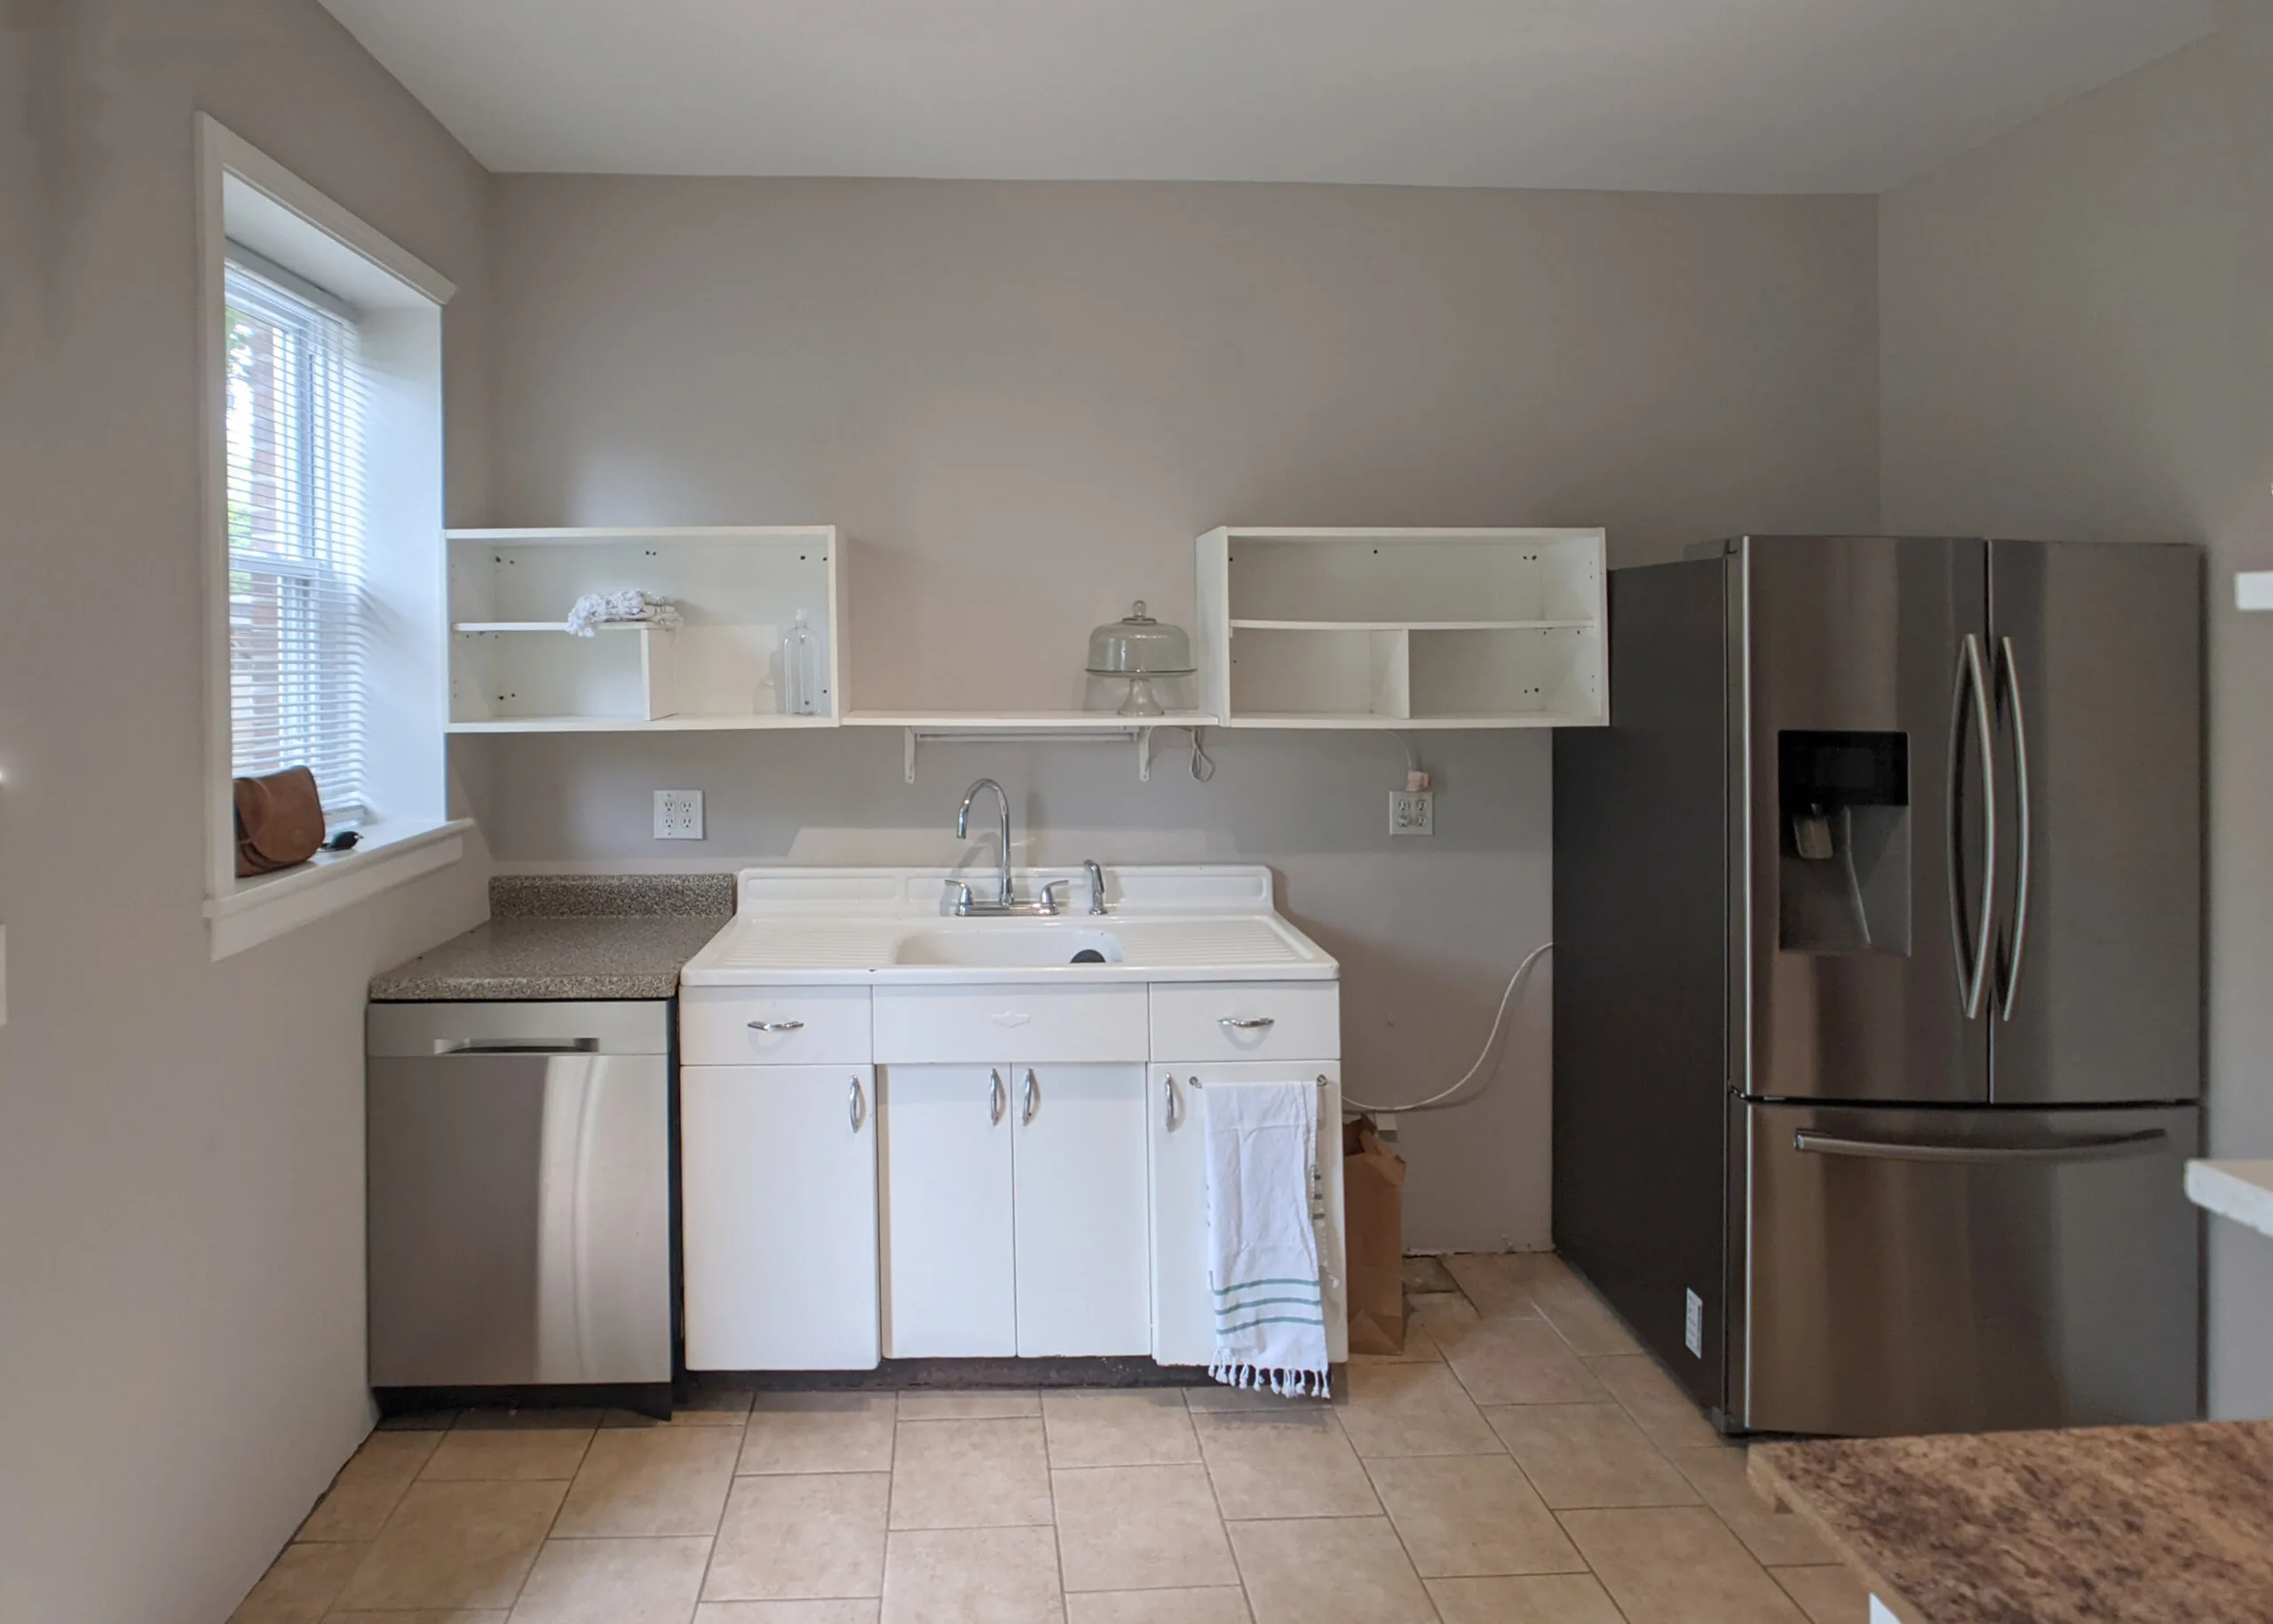
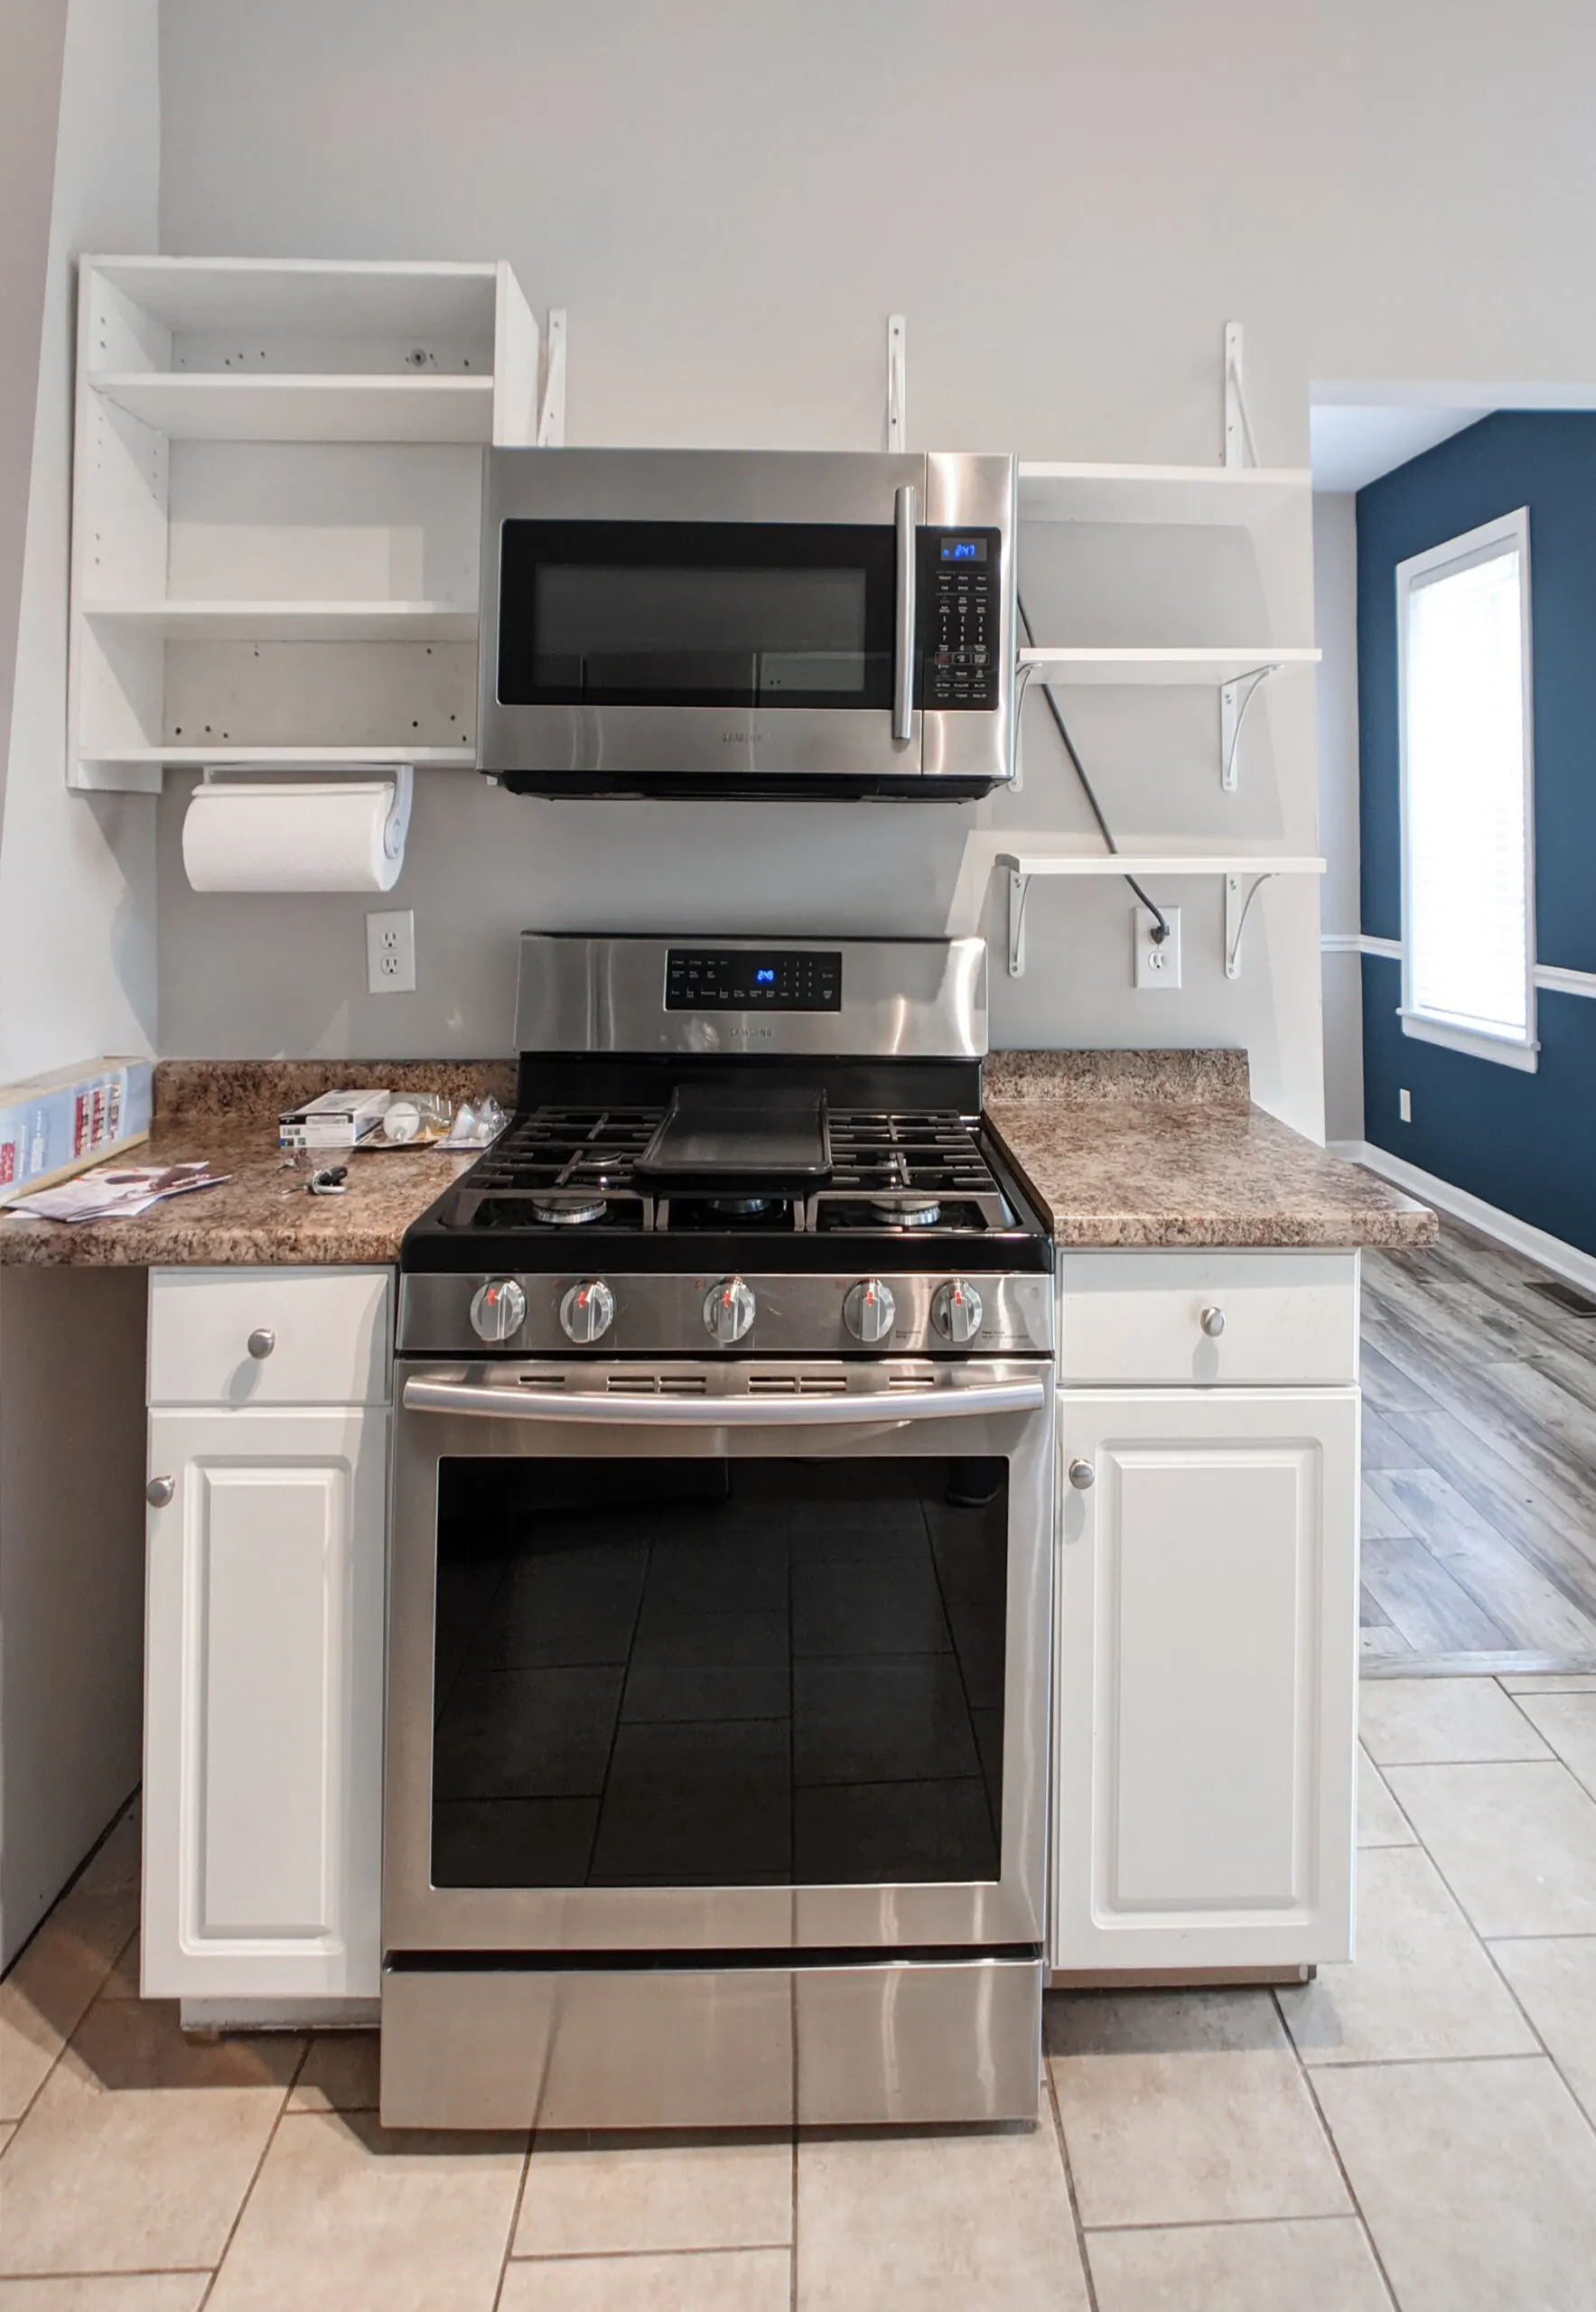
When I moved in, the cottage featured mismatched scraps of Formica countertops, a rusted-out vintage 1950s sink, and basin, and cheap MDF bookshelves screwed to the walls in place of cabinets. This was the kitchen that I cooked in for the first six months of ownership.
As you may know, if you’ve ever undertaken a kitchen remodel, it takes planning. In 2022, with labor and supplies shortages at (hopefully) their peak, preparation for a big kitchen remodel takes even longer.
By mid-summer of 2021, I had a pretty good idea of what I wanted for my kitchen renovation. I’d selected a “kitchen inspo” picture taken from an Idaho Airbnb (found, of course, via Pinterest) and used the image and my measurements to begin getting some quotes on my kitchen remodel.
Introductions and connections
While my first bid, from a predatory contractor, exceeded $50,000 to remodel my small 9×12 kitchen, I kept asking around for referrals. Although I briefly sank into a pit of despair concerned that I would not find someone skilled and trustworthy to help with my kitchen remodel, I was soon introduced to a husband-and-wife team, home flippers who did small remodels in between projects.
This introduction, it turns out, was the start of being able to move from planning to executing my kitchen remodel. This contractor estimated my kitchen remodel to come in at about $15,000 including labor but excluding any luxury upgrades.
Shopping and comparing IKEA to custom cabinets
Before I ever did a home design appointment at IKEA, I had meetings are local builder supplies specializing in custom kitchens. I sat through the meetings, shared my measurements, and designed the kitchen with a member of their design staff.
In both of those stores, however, everything was backordered by months, and even if I was willing to wait 3 to 4 months for components to come back in stock, I found myself making allowances and getting farther and farther away from my inspiration kitchen, even though I was willing to pay for custom cabinets.
Designing my kitchen at IKEA
I was ready to sign on the dotted line with one of the big box home builder supply stores, but I decided to give IKEA kitchen planning a try first. I booked an in-person meeting in St. Louis, and from the start, the process was much easier than working with the custom cabinet brokers. Although a few things weren’t presently in stock, my IKEA designer Damon assured me that IKEA is cabinets were unlikely to be backordered more than a month (indeed, my backordered items ended up arriving at my home before my standard order, which I’d pushed back delivery on in anticipation of a full month of backorder).
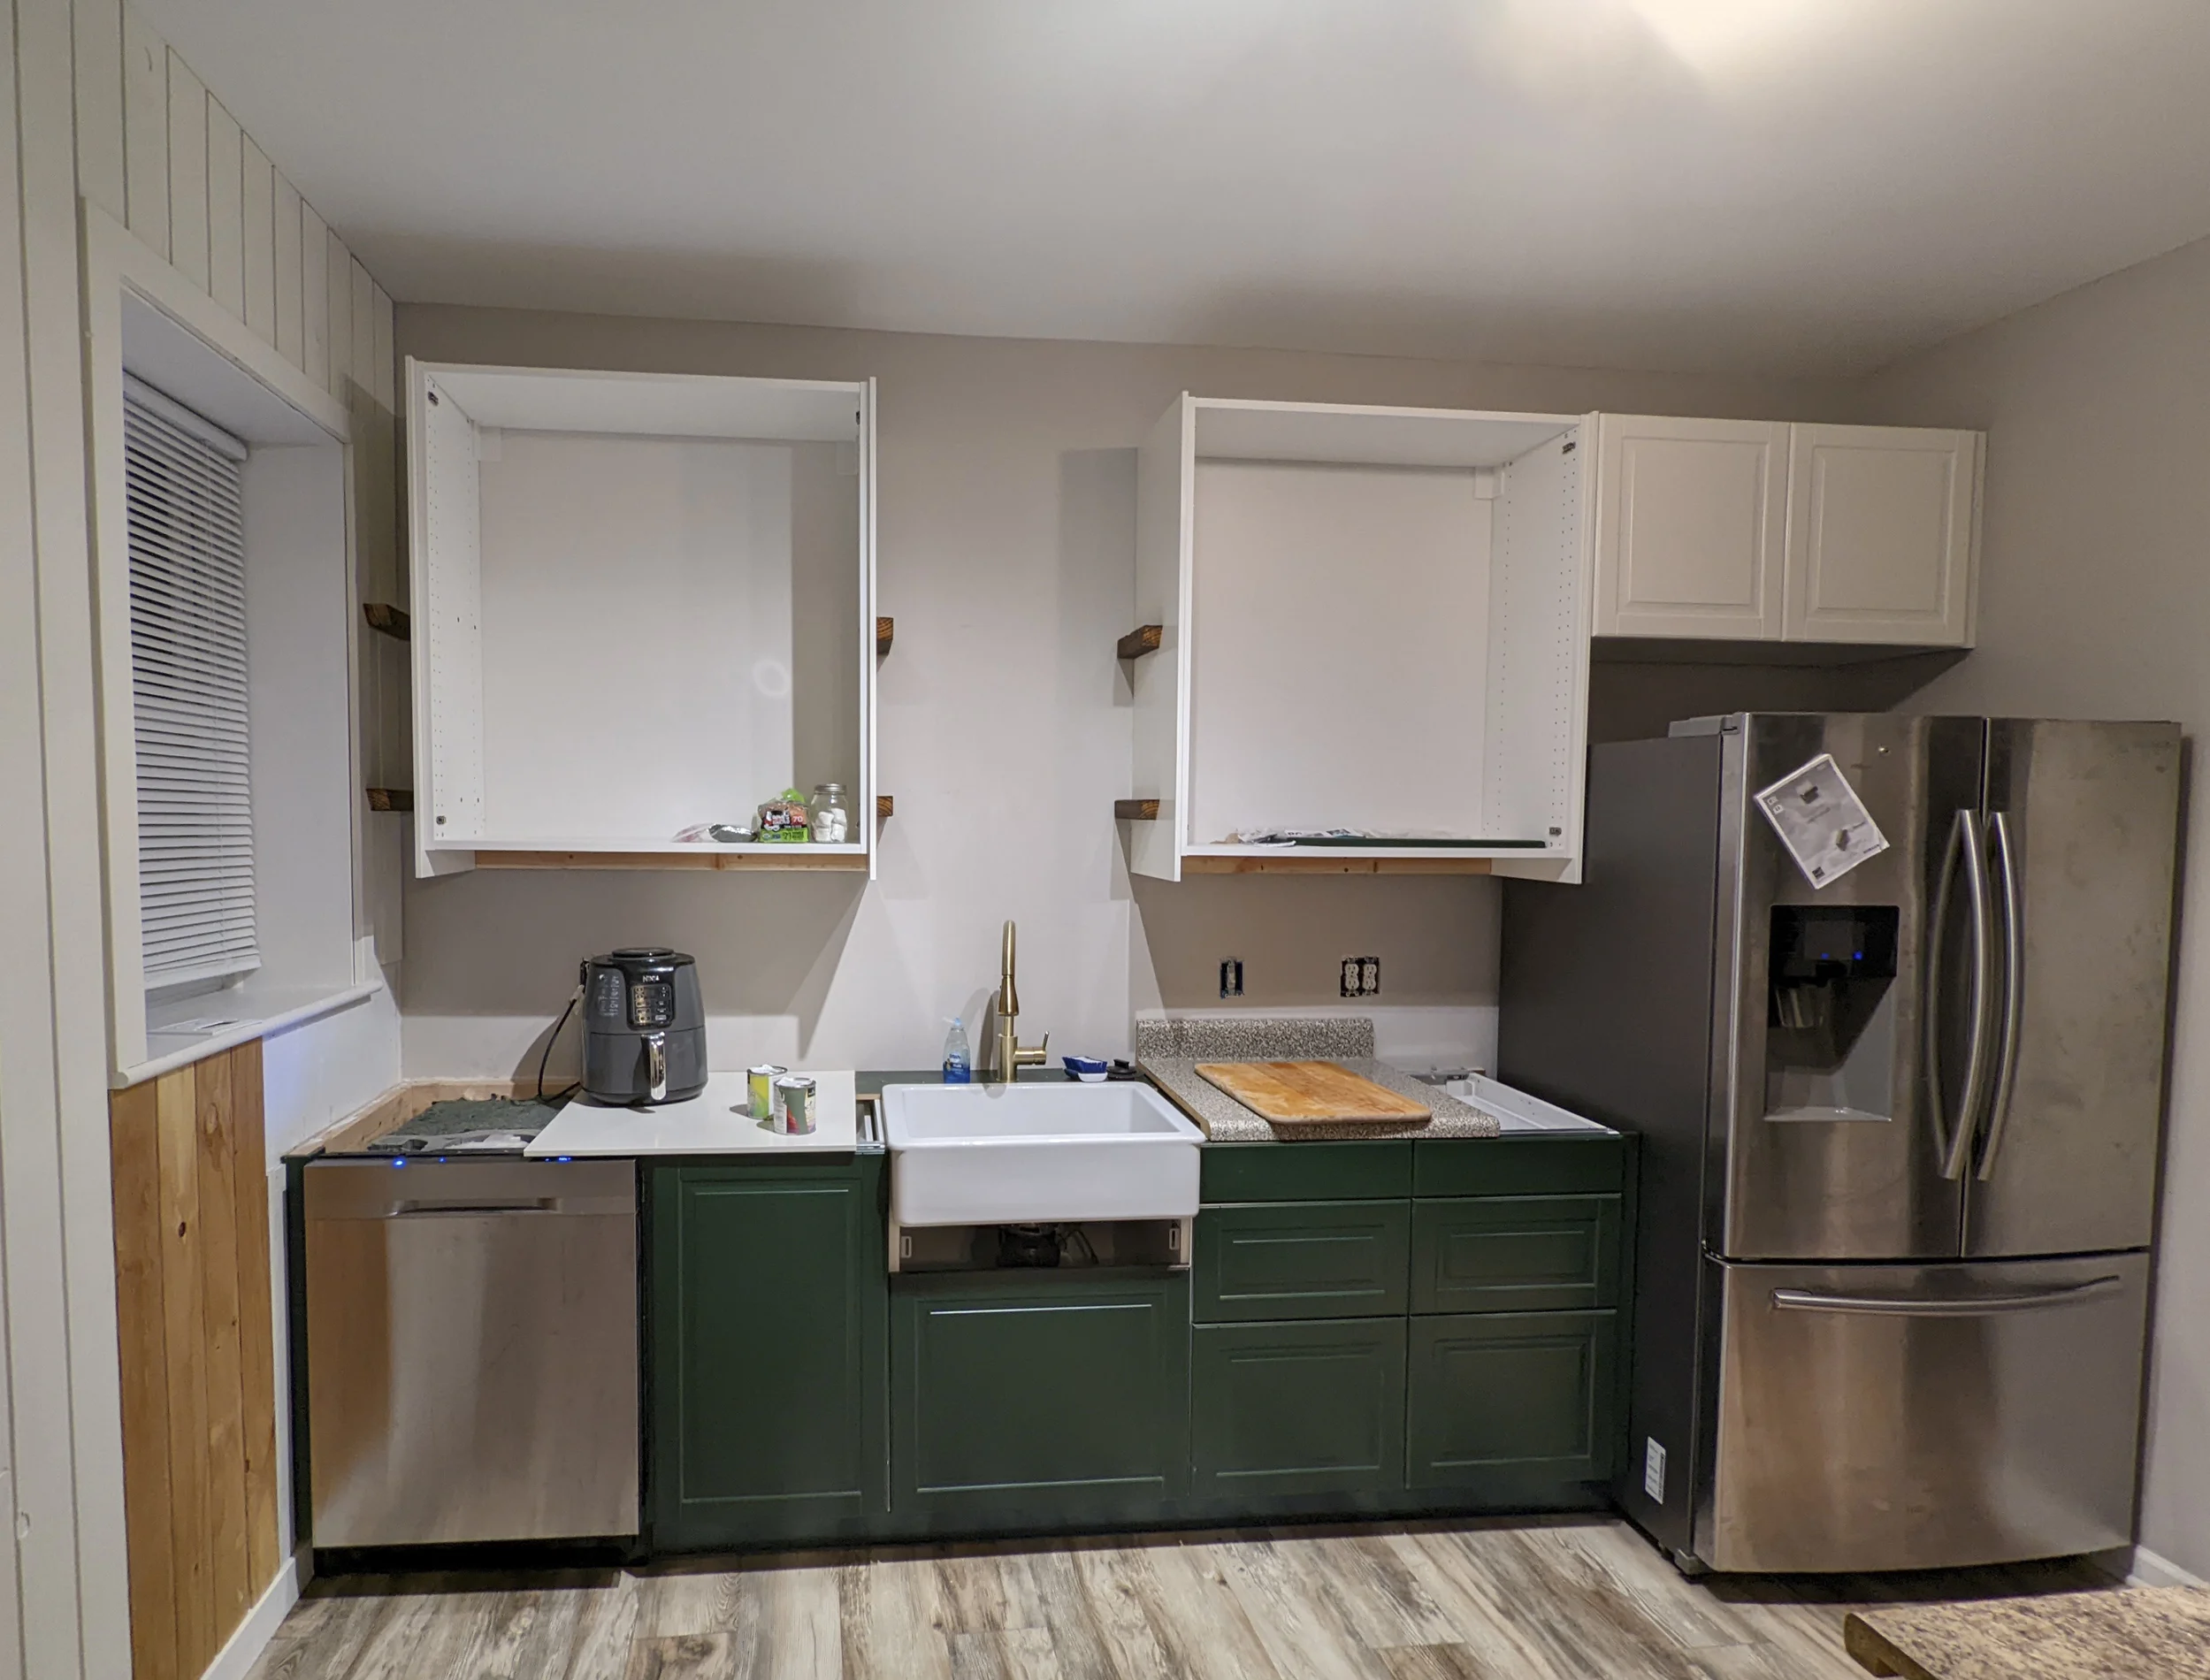
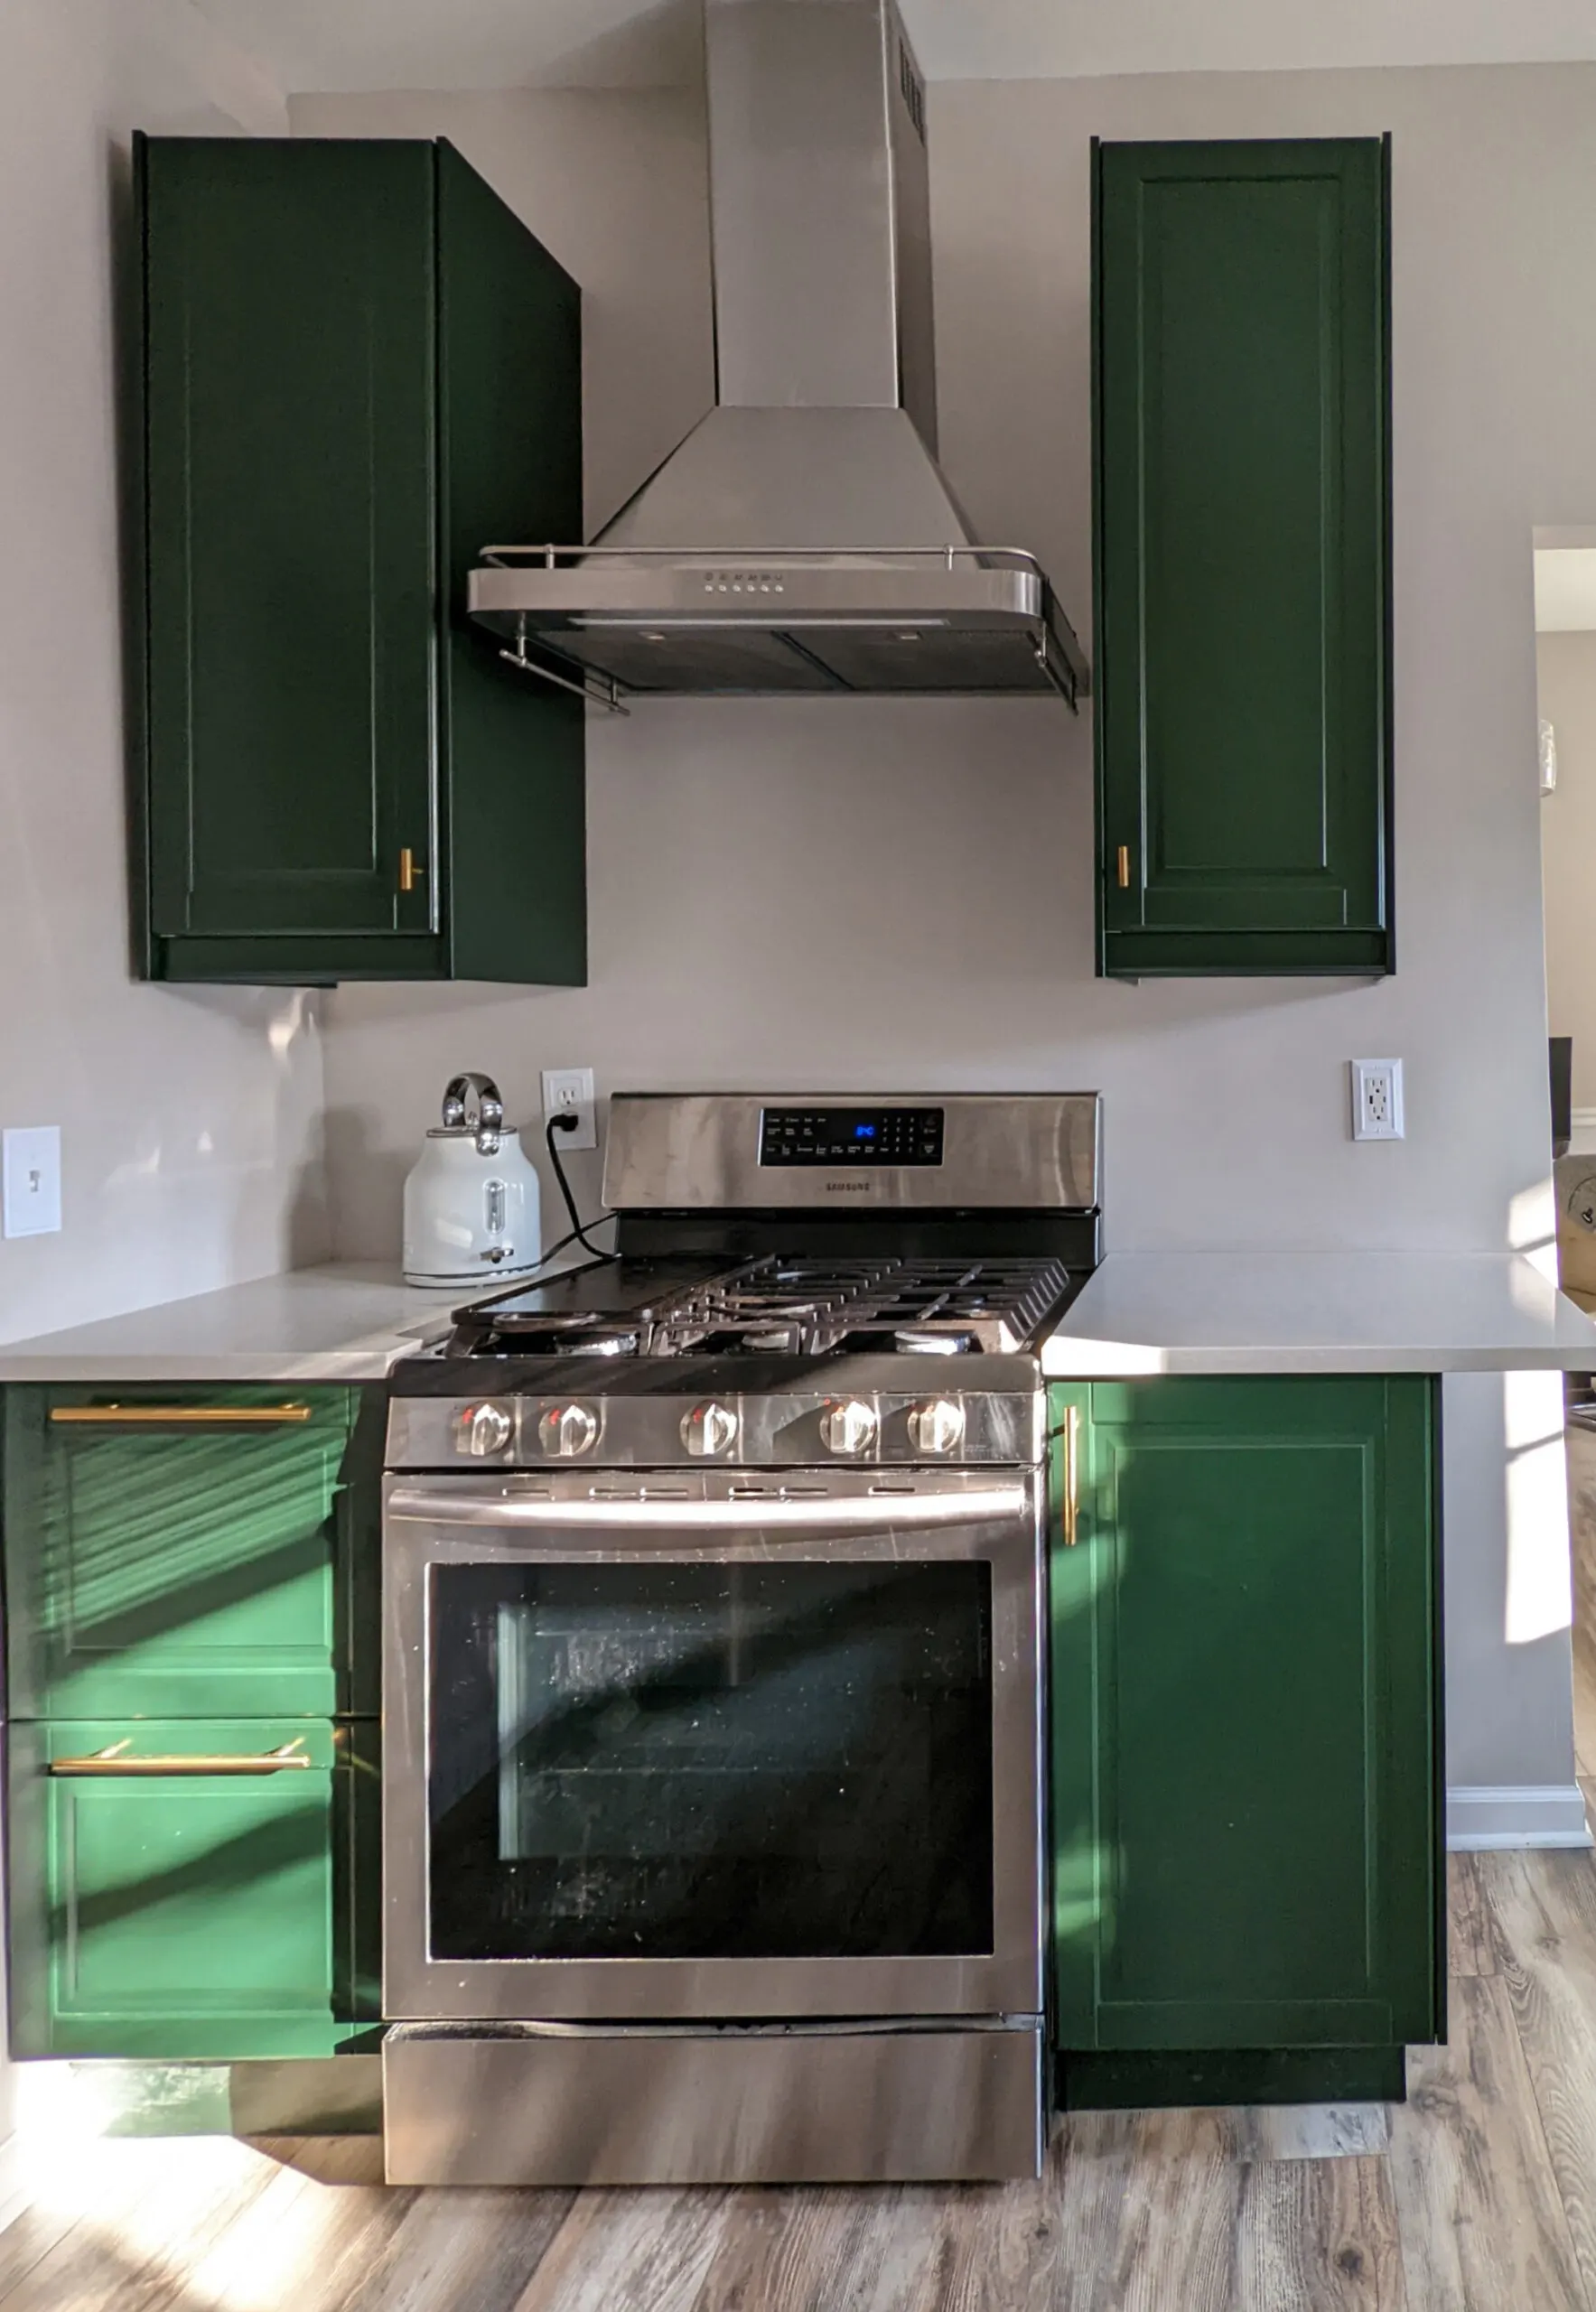
IKEA, because they offered stock sizes, was able to accommodate the plans I had for my kitchen better than the big box remodeling stores. IKEA’s line of dark green kitchen cabinets meant that I could have the look I dreamed of without having to pay the cost of custom color cabinets- a stocked color meant that I could have the forest green base cabinets and drawers that I wanted immediately (without back order) and priced at literally 75% less than the cost of having custom green cabinets.
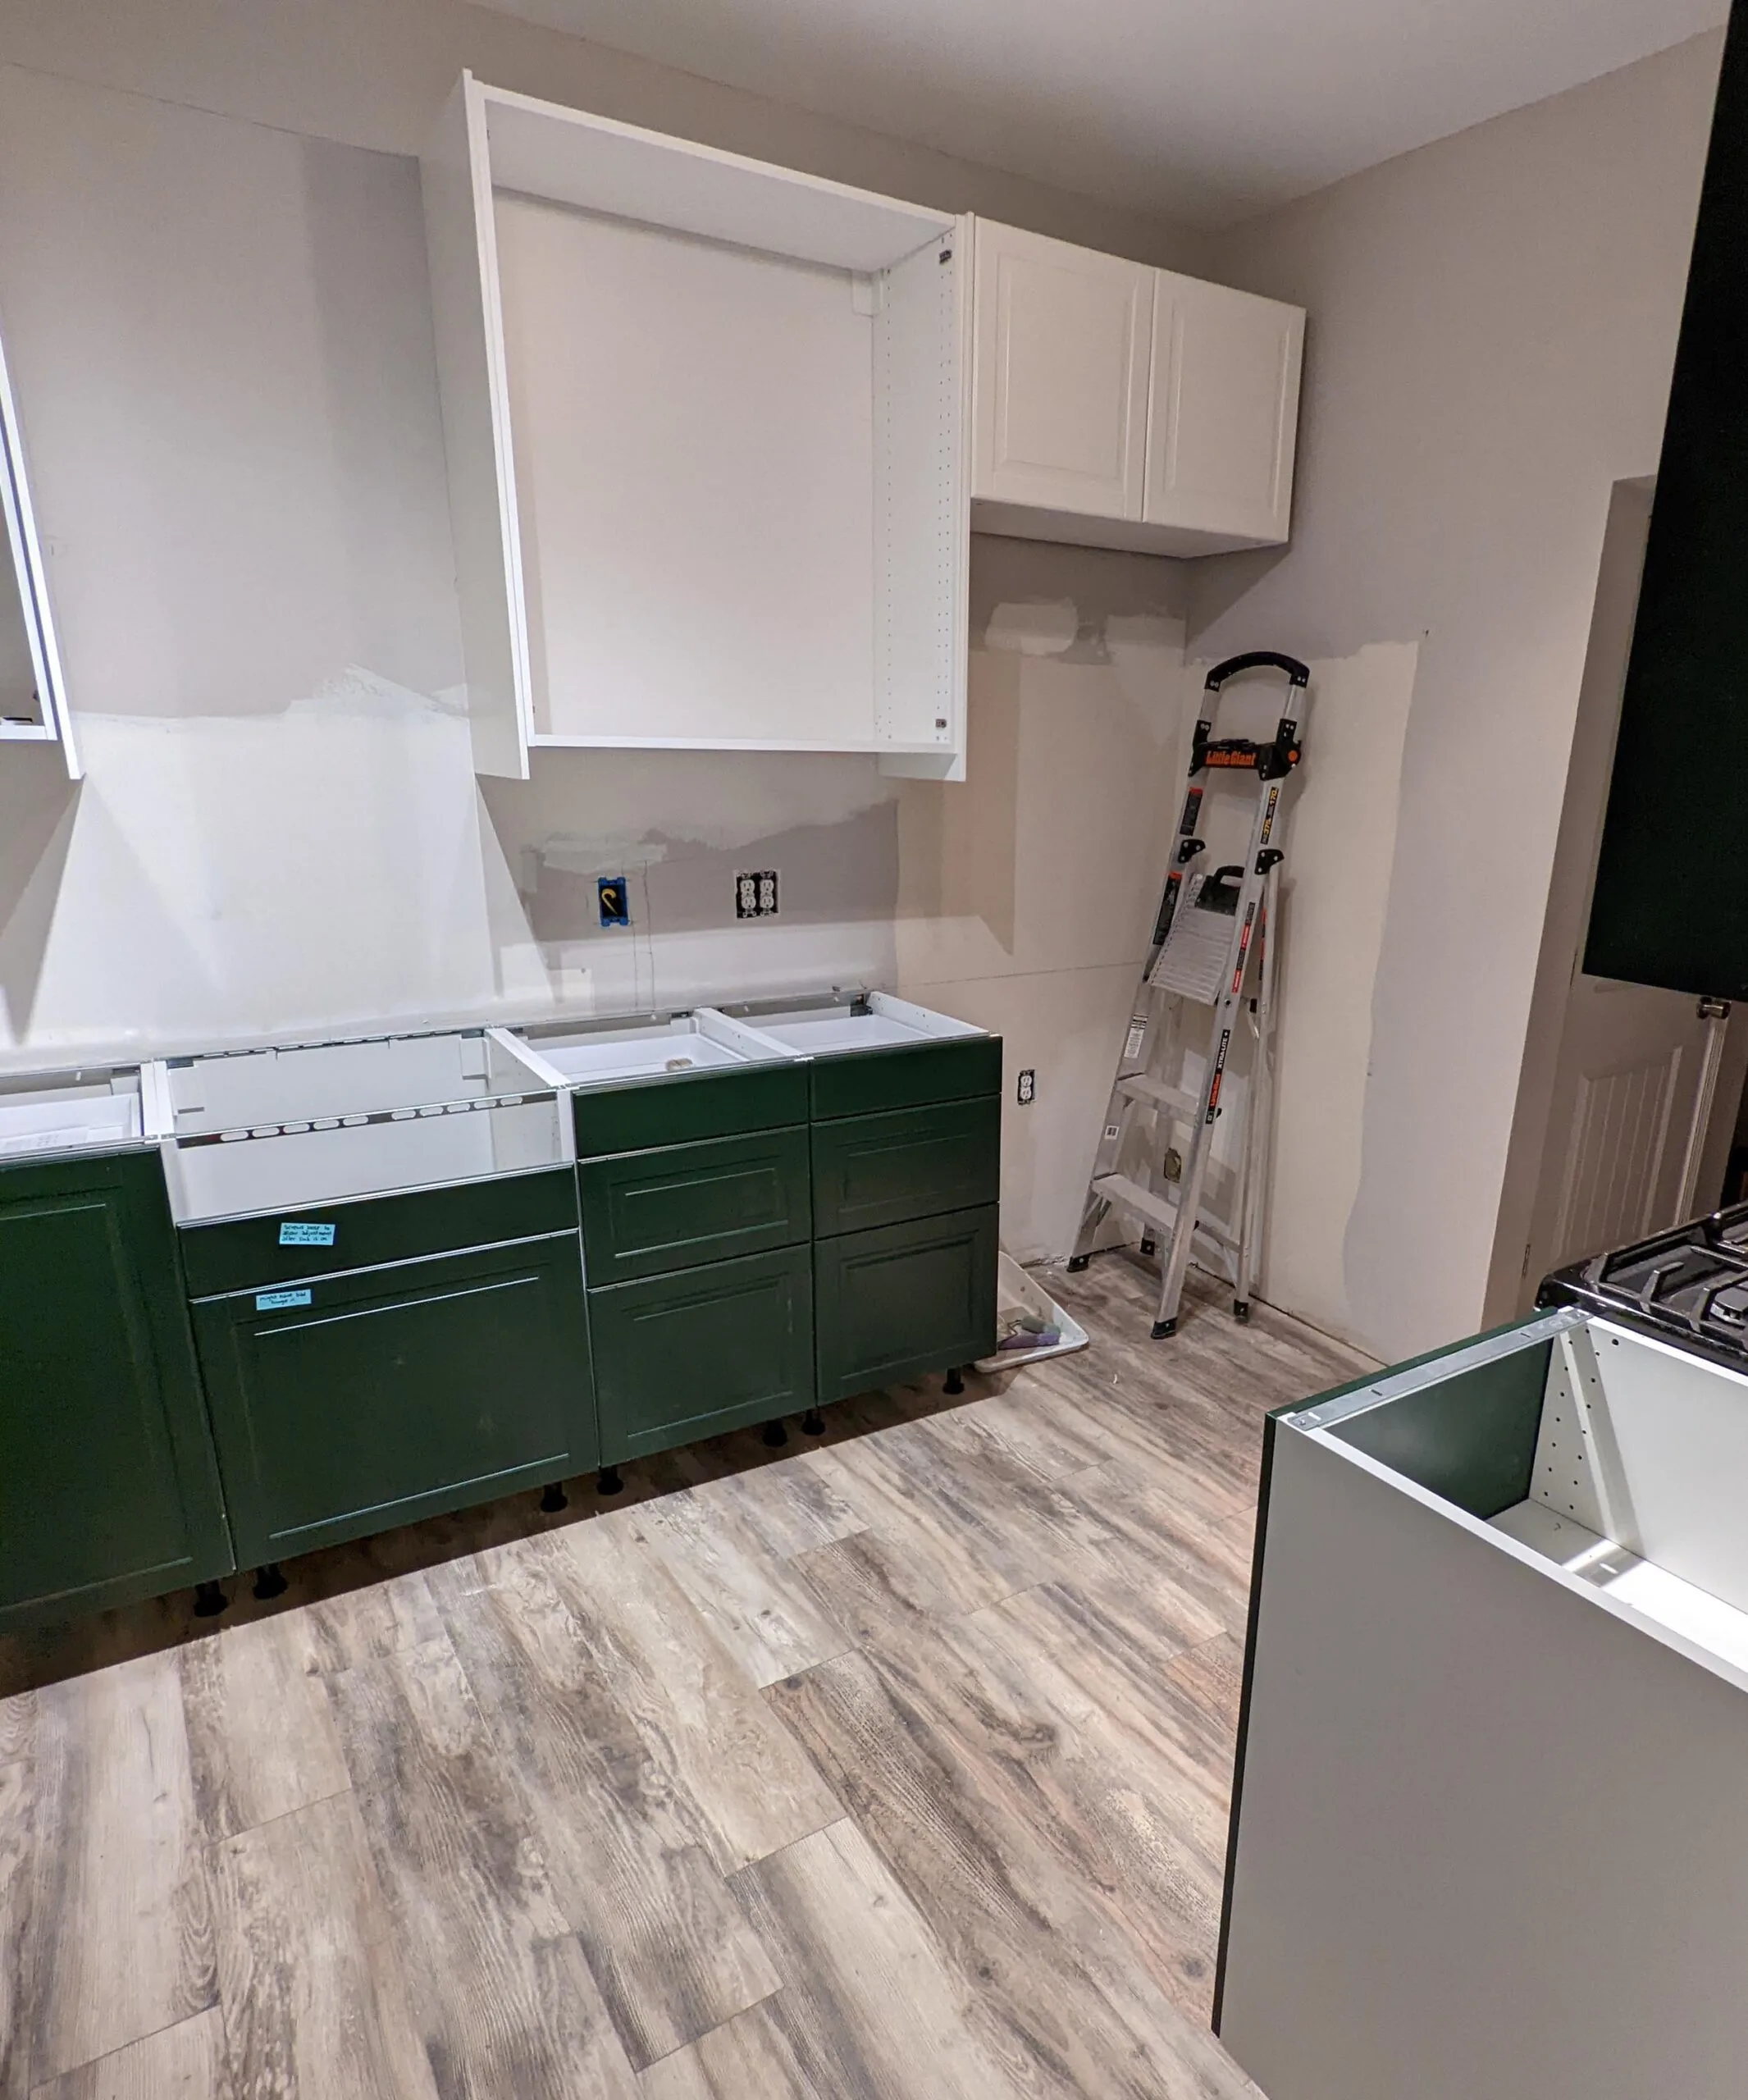
The big delay: installation
I designed and purchased my IKEA kitchen in late October. While IKEA offers an assembly and installation service, this was where the severe delays came: they were booking three months out, and the service wasn’t cheap (Ikea’s installation for my 9×12 kitchen would have added about $2,500 to my kitchen remodel budget).
Though tempted to book professional installation with IKEA’s certified installers, I opted to have a private contractor install my kitchen cabinets instead. While my contractor indicated they were willing to assemble the cabinets, since they were already delivered three weeks before the contractor was due to start, I decided to give it a go…
Assembling my own IKEA cabinets
When I tell people that I assembled my own cabinets from IKEA kitchen they look at me with an odd look – it’s perceived as being quite a feat! As someone who’s lived through it, though, I think the admiration belongs to IKEA! I realized as I was assembling drawers, adding drawer fronts, and putting together pullouts just how much research and savvy design has gone into the development of 2022’s version of IKEA cabinets.
Honestly, I’m still shocked that assembling an entire kitchen really only required a screwdriver and a small hammer! There were plenty of things that surprised me about my Ikea kitchen remodel, but this was a really pleasant one!
When all the boxes arrived – over 200 individual packages! – It was really overwhelming. But here’s how I approached it:
The Easiest Way to Get Started Assembling an Ikea Kitchen:
In 2020, I rediscovered my childhood love for puzzles. To put together a complex jigsaw puzzle, I start by sorting the pieces, next fitting the edge pieces together to form the frame, and then working section by section to complete the jigsaw puzzle. I used this same approach to assemble my IKEA kitchen from flatpack to fully assembled glory:
1. Sort packages
Using the manifest from my IKEA kitchen design appointment, I identified which parts and packages belonged to each separate cabinet unit. Each of these packages was marked with a number identifying the cabinet section that it belonged to, and was sorted into separate piles.
2. Assemble Sektion Frames
After sorting and labeling the packages by cabinet unit, my next step to assemble my own IKEA kitchen cabinets was to assemble the basic frame of the green cabinet. After all, before putting together and adding drawers, the basic frame- top, sides, and bottom- have to be assembled into a box-shaped container. Turns out, this was pretty easy and once I found myself surrounded by a room full of assembled cabinet boxes, I felt motivated to keep going and try assembling IKEA drawers, shelves and pullouts.
3. Assemble and install cabinet features and fronts
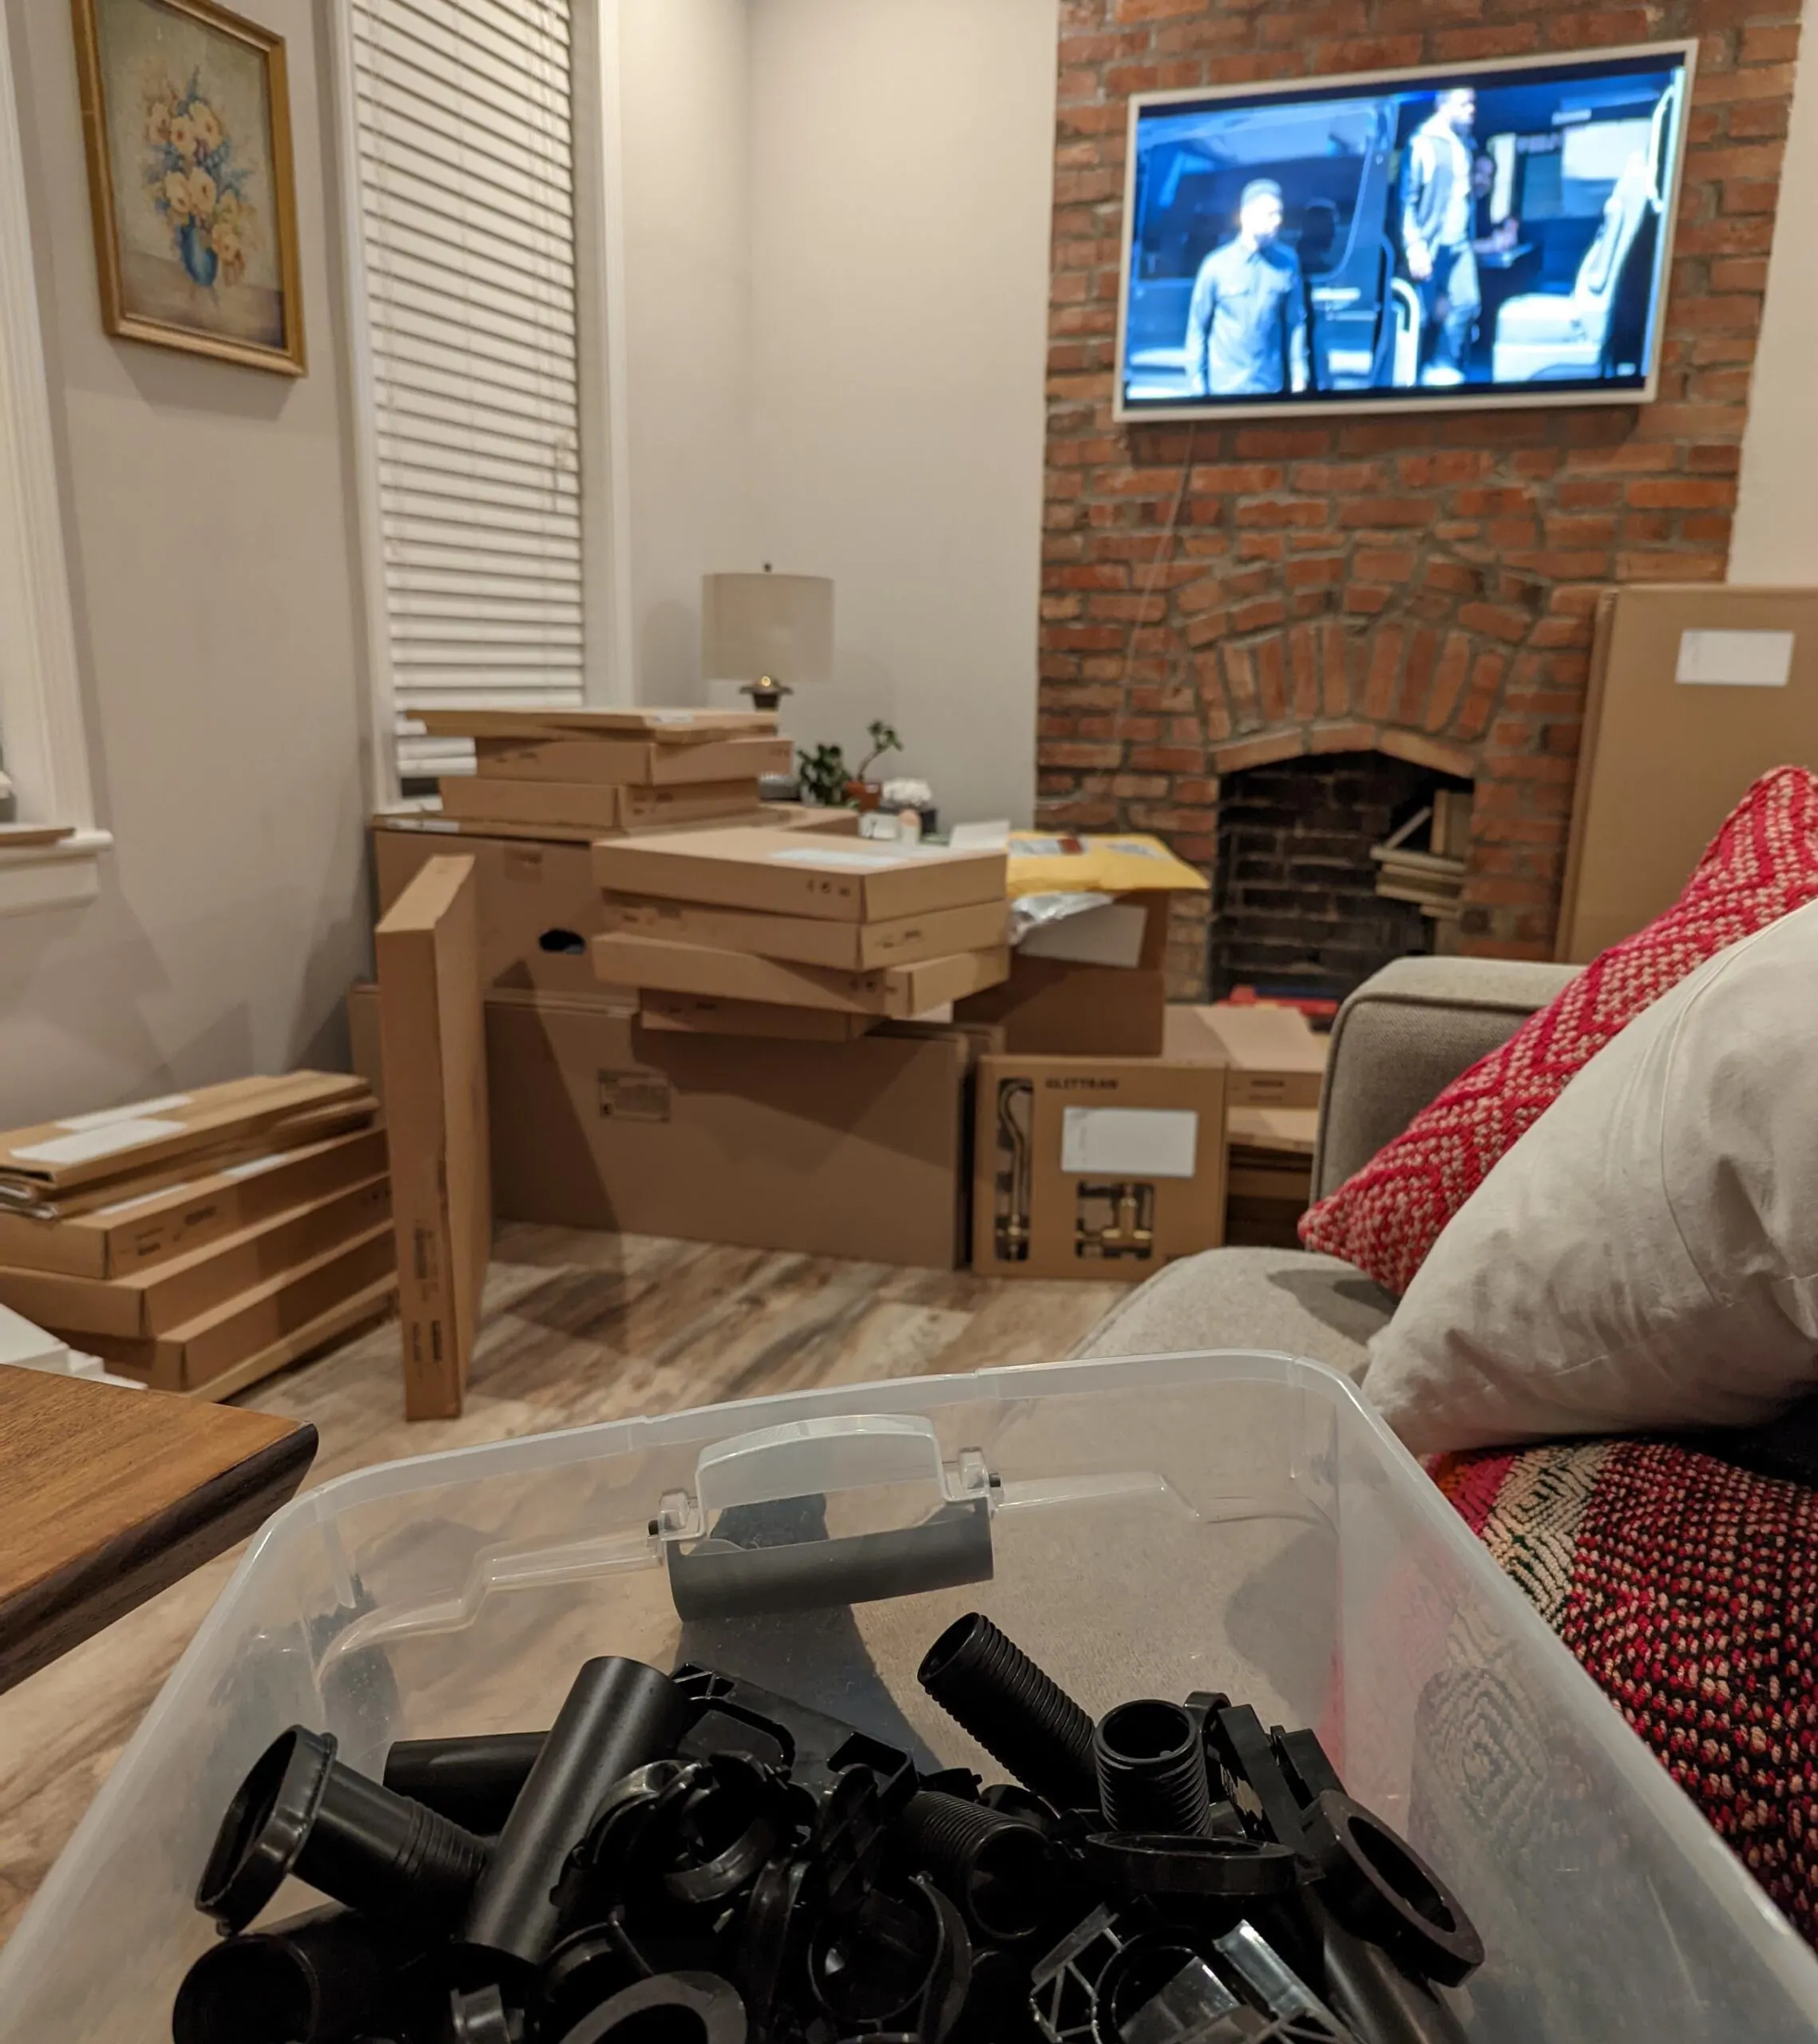
Although assembling drawers, doors, hinges, shelves, and pullouts was the hardest part of assembling my own IKEA kitchen, I found that there was a YouTube video for just about every challenge that stumped me. Using Google and YouTube, I was able to find tutorials for assembling just about every element of my IKEA kitchen. One thing that makes assembling your own IKEA kitchen much faster is that the assembly methods often repeat for similar elements – once you’ve attached one the hinge you know how to do all of them, and once you’ve made it through assembling your first drawer, drawers and pullouts are all easy after that.
Using these three basic steps, I was able to assemble all the parts and pieces for my IKEA kitchen remodel in about two full days. While it was a little messier, and harder work in putting together a puzzle, I binged watched a few movies and kept the hot cocoa flowing and it went quickly.
Bringing in the pros: installing my IKEA kitchen cabinets
Once the assembly of the individual units was done, my DIY came to an end.
Yes, I know this is a DIY blog, but an important element of successful DIYs is knowing when you’re in over your head. Personally, when things like electrical, plumbing, or really heavy lifting get involved, that’s when I know my D.I.Y. is D.O.N.E.
To transition my IKEA kitchen from loose parts filling my dining room to a fully assembled kitchen, I handed the house keys over to my contractor (literally, as I took off for Hawaii for Christmas vacation). While I was gone, the builders-grade tile floor came up, the rusted-out cast-iron kitchen sink was hauled off, Pergo Wet Protect Waterproof Laminate went down, and my 9 x 12 kitchen was prepped for installation of the IKEA cabinets.
Living in a Kitchen Remodel
Coming home from Christmas vacation to find my kitchen reduced to an empty room was disruptive. For the next two weeks, I ate only take-out food, while perched in a small section of my living room surrounded by furniture covered in dust-protective plastic sheeting. For fun, I’d occasionally plug in my pressure cooker, the only appliance I had during that time, and I washed my dishes in a small sink in a tiny half bathroom in the cottage’s first floor.
Finishing up: IKEA kitchen final touches
While, for the most part, this job flowed easily without being affected by backorders, I did experience problems with IKEA’s countertop installer, which measured and templated the countertops incorrectly and delayed installation by almost 2 weeks (which was then further delayed by a week of ice and snow in late January).
Finally, on February 9, 75 days after the first shipments from IKEA begin trickling in, and 50 days after demo of the old kitchen began, countertops were installed in my kitchen and my contractor was able to complete the finishing touches.
Ongoing projects:
If you look closely, you might notice that my kitchen does not currently have a backsplash. Exhausted by decision fatigue, I decided, simply, to wait.
This final step of a kitchen remodel isn’t that one needs to be rushed so I’ve decided to wait. Picking a kitchen backsplash is a particular challenge in a kitchen like this one, where the floor, base cabinets, and to some degree even the upper cabinets are all very visually interesting.
Against this backdrop, a backsplash that also adds visual interest could end up overwhelming the senses and making the kitchen look like too much in terms of aesthetics. I decided that in order to make a better decision about which backsplash I use, I would delay my choice of backsplash until I had lived with the kitchen for a time.
Choosing Dark Green Kitchen Cabinets
Whether you are painting your kitchen cabinets green and doing a kitchen remodel without replacing cabinets, or doing a full remodel and installing forest green or sage cabinets, it’s a big shift that will change the look and feel of your kitchen.
Why Choose Cabinets instead of Open Shelving
I love a good set of open shelves (find proof in my articles on reclaimed wood open shelving in my kitchen or in my tutorial on building live edge driftwood shelves) but open shelving isn’t always the best choice. Open shelving, instead of cabinets, requires a relentless commitment to staying organized and a willingness to remove, wash, and replace the contents of the shelves regularly as airborne cooking oils settle on shelf-stored items and collect dust.
Both shelves and cabinets provide storage, and as you are considering the interior design of your kitchen remodel, you should consider how much storage space you need. It is essential to have enough storage to keep your ingredients, utensils, and dishes stored up and away from the countertop. Cabinets can even hide unsightly details such as a dated dishwasher and your garbage and recycling bins.
Forest green kitchen cabinets are, I think, the ideal means of taking your kitchen from a simple (boring) look to a powerful statement that provides plenty of functionality while being stylish. With the bold look of forest green or sage green kitchen cabinets, you can quickly transform your kitchen’s look, feel, and functionality. Planning for more cabinets than you expect you might need (if space allows) is one of the best ways to add more space to store more items in your kitchen- which many people find helps keep them organized. Visually bold cabinets are a valuable upgrade to your kitchen, making it look more friendly and convenient- not to mention more expensive!
How Colorful Kitchen Cabinets Impact a Space
Dark green kitchen cabinets have a powerful impact on a space. They also make the entire kitchen appear bold and dramatic. It’s not necessarily that they make a person more productive or comfortable while cooing, but cabinets provide organization and visual interest in a kitchen- green kitchen cabinets add to this effect by adding dimension and drama.
Thanks for Reading!!!
I hope you can tell that I love DIY, researching the best affordable solutions for every-day problems opportunities and documenting / sharing solutions!🙌 Hawk-Hill.com is reader-supported.
☕ Hawk-Hill.com is reader-supported. If this article saved you time or money, please consider donating $1 to help me cover the cost of hosting this website OR If you appreciate this information and want to throw a “Thanks!” my way by buying me a coffee – I would Of Course appreciate it! :]
Reader Questions and Recommendations
Readers, do you have any favorite topics / posts? What would you like to read more about in the future? As I hope you can tell from this and other articles on my site, I really enjoy DIY / a good challenge, and I’m not afraid to roll up my sleeves to figure out a great, and hopefully simple 😁 solution. So please feel free to let me know in the comments below (or reach out via social media)!
Ok Really – I’ll try to wrap this up now😂
Finally, if you’d like to continue to learn about interesting DIY options as well as how YOU can tackle creative new projects consider checking out the latest and most popular articles listed on the Hawk-Hill Home Page. I’m always trying to enjoy and write about the creative side of life so please don’t be a stranger – check back often!😍
If you enjoyed this post you may also enjoy reading / perusing / devouring😊 one or all of these articles as well!

