
To build reclaimed wood shelves for the remodel of my 1910 cottage’s kitchen, I followed these steps:
- First, I purchased reclaimed wood from an architectural salvage company in the form of 100-year-old floor joists.
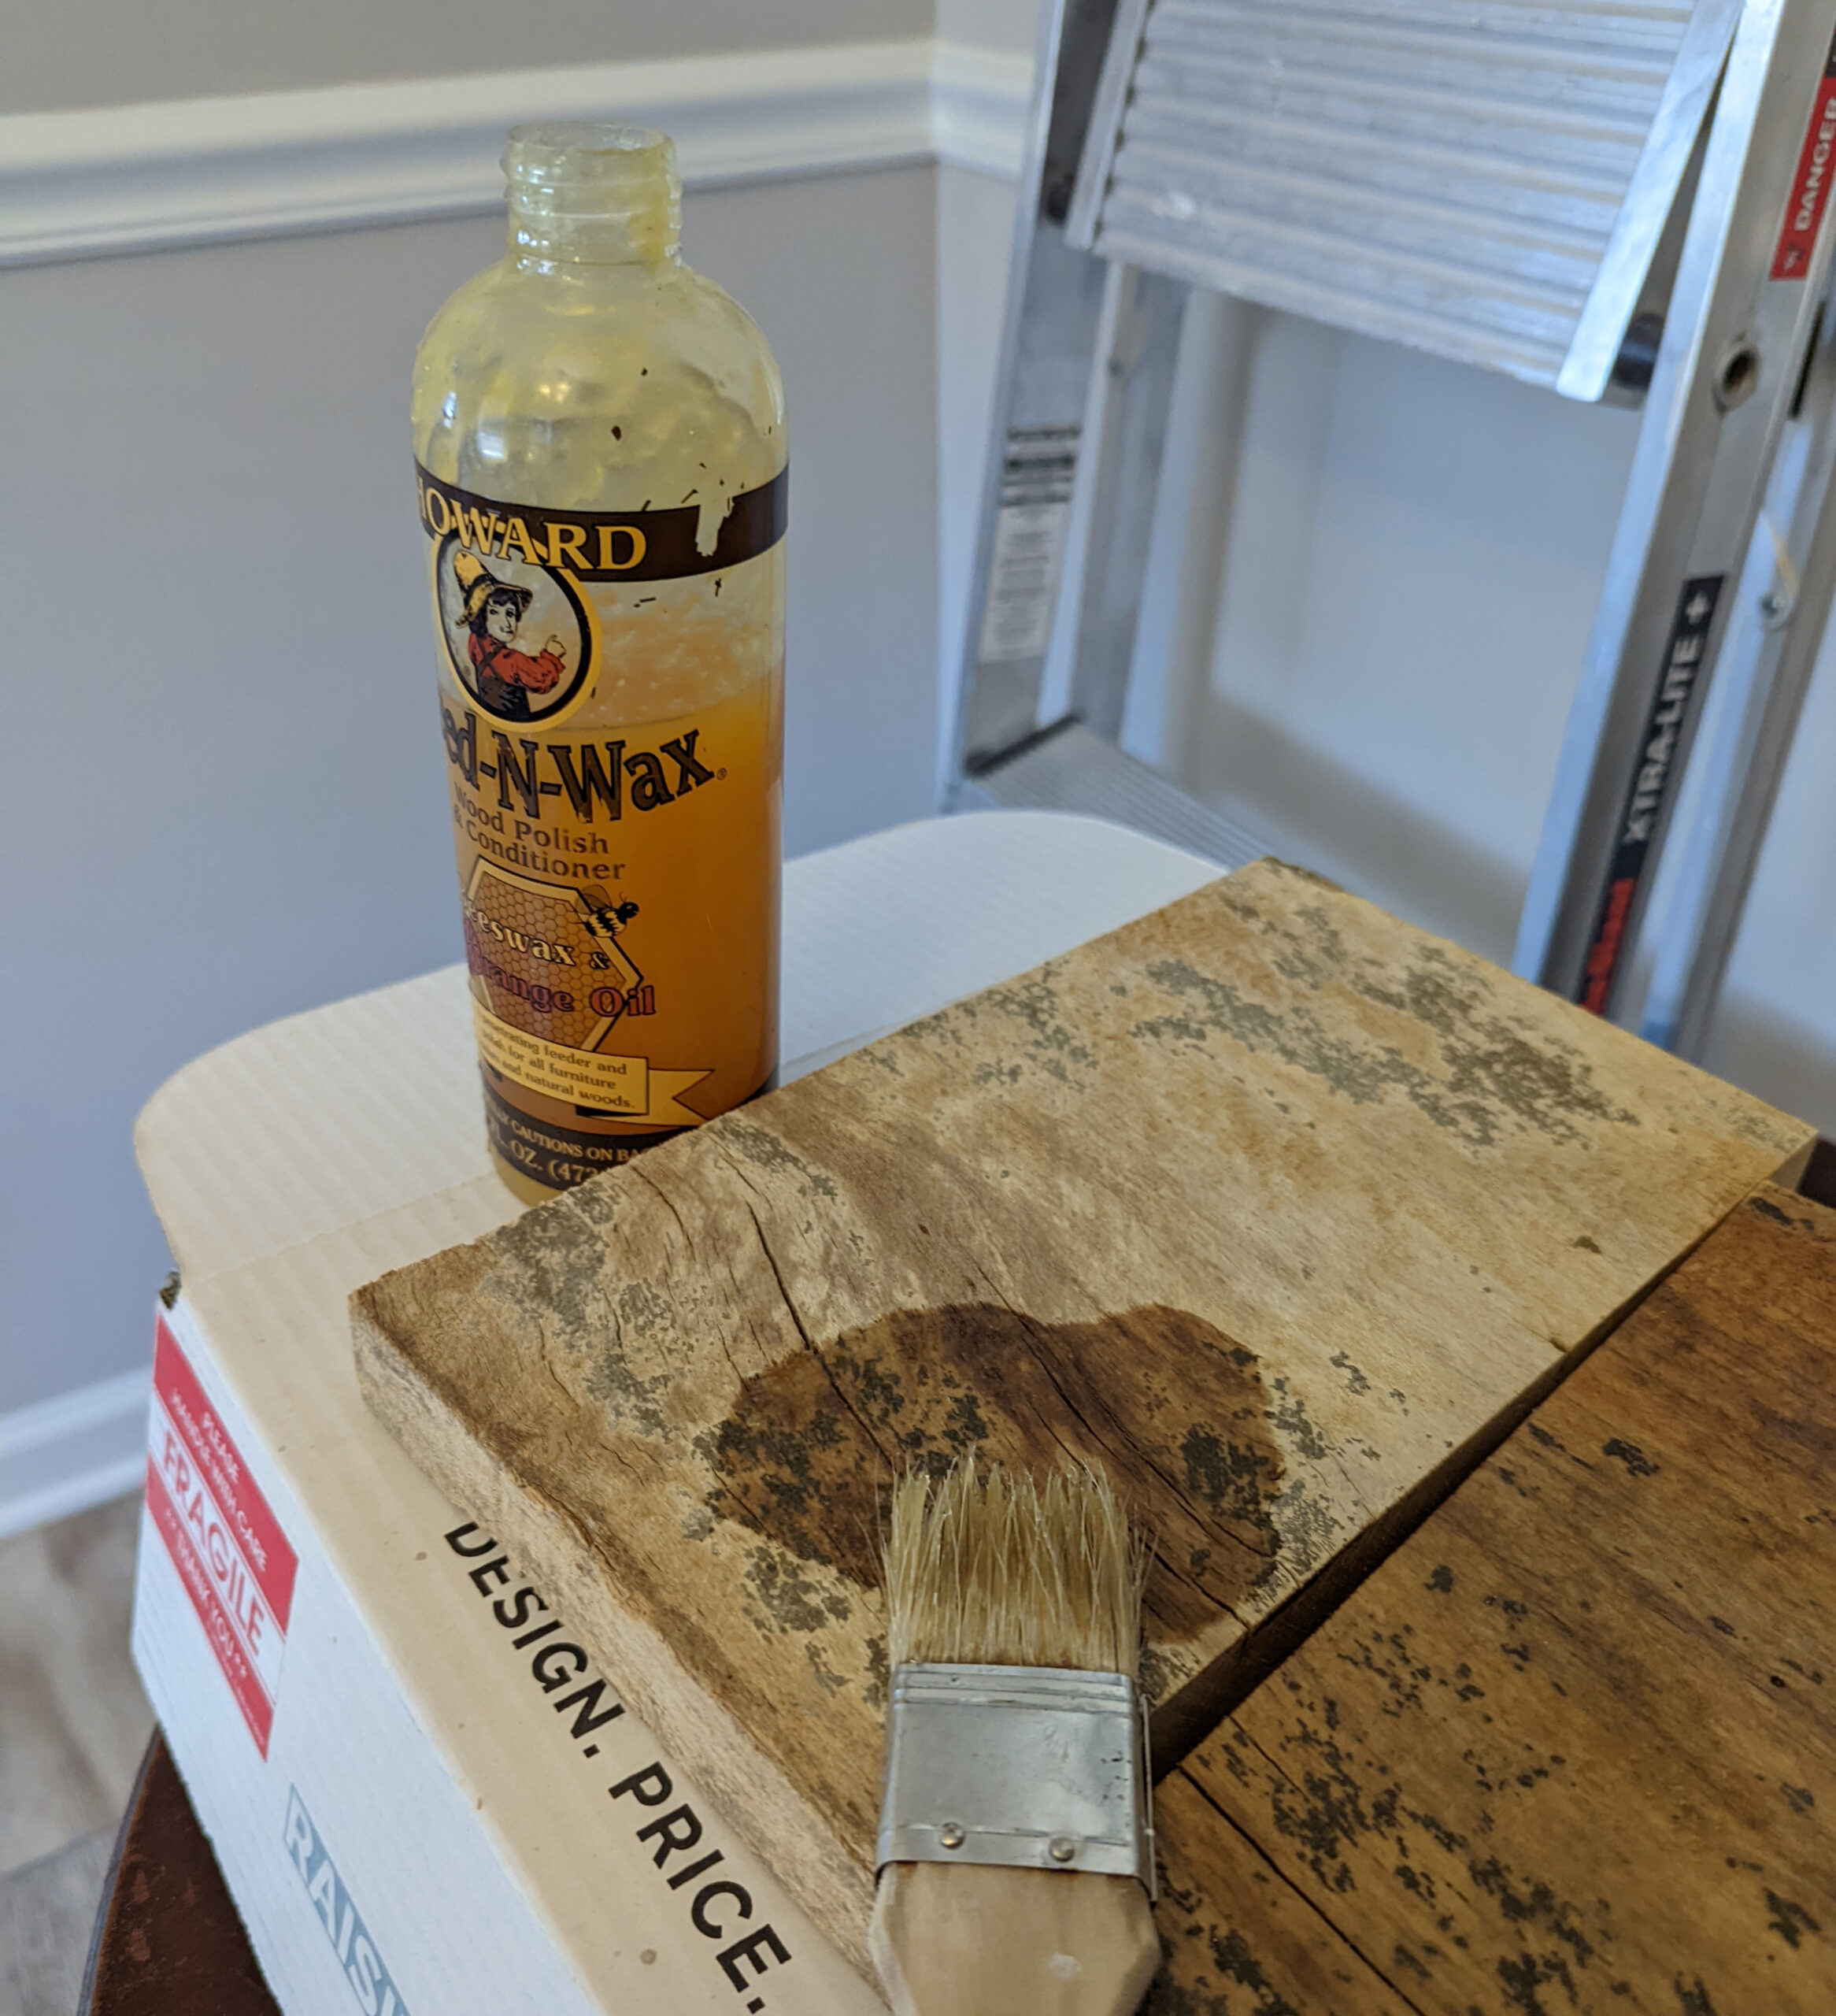
- Then, I washed, dried, and conditioned the boards using a beeswax blend conditioner, and warmed the boards to help the conditioner penetrate,
- Finally, I had shelf cleats cut from the reclaimed wood, secured the cleats to a wall, and added my shelves.
Keep reading for a guide to creating a similar set of reclaimed wood shelves for your kitchen.


St. Louis is a city filled with historic neighborhoods. While I’ve grown used to cities and towns where the historic district bridges a few blocks or perhaps several neighborhoods, in St. Louis, historic districts stretch for miles along the western shore of the Mississippi River.
Among this fertile soil of historic buildings, several architectural salvage firms have popped up, the most prominent being just a few blocks from Hawk Hill Cottage. Through following their social media feeds, I’m always interested to see how contractors and kitchen designers are using antique building supplies in modern renovations and remodeling projects.
That’s where I got the inspiration for using old floor joist boards to build open shelving in my modern kitchen remodel in my cottage’s kitchen. My 1910 cottage features a small kitchen that I renovated using IKEA’s cabinets in 2022. Like many modern kitchen remodels, it was tempting to use a significant amount of open shelving in order to reduce the costs of cabinets upper cabinets (after all, each of the upper cabinets in my remodel was $500!) but ultimate I chose a combination of open shelving and glass-front cabinets.
I opted for a combination of cabinets with fronts and open shelving in order to spend less time dusty and be able to get away with my slightly less aesthetically minimal organizational style.
Get a Closer Look at my Reclaimed Wood Kitchen Shelves in this Video
Using Open Shelving to Fill in the Gaps between Stock Cabinets
One of the problems with flatpack standardized kitchen cabinets, like those that IKEA sells, is that the kitchens these cabinets end up in are anything but standard-sized. While custom cabinets can bridge any size opening in any shape or size of kitchen, that’s not always the case with IKEA cabinets.
In my Ikea kitchen remodel, there was no way to purchase and hang IKEA cabinets that wouldn’t leave awkward gaps. Thankfully, this didn’t come as a surprise during my kitchen design appointment and I knew in advance that I wanted to create these open shelves using floor joists salvaged from century-old Saint Louis home.
Hawk-Hill.com is a participant in the Amazon Services LLC Associates Program, an affiliate advertising program designed to provide a means for website owners to earn advertising fees by advertising and linking to Amazon.com and any other website that may be affiliated with Amazon Service LLC Associates Program
Restoring Reclaimed Wood for Use as Open Shelves
Finding this reclaimed wood was the easy part – way easier than the wood used to the kitchen accent wall! I live just about six blocks from St. Louis’s most prominent architectural salvage store, but bringing it back to life took relying on an old wood restoration hack I’ve been using – and writing about – for years. A simple method for cleaning, reconditioning, and treatment with this beeswax-based wood conditioner brought this old, gray, and dry wood vibrantly back to life.
First: Cleaning Reclaimed Wood
Just like making live edge driftwood shelves, the first step to making reclaimed wood open shelving is to wash the wood planks you’ll be using. These shelves will be in close proximity to food and used to store items you’ll eat off of, so before you begin preparing the wood, it should be scrubbed clean.
For small items like the wooden toolbox I recently restored, I begin by running small wood pieces through a cycle of my dishwasher for an intensive but passive cleaning. For these shelves, I used a nylon-bristled scrub brush, dawn detergent, water, and elbow grease to scrub deep into the grain of the wood and remove any loose or nearly-loose debris.
Next, dry completely. I propped my boards up over a heat vent on an evening I knew the heat would run for most of the night. By morning my shelf boards were completely dry.
How to Condition Rough & Uneven Reclaimed Wood
One challenge that I faced with this wood, which I don’t often have to manage with other furniture that I’m restoring, was the deep texture on these boards.
100-years-ago, sawmills didn’t leave a clean finish on wood, and years of use as floor joists left the boards that I was using for my reclaimed wood open shelving pitted and splintered.
Sanding might have been helpful to deal with this pitted texture, however, I wanted to maintain as much of the original texture as possible. To maintain the vintage textured wood, I decided to try oiling the wood before sanding, in hopes of achieving a very antique-looking open shelf.
As I wiped the conditioner on this textured wood, it didn’t soak in as usual – instead, the beeswax-based solution collected in crevices as an unsightly goop that I knew would collect dirt and debris (and quickly turn disgusting). To get my shelves in dish-storing condition and looking great, I needed to find a way to melt the beeswax and encourage the conditioner to soak deep into the dry reclaimed wood.
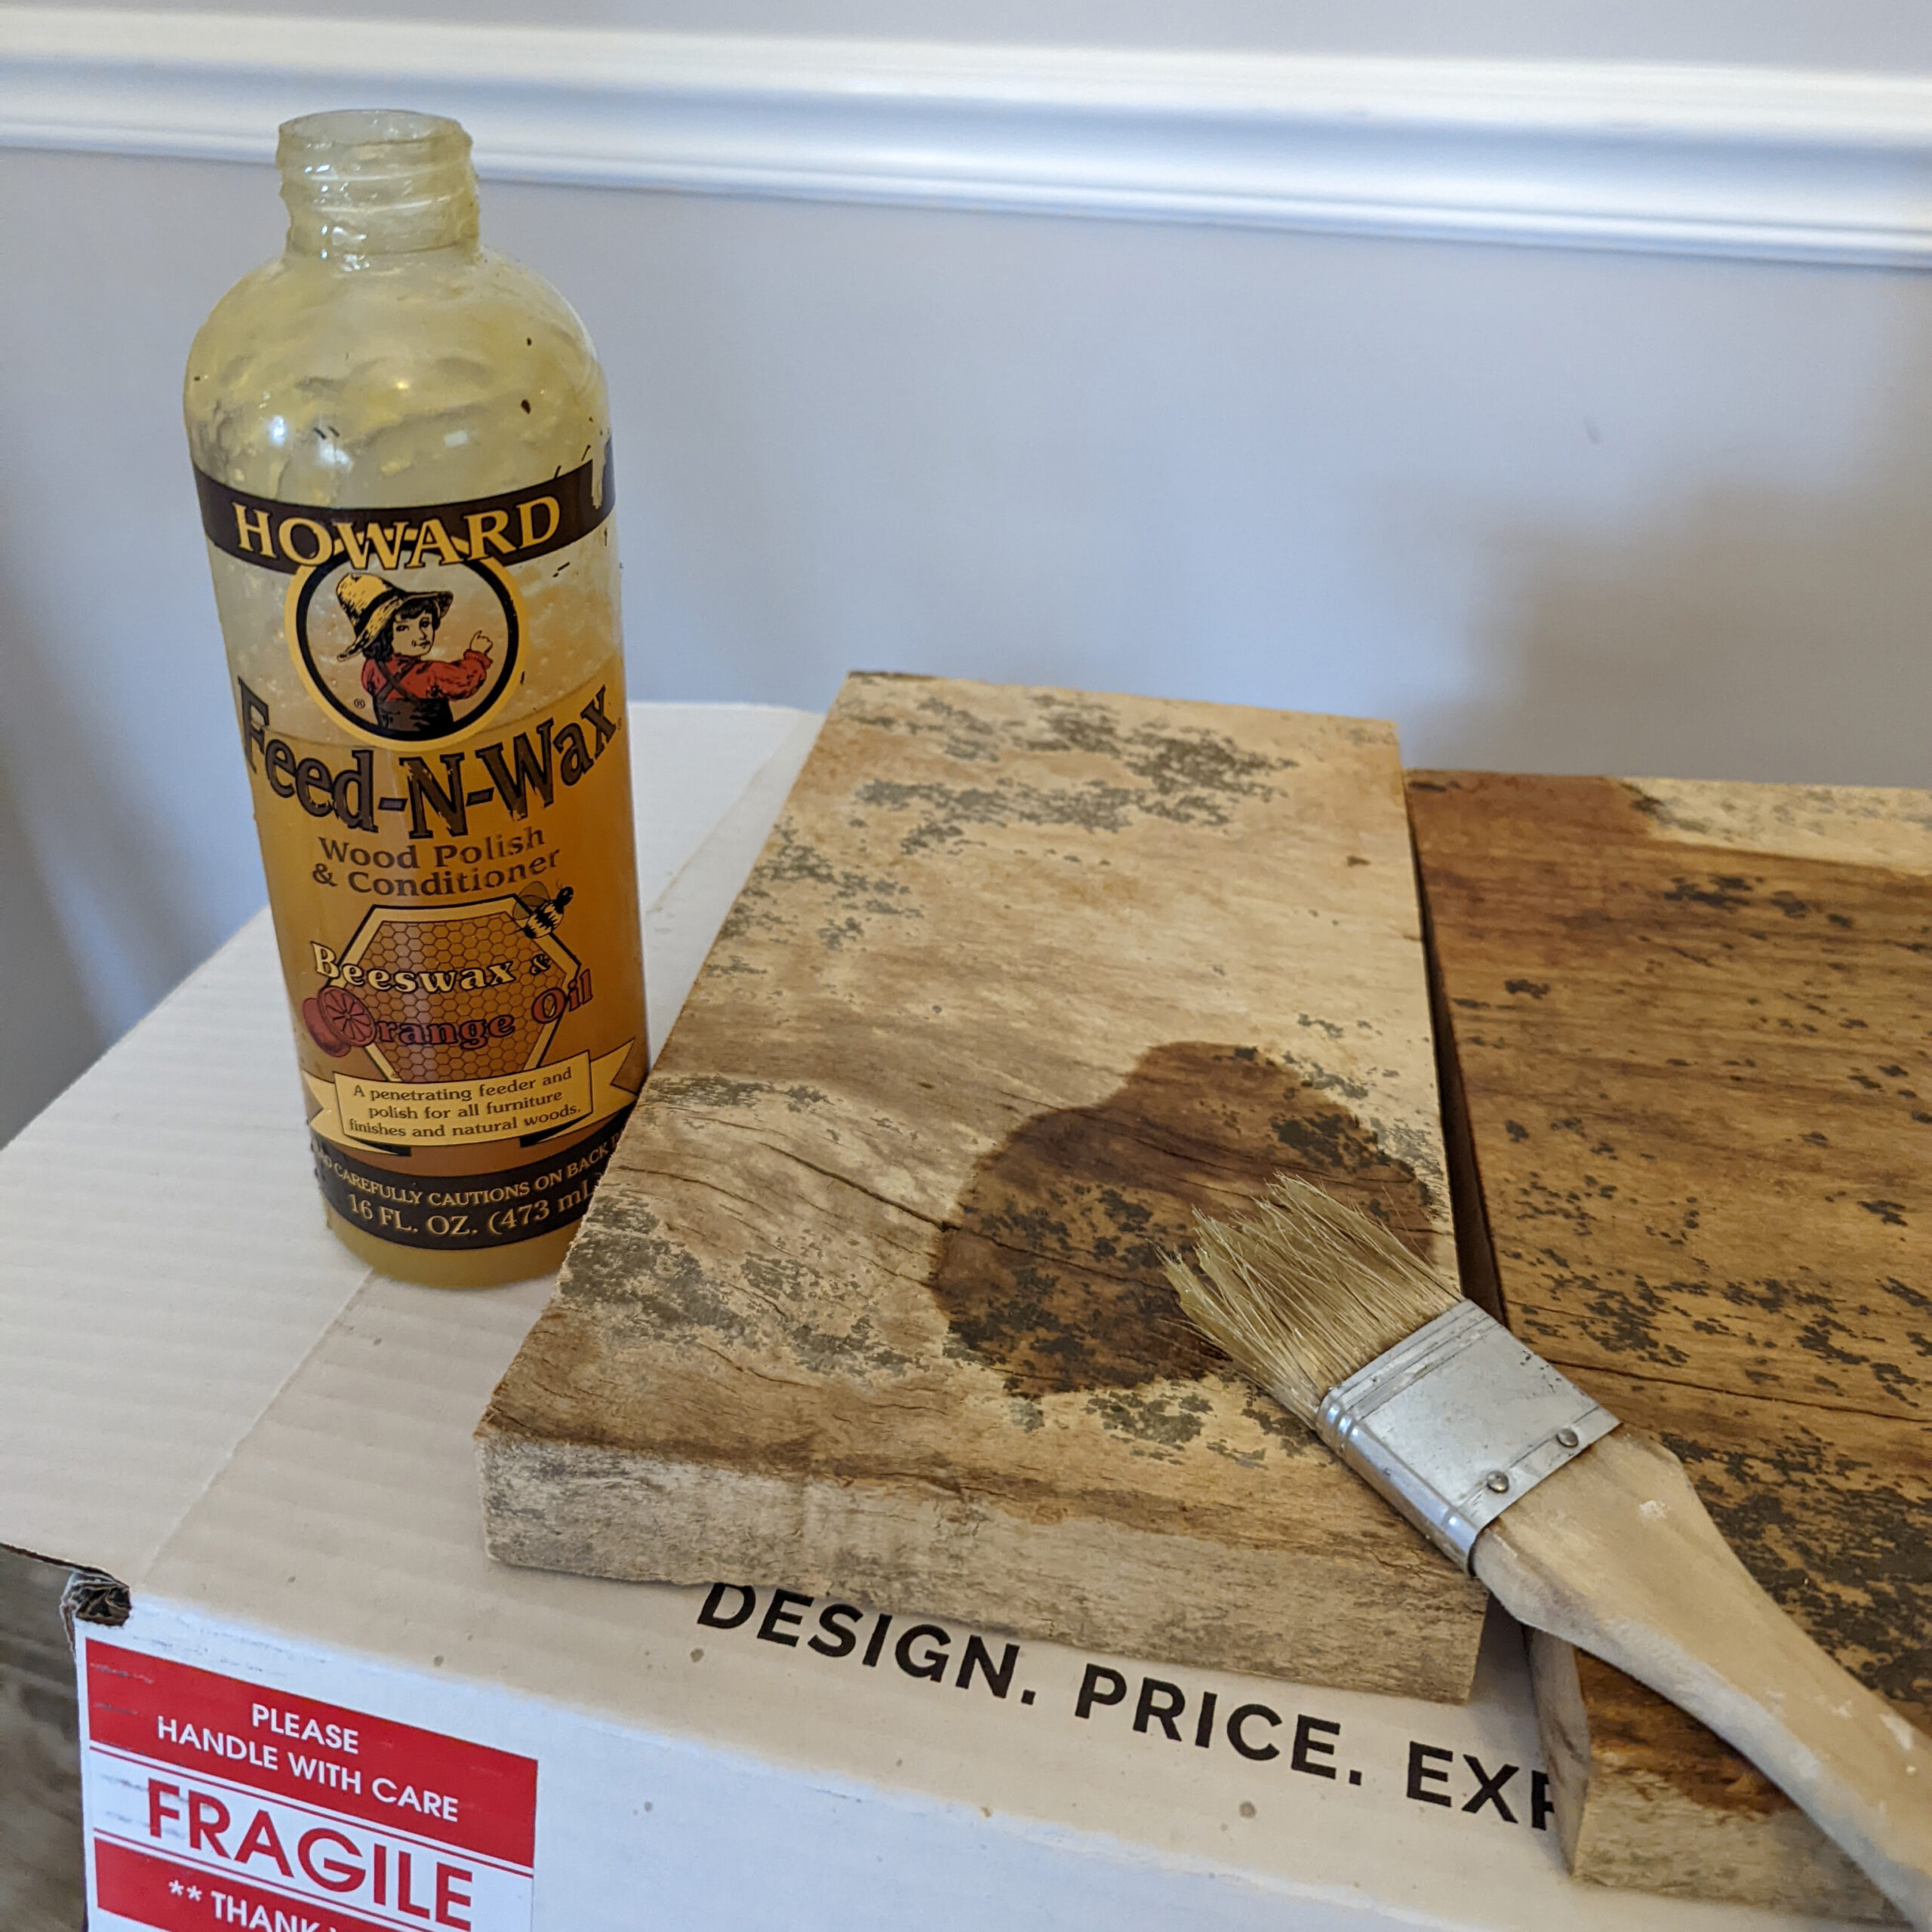
When placing them over a heat register overnight didn’t help, I turned to the next best heat source: a hairdryer. Taking a few minutes to apply heat with a hairdryer to the surface of the newly conditioned wood worked great to melt the beeswax and allow the conditioner to soak deep into the texture of the wood, warming the tone and removing the ugly gray finish that reclaimed wood often has before treatment.
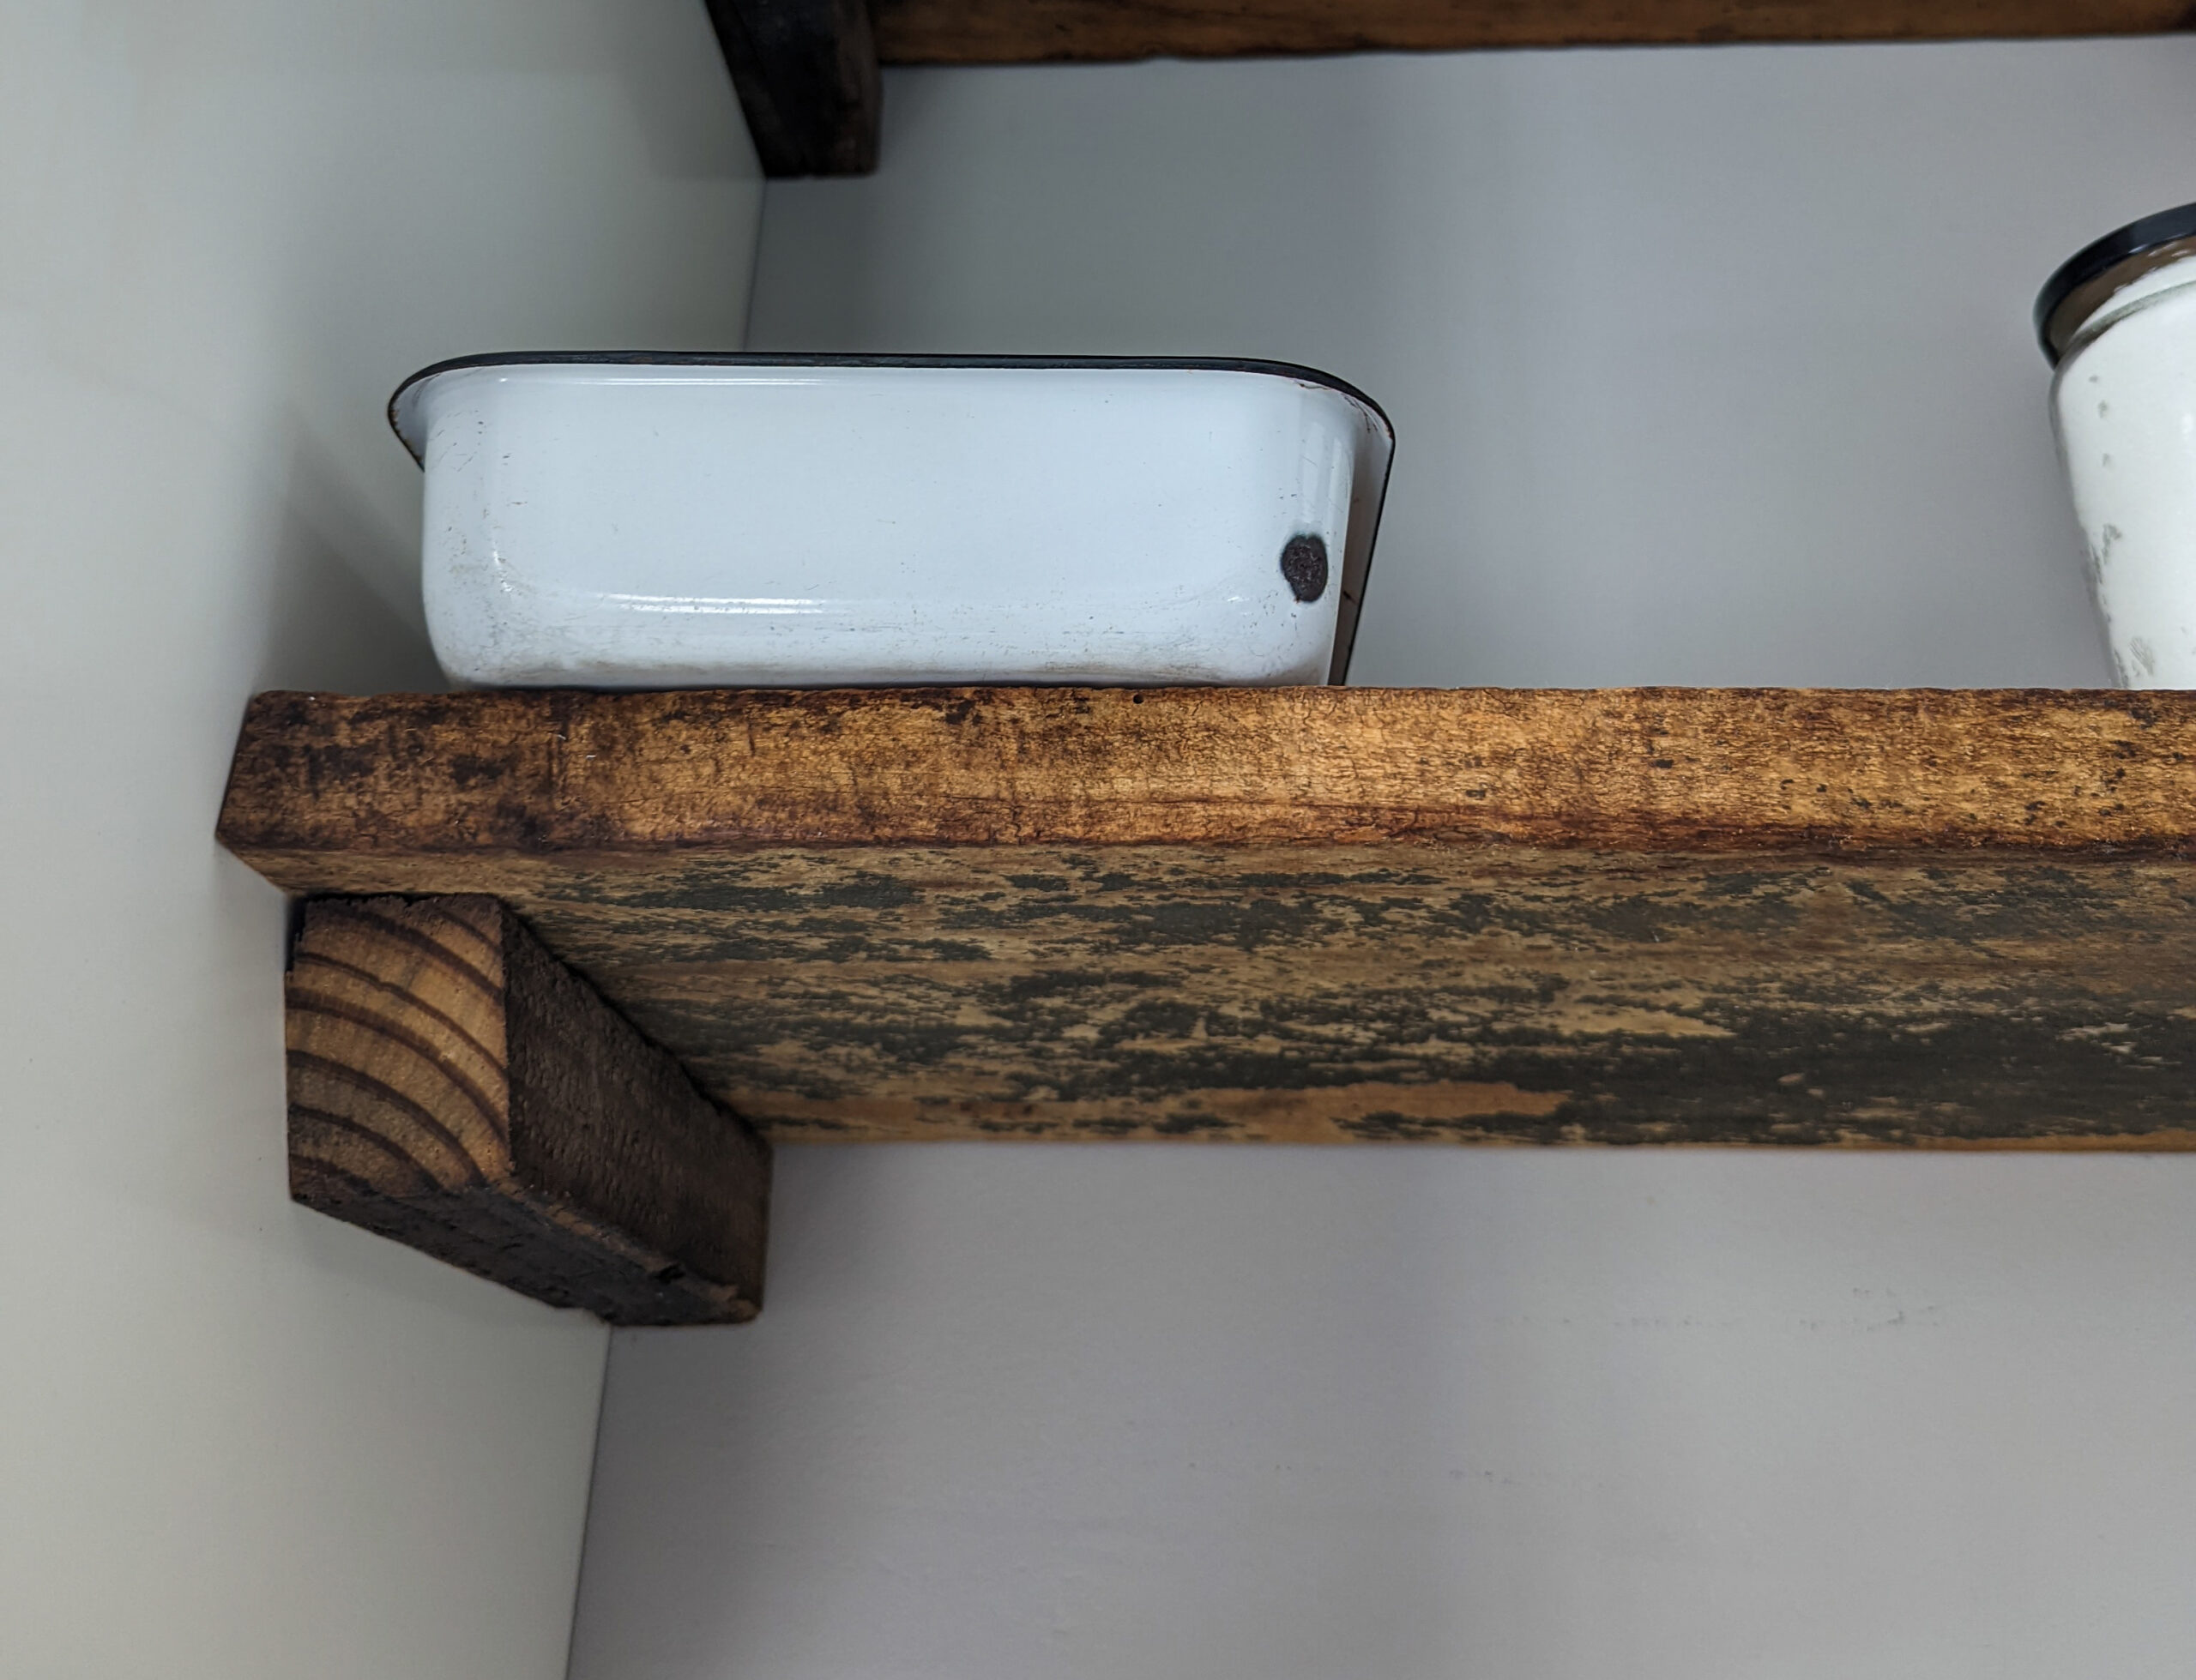
Mounting these reclaimed wood
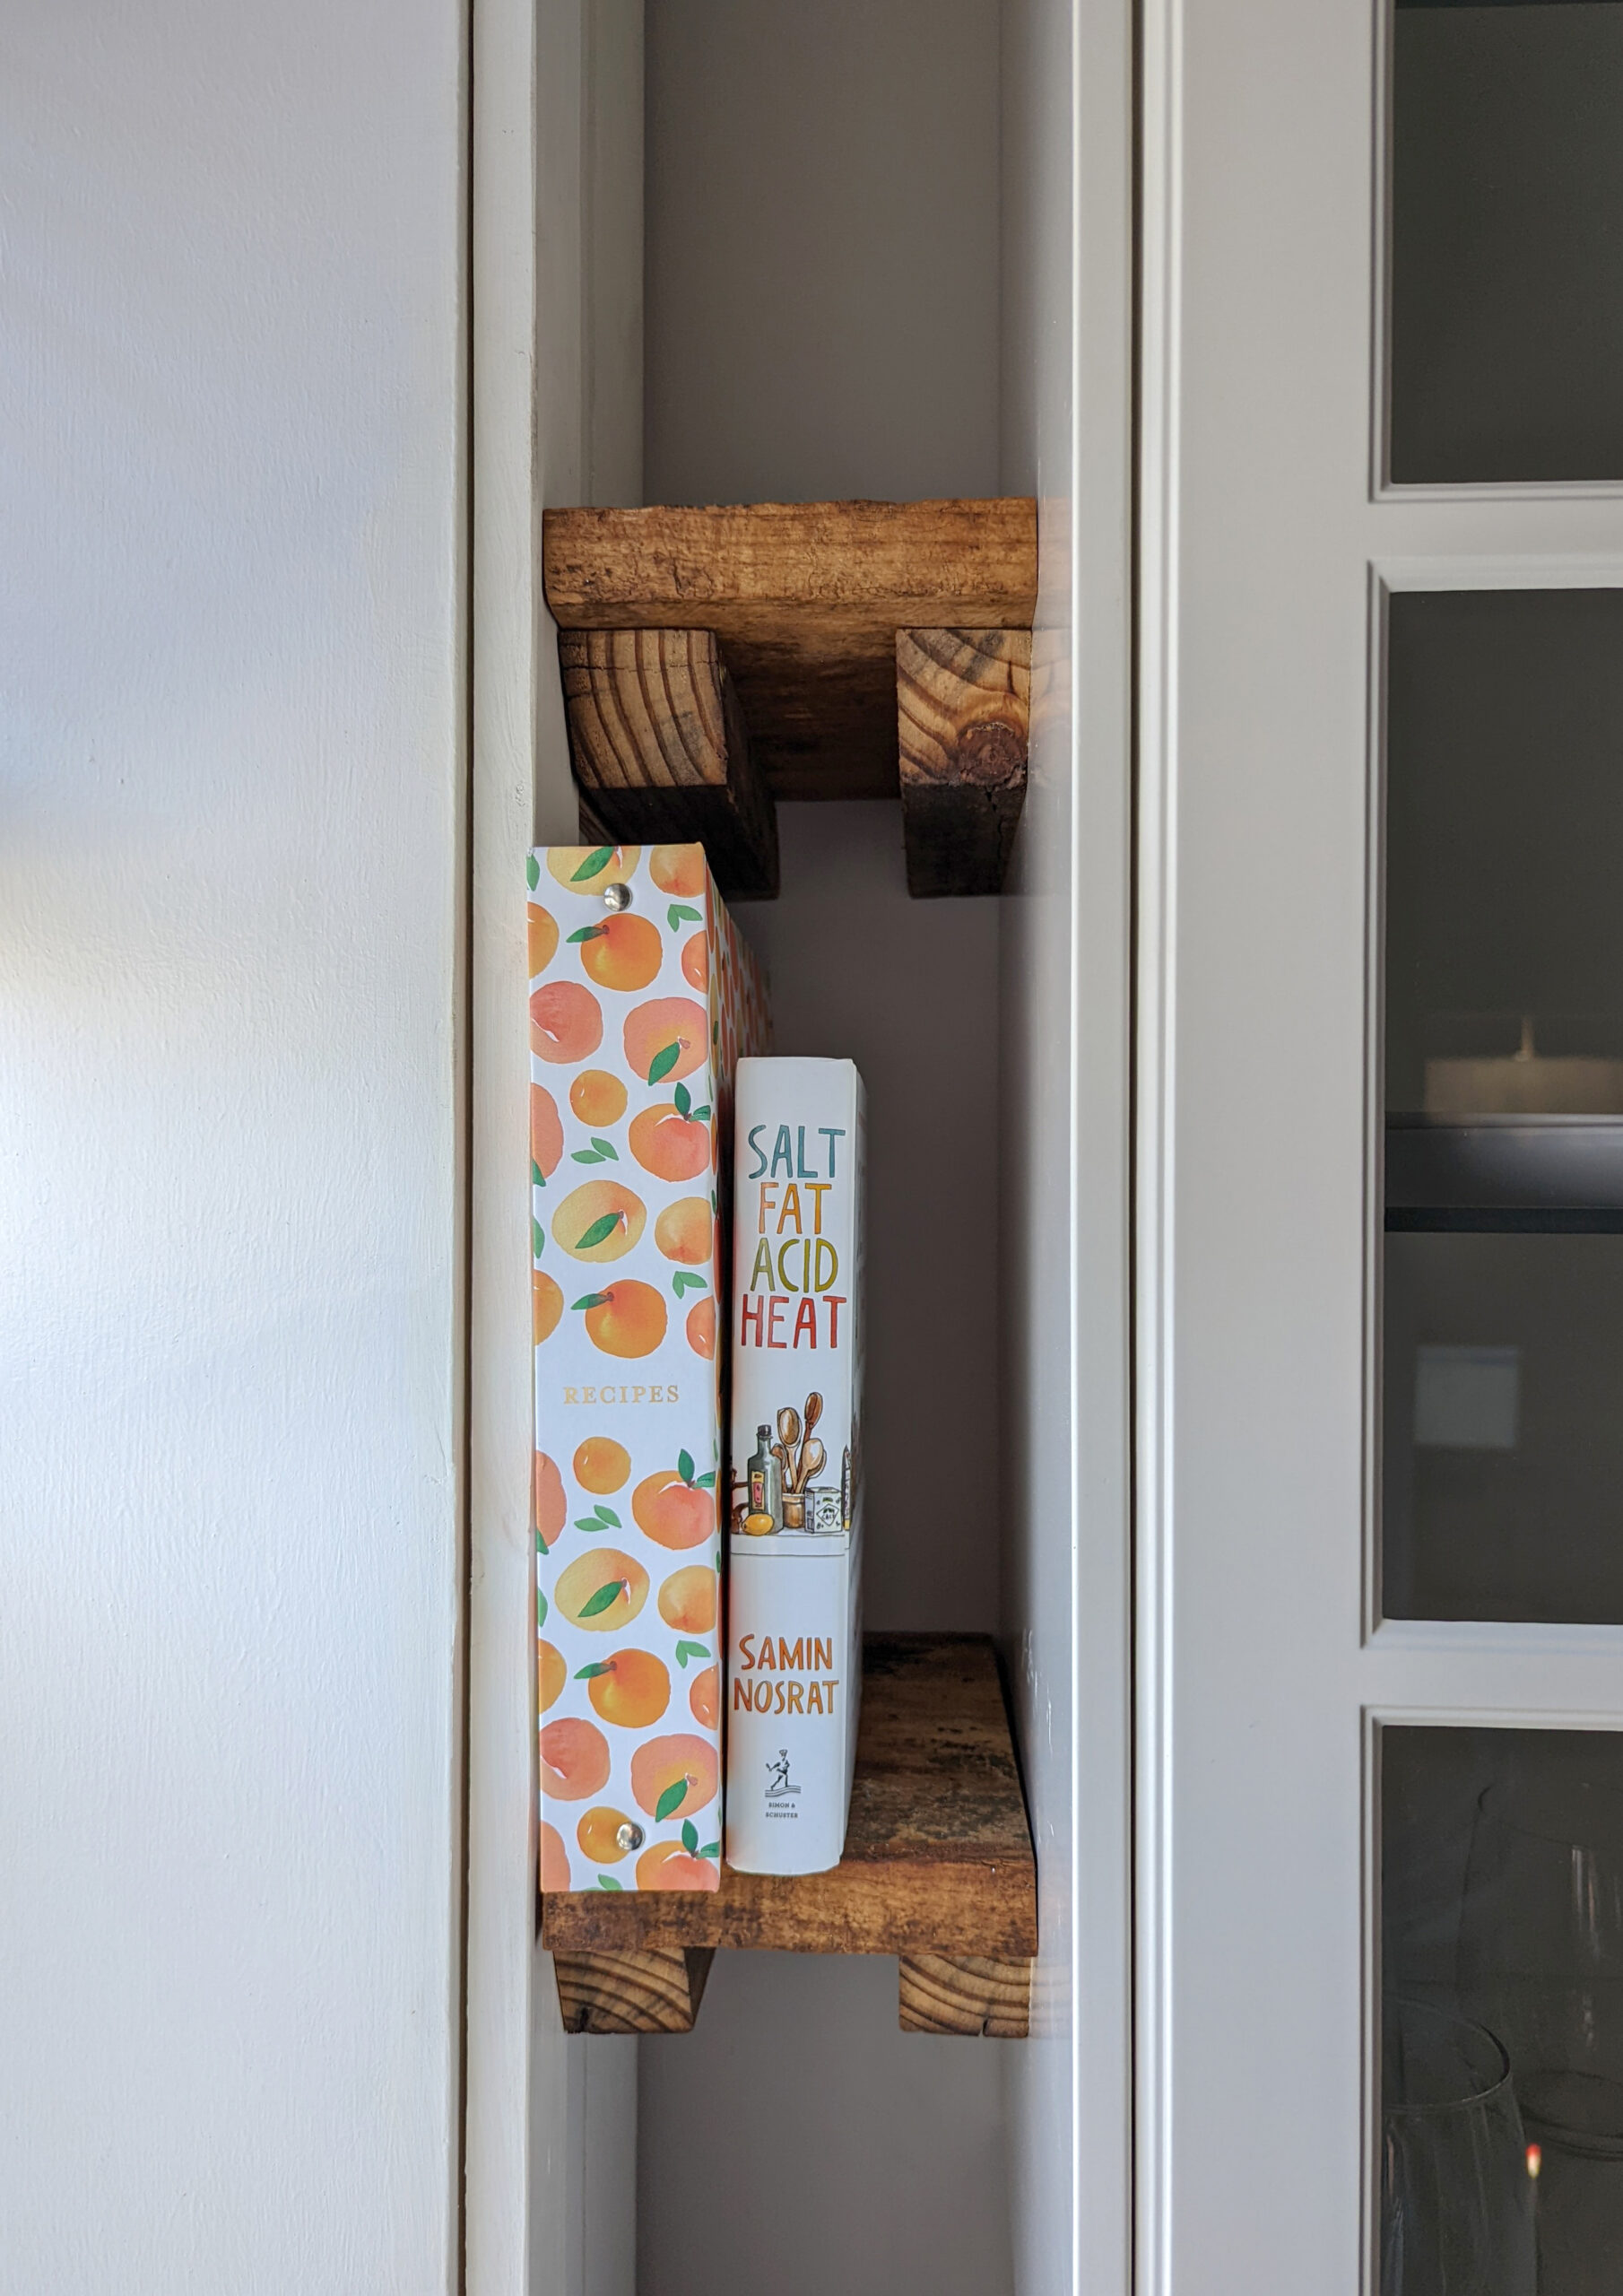
There are many ways to mount reclaimed wood open shelves, but on my contractor’s advice, we chose to reinforce the mounts of the upper cabinets on either side of my open shelving and then attach the open shelving directly to the sides of the cabinets.
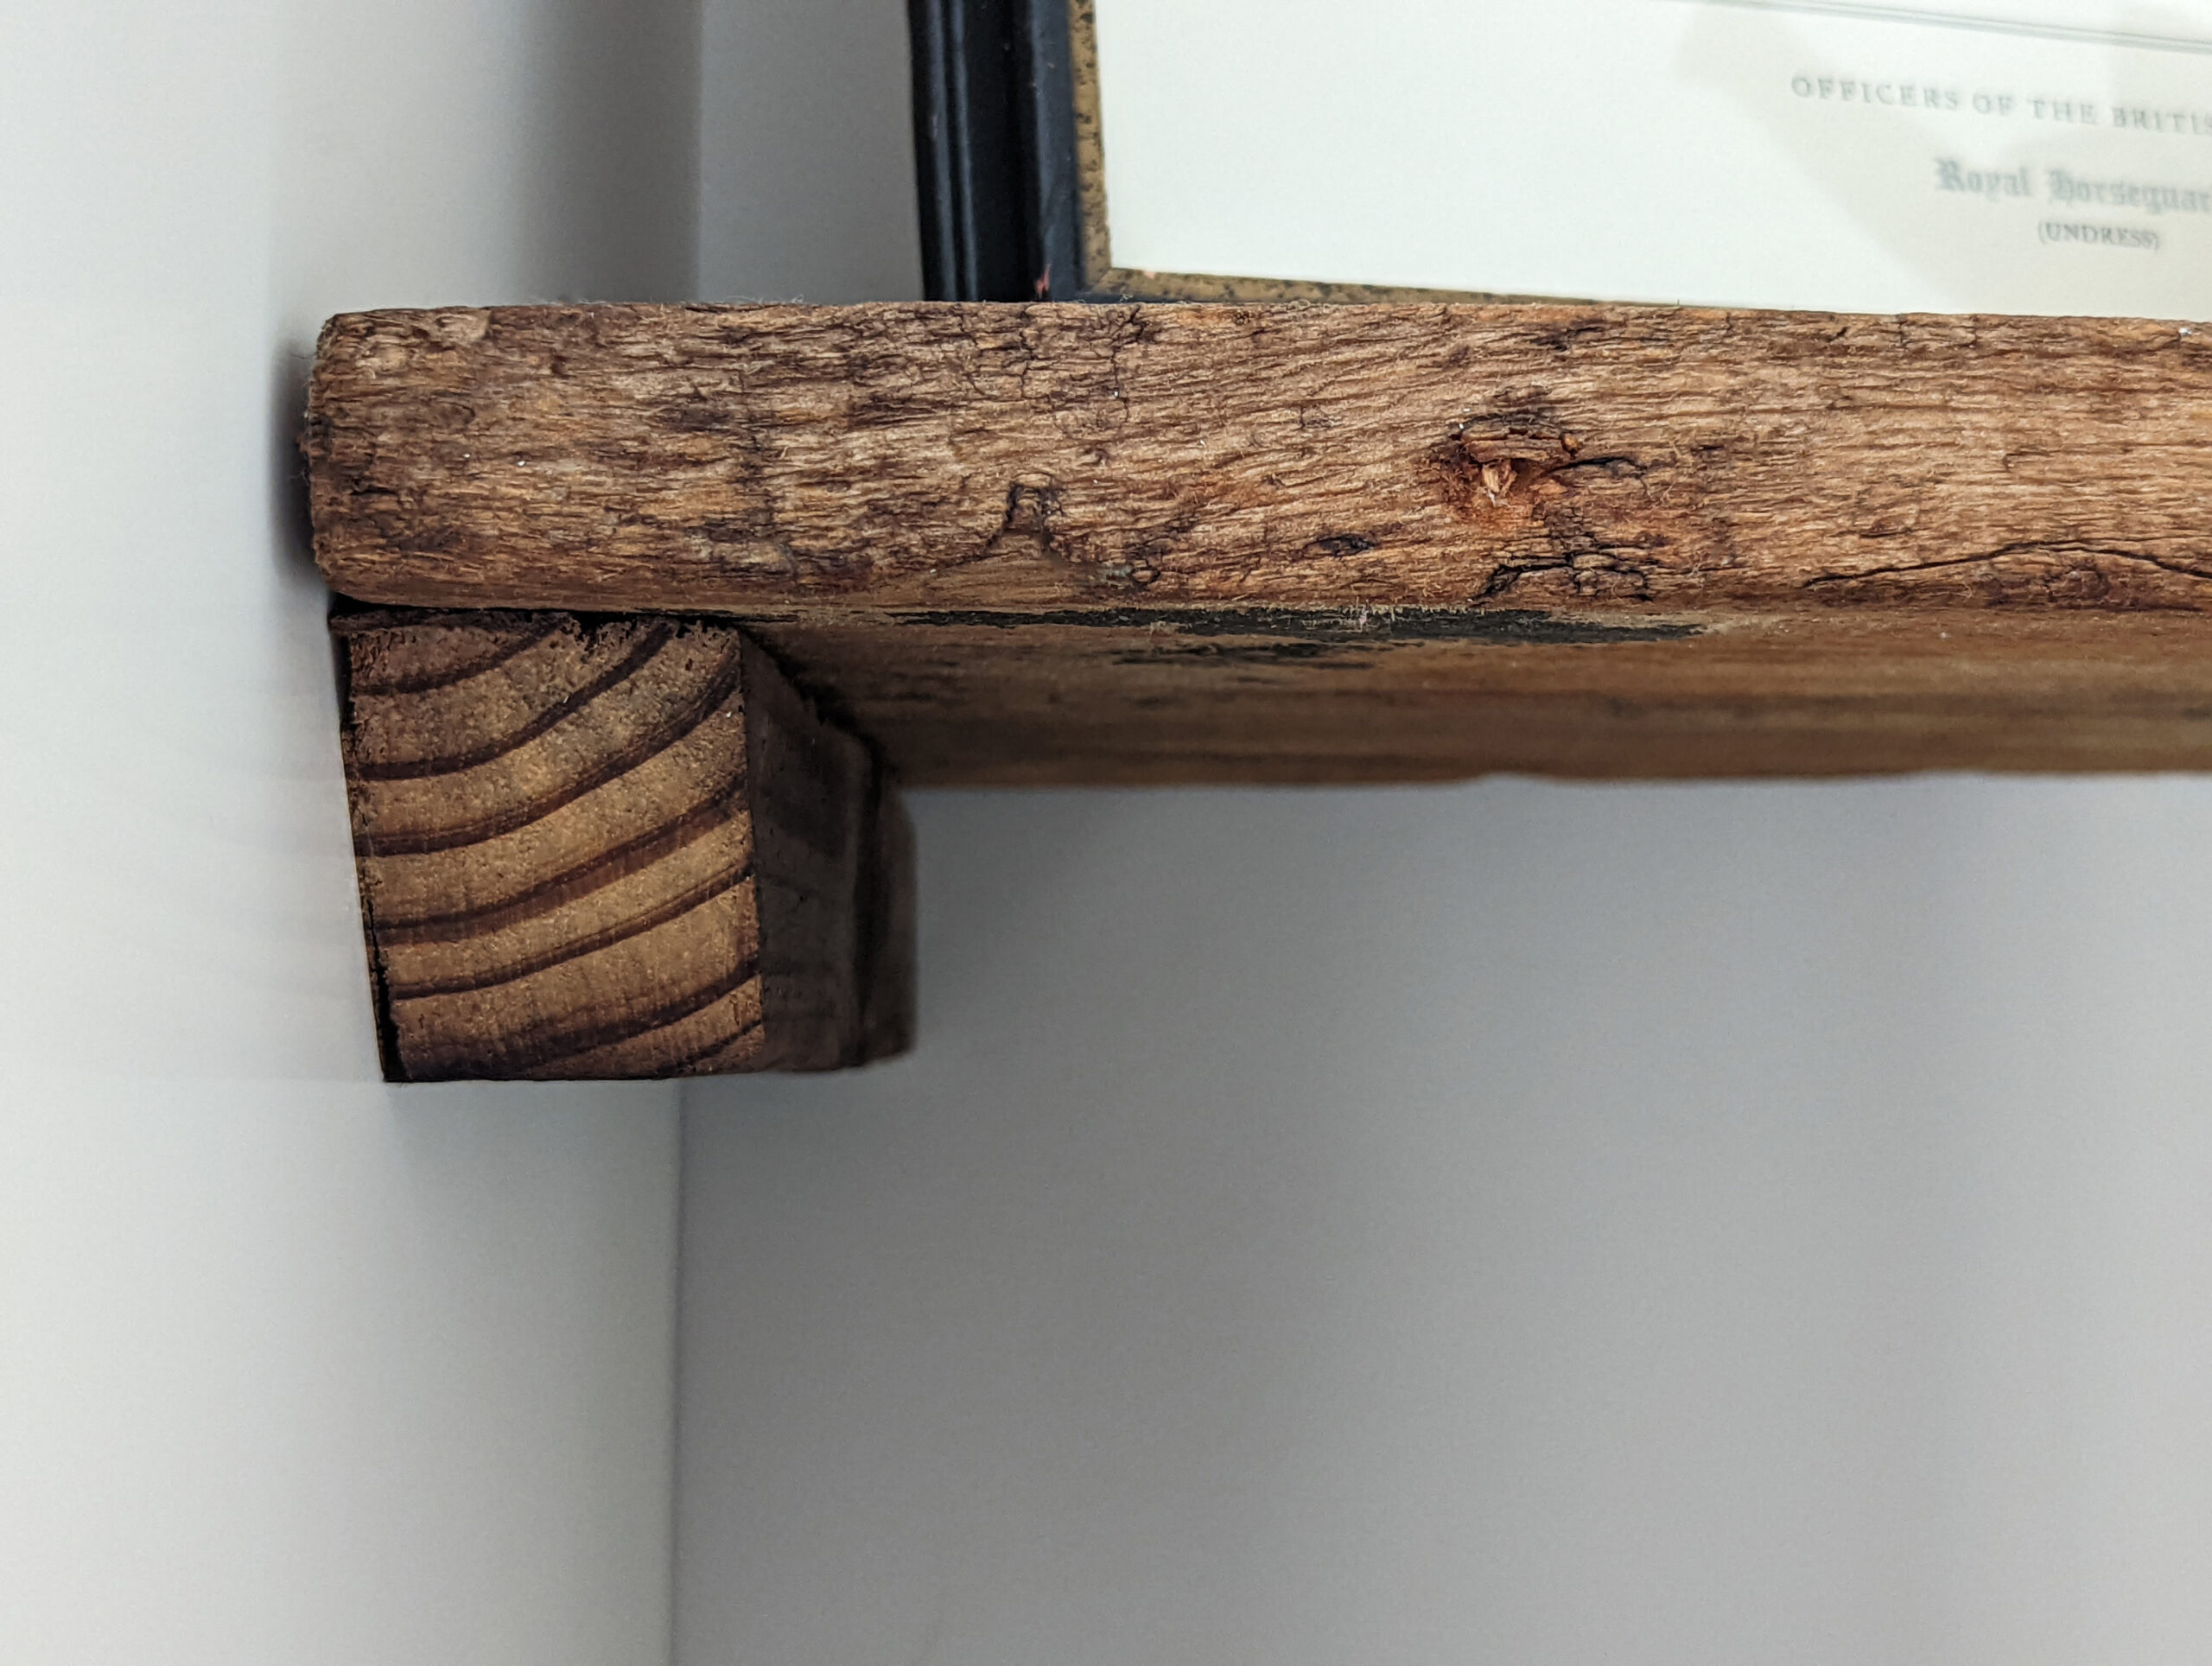
By cutting blocks (aka “shelf cleats”) from the scraps of reclaimed wood, supports were added on either side of the shelf, creating a resting spot for each of the reclaimed wood open shelves.
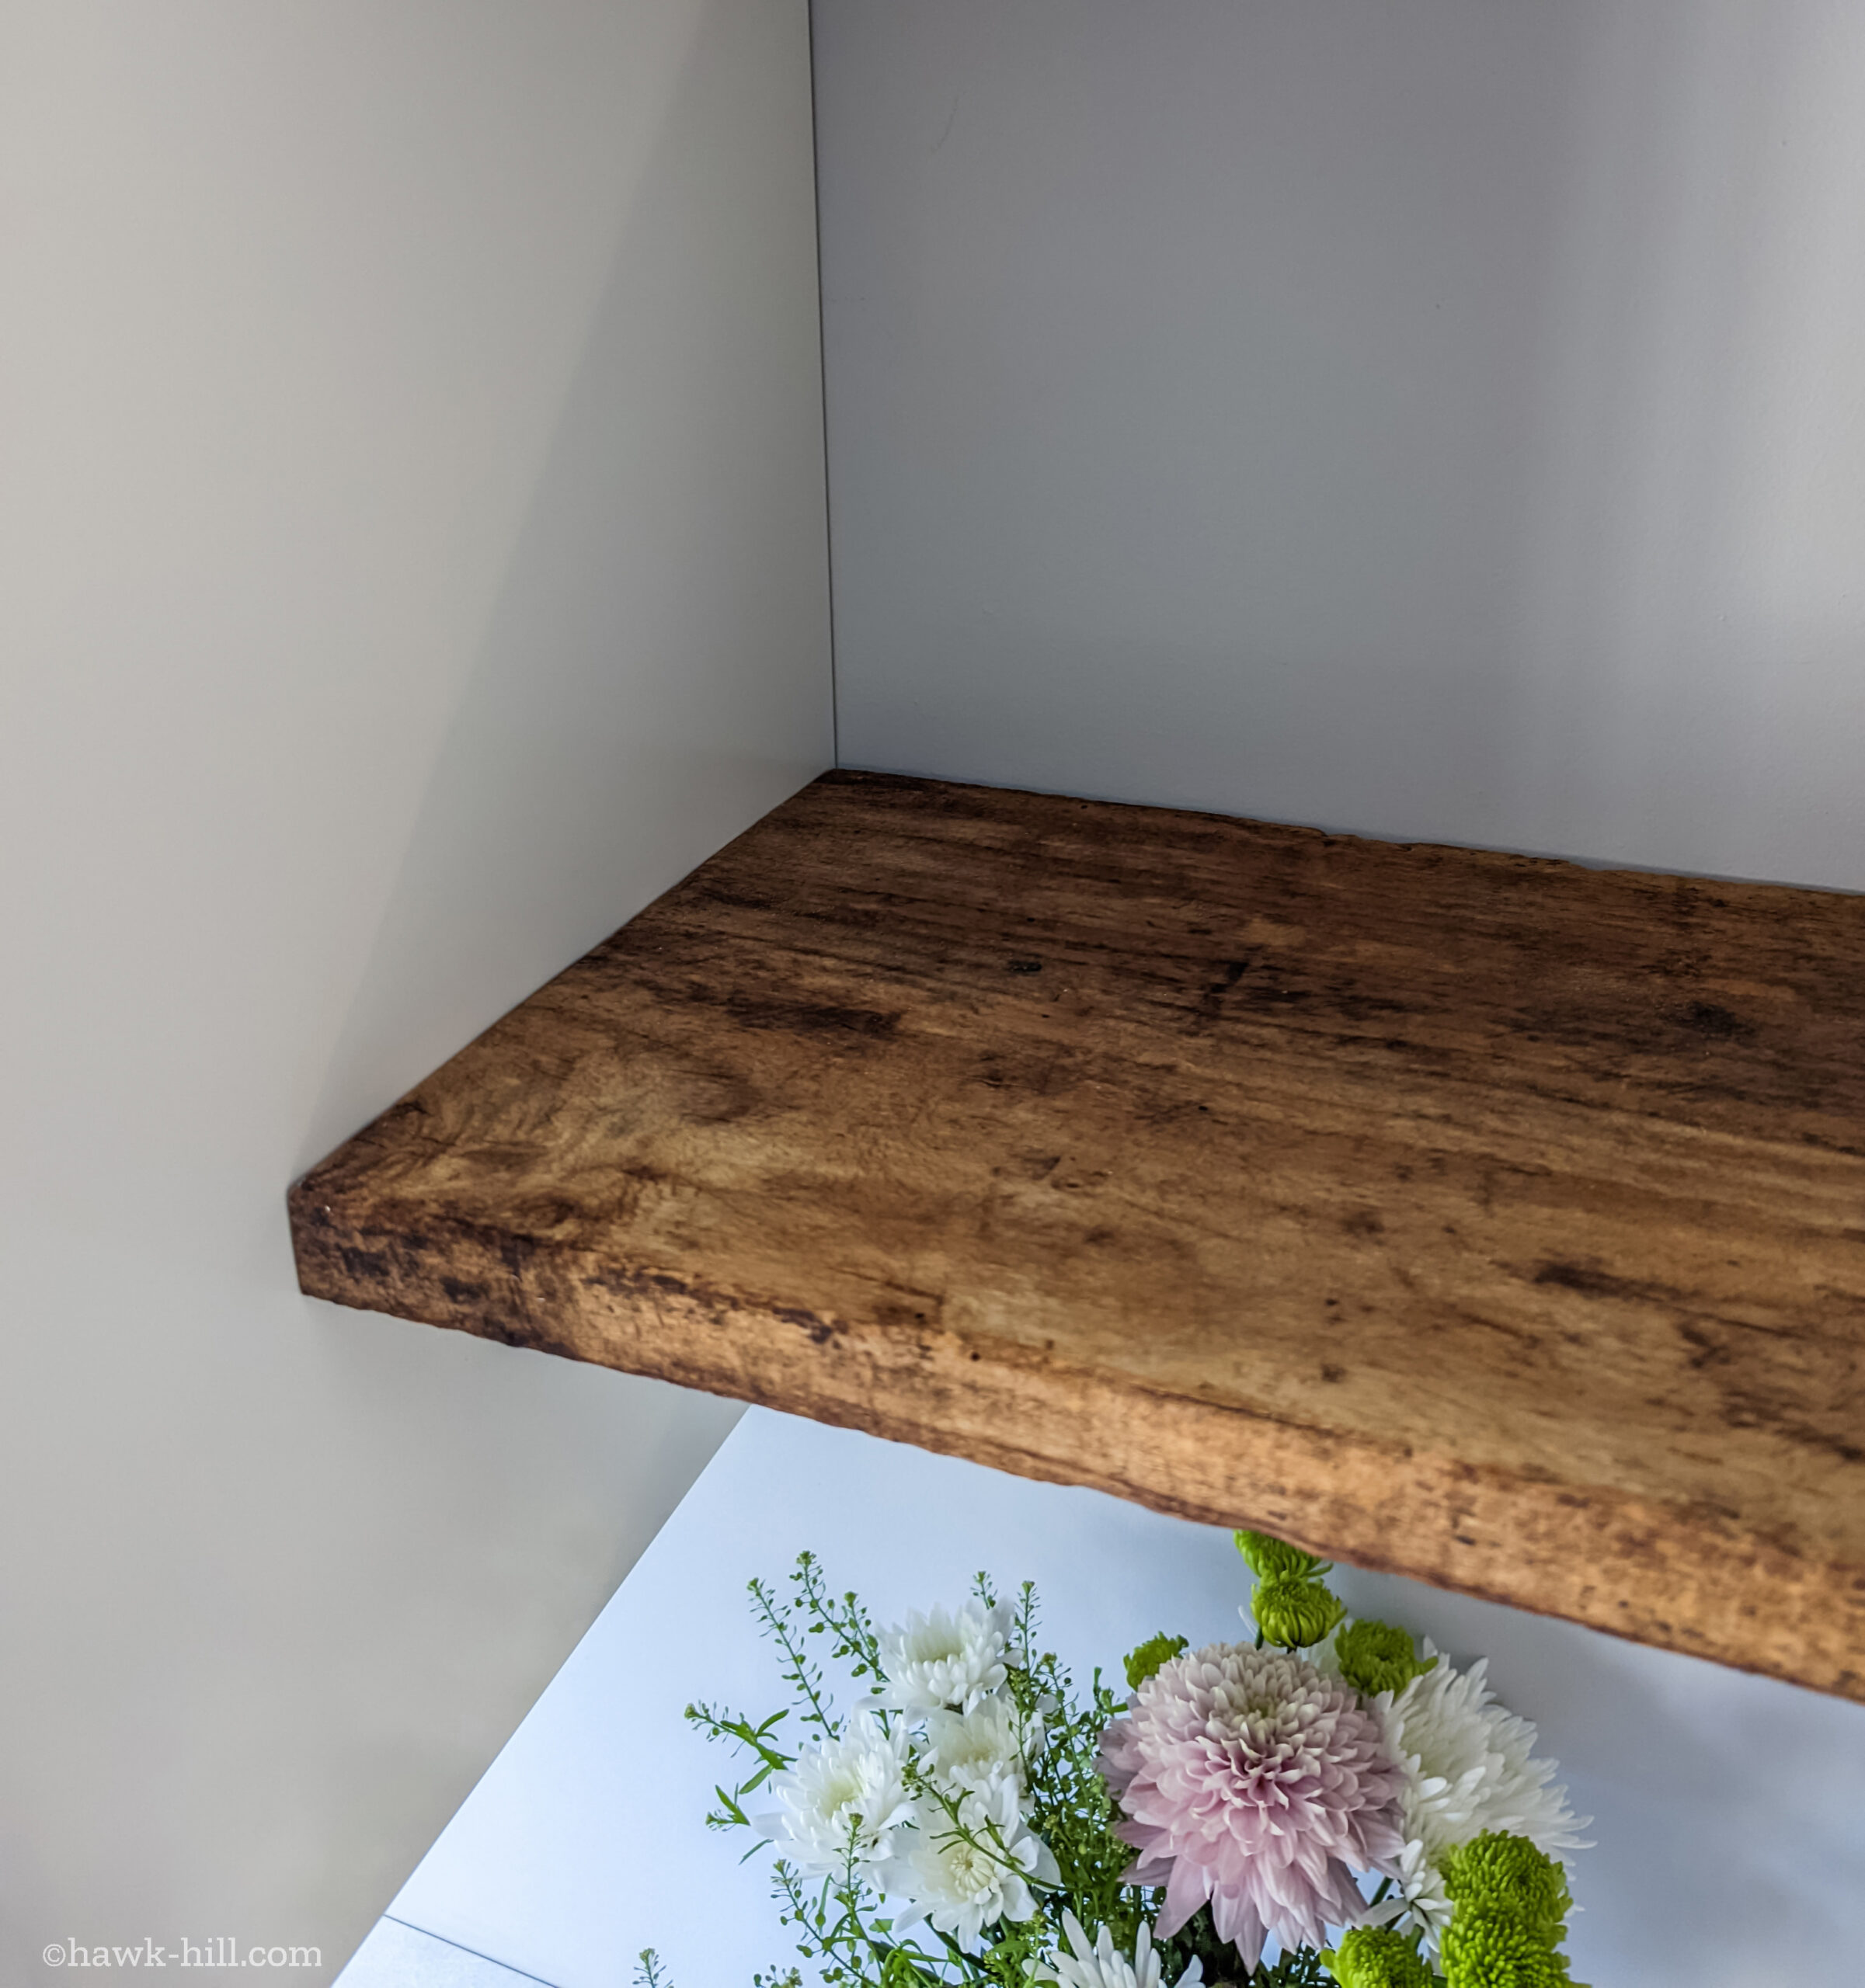
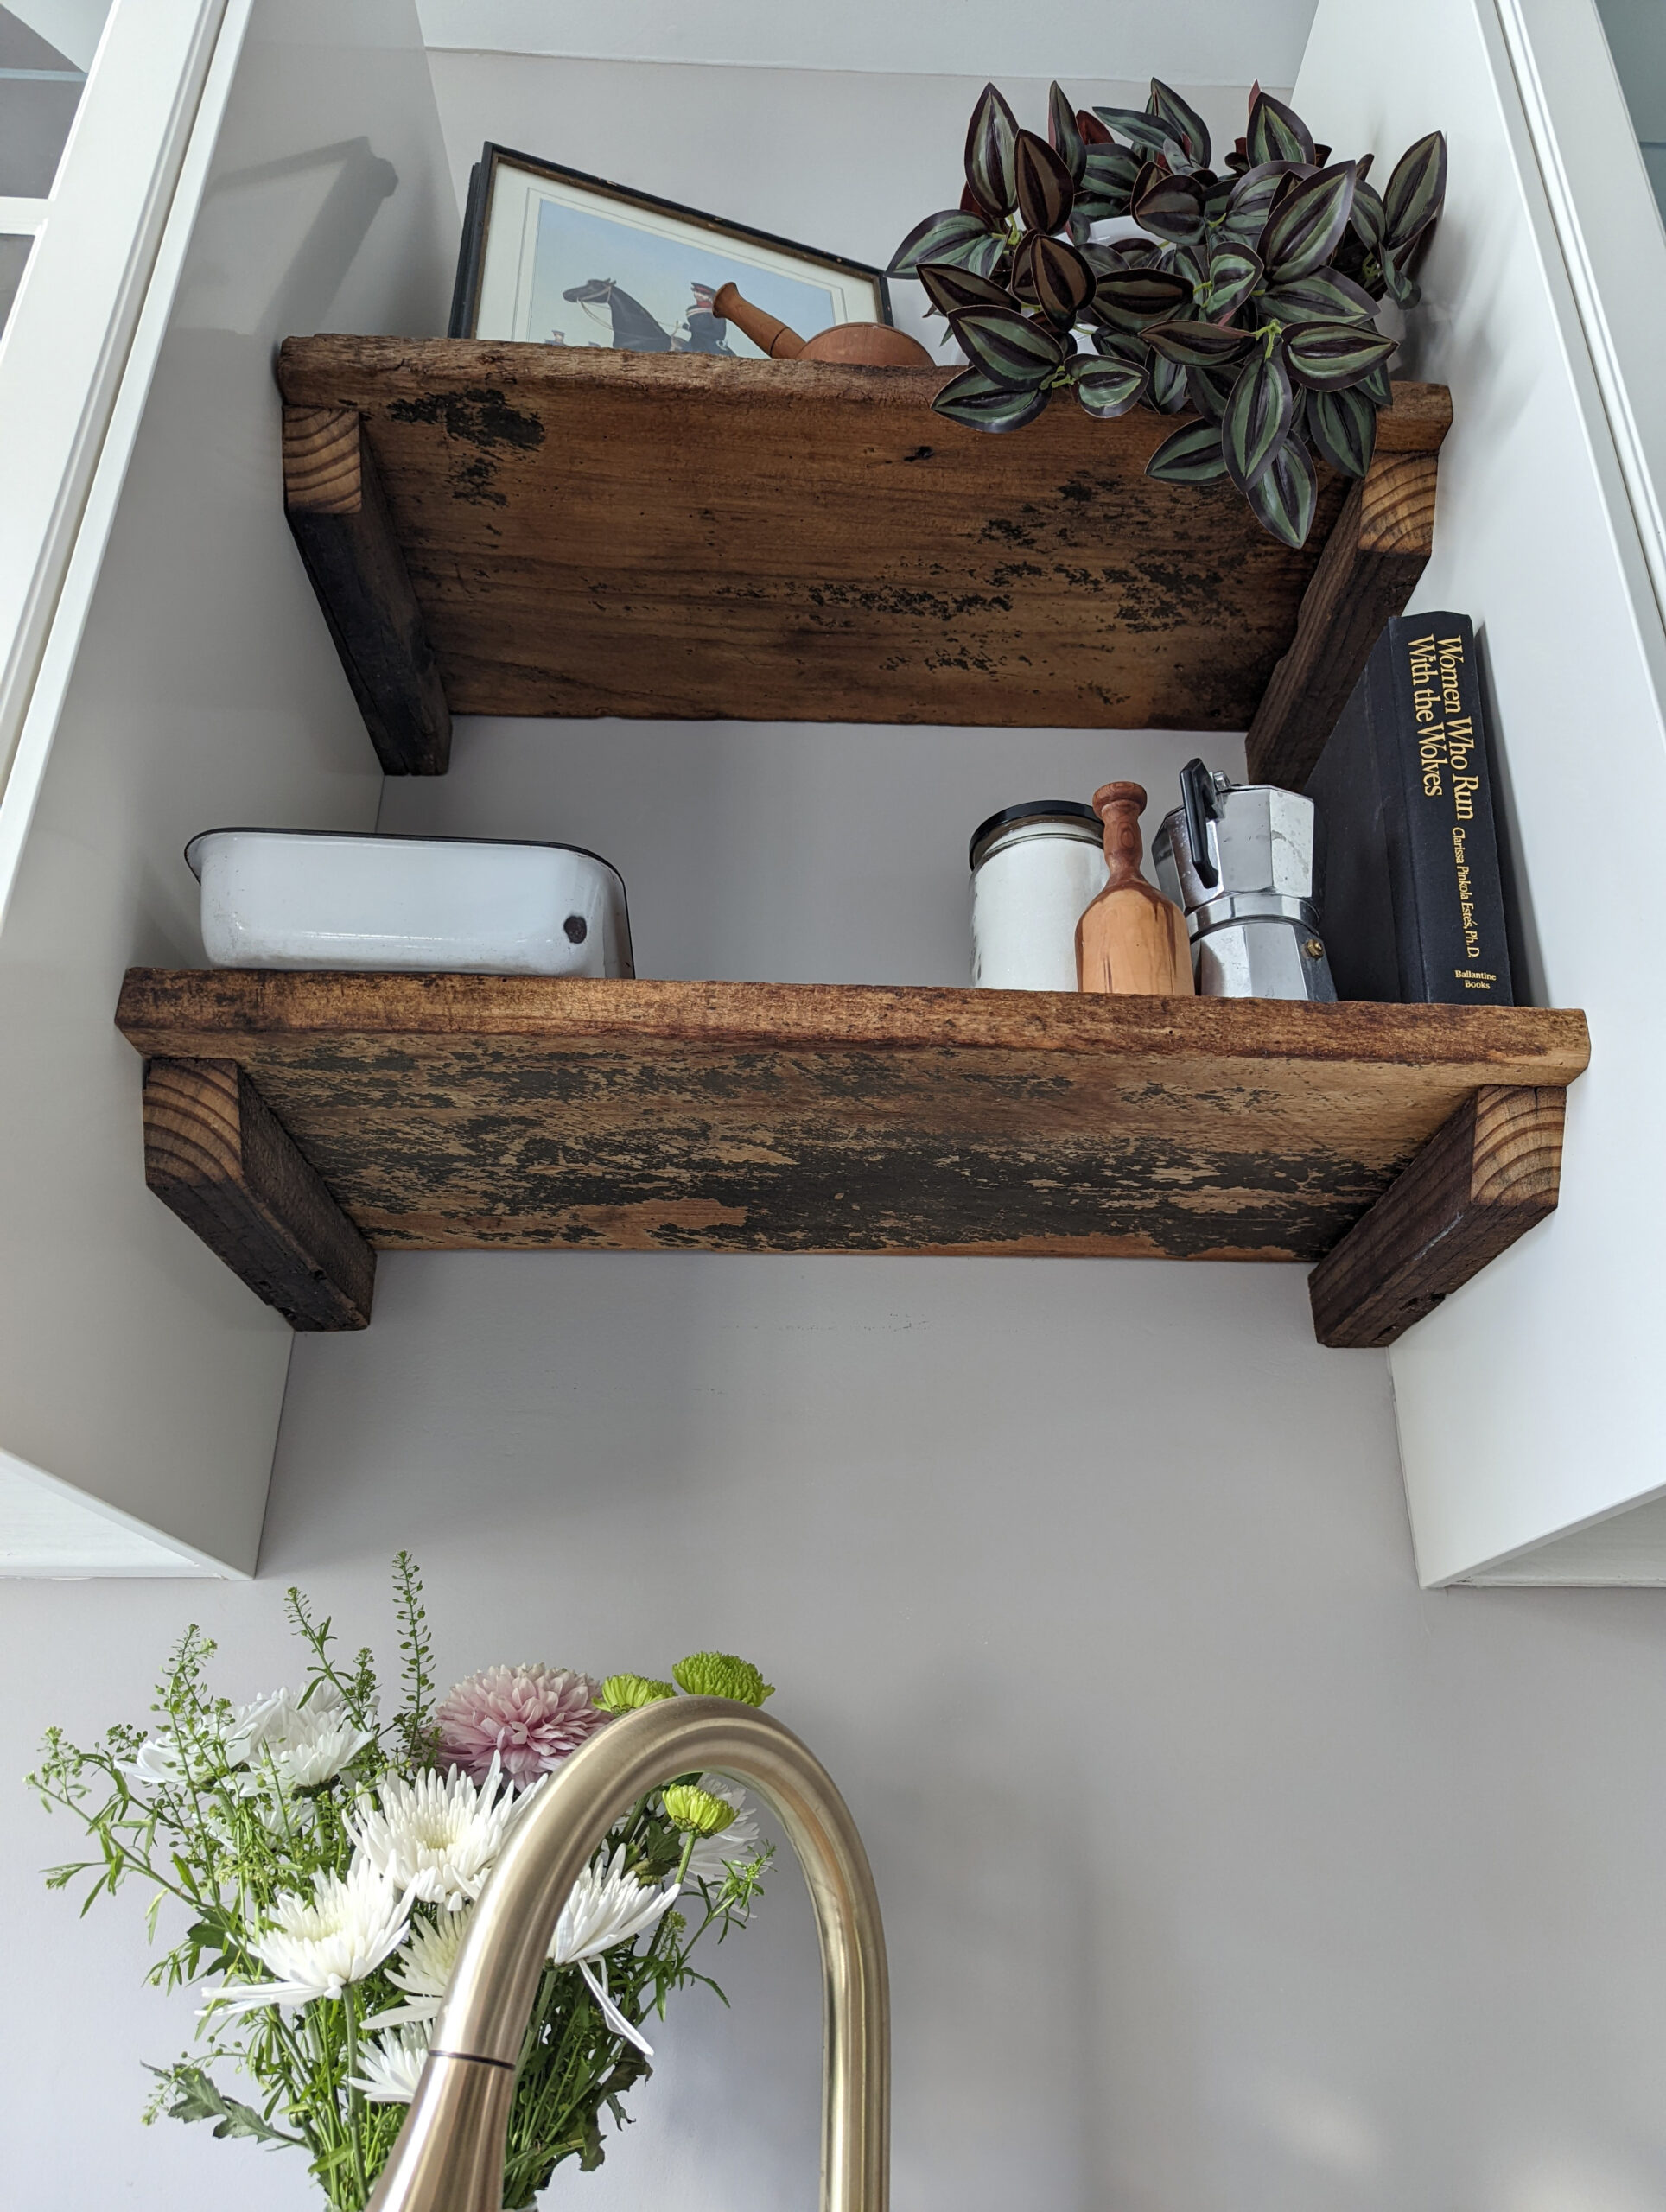
The final result: Reclaimed Wood Open Shelves for the cottage kitchen
It’s only been a few weeks since I finished my IKEA kitchen remodel, and there were plenty of surprises, but these reclaimed wood open shelves paired with modern dark green kitchen cabinets are one of my favorite elements in my kitchen and something that everyone who sees my kitchen comments on.
The thick century-old boards, formerly floor joists in a 19th-century building, work perfectly to hold items both decorative and functional in my modern cottage kitchen.
How to Build Open Shelves from Reclaimed Wood
Total time (excluding drying) 1 hour and 30 minutes
Source Reclaimed Lumber
Architectural salvage is the best place to find flat, wide reclaimed wood in lengths for open shelving.
Clean and Dry Reclaimed Wood
Use a scrub brush, soap, and plenty of water to remove years of dirt and dust.
Cut Shelving Boards to Size
Use a miter saw to cut the boards to the size needed for your open shelving.
Condition Wood
Oiling the wood will make the color of the wood deeper and richer as well as provide a natural protection from water spots.
Mount Shelves
Using cleats, brackets, or floating shelf mounts, hang your reclaimed wood shelves.
Thanks for Reading!!!
I hope you can tell that I love DIY, researching the best affordable solutions for every-day problems opportunities and documenting / sharing solutions!🙌 Hawk-Hill.com is reader-supported.
☕ Hawk-Hill.com is reader-supported. If this article saved you time or money, please consider donating $1 to help me cover the cost of hosting this website OR If you appreciate this information and want to throw a “Thanks!” my way by buying me a coffee – I would Of Course appreciate it! :]
Reader Questions and Recommendations
Readers, do you have any favorite topics / posts? What would you like to read more about in the future? As I hope you can tell from this and other articles on my site, I really enjoy DIY / a good challenge, and I’m not afraid to roll up my sleeves to figure out a great, and hopefully simple 😁 solution. So please feel free to let me know in the comments below (or reach out via social media)!
Ok Really – I’ll try to wrap this up now😂
Finally, if you’d like to continue to learn about interesting DIY options as well as how YOU can tackle creative new projects consider checking out the latest and most popular articles listed on the Hawk-Hill Home Page. I’m always trying to enjoy and write about the creative side of life so please don’t be a stranger – check back often!😍
Also chech our Pinteres account https://www.pinterest.com/curlylindsay/
If you enjoyed this post you may also enjoy reading / perusing / devouring😊 one or all of these articles as well!
- 💡4 Easy Steps to Make Your Own Sea Glass 🌊
- ❤️Bedroom Decorating Ideas for Single Women’s Master Bedrooms 🛏️
- 🏡Ikea Kitchen Cost: What I Spent for a 9×12 Kitchen Remodel 💵