
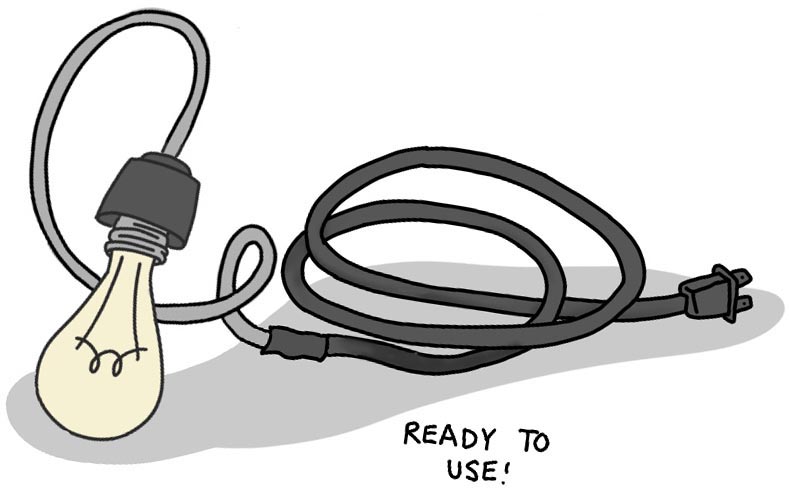
One of my most-read posts – and the post that really got me taking my blog more seriously- is my tutorial on how to convert a light fixture to a plug-in style lamp. But for some of the applications where a portable-chandelier lamp comes in handy, it can be easier and safer to use a different method than the one described in that article.
In this article, we’ll discuss how to safely splice together a chandelier (or any hard-wired electrical device) to an extension cord. So lets jump into how to splice an extension cord 💡🙌
What you’ll need:
Hawk-Hill.com is a participant in the Amazon Services LLC Associates Program, an affiliate advertising program designed to provide a means for website owners to earn advertising fees by advertising and linking to Amazon.com and any other website that may be affiliated with Amazon Service LLC Associates Program
– Chandelier
– Extension Cord
– Heat Shrink Tubing Sleeves
– Heat Gun or Mini Butane Torch (both work great for epoxy resin projects, as well)
– Wire Strippers (scissors can work in a pinch if you are careful)
How to Splice A Light Fixture to an Extension Cord
Light fixtures are, as the name indicates, usually “fixed” in place via permanent mounting. Converting a fixture, instead, to power via an extension cord frees you to be able to create dramatic lighting anywhere.
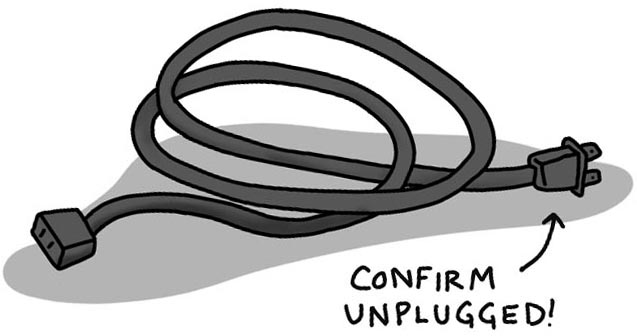
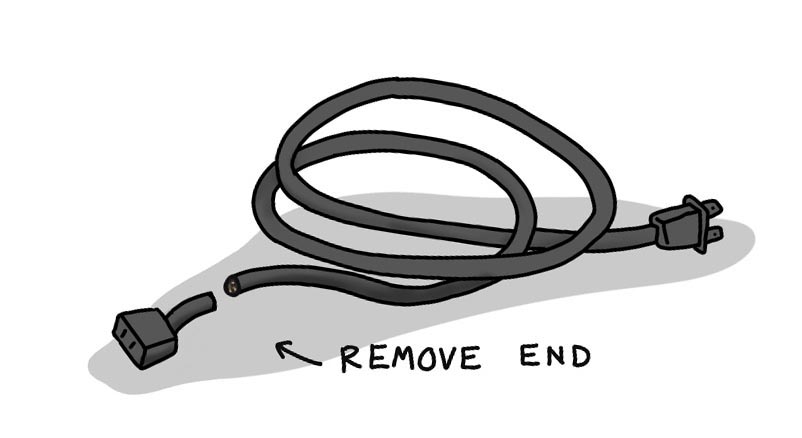
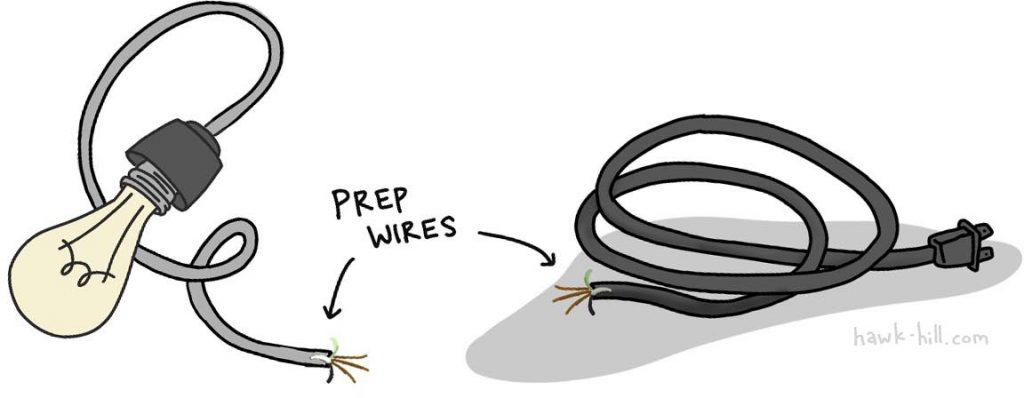
1. With extension cord unplugged, use sharp scissors to cut off the female end of the extension cord (That’s the end you’d typically plug your vacuum, appliance, etc into- not the end that plugs into a wall outlet)
2. Next, us the wire strippers to strip off a few inches of the outer covering of the extension cord. You should find within the cord a black wire, a white wire, and a green grounding wire.
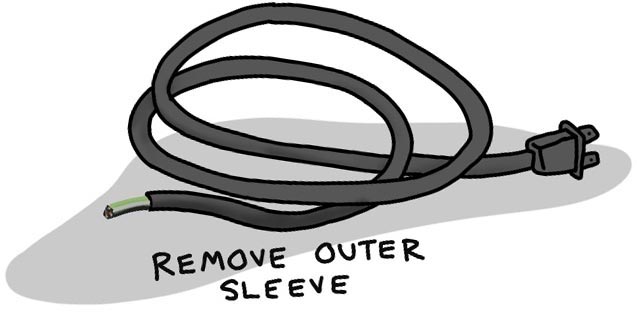
3. Remove the colored coating from those inner cords, exposing the copper wires. You’ll need about 1 inch of exposed copper showing.

4. Next, shift your attention to your light fixture. How do the wires appear? Most light fixtures will already have wires exposed and ready, but if they aren’t- or if they are very frayed by previous use, you can cut the wires back a bit and prepare them in the same way you prepared your extension cord.
5. With light fixture wires prepared just like the extension cord, slip a wide Heat Shrink Tubing Sleeve over all three cords and down onto the main cord, and then, also thread a smaller heat shrink tube down each of the 3 individual wires (a total of 4 tubes total).
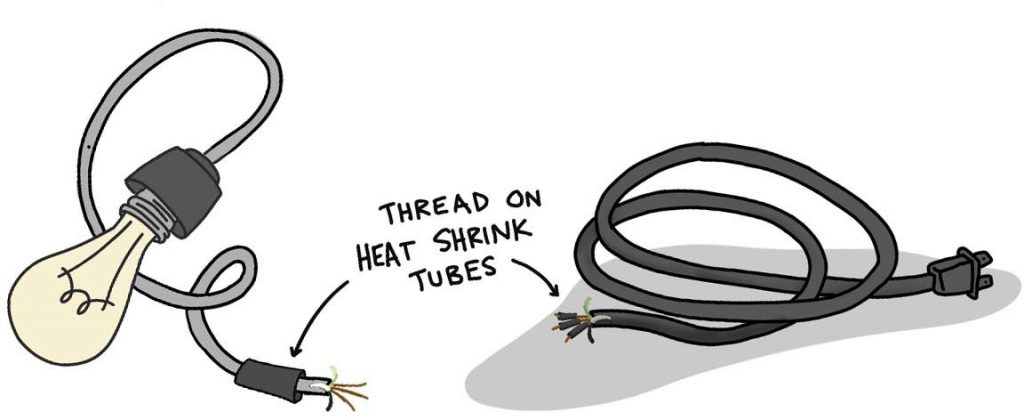
6. With tubes in place ready to cover the connections to be made, begin joining the corresponding wires together: black to black, white to white, green to green. Firmly twisting the matching exposed copper wires firmly and smoothing excess wire on one side, parallel with the wire.

7. Next, for each wire, slide the Heat Shrink Tubing Sleeve back up the wire until it completely covers the wire’s exposed areas. Use a heat gun (you can also CAREFULLY use the heat of a lighter, mini torch, or candle) to cause the sleeve to contract around the wire. If any part of the wire is still exposed, remove, untwist, and start again with a new tube.
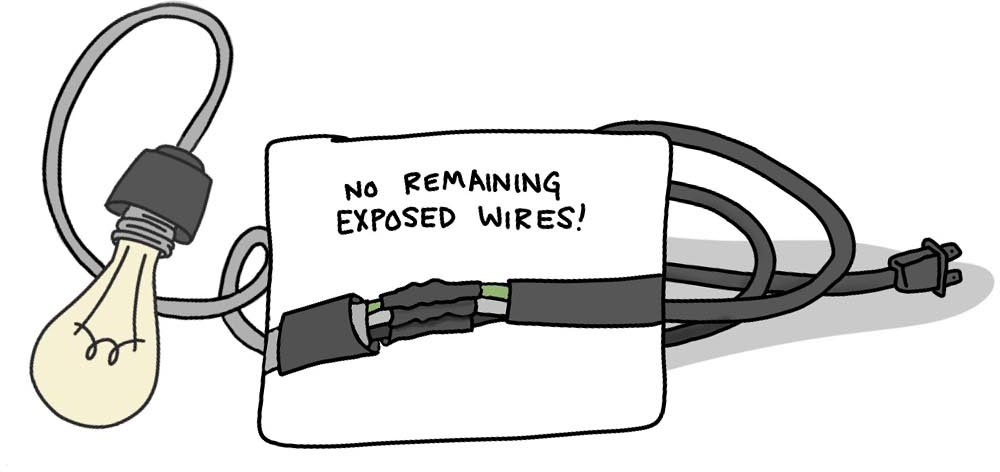
8. Repeat Step 7 for each of the wires, after all three wires have been individually joined and covered with individual heat shrink tubes, slide the final, largest heat shrink tube over the bundle of joined wires and carefully shrink the outer sleeve over the bundle of wires.
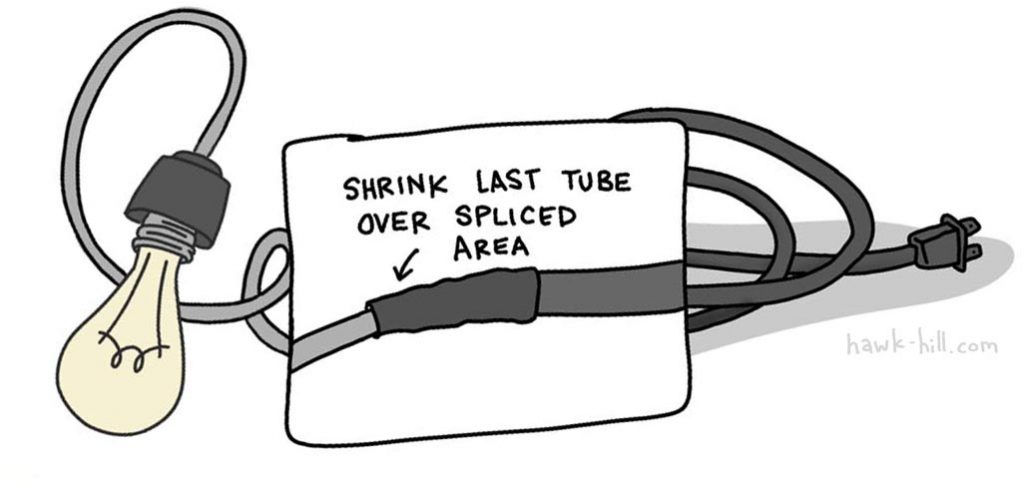
9. If you’ve securely covered every exposed wire, with generous overlapping so shifting will not expose wires, you should have a connection safe for use in any dry area.
If you are at all concerned with your final product or confused by any step of the instructions, consult a licensed electrician.
Once complete, your formerly hardwired light fixture can be used in many more locations- just be sure to keep it dry, keep the cord away from spaces where it could cause someone to trip, and avoid letting the light come near flammable materials.
How to Use Spliced Cord Light Fixures
This tutorial is the first step towards hanging a ceiling light without wiring, but it also creates very versatile lights! Lighting is an important aspect of any home, and being able to splice a light to an extension cord will give you more flexibility in how you light your home.
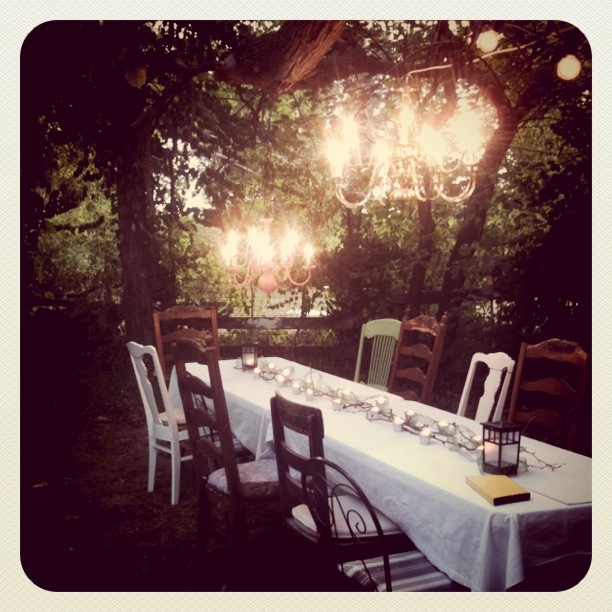
Use spliced ceiling lights to create a photoshoot backdrop, mood lighting, or (weather permitting) extravagant outdoor lighting on a budget. In the image below, you can see how we used mismatched chandeliers spliced to extension cords to create a cozy dining table under a sprawling live oak for a casual evening diner party.
Some Safety notes when Working With Electricity
For any project that involves working with electricity, prioritize safety precautions to protect yourself and others. First, make sure the area around you is clean and dry. Second, work with quality materials. Don’t repurpose a frayed and worn out extension cord! Purchase a high quality new one instead.
Third, (and most important) triple check that the cord or light fixture you are working on is unplugged from a power source. Never touch live electrical wires with your bare hands or with a tool. Lastly, if something seems off, then trust your guy. Its better to pause and reread the tutorial (or set the project aside until you can consult with an electrician) than to proceed through the directions if you’re unclear of the next step. O be wise, what can I say more :]
Thanks for Reading!!!
I hope you can tell that I love DIY, researching the best affordable solutions for every-day problems opportunities and documenting / sharing solutions!🙌 Hawk-Hill.com is reader-supported.
☕ Hawk-Hill.com is reader-supported. If this article saved you time or money, please consider donating $1 to help me cover the cost of hosting this website OR If you appreciate this information and want to throw a “Thanks!” my way by buying me a coffee – I would Of Course appreciate it! :]
Reader Questions and Recommendations
Readers, do you have any favorite topics / posts? What would you like to read more about in the future? As I hope you can tell from this and other articles on my site, I really enjoy DIY / a good challenge, and I’m not afraid to roll up my sleeves to figure out a great, and hopefully simple 😁 solution. So please feel free to let me know in the comments below (or reach out via social media)!
Ok Really – I’ll try to wrap this up now😂
Finally, if you’d like to continue to learn about interesting DIY options as well as how YOU can tackle creative new projects consider checking out the latest and most popular articles listed on the Hawk-Hill Home Page. I’m always trying to enjoy and write about the creative side of life so please don’t be a stranger – check back often!😍
Also chech our Pinteres account https://www.pinterest.com/curlylindsay/
If you enjoyed this post you may also enjoy reading / perusing / devouring😊 one or all of these articles as well!
- 💡4 Easy Steps to Make Your Own Sea Glass 🌊
- ❤️Bedroom Decorating Ideas for Single Women’s Master Bedrooms 🛏️
- 🏡Ikea Kitchen Cost: What I Spent for a 9×12 Kitchen Remodel 💵
Thanks for this! I’m excited to add light to my workshop! The light I got (for free – woot!) only had two wires, and they’re both the same color. What do I do with that?