
While it’s easy to paint a bright polished silver finish on a frame or other item using the incredible metallic finish spray-paint on the market today, creating an antique silver painted finish on a frame or other piece of silver-painted projects is a bigger challenge- but, through trial and error, I found a method that works every time.
In this article you’ll learn how to paint an antique silver finish that looks vintage and tarnished with age, using my two-step method for creating a vintage sterling silver patina painting look.
- What you’ll need to make this happen 💪
- How to paint an antique silver patina
- Paint the Item with this key product
- Methods to Add more Faux Age to Silver Paint 🙌
Uses for this silver painting tutorial
This article was inspired by my successful tutorial on how to paint an antique gold patina. That tutorial, one of the very first DIYs of Hawk Hill, was created back in 2014! Over the years, I’ve updated photographs and even adjusted my method as I experimented with different ways to replicate the iconic warm tones of antique gold. Using that knowledge, when I moved to Hawk Hill cottage, I began experimenting with how to replicate a similarly aged metal patina on top of metallic silver paint.
It took me a few tries, but I think I’ve perfected my method for getting that real tarnished sterling silver look using just a few basic craft supplies.
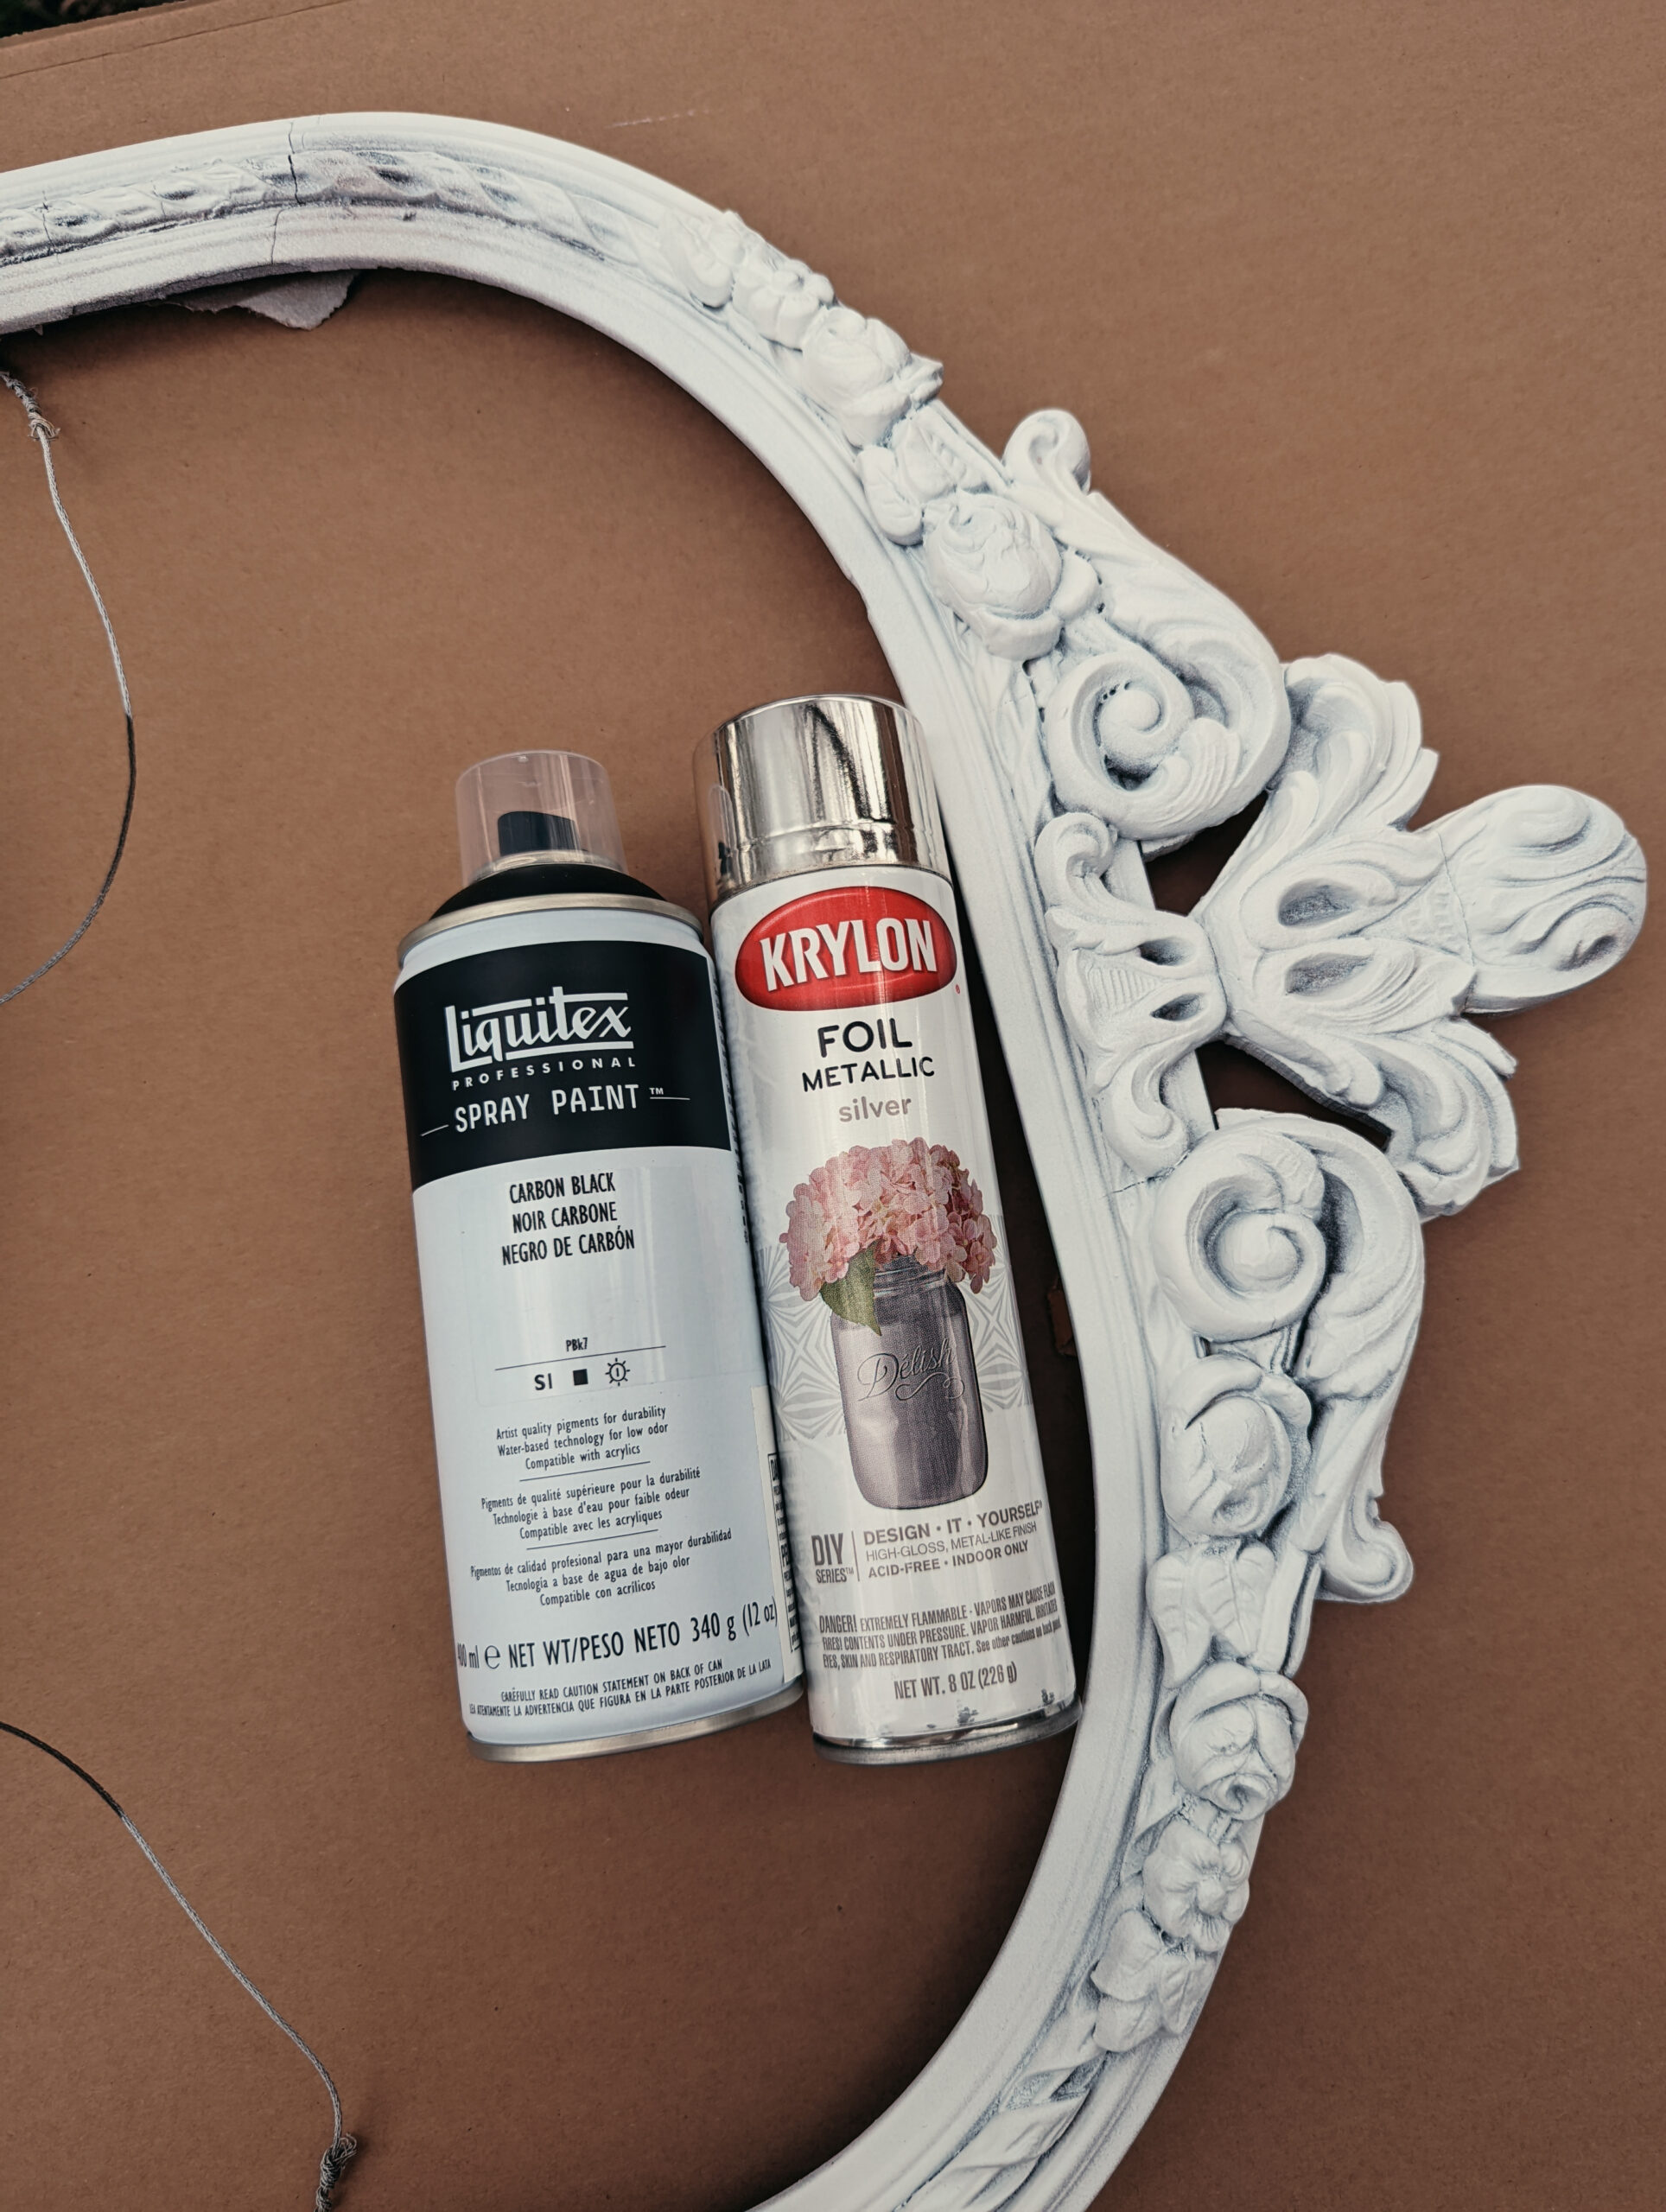
What you’ll need to paint your antique silver frames:
- Krylon sterling silver or foil silver spray paint. (In my tests, I found virtually undetectable differences in the finishes once faux finish was added)
- Liquitex professional spray paint in carbon black
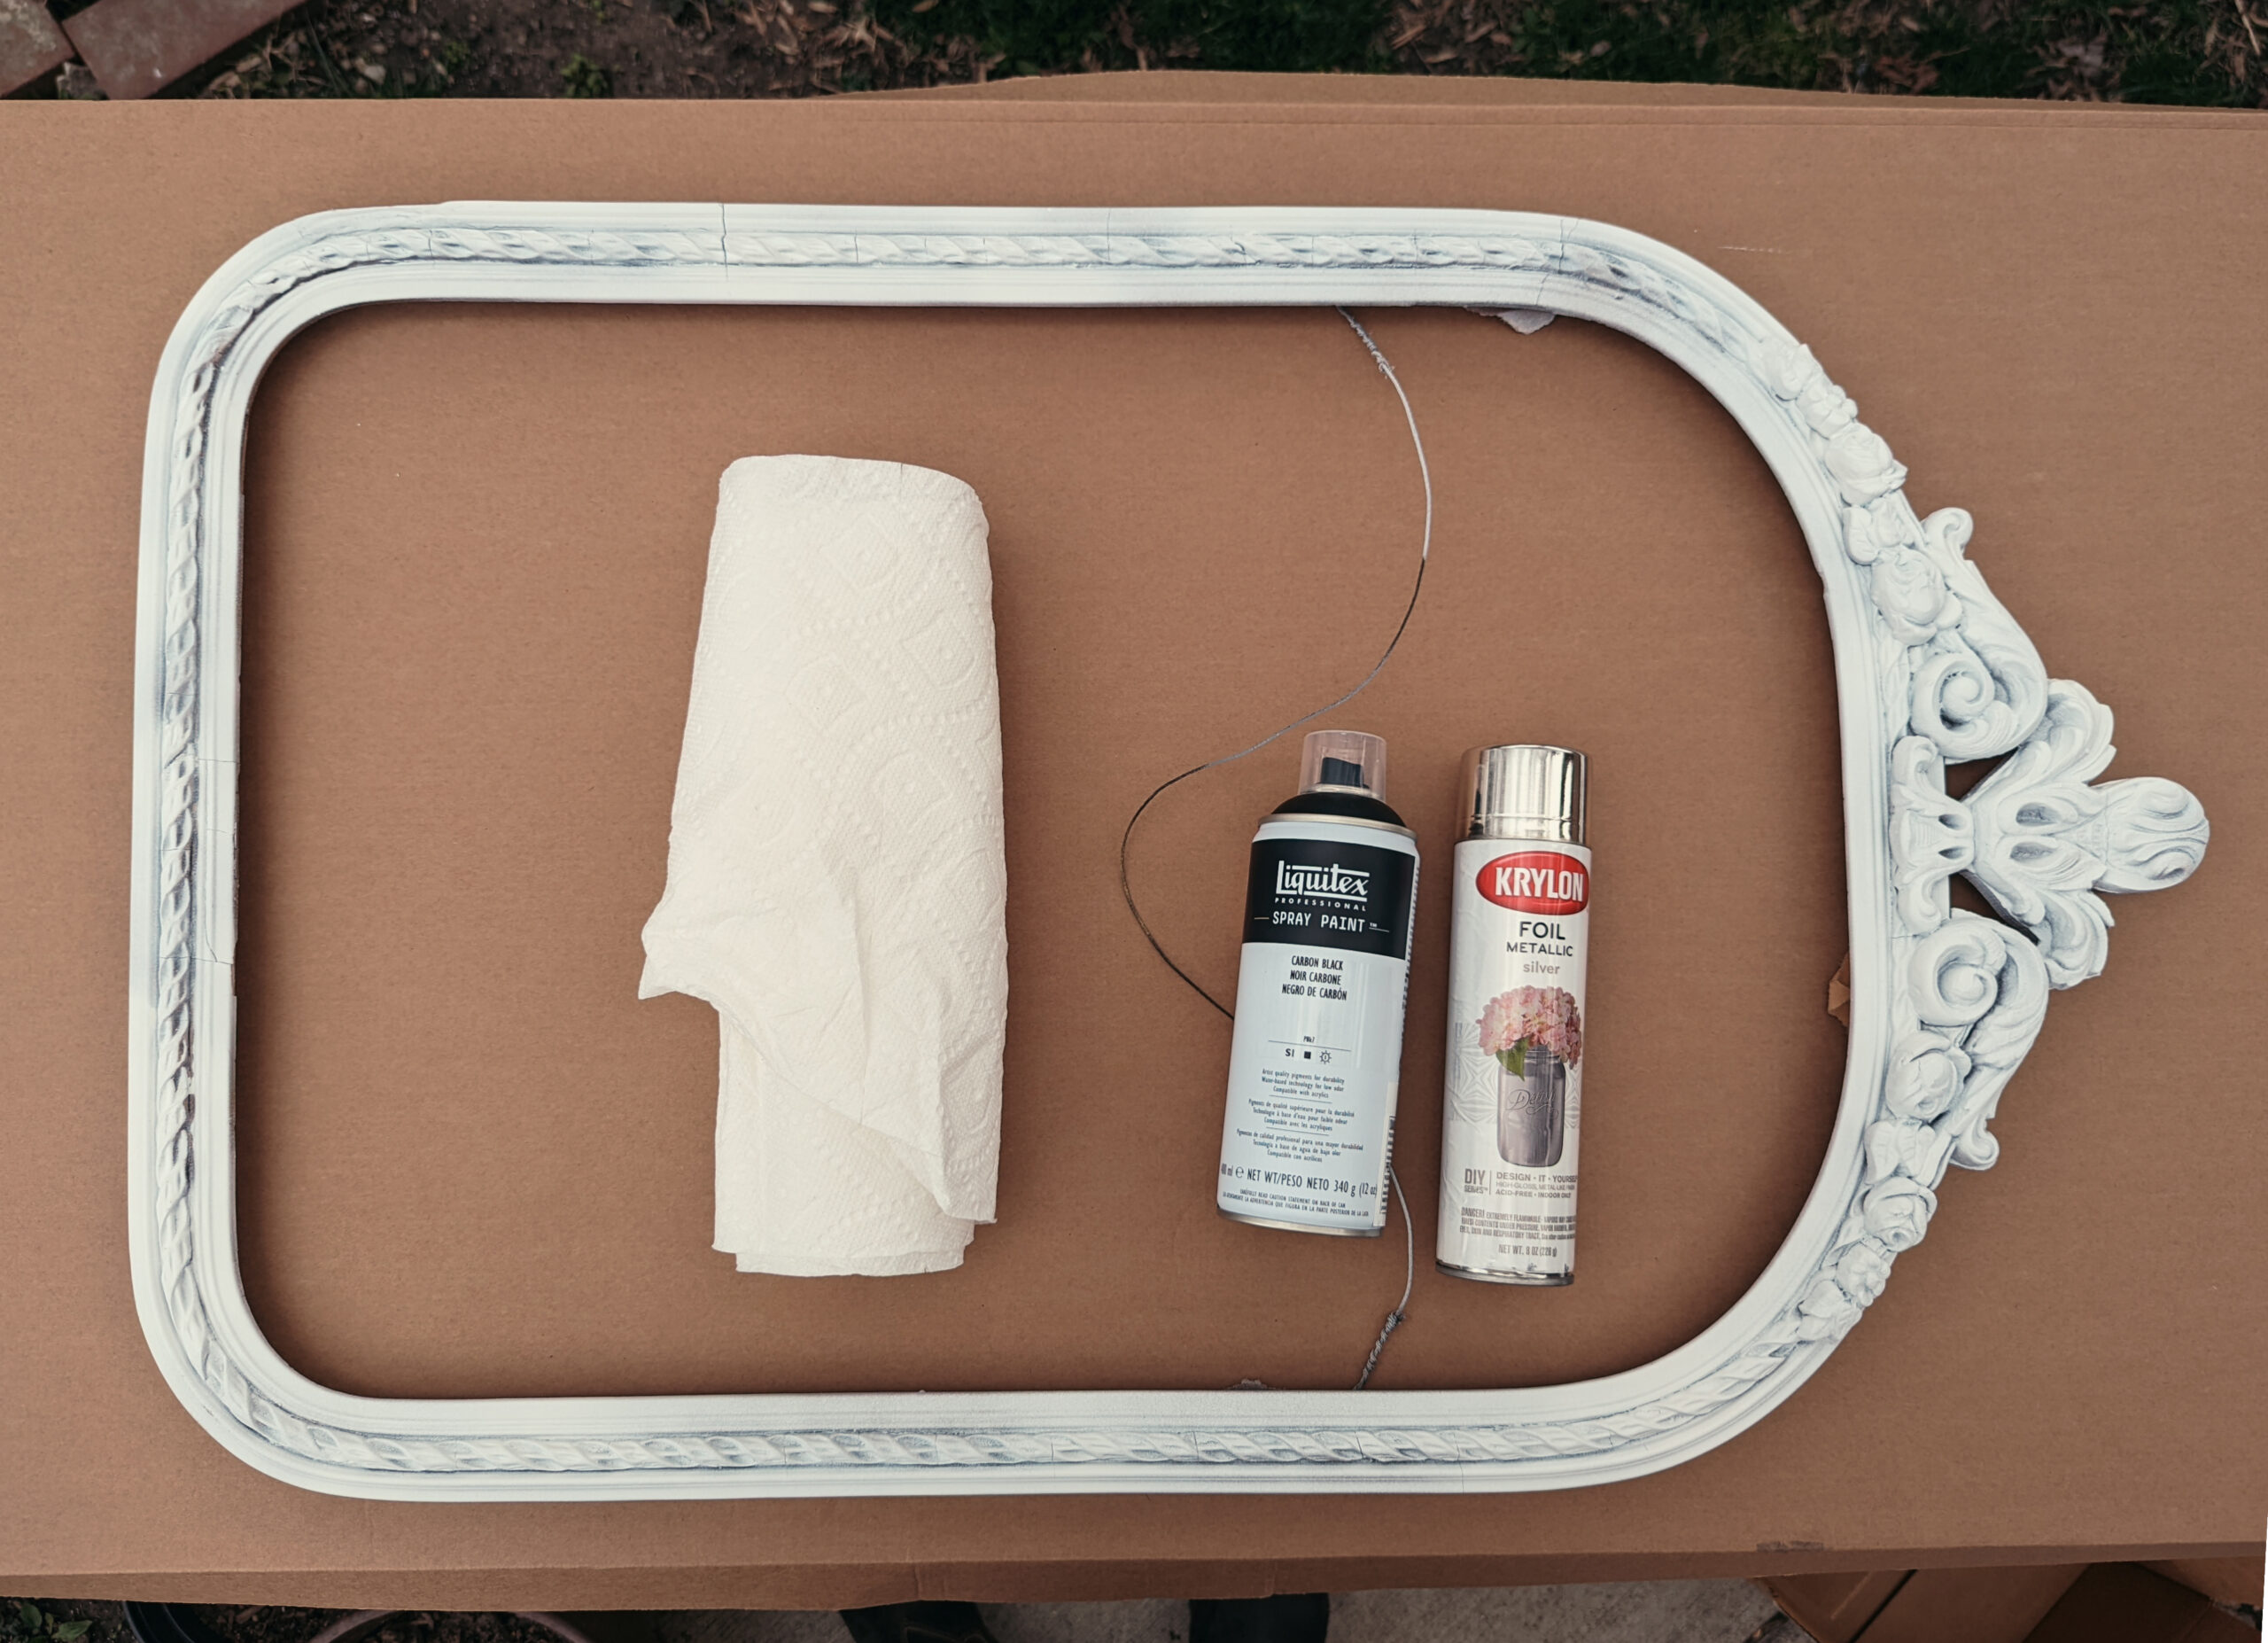
- 1/3 Roll of Paper Towels (premium paper towels really do work best for this project)
- A few moist paper towels (wrung out) or a spray bottle adjusted to spray an ultra-fine mist of water
How to paint an antique silver patina
Select and clean the object you’ll be painting.
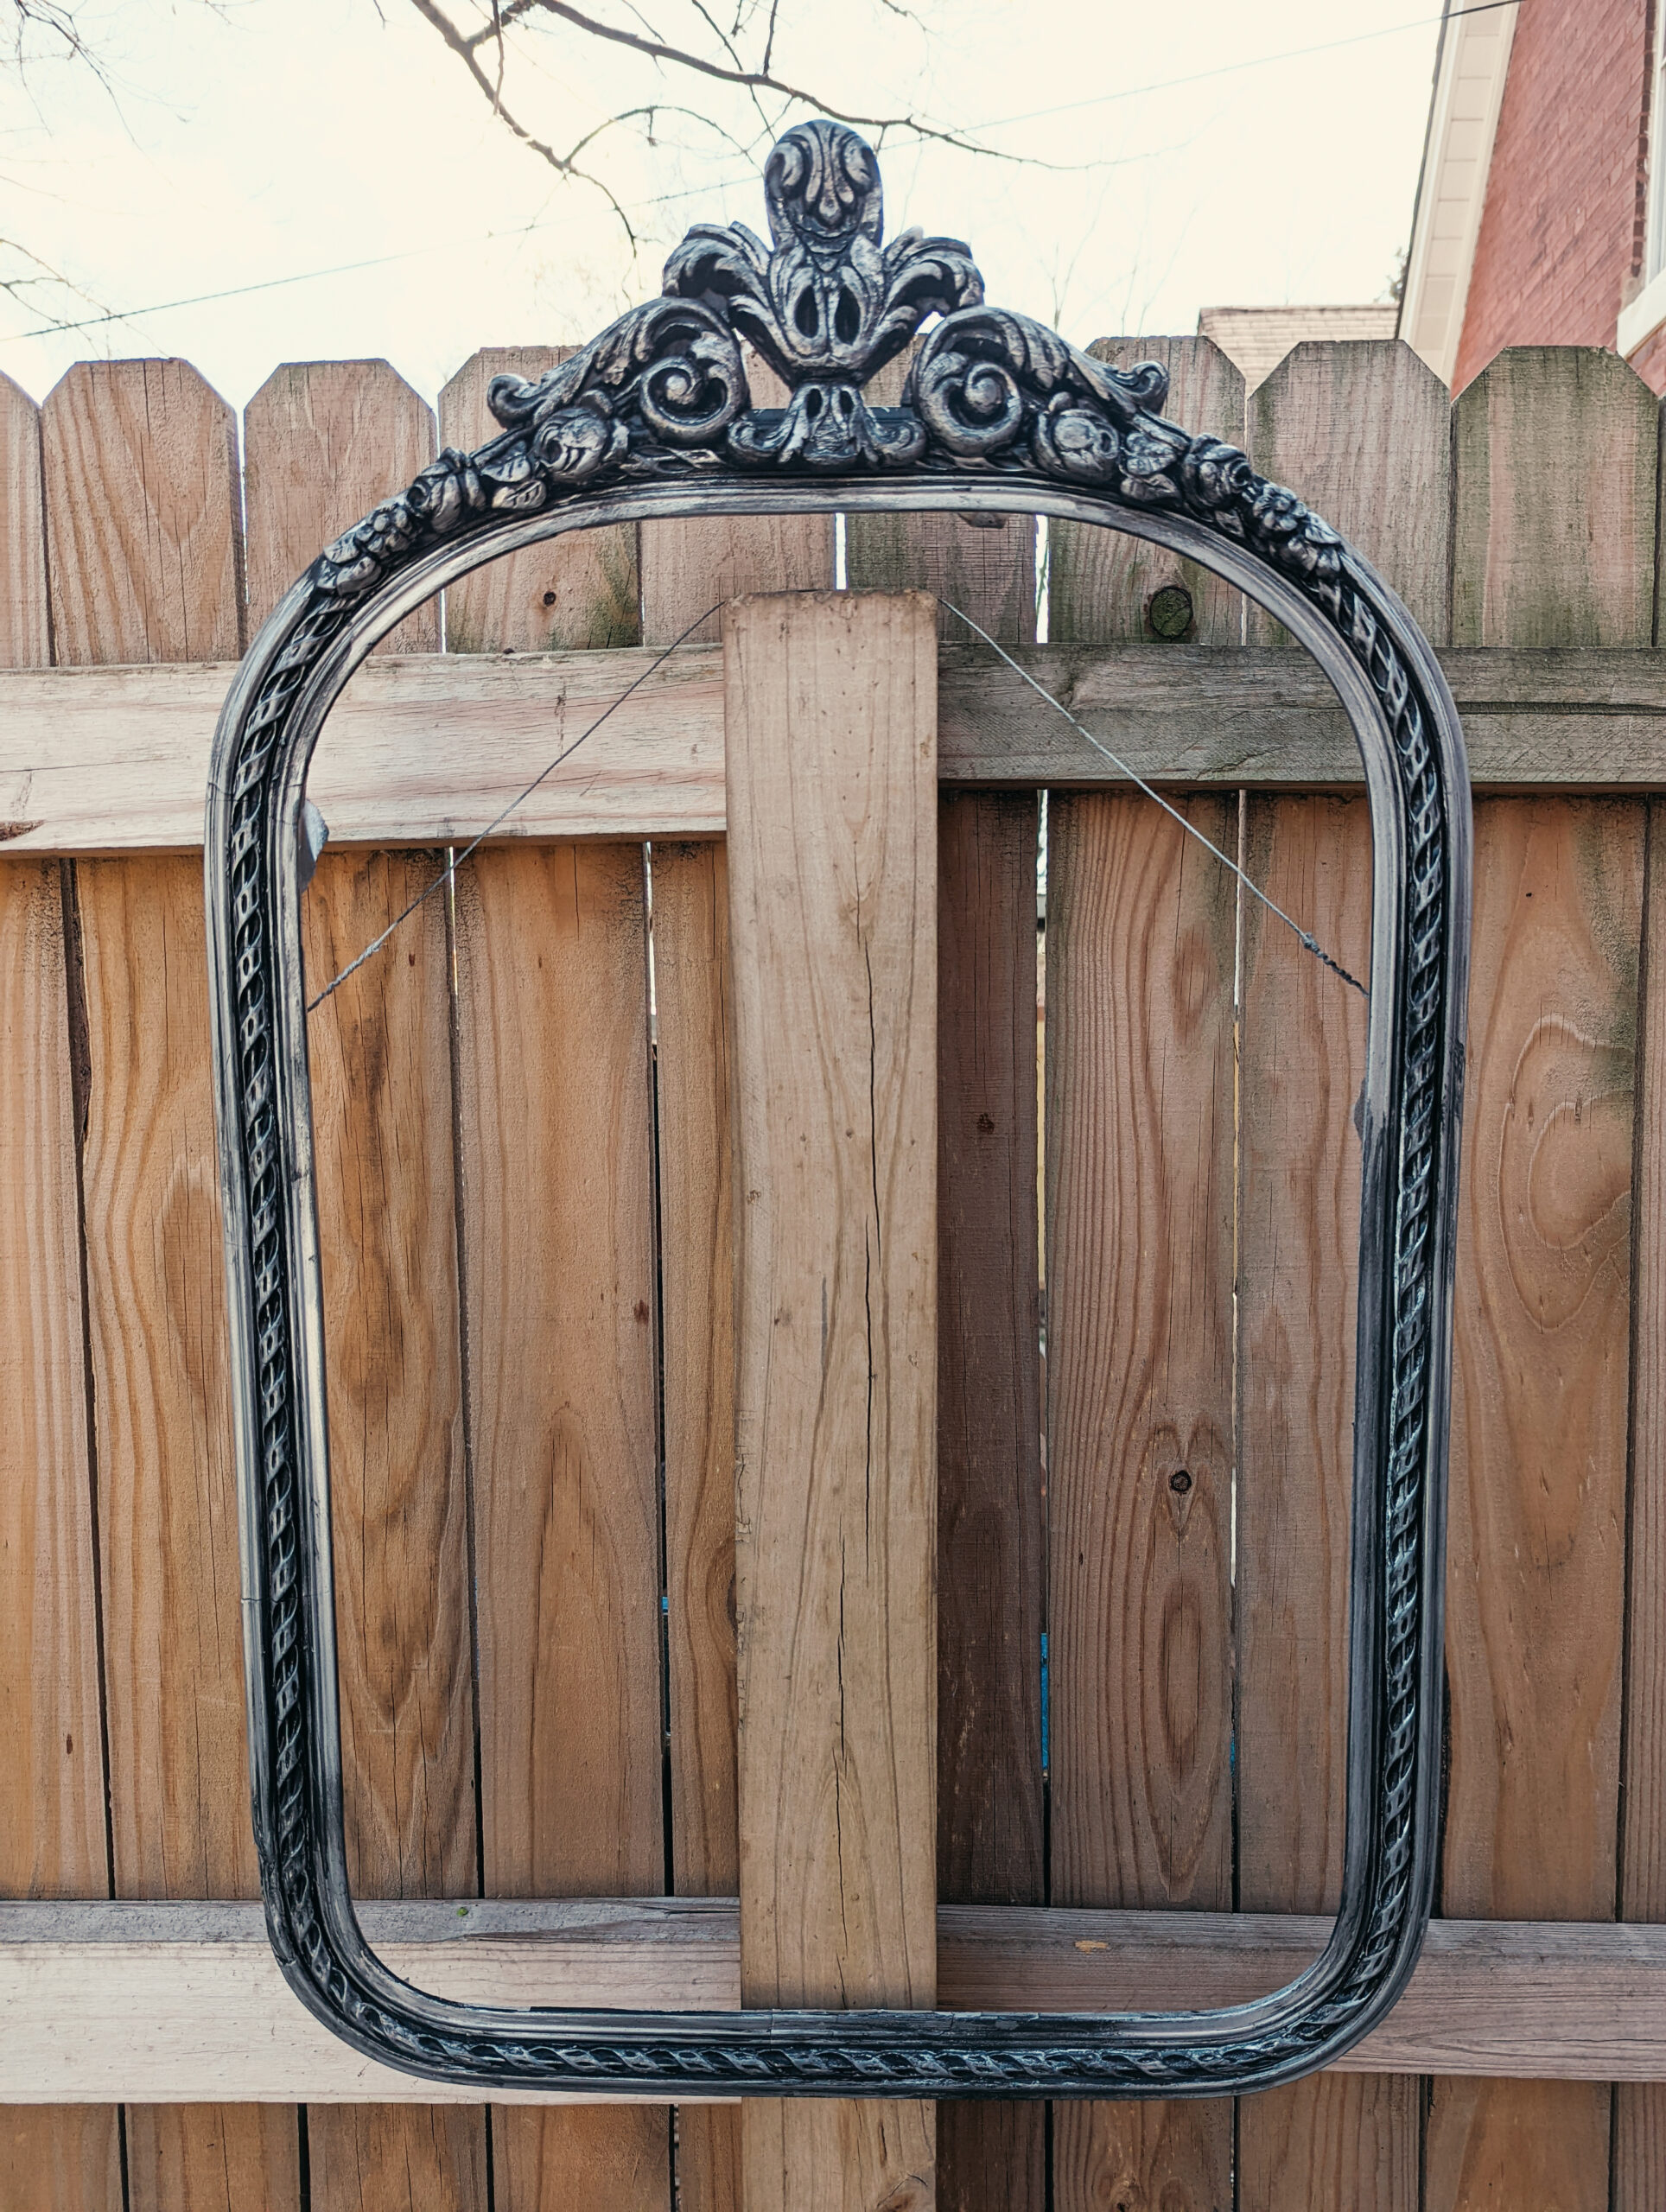
Vintage frames are some of my favorite items to repaint using a faux antique metallic finish – but often vintage frames need a good cleaning first. Wash the frames with water, paper towels, and a little bit of vinegar – and allow them to dry completely before advancing to the next step.
(Optional) prime the surface of the item you’ll be painting
Krylon metallic spray paints are relatively high-quality paints, so if you are painting a previously painted surface, you can probably skip this step.
✅ Do use a primer if you’ll be applying this antique silver painting method to bare unfinished wood, raw metal, or surfaces that aren’t entirely smooth.
If you prime, be sure to read the label on your primer and continue only after the label indicates that the primer is dry, and it feels dry and hard to the touch. My preferred primer is Bull’s-Eye 123, which can cover just about anything.
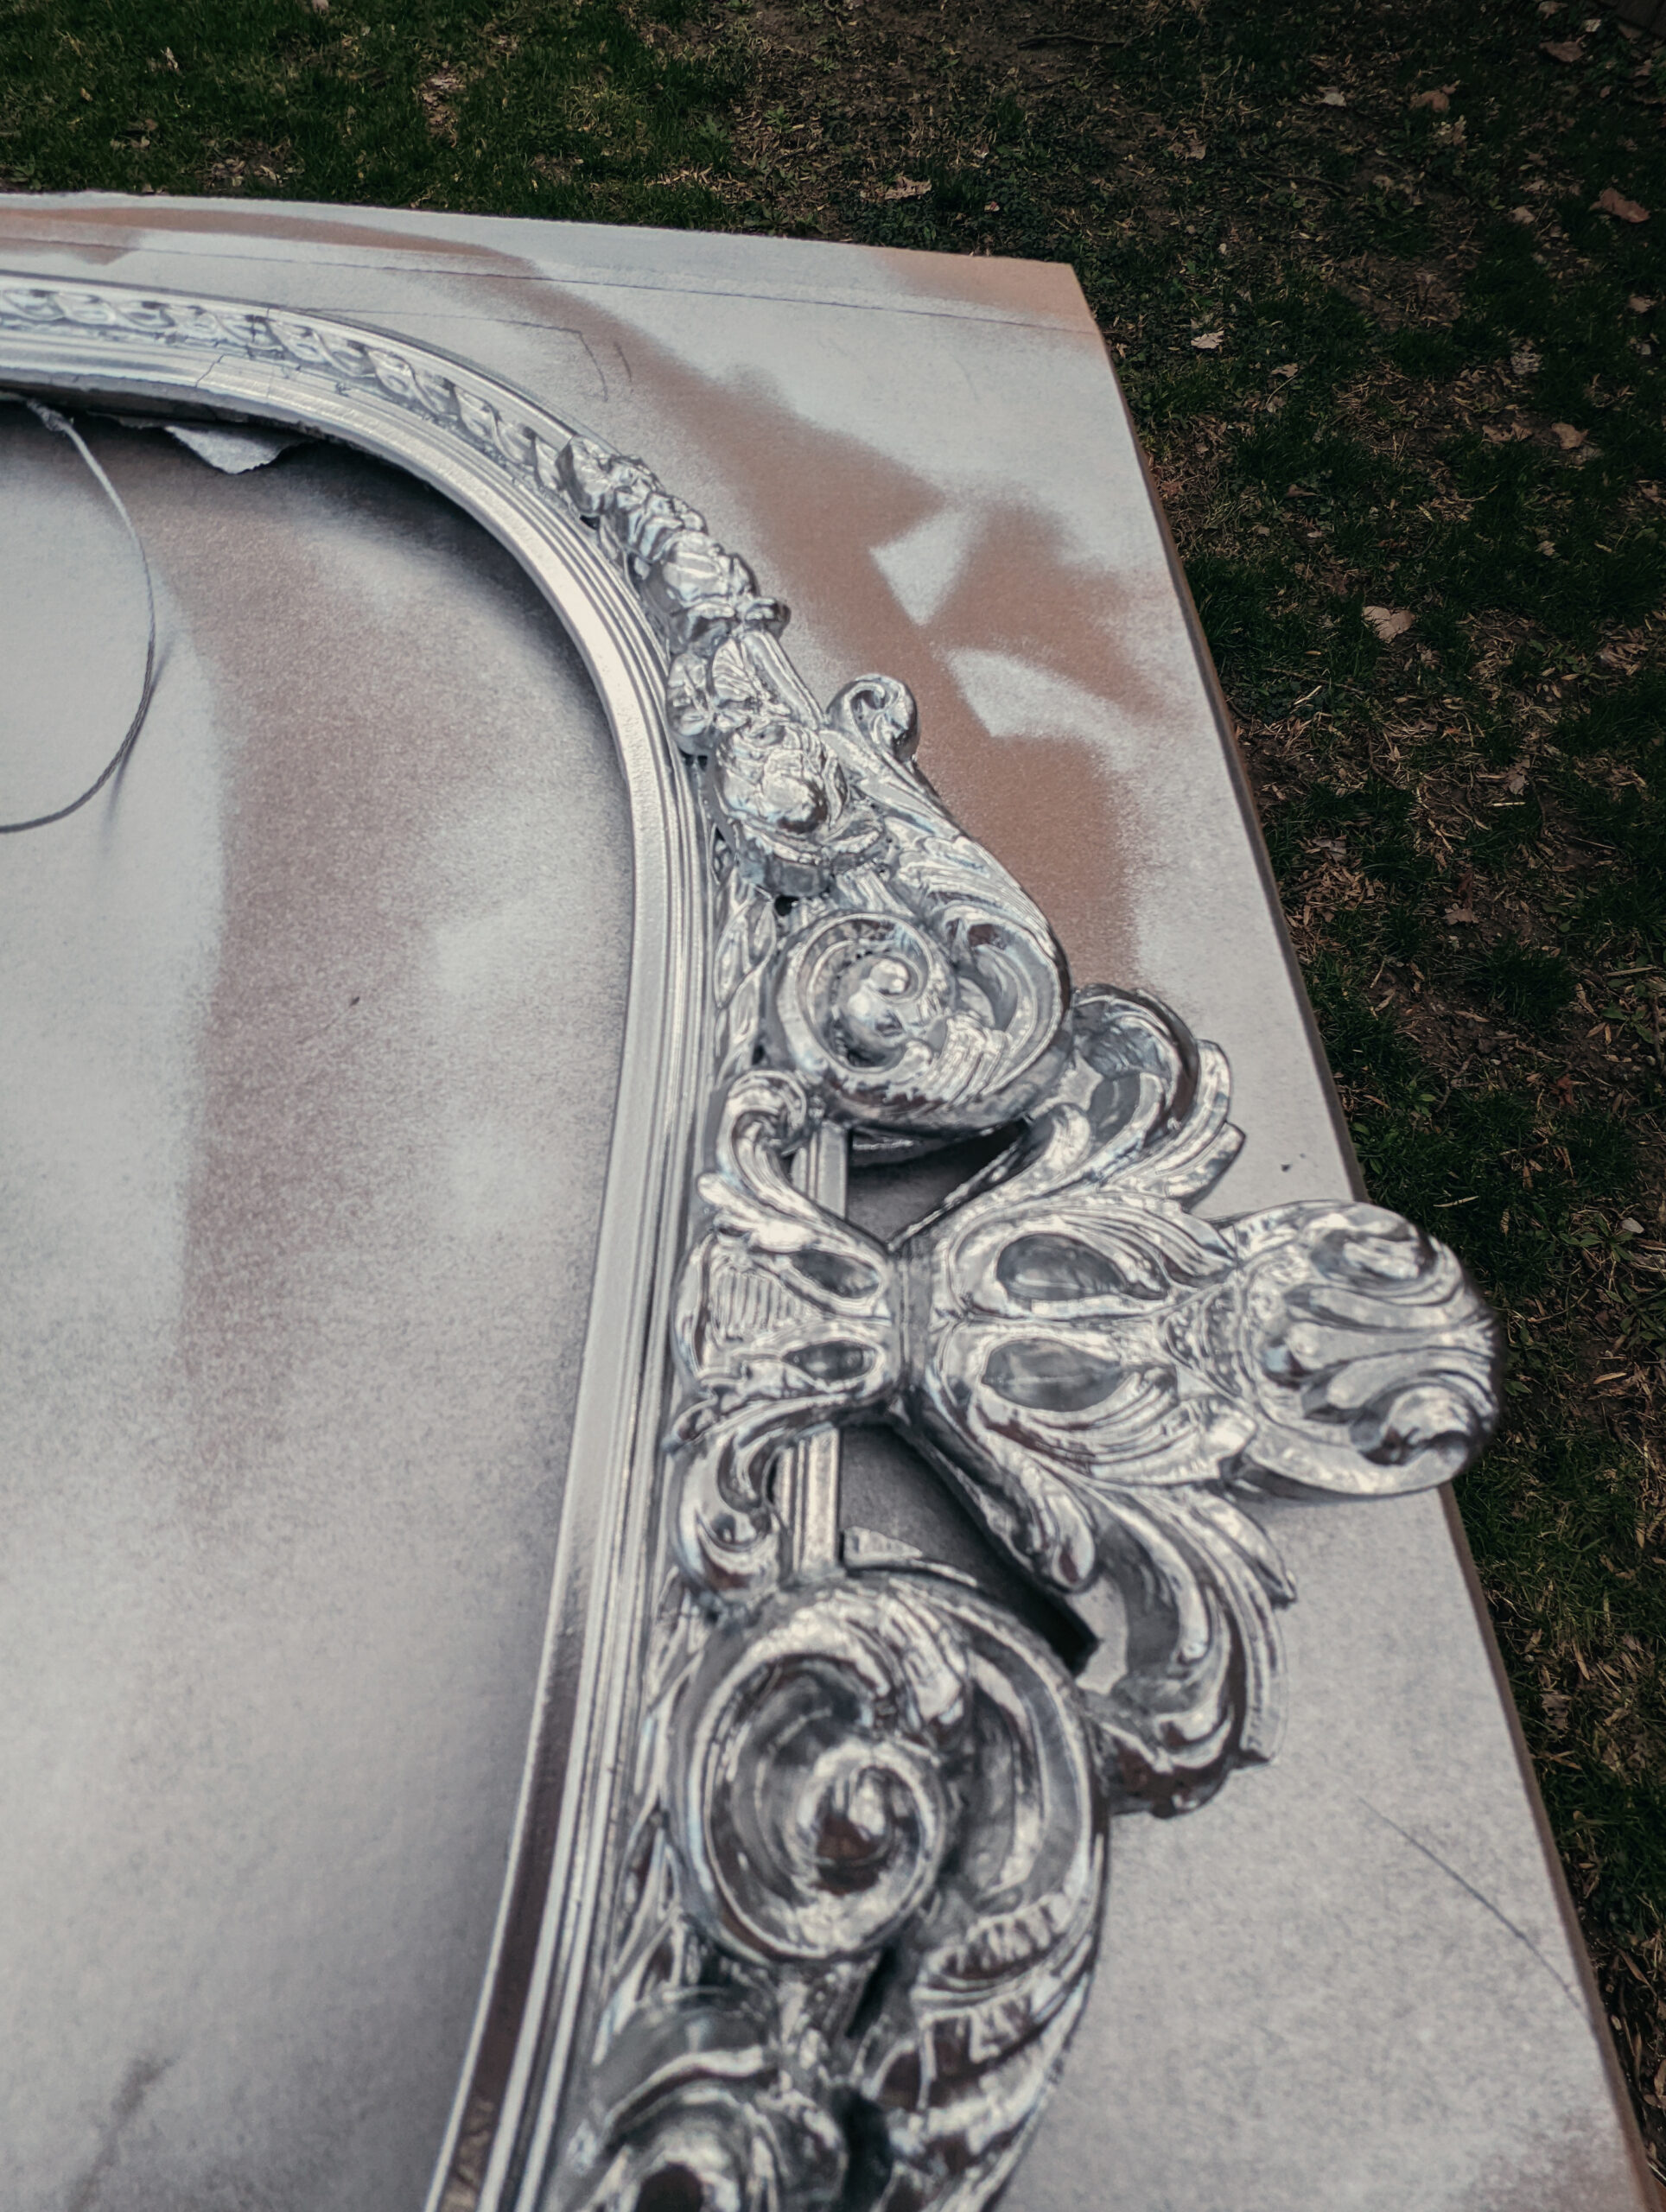
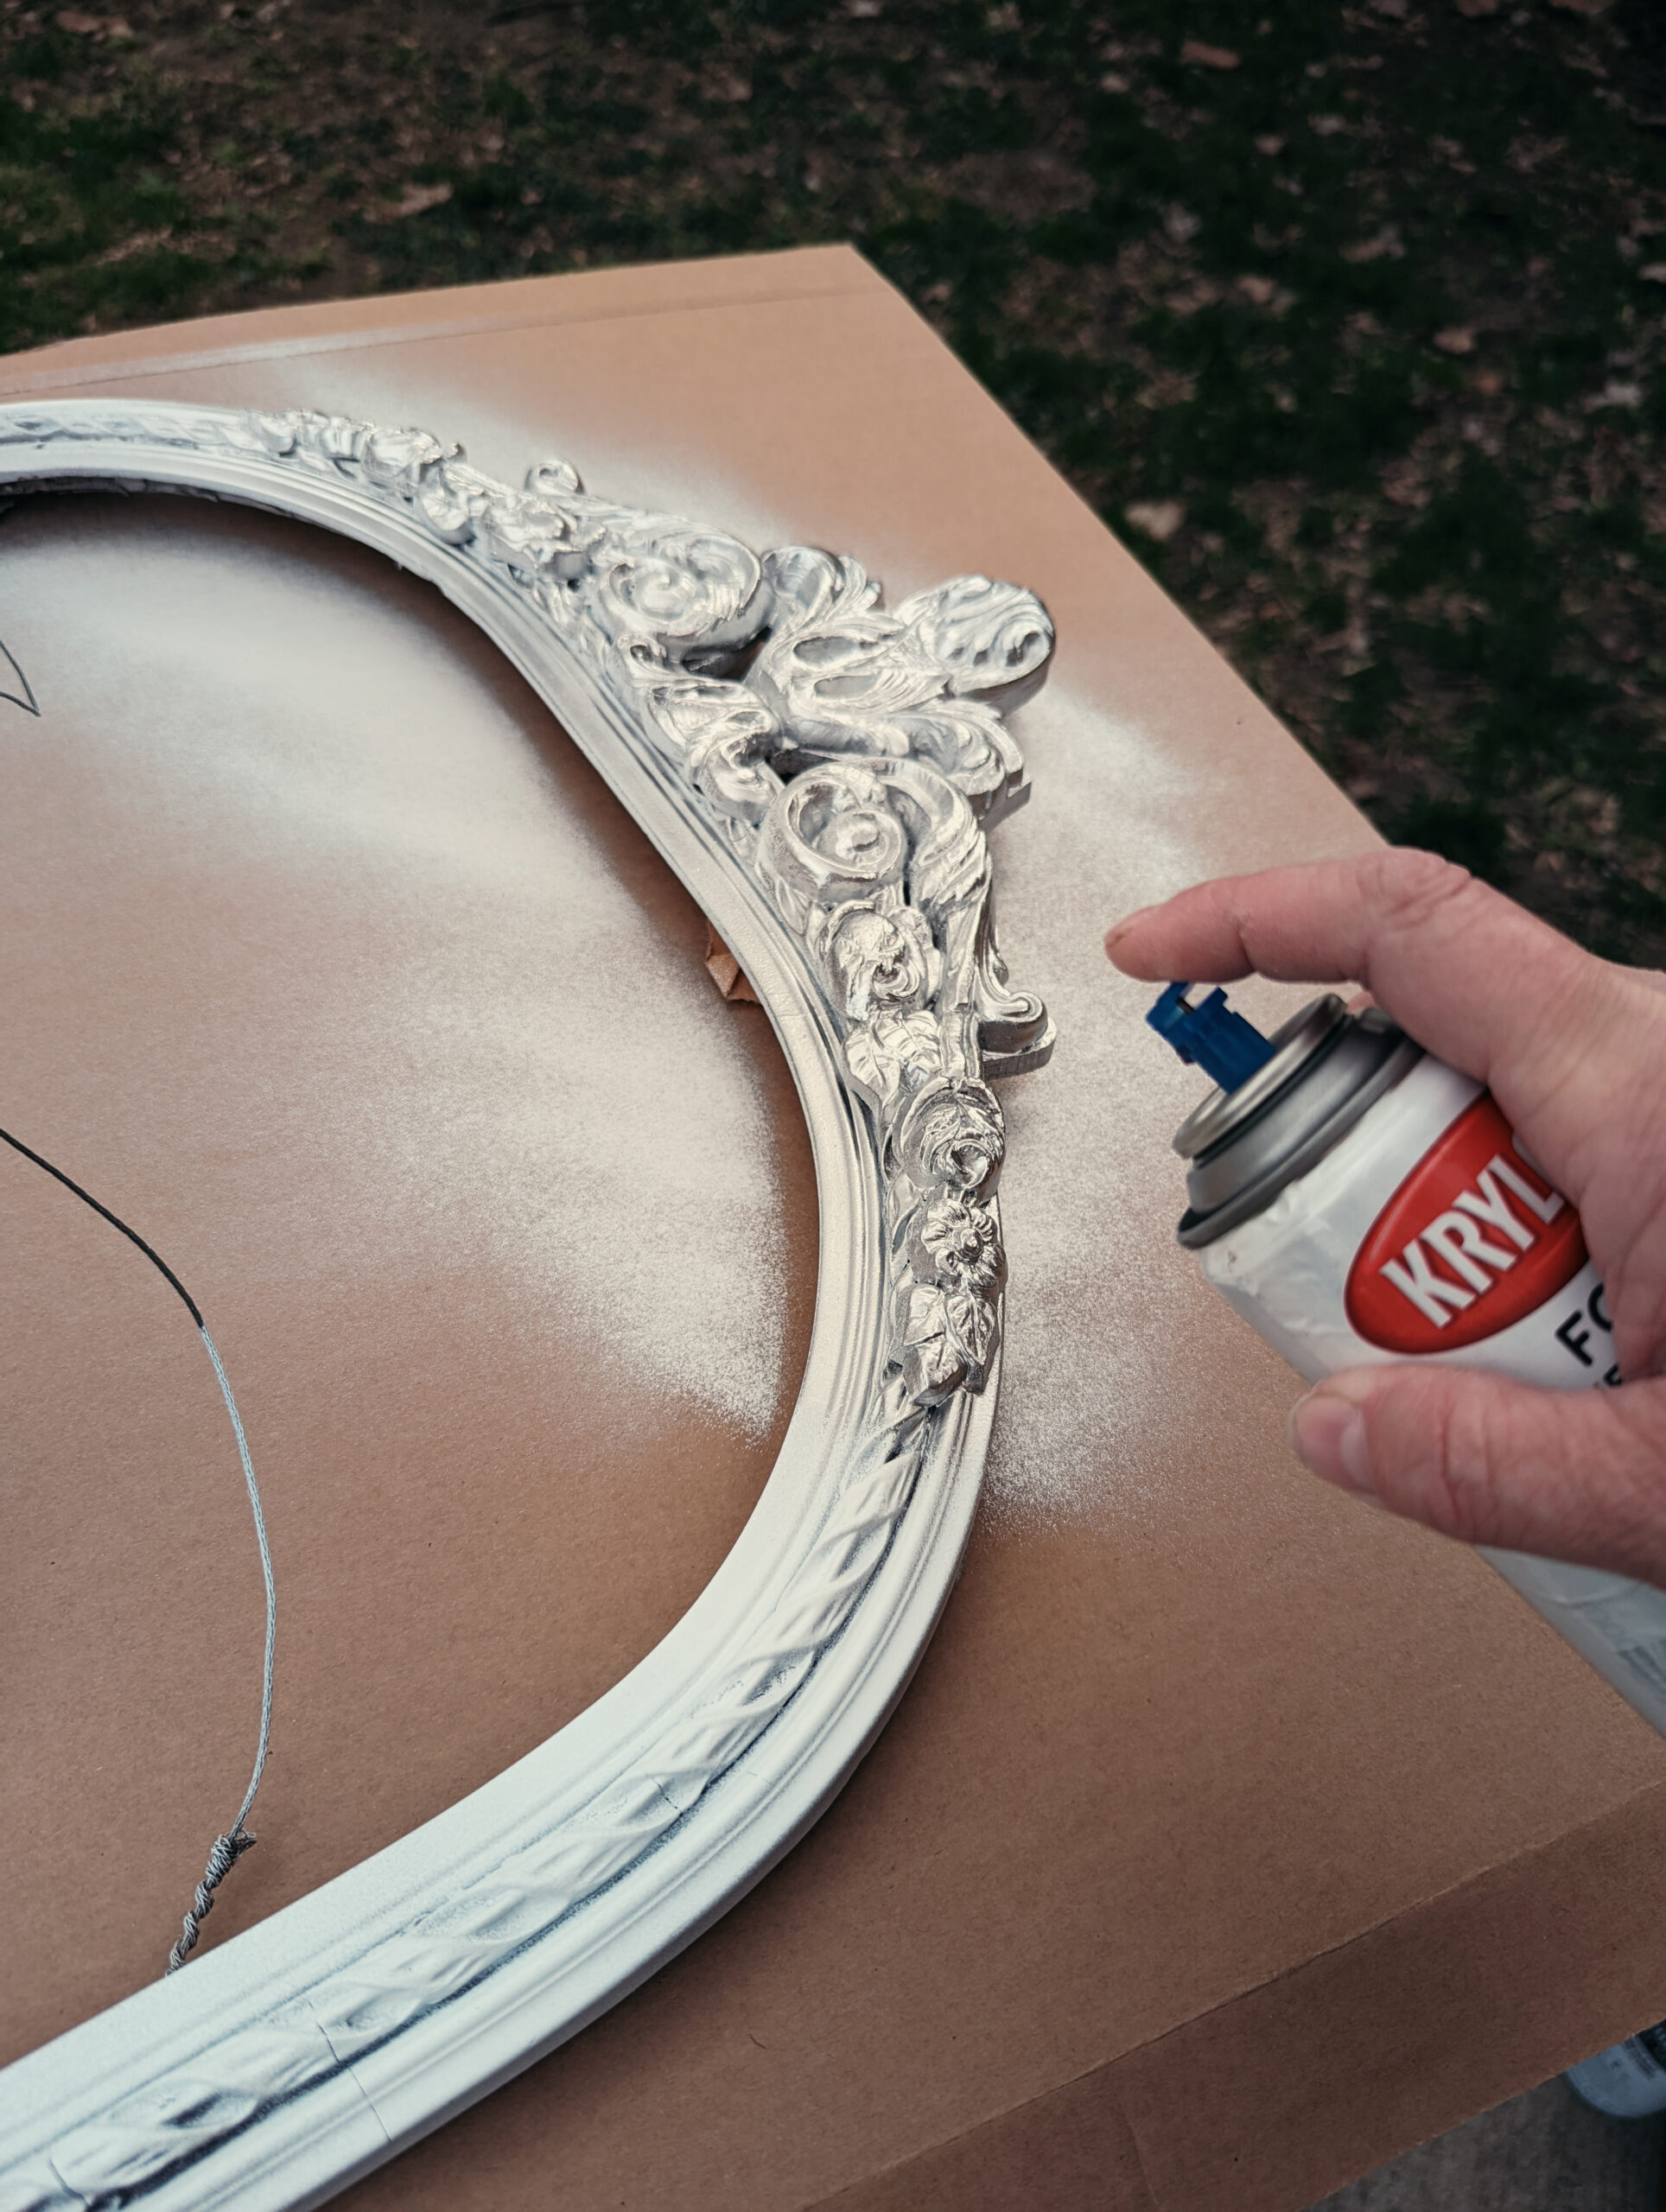
Paint the item with a metallic silver spray paint
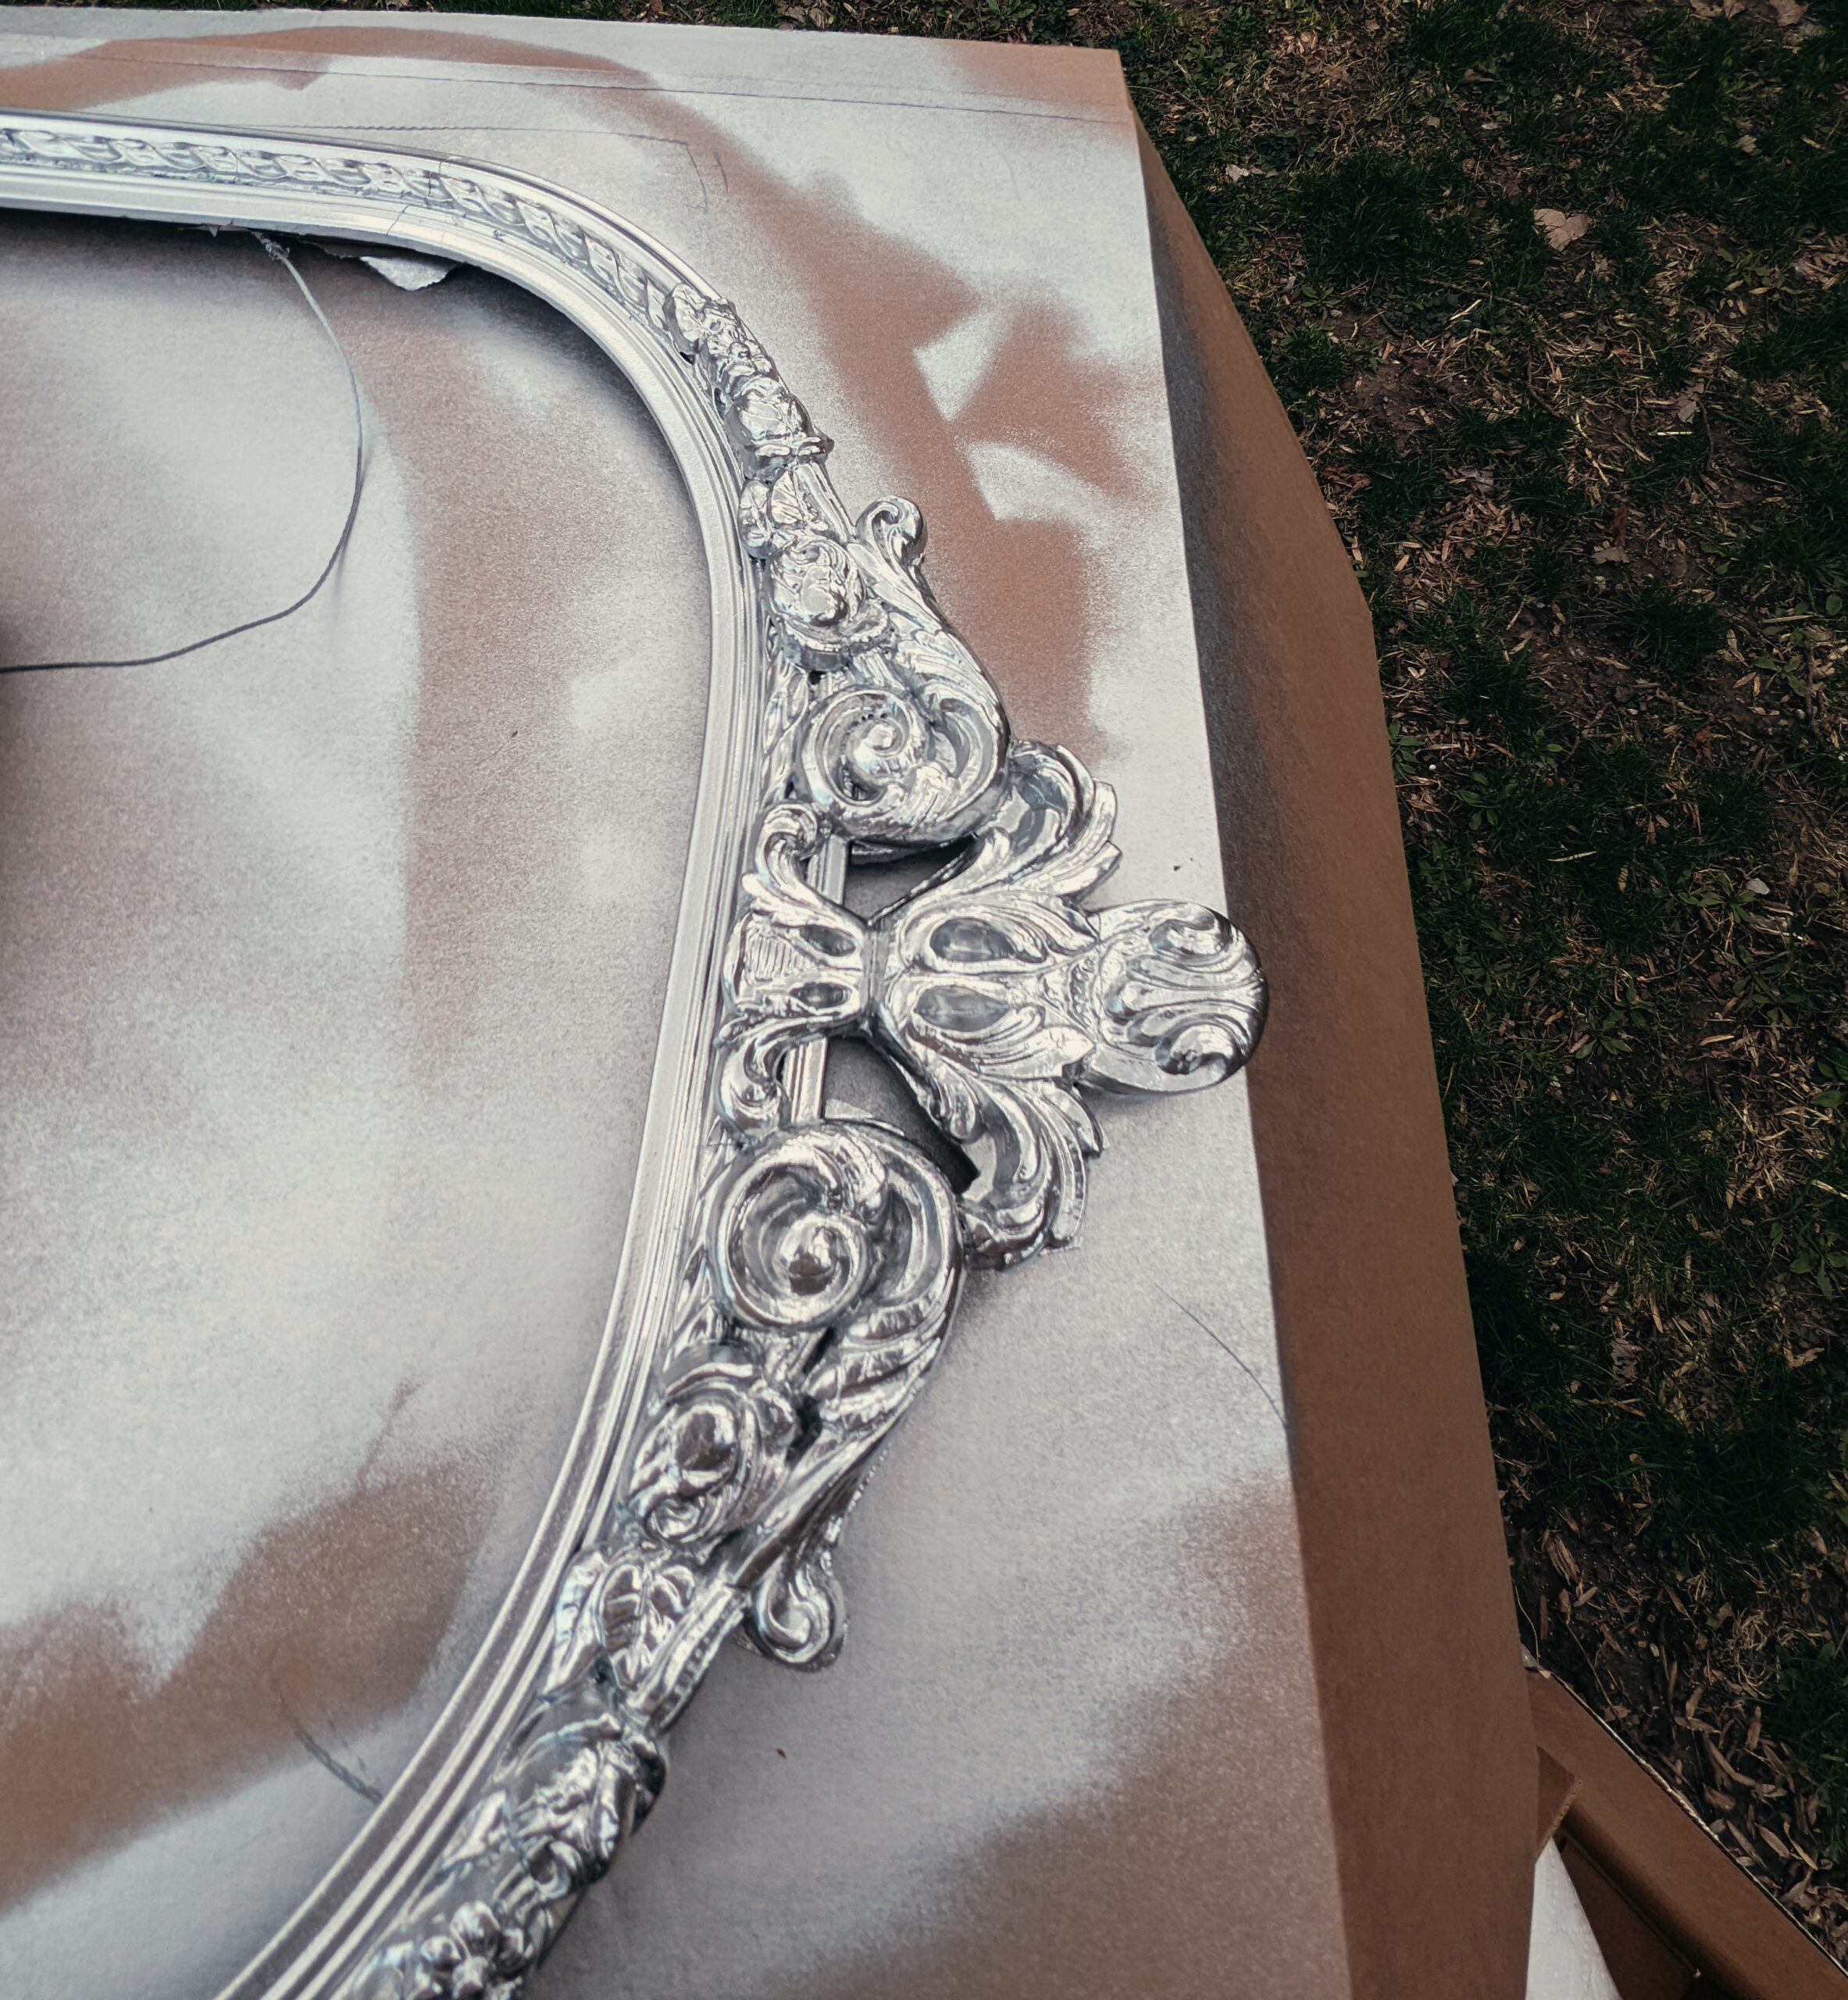
Using a foil silver finish or a metallic sterling silver finish, paint the frame or other object that you’ll be painting this finish on. The trick with painting metallic paints, especially frames that have crevices and three sides to be covered, is to paint multiple very light coats rather than one heavy coat (which can result in unsightly drips dried in the finish of the paint).
Allow the base coat of silver paint to dry completely – and I mean completely. In my testing of this method for painting and antique silver finish, I found that if I rushed ahead to the antiquing process before the bottom layer of metallic silver spray paint was 100% dry, the result was that the silver paint took on a grayish dull tone due to being damaged by the antiquing process.
Read these steps in advance: the next three steps go very quickly, you must progress through them rapidly in order to prevent the layer of antiquing paint from drying before it is given the antique faux finish.
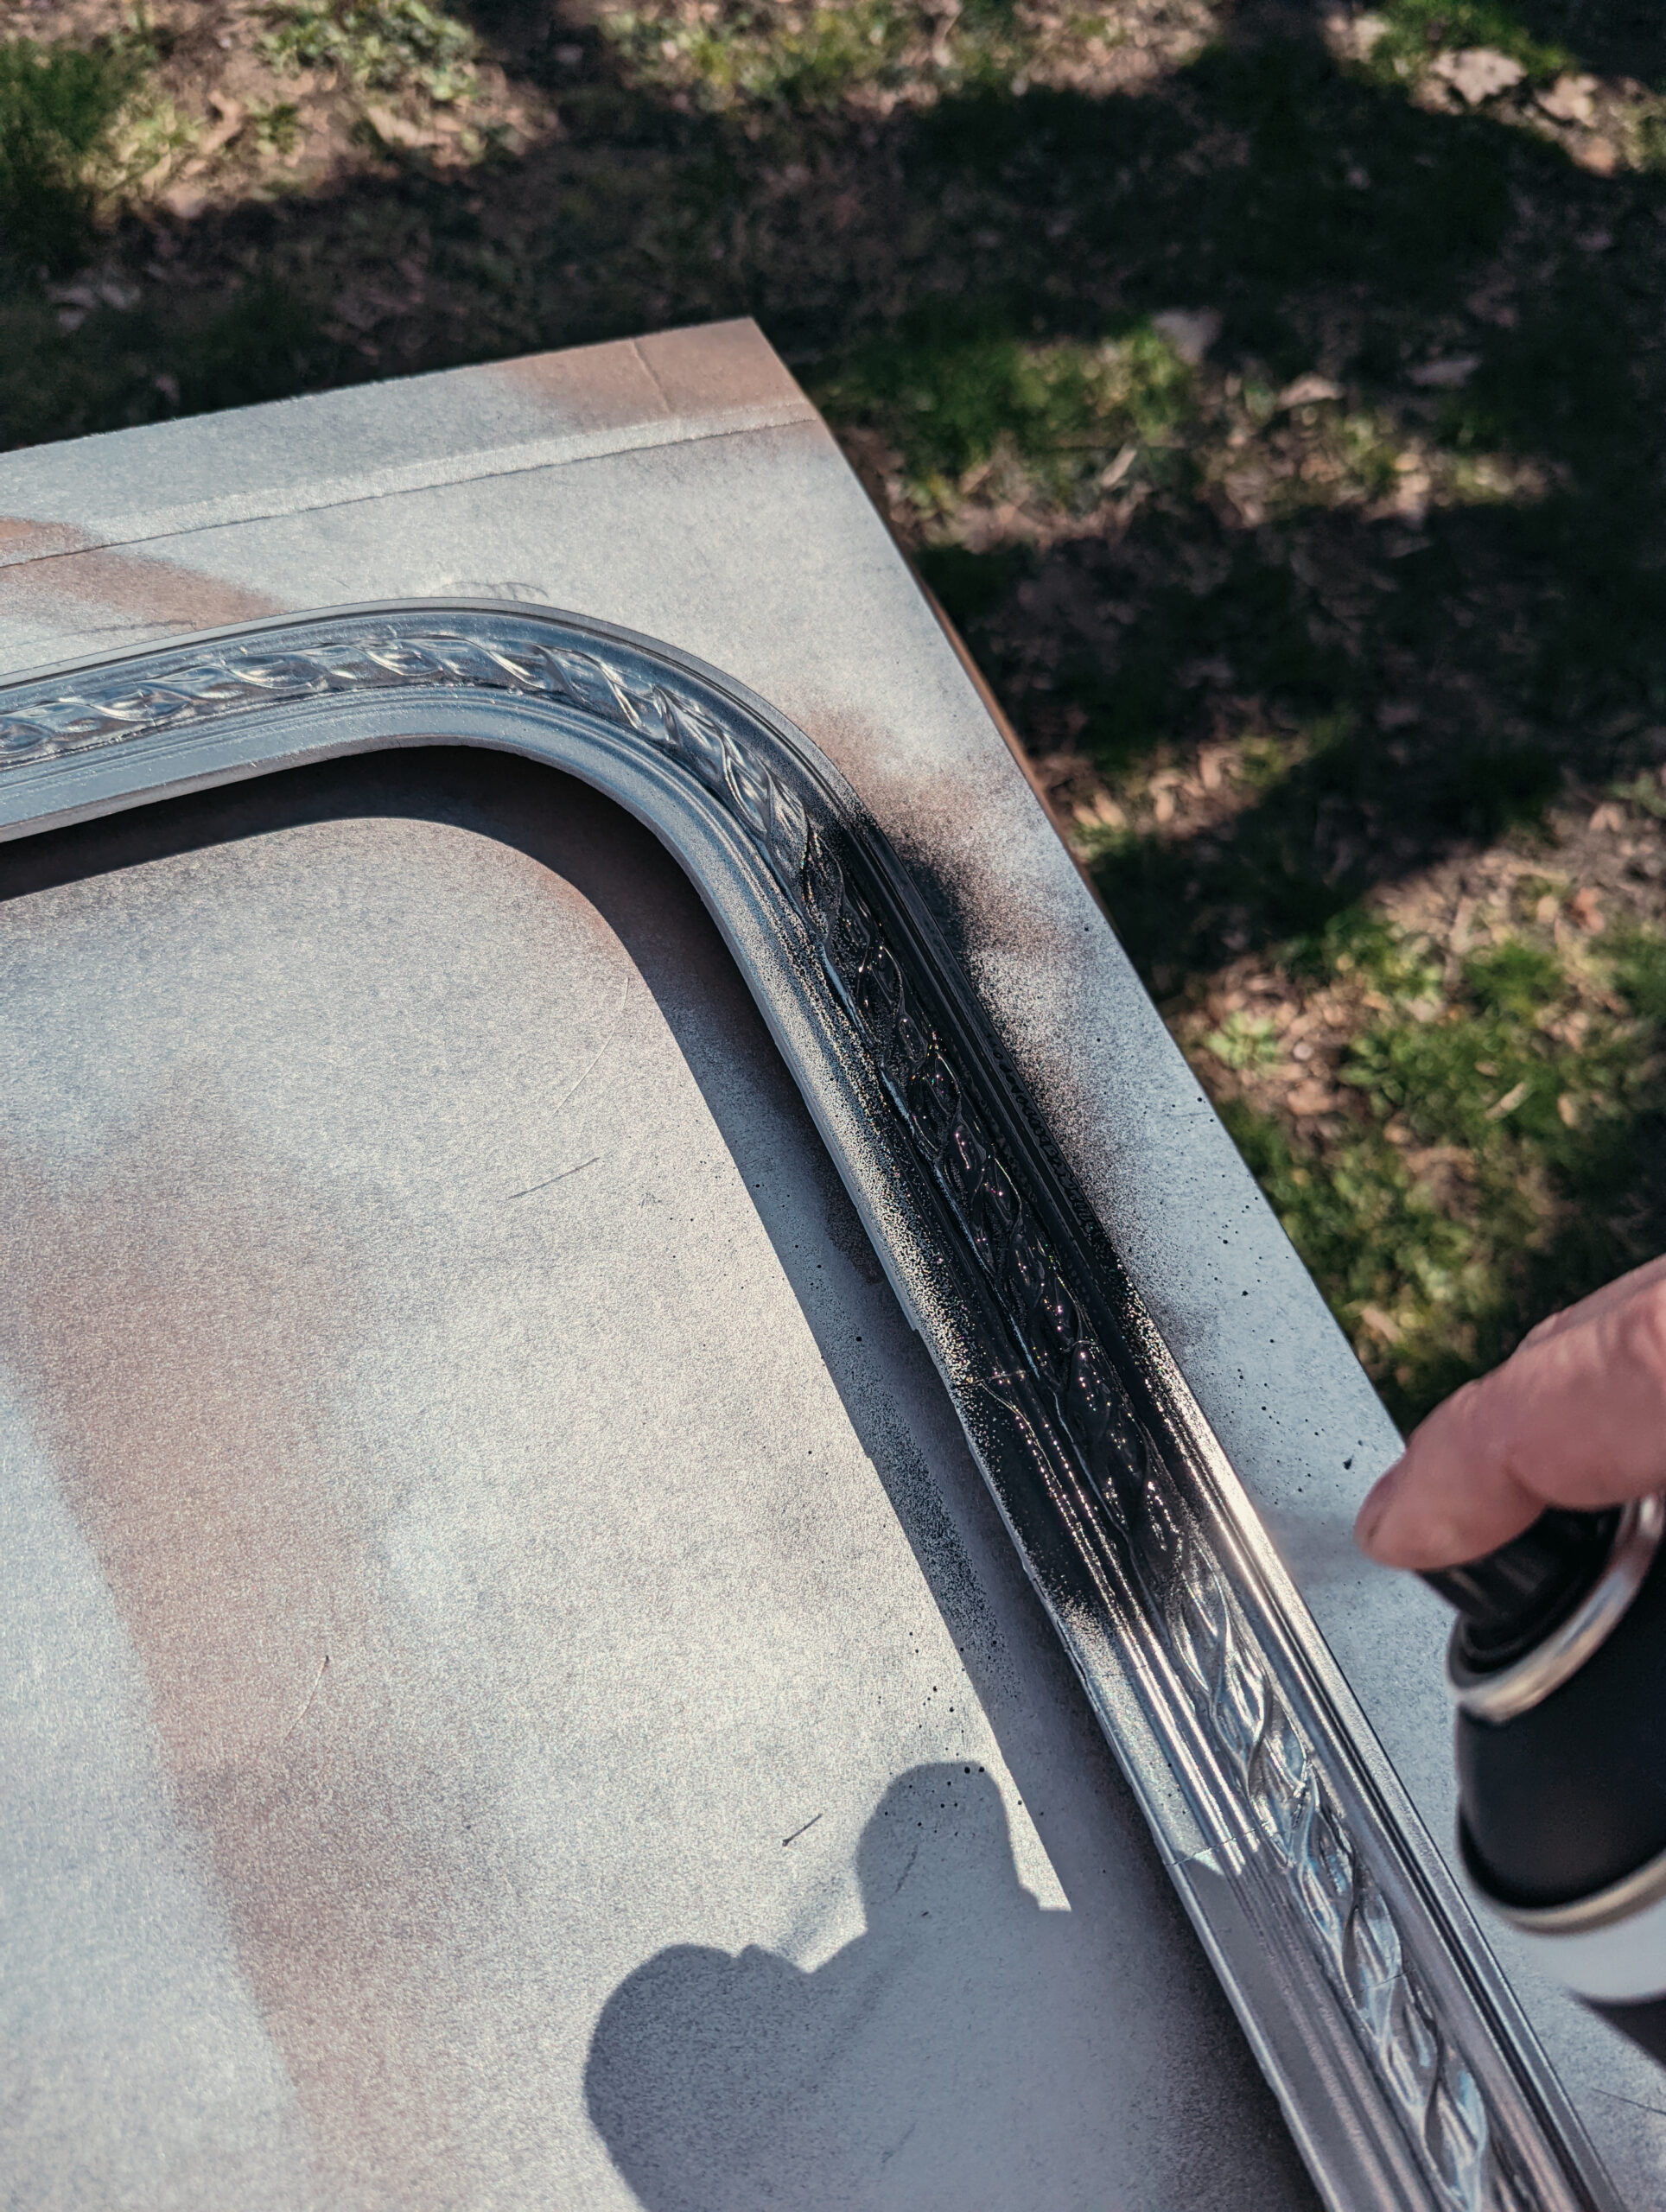
Spray the frame or object with carbon black acrylic spray paint
I highly recommend using Liquitex artist spray paint for this step, I’ve tested this method with generic black spray paint (and even with high-end brand Montana spray paints), and nothing creates the antique silver paint effect like Liquitex.
Spray a thin, even layer of black spray paint over the dry metallic silver spray paint, being sure to paint only a very small section and move the flow of the paint to cover multiple sides at once.
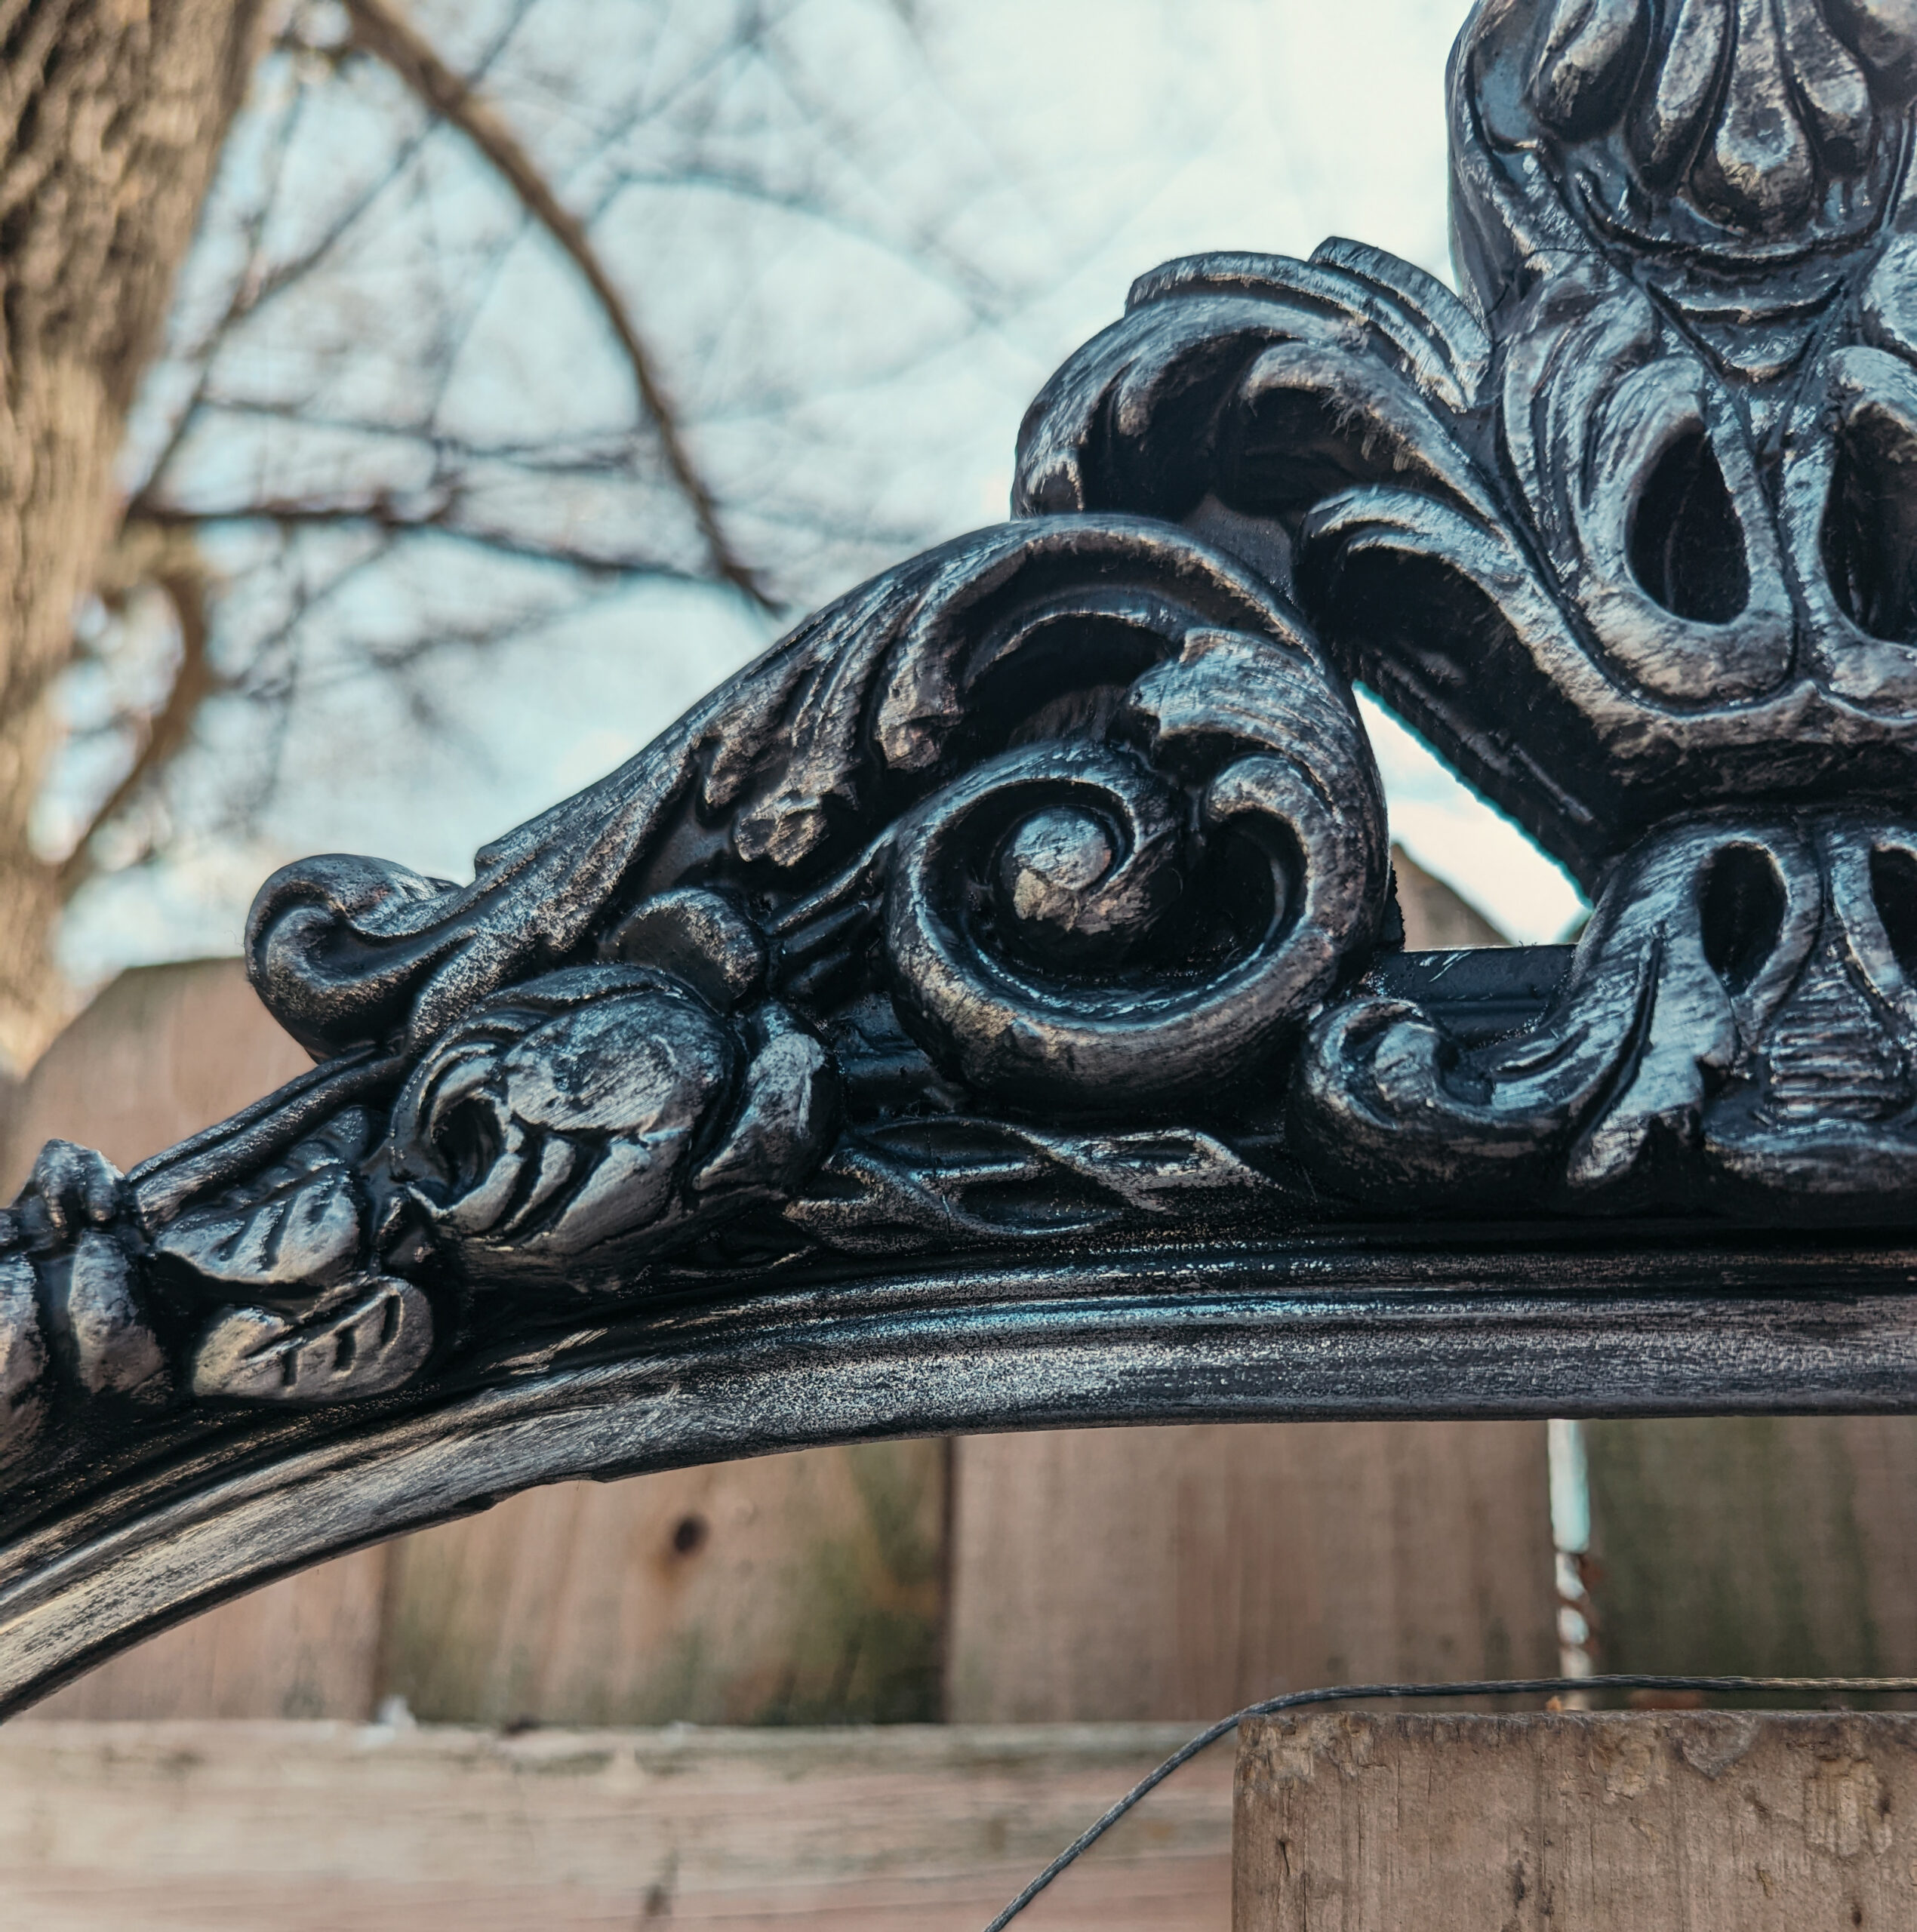
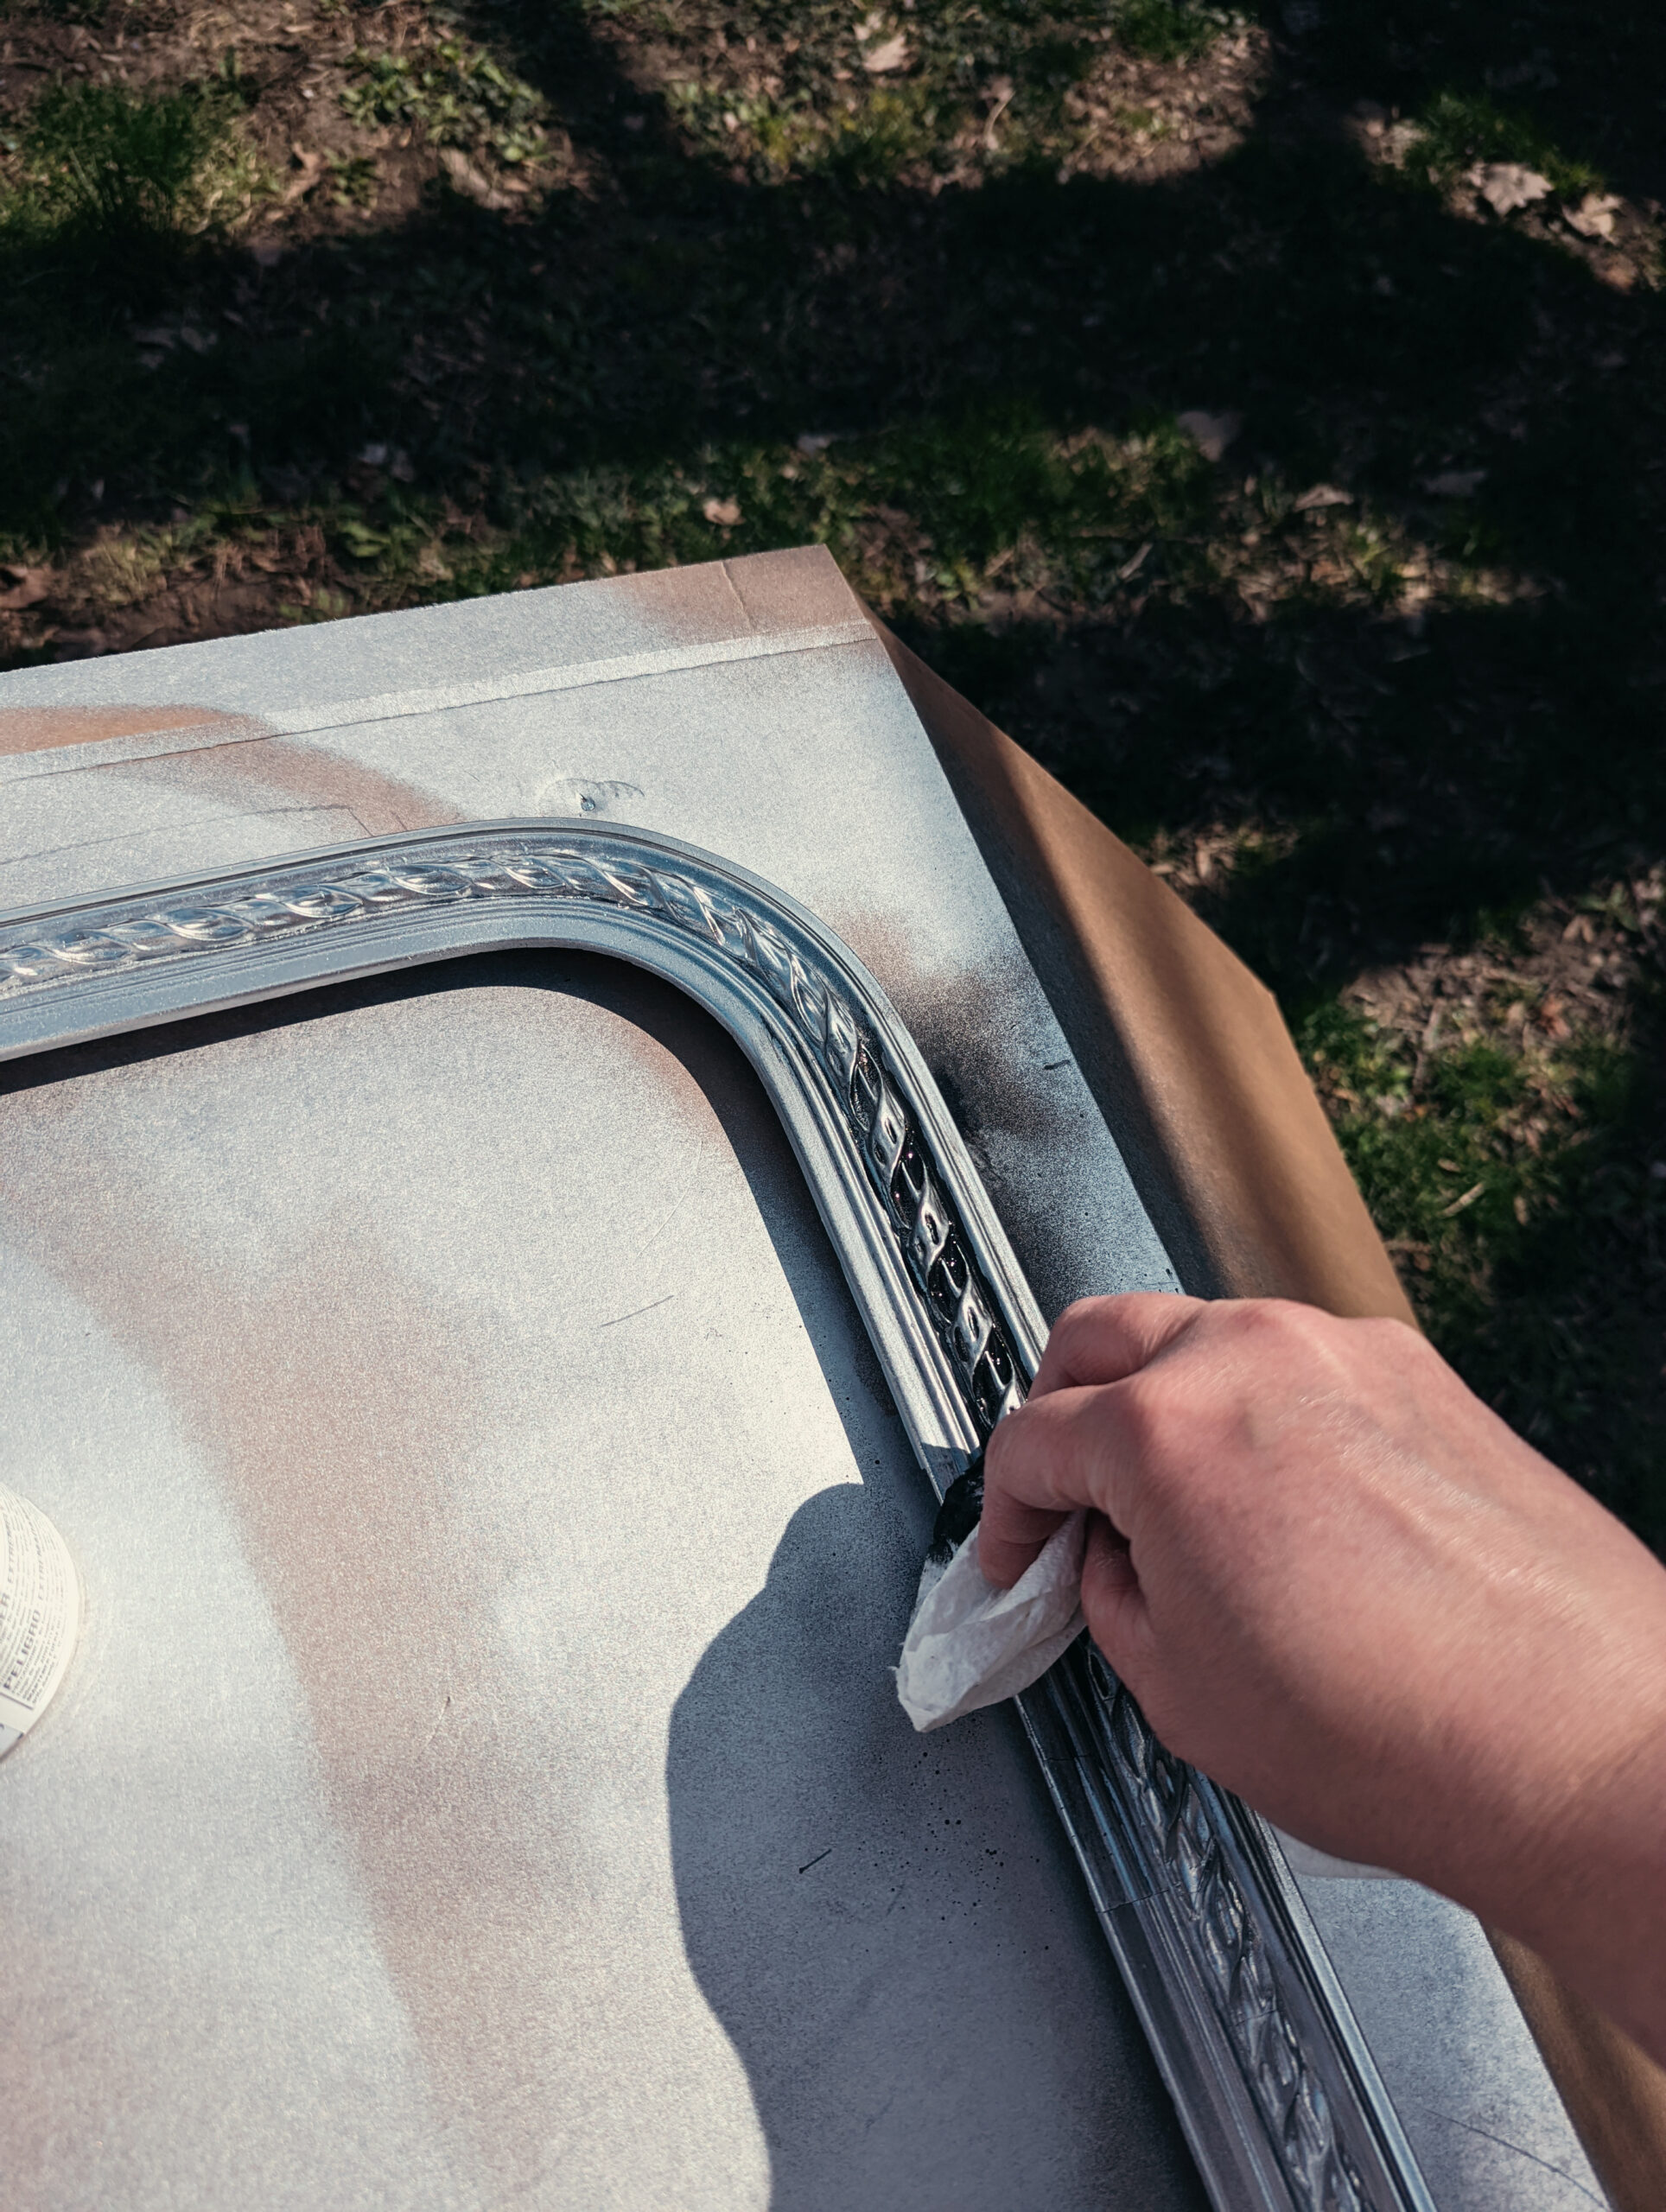
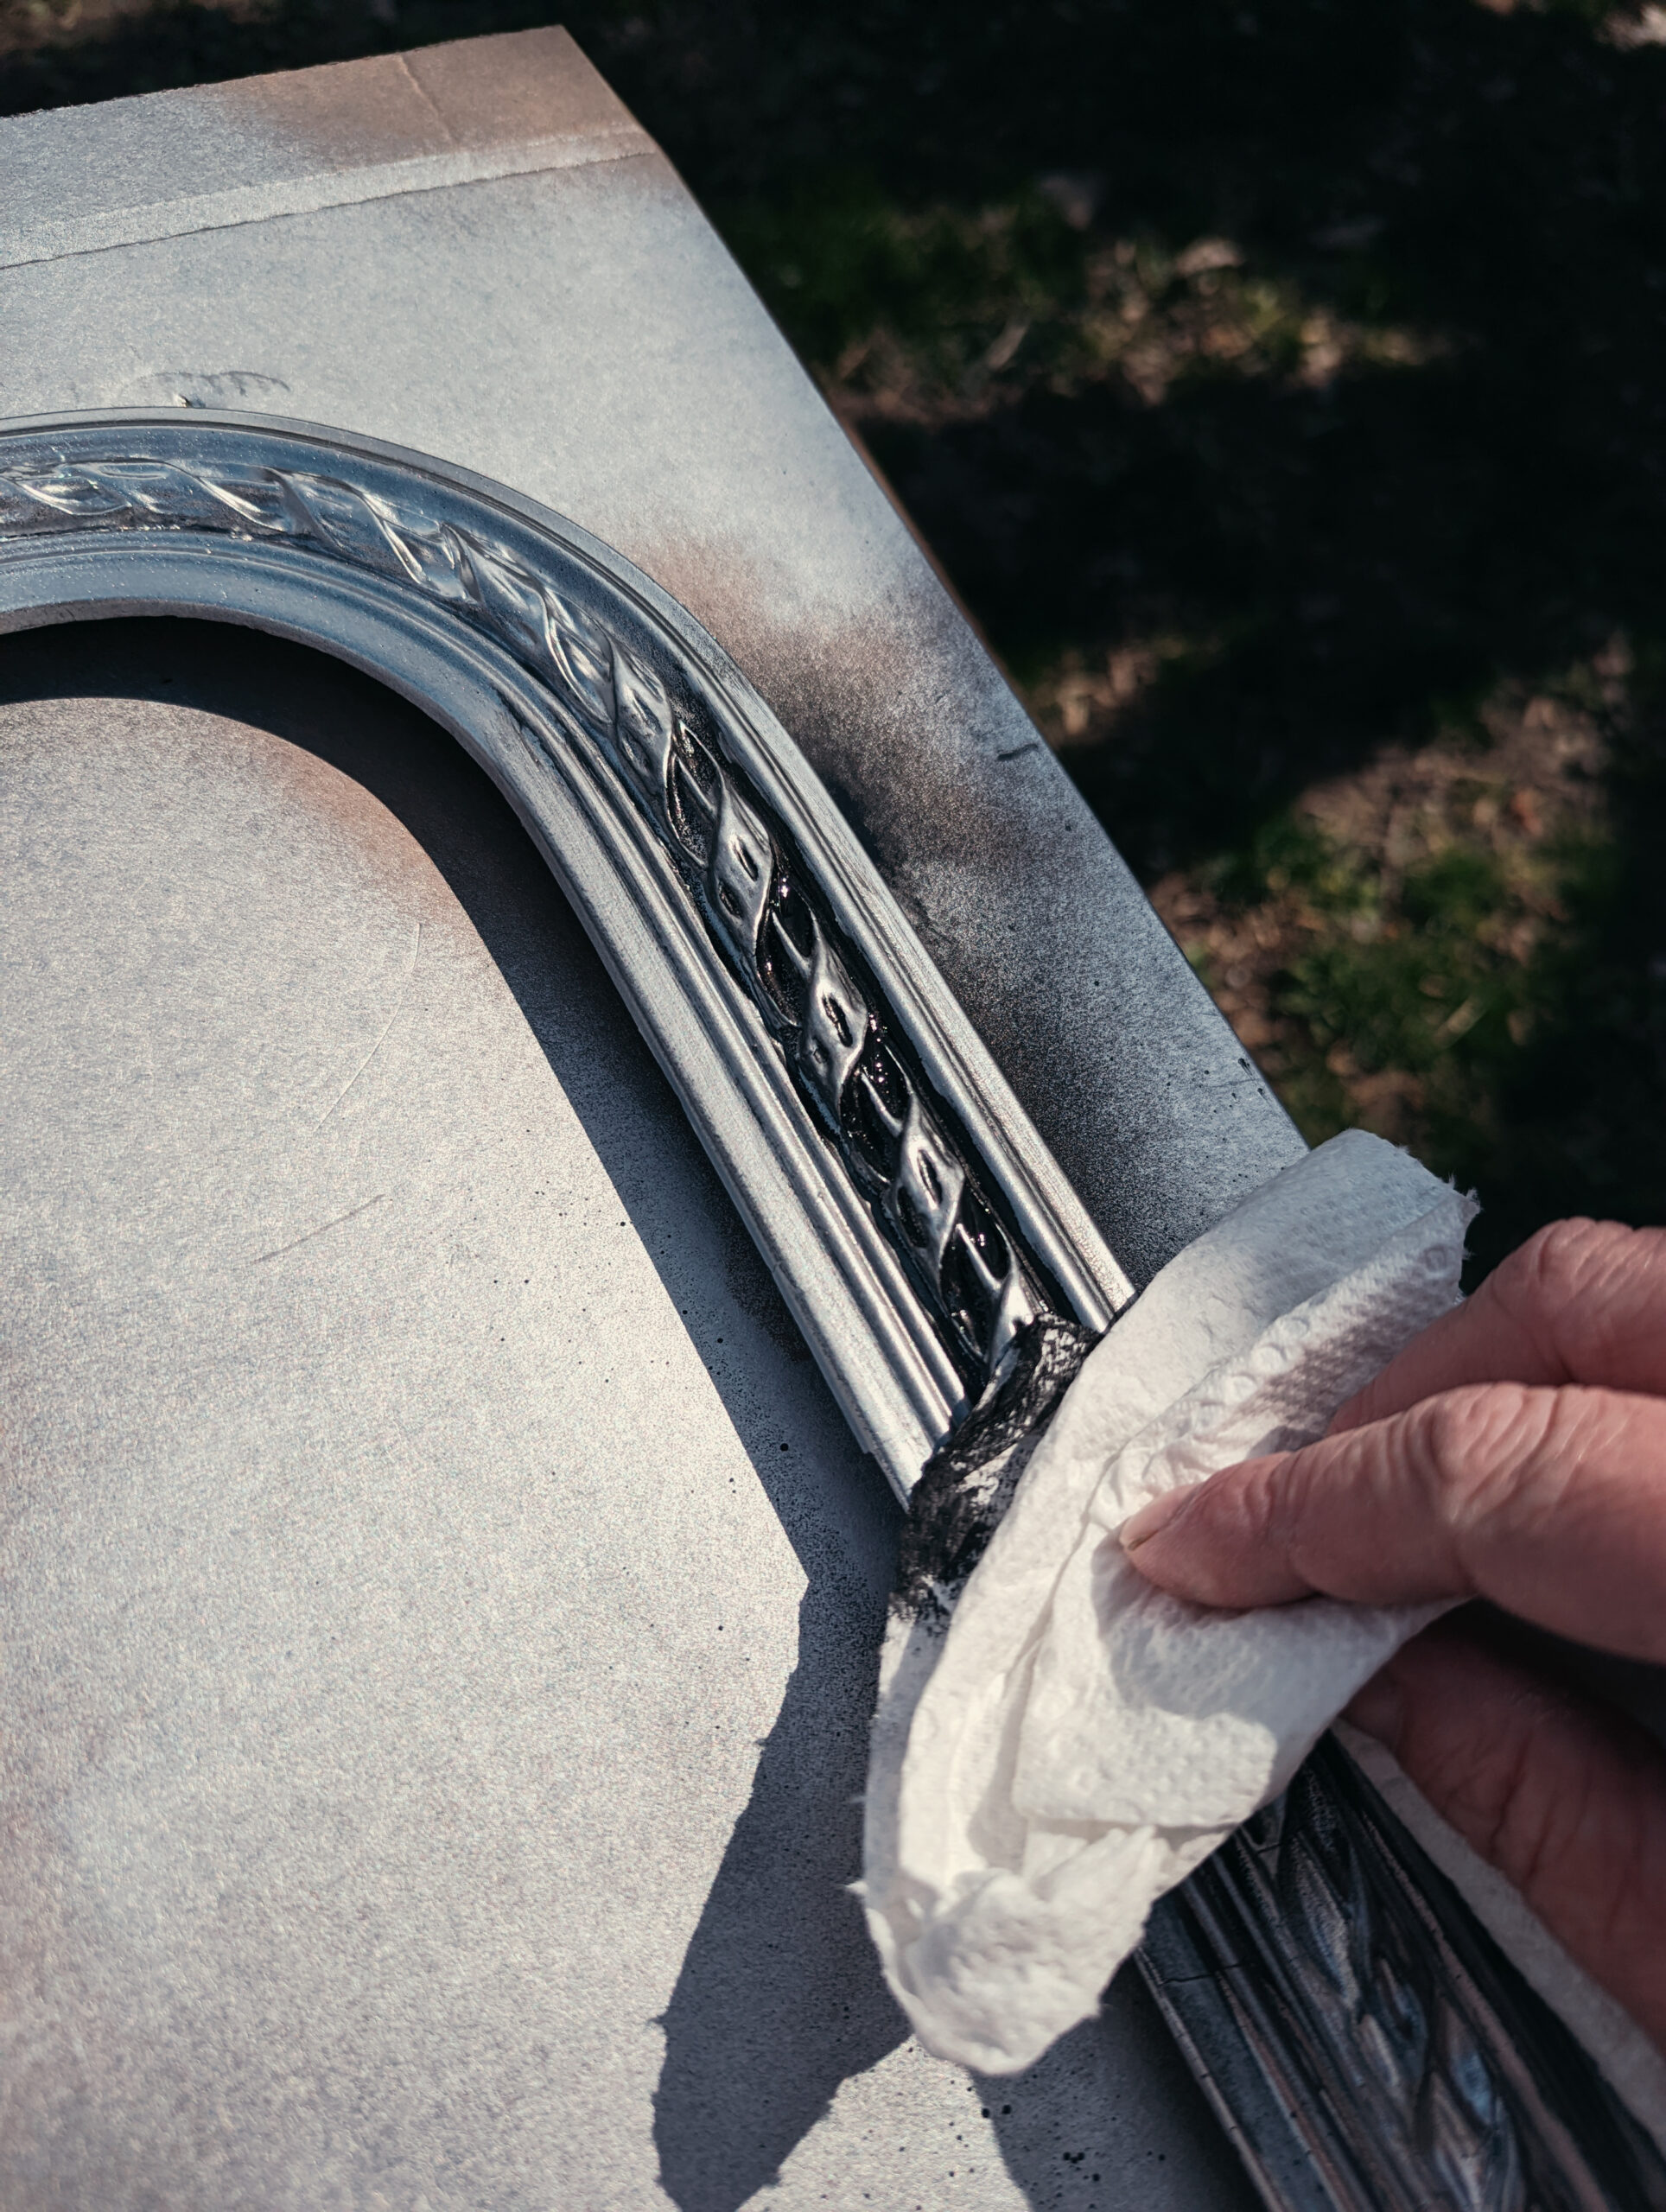
Use paper towels to wipe excess black paint off high points
Quickly, before the black spray paint has a chance to dry (and it dries quickly!), grab a handful of paper towels and wipe the surface of your object vigorously. Turn or fold the paper towel as needed so that you are wiping with a clean surface that can absorb excess paint.
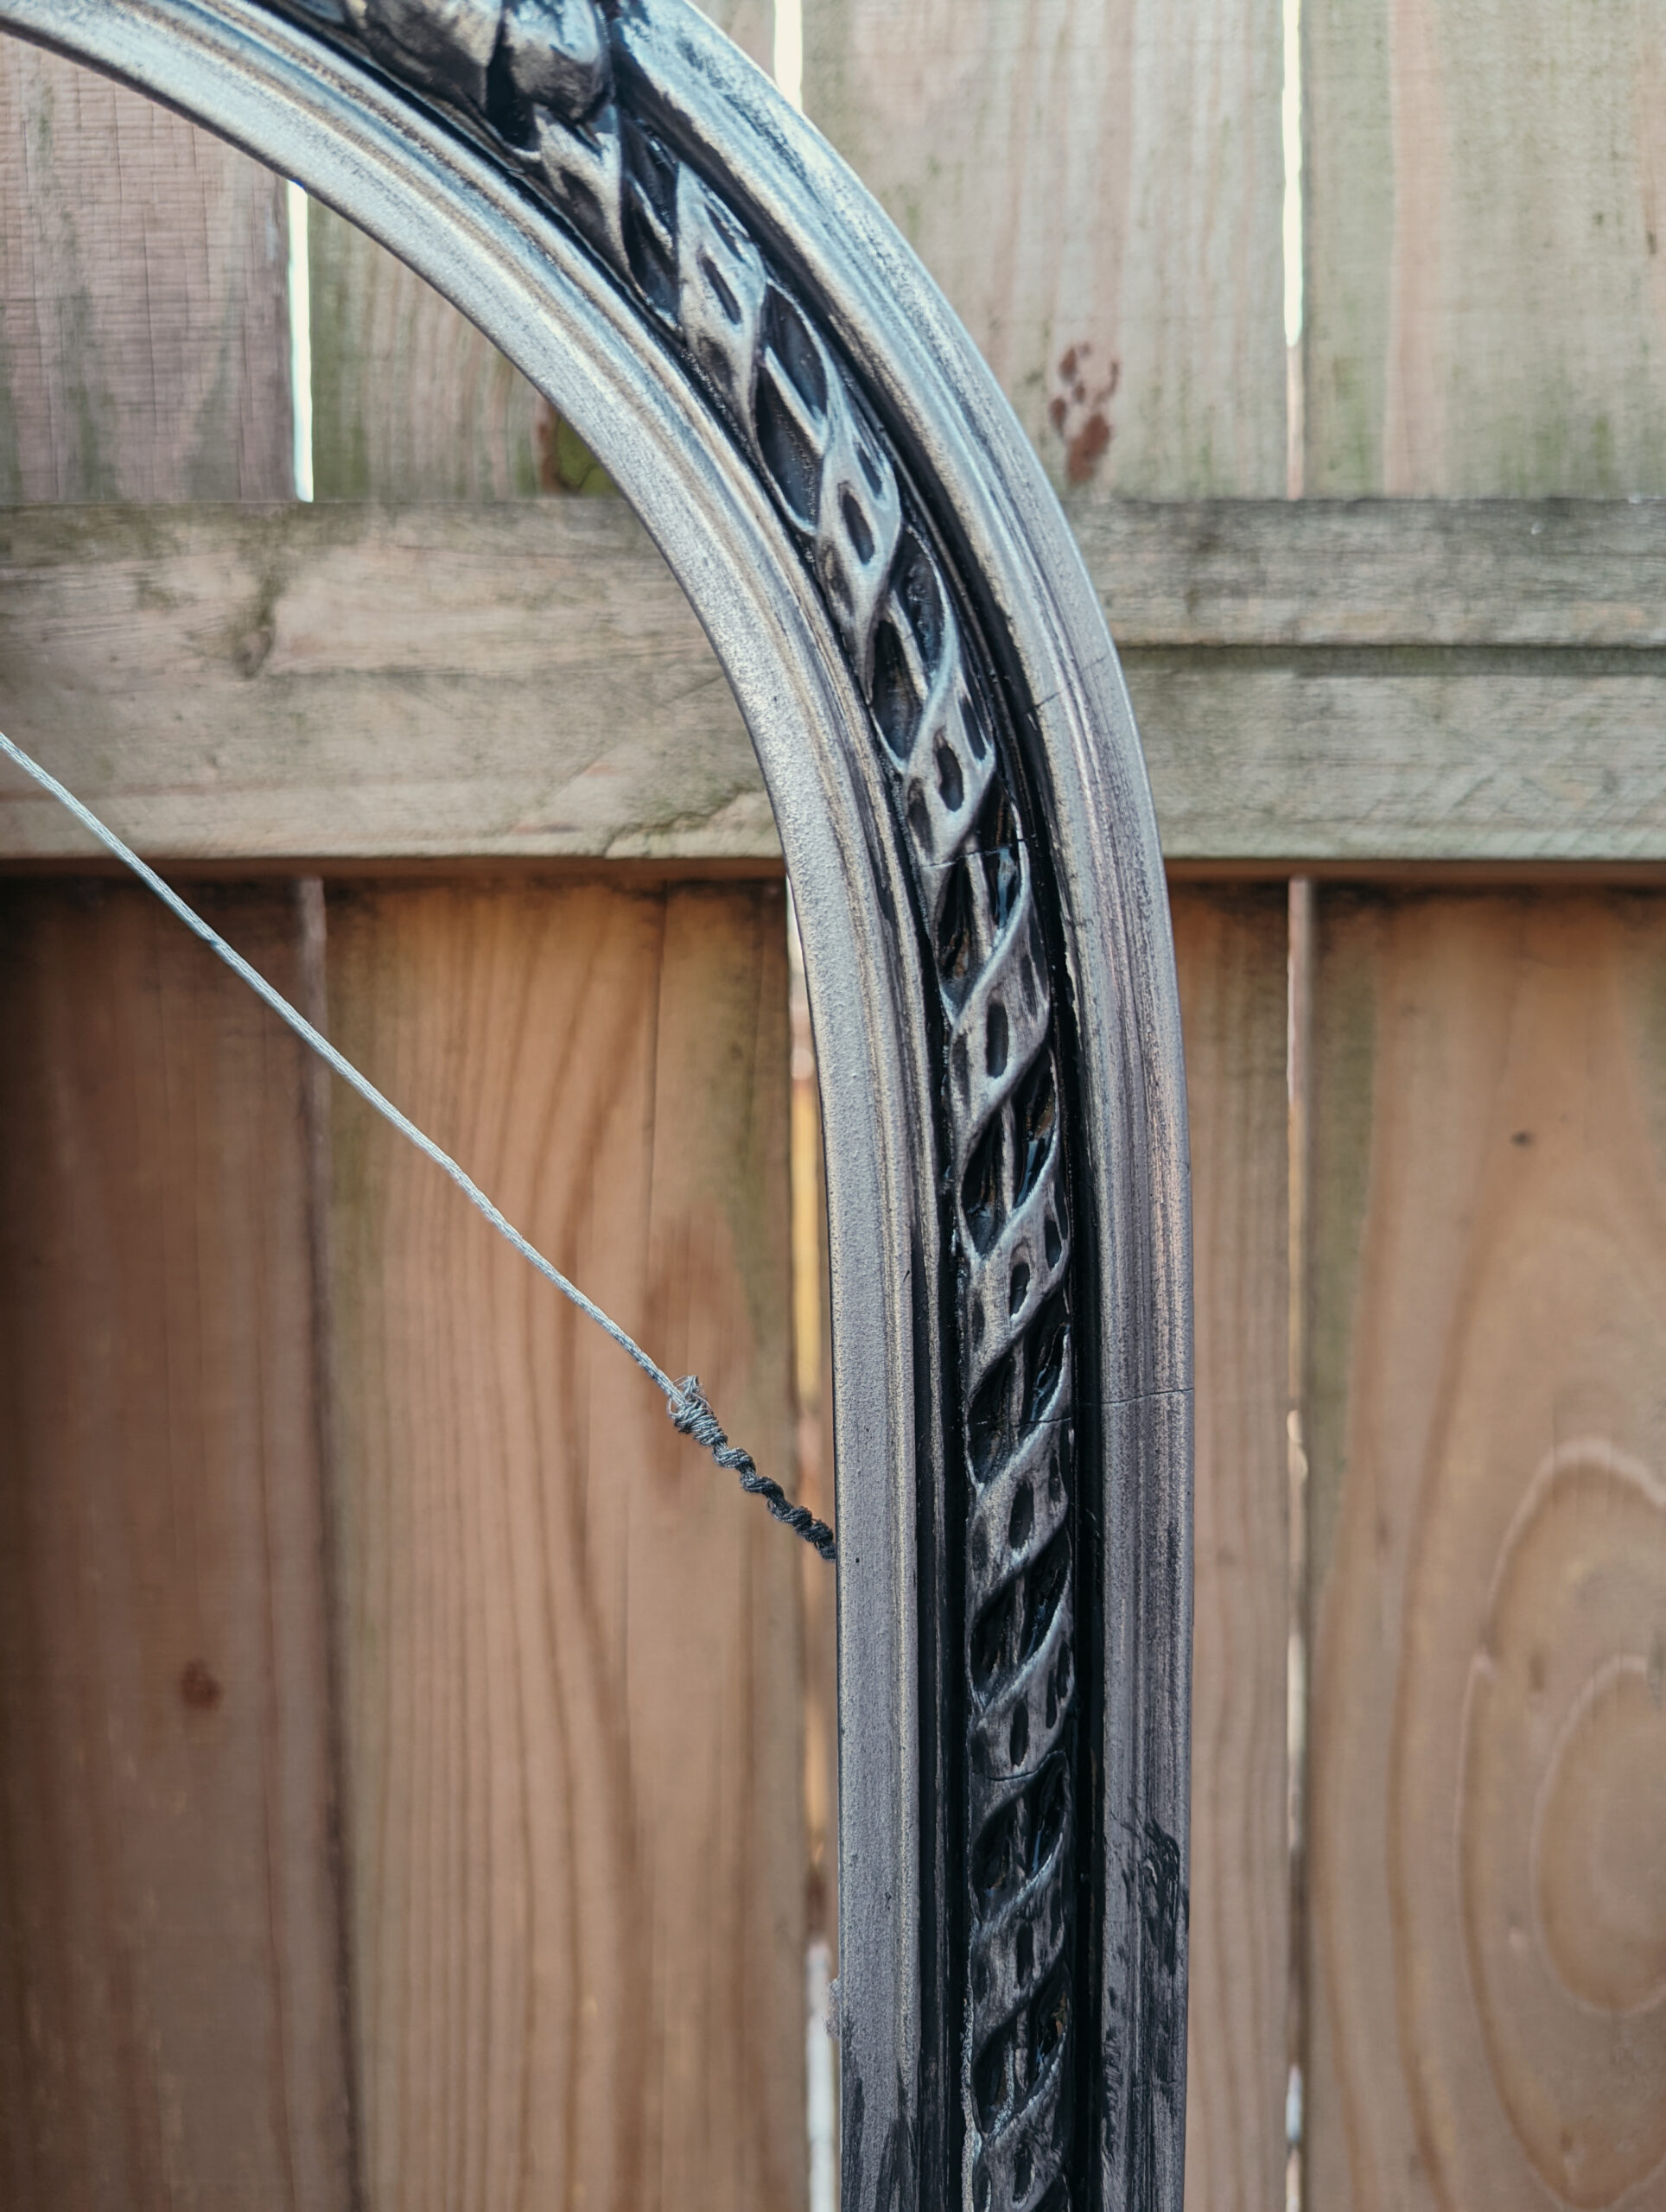
This step almost completely removes the black paint from the high points of your frame, but leaves the black marks in the grooves and depressions of your frame or textured object. This method of leaving black paint (that replicates the look of tarnish or grime) in the grooves turns your shiny metallic silver object into an aged-looking vintage silver paint job.
Use a bit of water as needed to remove more black paint
If you find that the black spray paint is drying too quickly to work well with, work in smaller spots or use a bit of water – dampening your paper towels or even spraying a ultra fine mist of water over the black spray paint while it is still wet can increase your working time as you create this antique silver paint finish.
Let dry and seal with a clear sealant.
Once you’re satisfied with the appearance of your now vintage looking antique silver painted surface, leave the object undisturbed to dry completely – ideally, 24 hours. If your object will be exposed to high humidity or extreme temperatures, you may wish to apply a clear sealant; however, modern paints are quite resistant to any environment that humans thrive in, see you can generally skip applying a sealant without issue.
That’s it! Painting antique silver is every bit as easy as painting antique gold, and just takes a few tweaks to the color and tone of the spray paints that you use. Like my antique gold painting tutorial, you can also complete this project using paint applied with a paintbrush – it just takes a little bit longer, and I find that the effect is slightly less authentic due to the appearance of brushstrokes in the crevices where the faux-tarnish paint settles.

Methods to Add more Faux Age to Silver Paint:
Method 1: Vintage Surface Treatments
Montana brand spray paints (a premium line manufactured for artists and stage crews), offer a semi-translucent surface treatment called “vintage surface,” which may offer another layer of authenticity to your antique silver painted surface.
Method 2: Adding A Fine Layer of Grit to your Paint
In my college ceramic classes, I began experimenting with what I then called a primitive finish on my decorative gingerbread man candleholders (which I made, incidentally, with the same pattern that you can now download in my paper doll template). I made my primitive finish by combining acrylic paint with fine-particle sand. The tiny sand added an authentic primitive look to my acrylic-finish ceramics. The same method could be used for this tutorial on how to paint an antique silver finish, but instead of using spray paint, you’d want to mix paint with extremely fine grit (like this carbide grit for rock polishing at Amazon) and apply with a paintbrush before wiping away with towels.
Understanding How Silver Tarnishes: Key to Replicating the Finish
When silver is exposed to oxygen, it forms a compound called silver oxide. Silver oxide is black, so it makes silver look tarnished. Silver oxide is also very insoluble in water, so it doesn’t come off when you clean silver with water.
Silverware tarnishes because of a chemical reaction between the silver and sulfur in the air. The silver reacts with the sulfur to form silver sulfide, which is a black substance. The more silver sulfide that forms, the darker the silver will become.
Using this Silver Painting Method for Holiday Decor and Costumes
If you are wondering if this DIY method for creating an aged silver finish will work on your Halloween costume, stage prop, haunted house decor, or LARP equipment, it will!
In fact, this method is perfect for getting that grungy, aged look of old swords, or spooky effect on dollar store props for your Halloween decorations.
Wood, Metal, Paper Mache. This method works well for costumes and props made from wood, metal, paper-mâché, and many other materials.
Painting Cardboard Silver. With care to not be too aggressive on the surface, it will also work to turn cardboard creations into antique-looking props – perfect for realistic knight costumes, dystopian robots, etc.
Glass. This acrylic paint-based method can even be used on glass (though it will scrape off the glass if handled roughly). This means it’s a great way to turn inexpensive glass candlesticks from a thrift store into spooky Halloween decorations on a budget.
Plastic. This antique silver faux finish is a little trickier, however, to use on holiday decor or costume parts that are made from plastic or fabric. Paint often flakes off of plastic, so it’s especially important to use a high-quality primer for the first coat of paint. With a good primer, this method will work to turn plain plastic surfaces into an antique silver finish.
Fabric. Unfortunately, spray painting fabric generally doesn’t work, and trying to antique it was a second coat definitely won’t work. Instead, consider using cardboard to create a costume with metal-like panels. Do this by sculpting cardboard, painting the cardboard panels, and stitching or gluing them to a fabric costume worn underneath them.
Final thoughts
Using modern metallic spray paint and a high pigment acrylic overcoat, adjusted with a bit of moisture and agitation, you can create the look of antique tarnished silver at home in just a few minutes.
Thanks for Reading!!!
I hope you can tell that I love DIY, researching the best affordable solutions for every-day problems opportunities and documenting / sharing solutions!🙌 Hawk-Hill.com is reader-supported.
☕ Hawk-Hill.com is reader-supported. If this article saved you time or money, please consider donating $1 to help me cover the cost of hosting this website OR If you appreciate this information and want to throw a “Thanks!” my way by buying me a coffee – I would Of Course appreciate it! :]
Reader Questions and Recommendations
Readers, do you have any favorite topics / posts? What would you like to read more about in the future? As I hope you can tell from this and other articles on my site, I really enjoy DIY / a good challenge, and I’m not afraid to roll up my sleeves to figure out a great, and hopefully simple 😁 solution. So please feel free to let me know in the comments below (or reach out via social media)!
Ok Really – I’ll try to wrap this up now😂
Finally, if you’d like to continue to learn about interesting DIY options as well as how YOU can tackle creative new projects consider checking out the latest and most popular articles listed on the Hawk-Hill Home Page. I’m always trying to enjoy and write about the creative side of life so please don’t be a stranger – check back often!😍
Also chech our Pinteres account https://www.pinterest.com/curlylindsay/
If you enjoyed this post you may also enjoy reading / perusing / devouring😊 one or all of these articles as well!
- 💡4 Easy Steps to Make Your Own Sea Glass 🌊
- ❤️Bedroom Decorating Ideas for Single Women’s Master Bedrooms 🛏️
- 🏡Ikea Kitchen Cost: What I Spent for a 9×12 Kitchen Remodel 💵
Thank you so much for explaining this process in much detail. In the past I’ve been looking to restore several metal objects to look like vintage silver and it was always a failure…..until now. Thanks again for this post. Now I have the perfect finish I was looking for.
I’m SO glad this article helped in your quest for the perfect vintage silver look! :]